My neighbor wasn’t trying to impress anyone. I’d stopped by to grab a package that got delivered to her house by mistake, and the smell of chocolate and something sweet—almost like a bakery—hit me before I even got to her front door. Honestly, I figured she was making some complicated layered dessert for a holiday party. But when she handed me a plate of these little chocolate balls dusted in powdered sugar, she just shrugged and said, “Oh, those? They’re nothing. Just crushed cookies and cream cheese.”
I took one bite, and let me tell you, I stood there in her entryway for a solid minute just staring at it. The texture was incredible—creamy on the inside, firm on the outside, with this rich, fudgy flavor that tasted like it took hours of work. She laughed at my reaction and told me the whole thing came together in about twenty minutes. Twenty minutes! I mean, here I was stressing over a complicated gingerbread house that was falling apart, and she’d made the best thing I’d eaten all season without breaking a sweat.
That moment stayed with me. Maybe you’ve been there—spending way too much time on a holiday dessert that nobody even finishes, while the simple stuff disappears in minutes. These Easy No-Bake Christmas Oreo Truffle Balls are that simple stuff. They’re the recipe you’ll make year after year, not because they’re fancy, but because they’re just that good. And honestly? They look like you spent all day in the kitchen. I’ve been making them every Christmas since that afternoon, and they’ve never let me down.
Why You’ll Love This Recipe
Let’s face it—the holidays are chaotic enough without complicated baking projects. These Easy No-Bake Christmas Oreo Truffle Balls are the answer to your busy-season prayers. Here’s why they work so well:
- Quick & Easy: From start to finish, you’re looking at about 20 minutes of active work. The hardest part is waiting for them to chill in the fridge.
- Simple Ingredients: You need exactly four main ingredients. No hunting down specialty stores or spending a fortune on fancy chocolate.
- Perfect for the Holidays: Whether you’re making cookie plates for neighbors, bringing something to a party, or just want a sweet treat without turning on the oven, these fit every occasion.
- Crowd-Pleaser: I’ve brought these to cookie swaps, office parties, and family gatherings, and they’re always the first thing to disappear. Kids love them. Adults love them. Everyone loves them.
- Unbelievably Delicious: The combination of crushed Oreos and cream cheese creates this truffle-like texture that’s rich without being too heavy. Roll them in festive sprinkles, and they look like something from a fancy bakery.
What makes these different from every other truffle recipe out there? It’s the ratio. I’ve tested this dozens of times to get that perfect balance where the Oreo flavor shines through without the cream cheese overwhelming it. Plus, you can customize them a hundred different ways—white chocolate coating, peppermint extract, different sprinkle colors. They’re a blank canvas for your holiday creativity.
What Ingredients You Will Need
This recipe uses simple, pantry-friendly ingredients to deliver big flavor without the fuss. Most of these are probably already in your kitchen, which is exactly the point.
- 1 (14.3 oz) package Oreo cookies (regular, not double-stuf)—You’ll crush these into a fine crumb. The original Oreos work best here because the cream-to-cookie ratio is perfect. I’ve tried this with generic chocolate sandwich cookies, and honestly, Oreos give the best texture and flavor. Don’t use double-stuf—too much filling throws off the balance.
- 1 (8 oz) block cream cheese, softened—This is the binder that holds everything together. Make sure it’s at room temperature, or you’ll end up with lumpy truffles. I prefer Philadelphia brand for its consistent texture, but any full-fat cream cheese works. Low-fat cream cheese makes the mixture too soft and sticky.
- 1 teaspoon vanilla extract (optional but recommended)—It enhances the chocolate flavor and adds a warm note that feels very holiday-ish. Pure vanilla extract is worth the splurge here, but imitation works fine too.
- 1/2 cup powdered sugar (optional, for extra sweetness)—I skip this if I’m using regular Oreos, but if you like things on the sweeter side, go ahead and add it. It also helps firm up the mixture if it feels too soft.
- For coating: You have options here. I use about 1 cup of holiday sprinkles (red, green, and white), crushed candy canes, cocoa powder, or powdered sugar. You can also melt white chocolate chips or semi-sweet chocolate chips for a fancier finish. If you’re dipping in chocolate, you’ll need about 1 1/2 cups of chips and 1 tablespoon of coconut oil to thin the chocolate.
For the best results, use full-fat cream cheese and regular Oreos. The texture just isn’t the same with substitutions, trust me on this one. If you’re gluten-free, look for gluten-free chocolate sandwich cookies—they work beautifully in this recipe.
Equipment Needed
You don’t need much for this recipe, which is part of why I love it. Here’s what you’ll want on hand:
- Food processor—This makes quick work of crushing the Oreos into a fine crumb. If you don’t have one, you can put the cookies in a zip-top bag and crush them with a rolling pin. It takes a little more elbow grease, but it works. I’ve done both, and honestly, the food processor is worth pulling out for the even texture.
- Large mixing bowl—For combining the crushed cookies with the cream cheese. Any medium-to-large bowl works here.
- Hand mixer or stand mixer—Not strictly necessary, but it makes incorporating the cream cheese much easier. You can absolutely do it by hand with a sturdy spatula—I’ve done it many times—but the mixer gives you a smoother, more even mixture.
- Small cookie scoop or melon baller—For portioning the truffles evenly. I use a 1-tablespoon scoop, and it’s perfect. If you don’t have one, just use a tablespoon measure.
- Baking sheet lined with parchment paper—For chilling the truffles. A plate or tray works too, as long as it fits in your fridge.
- Small bowls—For holding your sprinkles or other coatings. Shallow bowls make rolling easier.
That’s it. No fancy equipment required. I’ve made these in a friend’s kitchen with just a bag, a rolling pin, and a bowl, and they turned out perfect.
Preparation Method
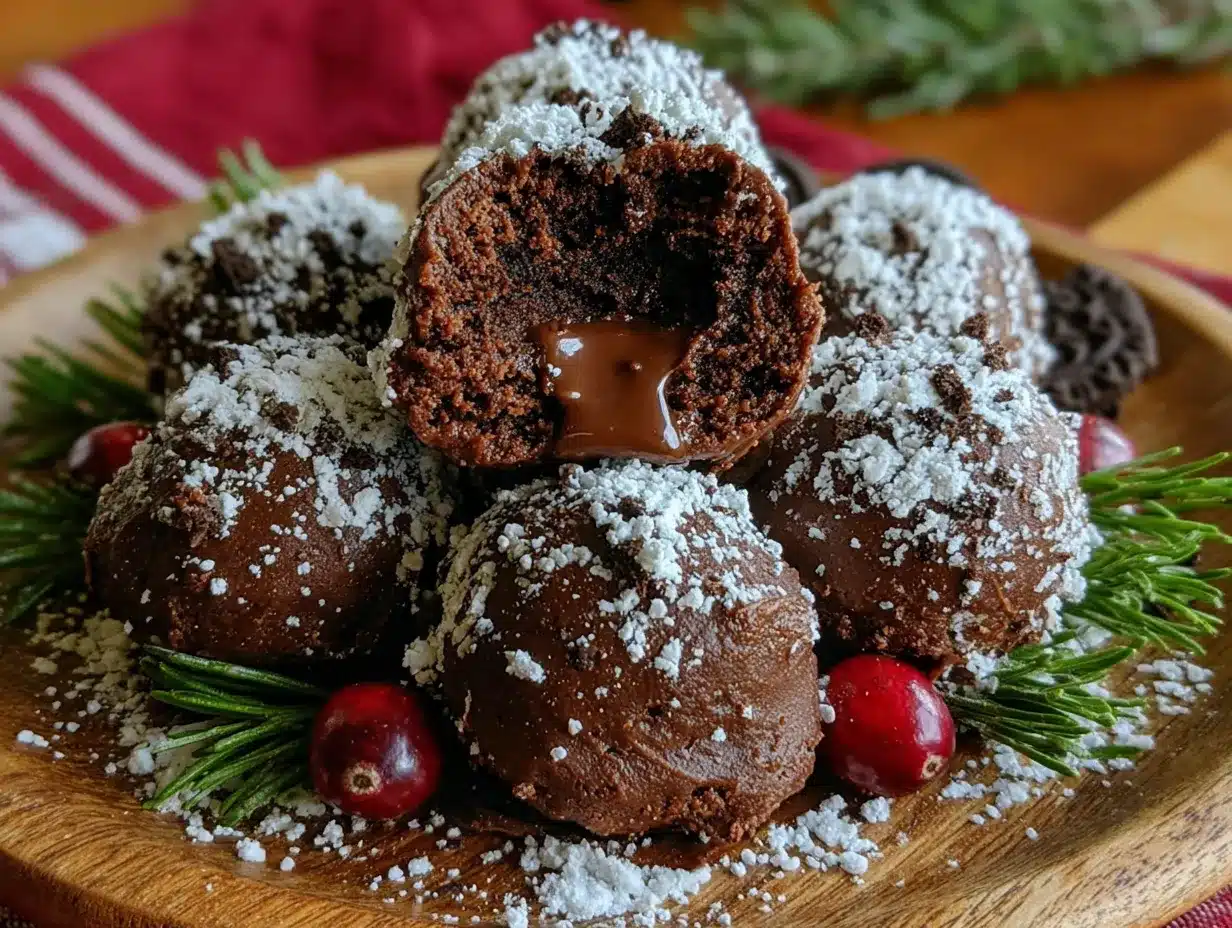
Making these Easy No-Bake Christmas Oreo Truffle Balls is almost embarrassingly simple. Here’s how to do it:
- Crush the Oreos. Place the entire package of Oreos—filling and all—into your food processor. Pulse until you get a fine, sand-like crumb. You don’t want any large chunks, but a few tiny pieces of cookie are fine. If you’re using the bag-and-rolling-pin method, seal the bag well and go to town. It should take about 3-4 minutes of steady crushing. Pro tip: Do this before your cream cheese is softened, so you’re not waiting around.
- Soften the cream cheese. Take your cream cheese out of the fridge about 30 minutes before you start. If you forgot (I forget all the time), cut it into small cubes and let it sit on the counter for 10-15 minutes. You can also microwave it in 10-second bursts, but be careful—you want it soft, not melted.
- Mix the base. In a large bowl, combine the crushed Oreos with the softened cream cheese and vanilla extract. If you’re using powdered sugar, add it now. Beat with a hand mixer on medium speed until everything is fully combined and the mixture holds together when you squeeze it. It should look like a thick, dark brown dough. Taste it. Yes, it’s dangerous, but you need to know if it’s sweet enough for you.
- Chill the mixture. Cover the bowl with plastic wrap and pop it in the fridge for at least 30 minutes. This step is crucial—the mixture needs to firm up so you can roll it into balls without making a mess. I’ve skipped this before (impatient, who me?), and it was a sticky disaster. Don’t be like me. Give it the full 30 minutes.
- Roll the truffles. Line a baking sheet with parchment paper. Using your cookie scoop or a tablespoon, portion out the mixture and roll it between your palms into smooth balls. You should get about 24-28 truffles, depending on how big you make them. Place each ball on the prepared baking sheet. If the mixture starts getting too soft to handle, pop it back in the fridge for 10 minutes.
- Add the coating. This is the fun part. Pour your chosen coating into a small shallow bowl. Roll each truffle ball in the coating until it’s fully covered. For sprinkles, gently press them in so they stick. For powdered sugar, roll gently to avoid making a mess. If you’re dipping in melted chocolate, place the rolled truffles in the freezer for 15 minutes first, then dip them using a fork or dipping tool.
- Final chill. Place the coated truffles back on the baking sheet and refrigerate for at least 1 hour before serving. This sets everything up perfectly. The truffles will firm up and the flavors will meld together. I know it’s hard to wait, but trust me—they’re better after a good chill.
Your truffles should be firm to the touch but creamy when you bite into them. If they’re too soft, they need more chill time. If they’re too hard, they might have been in the fridge too long—but honestly, that’s a rare problem with this recipe.
Cooking Tips & Techniques
After making these Easy No-Bake Christmas Oreo Truffle Balls more times than I can count, I’ve picked up a few tricks that make the process smoother:
Don’t overmix the cream cheese. I learned this the hard way. If you beat the mixture too long, the cream cheese can break down and make the truffles greasy. Just mix until everything comes together—about 30 seconds on medium speed. You want it uniform, not whipped.
Wet your hands slightly. When rolling the truffles, lightly dampen your palms with water. This prevents the mixture from sticking to your hands and gives you smoother balls. Don’t use too much water, though, or you’ll mess with the texture. Just a light mist works wonders.
Work in batches. If you’re making a big batch, keep the unused mixture in the fridge while you roll. The mixture softens as it sits at room temperature, and warm truffles are hard to coat evenly. I pull out about a quarter of the mixture at a time and leave the rest chilling.
Use high-quality sprinkles. Not all sprinkles are created equal. Cheap sprinkles can bleed their color onto the truffles, especially if they’re stored in a humid environment. I use Wilton or similar brand sprinkles for the best results. The colors stay bright and don’t run.
Chocolate dipping made easy. If you’re going the melted chocolate route, add a teaspoon of coconut oil or shortening to the chocolate before melting. This thins the chocolate and gives you a smoother, shinier finish. It also helps the chocolate set up without blooming (those white streaks you sometimes see on chocolate).
Timing is everything. These truffles need at least 1 hour in the fridge to set, but they’re even better after 2-3 hours. I usually make them the day before I need them. They actually improve overnight as the flavors meld together. Just keep them covered so they don’t pick up fridge smells.
Variations & Adaptations
One of the best things about this recipe is how easy it is to change up. Here are some variations I’ve tried and loved:
Peppermint Oreo Truffles: Add 1/2 teaspoon of peppermint extract to the mixture along with the vanilla. Roll the finished truffles in crushed candy canes for a festive, minty crunch. This is my go-to Christmas variation. The peppermint pairs beautifully with the chocolate Oreo base.
White Chocolate Dream: Use golden Oreos instead of regular, and add 1/4 cup of white chocolate chips (melted and cooled slightly) to the mixture. Roll the truffles in white chocolate sprinkles or drizzle with melted white chocolate. These look gorgeous on a holiday dessert table.
Gluten-Free Version: Swap the regular Oreos for gluten-free chocolate sandwich cookies. The texture is slightly different—a bit crumblier—but the taste is almost identical. I’ve made these for gluten-free friends, and they couldn’t tell the difference.
Vegan Option: Use vegan cream cheese (I like Kite Hill or Tofutti) and vegan chocolate sandwich cookies. The texture is a little softer, so you’ll need to chill the mixture longer—about 45 minutes instead of 30. These are a hit at parties where there are dietary restrictions.
Spiced Holiday Version: Add 1/2 teaspoon of cinnamon and a pinch of nutmeg to the Oreo mixture. Roll the truffles in a mix of powdered sugar and cinnamon. This gives them a warm, cozy flavor that feels very wintery. I made these for a Christmas Eve party, and everyone asked for the recipe.
No-Chocolate Option: Believe it or not, you can make these with golden Oreos and leave out the chocolate coating entirely. Just roll them in powdered sugar or coconut flakes. They’re lighter in flavor and color, perfect for a dessert table that needs variety.
Serving & Storage Suggestions
These Easy No-Bake Christmas Oreo Truffle Balls are best served cold, straight from the fridge. The texture is perfect when they’re firm but still creamy on the inside. I like to arrange them on a festive platter or in mini paper cupcake liners for a polished look. They’re great on a cookie plate, as part of a dessert charcuterie board, or just as a grab-and-go treat.
For drinks, these pair beautifully with hot cocoa, coffee, or a glass of cold milk. If you’re serving them at a party, put out a small bowl of each variation so guests can try different flavors. I’ve also tucked them into gift boxes with tissue paper for homemade Christmas presents—they travel well and look adorable.
Storage: Keep the truffles in an airtight container in the refrigerator for up to 2 weeks. Yes, really. They hold up beautifully. Just make sure they’re in a single layer or separated by parchment paper so they don’t stick together. If you’re stacking them, use wax paper between layers.
Freezer Instructions: These truffles freeze like a dream. Place them in a single layer on a baking sheet and freeze until solid (about 1 hour). Transfer to a freezer-safe bag or container, and they’ll keep for up to 3 months. To thaw, just move them to the fridge overnight. They taste exactly like fresh-made. I always keep a batch in the freezer for unexpected guests or last-minute holiday cravings.
Reheating: You don’t need to reheat these—they’re meant to be served cold. But if you’ve frozen them, let them sit at room temperature for about 10 minutes before serving for the best texture. They soften just enough to be creamy without getting messy.
Nutritional Information & Benefits
Here’s the honest truth: these are a treat, not a health food. But that doesn’t mean they can’t fit into a balanced holiday eating plan. Here’s a rough estimate per truffle (based on 24 truffles):
- Calories: 120-140
- Fat: 7-8g
- Carbohydrates: 14-16g
- Protein: 2g
- Sugar: 10-12g
These numbers will vary depending on your coating and any additions. If you’re watching your sugar intake, roll the truffles in unsweetened cocoa powder instead of sprinkles or powdered sugar. For a lower-fat option, use reduced-fat cream cheese—though the texture will be slightly less creamy.
On the bright side, Oreos contain a small amount of iron and calcium from the enriched flour, and cream cheese provides a bit of protein and calcium. The real benefit here is portion control—because each truffle is small and rich, you’re satisfied with just one or two. That’s a lot better than mindlessly eating an entire tray of brownies.
These are not gluten-free unless you use gluten-free cookies, and they contain dairy. If you have allergies, check your Oreo package—some varieties are made in facilities that process nuts and other allergens.
Conclusion
These Easy No-Bake Christmas Oreo Truffle Balls are the kind of recipe that makes you look like a holiday hero without any of the stress. They’re simple enough to make with kids, impressive enough to bring to any party, and delicious enough that you’ll find yourself making them year-round—not just at Christmas.
I love that this recipe came from a completely unremarkable Tuesday afternoon at my neighbor’s house. No fancy presentation, no complicated techniques—just good ingredients and a little bit of patience while they chill. That’s the kind of cooking I believe in. You don’t need a culinary degree or a kitchen full of gadgets to make something that stops people in their tracks.
So go ahead and give these a try. Customize them with your favorite coatings, make a batch for your next holiday gathering, or just keep them in the fridge for those moments when you need a little sweet pick-me-up. And when someone asks for the recipe—because they will—you can smile and say, “Oh, they’re nothing. Just crushed cookies and cream cheese.”
I’d love to hear how yours turn out! Drop a comment below with your favorite variation, or tag me in your photos if you share them on social media. Happy holidays, and happy snacking!
Frequently Asked Questions
Can I use double-stuf Oreos for this recipe?
I don’t recommend it. Double-stuf Oreos have too much filling, which throws off the balance of the truffles. The mixture ends up too soft and sweet. Stick with regular Oreos for the best texture and flavor.
How far in advance can I make these truffles?
You can make them up to 2 weeks ahead and store them in the fridge. They actually taste better after a day or two because the flavors have time to meld. For longer storage, freeze them for up to 3 months.
My truffle mixture is too sticky to roll. What should I do?
Pop the mixture back in the fridge for 15-20 minutes to firm up. If it’s still sticky after that, you might have used too much cream cheese or not enough cookies. Add a few more crushed Oreos to balance it out.
Can I make these without a food processor?
Absolutely! Put the Oreos in a sturdy zip-top bag and crush them with a rolling pin or even a heavy pan. It takes a little more effort, but the results are the same. Just make sure you crush them finely enough—no large chunks.
What’s the best way to coat truffles in melted chocolate?
Freeze the rolled truffles for 15 minutes first. Then melt your chocolate with a teaspoon of coconut oil. Use a fork or dipping tool to lower each truffle into the chocolate, tap off the excess, and place on parchment paper. The cold truffles help the chocolate set quickly and evenly.
PrintEasy No-Bake Christmas Oreo Truffle Balls

These Easy No-Bake Christmas Oreo Truffle Balls are a quick and simple holiday treat made with just four main ingredients. They’re creamy, fudgy, and perfect for cookie plates, parties, or homemade gifts.
- Prep Time: 20 minutes
- Cook Time: 0 minutes
- Total Time: 1 hour 50 minutes (includes chilling)
- Yield: 24-28 truffles 1x
- Category: Dessert
- Cuisine: American
Ingredients
- 1 (14.3 oz) package Oreo cookies (regular, not double-stuf)
- 1 (8 oz) block cream cheese, softened
- 1 teaspoon vanilla extract (optional)
- 1/2 cup powdered sugar (optional)
- For coating: 1 cup holiday sprinkles, crushed candy canes, cocoa powder, or powdered sugar; or 1 1/2 cups white or semi-sweet chocolate chips + 1 tablespoon coconut oil (for dipping)
Instructions
- Crush the Oreos: Place the entire package of Oreos (filling and all) into a food processor. Pulse until you get a fine, sand-like crumb. Alternatively, crush in a zip-top bag with a rolling pin.
- Soften the cream cheese: Take cream cheese out of the fridge about 30 minutes before starting. If forgotten, cut into small cubes and let sit for 10-15 minutes, or microwave in 10-second bursts until soft but not melted.
- Mix the base: In a large bowl, combine crushed Oreos, softened cream cheese, vanilla extract, and powdered sugar (if using). Beat with a hand mixer on medium speed until fully combined and the mixture holds together when squeezed.
- Chill the mixture: Cover the bowl with plastic wrap and refrigerate for at least 30 minutes until firm.
- Roll the truffles: Line a baking sheet with parchment paper. Using a small cookie scoop or tablespoon, portion out the mixture and roll into smooth balls. Place on prepared baking sheet. You should get about 24-28 truffles.
- Add the coating: Pour chosen coating into a shallow bowl. Roll each truffle ball in the coating until fully covered. For sprinkles, gently press them in. For chocolate dipping, freeze rolled truffles for 15 minutes, then dip in melted chocolate mixed with coconut oil.
- Final chill: Place coated truffles back on baking sheet and refrigerate for at least 1 hour before serving.
Notes
For best results, use full-fat cream cheese and regular Oreos. If mixture is too sticky, chill longer. Wet hands slightly when rolling to prevent sticking. Truffles improve after a day in the fridge. Store in an airtight container in the refrigerator for up to 2 weeks, or freeze for up to 3 months.
Nutrition
- Serving Size: 1 truffle
- Calories: 130
- Sugar: 11
- Sodium: 95
- Fat: 7.5
- Saturated Fat: 3.5
- Carbohydrates: 15
- Fiber: 0.5
- Protein: 2
Keywords: no-bake, Christmas, Oreo truffles, holiday dessert, easy dessert, cookie balls, cream cheese truffles


