My mouth is already watering for those tangy, garlicky crunches before I even finish slicing the cucumbers. Somehow, I always think I have more time to wait when making pickles, but honestly, these crispy garlic-dill refrigerator pickles prove you don’t have to wait weeks to get that perfect bite. I stand there, smelling the sharp scent of fresh garlic mingling with dill, the sound of cucumbers snapping as I cut them, all while knowing that in just 24 hours, I’ll have pickles that hit that sweet spot between crisp and tangy. It’s like a quick fix for a pickle craving—no long fermenting, no fuss. Just fresh, punchy flavor and crunch that wakes up sandwiches, salads, or even a simple snack.
Somehow this recipe stuck with me because it’s the kind of thing you can whip up on a whim, no special equipment, no complicated steps, and yet it feels like you’ve crafted something special. It never feels rushed or like a shortcut—more like a clever hack perfected over countless attempts where the garlic’s bite is balanced just right, and the dill is fresh, not overpowering. I keep thinking about how this will save me from boring store-bought pickles, especially when I want something bright and homemade in a flash. And that trust? It’s earned with every crisp, garlicky bite.
Why You’ll Love This Recipe
- Quick & Easy: Ready to eat in just 24 hours, perfect for last-minute pickle cravings or quick meal prep.
- Simple Ingredients: Uses everyday pantry items like fresh cucumbers, garlic, and dill—no weird preservatives or additives.
- Perfect for Any Occasion: Works great as a snack, topping for burgers, or alongside dishes like Korean BBQ bulgogi lettuce wraps.
- Crowd-Pleaser: Even pickle skeptics tend to love these because they’re not too sour or salty—just balanced and fresh.
- Unbelievably Delicious: The crispness stays intact and the garlic-dill flavor shines without overwhelming the palate.
This recipe is different because it skips the long fermentation and pressure-cooking steps that usually make homemade pickles a project. Instead, it uses a well-tested brine ratio and a quick refrigeration method that keeps the cucumbers crunchy. Plus, I’ve learned to slice the garlic thinly to release just the right amount of flavor without turning the pickles bitter. This isn’t just another jar of pickles—it’s my go-to when I want something fresh, lively, and ready fast.
What Ingredients You Will Need
This recipe uses simple, wholesome ingredients to deliver bold flavor and satisfying crunch without the fuss. Most of these are pantry staples, and substitutions are easy if you’re adapting for dietary needs or preferences.
- Fresh cucumbers (about 4 medium Kirby or Persian cucumbers, sliced into ¼-inch rounds or spears) – I prefer Kirby cucumbers for that ideal crunch and size.
- Fresh dill (about 3-4 sprigs, or 2 tablespoons chopped) – fresh is key here; dried dill won’t give you the same bright aroma.
- Garlic cloves (3-4 large cloves, sliced thin) – slicing instead of crushing keeps the flavor mellow and prevents bitterness.
- White vinegar (1 ½ cups or 360 ml) – use distilled white vinegar for clean acidity.
- Water (1 ½ cups or 360 ml) – balances the vinegar for perfect tanginess.
- Granulated sugar (1 tablespoon) – just enough to round out the flavor without making it sweet.
- Salt (2 tablespoons kosher salt or pickling salt) – kosher salt is my go-to for its purity and no additives.
- Mustard seeds (1 teaspoon) – adds a subtle depth and mild heat.
- Black peppercorns (½ teaspoon) – whole peppercorns for a gentle peppery kick.
- Red pepper flakes (optional, ¼ teaspoon) – if you like a little heat.
For a gluten-free variation, all these ingredients work perfectly as is. You can swap the sugar for a natural sweetener like honey or agave syrup, but keep in mind it’ll change the flavor profile slightly. Also, if you want to experiment, fresh herbs like tarragon or thyme can add a unique twist.
Equipment Needed
- Glass jars or containers with lids (quart-size or 1-liter) – I use mason jars because they seal well and are easy to clean.
- Sharp knife or mandoline slicer – for even cucumber slices; a mandoline speeds things up but be careful!
- Medium saucepan – to bring the brine to a boil and dissolve salt and sugar.
- Measuring cups and spoons – precision matters for the perfect brine balance.
- Mixing bowl – optional, for tossing cucumbers with salt before pickling if you want extra crispness.
If you don’t have mason jars, any clean, food-safe container with a tight-fitting lid will do. I’ve also used BPA-free plastic containers in a pinch, but glass definitely helps keep the flavors crisp and fresh. A mandoline slicer is a nifty gadget that makes slicing cucumbers quick and uniform, but honestly, a good sharp knife works just fine.
Preparation Method
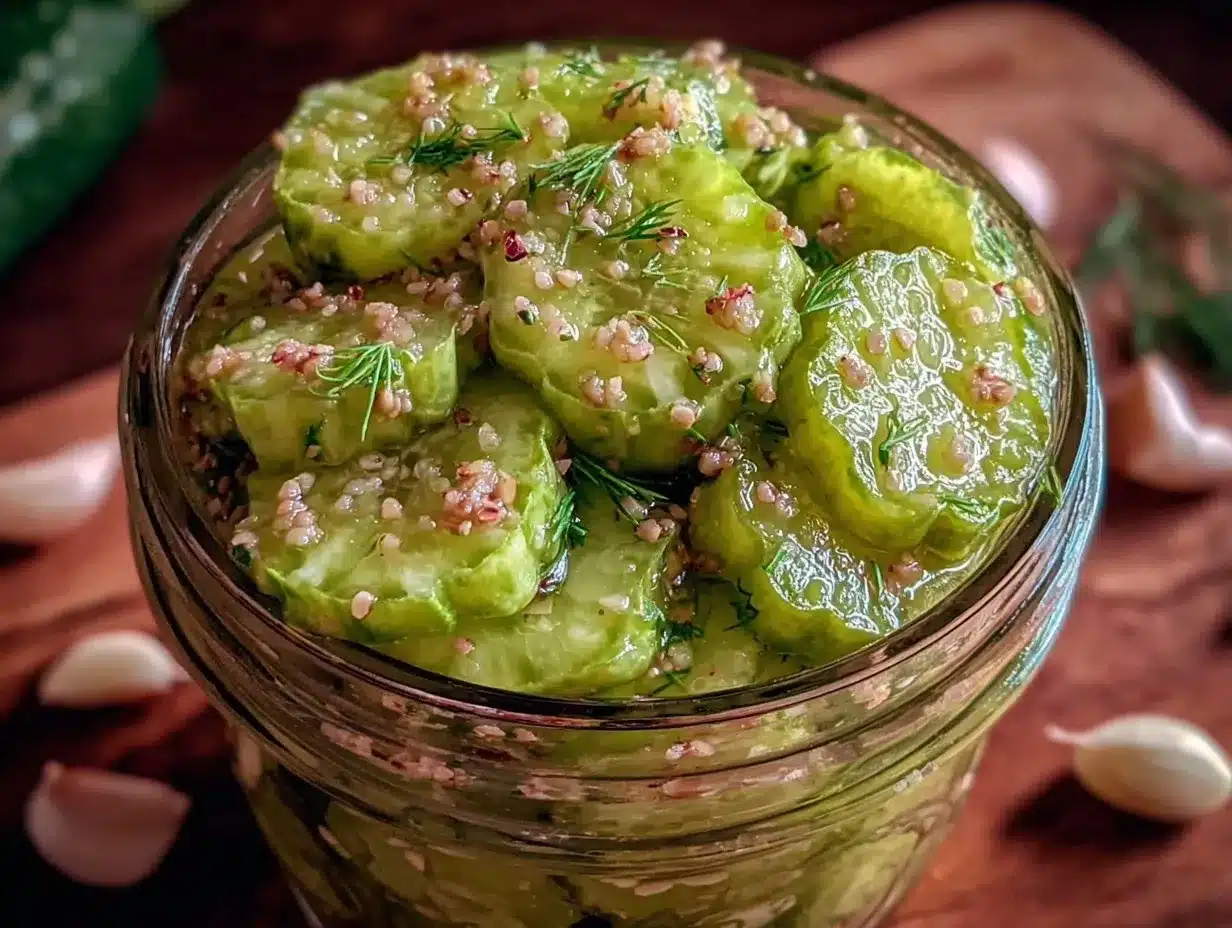
- Prepare the cucumbers: Wash cucumbers thoroughly to remove any dirt. Slice into ¼-inch thick rounds or spears, depending on your preference. For extra crispness, toss them with 1 tablespoon of kosher salt in a bowl and let sit for 30 minutes, then rinse and pat dry. This step is optional but helps draw out excess moisture.
- Make the brine: In a medium saucepan, combine 1 ½ cups white vinegar, 1 ½ cups water, 1 tablespoon sugar, and 2 tablespoons kosher salt. Add mustard seeds, black peppercorns, and red pepper flakes if using. Bring to a boil over medium heat, stirring until sugar and salt dissolve completely. Remove from heat and let cool slightly (about 5 minutes).
- Pack the jars: Place sliced garlic and fresh dill sprigs at the bottom of each clean jar. Pack the cucumbers tightly but without crushing. Pour the warm brine over the cucumbers, making sure they’re fully submerged. Leave about ½ inch of headspace at the top.
- Seal and refrigerate: Close the jars tightly with lids. Let them cool to room temperature for about 20 minutes, then place them in the refrigerator. The pickles will be ready to enjoy after 24 hours, but they taste even better after 48 hours.
- Enjoy and store: Keep the pickles refrigerated and consume within 2 weeks for best flavor and texture.
Tip: If you notice any floating herbs or cucumbers, just press them down with a clean utensil to keep everything submerged. Also, I learned the hard way that using too much salt makes the pickles overly salty, so stick to the recipe measurements for a balanced taste.
Cooking Tips & Techniques
One little trick I swear by is the optional salting step before pickling—it firms up the cucumbers so they stay crisp and don’t turn soggy after sitting in the brine. You know how disappointing it is when pickles get mushy fast. Also, slicing garlic thinly instead of crushing keeps the flavor bright and fresh without that harsh, bitter bite.
A common mistake is rushing to eat the pickles before the flavors have had a chance to meld. Honestly, they’re okay after a few hours, but 24 hours in the fridge is the sweet spot for that punchy garlic-dill tang paired with crisp cucumber texture. Multitasking by prepping other dishes—like the fresh quinoa and kale power bowl—while these pickle is curing makes the wait feel productive.
Using a clean jar and fresh ingredients is a must to prevent unwanted fermentation or off flavors. I’ve learned to always boil the brine to fully dissolve the salt and sugar; it also helps release the mustard seed flavor into the mix. Another tip: avoid overfilling the jar to allow the brine to circulate properly and coat every slice.
Variations & Adaptations
- Spicy version: Add more red pepper flakes or a sliced jalapeño to the jar for a fiery kick.
- Herbal twist: Replace dill with fresh tarragon or fresh thyme for a different flavor profile.
- Low sodium: Reduce salt by half and increase vinegar slightly to maintain acidity, though texture may be less crisp.
- Vegan creamy dip pairing: These pickles go wonderfully with a creamy dip made from dairy-free sour cream and chives.
- Quick ferment: Leave the jar out at room temperature for 6-8 hours before refrigerating to boost tanginess.
I once tried adding a teaspoon of coriander seeds and a splash of apple cider vinegar instead of white vinegar for a fruitier tang, which turned out unexpectedly delicious. Feel free to experiment with your favorite herbs and spices to make these pickles your own.
Serving & Storage Suggestions
Serve these crispy garlic-dill refrigerator pickles chilled, straight out of the jar for maximum crunch. They’re fantastic alongside grilled meats or stacked on sandwiches, especially with smoky flavors like the Jamaican jerk chicken stir fry. You can also dice them up to add a zesty crunch to tuna or egg salads.
Store pickles in the refrigerator in a sealed jar or container, and they’ll stay fresh for up to 2 weeks. The flavors deepen over time, so if you can wait, letting them sit a couple of days intensifies that garlicky punch and dill aroma. To re-crisp slightly mushy pickles, soak them briefly in ice water before serving.
Nutritional Information & Benefits
These pickles are low in calories (about 10-15 calories per serving), gluten-free, and keto-friendly. The vinegar and garlic provide antioxidants and antimicrobial properties, making this a gut-friendly snack option. Cucumbers add hydration and fiber while keeping carbs low. Using fresh dill contributes vitamins A and C, which support immune health.
For those watching sodium intake, keeping an eye on salt quantity is important, but you can adjust the brine to suit taste and health needs. Overall, these pickles offer a flavorful way to add probiotics and beneficial acids to your diet without extra sugars or preservatives.
Conclusion
Making these crispy garlic-dill refrigerator pickles is like having a shortcut to that satisfying pickle crunch and bright flavor without the wait or complicated processes. I love how easy they are to prepare with just a handful of ingredients and how quickly they transform from fresh cucumbers to a tangy, garlicky delight. The balance of garlic and dill feels just right every time, and the crispness is something I look forward to biting into.
Whether you’re new to pickling or a seasoned home cook, this recipe invites you to customize your pickles to fit your taste buds and pantry. It’s a little project with a big payoff and pairs perfectly with many dishes, especially those with bold or smoky flavors. If you’ve tried this recipe, I’d love to hear your tweaks or favorite ways to enjoy these pickles—sharing your experiences helps keep the kitchen lively and inspired.
Frequently Asked Questions
How long do refrigerator pickles last?
Refrigerator pickles are best eaten within 2 weeks. After that, they may lose crispness and flavor quality but are usually safe if kept cold.
Can I use regular cucumbers instead of Kirby cucumbers?
Yes, but Kirby cucumbers are preferred for their firmness and crunch. Regular slicing cucumbers work but may yield softer pickles.
Do I need to boil the brine?
Boiling the brine helps dissolve salt and sugar fully and releases flavors from spices, which improves the pickling process.
Can I make these pickles spicy?
Absolutely! Adding red pepper flakes or sliced jalapeños to the jar adds a nice spicy kick.
Why are my pickles not crunchy?
Common reasons include using old or overripe cucumbers, skipping the salting step, or storing pickles for too long. Using fresh cucumbers and optionally salting before pickling helps maintain crunch.
Pin This Recipe!
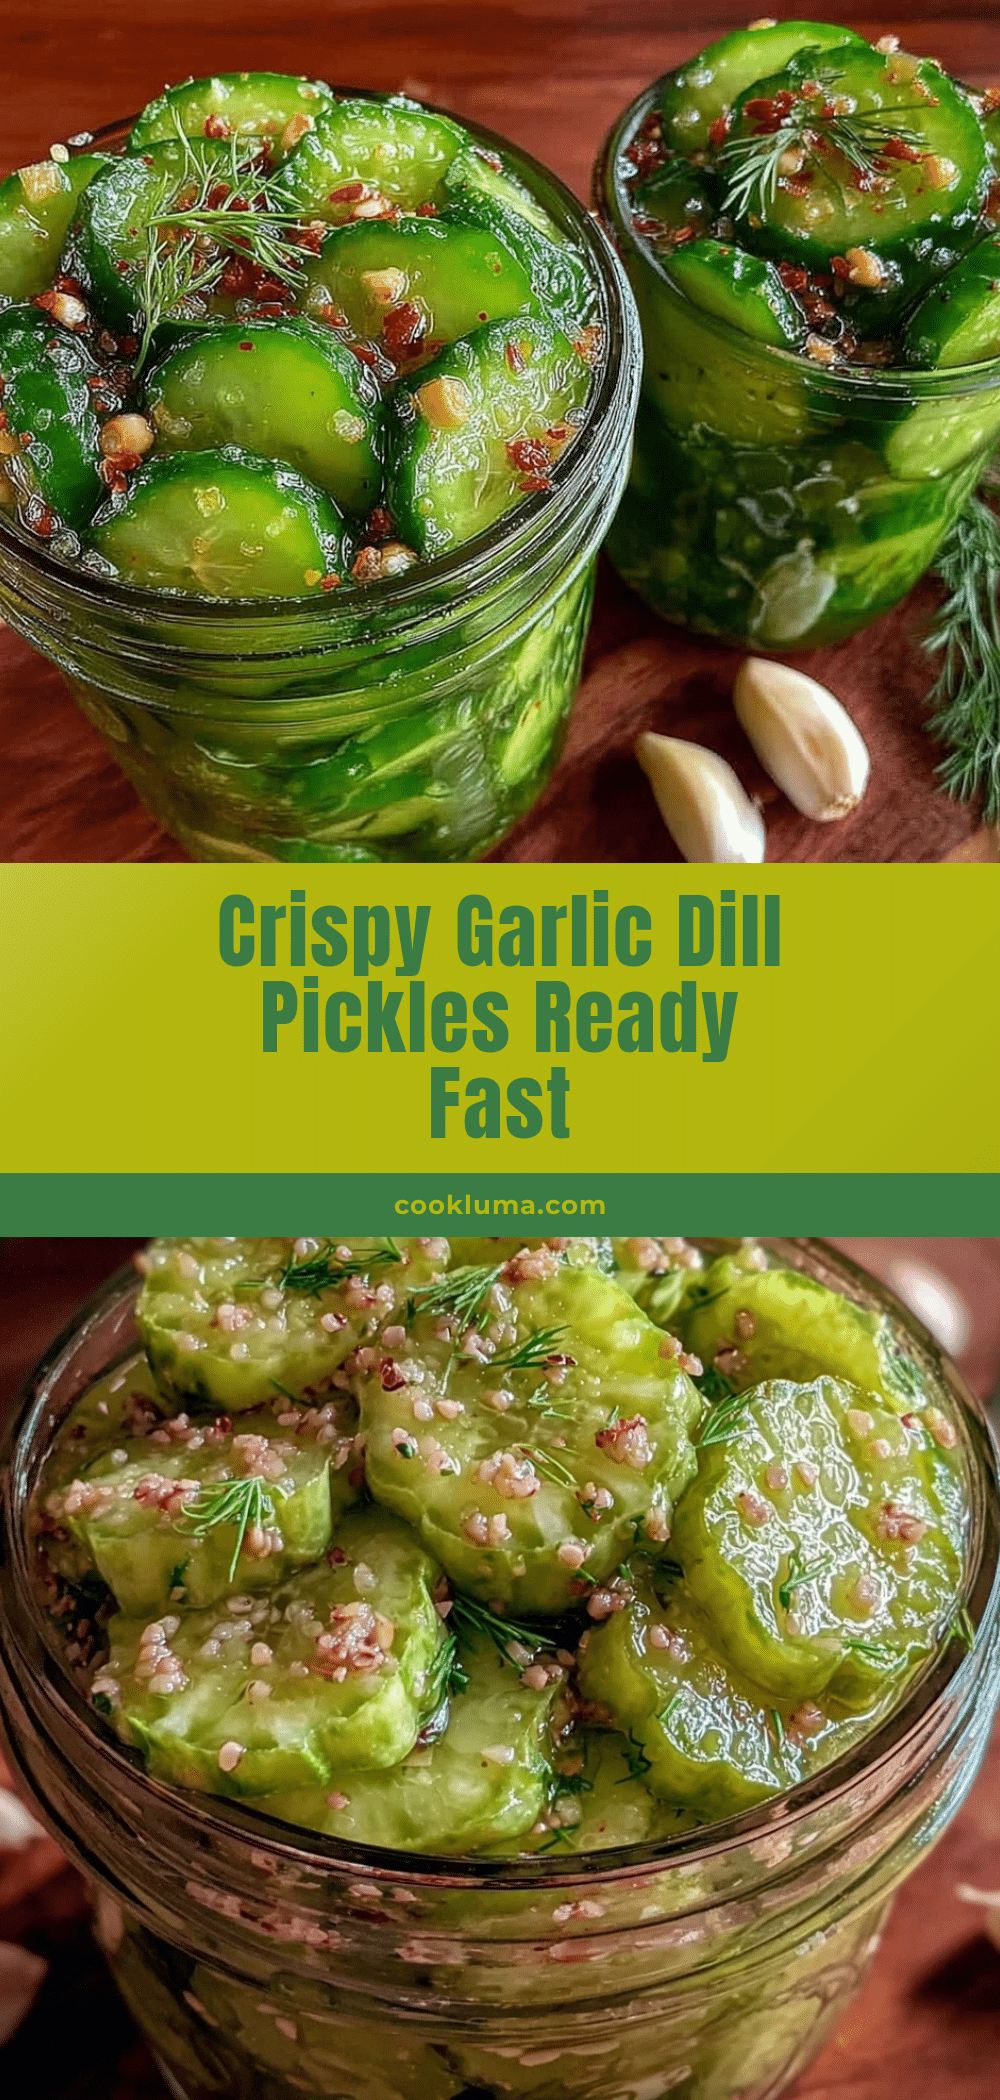
Crispy Garlic-Dill Refrigerator Pickles
Quick and easy refrigerator pickles ready in 24 hours with fresh garlic and dill for a perfect tangy crunch. No long fermentation needed, just fresh, punchy flavor and crisp texture.
- Prep Time: 10 minutes
- Cook Time: 10 minutes
- Total Time: 24 hours
- Yield: 4 servings 1x
- Category: Condiment
- Cuisine: American
Ingredients
- 4 medium Kirby or Persian cucumbers, sliced into 1/4-inch rounds or spears
- 3–4 sprigs fresh dill (about 2 tablespoons chopped)
- 3–4 large garlic cloves, sliced thin
- 1 1/2 cups (360 ml) distilled white vinegar
- 1 1/2 cups (360 ml) water
- 1 tablespoon granulated sugar
- 2 tablespoons kosher salt or pickling salt
- 1 teaspoon mustard seeds
- 1/2 teaspoon whole black peppercorns
- 1/4 teaspoon red pepper flakes (optional)
Instructions
- Wash cucumbers thoroughly. Slice into 1/4-inch thick rounds or spears.
- Optional: Toss cucumbers with 1 tablespoon kosher salt in a bowl and let sit for 30 minutes, then rinse and pat dry for extra crispness.
- In a medium saucepan, combine white vinegar, water, sugar, kosher salt, mustard seeds, black peppercorns, and red pepper flakes if using. Bring to a boil over medium heat, stirring until sugar and salt dissolve. Remove from heat and let cool slightly (about 5 minutes).
- Place sliced garlic and fresh dill sprigs at the bottom of each clean jar.
- Pack cucumbers tightly into jars without crushing.
- Pour warm brine over cucumbers, ensuring they are fully submerged with about 1/2 inch headspace.
- Seal jars tightly with lids. Let cool to room temperature for about 20 minutes, then refrigerate.
- Pickles are ready to eat after 24 hours, best after 48 hours. Keep refrigerated and consume within 2 weeks.
Notes
Optional salting step before pickling firms cucumbers for extra crispness. Slice garlic thinly to avoid bitterness. Use fresh dill for best aroma. Boil brine to dissolve salt and sugar and release spice flavors. Do not overfill jars to allow brine circulation. Store refrigerated and consume within 2 weeks. To re-crisp slightly mushy pickles, soak briefly in ice water before serving.
Nutrition
- Serving Size: About 1/2 cup pickle
- Calories: 1015
- Sugar: 1
- Sodium: 800
- Carbohydrates: 3
- Fiber: 0.5
Keywords: refrigerator pickles, garlic dill pickles, quick pickles, easy pickles, homemade pickles, crunchy pickles, no fermentation pickles