I used to think banana bread was a compromise. You know that feeling when you want cake but reach for something “healthier” and end up with a dry, dense brick that tastes like guilt? That was my relationship with banana bread for years. Then last spring, my neighbor Carol—the one who grows herbs in her kitchen window and never seems to rush anything—dropped off a loaf wrapped in tea towels. “Just something I threw together,” she said, shrugging. I thanked her politely and set it on the counter, figuring I’d pawn it off on my brother when he stopped by.
An hour later, I caught myself standing at the kitchen island, eating a third slice with my fingers. The crust had this incredible nutty depth, almost like caramel, and the inside was so tender it barely held together. I actually texted Carol mid-bite to ask what she’d done. “Oh,” she said, “I browned the butter. And I never use a mixer.” Honestly, I felt a little silly for not figuring it out myself. The browned butter made everything richer without being heavy, and skipping the mixer meant the batter came together in one bowl with a whisk and a spatula. No hauling out the stand mixer, no washing extra attachments.
That loaf changed how I think about banana bread entirely. It’s not a compromise anymore—it’s the thing I actually want to make. The kind where you use the spotty bananas that everyone else ignores and turn them into something that feels special without trying hard. Maybe you’ve been there too, staring at overripe bananas and wondering if they deserve better than another mediocre loaf. They do. And this is it.
Why You’ll Love This Recipe
This isn’t just another banana bread recipe floating around the internet. I’ve tested this version at least a dozen times, tweaking the butter temperature and the bake time until everything lined up perfectly. Here’s what makes it worth your afternoon:
- No mixer required—You don’t need a stand mixer, hand mixer, or any fancy gadget. Just a bowl, a whisk, and a spatula. Less cleanup, more banana bread.
- Browned butter magic—That nutty, toasty flavor transforms ordinary banana bread into something you’d find at a fancy bakery. It adds depth without any extra effort.
- Wholesome ingredients—Whole wheat flour, coconut sugar, and Greek yogurt keep this loaf feeling nourishing rather than indulgent. You’ll feel good eating it for breakfast or a midday snack.
- Perfect texture every time—The combination of melted browned butter and yogurt creates a tender crumb that stays moist for days. No dry, crumbly slices here.
- Quick to assemble—From start to oven in about 15 minutes. The hardest part is waiting for it to bake.
- Family-approved—I’ve brought this to brunches, potlucks, and casual dinners, and it disappears every single time. Kids love it, adults ask for the recipe.
What sets this apart from every other banana bread recipe is the browned butter. It’s a simple technique that adds so much flavor you won’t believe you ever skipped it. And by using whole wheat flour and coconut sugar, you get a loaf that feels satisfying and nourishing—the kind you can serve for breakfast without a second thought.
This recipe is the one I turn to when I want something comforting but still wholesome. It’s the loaf that makes you close your eyes after the first bite, not because it’s overly decadent, but because it tastes like exactly what you needed.
What Ingredients You Will Need
This recipe relies on simple, everyday ingredients that work together to create something truly special. Most of these are probably already in your kitchen, which makes this perfect for those moments when the bananas are begging to be used.
For the Banana Bread
- 1/2 cup (113g) unsalted butter—You’ll brown this first, so don’t skip that step. I prefer using a good-quality European-style butter like Kerrygold for the richest flavor, but any unsalted butter works beautifully.
- 3 large ripe bananas, mashed (about 1 1/2 cups or 340g)—The riper, the better. Look for bananas with lots of brown spots; they’re sweeter and easier to mash. If your bananas aren’t quite ready, you can roast them in a 300°F oven for 15-20 minutes until soft.
- 1/3 cup (80ml) plain Greek yogurt—Full-fat or 2% works best for moisture. The yogurt adds tenderness and a subtle tang that balances the sweetness. You can substitute with sour cream if that’s what you have.
- 2 large eggs, room temperature—Room temperature eggs incorporate more evenly into the batter. If you forgot to take them out ahead of time, place them in a bowl of warm water for 5 minutes.
- 1 teaspoon vanilla extract—Pure vanilla extract makes a difference here. I’ve tried imitation vanilla in a pinch, and the flavor just isn’t as warm and rounded.
- 1/2 cup (100g) coconut sugar—This adds a subtle caramel flavor that pairs beautifully with the browned butter. You can substitute with light brown sugar if needed, but coconut sugar keeps things a bit more wholesome.
- 1 3/4 cups (210g) whole wheat flour—I use white whole wheat flour for a lighter texture, but regular whole wheat flour works too. If you’re new to whole wheat baking, the white whole wheat variety is less assertive and works wonderfully here.
- 1 teaspoon baking soda—Make sure your baking soda is fresh. To test it, drop a small amount into vinegar—if it fizzes vigorously, it’s good to go.
- 1/2 teaspoon salt—Fine sea salt or kosher salt both work. The salt enhances all the other flavors and balances the sweetness.
- 1 teaspoon cinnamon—This is optional but highly recommended. Cinnamon and banana are a classic pairing, and it adds warmth to every bite.
Optional Mix-Ins
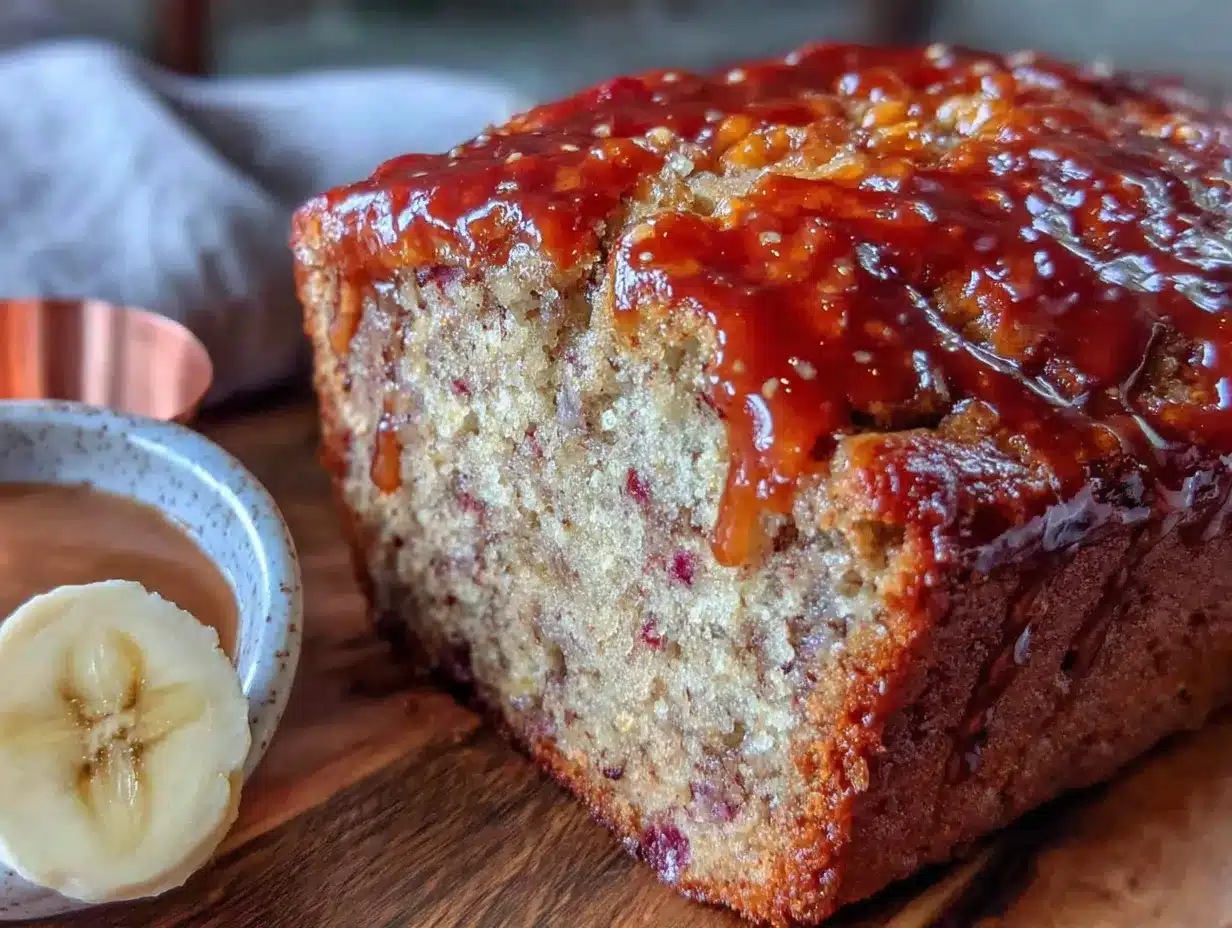
- 1/2 cup (75g) chopped walnuts or pecans—Toast them first for extra flavor. Spread them on a baking sheet and bake at 350°F for 5-7 minutes until fragrant.
- 1/2 cup (85g) dark chocolate chips—I like using 70% cacao chocolate chips for a rich, not-too-sweet addition.
- 1/4 cup (30g) shredded unsweetened coconut—Adds texture and a subtle tropical note.
When it comes to ingredient selection, I always recommend using the best quality you can reasonably afford. For this recipe, the butter and bananas do most of the heavy lifting, so splurging a little on those two ingredients makes a noticeable difference.
Equipment Needed
One of the best things about this recipe is how little equipment you need. No stand mixer, no hand mixer, no food processor. Just basic kitchen tools that you probably already own.
- 9×5-inch loaf pan—A standard loaf pan works perfectly. If you’re using a dark nonstick pan, reduce the oven temperature by 25°F to prevent over-browning. Glass or ceramic pans work too, but they may require a slightly longer baking time.
- Medium saucepan—For browning the butter. A light-colored saucepan makes it easier to see the butter change color. I’ve used my trusty stainless steel pan for years and it works beautifully.
- Large mixing bowl—Any large bowl will do. I prefer a wide, shallow bowl for easier mixing.
- Whisk—For combining the wet ingredients and smoothing out any lumps.
- Rubber spatula—Essential for folding everything together without overmixing. A silicone spatula is my go-to because it’s heat-resistant and flexible.
- Measuring cups and spoons—For accurate measurements. I recommend using a kitchen scale for the most consistent results, especially for the flour.
- Parchment paper—Lining the loaf pan makes removal effortless. You can also grease the pan with butter or cooking spray if you don’t have parchment.
- Cooling rack—Allows air to circulate around the loaf so it cools evenly. If you don’t have one, you can use the inverted loaf pan or a wire rack from your oven.
If you don’t have a 9×5-inch pan, you can use an 8×4-inch pan instead. Just increase the baking time by 5-10 minutes and keep an eye on it. I’ve also made this as muffins—fill a standard muffin tin about 3/4 full and bake for 18-22 minutes. Budget-friendly tip: you don’t need expensive equipment for this recipe. A basic whisk and a sturdy bowl will get the job done beautifully.
Preparation Method
Let me walk you through this step by step. I’ve made this loaf more times than I can count, so I’ve picked up a few tricks along the way.
- Preheat your oven to 350°F (175°C). Position a rack in the center of the oven. Line your 9×5-inch loaf pan with parchment paper, leaving some overhang on the long sides for easy lifting. If you don’t have parchment, grease the pan thoroughly with butter or cooking spray.
- Brown the butter. Place the 1/2 cup of butter in a medium saucepan over medium heat. Let it melt completely, then continue cooking, swirling the pan occasionally. The butter will start to foam and bubble—that’s normal. After about 5-7 minutes, you’ll notice the foam subsiding and little brown specks forming at the bottom of the pan. The butter will smell nutty and toasty. Once it reaches a golden amber color, immediately remove it from the heat and pour it into a heatproof bowl to stop the cooking process. Don’t walk away during this step—browned butter can go from perfect to burnt in seconds.
- Let the browned butter cool slightly. Set it aside for about 5-10 minutes. You want it warm but not hot, so it doesn’t cook the eggs when you add them.
- Mash the bananas. In your large mixing bowl, mash the bananas with a fork until mostly smooth with a few small lumps remaining. I like leaving a few chunks for texture. Measure out 1 1/2 cups (340g) if you’re being precise.
- Add the wet ingredients. To the mashed bananas, add the cooled browned butter, Greek yogurt, eggs, vanilla extract, and coconut sugar. Whisk everything together until well combined and smooth. The mixture should look glossy and smell incredible at this point.
- Combine the dry ingredients. In a separate small bowl, whisk together the whole wheat flour, baking soda, salt, and cinnamon (if using). This ensures the baking soda and salt are evenly distributed throughout the flour.
- Fold the dry ingredients into the wet. Add the flour mixture to the banana mixture. Use your rubber spatula to gently fold everything together. Stir just until you no longer see streaks of flour. A few lumps are perfectly fine—overmixing will make the bread tough. If you’re adding nuts or chocolate chips, fold them in at this stage.
- Pour the batter into the prepared pan. Use your spatula to scrape every last bit of batter into the pan. Spread it evenly, and give the pan a gentle tap on the counter to release any air bubbles.
- Bake for 50-60 minutes. Place the pan in the preheated oven and bake until a toothpick inserted into the center comes out clean or with just a few moist crumbs. The top should be golden brown and spring back when lightly touched. Start checking at the 50-minute mark. Every oven runs a little differently, so trust your senses more than the timer.
- Cool in the pan for 10 minutes. Place the loaf pan on a cooling rack and let it rest for 10 minutes. This allows the structure to set so the loaf doesn’t fall apart when you remove it.
- Remove and cool completely. Use the parchment overhang to lift the loaf out of the pan and transfer it to the cooling rack. Let it cool completely before slicing—about 1 to 1 1/2 hours. I know it’s tempting to cut into it right away, but warm banana bread is fragile and tends to crumble. Patience pays off here.
A quick note on timing: the total active time is about 15 minutes. The rest is just waiting for the oven to do its thing. I usually start this right after breakfast so it’s ready by mid-morning snack time.
Cooking Tips & Techniques
After making this recipe more times than I can count, I’ve collected a few hard-earned lessons. Here’s what I wish someone had told me from the start.
Don’t rush the browning process. The first time I browned butter, I got impatient and cranked up the heat. The butter went from melted to burnt in what felt like seconds. Keep the heat at medium and watch carefully. The butter will foam, then the foam will subside, and then you’ll see those beautiful brown specks. That’s your cue to pull it off the heat immediately. I keep a cold bowl ready nearby just in case.
Room temperature ingredients matter. I know it’s tempting to use cold eggs straight from the fridge, but room temperature ingredients emulsify better and create a more tender crumb. If you’re in a hurry, place the eggs in a bowl of warm water for 5 minutes. For the yogurt, let it sit on the counter while you gather your other ingredients.
Measure your flour correctly. This is probably the most common mistake in baking. Scooping flour directly with the measuring cup packs it down and can add up to 25% more flour than intended. Instead, fluff the flour with a spoon, then spoon it into your measuring cup and level it off with a knife. If you have a kitchen scale, 210 grams is your target.
Check for doneness the right way. A toothpick test is reliable, but I also look for the edges pulling away slightly from the pan. The top should be a deep golden brown, and the loaf should feel firm when you gently press the center. If the top is browning too quickly but the center isn’t done yet, tent the loaf loosely with aluminum foil for the last 10-15 minutes of baking.
Let it cool completely. I learned this the hard way after slicing into a warm loaf and watching it crumble into pieces. The structure needs time to set. If you absolutely can’t wait, I understand—just know that the texture will be better if you do.
Use overripe bananas. The best bananas for this recipe are the ones that look past their prime—lots of brown spots, almost mushy to the touch. They’re sweeter and easier to mash. If your bananas are only slightly spotted, you can speed up the ripening process by placing them in a paper bag with an apple overnight.
Variations & Adaptations
This recipe is wonderfully adaptable, and I’ve tried several variations over the years. Here are some of my favorites.
Gluten-free version. Substitute the whole wheat flour with a good-quality gluten-free all-purpose flour blend that contains xanthan gum. I’ve had great results with King Arthur Flour’s gluten-free measure-for-measure blend. The texture will be slightly more tender, but still delicious. Add an extra tablespoon of yogurt to help with moisture.
Dairy-free version. Replace the butter with a high-quality vegan butter stick (not margarine from a tub) and use a dairy-free yogurt like coconut or almond milk yogurt. The browned butter flavor won’t be exactly the same, but you’ll still get a lovely nuttiness from the vegan butter. I’ve tried this with Miyoko’s European-style cultured vegan butter and was pleasantly surprised.
Lower sugar option. Reduce the coconut sugar to 1/3 cup (67g) if you prefer a less sweet loaf. The bananas provide plenty of natural sweetness, so this works well. You can also add a tablespoon of maple syrup if you want to keep some sweetness without using granulated sugar.
Seasonal twist. In the fall, add 1/2 cup of canned pumpkin puree and reduce the yogurt to 2 tablespoons. Add an extra 1/4 teaspoon of cinnamon and a pinch of nutmeg. The pumpkin adds moisture and a lovely earthy flavor that pairs beautifully with the browned butter.
Chocolate lover’s version. Fold in 1/2 cup of dark chocolate chips and 2 tablespoons of cocoa powder (reduce the flour by 2 tablespoons to compensate). This creates a rich, fudgy banana bread that feels almost like dessert. I’ve made this for birthdays and it always gets rave reviews.
Nut-free option. Simply omit the nuts if you’re avoiding them. The bread is still delicious without them. You can add seeds like pumpkin or sunflower seeds for a similar crunch if you like.
One of my personal favorite variations is adding a tablespoon of orange zest along with the vanilla extract. The citrus brightens the whole loaf and makes it feel fresh and unexpected. I stumbled on this combination when I had an orange sitting on my counter and decided to experiment. It’s been a staple ever since.
Serving & Storage Suggestions
This banana bread is incredibly versatile when it comes to serving. Here’s how I like to enjoy it and how to keep it fresh.
Serving temperature. This loaf is delicious at room temperature, but I also love it slightly warm. Pop a slice in the toaster or microwave for about 10-15 seconds to bring back that fresh-from-the-oven feel. For a special treat, spread a thin layer of salted butter or a dollop of Greek yogurt on top.
Presentation ideas. For brunch, I like to slice the loaf and arrange it on a wooden board with fresh berries and a small dish of honey. It looks beautiful and requires minimal effort. For a more indulgent dessert, serve a slice with a scoop of vanilla ice cream and a drizzle of caramel sauce.
Complementary dishes. This banana bread pairs wonderfully with a hot cup of coffee or tea. For a complete breakfast, serve it alongside scrambled eggs and fresh fruit. It also makes a great addition to a brunch spread with yogurt parfaits, fruit salad, and mimosas.
Storage instructions. Store the loaf wrapped tightly in plastic wrap or in an airtight container at room temperature for up to 4 days. The moisture from the bananas and yogurt keeps it tender for longer than most banana breads. If you live in a humid climate, you might want to store it in the refrigerator to prevent mold, but let it come to room temperature before serving for the best texture.
Freezing instructions. This loaf freezes beautifully. Wrap the cooled loaf tightly in plastic wrap, then in a layer of aluminum foil, and freeze for up to 3 months. You can also slice the loaf before freezing and wrap individual slices. That way, you can pull out a slice whenever the craving strikes. To thaw, leave it at room temperature for about an hour, or pop a frozen slice in the toaster for a quick treat.
How flavors develop. Honestly, this banana bread tastes even better on the second day. The flavors meld together and the texture becomes even more moist and tender. If you can resist eating it all on day one, you’re in for a treat on day two.
Nutritional Information & Benefits
This banana bread is designed to feel indulgent while still being nourishing. Here’s a rough breakdown per slice (based on 10 slices):
- Calories: Approximately 220-250
- Protein: 5-6 grams
- Fat: 10-12 grams
- Carbohydrates: 30-35 grams
- Fiber: 3-4 grams
- Sugar: 14-16 grams (naturally occurring from bananas and coconut sugar)
Health benefits of key ingredients:
- Bananas are rich in potassium, vitamin B6, and fiber. They support heart health and digestion.
- Whole wheat flour provides more fiber and nutrients than refined white flour, keeping you fuller longer.
- Greek yogurt adds protein and probiotics, which are great for gut health.
- Coconut sugar has a lower glycemic index than regular sugar and contains small amounts of minerals like zinc and iron.
- Butter provides vitamin A and healthy fats that help your body absorb fat-soluble vitamins.
Dietary considerations: This recipe is vegetarian. For gluten-free or dairy-free options, see the variations section above. It is not suitable for vegan diets as written, but you can try a flax egg substitute if needed.
Potential allergens: This recipe contains wheat (gluten), dairy, and eggs. If using nuts as a mix-in, it also contains tree nuts.
From a wellness perspective, I love that this recipe lets me enjoy a slice of banana bread without the sugar crash or guilt that often comes with traditional versions. It’s the kind of treat that supports my energy rather than draining it.
Conclusion
This wholesome no-mixer banana bread with browned butter is proof that simple ingredients and a little technique can create something truly special. It’s the loaf I turn to when I want to use up those spotty bananas, when I need a quick gift for a friend, or when I just want something comforting that doesn’t require a trip to the store.
What I love most about this recipe is how forgiving it is. You can customize it with whatever mix-ins you have on hand, adjust the sweetness to your liking, and it always turns out beautifully. The browned butter adds that little something extra that makes people ask, “What did you do differently?” And the fact that it all comes together in one bowl with no mixer? That’s just the cherry on top.
I’d love to hear how yours turns out. Did you add chocolate chips? Try it with walnuts? Maybe you discovered a new variation I haven’t thought of yet. Drop a comment below and share your version. And if you loved this recipe, please share it with a friend who needs a little banana bread in their life. Happy baking, friends!
Frequently Asked Questions
Can I use all-purpose flour instead of whole wheat flour?
Absolutely. You can substitute the whole wheat flour with an equal amount of all-purpose flour (210 grams or 1 3/4 cups). The texture will be slightly lighter and less dense. If you want to keep some whole grain goodness, try using half whole wheat and half all-purpose flour.
Why did my banana bread turn out dry?
Dry banana bread is usually the result of overmixing the batter or overbaking it. Mix just until the flour disappears, and start checking for doneness at the 50-minute mark. Also, make sure your bananas are very ripe—underripe bananas have less moisture and sweetness.
Can I make this recipe vegan?
Yes, with a few adjustments. Replace the eggs with flax eggs (2 tablespoons ground flaxseed mixed with 6 tablespoons water), use a vegan butter stick, and substitute the Greek yogurt with a dairy-free yogurt like coconut or almond milk yogurt. The texture will be slightly different, but still delicious.
How do I know when the butter is properly browned?
Watch for three signs: the butter will foam, then the foam will subside, and you’ll see golden brown specks forming at the bottom of the pan. The butter will smell nutty and toasty. Once you see those brown specks, remove it from the heat immediately to prevent burning.
Can I double this recipe?
Yes, this recipe doubles beautifully. Simply double all the ingredients and use two 9×5-inch loaf pans. You can bake them at the same time on the same oven rack, but you may need to rotate the pans halfway through for even baking. The baking time will be similar, but start checking at the 50-minute mark.
Pin This Recipe!
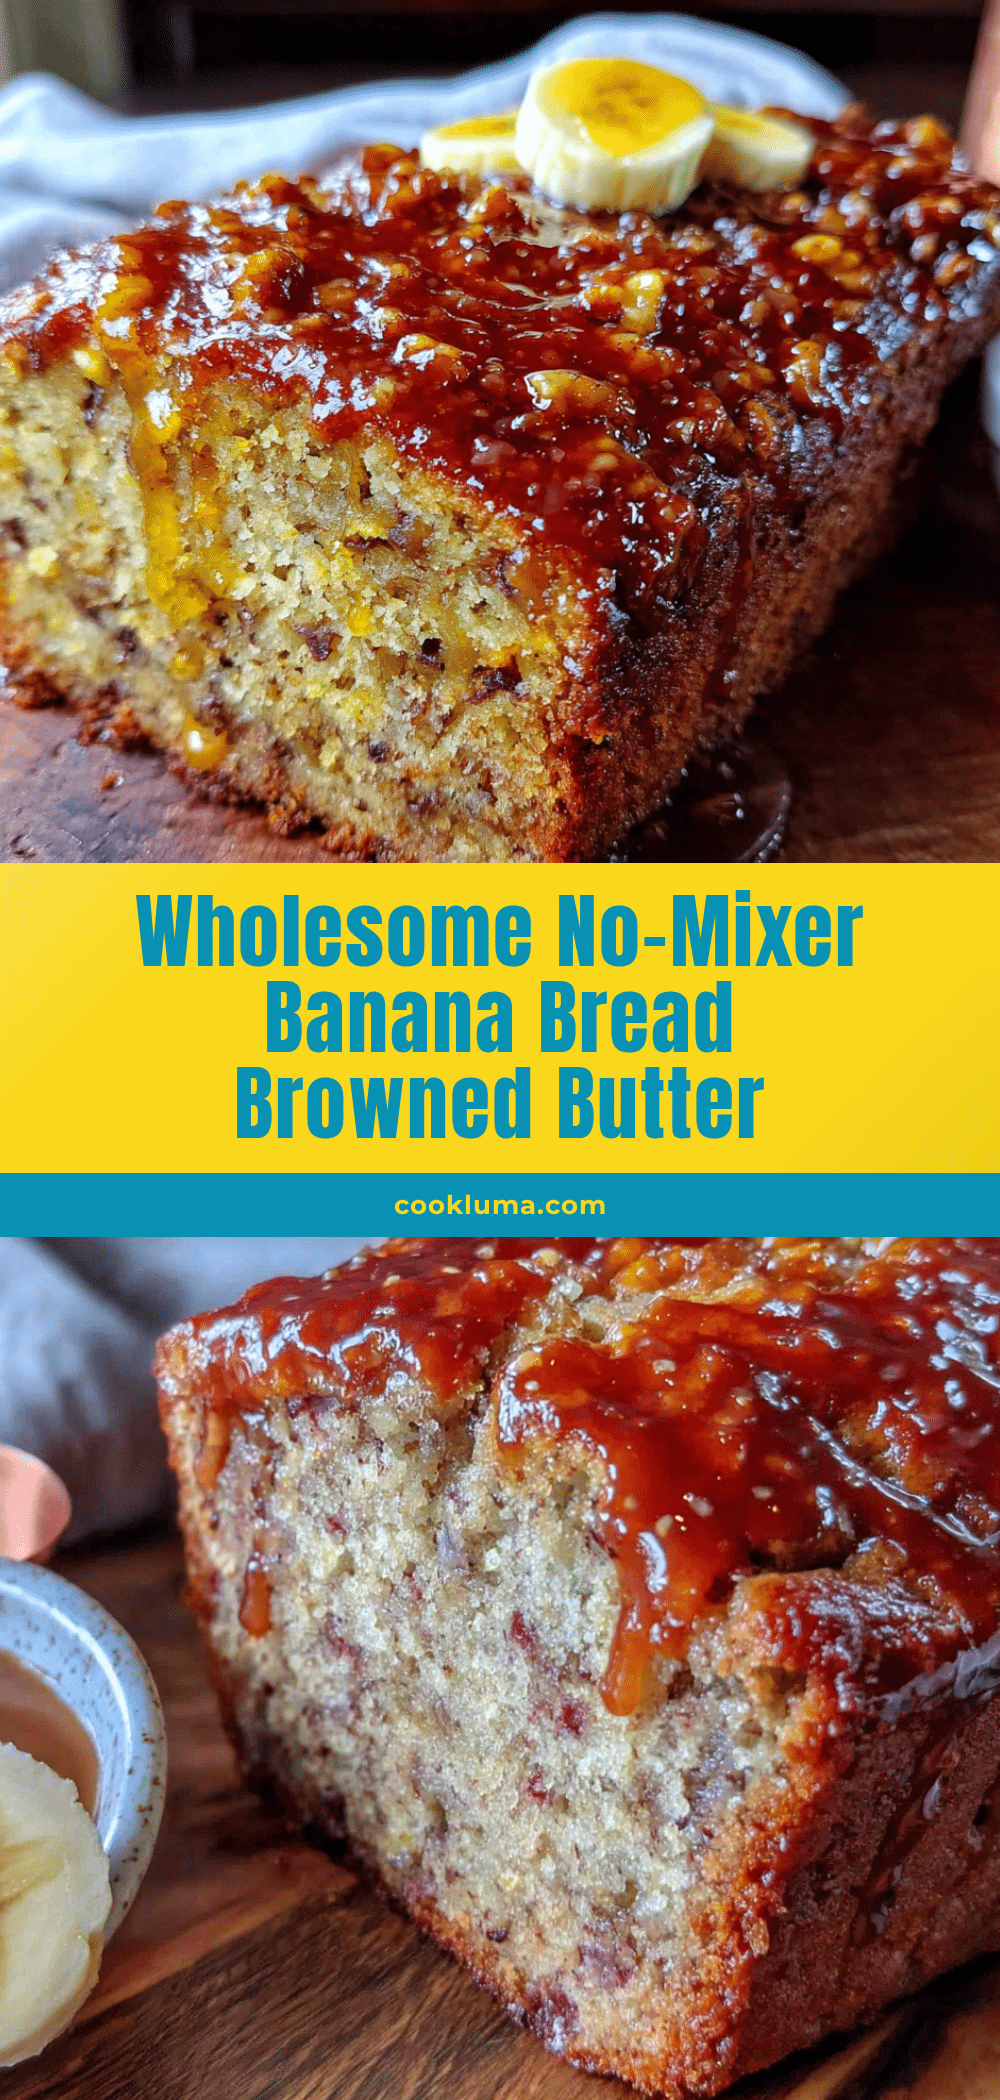
Wholesome No-Mixer Banana Bread with Browned Butter
This banana bread uses browned butter for a nutty, caramel-like depth and comes together in one bowl without a mixer. It’s tender, moist, and made with wholesome ingredients like whole wheat flour, coconut sugar, and Greek yogurt.
- Prep Time: 15 minutes
- Cook Time: 55 minutes
- Total Time: 1 hour 10 minutes
- Yield: 10 servings 1x
- Category: Dessert
- Cuisine: American
Ingredients
- 1/2 cup (113g) unsalted butter
- 3 large ripe bananas, mashed (about 1 1/2 cups or 340g)
- 1/3 cup (80ml) plain Greek yogurt
- 2 large eggs, room temperature
- 1 teaspoon vanilla extract
- 1/2 cup (100g) coconut sugar
- 1 3/4 cups (210g) whole wheat flour
- 1 teaspoon baking soda
- 1/2 teaspoon salt
- 1 teaspoon cinnamon (optional)
- 1/2 cup (75g) chopped walnuts or pecans (optional)
- 1/2 cup (85g) dark chocolate chips (optional)
- 1/4 cup (30g) shredded unsweetened coconut (optional)
Instructions
- Preheat your oven to 350°F (175°C). Position a rack in the center of the oven. Line your 9×5-inch loaf pan with parchment paper, leaving some overhang on the long sides for easy lifting. If you don’t have parchment, grease the pan thoroughly with butter or cooking spray.
- Brown the butter. Place the 1/2 cup of butter in a medium saucepan over medium heat. Let it melt completely, then continue cooking, swirling the pan occasionally. The butter will start to foam and bubble. After about 5-7 minutes, you’ll notice the foam subsiding and little brown specks forming at the bottom of the pan. The butter will smell nutty and toasty. Once it reaches a golden amber color, immediately remove it from the heat and pour it into a heatproof bowl to stop the cooking process.
- Let the browned butter cool slightly. Set it aside for about 5-10 minutes. You want it warm but not hot, so it doesn’t cook the eggs when you add them.
- Mash the bananas. In your large mixing bowl, mash the bananas with a fork until mostly smooth with a few small lumps remaining. Measure out 1 1/2 cups (340g) if you’re being precise.
- Add the wet ingredients. To the mashed bananas, add the cooled browned butter, Greek yogurt, eggs, vanilla extract, and coconut sugar. Whisk everything together until well combined and smooth.
- Combine the dry ingredients. In a separate small bowl, whisk together the whole wheat flour, baking soda, salt, and cinnamon (if using).
- Fold the dry ingredients into the wet. Add the flour mixture to the banana mixture. Use your rubber spatula to gently fold everything together. Stir just until you no longer see streaks of flour. A few lumps are perfectly fine. If you’re adding nuts or chocolate chips, fold them in at this stage.
- Pour the batter into the prepared pan. Use your spatula to scrape every last bit of batter into the pan. Spread it evenly, and give the pan a gentle tap on the counter to release any air bubbles.
- Bake for 50-60 minutes. Place the pan in the preheated oven and bake until a toothpick inserted into the center comes out clean or with just a few moist crumbs. The top should be golden brown and spring back when lightly touched. Start checking at the 50-minute mark.
- Cool in the pan for 10 minutes. Place the loaf pan on a cooling rack and let it rest for 10 minutes.
- Remove and cool completely. Use the parchment overhang to lift the loaf out of the pan and transfer it to the cooling rack. Let it cool completely before slicing—about 1 to 1 1/2 hours.
Notes
Don’t rush the browning process; keep heat at medium and watch carefully. Room temperature ingredients matter for a tender crumb. Measure flour correctly by fluffing, spooning, and leveling. Check for doneness with a toothpick and by looking for edges pulling away from the pan. Let the loaf cool completely before slicing to prevent crumbling. Use overripe bananas for best sweetness and moisture.
Nutrition
- Serving Size: 1 slice
- Calories: 235
- Sugar: 15
- Sodium: 280
- Fat: 11
- Saturated Fat: 6
- Carbohydrates: 33
- Fiber: 3.5
- Protein: 5.5
Keywords: banana bread, browned butter, no mixer, whole wheat, coconut sugar, healthy banana bread, easy banana bread


