My brother-in-law claimed to hate pumpkin pie for thirty-seven years. Thirty-seven years of Thanksgiving dinners spent pushing the dessert plate aside, asking if there was any apple pie instead, making that little face people make when they think nobody’s watching. I believed him, honestly. We all did. Then last November, I made this version “just to test the recipe” on a random Tuesday afternoon, and I found him standing at the kitchen counter at 10 PM with a fork in one hand and the pie plate in the other, caught absolutely red-handed.
“This isn’t pumpkin pie,” he said, mouth half-full. “This is something else entirely.”
And you know what? He wasn’t wrong. This isn’t your grandmother’s pumpkin pie — though I’m sure hers was lovely. This is the one that makes people close their eyes on the first bite. The filling is silky, not grainy. The spices hit you in layers, not all at once. And that maple whipped cream on top? Let me tell you, it’s the kind of thing that makes you wonder why we ever bothered with the canned stuff. I’ve been tinkering with this recipe for about four years now, testing it on every dinner guest who walked through my door. One neighbor, Sarah, asked for the recipe before she even finished her slice. That’s when I knew I had something worth sharing.
Maybe you’ve been the one stuck bringing dessert to a gathering, hoping it actually turns out this time. Or maybe you’ve got a pumpkin pie skeptic at your own table. Either way, this one’s for you. It’s the pie that converts people without you even trying — and honestly, that’s the best kind of magic.
Why You’ll Love This Recipe
I’ve tested this pumpkin pie more times than I care to count — through burnt crusts, weepy fillings, and one particularly disastrous attempt where I forgot the sugar entirely (don’t ask). Every tweak brought me closer to this version, which I now confidently call the best I’ve ever made. Here’s why it works:
- Silky, Not Grainy: The secret is in the straining and the exact oven temperature. No more of that weird, cracked texture on top.
- Real Maple Flavor: The whipped cream isn’t an afterthought — it’s made with actual maple syrup, not extract. It changes everything.
- Make-Ahead Friendly: You can prep the crust and filling a day ahead. That means less stress when guests are about to arrive.
- Perfect for a Crowd: This recipe scales beautifully. I’ve made it for Thanksgiving dinners of twelve and cozy gatherings of four.
- Impressive Presentation: The contrast between the golden pie and the white, billowy cream on top? Absolutely stunning on a dessert table.
- Actually Foolproof: I’ve walked three different friends through this over the phone. All three said it turned out perfect. That’s the kind of reliability you want in a holiday recipe.
This isn’t just another pumpkin pie recipe you’ll bookmark and forget. It’s the one you’ll come back to every year, the one your family will start requesting by name. There’s something deeply satisfying about pulling a perfect pie out of the oven, knowing you made it from scratch, watching everyone reach for seconds. That’s the feeling this recipe delivers, every single time.
What Ingredients You Will Need
This recipe uses simple, honest ingredients that work together to create something genuinely special. Most of these are pantry staples, especially during the fall months, which makes this pie surprisingly easy to throw together even on short notice.
For the Pie Crust
- 1 ¼ cups all-purpose flour (160g) — I prefer King Arthur Flour for consistent results, but any brand works fine
- ½ teaspoon salt — fine sea salt is best
- 1 tablespoon granulated sugar — just enough to add a hint of sweetness
- ½ cup cold unsalted butter (113g), cut into small cubes — must be very cold, straight from the fridge
- 3-4 tablespoons ice water — start with 3 and add more only if needed
For the Pumpkin Filling
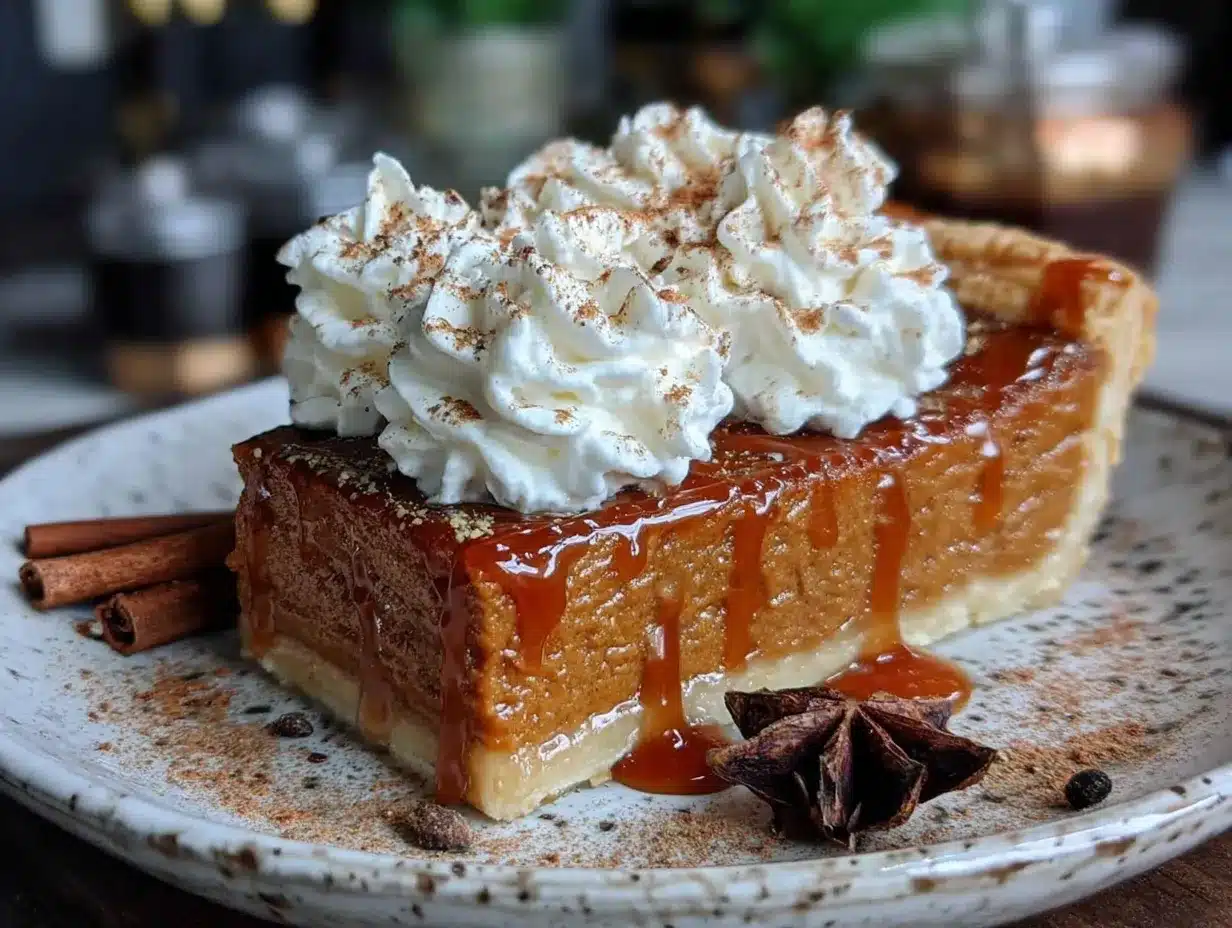
- 1 can (15 oz) pure pumpkin purée (425g) — not pumpkin pie filling, just plain pumpkin. Libby’s is my go-to brand
- ¾ cup packed light brown sugar (150g) — adds depth and moisture
- 2 large eggs, room temperature — cold eggs can make the filling seize up
- 1 cup heavy cream (240ml) — for that luxurious, velvety texture
- 1 teaspoon vanilla extract — pure, not imitation
- 2 teaspoons ground cinnamon
- 1 teaspoon ground ginger
- ½ teaspoon ground nutmeg — freshly grated is incredible if you have it
- ¼ teaspoon ground cloves
- ¼ teaspoon salt
For the Maple Whipped Cream
- 1 cup heavy cream (240ml), very cold
- 3 tablespoons pure maple syrup — Grade A dark amber has the strongest flavor
- ½ teaspoon vanilla extract
- Pinch of salt — trust me on this one, it balances the sweetness
A quick note on the pumpkin purée: I’ve tried roasting fresh sugar pumpkins and making my own purée. It’s lovely, I won’t lie, but it also introduces more moisture into the filling, which can lead to a soggy pie. For the most consistent, reliable results, stick with canned. That’s what I use in my own kitchen, and I don’t feel even a little bit guilty about it.
For the maple syrup, please use the real stuff. The imitation pancake syrups have a completely different consistency and flavor profile. They’ll make your whipped cream taste artificial, and you’ve put too much effort into this pie for that.
Equipment Needed
You don’t need a fancy kitchen to pull off this pie. Here’s what you’ll actually use:
- 9-inch pie dish — glass or ceramic works best. I use a deep-dish Pyrex that I’ve had for years. Metal can work but conducts heat differently.
- Rolling pin — if you don’t have one, a wine bottle works in a pinch. I’ve done it.
- Large mixing bowls — one for the crust, one for the filling
- Whisk — for smoothing out the filling
- Pastry cutter or two forks — for cutting butter into the flour
- Plastic wrap — for chilling the dough
- Parchment paper and pie weights — or dried beans, which I’ve used for years before buying actual pie weights
- Electric mixer or stand mixer — for the whipped cream. A whisk and strong arm work too, but be prepared for a workout
- Cooling rack — essential for even cooling
If you’re making this for a dinner party and don’t have pie weights, don’t stress. Line your crust with parchment and fill it with any dried beans you have — lentils, chickpeas, whatever. They work exactly the same and cost nothing extra.
Preparation Method
Let’s walk through this step by step. I’ve made this pie enough times to know exactly where things can go wrong, so I’ll point those spots out as we go.
Step 1: Make the Pie Crust
In a large bowl, whisk together the flour, salt, and sugar. Add the cold butter cubes. Using a pastry cutter or two forks, cut the butter into the flour until the mixture looks like coarse meal with some pea-sized butter pieces remaining. This is important — those little chunks of butter create flaky layers as the pie bakes.
Sprinkle 3 tablespoons of ice water over the mixture and stir with a fork until the dough starts coming together. If it seems dry, add the fourth tablespoon. Turn the dough onto a lightly floured surface and gather it into a disk. Wrap in plastic wrap and refrigerate for at least 1 hour. I’ve left mine overnight before, and it works beautifully.
Step 2: Blind Bake the Crust
Preheat your oven to 375°F (190°C). On a floured surface, roll the chilled dough into a 12-inch circle, about ⅛-inch thick. Carefully transfer it to your pie dish. Trim the edges, leaving about a ½-inch overhang, then fold it under and crimp however you like. I do a simple fluted edge — nothing fancy.
Line the crust with parchment paper and fill with pie weights or dried beans. Bake for 15 minutes. Remove the parchment and weights, then bake for another 8-10 minutes until the bottom looks dry and lightly golden. Set aside to cool slightly. This step prevents that dreaded soggy bottom.
Step 3: Prepare the Filling
Turn the oven down to 350°F (175°C). In a large bowl, whisk together the pumpkin purée and brown sugar until smooth. Add the eggs one at a time, whisking well after each. Pour in the heavy cream and vanilla, and whisk until everything is combined.
In a small bowl, mix the cinnamon, ginger, nutmeg, cloves, and salt. Add these spices to the pumpkin mixture and whisk thoroughly. Taste the filling — yes, raw eggs and all, just a tiny dab on your finger. Adjust the spices if you want more kick. I usually add an extra pinch of ginger because I love the warmth it brings.
Step 4: Bake the Pie
Pour the filling into the pre-baked crust. Place the pie on the middle rack of the oven. Bake for 50-60 minutes, but start checking at 45 minutes. The edges should be set, and the center should jiggle just slightly when you gently shake the pie. That slight jiggle is your friend — it means the filling will set up silky smooth as it cools.
If the crust edges are browning too quickly, loosely tent them with foil or use a pie shield. I learned this the hard way after a few burnt crusts. Remove the pie from the oven and let it cool completely on a wire rack. This takes about 2-3 hours. Don’t rush it, or you’ll end up with a runny pie.
Step 5: Make the Maple Whipped Cream
Just before serving, pour the cold heavy cream into a chilled bowl. Add the maple syrup, vanilla, and salt. Beat with an electric mixer on medium-high speed until soft peaks form — this takes about 2-3 minutes. Don’t overbeat, or you’ll end up with butter. Trust me, I’ve done it.
Serve the pie at room temperature or slightly warm, with a generous dollop of maple whipped cream on top. Watch your guests’ faces light up.
Cooking Tips & Techniques
Over the years, I’ve made every mistake you can imagine with this pie. Here’s what I’ve learned so you don’t have to repeat my errors.
Don’t overwork the dough. The more you handle pie crust, the tougher it gets. Mix just until it comes together, and roll it out with confidence but not aggression. If the dough cracks at the edges, just patch it with your fingers — nobody will know.
Chill everything. Cold butter, cold water, cold dough. Warm ingredients make for a tough, greasy crust. If your kitchen is warm, pop the dough back in the fridge for 10 minutes between rolling and baking.
Watch the filling consistency. If your pumpkin filling looks curdled or separated after adding the cream, you probably added cold cream to room-temperature ingredients. Next time, let the cream sit out for 15 minutes first. If it’s already happened, whisk vigorously — it usually comes back together.
The jiggle test matters. I used to overbake my pies because I was scared of undercooked eggs. But a fully set center means a cracked, dry filling. Pull the pie when the center wobbles like Jell-O. It will continue cooking from residual heat as it cools.
Make the whipped cream fresh. It only takes a few minutes, and the texture is incomparable. If you absolutely must make it ahead, whip it slightly softer than you think, then re-whip briefly before serving.
Variations & Adaptations
One of the best things about this pumpkin pie is how adaptable it is. Here are a few variations I’ve tried and loved:
Gluten-Free Version: Swap the all-purpose flour for a 1:1 gluten-free baking flour blend. I’ve used Bob’s Red Mill with great results. The crust will be a bit more delicate, so handle it gently.
Dairy-Free Adaptation: Use full-fat coconut cream instead of heavy cream in both the filling and the whipped cream. The coconut flavor is subtle and actually pairs beautifully with the pumpkin and maple. For the crust, use cold coconut oil or vegan butter.
Spice It Up: Add ¼ teaspoon of cardamom or allspice to the spice mix for a more complex flavor profile. I did this accidentally one year when I grabbed the wrong jar, and it was a happy accident.
Bourbon Maple Whipped Cream: Add 1 tablespoon of bourbon along with the maple syrup. It adds a smoky warmth that’s incredible with the pumpkin. Just be aware that the alcohol will keep the cream from holding stiff peaks — it’ll be softer, but still delicious.
Individual Mini Pies: Use a muffin tin instead of a pie dish. Roll the dough, cut circles, press into greased muffin cups, fill, and bake for about 20-25 minutes. Perfect for parties where everyone wants their own.
Serving & Storage Suggestions
This pie is best served at room temperature or slightly warm. If you’ve refrigerated it, let it sit out for about 30 minutes before serving. The flavors are much more pronounced when the pie isn’t cold.
For presentation, I like to dollop the maple whipped cream right on top of each slice just before serving, then sprinkle a tiny pinch of cinnamon or nutmeg over the cream. It looks beautiful and tastes even better.
This pie pairs wonderfully with a cup of strong black coffee or a spiced chai latte. If you’re serving it at a dinner party, a glass of bourbon or a dark rum cocktail is a lovely match.
Storage: Cover the pie loosely with plastic wrap or foil and refrigerate for up to 4 days. The crust will soften slightly over time, but the flavor actually improves after a day or two as the spices meld together.
Freezing: You can freeze the fully baked and cooled pie for up to 3 months. Wrap it tightly in plastic wrap, then foil. Thaw overnight in the refrigerator and bring to room temperature before serving. Make the whipped cream fresh — frozen whipped cream doesn’t quite recover its texture.
Reheating: If you prefer warm pie, place slices in a 300°F (150°C) oven for about 10 minutes. Don’t microwave it — the crust gets rubbery and the filling can become watery.
Nutritional Information & Benefits
While I wouldn’t call pumpkin pie health food, it does have some redeeming qualities. Here’s the approximate nutritional breakdown per slice (based on 8 servings):
- Calories: 380-420
- Fat: 24g
- Carbohydrates: 42g
- Protein: 5g
- Fiber: 3g
- Sugar: 28g
Pumpkin itself is packed with vitamin A, fiber, and antioxidants. The cinnamon and ginger have anti-inflammatory properties, and the maple syrup provides small amounts of minerals like zinc and manganese. Of course, the heavy cream and butter balance that out, but hey — it’s a holiday dessert. Everything in moderation, right?
For those with dietary concerns: this recipe contains dairy, eggs, and gluten. The variations section above offers alternatives for most of these. If you’re watching your sugar intake, you can reduce the brown sugar to ½ cup, though the filling will be slightly less sweet and a bit more firm.
Conclusion
This pumpkin pie with maple whipped cream has become my signature dish, the one people request for every gathering. It’s the pie that turned my brother-in-law from a skeptic into someone who now asks if I’ve made “that pumpkin thing” whenever he visits. There’s something deeply satisfying about that — not just proving someone wrong, but giving them a new favorite thing they didn’t even know they were missing.
The beauty of this recipe is that it’s forgiving enough for beginners but impressive enough for experienced bakers. You can make it your own with different spices, toppings, or crust variations. That’s what I love most about cooking — a recipe is just a starting point, and every time you make it, you add your own little touches.
I’d love to hear how yours turns out. Did you add extra ginger? Try the bourbon cream? Did you finally convert your own pumpkin pie skeptic? Drop a comment below and let me know. And if you share a photo on social media, tag me — I want to see your beautiful pies in all their golden, maple-topped glory. Happy baking, friends!
Frequently Asked Questions
Can I use fresh pumpkin instead of canned?
You absolutely can, but be aware that fresh pumpkin purée has more water content. You’ll need to strain it through cheesecloth or a clean kitchen towel for at least an hour to remove excess moisture. Even then, the texture might be slightly different. For the most consistent results, I recommend canned pumpkin purée — it’s actually more concentrated in flavor.
Why did my pumpkin pie crack on top?
Cracking usually happens from overbaking. The filling expands as it heats, and if it sets too firmly, the surface cracks as it contracts during cooling. Pull your pie out when the center still has a slight jiggle. Also, avoid drastic temperature changes — don’t put a hot pie directly in the fridge.
Can I make this pie ahead of time?
Yes! You can make the entire pie a day ahead and refrigerate it. The flavors actually meld and improve overnight. Just hold off on the whipped cream until you’re ready to serve. You can also prep the crust dough up to 3 days in advance and keep it in the fridge.
How do I prevent a soggy bottom crust?
Blind baking is your best friend here. Pre-baking the crust for about 25 minutes before adding the filling creates a barrier that keeps the crust crisp. Also, make sure your filling isn’t too warm when you pour it in — let it cool slightly if you’ve just mixed it.
Can I use store-bought pie crust instead?
You can, and I won’t judge you for it. If you’re short on time or just not feeling the homemade crust thing, a good-quality refrigerated pie crust works fine. Just blind bake it according to the package directions before adding the filling. The filling and maple whipped cream are still homemade, and that’s what really shines.
Pin This Recipe!
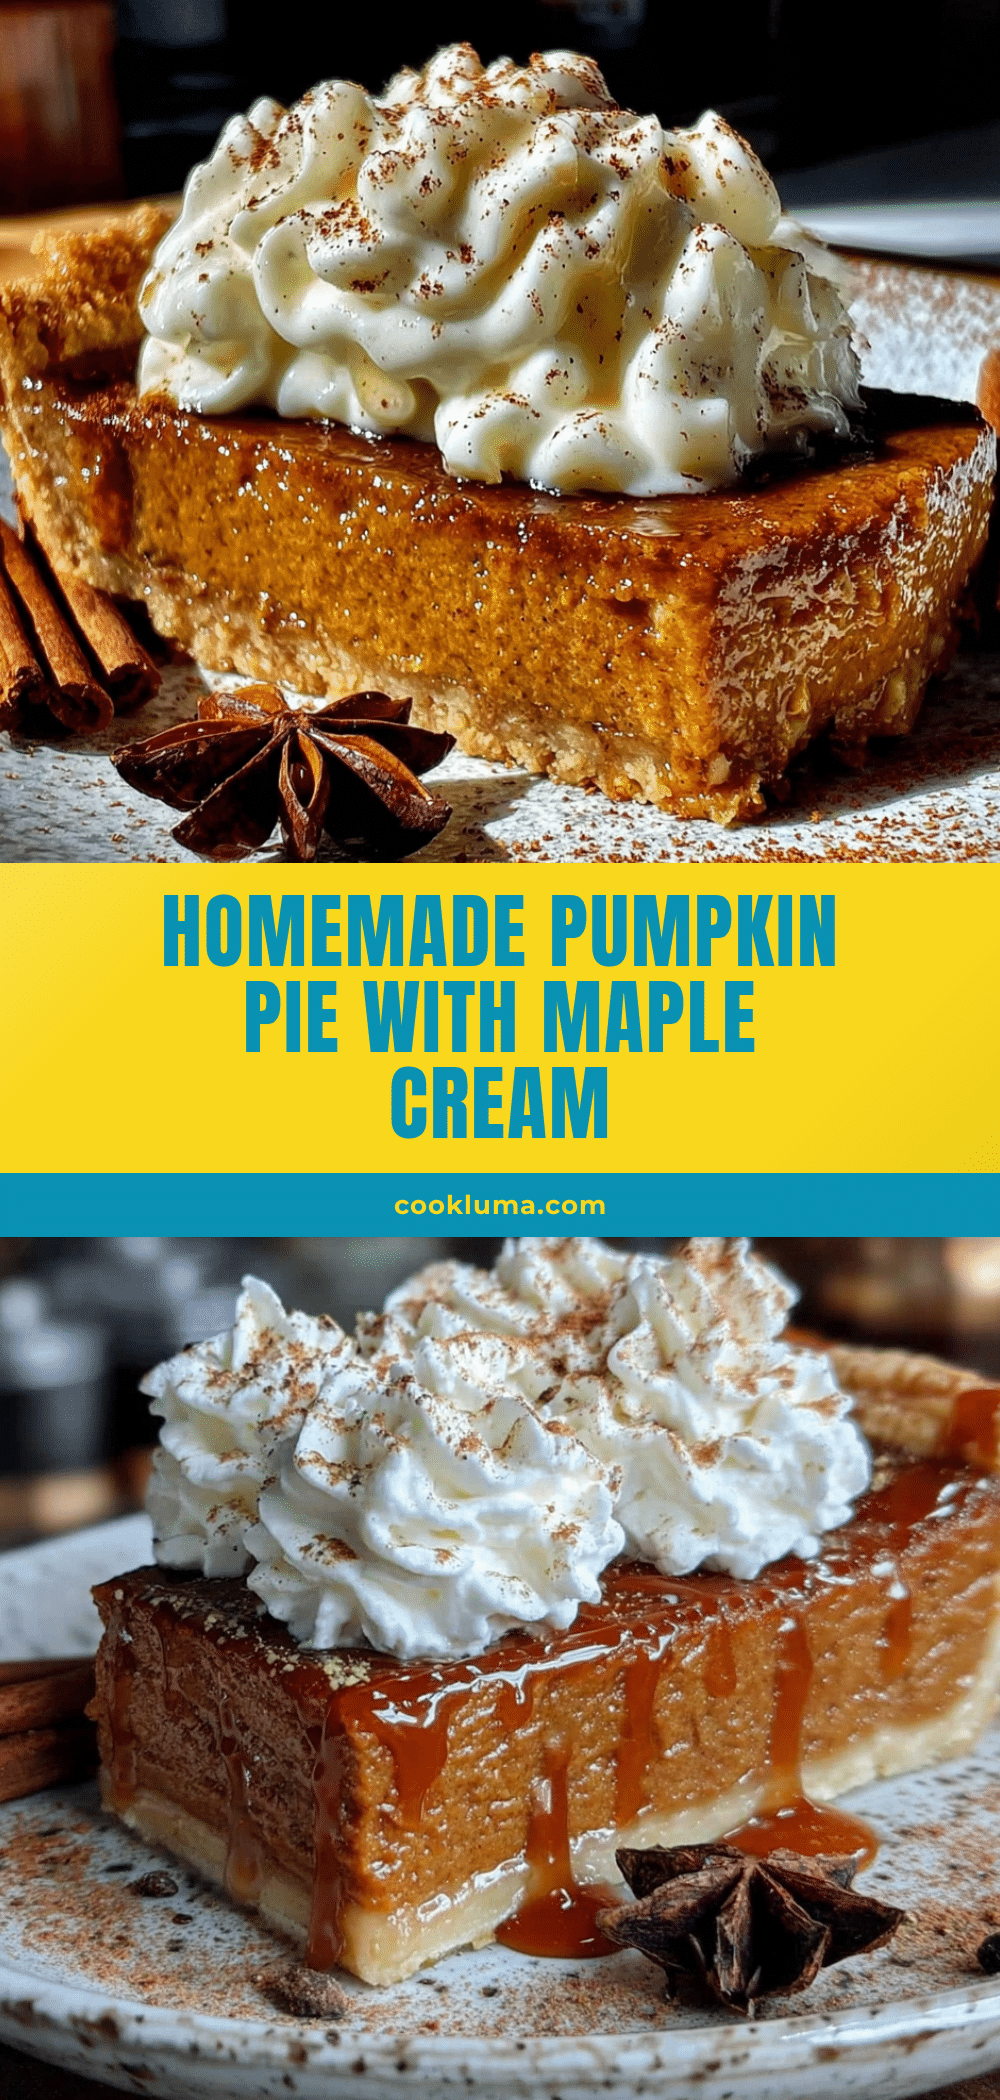
The Best Homemade Pumpkin Pie with Maple Whipped Cream
This silky, spiced pumpkin pie with real maple whipped cream is the one that converts skeptics. With a flaky homemade crust and a foolproof filling, it’s perfect for Thanksgiving or any fall gathering.
- Prep Time: 30 minutes
- Cook Time: 1 hour 10 minutes
- Total Time: 4 hours 40 minutes (includes chilling and cooling)
- Yield: 8 servings 1x
- Category: Dessert
- Cuisine: American
Ingredients
- 1 ¼ cups all-purpose flour (160g)
- ½ teaspoon fine sea salt
- 1 tablespoon granulated sugar
- ½ cup cold unsalted butter (113g), cut into small cubes
- 3–4 tablespoons ice water
- 1 can (15 oz) pure pumpkin purée (425g), not pumpkin pie filling
- ¾ cup packed light brown sugar (150g)
- 2 large eggs, room temperature
- 1 cup heavy cream (240ml)
- 1 teaspoon pure vanilla extract
- 2 teaspoons ground cinnamon
- 1 teaspoon ground ginger
- ½ teaspoon ground nutmeg, preferably freshly grated
- ¼ teaspoon ground cloves
- ¼ teaspoon salt
- 1 cup heavy cream (240ml), very cold (for whipped cream)
- 3 tablespoons pure maple syrup, Grade A dark amber (for whipped cream)
- ½ teaspoon vanilla extract (for whipped cream)
- Pinch of salt (for whipped cream)
Instructions
- Make the pie crust: In a large bowl, whisk together flour, salt, and sugar. Add cold butter cubes. Using a pastry cutter or two forks, cut the butter into the flour until the mixture looks like coarse meal with some pea-sized butter pieces remaining.
- Sprinkle 3 tablespoons of ice water over the mixture and stir with a fork until the dough starts coming together. If it seems dry, add the fourth tablespoon. Turn the dough onto a lightly floured surface and gather it into a disk. Wrap in plastic wrap and refrigerate for at least 1 hour (or overnight).
- Blind bake the crust: Preheat oven to 375°F (190°C). On a floured surface, roll the chilled dough into a 12-inch circle, about ⅛-inch thick. Transfer to a 9-inch pie dish. Trim edges, leaving a ½-inch overhang, fold under, and crimp. Line with parchment paper and fill with pie weights or dried beans. Bake for 15 minutes. Remove parchment and weights, then bake for another 8-10 minutes until the bottom looks dry and lightly golden. Set aside to cool slightly.
- Prepare the filling: Reduce oven temperature to 350°F (175°C). In a large bowl, whisk together pumpkin purée and brown sugar until smooth. Add eggs one at a time, whisking well after each. Pour in heavy cream and vanilla, whisk until combined.
- In a small bowl, mix cinnamon, ginger, nutmeg, cloves, and salt. Add spices to pumpkin mixture and whisk thoroughly. Taste the filling and adjust spices if desired.
- Bake the pie: Pour filling into pre-baked crust. Place on middle rack of oven. Bake for 50-60 minutes, checking at 45 minutes. The edges should be set, and the center should jiggle slightly when gently shaken. If crust edges brown too quickly, loosely tent with foil. Remove from oven and cool completely on a wire rack (about 2-3 hours).
- Make the maple whipped cream: Just before serving, pour cold heavy cream into a chilled bowl. Add maple syrup, vanilla, and salt. Beat with an electric mixer on medium-high speed until soft peaks form (about 2-3 minutes). Do not overbeat.
- Serve pie at room temperature or slightly warm with a generous dollop of maple whipped cream on top.
Notes
For best results, use canned pumpkin purée (not fresh) to avoid excess moisture. Chill all crust ingredients thoroughly. Pull the pie from the oven when the center still jiggles slightly to prevent cracking. Make whipped cream fresh just before serving. The pie can be made a day ahead and refrigerated; flavors improve overnight. For gluten-free, use a 1:1 gluten-free flour blend. For dairy-free, use full-fat coconut cream instead of heavy cream and coconut oil or vegan butter for the crust.
Nutrition
- Serving Size: 1 slice (1/8 of pie)
- Calories: 400
- Sugar: 28
- Sodium: 320
- Fat: 24
- Saturated Fat: 14
- Carbohydrates: 42
- Fiber: 3
- Protein: 5
Keywords: pumpkin pie, maple whipped cream, Thanksgiving dessert, homemade pie, fall dessert, pumpkin dessert, holiday pie


