There used to be a tiny Halloween pop-up bar tucked behind a vintage clothing store in Portland called The Cauldron. When they closed after just two seasons, I honestly felt a little lost. Their signature drink—a smoking, bubbling purple potion that glowed under blacklight—was the whole reason I dragged friends there every October. After twelve attempts—some of them involving purple Kool-Aid disasters and one memorable incident with a blender and frozen grapes that I’m still finding seeds from—I finally cracked the code. This Spooky Purple Potion Halloween Punch is the exact recreation, and let me tell you, it was worth every stained countertop.
The first time I made this for my Halloween party, I set the punch bowl on the table and watched people’s faces go from curious to delighted. The dry ice fog rolls across the surface like something out of a haunted mansion, and the deep purple color catches the light in a way that feels almost magical. I mean, honestly, it’s the kind of drink that makes adults feel like kids again. You know that feeling when something looks so cool you almost forget to taste it? Well, don’t forget, because the flavor is just as good as the show.
This punch is sweet, tart, and just a little bit fizzy—think lemonade meets berry soda with a hint of citrus that keeps it from being cloying. It’s perfect for Halloween parties, spooky movie nights, or any gathering where you want to impress without spending hours in the kitchen. And the best part? It’s incredibly simple to put together. The dry ice does all the heavy lifting in the drama department. I’ve been making this every October since that bar closed, and it’s become my signature party trick.
Why You’ll Love This Recipe
This isn’t just another Halloween punch recipe. After testing countless versions—some too sweet, some too complicated, some that just didn’t look spooky enough—I landed on this combination that checks every box. Here’s why you’ll love it:
- Visually Stunning: The dry ice creates a dramatic fog effect that wows every guest. No special effects needed.
- Simple Ingredients: You probably already have most of the ingredients in your pantry or fridge. No exotic fruit juices or hard-to-find syrups.
- Quick Assembly: This comes together in under 10 minutes. Seriously, the hardest part is finding the dry ice.
- Perfect for Parties: It serves a crowd, looks incredible, and doesn’t require constant attention. Set it and let the fog do the work.
- Kid-Friendly (with supervision): The punch itself is non-alcoholic and delicious. Just keep kids away from the dry ice.
- Customizable: You can easily make it alcoholic for adult gatherings or adjust the sweetness to your liking.
What makes this recipe different from all the other Halloween punches out there is the balance. I spent a lot of time tweaking the ratios so the flavor isn’t overshadowed by the spectacle. The lemon-lime soda adds just enough fizz without making it taste like carbonated candy, and the grape juice concentrate gives it that deep, almost eerie purple color that glows under blacklight. It’s the kind of punch that makes people ask for the recipe before they even finish their first cup—and honestly, that’s the best compliment a home cook can get.
What Ingredients You Will Need
This recipe uses simple, everyday ingredients that come together to create something truly magical. The beauty of this punch is that you don’t need any fancy mixology skills or obscure ingredients. Here’s what you’ll need:
For the Punch Base
- 1 liter lemon-lime soda (like Sprite or 7Up) – This provides the fizz and balances the sweetness. I prefer Sprite for its cleaner citrus flavor.
- 1 liter grape juice (100% juice, not from concentrate if possible) – This gives the punch its signature purple color and a natural sweetness. Look for a brand that doesn’t have added sugar.
- 1 cup lemonade (homemade or store-bought) – Adds tartness to cut through the sweetness. I like Simply Lemonade for consistency.
- 1/2 cup orange juice (fresh squeezed is best, but pulp-free works) – Adds depth and a subtle citrus note that rounds out the flavor.
- 1/4 cup honey or simple syrup (optional, adjust to taste) – Only if you want it sweeter. I usually skip this because the grape juice and soda are sweet enough.
For the Spooky Effect
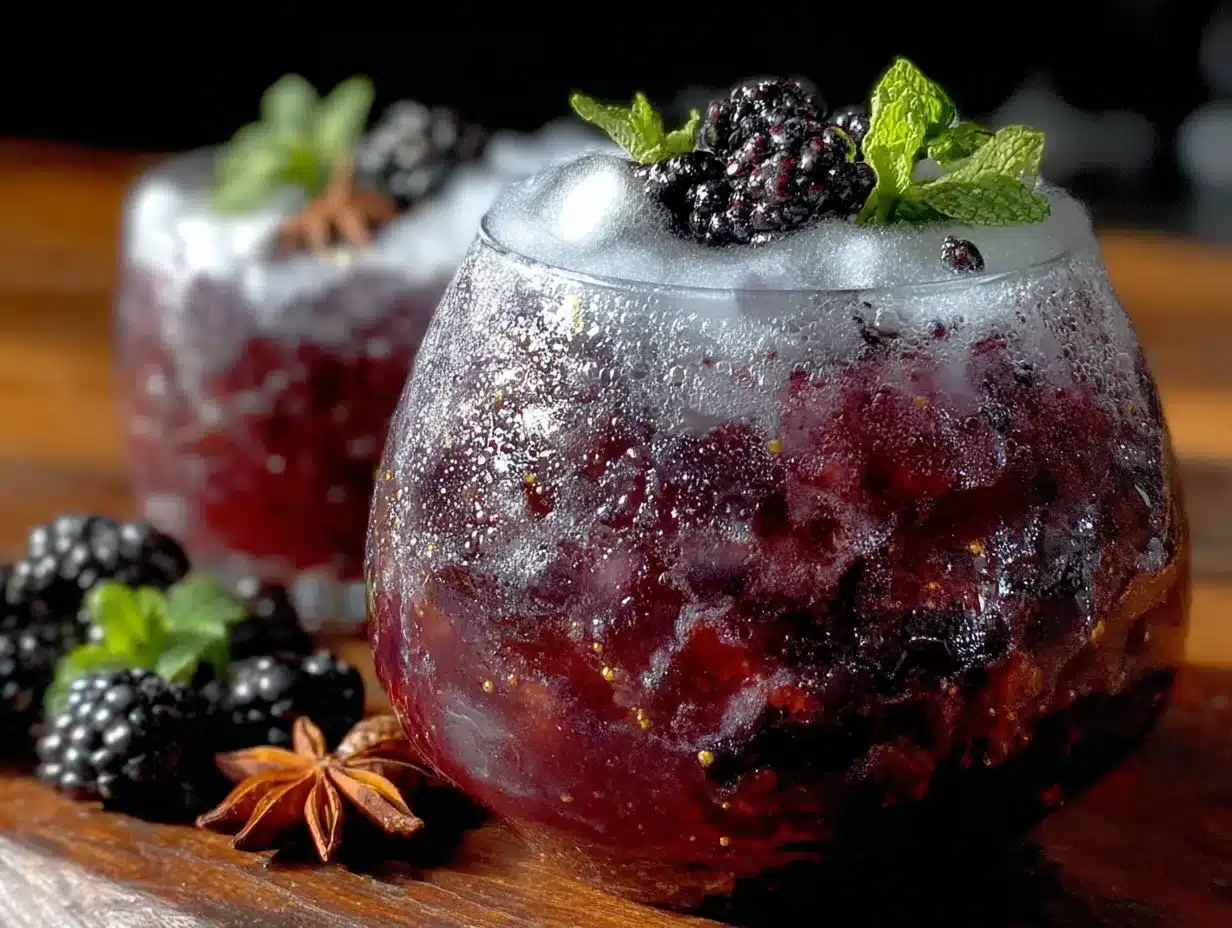
- 2-3 pounds dry ice (food-grade only, available at some grocery stores or ice suppliers) – This creates the fog effect. Handle with care and never touch it directly.
- Purple or black food coloring (optional, for extra drama) – A few drops can intensify the color. I use gel food coloring for better control.
For Garnish (Optional but Fun)
- Frozen grapes or berries – These double as ice cubes and add a pop of color. Frozen blueberries work great.
- Edible glitter or luster dust – For a magical shimmer. Use sparingly.
- Plastic spiders or gummy worms – For a creepy-crawly effect that kids love.
- Fresh mint sprigs – A surprising but lovely addition that adds a fresh aroma.
When selecting your ingredients, pay attention to the grape juice quality. I’ve found that Welch’s 100% grape juice works perfectly, but if you can find a darker, more concentrated variety, the color will be even more intense. For the lemon-lime soda, avoid diet versions if possible—the artificial sweeteners can leave a weird aftertaste when mixed with the other ingredients. And please, I cannot stress this enough, only use food-grade dry ice. The stuff used for shipping or industrial purposes may contain contaminants.
Equipment Needed
You don’t need much to make this punch, but a few key items will make the process smoother and safer. Here’s what you’ll need:
- Large punch bowl or beverage dispenser – Glass or clear plastic works best so guests can see the fog effect. I use a vintage glass punch bowl I found at a thrift store.
- Tongs or long-handled spoon – For handling the dry ice. Never use your bare hands.
- Thick kitchen gloves or oven mitts – Safety first! Dry ice can cause frostbite on contact.
- Measuring cups and spoons – For accurate ingredient ratios.
- Large pitcher – For mixing the punch base before transferring to the punch bowl.
- Small hammer or mallet – To break the dry ice into smaller pieces if needed. Wrap it in a towel first.
- Ladle – For serving. Make sure it’s long enough to avoid contact with the dry ice.
- Blacklight (optional) – If you really want to amp up the spooky factor, a blacklight will make the punch glow. It’s not necessary, but it’s a game-changer.
If you don’t have a fancy punch bowl, don’t worry. A large glass mixing bowl or even a clean plastic storage container will work. The key is to use something clear so the fog effect is visible. I once used a ceramic bowl and regretted it—nobody could see the dry ice working its magic. Also, if you’re using a beverage dispenser with a spigot, make sure the dry ice pieces are small enough not to clog the opening. Learned that one the hard way.
Preparation Method
Making this punch is incredibly straightforward, but there are a few important safety steps to follow, especially when working with dry ice. Follow these steps carefully, and you’ll have a show-stopping punch in no time.
- Prepare the dry ice: About 30 minutes before serving, put on your thick gloves and carefully remove the dry ice from its packaging. Place it on a towel and use the hammer to break it into smaller pieces, roughly the size of golf balls. You want pieces that will fit easily into your punch bowl without sticking out of the liquid. Set the pieces aside in a bowl or container—do not seal them in an airtight container as the pressure can cause an explosion.
- Mix the punch base: In a large pitcher, combine the lemon-lime soda, grape juice, lemonade, and orange juice. Stir gently to combine. Taste and add honey or simple syrup if you want it sweeter. Remember that the dry ice won’t affect the flavor, so get it right now. If you’re using food coloring, add it a drop at a time until you reach your desired shade of purple. I usually add about 3-4 drops of purple gel coloring for that deep, almost black-purple look.
- Chill everything: Place the pitcher in the refrigerator for at least 30 minutes before serving. The punch needs to be very cold when you add the dry ice. Warm liquid will cause the dry ice to sublimate too quickly, reducing the fog effect. Trust me, I learned this the hard way when I rushed it one year and got about two minutes of fog.
- Set up your serving station: Place your punch bowl or dispenser in a well-ventilated area. Dry ice releases carbon dioxide, so you don’t want it in a small, enclosed space. A dining room or living room with good airflow is perfect. If you’re using a blacklight, set it up now and test it to make sure the punch glows.
- Add the punch base: Pour the chilled punch mixture into the punch bowl. Leave about 2-3 inches of space at the top to prevent overflow when you add the dry ice. The fog effect starts immediately, so have your guests nearby to watch the show.
- Add the dry ice: Using tongs, carefully drop the dry ice pieces into the punch bowl. Do not touch the dry ice with your bare hands—it can cause frostbite almost instantly. Add 2-3 pieces at a time for continuous fog. The fog will roll over the sides of the bowl and spread across the table, creating that eerie, haunted effect. It usually lasts 5-10 minutes per piece, so you’ll need to add more every 15-20 minutes to keep the effect going.
- Add garnishes: Once the fog is going, add your frozen grapes or berries, edible glitter, or plastic spiders. The fog will swirl around them, making them look even more dramatic. I like to add a few gummy worms crawling over the edge of the bowl for an extra creepy touch.
- Serve immediately: Use the ladle to serve the punch, being careful not to scoop up any dry ice pieces. Warn your guests not to consume the dry ice—it’s for visual effect only. Most people know this, but it’s worth mentioning, especially if kids are around.
A quick note on timing: The dry ice fog effect is most dramatic in the first 30 minutes after you add it. For longer parties, keep the extra dry ice in a cooler (not sealed) and add more pieces every 20-30 minutes. The punch itself will stay good for several hours, but the carbonation from the soda will start to fade after about 2 hours. If that happens, you can add a splash of fresh lemon-lime soda to revive the fizz.
Cooking Tips & Techniques
After making this punch for countless Halloween parties, I’ve picked up a few tricks that make the process smoother and the results more impressive. Here are my top tips:
Handle dry ice safely. This is the most important tip. Always wear thick gloves or use tongs when handling dry ice. Never store it in an airtight container—the pressure buildup can cause it to explode. And never, ever put dry ice in your mouth. It sounds obvious, but I’ve seen people try it at parties. Keep it out of reach of children and pets.
Buy dry ice the day of your party. Dry ice sublimates (turns from solid to gas) at a rate of about 5-10 pounds per 24 hours, depending on how it’s stored. Buy it as close to your event as possible, and store it in a cooler with the lid slightly cracked to allow gas to escape. Don’t put it in your freezer—the extreme cold can damage your freezer’s thermostat.
Chill everything thoroughly. I cannot stress this enough. Cold liquid makes the dry ice sublimate slowly and steadily, producing a beautiful, continuous fog. Warm liquid causes rapid sublimation, which creates a huge burst of fog that dissipates quickly. I learned this when I was in a hurry one year and ended up with a five-minute fog show instead of an hour-long one.
Use a clear bowl for maximum effect. The fog effect is best seen when the punch bowl is transparent. The carbon dioxide fog is heavier than air, so it will roll over the sides of the bowl and spread across the table. A dark or opaque bowl hides this effect entirely. I made that mistake once and my guests were confused about why I was so excited about a bowl of purple liquid.
Don’t overdo the food coloring. A little goes a long way. Start with 2-3 drops and adjust from there. You can always add more, but you can’t take it out. The grape juice already provides a nice purple color, so you might not even need food coloring. I usually skip it unless I’m going for that neon glow under blacklight.
Make a test batch first. If you’re serving this at a big party, make a small test batch a few days before to make sure you like the flavor and color. This also gives you a chance to practice with the dry ice if you’ve never used it before. Trust me, you don’t want your first dry ice experience to be in front of 20 guests.
Variations & Adaptations
One of the best things about this punch is how easily it adapts to different tastes and occasions. Here are some variations I’ve tried and loved:
Adult Version: For an adults-only gathering, replace the lemon-lime soda with vodka or white rum. Add 1-2 cups of your chosen spirit to the punch base. I’ve also tried it with blue curacao for an even more vibrant color, and it was a huge hit. Just remember that alcohol can affect how quickly the dry ice sublimates, so you might need to add more pieces throughout the evening.
Berry Blast Variation: Swap the grape juice for a mixed berry juice blend (like cranberry-raspberry or blueberry-pomegranate). This gives the punch a slightly tarter flavor and a different shade of purple. I’ve also added a cup of frozen mixed berries directly to the punch bowl for extra color and flavor as they thaw.
Citrus Twist: Add the juice of one lemon and one lime to the punch base for a brighter, more citrus-forward flavor. This works especially well if you’re serving the punch alongside rich or savory foods, as the acidity helps cleanse the palate. I made this version for a Halloween potluck and it paired beautifully with the chili and nachos.
Dairy-Free Creamsicle Version: For a creamier, non-dairy version, add 1 cup of coconut milk or oat milk to the punch base. This creates a beautiful swirl effect and a slightly richer texture. Just be aware that the milk will make the punch opaque, so you won’t see the dry ice fog as clearly. I reserve this version for smaller gatherings where the flavor is the star.
Sparkling Water Version: If you want to reduce the sugar content, replace the lemon-lime soda with plain sparkling water and add a sugar-free sweetener like stevia or monk fruit. The flavor won’t be as sweet, but the fizz will still be there. I’ve made this for friends who are watching their sugar intake, and they loved it.
Halloween Color Swap: For a different spooky color, use apple juice and green food coloring for a “Witch’s Brew” effect, or clear soda with red food coloring for a “Blood Punch” version. The dry ice fog works with any liquid, so feel free to get creative. I’ve done a green version for St. Patrick’s Day and it was just as impressive.
Serving & Storage Suggestions
This punch is best served immediately after adding the dry ice, but with a little planning, you can keep the party going all night. Here’s what I’ve learned about serving and storing this spooky concoction.
Serving Temperature: Serve the punch ice cold. The colder it is, the better the dry ice effect. I like to chill the punch base for at least an hour before serving, and I sometimes add a few ice cubes made from the punch itself to keep it cold without diluting the flavor. If you’re using frozen grapes or berries as garnish, they’ll help keep things cold too.
Presentation Tips: Place the punch bowl on a table with a dark or black tablecloth to make the fog more visible. If you have a blacklight, position it behind or above the punch bowl for maximum glow effect. I also like to add a few battery-operated tea lights around the base of the bowl for a warm, flickering contrast to the cold fog. It creates this amazing visual tension that guests always comment on.
Complementary Dishes: This punch pairs beautifully with savory Halloween snacks. Think spicy buffalo wings, loaded nachos, or a hearty chili. The sweetness and acidity of the punch cut through rich, fatty foods perfectly. For dessert, serve it alongside pumpkin pie or chocolate cupcakes. I once served it with a cheese board featuring sharp cheddar and aged gouda, and the combination was surprisingly good.
Storage Instructions: The punch base (without dry ice) can be made up to 24 hours in advance and stored in the refrigerator. Just give it a good stir before serving. Once you add the dry ice, the punch should be consumed within 2-3 hours for the best flavor and fizz. Any leftover punch base can be stored in the refrigerator for up to 3 days, though the carbonation will fade over time.
Reheating: This is a cold punch, so there’s no reheating involved. If the punch warms up during the party, you can add a few ice cubes made from the punch base to cool it down without diluting the flavor. Avoid adding regular ice cubes, as they’ll water down the punch and ruin the color.
Flavor Development: Interestingly, the flavors in this punch meld together beautifully over time. If you make the base a few hours ahead, the grape and citrus flavors will blend into a more cohesive taste. I’ve found that the punch tastes even better after sitting for an hour or two, as long as it stays cold. Just don’t add the dry ice until you’re ready to serve.
Nutritional Information & Benefits
While this punch is definitely a treat, it does have some redeeming qualities. Here’s a rough nutritional breakdown per 8-ounce serving (without added sweetener or alcohol):
- Calories: Approximately 120-150 calories per serving
- Carbohydrates: 30-35 grams (mostly from natural sugars in the fruit juices)
- Sugar: 25-30 grams (primarily from grape juice and lemon-lime soda)
- Vitamin C: 20-25% of the daily recommended intake (from the citrus juices)
- Antioxidants: Grape juice is rich in polyphenols and flavonoids, which support heart health
The grape juice in this punch is actually a good source of antioxidants, particularly resveratrol, which is known for its anti-inflammatory properties. The citrus juices provide a solid dose of vitamin C, which supports immune function—perfect for the cold and flu season that often coincides with Halloween. And if you use 100% fruit juice without added sugar, you’re getting natural sweetness without the refined stuff.
That said, this is a party punch, not a health drink. The sugar content is on the higher side, so I recommend enjoying it in moderation. If you’re watching your sugar intake, you can reduce the sweetness by using sparkling water instead of lemon-lime soda or by cutting back on the honey or simple syrup. The frozen grapes are a great alternative to sugary garnishes, and they add fiber and vitamins without the extra sugar.
For those with dietary restrictions, this punch is naturally gluten-free, dairy-free, and vegan (as long as you use plant-based sweeteners). Just be sure to check the labels on your ingredients, especially the lemon-lime soda and food coloring, to ensure they meet your dietary needs. And of course, the dry ice itself is just frozen carbon dioxide, so it’s safe for all diets—just don’t eat it!
Conclusion
This Spooky Purple Potion Halloween Punch is more than just a drink—it’s a centerpiece, a conversation starter, and a memory-maker. Every time I make it, I’m transported back to that little pop-up bar in Portland, watching strangers become friends over a shared sense of wonder. The dry ice fog, the deep purple glow, the way the flavors come together in perfect harmony—it’s pure magic in a cup.
I’ve made this punch for Halloween parties, costume contests, and even a few non-Halloween gatherings where I just wanted to add a little drama. It never fails to impress. And honestly, it’s one of those recipes that makes you feel like a kitchen wizard without any of the stress. No complicated techniques, no hard-to-find ingredients, just a few simple components that come together to create something truly special.
So go ahead and give it a try. Experiment with the variations, make it your own, and don’t be afraid to get a little spooky with it. And when your guests ask for the recipe (because they will), send them my way. I’d love to hear how it turned out—drop a comment below or tag me in your photos. Happy haunting!
Frequently Asked Questions
Is dry ice safe to use in drinks?
Yes, dry ice is safe to use in drinks as long as you follow safety guidelines. Never touch dry ice with bare skin, and never consume it. It’s meant for visual effect only. Make sure to use food-grade dry ice and handle it with tongs or thick gloves. The carbon dioxide gas it releases is safe in well-ventilated areas.
How long does the dry ice fog effect last?
The fog effect from each piece of dry ice typically lasts 5-10 minutes, depending on the temperature of the liquid and the size of the pieces. For continuous fog throughout your party, plan to add new pieces every 15-20 minutes. A 2-3 pound block of dry ice should last for about 2-3 hours of continuous use.
Can I make this punch ahead of time?
Absolutely! You can mix the punch base (without dry ice) up to 24 hours in advance and store it in the refrigerator. Just give it a good stir before serving. Only add the dry ice right before you’re ready to serve, as the fog effect is most dramatic in the first 30 minutes. The punch base itself will stay good for 2-3 days in the fridge.
What can I use instead of dry ice?
If you can’t find dry ice, you can create a similar fog effect using a fog machine or by placing a bowl of dry ice in a separate container near the punch. Alternatively, you can use dry ice pellets (smaller pieces) that are easier to handle. For a non-fog alternative, use purple ice cubes made from the punch itself to keep it cold without diluting the flavor.
Can I make this punch non-alcoholic for kids?
Yes, this recipe is naturally non-alcoholic and kid-friendly. Just make sure to supervise children around the dry ice and explain that they should not touch or consume it. The punch itself is delicious and safe for all ages. For a fun twist, you can add gummy worms or plastic spiders to the punch bowl for an extra spooky touch that kids love.
Pin This Recipe!
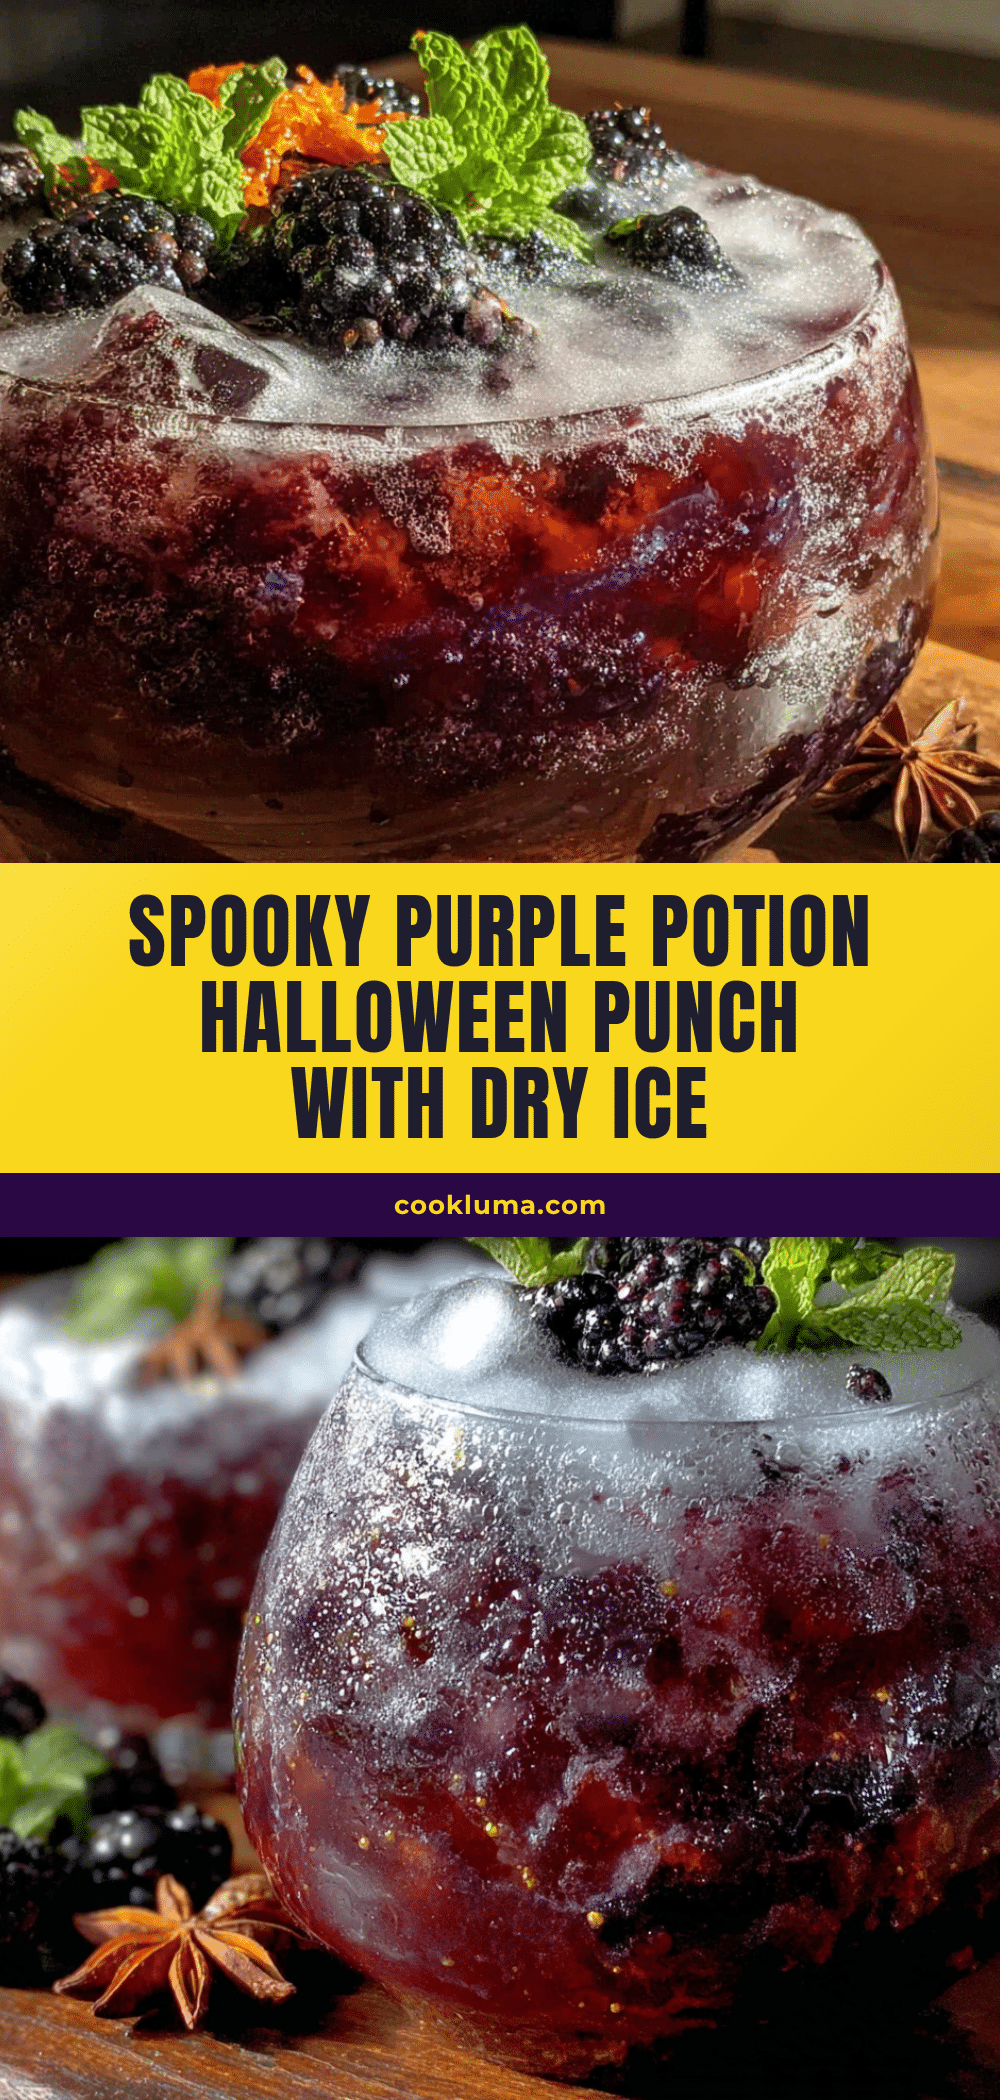
Spooky Purple Potion Halloween Punch: Easy Dry Ice Recipe
A dramatic, smoking purple punch that glows under blacklight, perfect for Halloween parties. This easy recipe combines grape juice, lemon-lime soda, and citrus for a sweet-tart flavor, with dry ice creating a haunting fog effect.
- Prep Time: 10 minutes
- Cook Time: 0 minutes
- Total Time: 40 minutes (includes chilling time)
- Yield: 12 servings 1x
- Category: Beverage
- Cuisine: American
Ingredients
- 1 liter lemon-lime soda (like Sprite or 7Up)
- 1 liter grape juice (100% juice, not from concentrate if possible)
- 1 cup lemonade (homemade or store-bought)
- 1/2 cup orange juice (fresh squeezed is best, but pulp-free works)
- 1/4 cup honey or simple syrup (optional, adjust to taste)
- 2–3 pounds dry ice (food-grade only)
- Purple or black food coloring (optional)
- Frozen grapes or berries (optional, for garnish)
- Edible glitter or luster dust (optional, for garnish)
- Plastic spiders or gummy worms (optional, for garnish)
- Fresh mint sprigs (optional, for garnish)
Instructions
- Prepare the dry ice: About 30 minutes before serving, put on thick gloves and carefully remove the dry ice from its packaging. Place it on a towel and use a hammer to break it into smaller pieces, roughly the size of golf balls. Set aside in a bowl or container—do not seal in an airtight container.
- Mix the punch base: In a large pitcher, combine the lemon-lime soda, grape juice, lemonade, and orange juice. Stir gently. Taste and add honey or simple syrup if desired. If using food coloring, add a drop at a time until desired shade is reached.
- Chill everything: Place the pitcher in the refrigerator for at least 30 minutes before serving. The punch needs to be very cold when adding the dry ice.
- Set up your serving station: Place your punch bowl or dispenser in a well-ventilated area. If using a blacklight, set it up now.
- Add the punch base: Pour the chilled punch mixture into the punch bowl, leaving about 2-3 inches of space at the top to prevent overflow.
- Add the dry ice: Using tongs, carefully drop the dry ice pieces into the punch bowl. Add 2-3 pieces at a time for continuous fog. The fog will last 5-10 minutes per piece; add more every 15-20 minutes to keep the effect going.
- Add garnishes: Once the fog is going, add frozen grapes or berries, edible glitter, or plastic spiders.
- Serve immediately: Use a ladle to serve the punch, being careful not to scoop up any dry ice pieces. Warn guests not to consume the dry ice.
Notes
Handle dry ice with care: never touch with bare skin, never consume, and never store in an airtight container. Buy dry ice the day of your party and store in a cooler with the lid slightly cracked. Chill all ingredients thoroughly for best fog effect. The punch base can be made up to 24 hours in advance. For an adult version, replace lemon-lime soda with vodka or white rum (1-2 cups).
Nutrition
- Serving Size: 8 ounces
- Calories: 135
- Sugar: 28
- Sodium: 25
- Carbohydrates: 33
Keywords: Halloween punch, dry ice punch, purple potion, spooky drink, party punch, non-alcoholic punch, Halloween drink, grape punch, dry ice recipe


