I was standing in line at the hardware store, holding a bag of drywall screws and a new putty knife, when the guy behind the counter—a grizzled old plumber named Frank with a name tag that said “Frank, 23 Years”—started talking about chili. Not his plumbing jobs, not the weather, but chili. He said, “You want to feed a crowd without a bunch of nonsense? You make my no-bean chili. It’s the only thing I know how to cook, and I’ve been making it for every Super Bowl since ’89.”
I wasn’t expecting cooking advice from a plumber at the hardware store, but there I was, holding drywall screws, listening to him describe exactly how to brown five pounds of ground beef in a pot the size of a small car. He told me about the time he brought this chili to a church potluck and a woman asked for the recipe before she even finished her first bowl. “She thought I bought it from a restaurant,” he said, shaking his head. “I told her, ‘Nope, it’s just the chili I make when I don’t want to hear people complain about beans.'”
I scribbled his instructions on the back of my receipt, right between the price of the putty knife and the total for the screws. I honestly thought I’d lose that receipt, but I stuffed it in my glove compartment, and there it stayed for three months. When I finally tried it—on a Tuesday night when I had zero energy and a fridge full of ground beef—I couldn’t believe how good it was. It was rich, smoky, and deeply satisfying in a way that felt like a hug from the inside. Maybe you’ve been there, standing in your kitchen at 6 PM, staring at a pile of meat and wondering how to turn it into dinner. This is the answer.
That first batch, I made a mess. I forgot to drain the fat, and the chili was greasier than I wanted. But Frank’s core method—the way he browned the meat and let the spices bloom in the rendered fat—was genius. I kept making it, tweaking it, and now it’s the chili I make when I need to feed a crowd without spending my whole evening in the kitchen. It’s quick, it’s honest, and it doesn’t have a single bean in it.
Why You’ll Love This Recipe
Let me tell you why this no-bean chili has become my go-to for weeknight dinners and game-day gatherings. I’ve tested this recipe at least a dozen times, tweaking the spice ratios and the cooking times until it hit that perfect balance of bold flavor and effortless preparation. It’s the kind of recipe that makes you look like a hero without breaking a sweat.
- Quick & Easy: This chili comes together in under 45 minutes, from start to finish. No soaking, no simmering for hours—just pure, meaty goodness that’s ready when you are.
- Simple Ingredients: You probably have most of these ingredients in your pantry right now. No fancy grocery trips are needed—just ground beef, canned tomatoes, and a few spices.
- Perfect for Weeknights and Crowds: Whether it’s a busy Tuesday dinner or a Super Bowl party, this chili scales up beautifully and satisfies everyone.
- Crowd-Pleaser: I’ve served this to picky eaters, spice lovers, and even my uncle who “doesn’t like chili”—and everyone goes back for seconds.
- Unbelievably Delicious: The texture is thick and hearty, and the flavor is smoky, savory, and just a little bit spicy. It’s comfort food at its finest.
What makes this recipe different from the rest? It’s the technique of letting the spices toast in the rendered beef fat before adding the liquids. That one step—inspired by Frank’s offhand comment about “waking up the chili powder”—turns a simple pot of meat into something deeply flavorful. This isn’t just another chili recipe; it’s the best version you’ll make.
What Ingredients You Will Need
This recipe uses simple, wholesome ingredients that work together to create a bold, meaty chili without any fuss. Most of these are pantry staples, and I’ve included substitution guidance where it helps.
- Ground beef (5 lbs / 2.27 kg, 80/20 blend) – The fat content is key here; it adds flavor and richness. I prefer 80/20 for the best texture. (If you use leaner beef, add a tablespoon of oil.)
- Yellow onions (2 large, diced) – They form the aromatic base. Sweet or white onions work too.
- Garlic (6 cloves, minced) – Fresh garlic is non-negotiable for the best flavor. (Use 2 tsp garlic powder in a pinch.)
- Chili powder (1/2 cup / 60 g) – I recommend Gebhardt or McCormick for consistent heat and depth. (Adjust to your spice tolerance.)
- Ground cumin (2 tbsp / 14 g) – Adds warmth and earthiness. Toast it briefly in the pan for extra flavor.
- Smoked paprika (1 tbsp / 7 g) – This gives the chili its smoky backbone. Regular paprika works, but smoked is better.
- Dried oregano (1 tbsp / 3 g) – A subtle herbaceous note that rounds out the spices.
- Crushed red pepper flakes (1 tsp, or to taste) – Optional, but I love the gentle heat. (Skip if serving kids.)
- Crushed tomatoes (2 cans, 28 oz / 794 g each) – Use San Marzano for the best flavor. (Diced tomatoes work, but crush them slightly.)
- Tomato paste (2 tbsp / 30 g) – Adds depth and thickness. (I use Contadina or Cento.)
- Beef broth (2 cups / 473 ml) – Low-sodium is best so you can control the salt. (Chicken broth works in a pinch.)
- Worcestershire sauce (2 tbsp / 30 ml) – Adds umami and complexity. (Soy sauce is a decent substitute.)
- Bay leaves (2) – They add a subtle herbal note. Remember to remove them before serving.
- Salt and black pepper (to taste) – I start with 2 tsp salt and 1 tsp pepper, then adjust.
- Optional toppings: Shredded cheddar cheese, sour cream, diced onions, pickled jalapeños, or fresh cilantro. (These are for serving, not cooking.)
Equipment Needed
You don’t need a lot of fancy gear for this chili, which is part of its charm. Here’s what you’ll need:
- Large Dutch oven or heavy-bottomed pot (8-quart / 7.5-liter minimum) – This is essential for browning 5 pounds of beef without overcrowding. I use a Lodge enameled cast iron pot, and it’s perfect. (If you don’t have one, a large stockpot works, but watch the heat to avoid scorching.)
- Wooden spoon or spatula – For breaking up the meat and stirring. A flat-edged wooden spoon is my favorite.
- Sharp chef’s knife – For dicing onions and mincing garlic. A dull knife makes the prep take twice as long.
- Cutting board – A large one is helpful for all that onion dicing.
- Measuring cups and spoons – For accuracy, especially with the spices.
- Can opener – Unless you’re using pull-tab cans.
- Ladle – For serving. A 6-ounce ladle is perfect for portion control.
If you don’t have a Dutch oven, a large nonstick skillet can work for browning the meat in batches, then transfer to a pot. I’ve done it that way, and it just means more dishes to wash—but the chili still turns out great.
Preparation Method
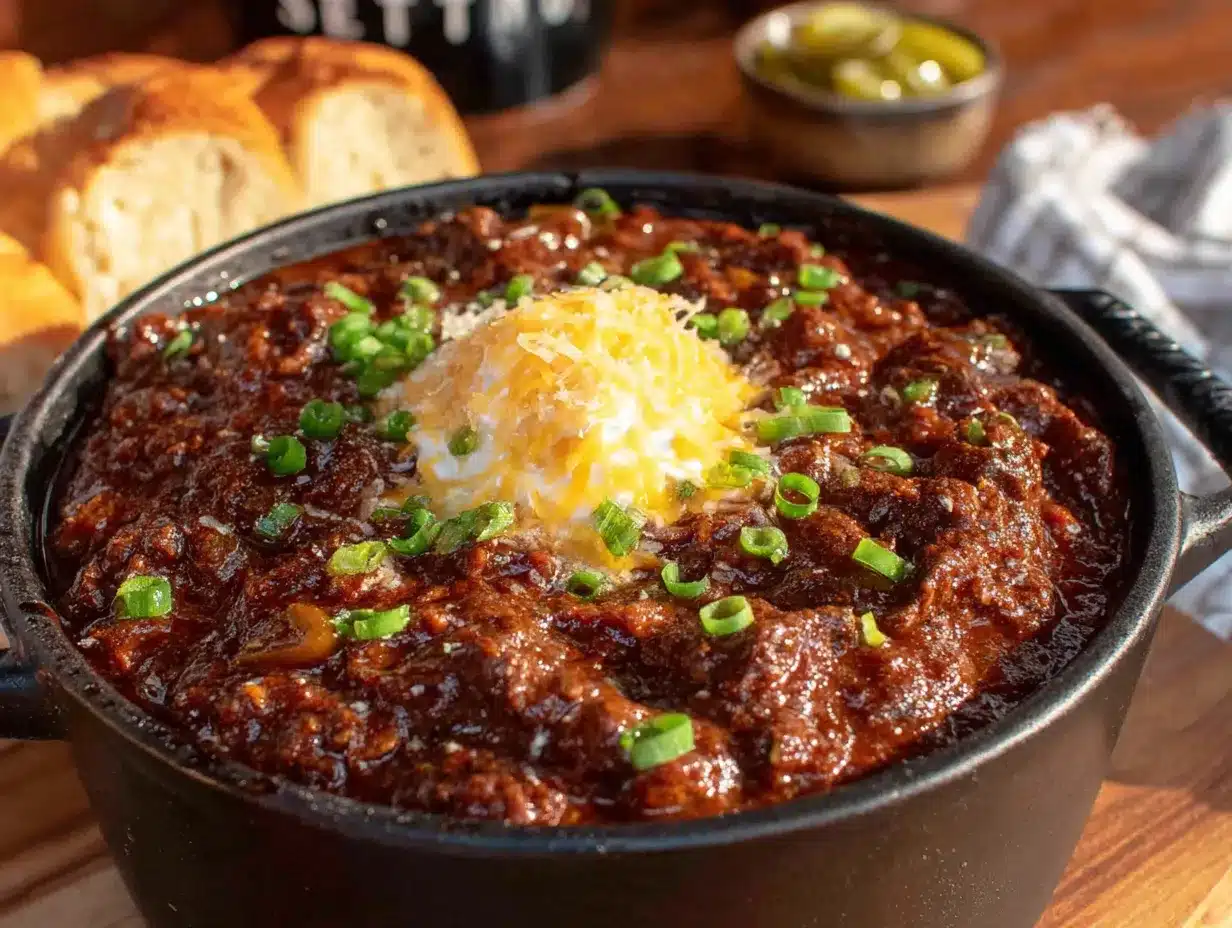
Follow these steps carefully, and you’ll have a pot of chili that tastes like it simmered all day.
- Brown the beef in batches (10 minutes): Heat your large Dutch oven over medium-high heat. Add half the ground beef (2.5 lbs / 1.13 kg) and cook, breaking it apart with a wooden spoon, until deeply browned—about 5-7 minutes. Don’t stir too often; let it sit and develop a crust. Use a slotted spoon to transfer the cooked beef to a bowl, leaving the rendered fat in the pot. Repeat with the remaining beef. (Tip: If you overcrowd the pot, the meat will steam instead of brown. Work in batches for the best texture.)
- Sauté the aromatics (5 minutes): Reduce the heat to medium. Add the diced onions to the pot with the rendered fat (you should have about 3-4 tablespoons; if not, add a splash of oil). Cook, stirring occasionally, until the onions are soft and translucent—about 4 minutes. Add the minced garlic and cook for 1 more minute, until fragrant. (Warning: Don’t let the garlic burn; it will turn bitter.)
- Toast the spices (2 minutes): Add the chili powder, cumin, smoked paprika, oregano, and crushed red pepper flakes to the pot. Stir constantly for 1-2 minutes, until the spices are fragrant and darken slightly. This step is crucial—it wakes up the flavors and removes the raw taste from the chili powder. (Your kitchen will smell amazing right now.)
- Combine the beef and tomatoes (2 minutes): Return the browned beef to the pot, along with any accumulated juices. Add the crushed tomatoes, tomato paste, beef broth, and Worcestershire sauce. Stir everything together until the tomato paste is fully incorporated. (The mixture should look thick and slightly chunky.)
- Simmer the chili (20-25 minutes): Add the bay leaves and bring the chili to a gentle boil. Reduce the heat to low, cover the pot, and let it simmer for 20 minutes, stirring occasionally. After 20 minutes, remove the lid and let it simmer uncovered for another 5 minutes to thicken. (The chili should be thick enough to coat the back of a spoon. If it’s too thin, simmer uncovered a few more minutes.)
- Season and serve (2 minutes): Remove the bay leaves and discard. Taste the chili and season with salt and black pepper. I usually start with 2 teaspoons of salt and 1 teaspoon of pepper, then adjust. (Remember: the flavors will deepen as the chili sits, so don’t oversalt.) Serve hot with your favorite toppings.
Cooking Tips & Techniques
I’ve made this chili more times than I can count, and I’ve learned a few things the hard way. Here are my best tips for success.
Don’t rush the browning. The deep, savory flavor of this chili comes from the Maillard reaction—the browning of the meat. If you stir the beef constantly, it won’t brown properly. Let it sit in the pan for a few minutes before breaking it apart. I once tried to speed this up by using a higher heat, and I ended up with burnt spots and raw spots. Medium-high heat, patience, and batches are your friends.
Toast your spices. This is the secret weapon. When you add the spices to the hot fat and stir for a minute, they release their essential oils and become exponentially more flavorful. I forgot to do this once, and the chili tasted flat and dusty. Never again.
Use the right fat. Don’t drain all the fat after browning the beef. You need about 3-4 tablespoons to sauté the onions and toast the spices. If you use lean beef (like 93/7), add a tablespoon of oil to compensate. The fat carries the flavor, so don’t be afraid of it.
Adjust the heat to your crowd. This recipe has a mild-to-medium heat level. If you’re serving spice lovers, add an extra tablespoon of chili powder and a teaspoon of cayenne. For a milder version, reduce the chili powder to 1/3 cup and skip the red pepper flakes. I’ve done both, and the recipe is forgiving.
Make it ahead. This chili tastes even better the next day. The flavors meld and deepen overnight. I often make it a day before I need it, let it cool, and refrigerate it. Reheat gently on the stove, adding a splash of broth if it’s too thick.
Variations & Adaptations
This chili is a blank canvas, and I’ve tried several variations over the years. Here are my favorites.
- Smoky Chipotle Version: Add 2-3 minced chipotle peppers in adobo sauce along with the garlic. This gives the chili a deep, smoky heat that’s incredible. I made this for a tailgate once, and people were asking for the recipe for weeks. (Just be careful—chipotle is spicy.)
- Turkey or Venison Option: Swap the ground beef for ground turkey or venison. If using turkey, add 2 tablespoons of oil since it’s leaner. Venison has a rich, gamey flavor that works beautifully with the spices. I’ve done both, and they’re excellent—just don’t overcook the turkey or it will dry out.
- Add Vegetables: If you want to sneak in some veggies, add diced bell peppers (2, any color) along with the onions. You can also stir in a cup of frozen corn or diced zucchini during the last 10 minutes of simmering. I tried adding carrots once, and while it was tasty, it changed the texture too much for my taste.
- Spicier Version: For heat seekers, add 1-2 tablespoons of cayenne pepper along with the other spices, or stir in a teaspoon of habanero hot sauce at the end. My brother-in-law loves this version, but I have to warn guests before they try it.
- Slow Cooker Adaptation: Brown the beef and sauté the aromatics on the stove, then transfer everything to a slow cooker. Cook on low for 6-8 hours or high for 3-4 hours. The texture will be slightly different—more melded together—but still delicious. I prefer the stovetop version for the deeper browning, but the slow cooker is great for busy days.
Serving & Storage Suggestions
This chili is incredibly versatile when it comes to serving and storing. Here’s what I’ve learned.
Serving Temperature: Serve the chili hot, straight from the pot. I like to ladle it into deep bowls and let people add their own toppings. A dollop of sour cream, a handful of shredded cheddar, and some diced onions are my go-to. For a crowd, set up a topping bar with options like pickled jalapeños, fresh cilantro, sliced avocado, and crushed tortilla chips.
Complementary Dishes: This chili pairs beautifully with cornbread—I love a moist, slightly sweet version—or a simple side salad with a tangy vinaigrette. For a heartier meal, serve it over rice or with crusty bread for dipping. I’ve also used it as a topping for baked potatoes or hot dogs for a chili dog night.
Storage Instructions: Let the chili cool completely before storing. Transfer it to an airtight container and refrigerate for up to 5 days. The flavors actually improve after a day or two. For longer storage, freeze the chili in freezer-safe bags or containers for up to 3 months. (I like to portion it into 2-cup containers for easy weeknight meals.)
Reheating Methods: Reheat the chili on the stovetop over medium-low heat, stirring occasionally. Add a splash of beef broth or water if it’s too thick. You can also microwave individual portions in a microwave-safe bowl, covered, for 2-3 minutes, stirring halfway through. The stovetop method gives the best texture.
Flavor Development: Like most chilis, this one tastes even better the next day. The spices meld together, and the meat absorbs more of the tomato flavor. I’ve found that the chili is at its peak on day two or three. (If you’re making it for a party, make it a day ahead—you’ll thank yourself.)
Nutritional Information & Benefits
This chili is hearty and satisfying, and it also offers some nutritional benefits. Here’s a rough breakdown per serving (based on 10 servings):
- Calories: Approximately 450-500 per serving
- Protein: 35-40 grams (from the beef)
- Fat: 25-30 grams (mostly from the beef, which provides energy and flavor)
- Carbohydrates: 15-20 grams (from the tomatoes and onions)
- Fiber: 4-5 grams (from the tomatoes and onions)
- Sodium: 800-1000 mg (varies based on broth and salt added)
Health Benefits: This chili is packed with protein, which helps keep you full and supports muscle repair. The tomatoes are rich in lycopene, an antioxidant that supports heart health. The onions and garlic provide prebiotic fiber and immune-boosting compounds. (If you’re watching your sodium, use no-salt-added tomatoes and low-sodium broth.)
Dietary Considerations: This recipe is naturally gluten-free (check your Worcestershire sauce) and dairy-free (unless you add cheese on top). It’s also low-carb, with most of the carbs coming from vegetables. (For a keto version, reduce the onions to one and skip the cornbread.)
Potential Allergens: This recipe contains no common allergens, but some Worcestershire sauces contain anchovies (fish). Check the label if you have a fish allergy. (I use Lea & Perrins, which is gluten-free and contains anchovies.)
Conclusion
This quick no-bean chili has become a staple in my kitchen, and I hope it becomes one in yours too. It’s the recipe I turn to when I need to feed a crowd without spending hours in the kitchen, and it never disappoints. The deep, smoky flavor—thanks to Frank’s tip about toasting the spices—makes it taste like it simmered all day, even though it’s ready in under an hour.
I love how adaptable this chili is. You can make it spicier, smokier, or milder depending on your mood. You can add vegetables or swap the protein. It’s forgiving, reliable, and always delicious. That’s the kind of recipe worth keeping close.
Now I want to hear from you. Have you tried this chili? Did you add your own twist? Drop a comment below and let me know how it turned out—I read every single one. And if you loved it, share this recipe with a friend who needs a quick dinner win. Happy cooking, friends—you’ve got this.
Frequently Asked Questions
Can I use a different type of meat?
Absolutely. Ground turkey, chicken, or venison all work well. Just adjust the fat content—add a tablespoon of oil if using lean meat. I’ve made this with ground bison, and it was fantastic.
How can I make this chili less spicy?
Reduce the chili powder to 1/3 cup and skip the crushed red pepper flakes entirely. You can also use mild chili powder. The result will still be flavorful, just without the heat.
Can I make this chili in a slow cooker or Instant Pot?
Yes. For a slow cooker, brown the beef and sauté the aromatics on the stove, then transfer everything to the slow cooker and cook on low for 6-8 hours. For an Instant Pot, use the sauté function to brown the beef and aromatics, then pressure cook on high for 15 minutes with a natural release.
How do I thicken the chili if it’s too thin?
Simmer it uncovered for 10-15 minutes to let the excess liquid evaporate. Alternatively, mash a tablespoon of cornstarch with an equal amount of cold water to make a slurry, stir it in, and simmer for 5 minutes. I prefer the simmering method for better texture.
Can I freeze this chili?
Yes, this chili freezes beautifully. Let it cool completely, then transfer it to freezer-safe bags or containers. It will keep for up to 3 months. Thaw overnight in the refrigerator and reheat on the stovetop or in the microwave.
PrintQuick No-Bean Chili for a Crowd (Best Stovetop Recipe)

A rich, smoky, and deeply satisfying no-bean chili that comes together in under 45 minutes. Perfect for weeknight dinners and game-day gatherings, this recipe uses simple ingredients and a clever technique of toasting spices in rendered beef fat for maximum flavor.
- Prep Time: 15 minutes
- Cook Time: 30 minutes
- Total Time: 45 minutes
- Yield: 10 servings 1x
- Category: Main Course
- Cuisine: American
Ingredients
- 5 lbs (2.27 kg) ground beef (80/20 blend)
- 2 large yellow onions, diced
- 6 cloves garlic, minced
- 1/2 cup (60 g) chili powder
- 2 tbsp (14 g) ground cumin
- 1 tbsp (7 g) smoked paprika
- 1 tbsp (3 g) dried oregano
- 1 tsp crushed red pepper flakes (optional, to taste)
- 2 cans (28 oz / 794 g each) crushed tomatoes (preferably San Marzano)
- 2 tbsp (30 g) tomato paste
- 2 cups (473 ml) low-sodium beef broth
- 2 tbsp (30 ml) Worcestershire sauce
- 2 bay leaves
- Salt and black pepper to taste (start with 2 tsp salt and 1 tsp pepper)
- Optional toppings: shredded cheddar cheese, sour cream, diced onions, pickled jalapeños, fresh cilantro
Instructions
- Brown the beef in batches: Heat a large Dutch oven over medium-high heat. Add half the ground beef (2.5 lbs / 1.13 kg) and cook, breaking it apart with a wooden spoon, until deeply browned—about 5-7 minutes. Transfer to a bowl with a slotted spoon, leaving the rendered fat in the pot. Repeat with the remaining beef.
- Sauté the aromatics: Reduce heat to medium. Add diced onions to the pot with the rendered fat (about 3-4 tablespoons; add a splash of oil if needed). Cook until soft and translucent—about 4 minutes. Add minced garlic and cook for 1 more minute until fragrant.
- Toast the spices: Add chili powder, cumin, smoked paprika, oregano, and crushed red pepper flakes. Stir constantly for 1-2 minutes until fragrant and slightly darkened.
- Combine the beef and tomatoes: Return the browned beef to the pot along with any accumulated juices. Add crushed tomatoes, tomato paste, beef broth, and Worcestershire sauce. Stir until the tomato paste is fully incorporated.
- Simmer the chili: Add bay leaves and bring to a gentle boil. Reduce heat to low, cover, and simmer for 20 minutes, stirring occasionally. Remove lid and simmer uncovered for 5 more minutes to thicken.
- Season and serve: Remove bay leaves and discard. Season with salt and black pepper to taste. Serve hot with desired toppings.
Notes
For best flavor, don’t rush the browning of the beef and toast the spices in the rendered fat. The chili tastes even better the next day. For a spicier version, add extra chili powder or cayenne. For a milder version, reduce chili powder to 1/3 cup and skip the red pepper flakes.
Nutrition
- Serving Size: 1 serving (approxima
- Calories: 475
- Sugar: 8
- Sodium: 900
- Fat: 28
- Saturated Fat: 10
- Carbohydrates: 18
- Fiber: 5
- Protein: 38
Keywords: no-bean chili, quick chili, stovetop chili, crowd-pleasing chili, game day chili, ground beef chili, easy chili recipe


