This was supposed to be a pumpkin pie. A full, proper, deep-dish pumpkin pie for a small Friendsgiving I was hosting. I had the crust chilling, the filling whisked, and my grandmother’s pie plate ready. Then I realized my oven had other plans. It was running fifty degrees too hot, and I was already running late from a work call that ran over. I stood there, staring at a bowl of spiced pumpkin filling and a ball of dough, and honestly? I almost cried. I mean, the whole point was to make something impressive without much fuss, and now I had a kitchen disaster on my hands.
In a moment of pure desperation, I grabbed a biscuit cutter and started stamping out little rounds of dough. I spooned a tiny bit of filling onto each one, folded them over, and crimped the edges with a fork. I threw them on a sheet pan, crossed my fingers that the hot oven wouldn’t burn them to a crisp, and slid them in. Ten minutes later, I pulled out the most beautiful, flaky, golden little pies I’d ever seen. They were bite-sized, perfectly portioned, and somehow even better than the pie I had planned. My friends devoured them in minutes, and someone actually asked for the recipe. That’s when it hit me—sometimes the best things come from plans falling apart.
These quick mini pumpkin hand pies are now my go-to fall dessert, and maybe you’ve been there too, staring at a half-baked idea that turned into something incredible. They’re everything a weeknight dessert should be: fast, forgiving, and absolutely delicious. No rolling pins, no pie plates, no stress. Just pure, buttery, pumpkin-spiced happiness in every little pocket.
Why You’ll Love This Recipe
Let me tell you why these little pies have become my secret weapon for fall entertaining and weeknight dessert emergencies. I’ve tested this recipe more times than I can count, tweaking the filling-to-dough ratio and the bake time until everything was just right. Here’s what makes them special:
- Quick & Easy: From start to finish, these hand pies are ready in under 30 minutes. No chilling, no rolling, no fuss. Perfect for those evenings when you need dessert fast.
- Simple Ingredients: You probably already have most of what you need in your pantry. Canned pumpkin, pie spice, and refrigerated pie crusts keep the grocery list short and sweet.
- Perfect for Fall Gatherings: Whether it’s a casual dinner party, a Thanksgiving potluck, or just a cozy night in, these hand pies are always a hit. They’re portable, shareable, and disappear fast.
- Crowd-Pleaser: Kids love the cute size, adults love the rich flavor, and everyone loves that they’re not too heavy. I’ve yet to meet someone who can eat just one.
- Unbelievably Delicious: The filling is creamy and spiced just right, while the crust bakes up flaky and golden. It’s comfort food in a handheld package, and it honestly tastes like you spent hours in the kitchen.
What sets this recipe apart is the texture. The filling is thick enough to hold its shape but still silky smooth, thanks to a little trick I learned after a few too-runny batches. And the crust? Using refrigerated pie dough means you get that homemade flakiness without the work. It’s not just another pumpkin dessert—it’s your new favorite fall tradition.
This is the kind of dessert that makes you close your eyes after the first bite. It’s fall in a pocket, and it’s here to save your weeknight.
What Ingredients You Will Need
This recipe uses simple, wholesome ingredients to deliver big flavor without the fuss. Most of these are pantry staples, especially once pumpkin season rolls around. Here’s what you’ll need and why each ingredient matters.
- 1 can (15 oz) pumpkin puree: Not pumpkin pie filling—make sure you grab pure pumpkin puree. I prefer Libby’s for its consistent texture and rich color. The puree gives the filling its creamy body and earthy sweetness.
- 1/2 cup brown sugar, packed: Brown sugar adds moisture and a deep, molasses-like sweetness that pairs perfectly with pumpkin. Light or dark both work; dark gives a richer flavor.
- 1 large egg: The egg helps bind the filling and gives it a custard-like texture. Make sure it’s at room temperature so it blends smoothly.
- 1 teaspoon pumpkin pie spice: You can use store-bought or make your own with cinnamon, nutmeg, ginger, and cloves. I like using a blend from McCormick for consistent flavor.
- 1/2 teaspoon ground cinnamon: Extra cinnamon amps up the warm, cozy notes. It’s non-negotiable in my book.
- 1/4 teaspoon salt: A pinch of salt balances the sweetness and brightens all the spices.
- 1 tablespoon heavy cream or milk: This thins the filling just enough to make it spreadable without being runny. Use dairy-free milk if needed.
- 2 refrigerated pie crusts: Store-bought pie dough is my shortcut here, and honestly, it works beautifully. Pillsbury is my go-to for consistent flakiness. If you’re feeling ambitious, homemade works too, but keep it chilled.
- 1 egg + 1 tablespoon water: This egg wash gives the hand pies that gorgeous golden-brown finish. Don’t skip it—it makes them look bakery-worthy.
- Turbinado or coarse sugar (optional): Sprinkling this on top before baking adds a delightful crunch and a little sparkle. It’s a small touch that makes a big difference.
For substitutions, you can swap the brown sugar with coconut sugar for a less refined option. Use a gluten-free pie crust if needed, and replace the egg in the filling with a flax egg (1 tablespoon flaxseed meal + 3 tablespoons water) for a vegan version. The texture will be slightly different but still delicious.
When shopping for pumpkin puree, look for cans that feel heavy for their size—that means less water content. And if you can find organic pumpkin, the flavor is often a bit brighter. Just avoid anything labeled “pumpkin pie mix” since it already has sugar and spices added.
Equipment Needed
You don’t need a fancy kitchen to make these hand pies. Here’s what you’ll need:
- Baking sheet: A standard half-sheet pan works perfectly. Line it with parchment paper for easy cleanup.
- Parchment paper: Keeps the pies from sticking and makes cleanup a breeze.
- Biscuit cutter or round cookie cutter: I use a 3-inch cutter, but a drinking glass works in a pinch. Just make sure the rim is thin enough to cut through dough cleanly.
- Rolling pin: Even with refrigerated dough, you might need to roll it out slightly to get even thickness. A wine bottle works if you don’t have one.
- Small bowl: For mixing the egg wash.
- Pastry brush: For brushing the egg wash. A silicone brush is easy to clean and doesn’t shed bristles.
- Fork: For crimping the edges and venting the pies.
- Spatula: For transferring the pies to the baking sheet.
I remember my first time making these, I didn’t have a biscuit cutter and used a mason jar lid instead. It worked, but the edges were a little rough. A proper cutter makes the process smoother, but don’t let a missing tool stop you—improvisation is part of the fun.
For budget-friendly options, check dollar stores for basic cookie cutters and pastry brushes. They’re often just as good as the fancy ones.
Preparation Method
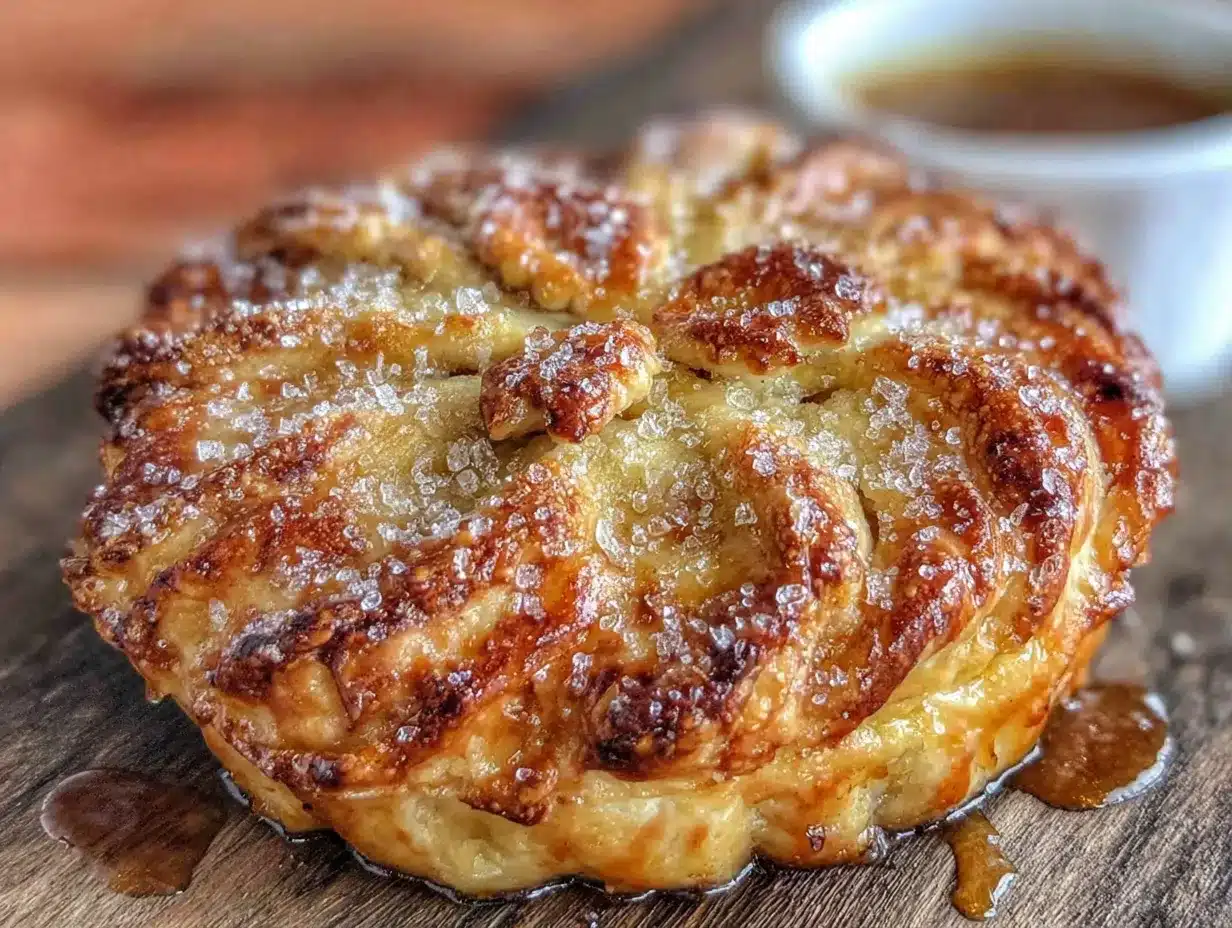
Let’s get these little pies made. I promise, it’s easier than you think.
- Preheat your oven to 400°F (200°C). Line a baking sheet with parchment paper and set it aside. Getting the oven hot is key—the high temperature creates steam in the dough, which makes it flaky.
- Make the filling: In a medium bowl, whisk together the pumpkin puree, brown sugar, egg, pumpkin pie spice, cinnamon, salt, and heavy cream. Mix until everything is smooth and well combined. The filling should be thick but spreadable—if it looks too runny, add a tablespoon more pumpkin puree. Taste it and adjust the spices if you like things extra cozy. I always add a pinch more cinnamon because I can’t help myself.
- Prepare the dough: Let the refrigerated pie crusts sit at room temperature for about 5 minutes so they’re easier to handle. On a lightly floured surface, unroll one crust and gently roll it out to about 1/8-inch thickness if it seems thick. Use your biscuit cutter to cut out rounds as close together as possible. You should get about 6 rounds per crust. Reroll the scraps once to get a few more—don’t overwork the dough or it will get tough.
- Assemble the hand pies: Place half of the dough rounds on the prepared baking sheet, spacing them about 2 inches apart. Spoon about 1 tablespoon of filling onto the center of each round, leaving a 1/2-inch border around the edges. Don’t overfill—trust me, I learned this the hard way when filling oozed out and burned on the pan. Place another dough round on top of each filled round.
- Crimp and vent: Use a fork to press the edges of each pie together firmly, sealing in the filling. Then, poke 2-3 small holes in the top of each pie to let steam escape. This prevents them from bursting open in the oven. If the dough feels warm, pop the tray in the fridge for 5 minutes to chill—this helps the pies hold their shape.
- Apply the egg wash: In a small bowl, whisk the egg with 1 tablespoon of water until frothy. Brush a thin layer over the tops of each pie. Sprinkle with turbinado sugar if using. The egg wash is what gives them that beautiful golden sheen—don’t skip it.
- Bake: Place the baking sheet in the preheated oven and bake for 12-15 minutes, or until the pies are golden brown and the filling is bubbling slightly through the vents. Keep an eye on them after 10 minutes—ovens vary, and you want them golden, not burnt. The smell that fills your kitchen is absolutely intoxicating.
- Cool: Let the hand pies cool on the baking sheet for 5 minutes, then transfer them to a wire rack to cool completely. The filling will be very hot at first, so resist the urge to bite into one immediately. I may have burned my tongue on the first batch, and while it was worth it, patience pays off.
And that’s it! In under 30 minutes, you have a batch of beautiful, flaky, pumpkin-spiced hand pies that taste like fall in every bite.
Cooking Tips & Techniques
Over the dozens of batches I’ve made, I’ve picked up a few tricks that make these hand pies even better. Let me share what I’ve learned the hard way.
Don’t overfill the pies. I know it’s tempting to pile on the filling, but too much will cause the pies to burst open in the oven. A heaping tablespoon is plenty. The filling spreads as it bakes, so you’ll get a nice amount in every bite.
Keep the dough cold. If the dough gets too warm, it becomes sticky and hard to work with. If you notice the rounds getting soft, pop them in the fridge for 5-10 minutes before baking. Cold dough creates steam pockets in the oven, which is what gives you those flaky layers.
Seal the edges well. I use a fork to crimp the edges, pressing down firmly all the way around. If the edges aren’t sealed, the filling will leak out and make a mess on the pan. A little water on your finger can help seal stubborn spots.
Use a light hand with the egg wash. You want a thin, even layer. Too much egg wash can pool around the edges and make them soggy. A pastry brush gives you the most control, but a paper towel dipped in the wash works in a pinch.
Rotate the pan halfway through. Ovens often have hot spots, so rotating the baking sheet halfway through baking ensures even browning. I learned this after one batch came out with half the pies darker than the other half.
Let them cool completely. I know it’s hard to wait, but the filling sets as it cools. If you bite into one too soon, the filling will be runny and might burn your mouth. Give them at least 10 minutes on the wire rack.
One time, I forgot to add the egg to the filling. The hand pies still tasted good, but the filling was a bit loose and didn’t hold together as nicely. So double-check your ingredients before you start mixing—it’s an easy mistake to make when you’re in a hurry.
Variations & Adaptations
These hand pies are incredibly versatile. Here are some of my favorite ways to change them up:
- Vegan Version: Use a flax egg (1 tablespoon flaxseed meal + 3 tablespoons water) in the filling and a vegan pie crust. Brush with a little non-dairy milk instead of egg wash. They won’t be as golden, but they’ll still be delicious.
- Gluten-Free Option: Swap in a gluten-free pie crust. I’ve had good luck with Wholly Gluten-Free brand. Just handle the dough gently since it can be more fragile.
- Spice It Up: Add a pinch of cayenne pepper or a dash of cardamom to the filling for a warm, unexpected kick. I tried this last Thanksgiving and it was a hit with the adventurous eaters.
- Apple Pumpkin Fusion: Finely dice half an apple and mix it into the filling. The apple adds a little texture and tartness that pairs beautifully with the pumpkin. It’s like two fall desserts in one.
- Chocolate Drizzle: Once the pies have cooled, drizzle them with melted dark chocolate. The bitterness of the chocolate balances the sweet, spiced filling perfectly. I did this for a party once, and they vanished in minutes.
- Savory Twist: Skip the sugar and spices, and fill the pies with a mixture of pumpkin, sage, garlic, and Parmesan. Bake as directed and serve as an appetizer. It’s unexpected but so good.
Don’t be afraid to experiment. The basic formula is forgiving, and you might stumble on a combination that becomes your new favorite.
Serving & Storage Suggestions
These hand pies are best served warm, but they’re delicious at room temperature too. Here’s how to make the most of them.
Serving: Arrange the pies on a platter and dust with a little powdered sugar for a pretty presentation. They’re perfect on their own, but a dollop of whipped cream or a scoop of vanilla ice cream takes them over the top. For a fall-themed dessert board, pair them with apple slices, caramel dip, and spiced nuts.
Storage: Store leftover hand pies in an airtight container at room temperature for up to 2 days. If you need to keep them longer, pop them in the fridge for up to 5 days. The crust might lose a bit of its flakiness, but they’ll still taste great.
Freezing: These freeze beautifully. Place the baked and cooled pies in a single layer on a baking sheet and freeze until solid, then transfer them to a freezer-safe bag or container. They’ll keep for up to 3 months. To reheat, pop them in a 350°F oven for 5-7 minutes, or microwave for 15-20 seconds. The oven method gives you a crispier crust.
Reheating: For that just-baked texture, reheat in the oven or an air fryer at 350°F for 5 minutes. The microwave is faster but will soften the crust. If you’re in a hurry, it’s still a good option.
The flavors actually deepen after a day or two, so don’t worry if you have leftovers. I actually prefer them on day two—the spices have had time to meld, and the filling is even more luscious.
Nutritional Information & Benefits
While these hand pies are a treat, they do offer some nutritional perks. Here’s a rough estimate per pie (based on 12 servings):
- Calories: 180
- Fat: 9g
- Carbohydrates: 23g
- Fiber: 2g
- Sugar: 11g
- Protein: 3g
Pumpkin is a nutritional powerhouse. It’s packed with vitamin A, which supports eye health and immune function. It’s also rich in fiber, which helps with digestion and keeps you feeling full. The spices—cinnamon, ginger, nutmeg—are anti-inflammatory and full of antioxidants.
For dietary considerations, these pies are nut-free and can be made gluten-free or vegan with simple substitutions. They’re not low-carb, but the portion size helps keep things reasonable. If you’re watching your sugar intake, you can reduce the brown sugar to 1/3 cup, though the filling will be a little less sweet.
I love that I can serve these at a party without feeling guilty about what’s in them. They’re a dessert that actually has some redeeming qualities, and that makes the indulgence feel a little more balanced.
Conclusion
These quick mini pumpkin hand pies have become a staple in my fall cooking rotation, and I hope they become one in yours too. They started as a happy accident—a broken oven and a desperate cook—but they’ve turned into something I genuinely look forward to making every year. They’re proof that you don’t need a fancy recipe or hours in the kitchen to create something memorable.
What I love most about these pies is how adaptable they are. You can make them your own with different spices, fillings, or toppings. They’re forgiving, fast, and always delicious. Whether you’re making them for a weeknight treat, a holiday gathering, or just because it’s Tuesday and you deserve something sweet, they never disappoint.
I’d love to hear how yours turn out. Did you try a variation? Did you burn your tongue like I did? Drop a comment below and let me know. And if you share them on social media, tag me—I want to see your beautiful hand pies. Until next time, happy baking, and may your kitchen be filled with the smell of cinnamon and pumpkin spice.
Frequently Asked Questions
Can I use homemade pie crust instead of refrigerated?
Absolutely! Homemade pie crust works wonderfully. Just make sure it’s well-chilled before cutting and assembling. The bake time might vary slightly, so keep an eye on them.
Can I make the filling ahead of time?
Yes, you can make the filling up to 2 days in advance. Store it in an airtight container in the fridge. Give it a good stir before using, as it might separate slightly.
Why did my hand pies burst open in the oven?
This usually happens if you overfill them or don’t seal the edges well enough. Make sure to leave a border around the filling and press the edges firmly with a fork. The steam vents also help release pressure.
Can I use fresh pumpkin instead of canned?
You can, but fresh pumpkin puree tends to be more watery than canned. To compensate, cook the puree down on the stovetop until it thickens, or add an extra tablespoon of pumpkin to the filling to offset the moisture.
How do I make these pies dairy-free?
Use a dairy-free pie crust and replace the heavy cream with coconut cream or a non-dairy milk. The egg wash can be replaced with a little maple syrup mixed with non-dairy milk for a golden finish.
Pin This Recipe!
Quick Mini Pumpkin Hand Pies: Easy Fall Dessert

These quick mini pumpkin hand pies are a fast, forgiving, and absolutely delicious fall dessert. Made with simple ingredients like canned pumpkin and refrigerated pie crusts, they’re ready in under 30 minutes and perfect for weeknight treats or fall gatherings.
- Prep Time: 15 minutes
- Cook Time: 15 minutes
- Total Time: 30 minutes
- Yield: 12 servings 1x
- Category: Dessert
- Cuisine: American
Ingredients
- 1 can (15 oz) pumpkin puree
- 1/2 cup brown sugar, packed
- 1 large egg
- 1 teaspoon pumpkin pie spice
- 1/2 teaspoon ground cinnamon
- 1/4 teaspoon salt
- 1 tablespoon heavy cream or milk
- 2 refrigerated pie crusts
- 1 egg + 1 tablespoon water (for egg wash)
- Turbinado or coarse sugar (optional)
Instructions
- Preheat your oven to 400°F (200°C). Line a baking sheet with parchment paper and set it aside.
- Make the filling: In a medium bowl, whisk together the pumpkin puree, brown sugar, egg, pumpkin pie spice, cinnamon, salt, and heavy cream until smooth and well combined.
- Prepare the dough: Let the refrigerated pie crusts sit at room temperature for about 5 minutes. On a lightly floured surface, unroll one crust and gently roll it out to about 1/8-inch thickness. Use a biscuit cutter to cut out rounds as close together as possible (about 6 per crust). Reroll scraps once to get a few more.
- Assemble the hand pies: Place half of the dough rounds on the prepared baking sheet, spacing them about 2 inches apart. Spoon about 1 tablespoon of filling onto the center of each round, leaving a 1/2-inch border. Place another dough round on top of each filled round.
- Crimp and vent: Use a fork to press the edges of each pie together firmly, sealing in the filling. Poke 2-3 small holes in the top of each pie to let steam escape. If the dough feels warm, chill the tray in the fridge for 5 minutes.
- Apply the egg wash: In a small bowl, whisk the egg with 1 tablespoon of water until frothy. Brush a thin layer over the tops of each pie. Sprinkle with turbinado sugar if using.
- Bake: Place the baking sheet in the preheated oven and bake for 12-15 minutes, or until the pies are golden brown and the filling is bubbling slightly through the vents.
- Cool: Let the hand pies cool on the baking sheet for 5 minutes, then transfer them to a wire rack to cool completely.
Notes
Don’t overfill the pies to prevent bursting. Keep the dough cold for flaky layers. Seal edges well with a fork. Use a light hand with the egg wash. Rotate the pan halfway through baking for even browning. Let pies cool completely before serving to allow filling to set.
Nutrition
- Serving Size: 1 hand pie
- Calories: 180
- Sugar: 11
- Sodium: 200
- Fat: 9
- Saturated Fat: 4
- Carbohydrates: 23
- Fiber: 2
- Protein: 3
Keywords: pumpkin hand pies, mini pumpkin pies, easy fall dessert, quick pumpkin dessert, hand pies, pumpkin spice


