I was digging through my freezer last Tuesday, looking for something—anything—that could become dinner in under an hour, when my hand landed on a single turkey breast wrapped in butcher paper. I’d bought it on a whim weeks ago, thinking I’d do something special with it. And standing there in the cold air, I caught it. That smell. Not from the freezer, but from my memory—the faint, buttery scent of herbs roasting, mixed with the particular warmth of my aunt’s tiny apartment kitchen. I was nine again, sitting on a stool too tall for my legs, watching her rub butter and sage into a turkey breast for a “just because” Sunday dinner. She passed a few years back, and I haven’t thought about that afternoon in ages. But there I was, holding this frozen bird, and I just knew I had to try to make that happen again. Honestly, I almost laughed at myself. A whole roasted turkey breast on a Tuesday night? With a three-year-old tugging at my shirt and a sink full of dishes? But I figured, why not? It’s just a turkey breast, not a whole bird. It’s faster. It’s doable. And maybe, just maybe, I could get that taste back.
So I thawed it in a cold water bath (a trick my aunt would have called “cheating,” but let’s face it, she’d have done the same), and I started pulling together what I remembered. Butter, softened. A handful of herbs from the back of the fridge. Garlic, because she used garlic in everything. And then I realized I had no idea what I was doing. I mean, I’ve roasted chicken a hundred times, but turkey always felt like a holiday thing—something you stress over for hours. But this was just a breast. How hard could it be? I ended up smearing that herb butter all over it like I was buttering a really large, very serious piece of toast. I threw it in the oven, made a quick pan gravy from the drippings (which honestly felt like magic), and thirty minutes later, I was slicing into the juiciest, most flavorful turkey I’d made in years. My kid asked for seconds. I may have teared up a little, but I’ll blame the onions. This is that recipe. The one that proves you don’t need a holiday or a whole day to get that feeling.
Why You’ll Love This Recipe
Let me be straight with you. I’ve tested this recipe six times to get it just right. Twice the butter burned. Once the gravy was so salty I had to start over. But the version you’re getting here? It’s the one that works every single time, even on a chaotic weeknight when you’re running on fumes. Here’s why this quick herb butter roasted turkey breast is going to become your new go-to:
- Quick & Easy: This isn’t a project. From prep to plate, you’re looking at about an hour. No brining overnight. No basting every fifteen minutes. Just a simple herb butter, a hot oven, and dinner.
- Simple Ingredients: You probably have most of this stuff already. Butter, garlic, dried herbs, salt, pepper. The only “special” ingredient is the turkey breast itself, and most grocery stores carry them year-round now.
- Perfect for Weeknights: This is not a holiday recipe. It’s a Tuesday recipe. It’s a “I forgot to plan dinner and I need something that feels special without the work” recipe. It’s for when you want the comfort of a roast without the three-hour commitment.
- Crowd-Pleaser: I’ve served this to picky kids, skeptical in-laws, and a friend who “doesn’t really like turkey.” Everyone went back for seconds. The herb butter keeps the meat incredibly moist, and the pan gravy ties it all together.
- Unbelievably Delicious: The secret here is the compound butter. By mixing the herbs directly into the softened butter and spreading it under and over the skin, you get flavor in every single bite. No dry, bland spots. Just juicy, herby, golden-brown turkey.
This recipe is different because it respects your time. Most turkey recipes assume you have a whole day to dedicate to the process. This one assumes you have a hungry family, a tired brain, and maybe forty-five minutes of active attention. It’s comfort food that works with your life, not against it. And honestly? That first bite—warm, buttery, with that hit of sage and thyme—it’s the kind of moment that makes you close your eyes and just breathe for a second. You deserve that on a regular Tuesday.
What Ingredients You Will Need
This recipe uses simple, wholesome ingredients to deliver bold flavor and satisfying texture without the fuss. Most of these are pantry staples, which is exactly what you want on a busy weeknight. Here’s what you’ll need and why each one matters.
For the Herb Butter
- Unsalted butter, softened (4 tablespoons, or 1/2 stick): This is the backbone of the whole dish. Using unsalted butter lets you control the salt level. Make sure it’s truly softened to room temperature—cold butter won’t mix evenly with the herbs. I usually leave it out on the counter for about 30 minutes before I start.
- Fresh garlic, minced (2 cloves): Garlic and turkey are a classic pair. Fresh garlic gives a sharper, more aromatic punch than the jarred stuff. If you’re in a real pinch, you can use 1/2 teaspoon of garlic powder, but fresh really is better here.
- Dried sage (1 teaspoon): Sage is the quintessential turkey herb. It has this slightly earthy, almost peppery flavor that cuts through the richness of the butter. I prefer dried here because it’s more concentrated and won’t make the butter watery.
- Dried thyme (1 teaspoon): Thyme adds a subtle lemony, floral note that balances the sage. Again, dried works perfectly. If you have fresh, use about 1 tablespoon of fresh thyme leaves, finely chopped.
- Dried rosemary (1/2 teaspoon): Rosemary is strong, so a little goes a long way. It adds that piney, almost woodsy aroma that makes your whole kitchen smell incredible. Crush it between your fingers before adding to release the oils.
- Salt and black pepper (1/2 teaspoon each): Season the butter itself. This ensures every bit of the turkey gets seasoned, not just the surface.
For the Turkey
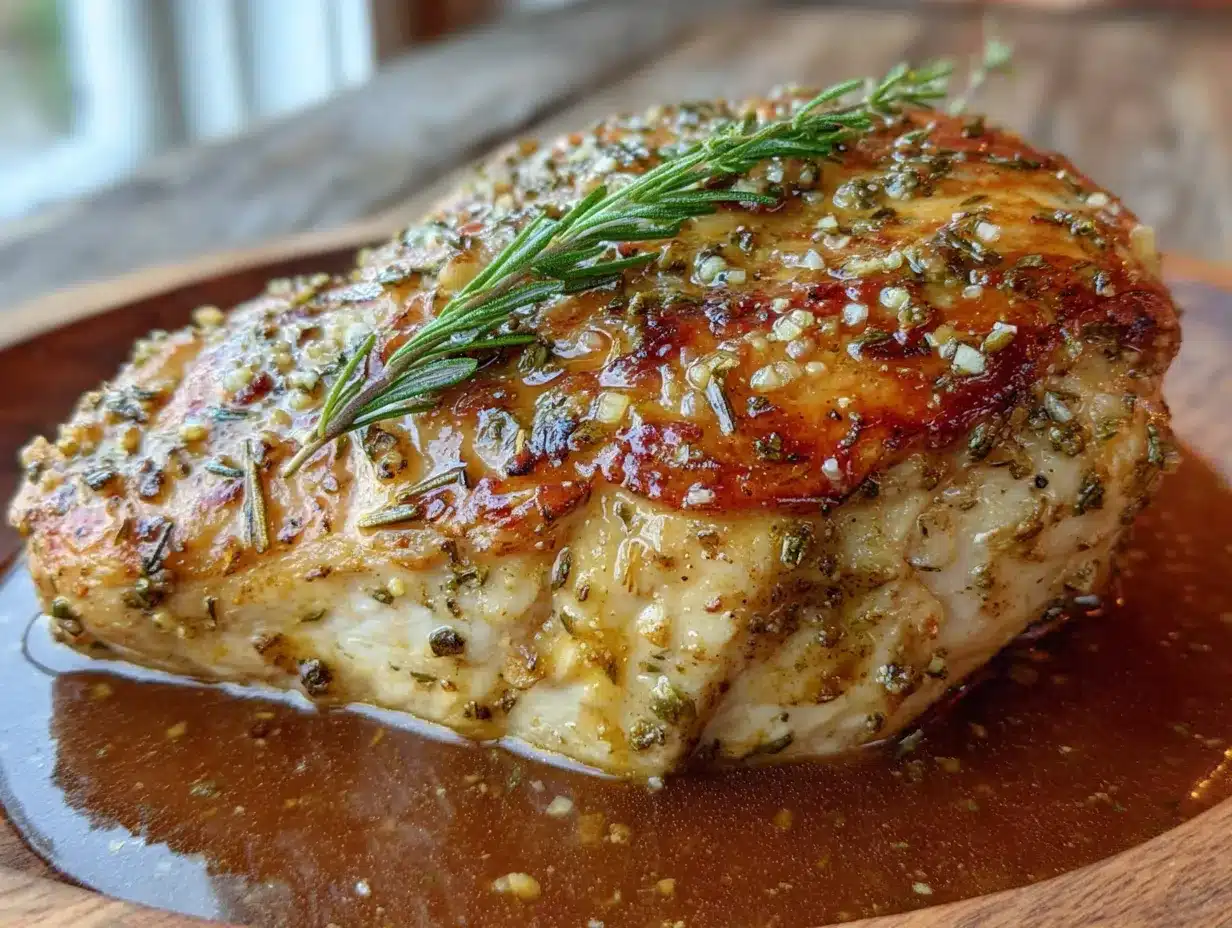
- Bone-in, skin-on turkey breast (2.5 to 3 pounds): This is the star. Bone-in helps the meat stay moist during cooking, and the skin is what gets that gorgeous golden-brown crust. A 2.5-pound breast will feed about 4 people with some leftovers. If you’re feeding a smaller crowd, you can use a 1.5-pound breast and reduce the cooking time by about 10-15 minutes.
- Olive oil (1 tablespoon): A little oil on the outside of the skin helps it crisp up. You can use any neutral oil, but olive oil adds a nice fruity note.
- Salt and pepper (for seasoning the outside): Don’t skip this. Even though the butter is seasoned, you want a final sprinkle on the skin for that perfect salty crust.
For the Easy Pan Gravy
- Pan drippings (from the roasted turkey): This is where all the flavor lives. Don’t you dare pour those out. The browned bits stuck to the bottom of the pan are pure gold.
- All-purpose flour (2 tablespoons): This thickens the gravy. You can use cornstarch for a gluten-free option, but I find flour gives a silkier texture.
- Chicken or turkey broth (1 cup): Store-bought is fine. Low-sodium is best so you can control the salt. If you have homemade broth, even better.
- Optional: A splash of white wine or a squeeze of lemon juice: This adds a little acidity to balance the richness. I’ve done it both ways, and honestly, it’s not essential, but it does brighten things up.
Ingredient Selection Tip: When buying your turkey breast, look for one that’s plump and feels heavy for its size. Avoid any that look dried out or have a lot of liquid in the package. I usually grab the store brand or whatever is on sale—I’ve never noticed a difference in quality for this recipe.
Equipment Needed
You don’t need a lot of fancy gear for this one, which is part of the beauty of it. Here’s what you’ll need:
- Small roasting pan or oven-safe skillet: A 9×13 baking dish works perfectly. You want something with sides high enough to catch the drippings for the gravy. I use a cast-iron skillet when I want extra browning, but a glass or ceramic dish works just fine.
- Instant-read thermometer: This is non-negotiable for me. Turkey is done at 165°F in the thickest part of the breast, and guessing can lead to dry meat or undercooked spots. A simple digital thermometer costs about $10 and will save your dinner.
- Small bowl for mixing the herb butter: Any bowl will do. I use the same one I softened the butter in to save on dishes.
- Whisk: For the gravy. A fork works in a pinch, but a whisk gives you a smoother result.
- Measuring spoons: For the herbs and seasonings. I’m usually a “pinch and pray” kind of cook, but for this recipe, the ratios matter.
- Cutting board and sharp knife: For carving. Let the turkey rest before you slice into it, and use a sharp knife for clean cuts.
Budget-Friendly Option: If you don’t have a roasting pan, a foil-lined baking sheet with a wire rack on top works. Just be aware that the drippings might spread out more, so you’ll need to scrape them into a saucepan for the gravy. I’ve done this in a pinch, and it still turns out great.
Preparation Method
Alright, let’s get cooking. This whole process takes about 10 minutes of active prep and about 40-50 minutes of oven time. Here’s the step-by-step.
- Preheat your oven to 375°F (190°C). Position the rack in the middle of the oven. While it’s heating, take your turkey breast out of the fridge and let it sit on the counter for about 15 minutes. This takes the chill off and helps it cook more evenly.
- Make the herb butter. In a small bowl, combine the softened butter, minced garlic, dried sage, dried thyme, dried rosemary, salt, and pepper. Mash it all together with a fork until it’s evenly mixed. The butter should be soft and spreadable—if it’s still too firm, let it sit out for another 5 minutes. Taste a tiny bit (yes, raw butter is fine) and adjust the seasoning if needed. You want it to taste distinctly herby and well-salted.
- Prep the turkey. Pat the turkey breast dry with paper towels. This is important—wet skin won’t crisp up. Place the turkey breast skin-side up in your roasting pan or skillet.
- Apply the herb butter. Using your fingers, gently loosen the skin from the meat. Start at the edge and work your fingers underneath, being careful not to tear the skin. You want to create a pocket. Take about half of the herb butter and spread it directly onto the meat under the skin. Then, spread the remaining butter all over the top of the skin. Don’t forget the sides. It might look a little messy, but that’s okay. Drizzle the olive oil over the top and sprinkle with a pinch of salt and pepper.
- Roast the turkey. Place the pan in the preheated oven. Roast for 35-45 minutes, or until the internal temperature in the thickest part of the breast reaches 160°F (71°C). The exact time will depend on the size of your breast. For a 2.5-pound breast, start checking at 35 minutes. The skin should be golden brown and crispy.
- Rest the turkey. Remove the pan from the oven and transfer the turkey breast to a cutting board. Loosely tent it with aluminum foil. Let it rest for 10-15 minutes. The internal temperature will continue to rise to the safe 165°F (74°C) during this time. Do not skip this step—resting is what keeps the meat juicy.
- Make the pan gravy. While the turkey rests, place the roasting pan on the stovetop over medium heat. (If your pan isn’t stovetop-safe, pour the drippings into a saucepan.) You should see about 2-3 tablespoons of drippings and browned bits in the pan. Sprinkle the flour over the drippings and whisk constantly for 1-2 minutes, until the mixture is bubbly and golden. Slowly pour in the broth while whisking continuously to prevent lumps. Let the gravy simmer for 2-3 minutes, until it thickens to your liking. Taste and add salt and pepper as needed. If you’re using wine or lemon juice, add it now.
- Carve and serve. Slice the turkey breast against the grain into thick pieces. Spoon the gravy over the top or serve it on the side. That’s it. You just made a full roast dinner on a weeknight.
Troubleshooting Tip: If your gravy is too thin, let it simmer a minute longer. If it’s too thick, whisk in a splash more broth. If it’s lumpy, don’t panic—strain it through a fine-mesh sieve into a clean bowl. I’ve had to do this more times than I care to admit.
Cooking Tips & Techniques
I’ve made this recipe enough times to know where things can go sideways. Here’s what I’ve learned so you don’t have to make the same mistakes.
Don’t skip the resting step. I know, I know. You’re hungry, the gravy is ready, and the turkey smells incredible. But if you slice into it right away, all those juices will run out onto the cutting board instead of staying in the meat. I learned this the hard way when I carved a beautiful turkey breast only to watch it turn into a dry, sad pile on the plate. Let it rest. Set a timer if you have to.
Check the temperature early. Ovens vary wildly. My friend’s oven runs 25 degrees hot, and she didn’t know until she burned three batches of cookies. Start checking the internal temperature at the 30-minute mark, even if the recipe says 35. Better to check early and put it back in than to overcook it.
Use a meat thermometer, not the pop-up timer. Those little plastic pop-up things that come with some turkeys are notoriously unreliable. They usually trigger when the meat is already overcooked. A simple instant-read thermometer is cheap and gives you accurate readings every time.
If the skin is browning too fast, tent it. One time, my turkey skin was getting dark at the 20-minute mark, but the inside was still raw. I just laid a piece of foil loosely over the top and let it finish cooking. The skin stayed crispy, and the meat cooked through perfectly.
Multitask wisely. While the turkey roasts, you can prep your sides. Mashed potatoes, roasted vegetables, or a simple salad all work great. I usually throw some green beans in the oven on the rack below the turkey for the last 15 minutes. One oven, two dishes, minimal cleanup.
Variations & Adaptations
This recipe is a great base, but don’t be afraid to make it your own. Here are some ways I’ve adapted it depending on what I have on hand or who I’m feeding.
Herb Swap: Not a fan of sage? Use all thyme and rosemary, or swap in dried tarragon for a more anise-like flavor. I once made this with dried dill and lemon zest (added to the butter) and it was fantastic with roasted potatoes. The possibilities are endless, so use whatever herbs you have in the cupboard.
Spicy Version: Add 1/2 teaspoon of smoked paprika and a pinch of cayenne pepper to the herb butter. It gives the turkey a subtle warmth without being overpowering. I did this for a game-day dinner, and my husband kept asking what “secret ingredient” I used.
Citrus Twist: Before roasting, place a few thin slices of lemon or orange under the skin with the herb butter. The citrus infuses the meat as it roasts and adds a bright note that cuts through the richness. I tried this with a blood orange once, and the flavor was surprisingly delicate.
Gluten-Free Gravy: Swap the all-purpose flour for an equal amount of cornstarch or arrowroot powder. Mix it with a little cold water to make a slurry before whisking it into the drippings. It thickens just as well and is completely gluten-free.
Smaller Portion: Cooking for one or two? Use a 1-pound turkey breast tenderloin instead. Reduce the herb butter to 2 tablespoons and roast for about 20-25 minutes. The cooking time will be much shorter, so keep an eye on it.
Serving & Storage Suggestions
This turkey breast is best served hot, right after it’s rested. The contrast between the crispy skin and the juicy meat is what makes it special. Here’s how to make the most of it.
Serving Temperature: Serve the turkey hot, with the gravy warm on the side. If you’re making sides, try to time everything so it’s all ready around the same time. Mashed potatoes, roasted carrots, or a simple green salad are all excellent choices.
Presentation: Slice the turkey against the grain into thick, even slices. Arrange them on a platter and spoon a little gravy over the top. Garnish with a sprig of fresh thyme or parsley if you’re feeling fancy. It looks like you spent hours on it, but you and I know the truth.
Storage: Leftover turkey will keep in an airtight container in the refrigerator for up to 4 days. The gravy can be stored separately for up to 3 days. The flavors actually meld together overnight, so leftovers might taste even better the next day.
Reheating: The best way to reheat turkey without drying it out is in the oven. Place the slices in a baking dish, add a splash of broth or water, cover with foil, and warm at 300°F (150°C) for about 10-15 minutes. You can also reheat it in the microwave, but the texture won’t be as good. For the gravy, just warm it in a small saucepan over low heat, stirring occasionally.
Freezing: Cooked turkey freezes well for up to 3 months. Wrap it tightly in plastic wrap and then foil, or store it in a freezer-safe bag. Thaw in the refrigerator overnight before reheating. The gravy can also be frozen in a separate container.
Nutritional Information & Benefits
This recipe is a solid choice for a balanced meal. Turkey breast is a lean protein, and the herb butter adds healthy fats from the butter and olive oil. Here’s a rough breakdown per serving (based on 4 servings, including gravy):
- Calories: Approximately 350-400
- Protein: 40-45 grams
- Fat: 18-22 grams
- Carbohydrates: 5-8 grams (mostly from the flour in the gravy)
Health Benefits: Turkey is an excellent source of lean protein, which is essential for muscle repair and keeping you full. It’s also rich in B vitamins, particularly B6 and B12, which support energy metabolism. The herbs in the butter—sage, thyme, and rosemary—are packed with antioxidants and have anti-inflammatory properties. So while this might feel like comfort food, it’s actually pretty good for you.
Dietary Considerations: This recipe is naturally low-carb and keto-friendly (just skip the flour in the gravy or use a low-carb thickener). It’s also gluten-free if you use cornstarch instead of flour. If you’re watching your sodium, use unsalted butter and low-sodium broth, and go easy on the added salt.
Potential Allergens: This recipe contains dairy (butter) and gluten (flour in the gravy). For a dairy-free version, use vegan butter or olive oil in place of the herb butter. For gluten-free, use the cornstarch slurry as mentioned above.
Conclusion
I’ll be honest—I didn’t expect a simple roasted turkey breast to become one of my most-used recipes. But it has. It’s the recipe I turn to when I want something that feels special but doesn’t require a whole day in the kitchen. It’s the recipe that makes a regular Tuesday feel a little more intentional, a little more warm. And every time I make it, I think of that afternoon in my aunt’s kitchen, watching her work her magic with butter and herbs. Now I have my own version, and it’s just as good.
I really hope you give this a try. Play with the herbs, adjust the seasoning, make it your own. And when you do, I’d love to hear about it. Leave a comment below and tell me how it turned out, or share a photo of your creation. Did you add a twist? Did your family love it? Let’s keep this conversation going. Because honestly, good food is meant to be shared—and this one is too good to keep to myself.
Frequently Asked Questions
Can I use a frozen turkey breast for this recipe?
Yes, but you’ll need to thaw it completely before cooking. The safest way is to thaw it in the refrigerator for 24-48 hours, depending on the size. If you’re in a hurry, you can use the cold water method—submerge the sealed turkey breast in cold water, changing the water every 30 minutes. A 2.5-pound breast will take about 2-3 hours to thaw this way. Never cook a frozen turkey breast without thawing first, as it will cook unevenly.
Can I make the herb butter ahead of time?
Absolutely. You can make the herb butter up to 3 days in advance and store it in the refrigerator. Just let it soften at room temperature for about 20 minutes before using it. You can also freeze the herb butter for up to 3 months. Roll it into a log in plastic wrap, and slice off what you need when you’re ready to cook.
What if I don’t have all the herbs listed?
No problem at all. The beauty of this recipe is its flexibility. If you only have dried thyme, use 2 teaspoons of that alone. If you have poultry seasoning (a blend of sage, thyme, and sometimes rosemary), use 1 1/2 teaspoons of that instead. The key is to have about 2 1/2 teaspoons of dried herbs total. Feel free to experiment with what you have on hand.
How do I know when the turkey is done without a thermometer?
While a thermometer is the most reliable method, you can check for doneness by piercing the thickest part of the breast with a knife. The juices should run clear, not pink. You can also check the internal temperature by inserting a metal skewer into the thickest part for 30 seconds, then touching it to your wrist—if it feels hot, the meat is likely done. But honestly, a $10 thermometer is a worthwhile investment for perfectly cooked meat every time.
Can I use this recipe for a whole turkey?
This specific recipe is designed for a turkey breast, but you can adapt it for a whole turkey. You’ll need to multiply the herb butter by about 4 times for a 12-pound bird, and the cooking time will be significantly longer (about 2 1/2 to 3 hours at 350°F). You’ll also need to baste the turkey occasionally and tent the breast with foil if it browns too quickly. The pan gravy method works the same way, just with more drippings.
Pin This Recipe!
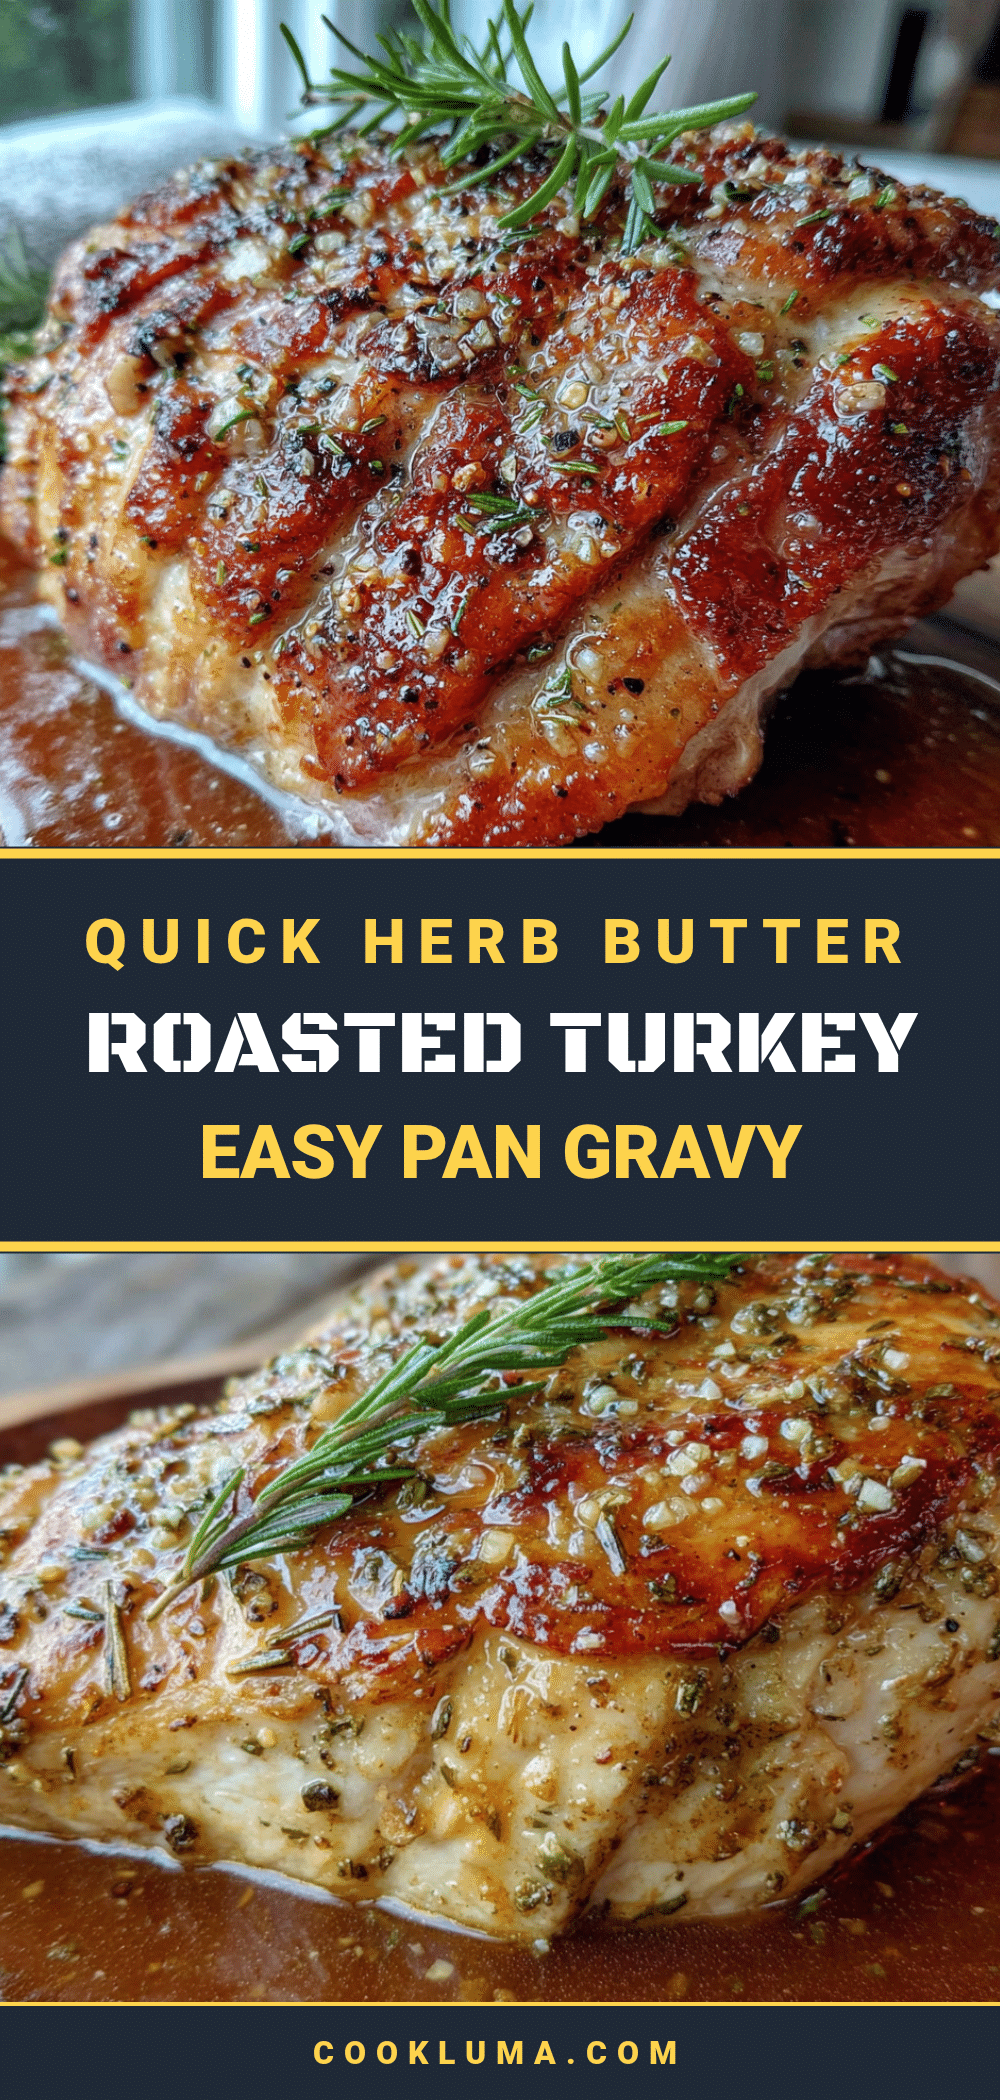
Quick Herb Butter Roasted Turkey Breast with Easy Gravy
A quick and easy roasted turkey breast recipe with herb butter and pan gravy, perfect for a weeknight dinner that feels special without the fuss. Ready in about an hour with simple ingredients.
- Prep Time: 10 minutes
- Cook Time: 35-45 minutes
- Total Time: 1 hour
- Yield: 4 servings 1x
- Category: Main Course
- Cuisine: American
Ingredients
- 4 tablespoons unsalted butter, softened
- 2 cloves fresh garlic, minced
- 1 teaspoon dried sage
- 1 teaspoon dried thyme
- 1/2 teaspoon dried rosemary
- 1/2 teaspoon salt
- 1/2 teaspoon black pepper
- 1 (2.5 to 3 pound) bone-in, skin-on turkey breast
- 1 tablespoon olive oil
- Salt and pepper for seasoning the outside
- 2 tablespoons all-purpose flour
- 1 cup chicken or turkey broth, low-sodium
- Optional: a splash of white wine or a squeeze of lemon juice
Instructions
- Preheat your oven to 375°F (190°C). Position the rack in the middle of the oven. While it’s heating, take your turkey breast out of the fridge and let it sit on the counter for about 15 minutes.
- Make the herb butter: In a small bowl, combine the softened butter, minced garlic, dried sage, dried thyme, dried rosemary, salt, and pepper. Mash it all together with a fork until evenly mixed.
- Prep the turkey: Pat the turkey breast dry with paper towels. Place the turkey breast skin-side up in your roasting pan or skillet.
- Apply the herb butter: Using your fingers, gently loosen the skin from the meat. Take about half of the herb butter and spread it directly onto the meat under the skin. Then, spread the remaining butter all over the top of the skin. Drizzle the olive oil over the top and sprinkle with a pinch of salt and pepper.
- Roast the turkey: Place the pan in the preheated oven. Roast for 35-45 minutes, or until the internal temperature in the thickest part of the breast reaches 160°F (71°C). The skin should be golden brown and crispy.
- Rest the turkey: Remove the pan from the oven and transfer the turkey breast to a cutting board. Loosely tent it with aluminum foil. Let it rest for 10-15 minutes. The internal temperature will continue to rise to 165°F (74°C) during this time.
- Make the pan gravy: While the turkey rests, place the roasting pan on the stovetop over medium heat. Sprinkle the flour over the drippings and whisk constantly for 1-2 minutes, until the mixture is bubbly and golden. Slowly pour in the broth while whisking continuously to prevent lumps. Let the gravy simmer for 2-3 minutes, until it thickens. Taste and add salt and pepper as needed. If using wine or lemon juice, add it now.
- Carve and serve: Slice the turkey breast against the grain into thick pieces. Spoon the gravy over the top or serve it on the side.
Notes
Don’t skip the resting step—it keeps the meat juicy. Check the temperature early as ovens vary. If the skin is browning too fast, tent with foil. For gluten-free gravy, use cornstarch instead of flour. Leftover turkey keeps in the refrigerator for up to 4 days.
Nutrition
- Serving Size: 1 serving (about 6-8
- Calories: 375
- Sugar: 1
- Sodium: 450
- Fat: 20
- Saturated Fat: 8
- Carbohydrates: 6
- Protein: 42
Keywords: turkey breast, herb butter, roasted turkey, easy gravy, weeknight dinner, quick turkey recipe


