My brother-in-law Mark had claimed to hate deviled eggs for as long as I’d known him. Fifteen years. At every family gathering, he’d pass the platter with a polite “no thanks” and a little shudder. Then last Easter, I set out a batch of these quick deviled eggs with crispy bacon and chives, honestly just to use up the extra eggs I’d boiled. I turned around to grab the paprika and caught him red-handed—three eggs already gone from the tray, reaching for a fourth with this guilty look on his face. “These are different,” he mumbled through a mouthful. “These are actually good.”
I mean, that’s the thing about deviled eggs, right? They’re either the first thing to disappear at a party or the sad platter nobody touches. There’s rarely an in-between. And I get it—a plain deviled egg can be pretty boring. Dry yolk, bland filling, that weird sulfur smell if you overcook the eggs. But this version? It’s a whole different story. The salty crunch of bacon, the fresh pop of chives, and a filling so creamy and tangy it practically melts on your tongue.
Maybe you’ve been there—staring at a basket of hard-boiled eggs, wondering if you should bother. Let me tell you, this recipe changed my mind about what deviled eggs could be, and I’m pretty sure it’ll change yours too. It’s the kind of appetizer that makes people close their eyes after the first bite, and honestly, that never gets old. I keep making them because they’re just that good, and because watching Mark sneak another one off the platter still makes me laugh every single time.
Why You’ll Love This Recipe
Let’s be real for a second. You’re busy, you’re tired, and the last thing you need is a complicated recipe that takes over your whole evening. That’s exactly why these quick deviled eggs with crispy bacon and chives are about to become your new go-to. They come together in about 20 minutes flat, and most of that time is just waiting for the eggs to boil.
- Quick & Easy: From start to finish, you’re looking at about 20 minutes of active time. The eggs boil while you chop the bacon and chives. It’s practically multitasking magic.
- Simple Ingredients: Eggs, bacon, chives, mayo, mustard, a little vinegar. That’s it. No fancy grocery trips, no obscure spices you’ll never use again. You probably have most of this stuff right now.
- Perfect for Weeknights: Need a fast appetizer for a last-minute guest? Want something special for a weeknight dinner side? These work. They’re fancy enough to impress but simple enough to make on a Tuesday.
- Crowd-Pleaser: I’ve brought these to potlucks, barbecues, and holiday dinners. They disappear. Every single time. Even from people who “don’t like deviled eggs.”
- Unbelievably Delicious: The creamy, tangy filling paired with salty, crunchy bacon and fresh chives? It’s a flavor and texture combo that’s next-level comfort food.
What makes this recipe different from the rest is the balance. The bacon isn’t just a garnish—it’s mixed right into the filling and sprinkled on top for double the crunch. The chives add a fresh, oniony bite that cuts through the richness. And the filling itself? It’s perfectly seasoned, not too tangy, not too mayo-heavy. I’ve tested this ratio more times than I care to admit, and this is the one. It’s not just another deviled egg recipe—it’s the best version.
This recipe is the kind that makes you close your eyes after the first bite. It’s comfort food reimagined—faster, simpler, but with the same soul-soothing satisfaction. Perfect for impressing guests without stress, or turning a simple weeknight into something a little more memorable.
What Ingredients You Will Need
This recipe uses simple, everyday ingredients to deliver big flavor without any fuss. Most of these are probably already in your kitchen, which makes this perfect for those “I need something to bring to a party tonight” moments.
For the Eggs
- 6 large eggs (the fresher the better for boiling, but honestly, slightly older eggs peel easier—go figure)
- Water (enough to cover the eggs by about an inch)
- 1 tablespoon white vinegar (added to the boiling water—helps prevent the whites from leaking if an egg cracks)
For the Filling
- 3 tablespoons mayonnaise (I prefer Hellmann’s for its creamy texture, but Duke’s adds a nice tang if that’s your thing)
- 1 teaspoon yellow mustard (or Dijon if you want a little more sophistication—both work great)
- 1/2 teaspoon white vinegar (adds brightness without changing the color)
- 1/4 teaspoon salt (adjust to taste)
- 1/8 teaspoon black pepper (freshly ground if you have it)
- 1/4 teaspoon paprika (plus more for garnish—smoked paprika is amazing here)
For the Topping
- 4 slices bacon (thick-cut works best for that satisfying crunch)
- 2 tablespoons fresh chives (finely chopped—don’t skip these, they make the dish)
Ingredient Tips: For the bacon, I’ve tried turkey bacon and it works in a pinch, but the real stuff just gives you that crispy texture and smoky flavor that makes these eggs unforgettable. Look for center-cut bacon if you want less fat. For the chives, fresh is non-negotiable here—dried chives just don’t have the same pop. If you can’t find chives, finely chopped green onions work too, just use the green parts only.
Substitution Guidance: Need a dairy-free option? Use vegan mayonnaise and skip the bacon (or use a plant-based bacon alternative). For a lower-fat version, swap half the mayo with plain Greek yogurt—it’ll be a little tangier but still delicious. And if you’re out of yellow mustard, a tiny pinch of turmeric mixed with a splash of vinegar makes a decent substitute for both color and tang.
Equipment Needed
You don’t need much for this recipe, which is honestly one of the best things about it. Here’s what you’ll need:
- Medium saucepan (for boiling the eggs—any size works as long as the eggs fit in a single layer)
- Slotted spoon (for gently lowering eggs into the water and fishing them out)
- Bowl of ice water (for shocking the eggs—helps with peeling)
- Sharp knife (for cutting the eggs cleanly—a dull knife will smash them)
- Small skillet (for cooking the bacon)
- Paper towels (for draining the bacon grease)
- Small mixing bowl (for the filling)
- Fork or potato masher (for mashing the yolks)
- Spoon or piping bag (for filling the eggs—a zip-top bag with the corner snipped off works perfectly if you don’t have a piping bag)
Personal Experience: I’ve made these with everything from a fancy stainless steel saucepan to a beat-up old pot I found at a thrift store. They turn out the same every time. The one thing I’d splurge on is a good sharp knife—it makes cutting the eggs so much cleaner. And if you don’t have a piping bag, don’t worry. A small spoon works just fine, and honestly, rustic-looking deviled eggs have their own charm.
Preparation Method
Alright, let’s get cooking. I’ll walk you through this step by step, with all the little tricks I’ve picked up along the way.
- Boil the eggs. Place your 6 eggs in a single layer in a medium saucepan. Cover them with cold water by about an inch. Add 1 tablespoon of white vinegar to the water—this helps the whites set quickly if any egg cracks. Bring the water to a rolling boil over high heat. Once it’s boiling hard, cover the pot, turn off the heat, and let it sit for exactly 10 minutes. Set a timer—this is crucial for perfectly cooked yolks.
- Ice bath time. While the eggs are sitting, fill a bowl with ice and cold water. When the timer goes off, use a slotted spoon to transfer the eggs to the ice bath. Let them chill for at least 5 minutes. This stops the cooking process and makes peeling so much easier. I once skipped this step and spent 10 minutes fighting with a stubborn shell—never again.
- Cook the bacon. While the eggs are cooling, cook your 4 slices of bacon in a small skillet over medium heat. Let it get nice and crispy—about 6-8 minutes, flipping once. Transfer the bacon to a paper towel-lined plate to drain and cool. Once it’s cool enough to handle, crumble or chop it into small pieces. Set aside about a tablespoon for garnish.
- Peel the eggs. Gently tap each egg on the counter to crack the shell all over, then roll it between your hands to loosen the shell. Start peeling from the wider end—there’s usually an air pocket there that makes it easier. Rinse the peeled eggs under cold water to remove any tiny shell fragments. Pat them dry with a paper towel.
- Cut and separate. Using a sharp knife, slice each egg in half lengthwise. Gently pop out the yolks into a small mixing bowl. Arrange the egg white halves on a serving platter, cut-side up.
- Make the filling. Mash the yolks with a fork until they’re crumbly with no large chunks. Add 3 tablespoons mayonnaise, 1 teaspoon yellow mustard, 1/2 teaspoon white vinegar, 1/4 teaspoon salt, 1/8 teaspoon black pepper, and 1/4 teaspoon paprika. Mix until smooth and creamy. Fold in most of the crumbled bacon (save that tablespoon for topping) and about half the chopped chives. Taste and adjust seasoning—I usually add another pinch of salt here.
- Fill the eggs. Spoon the filling into the egg white halves. For a neater look, transfer the filling to a piping bag or a zip-top bag with a small corner snipped off and pipe it in. For a more rustic look, just use a small spoon. Either way, don’t be shy—pile that filling high.
- Garnish and serve. Sprinkle the reserved bacon and remaining chives over the filled eggs. Dust with a little extra paprika for color. Serve immediately or refrigerate until ready.
Sensory Cues: When you’re boiling the eggs, you should see the water come to a full, rolling boil—big bubbles breaking the surface. When you peel them, the whites should be firm but tender, and the yolks should be a bright, sunny yellow with no gray-green ring around the edge (that’s a sign of overcooking). The filling should be smooth enough to pipe but thick enough to hold its shape—think the consistency of thick frosting.
Cooking Tips & Techniques
After making these quick deviled eggs with crispy bacon and chives more times than I can count, I’ve learned a few things the hard way. Let me save you some trouble.
Perfect hard-boiled eggs every time: The biggest mistake people make is boiling the eggs for too long. That green ring around the yolk? That’s sulfur from overcooking. The 10-minute rest method I shared above never fails. If you’re at high altitude, add a minute or two to the rest time. If you want jammy yolks, cut the rest time to 7 minutes—just know they’ll be harder to mash into a smooth filling.
Peeling without the pain: Older eggs actually peel easier than fresh ones. If your eggs are super fresh, try adding a pinch of baking soda to the boiling water—it raises the pH and helps loosen the shells. Also, peeling under running cold water helps wash away tiny shell fragments. I learned this after spending way too long picking shell pieces out of a batch of eggs.
Bacon texture matters: Don’t undercook the bacon. You want it crispy enough to crumble, not chewy. Chewy bacon in deviled eggs creates this weird textural contrast that just doesn’t work. Cook it until it’s deep golden brown and shatters when you press on it. Let it cool completely before crumbling—hot bacon will melt into the filling and make it greasy.
Make-ahead strategy: Here’s a weeknight lifesaver—boil and peel the eggs up to 3 days in advance. Store them in an airtight container in the fridge. Cook and crumble the bacon up to 2 days ahead. Chop the chives the morning of. Then all you have to do on serving day is mix the filling and assemble. Takes about 5 minutes.
Filling consistency: If your filling seems too thick, add a tiny splash of pickle juice or vinegar to loosen it up. Too thin? Add a little more crumbled bacon or another egg yolk. The perfect filling should hold a peak when you lift the spoon but still be creamy and spreadable.
Variations & Adaptations
One of the best things about this recipe is how easy it is to switch up. Here are some variations I’ve tried and loved:
Spicy Southwest Version
Add 1 tablespoon of finely chopped pickled jalapeños to the filling and a pinch of cayenne pepper. Swap the bacon for crumbled chorizo if you’re feeling adventurous. Top with a tiny slice of fresh jalapeño. This one gets rave reviews at game day parties.
Herb Garden Twist
Replace the chives with a mix of fresh dill, parsley, and tarragon. Use Dijon mustard instead of yellow. The herbs make it feel lighter and more elegant—perfect for spring brunches or baby showers. I made this for a bridal shower last year and got asked for the recipe four times.
Smoked Salmon Variation
Skip the bacon and top each deviled egg with a small piece of smoked salmon and a tiny caper. Add a squeeze of lemon to the filling. This is my go-to for holiday parties—it feels fancy but takes almost no extra effort.
Dietary Adaptations: For a keto-friendly version, use full-fat mayonnaise and add an extra egg yolk to the filling—the healthy fats will keep you satisfied. For gluten-free, this recipe is naturally gluten-free as long as your bacon doesn’t have any added wheat-based flavorings (most don’t). For a lower-calorie option, use light mayonnaise and turkey bacon, and swap half the egg yolks for mashed avocado—it sounds weird but it actually works really well.
Serving & Storage Suggestions
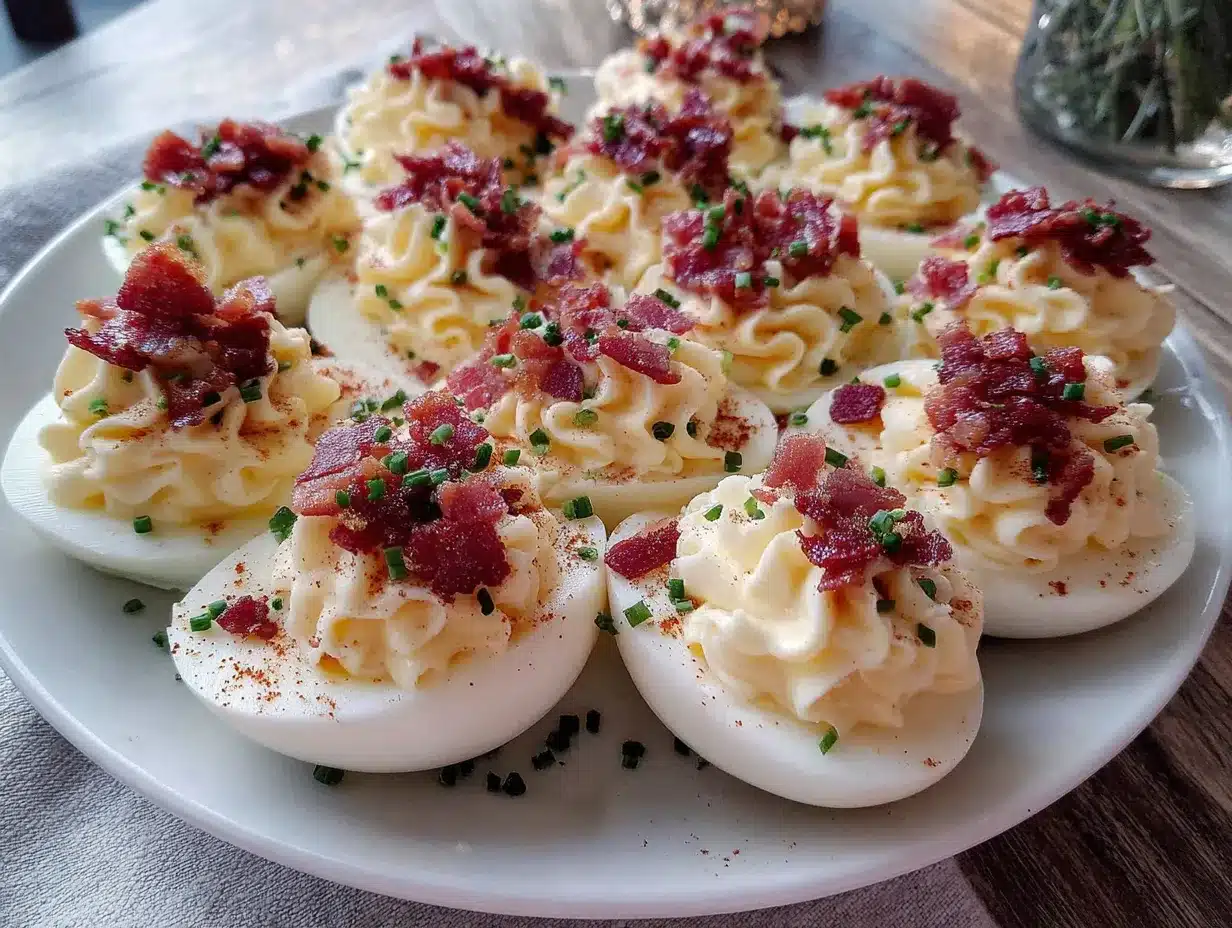
These quick deviled eggs with crispy bacon and chives are best served chilled or at room temperature. I usually arrange them on a white platter for maximum visual impact—the yellow filling, green chives, and brown bacon pop beautifully against white. A sprinkle of extra paprika right before serving adds that final touch of color.
What to serve with them: These pair beautifully with other finger foods like mini quiches, veggie sticks with ranch dip, or a simple cheese board. For a weeknight dinner, I’ve served them alongside a simple green salad and some crusty bread—it makes for a light, satisfying meal that comes together fast.
Storage Instructions: Store any leftover deviled eggs in an airtight container in the refrigerator for up to 2 days. The texture changes a bit after 24 hours—the whites get slightly firmer and the filling can absorb some moisture from the bacon—but they’re still delicious. I don’t recommend freezing them; the texture just isn’t the same after thawing.
Reheating: You don’t need to reheat these—they’re meant to be served cold. But if you’ve stored them and the bacon has lost its crunch, you can sprinkle a little freshly crumbled bacon on top before serving. I keep extra crumbled bacon in a small baggie in the fridge just for this purpose.
Flavor Development: Honestly, these are even better after sitting in the fridge for an hour or two. The flavors meld together, and the filling gets even creamier. If you’re making them for a party, assemble them a few hours ahead and keep them chilled—your guests will thank you.
Nutritional Information & Benefits
Here’s the approximate nutritional breakdown for one deviled egg half (based on 12 halves total from 6 eggs):
| Nutrient | Amount per Serving |
|---|---|
| Calories | 85 |
| Protein | 5g |
| Fat | 7g |
| Saturated Fat | 2g |
| Carbohydrates | 1g |
| Fiber | 0g |
| Sugar | 0g |
| Sodium | 180mg |
Health Benefits: Eggs are a fantastic source of high-quality protein and contain important nutrients like choline, which supports brain health. The yolks are rich in vitamin D and B vitamins. Bacon, while higher in fat and sodium, adds a satisfying crunch that can help you feel full and satisfied with just one or two eggs instead of mindlessly snacking on less nutritious options. Chives provide a small amount of vitamin K and antioxidants.
Dietary Considerations: This recipe is naturally gluten-free and low-carb. For a lower-sodium version, use reduced-sodium bacon and skip the added salt in the filling. For a heart-healthier option, use avocado oil mayonnaise and center-cut bacon. And if you’re watching your cholesterol, you can use two whole eggs plus four egg whites—just know the filling won’t be as rich.
Conclusion
So there you have it—quick deviled eggs with crispy bacon and chives that actually live up to the hype. They’re fast enough for a busy weeknight, fancy enough for a party, and delicious enough to convert even the biggest deviled egg skeptics (yes, Mark, I’m looking at you).
What I love most about this recipe is how it proves that simple ingredients, treated with a little care, can create something truly special. You don’t need complicated techniques or hard-to-find ingredients. Just good eggs, good bacon, fresh chives, and a little bit of love.
I’d love to hear how these turn out for you. Did you try one of the variations? Did you come up with your own twist? Drop a comment below and let me know—I read every single one, and your ideas might just inspire my next batch. And if you loved these as much as I do, share this recipe with a friend who needs a quick, impressive appetizer in their back pocket.
Happy cooking, friends. Go make something delicious.
Frequently Asked Questions
Can I make these deviled eggs a day ahead?
Absolutely! You can prepare the eggs and filling separately up to 24 hours in advance. Store the peeled egg whites and filling in separate airtight containers in the fridge. Assemble them about an hour before serving, then add the bacon and chives right before you serve to keep everything crunchy and fresh.
How do I keep the bacon crispy on deviled eggs?
The key is to add the bacon right before serving. If you’re making these ahead, store the crumbled bacon separately in a small bag or container at room temperature (not in the fridge, where moisture will soften it). Sprinkle it on just before you bring the platter to the table.
Why did my deviled egg filling turn out runny?
Runny filling usually means one of two things: too much mayonnaise, or the yolks weren’t fully drained of water after boiling. Make sure you pat the peeled eggs dry before cutting them. And start with 3 tablespoons of mayo—you can always add more, but you can’t take it out.
Can I use an air fryer for the bacon instead of a skillet?
Yes, and honestly, it’s my preferred method now. Cook the bacon in an air fryer at 375°F for about 8 minutes, flipping halfway through. It comes out perfectly crispy and flat, which makes it easier to crumble evenly. Plus, less mess on the stovetop.
How long do deviled eggs last at a party?
Deviled eggs should not sit out at room temperature for more than 2 hours. If you’re serving them at a party, set the platter on a bed of ice to keep them chilled, or put out small batches and replenish from the fridge as needed. When in doubt, throw them out—food safety first!
Pin This Recipe!

Quick Deviled Eggs with Crispy Bacon & Chives

These quick deviled eggs with crispy bacon and chives are creamy, tangy, and topped with salty bacon crunch. Perfect for parties, potlucks, or a fast weeknight appetizer, they come together in about 20 minutes and convert even the biggest skeptics.
- Prep Time: 10 minutes
- Cook Time: 10 minutes
- Total Time: 20 minutes
- Yield: 12 deviled egg halves (6 servings of 2 halves each) 1x
- Category: Appetizer
- Cuisine: American
Ingredients
- 6 large eggs
- Water (enough to cover eggs by 1 inch)
- 1 tablespoon white vinegar (for boiling water)
- 3 tablespoons mayonnaise
- 1 teaspoon yellow mustard
- 1/2 teaspoon white vinegar (for filling)
- 1/4 teaspoon salt
- 1/8 teaspoon black pepper
- 1/4 teaspoon paprika (plus more for garnish)
- 4 slices bacon (thick-cut)
- 2 tablespoons fresh chives (finely chopped)
Instructions
- Place 6 eggs in a single layer in a medium saucepan. Cover with cold water by 1 inch. Add 1 tablespoon white vinegar. Bring to a rolling boil over high heat. Cover, turn off heat, and let sit for exactly 10 minutes.
- While eggs sit, fill a bowl with ice and cold water. Transfer eggs to ice bath using a slotted spoon. Chill for at least 5 minutes.
- Cook 4 slices bacon in a small skillet over medium heat until crispy, about 6-8 minutes, flipping once. Transfer to paper towels to drain and cool. Crumble or chop into small pieces. Reserve 1 tablespoon for garnish.
- Gently tap each egg to crack shell all over, roll between hands, and peel starting from the wider end. Rinse under cold water and pat dry.
- Slice each egg in half lengthwise. Pop yolks into a small mixing bowl. Arrange egg white halves on a serving platter, cut-side up.
- Mash yolks with a fork until crumbly. Add 3 tablespoons mayonnaise, 1 teaspoon yellow mustard, 1/2 teaspoon white vinegar, 1/4 teaspoon salt, 1/8 teaspoon black pepper, and 1/4 teaspoon paprika. Mix until smooth and creamy. Fold in most of the crumbled bacon (reserve 1 tablespoon) and half the chopped chives. Taste and adjust seasoning.
- Spoon or pipe filling into egg white halves. For a neat look, use a piping bag or zip-top bag with corner snipped off. For rustic, use a small spoon.
- Sprinkle reserved bacon, remaining chives, and extra paprika over filled eggs. Serve immediately or refrigerate until ready.
Notes
For perfect hard-boiled eggs, use the 10-minute rest method. Older eggs peel easier. For make-ahead, boil and peel eggs up to 3 days in advance; cook bacon up to 2 days ahead. Add bacon and chives just before serving to keep them crunchy. If filling is too thick, add a splash of pickle juice or vinegar. If too thin, add more crumbled bacon or another egg yolk.
Nutrition
- Serving Size: 2 deviled egg halves
- Calories: 170
- Sodium: 360
- Fat: 14
- Saturated Fat: 4
- Carbohydrates: 2
- Protein: 10
Keywords: deviled eggs, bacon, chives, quick appetizer, party food, easy deviled eggs, bacon deviled eggs


