It was 11:47 PM on a random Tuesday in October, and I had a desperate, almost embarrassing craving for something that felt like a celebration. You know that feeling? When the day was long and gray, and you just need a tiny, edible victory lap before bed? I wanted cheesecake. Rich, creamy, decadent cheesecake. But I also wanted it to look spooky, because let’s face it, October has a way of making everything better with a little drama. I didn’t have the patience for a full water bath or a springform pan that always seems to leak, but I had a box of black cocoa powder I’d bought on a whim and a block of cream cheese that was staring at me from the fridge. The idea just arrived, fully formed, like a little culinary ghost: black velvet cheesecake bars with a spiderweb on top. Honestly, I wasn’t sure if I was a genius or just overtired. But at that hour, the usual rules of baking seemed to loosen, and I just went for it. This recipe, born from a late-night whim and a pantry full of Halloween spirit, has become my go-to for quick, impressive desserts that taste like you spent hours on them. Maybe you’ve been there, staring into the fridge at 11 PM, looking for a little magic. Well, this is it.
Why You’ll Love This Recipe
Let me tell you, these bars aren’t just another pretty face on the dessert table. They’ve been tested on tired weeknights, chaotic Halloween parties, and even a quiet Sunday afternoon when I needed a pick-me-up. They deliver every single time. Here’s why they’ve earned a permanent spot in my recipe rotation:
- Quick & Easy: From start to finish, you’re looking at about 45 minutes of active time. No water baths, no complicated techniques. Just mix, press, bake, and swirl. Perfect for when you need dessert, like, yesterday.
- Simple Ingredients: You probably have most of this in your kitchen right now. The only “special” ingredient is black cocoa powder, which is easy to find online or in well-stocked grocery stores, and it makes all the difference.
- Perfect for Halloween & Beyond: Obviously, the spiderweb design is a showstopper for Halloween parties. But honestly? The rich, Oreo-like flavor of the black velvet crust and the creamy tang of the cheesecake are fantastic any time of year. I’ve made it for Thanksgiving, too!
- Crowd-Pleaser: I’ve yet to meet someone who doesn’t love these. Kids go wild for the design, and adults appreciate the sophisticated, not-too-sweet flavor. They disappear fast.
- Unbelievably Delicious: The texture is the real star here. You get a fudgy, almost brownie-like black velvet base, a silky smooth cheesecake layer, and then that fun, gooey sour cream spiderweb on top. It’s a party in your mouth, and everyone’s invited.
What makes this recipe different is the technique. Instead of a separate crust, we’re making a simple black velvet cake batter that bakes up into a dense, fudgy base. The cheesecake layer is poured right on top, and they bake together. No fuss, no extra dishes, and the flavor combo is next-level. It’s comfort food reimagined—faster, easier, but with the same soul-soothing satisfaction. Perfect for impressing guests without stress, or turning a simple Tuesday night into something memorable.
What Ingredients You Will Need
This recipe uses simple, mostly pantry-staple ingredients to create a dessert that looks and tastes like it came from a fancy bakery. The star of the show is the black cocoa powder, which gives the base that deep, dark color and a flavor reminiscent of Oreos. Let’s break down what you’ll need.
For the Black Velvet Base:
- All-purpose flour: 1 cup (120g). The structure of our fudgy base.
- Granulated sugar: 1 cup (200g). Adds sweetness and helps create that tender crumb.
- Black cocoa powder: 1/2 cup (40g). This is the key! It’s different from regular cocoa—much darker and less acidic. I prefer the brand King Arthur Flour for its smooth, rich flavor.
- Baking soda: 1/2 teaspoon. Just a little to help it rise slightly.
- Salt: 1/4 teaspoon. Balances the sweetness and enhances the chocolate flavor.
- Buttermilk: 1/2 cup (120ml). Adds moisture and a subtle tang that complements the cheesecake. (If you don’t have buttermilk, you can make a quick substitute by adding 1/2 tablespoon of lemon juice or white vinegar to 1/2 cup of regular milk and letting it sit for 5 minutes).
- Vegetable oil: 1/4 cup (60ml). Keeps the base incredibly moist. Use a neutral oil like canola or grapeseed.
- Large egg: 1. Helps bind everything together.
- Vanilla extract: 1 teaspoon. For that warm, familiar flavor.
- Hot water: 1/4 cup (60ml). This helps bloom the cocoa powder, making the flavor deeper and richer. It’s a secret trick!
For the Cheesecake Layer:
- Cream cheese: 16 oz (two 8-oz blocks), softened to room temperature. This is non-negotiable for a smooth, lump-free filling. Set it out on the counter for at least an hour before you start.
- Granulated sugar: 1/2 cup (100g). Sweetens the tangy cream cheese.
- Large eggs: 2, at room temperature. Adding them one at a time ensures a silky texture.
- Vanilla extract: 1 teaspoon.
- Sour cream: 1/4 cup (60g). Adds a wonderful tang and makes the cheesecake extra creamy.
For the Spiderweb Topping:
- Sour cream: 1/2 cup (120g). This is the base of our web.
- Powdered sugar: 2 tablespoons (15g). Just a touch to sweeten the sour cream without making it runny.
- Black cocoa powder or dark chocolate sauce: 1 tablespoon. For creating the dark web lines. I like to use a little leftover black cocoa powder mixed with a teaspoon of milk to make a paste, but a good store-bought chocolate sauce works perfectly too.
Equipment Needed
You don’t need a professional pastry kitchen for this one. Here’s what you’ll need to pull these bars off without a hitch.
- 9×13-inch baking pan: This is the perfect size for these bars. If you only have an 8×8 pan, you can use it, but you’ll need to increase the baking time by 10-15 minutes and your bars will be much thicker.
- Electric mixer (hand or stand): A hand mixer is perfect for this. It makes creaming the cream cheese effortless. A whisk and some serious elbow grease will also work, but be prepared for a workout.
- Mixing bowls: You’ll need a couple of medium-sized bowls for the dry ingredients and the wet ingredients for the base, plus a larger bowl for the cheesecake filling.
- Parchment paper: This is your best friend. Lining the pan with parchment paper with an overhang on two sides makes lifting the bars out a dream. No scraping, no broken edges.
- Spatula or wooden spoon: For mixing the base. A silicone spatula is great for scraping every last bit of batter.
- Toothpick or skewer: This is your spiderweb-drawing tool! A thin, pointed object is key for creating the delicate web lines.
- Measuring cups and spoons: Accuracy is important in baking, so have these handy.
I’ve used both a cheap hand mixer and my fancy stand mixer for this recipe, and honestly, the hand mixer works just as well and is easier to clean. Don’t overthink the equipment—just use what you have.
Preparation Method
Alright, let’s get baking! This might look like a lot of steps, but I promise, it’s all straightforward. I’ve broken it down so it feels manageable, even on a busy weeknight.
- Preheat and Prep (5 minutes): First things first, preheat your oven to 350°F (175°C). While it’s heating up, line your 9×13-inch baking pan with parchment paper. Leave a couple of inches of overhang on the long sides—this will be your “handle” to lift the bars out later. Give the parchment a light spray of non-stick cooking spray, just to be safe.
- Make the Black Velvet Base (10 minutes): In a medium bowl, whisk together the flour, granulated sugar, black cocoa powder, baking soda, and salt. Make sure there are no lumps of cocoa—that’s the most important part. In a separate small bowl or measuring cup, whisk together the buttermilk, vegetable oil, egg, and vanilla extract. Pour the wet ingredients into the dry ingredients and stir with a spatula until just combined. It will look a little thick, that’s okay. Now, pour in the hot water and stir until the batter is smooth and glossy. It will be thin—almost like a lava cake batter. This is perfect. Pour the batter into your prepared pan and spread it evenly.
- Bake the Base (12-15 minutes): Pop the pan into the preheated oven and bake the base for 12 to 15 minutes. You’re not looking for a fully baked cake here. You want it to be just set around the edges and still a little wobbly in the center. A toothpick inserted into the center should come out with a few moist crumbs attached. The base will finish baking with the cheesecake layer. While it’s baking, you can start on the cheesecake filling. This is a great time-saver!
- Make the Cheesecake Filling (10 minutes): In a large bowl, beat the softened cream cheese with an electric mixer on medium speed until it’s smooth and creamy. This takes about 1-2 minutes. You don’t want any lumps. Add the 1/2 cup of granulated sugar and beat until well combined. Scrape down the sides of the bowl with a spatula. Add the eggs, one at a time, beating on low speed after each addition until just combined. Over-mixing will incorporate too much air, which can cause cracks. Finally, beat in the vanilla extract and the 1/4 cup of sour cream until the mixture is smooth and silky.
- Assemble the Layers (5 minutes): Once the base is out of the oven, let it cool on a wire rack for just 5 minutes. It doesn’t need to be fully cool. Carefully pour the cheesecake filling over the warm black velvet base. Use your spatula to gently spread it into an even layer, making sure it reaches all the corners. The warmth of the base will help the cheesecake layer settle.
- Bake the Cheesecake (30-35 minutes): Place the pan back in the oven and bake for 30 to 35 minutes. The cheesecake is done when the edges are set and the center still has a slight jiggle to it, like firm Jell-O. Don’t over-bake it, or it will be dry and crack. Turn off the oven, crack the oven door open, and let the cheesecake sit in the cooling oven for 1 hour. This gentle cooling helps prevent cracks. Then, remove it from the oven and let it cool completely on a wire rack at room temperature.
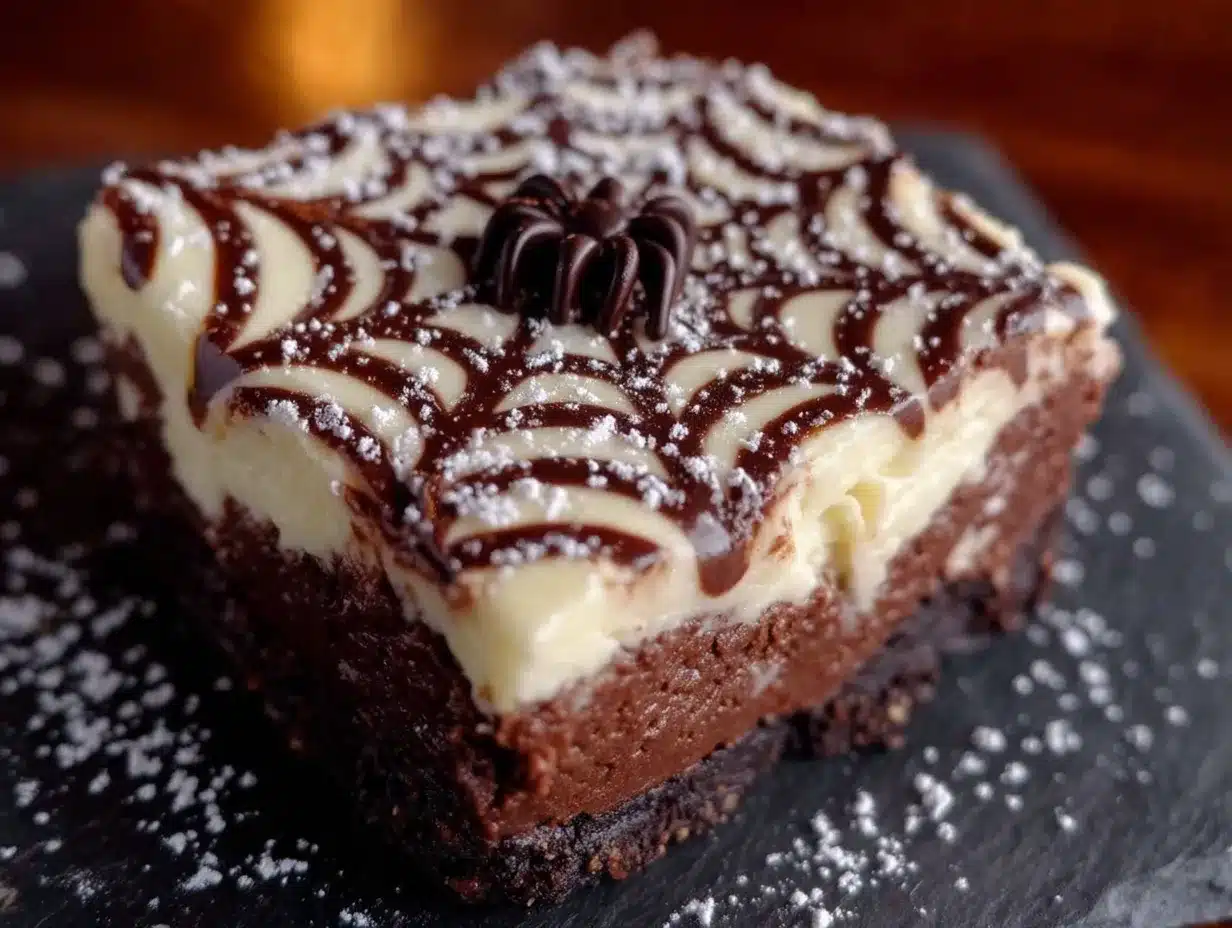
- Make the Spiderweb (10 minutes + chilling time): Once the cheesecake is completely cool (you can speed this up by popping it in the fridge for an hour), it’s time for the fun part! In a small bowl, mix together the 1/2 cup of sour cream and the powdered sugar until smooth. In another tiny bowl, mix the black cocoa powder with about 1-2 teaspoons of milk to make a thick, smooth paste. Or, just use your chocolate sauce. Spoon the sweetened sour cream into a small piping bag or a zip-top bag with a tiny corner snipped off. Pipe a few concentric circles on top of the cheesecake, starting from the center and working your way out. You only need 4-5 circles. Then, dip a toothpick or skewer into the black cocoa paste or chocolate sauce. Starting from the center of the cheesecake, drag the toothpick through the sour cream circles, straight out to the edge. Wipe the toothpick clean, dip it in the black paste again, and repeat from the center to the edge, working your way around the cheesecake. You’ll see the beautiful spiderweb pattern emerge! It’s magic.
- Chill and Serve (at least 4 hours): Place the pan in the refrigerator and chill for at least 4 hours, but preferably overnight. This is the hardest part—the waiting! Chilling allows the cheesecake to set completely, making it easy to cut into clean bars. Once fully chilled, use the parchment paper overhang to lift the entire block out of the pan. Place it on a cutting board and use a sharp, thin-bladed knife to cut into bars. For clean cuts, wipe the knife clean between each slice.
Cooking Tips & Techniques
I’ve made these bars more times than I can count, and I’ve learned a few things the hard way so you don’t have to. Here are my best tips for perfect spiderweb cheesecake bars.
- Room Temperature Ingredients are Everything: I cannot stress this enough. Cold cream cheese will give you a lumpy filling. Cold eggs will seize up the batter. Take the cream cheese and eggs out of the fridge at least an hour before you start. Trust me, this one step is the difference between a silky, professional cheesecake and a bumpy, frustrating one.
- Don’t Overmix the Cheesecake: Once you add the eggs, mix on low speed and only until each one is incorporated. Over-mixing beats too much air into the batter, which can cause the cheesecake to puff up in the oven and then collapse and crack as it cools. We want it dense and creamy, not airy.
- The “Jiggle Test” is Your Friend: The number one mistake people make with cheesecake is over-baking it. It should not be completely firm in the center when you take it out of the oven. A gentle, uniform jiggle across the whole surface when you shake the pan is exactly what you’re looking for. It will continue to set as it cools.
- Patience with the Chill: I know, I know. You want to eat it now. But cutting into a warm or even room-temperature cheesecake is a recipe for a gooey, messy disaster. The 4-hour (or overnight) chill is non-negotiable for getting those clean, beautiful bars. I once tried to rush it after 2 hours, and it was a delicious but structurally unsound mess.
- Clean Cuts Every Time: For those picture-perfect bars, use a long, sharp knife. Run it under hot water, dry it off with a towel, and then make your cut. Wipe the blade clean and reheat it between each slice. This gives you those gorgeous, smooth edges.
Variations & Adaptations
One of the best things about this recipe is how flexible it is. You can tweak it to fit any occasion or dietary need. Here are a few of my favorite variations I’ve tried over the years.
- Gluten-Free Black Velvet Base: I’ve made this for a friend with celiac disease, and it works beautifully. Simply substitute the all-purpose flour with a high-quality 1-to-1 gluten-free baking flour blend (like Bob’s Red Mill or King Arthur Flour). The texture will be slightly more tender, but the flavor is still incredible. No other adjustments needed!
- Peppermint Bark Version: This is a holiday favorite in my house. After the cheesecake has chilled and before cutting, melt about 1/2 cup of white chocolate chips with a teaspoon of coconut oil. Drizzle it over the top of the spiderweb and sprinkle with crushed candy canes or peppermint candies. It adds a festive crunch and a cool, minty flavor that pairs perfectly with the dark chocolate base.
- Pumpkin Spice Spiderweb: For a fall twist, swap out the sour cream in the cheesecake layer for 1/2 cup of pumpkin puree and add 1 teaspoon of pumpkin pie spice. The spiderweb on top can be made with a simple cream cheese glaze instead of sour cream for a richer flavor. It tastes like autumn in a bar.
- Dairy-Free Adaptation: You can make a decent dairy-free version of this! Use a dairy-free cream cheese (like Kite Hill or Tofutti), a dairy-free sour cream (like Forager Project), and a neutral oil instead of butter. For the buttermilk in the base, use a dairy-free milk (like oat or soy) mixed with a teaspoon of lemon juice. The texture will be slightly different, but the flavor is still spot-on.
Serving & Storage Suggestions
These bars are incredibly versatile when it comes to serving. Here’s how to make them look and taste their best, plus how to keep them fresh.
Serving: These bars are best served cold, straight from the fridge. The clean, cold cut is part of their charm. For a little extra drama, I love to serve them on a black or dark-colored plate to make the spiderweb really pop. A dollop of freshly whipped cream on the side is never a bad idea, and a few fresh raspberries or blackberries add a beautiful pop of color and a tart contrast to the rich, sweet bars. They’re perfect on their own, but they also pair wonderfully with a cup of hot coffee, a glass of cold milk, or even a dessert wine like a late-harvest Riesling.
Storage: Store any leftover bars in an airtight container in the refrigerator. They will stay fresh and delicious for up to 5 days. In fact, I think they taste even better on day two, after the flavors have had a chance to meld together. The texture remains perfectly creamy.
Freezing: These bars freeze like a dream! Once the cheesecake is fully chilled and cut into bars, place them on a baking sheet lined with parchment paper and freeze for about an hour, or until they are solid. Then, transfer the frozen bars to a freezer-safe bag or container, placing a piece of parchment paper between layers to prevent them from sticking. They will keep in the freezer for up to 3 months. To thaw, simply transfer a bar to the refrigerator overnight, or let it sit at room temperature for about 30 minutes. The texture will be just as good as the day you made them.
Nutritional Information & Benefits
Let’s be real—these are a treat! But that doesn’t mean we can’t appreciate what’s in them. Here’s a rough nutritional breakdown for one bar (based on 24 bars), and a look at some of the ingredients’ benefits.
Estimated Nutritional Values (per bar):
- Calories: 245
- Fat: 15g
- Carbohydrates: 24g
- Protein: 5g
- Sugar: 18g
Ingredient Benefits:
- Black Cocoa Powder: Unlike milk chocolate, black cocoa is rich in antioxidants called flavonoids, which can help support heart health. It also has a much lower sugar content than a typical chocolate bar.
- Cream Cheese & Sour Cream: These dairy products are excellent sources of calcium and protein, which are essential for strong bones and muscle function. They also add a satisfying richness that helps you feel full with a smaller portion.
- Eggs: A fantastic source of high-quality protein and choline, a nutrient important for brain health.
Dietary Considerations: This recipe is not gluten-free as written, but can easily be adapted (see Variations). It contains dairy, eggs, and wheat (gluten). For a lower-sugar option, you can reduce the sugar in the base by 1/4 cup and use a sugar substitute in the cheesecake layer, though the texture may be slightly different.
I personally love that this dessert feels indulgent but isn’t overly sweet. The black cocoa provides a deep, complex flavor that satisfies that chocolate craving with just one bar.
Conclusion
So there you have it—my late-night, slightly unhinged, completely delicious recipe for Quick Black Velvet Spiderweb Cheesecake Bars. Honestly, this recipe is proof that you don’t need a ton of time or fancy skills to make something that looks and tastes spectacular. It’s forgiving, it’s fun, and it always, always impresses. Whether you’re making it for a Halloween party, a holiday gathering, or just because it’s Tuesday and you deserve a little magic, I hope you give it a try.
I’d love to hear how yours turn out! Did you try a fun variation? Did your spiderweb come out perfectly on the first try (or did you have to laugh and start over like I sometimes do)? Drop a comment below and let me know. And if you share a photo on Pinterest or Instagram, tag me—I want to see your beautiful creations! Happy baking, friends!
Frequently Asked Questions
Can I use regular cocoa powder instead of black cocoa?
You can, but the flavor and color will be different. Regular cocoa powder will result in a lighter, more traditional chocolate cake base, not the dark, Oreo-like flavor of black cocoa. If you can’t find black cocoa, you can use a mix of 1/4 cup regular cocoa and 1/4 cup dark cocoa for a similar effect.
My spiderweb design turned into a mess. What did I do wrong?
Don’t worry, it happens! The most common mistake is using too much liquid for the black “web” lines. Make sure your black cocoa paste or chocolate sauce is thick, not runny. Also, drag your toothpick gently and confidently from the center out—don’t wiggle it or go back and forth. Practice makes perfect!
Can I make these cheesecake bars in a different sized pan?
Yes, but you’ll need to adjust the baking time. If you use a 9×9-inch pan, your bars will be thicker and will need to bake for about 10-15 minutes longer for both the base and the cheesecake layer. Keep an eye on them and use the jiggle test to know when they’re done.
How do I know when the cheesecake layer is perfectly baked?
The best way is the jiggle test. The edges should be set and look firm, but the center (about a 2-inch circle) should still jiggle slightly when you gently shake the pan. It will look a little underdone, but that’s exactly what you want. It will set completely as it cools in the oven and then in the fridge.
Can I skip the spiderweb topping?
Absolutely! If you’re short on time or just want a simpler bar, you can skip the spiderweb entirely. The black velvet cheesecake bars are still incredibly delicious on their own. You could also dust the top with a little powdered sugar or some black and orange sprinkles for a festive touch without the extra step.
Pin This Recipe!
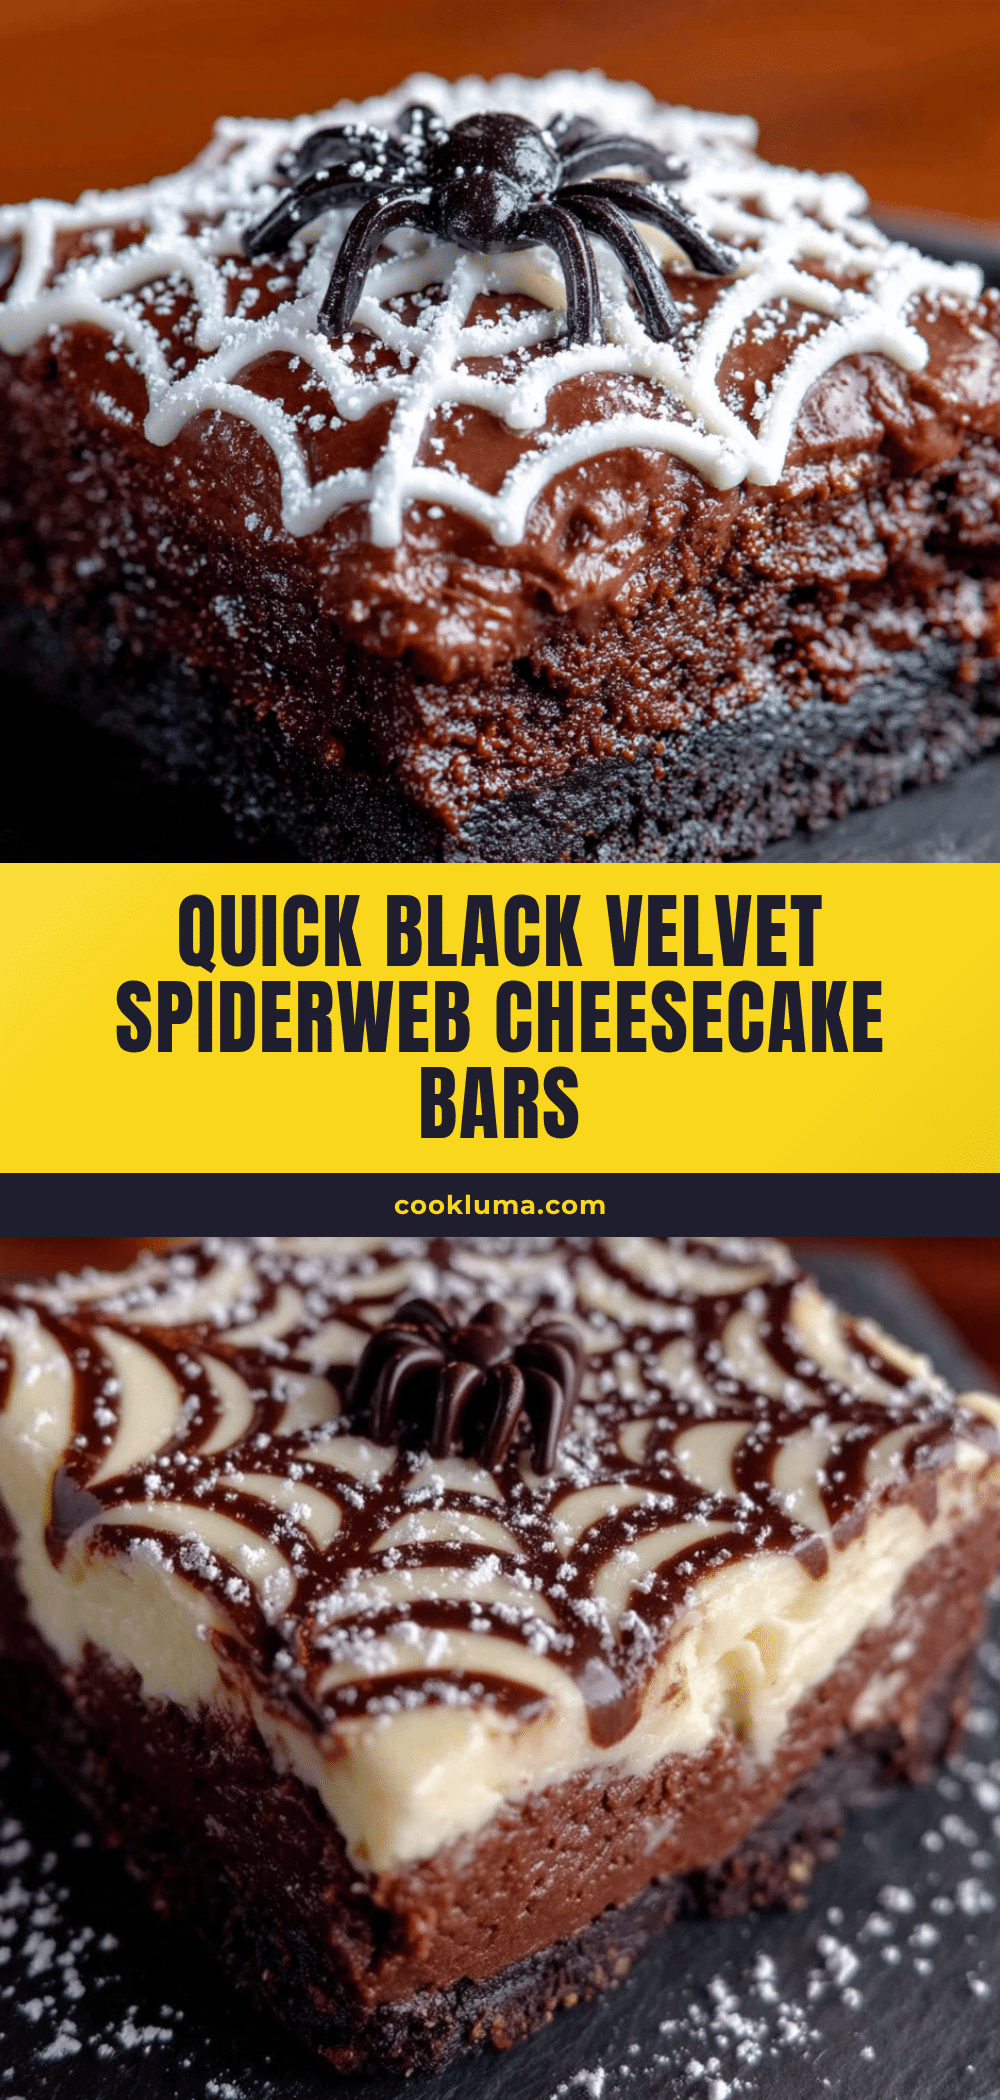
Quick Black Velvet Spiderweb Cheesecake Bars: Best Easy Recipe
Rich, creamy black velvet cheesecake bars with a fudgy base and a fun spiderweb topping. This quick and easy recipe is perfect for Halloween or any time you need a dramatic, delicious dessert without the fuss.
- Prep Time: 15 minutes
- Cook Time: 45 minutes
- Total Time: 5 hours (including chilling)
- Yield: 24 bars 1x
- Category: Dessert
- Cuisine: American
Ingredients
- 1 cup (120g) all-purpose flour
- 1 cup (200g) granulated sugar
- 1/2 cup (40g) black cocoa powder
- 1/2 teaspoon baking soda
- 1/4 teaspoon salt
- 1/2 cup (120ml) buttermilk
- 1/4 cup (60ml) vegetable oil
- 1 large egg
- 1 teaspoon vanilla extract
- 1/4 cup (60ml) hot water
- 16 oz (two 8-oz blocks) cream cheese, softened
- 1/2 cup (100g) granulated sugar
- 2 large eggs, at room temperature
- 1 teaspoon vanilla extract
- 1/4 cup (60g) sour cream
- 1/2 cup (120g) sour cream
- 2 tablespoons (15g) powdered sugar
- 1 tablespoon black cocoa powder or dark chocolate sauce
Instructions
- Preheat oven to 350°F (175°C). Line a 9×13-inch baking pan with parchment paper, leaving overhang on the long sides. Lightly spray with non-stick cooking spray.
- In a medium bowl, whisk together flour, 1 cup granulated sugar, black cocoa powder, baking soda, and salt. In a separate bowl, whisk together buttermilk, vegetable oil, egg, and 1 teaspoon vanilla extract. Pour wet ingredients into dry and stir until just combined. Stir in hot water until batter is smooth and glossy. Pour into prepared pan and spread evenly.
- Bake the base for 12-15 minutes, until edges are set and center is still slightly wobbly. A toothpick inserted in center should come out with moist crumbs. Let cool on a wire rack for 5 minutes.
- In a large bowl, beat softened cream cheese with an electric mixer on medium speed until smooth. Add 1/2 cup granulated sugar and beat until combined. Add eggs one at a time, beating on low after each addition. Beat in 1 teaspoon vanilla extract and 1/4 cup sour cream until smooth.
- Pour cheesecake filling over warm base and spread evenly. Bake for 30-35 minutes, until edges are set and center jiggles slightly. Turn off oven, crack door, and let cheesecake cool in oven for 1 hour. Then remove and cool completely on a wire rack.
- In a small bowl, mix 1/2 cup sour cream and powdered sugar until smooth. In another bowl, mix black cocoa powder with 1-2 teaspoons milk to form a thick paste (or use chocolate sauce). Spoon sweetened sour cream into a piping bag or zip-top bag with a tiny corner snipped off. Pipe 4-5 concentric circles on top of cooled cheesecake. Dip a toothpick into black cocoa paste and drag from center outward through the circles to create a spiderweb pattern. Repeat around the cheesecake.
- Chill in refrigerator for at least 4 hours, preferably overnight. Use parchment overhang to lift cheesecake out of pan. Cut into bars with a sharp knife, wiping blade clean between cuts.
Notes
Room temperature ingredients are crucial for a smooth cheesecake. Do not overmix the cheesecake filling. Use the jiggle test to avoid overbaking. Chill for at least 4 hours for clean cuts. For gluten-free, use a 1-to-1 gluten-free flour blend.
Nutrition
- Serving Size: 1 bar
- Calories: 245
- Sugar: 18
- Sodium: 180
- Fat: 15
- Saturated Fat: 8
- Carbohydrates: 24
- Fiber: 1
- Protein: 5
Keywords: black velvet, spiderweb, cheesecake bars, Halloween dessert, easy cheesecake, black cocoa, quick dessert


