There used to be a little diner on Route 9, just past the old feed store, that made chicken and dumplings that tasted like a hug in a bowl. When they closed abruptly three years ago—a “For Lease” sign taped in the window one Tuesday morning—I won’t lie, I felt a little pang of grief. That rich, velvety broth and those impossibly fluffy dumplings haunted me. After twelve tries—some were soupy disasters, one was so salty I actually laughed out loud—I finally got it. This one-pot chicken and dumplings with buttermilk biscuits is the exact recreation of that diner magic, and honestly, my family thinks I’m a kitchen wizard now. Maybe you’ve had that feeling, chasing a taste from a place that’s gone. Let me tell you, this recipe brings it back.
I remember the first time I served this to my crew. My youngest, who usually picks at anything green, asked for seconds before I even sat down. The steam was still curling off the bowl, and the biscuits had puffed up like little clouds on top. It was one of those rare, quiet moments where everyone just ate, happy and full. That’s the kind of meal this is—no fuss, no fancy ingredients, just pure, uncomplicated comfort. And the best part? It all comes together in one pot, so you’re not scrubbing a mountain of dishes afterward. That alone is a win in my book.
This isn’t just a recipe; it’s a solution for those nights when you need something hearty, fast, and guaranteed to please. It’s the kind of dinner that makes you look forward to leftovers. So, grab your biggest pot, and let’s bring that diner feeling back to your kitchen.
Why You’ll Love This Recipe
I’ve tested this one-pot chicken and dumplings more times than I care to count, and each batch taught me something new. It’s not just another recipe—it’s the one I turn to when I need a sure thing. Here’s why it’s become a staple in my home and why I think you’ll feel the same way.
- Quick & Easy : From pot to table in under 45 minutes. This is a lifesaver on hectic weeknights when you’re short on time but still want a home-cooked meal.
- Simple Ingredients : Everything is a pantry staple. No trips to a specialty store for obscure spices or hard-to-find cuts of meat. You probably have most of this already.
- Perfect for Family Dinners : This dish is a crowd-pleaser, plain and simple. It’s hearty enough for hungry teenagers and gentle enough for little ones. Plus, it reheats beautifully for lunch the next day.
- Crowd-Pleaser : I’ve served this at potlucks and casual get-togethers, and the pot always comes back empty. It’s the kind of recipe that gets passed around on index cards.
- Unbelievably Delicious : The secret is in the broth—rich, creamy, and deeply savory from the chicken and aromatics. And those dumplings? They’re light, fluffy, and soak up all that goodness without getting soggy.
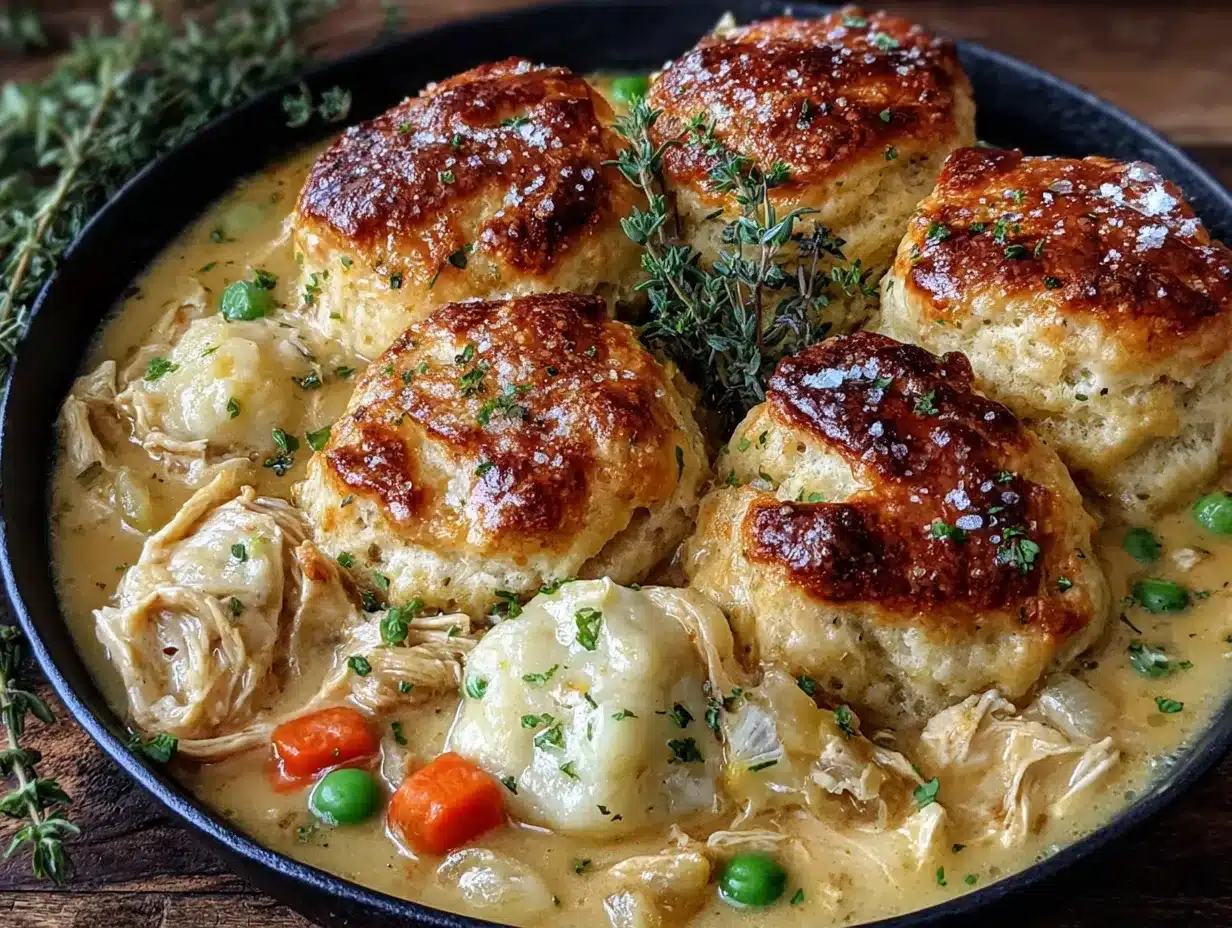
What makes this recipe different from all the others is the technique. Instead of using a separate biscuit mix or canned dough, I make a simple drop biscuit batter with buttermilk. It creates a dumpling that’s tender on the inside with a slightly crisp top after a quick broil. It’s the little detail that makes this version feel special without any extra work. This isn’t just a meal; it’s the one that makes everyone close their eyes after the first bite. It’s comfort food, reimagined for a busy family, and it works every single time.
What Ingredients You Will Need
This recipe uses simple, wholesome ingredients to deliver bold flavor and satisfying texture without the fuss. Most of these are pantry staples, making it easy to whip up on a whim. Let’s break down what you’ll need and why each one matters.
- For the Chicken & Broth:
- 1 ½ pounds boneless, skinless chicken thighs (about 4-5 thighs) – Thighs stay juicier than breasts during simmering. You can use breasts, but reduce the cooking time slightly to prevent dryness.
- 2 tablespoons unsalted butter – Adds richness to the base. I prefer Kerrygold for its flavor, but any good butter works.
- 1 medium yellow onion, diced (about 1 cup) – The aromatic foundation. Don’t skip it—it adds sweetness and depth.
- 2 medium carrots, peeled and diced (about 1 cup) – For a touch of natural sweetness and color.
- 2 celery stalks, diced (about ½ cup) – Adds a subtle earthiness. If you don’t have celery, a pinch of celery seed works in a pinch.
- 3 cloves garlic, minced – Fresh is best, but 1 teaspoon of garlic powder can substitute in a hurry.
- 1/3 cup all-purpose flour – This thickens the broth. For a gluten-free option, use a 1:1 gluten-free flour blend.
- 4 cups low-sodium chicken broth – Controls the salt level. I use Swanson’s, but any brand you trust is fine.
- 1 cup whole milk – For a creamier broth. 2% milk works, but whole milk gives the best texture.
- 1 teaspoon dried thyme – A classic pairing with chicken. Fresh thyme is lovely; use 1 tablespoon if you have it.
- ½ teaspoon dried rosemary – Adds a subtle piney note. Crush it between your fingers before adding to release the oils.
- ½ teaspoon black pepper – Freshly ground is best for brightness.
- 1 teaspoon salt, plus more to taste – I start with less and adjust at the end.
- 1 cup frozen peas – Added at the end for a pop of color and sweetness. No need to thaw them first.
- For the Buttermilk Biscuit Dumplings:
- 1 ½ cups all-purpose flour – Spoon and level it for accuracy. Too much flour makes tough dumplings.
- 2 teaspoons baking powder – Make sure it’s fresh for proper lift.
- ½ teaspoon baking soda – Helps the buttermilk react for a tender crumb.
- ½ teaspoon salt – Don’t skip it; it balances the biscuit.
- 4 tablespoons cold unsalted butter, cut into small cubes – Cold butter is key for flaky layers. I pop it in the freezer for 10 minutes before cutting.
- ¾ cup buttermilk, cold – The acid tenderizes the gluten. If you don’t have buttermilk, add 1 tablespoon of lemon juice to regular milk and let it sit for 5 minutes.
- 1 tablespoon fresh parsley, chopped (optional, for garnish) – Adds a fresh finish, but it’s not essential.
Ingredient Tip: For the best texture, use cold butter and cold buttermilk for the dumplings. It’s the same principle as making pie crust—cold fat creates steam pockets in the oven, giving you those light, fluffy layers.
Equipment Needed
You don’t need a fancy kitchen to pull this off. Here’s what you’ll need, along with a few tips from my own experience.
- Large Dutch Oven or Heavy-Bottomed Pot (5-6 quart) – This is your workhorse. A Dutch oven distributes heat evenly and holds the heat well. I use my trusty Lodge cast iron one, but any heavy pot with a lid works. If you’re using a thinner pot, stir more frequently to prevent scorching.
- Wooden Spoon or Silicone Spatula – For stirring the roux and scraping up the browned bits from the bottom. A wooden spoon is gentle on your pot’s surface.
- Measuring Cups and Spoons – Accurate measurements matter, especially for the flour in the dumplings. I keep a set of dry measuring cups and a liquid measuring cup handy.
- Sharp Knife and Cutting Board – For dicing the vegetables. A dull knife makes the job harder and can be dangerous. I sharpen mine every few weeks.
- Small Mixing Bowl – For mixing the biscuit dough. Any bowl will do, but a wide, shallow one makes it easier to work the butter into the flour.
- Pastry Cutter or Two Forks – To cut the butter into the flour. If you don’t have a pastry cutter, two knives or even your fingertips (work quickly so the butter stays cold) work fine.
- Ladle – For serving. A deep ladle helps get both broth and dumplings into the bowl.
Budget-Friendly Tip: A heavy-bottomed pot is a worthwhile investment. I found mine at a thrift store for $10, and it’s been going strong for years. Check secondhand shops before buying new.
Preparation Method
Let’s get cooking. This one-pot chicken and dumplings comes together in a few simple stages. Follow along, and you’ll have a steaming pot of comfort in no time.
Step 1: Brown the Chicken
Heat your Dutch oven over medium-high heat. Add the 2 tablespoons of butter and let it melt until it sizzles. Pat the chicken thighs dry with paper towels (this helps them brown, not steam). Season them lightly with a pinch of salt and pepper. Place the thighs in the pot in a single layer—don’t crowd them. Let them cook undisturbed for 4-5 minutes, until the underside is golden brown. Flip and cook for another 3-4 minutes. The chicken doesn’t need to be cooked through; it’ll finish in the broth. Transfer the browned thighs to a plate and set aside. Don’t wipe out the pot—those browned bits are flavor gold.
Step 2: Sauté the Vegetables
Reduce the heat to medium. Add the diced onion, carrots, and celery to the pot. Stir them around, scraping up the browned bits from the bottom with your wooden spoon. Cook for 5-6 minutes, until the onions are translucent and the carrots have started to soften. Add the minced garlic and cook for another 30 seconds, until fragrant. Your kitchen should smell amazing right about now.
Step 3: Make the Roux
Sprinkle the 1/3 cup of flour over the vegetables. Stir constantly for 1-2 minutes, until the flour is fully incorporated and has turned a light golden color. This cooks out the raw flour taste and helps thicken the broth. Don’t rush this step—a good roux is the backbone of the dish.
Step 4: Build the Broth
Slowly pour in the 4 cups of chicken broth while stirring continuously to prevent lumps. Add the 1 cup of milk, the dried thyme, dried rosemary, ½ teaspoon of black pepper, and 1 teaspoon of salt. Stir everything together. Bring the mixture to a gentle simmer—you should see small bubbles breaking the surface, not a rolling boil.
Step 5: Shred the Chicken
While the broth comes to a simmer, shred the browned chicken thighs. Use two forks to pull the meat apart into bite-sized pieces. They’ll be slightly undercooked in the center, which is perfect—they’ll finish cooking in the broth and stay tender. Return the shredded chicken to the pot, along with any accumulated juices from the plate.
Step 6: Simmer the Base
Let the broth simmer gently for 10 minutes. This allows the flavors to meld and the chicken to finish cooking. Stir occasionally to prevent sticking. After 10 minutes, taste the broth and adjust the salt and pepper. It should be savory and rich. Stir in the frozen peas; they’ll thaw quickly in the heat.
Step 7: Make the Dumpling Dough
While the broth simmers, prepare the biscuit dumplings. In a small mixing bowl, whisk together the 1 ½ cups of flour, 2 teaspoons of baking powder, ½ teaspoon of baking soda, and ½ teaspoon of salt. Add the cold butter cubes. Using a pastry cutter or your fingertips, work the butter into the flour until the mixture resembles coarse crumbs with some pea-sized butter pieces still visible. This is key for flaky dumplings. Pour in the cold buttermilk and stir with a fork just until a shaggy dough forms. Don’t overmix—overworking the dough makes tough dumplings. The dough will be sticky; that’s okay.
Step 8: Drop the Dumplings
Using a spoon or a small cookie scoop, drop heaping tablespoons of the dough onto the simmering broth. You should get about 12-14 dumplings. Space them out slightly, as they’ll puff up as they cook. Don’t press them down; let them sit on top of the broth.
Step 9: Cook the Dumplings
Cover the pot with a tight-fitting lid. Reduce the heat to low so the broth is at a gentle simmer—not a boil, or the dumplings might break apart. Let them cook undisturbed for 15 minutes. I know it’s tempting to peek, but resist! The steam is what cooks the dumplings through. After 15 minutes, the dumplings should be puffed and cooked through. To check, insert a toothpick into the center of one; it should come out clean.
Step 10: Optional Broil for a Golden Top
For a slightly crisp top on the dumplings, preheat your oven’s broiler. Carefully transfer the pot (if it’s oven-safe) to the oven and broil for 2-3 minutes, until the tops of the dumplings are golden brown. Watch closely—they can burn quickly. If your pot isn’t oven-safe, simply serve as is. The dumplings will still be delicious.
Step 11: Rest and Serve
Remove the pot from the heat and let it rest for 5 minutes. This allows the broth to thicken slightly and the dumplings to set. Ladle into bowls, making sure each serving gets a few dumplings and plenty of broth. Garnish with fresh parsley if you like, and serve warm.
Cooking Tips & Techniques
After making this one-pot chicken and dumplings more times than I can count, I’ve learned a few tricks that make a real difference. Here are my top tips for success, along with a few mistakes I’ve made so you don’t have to.
Don’t Skip Browning the Chicken. I know it’s an extra step, but it’s non-negotiable. Browning adds a deep, savory flavor to the broth that you can’t get from just simmering the meat. Those browned bits on the bottom of the pot are pure gold. I once tried to save time by skipping this step, and the broth was flat and one-dimensional. Never again.
Keep the Dumpling Dough Cold. Just like with biscuits, cold butter is essential for tender dumplings. If the butter melts before it hits the pot, you’ll end up with dense, heavy lumps. I cube the butter and pop it back in the fridge while I prep the vegetables. Also, handle the dough as little as possible—stir just until it comes together.
Resist the Urge to Peek. I know that lid is tempting, but lifting it releases steam and can cause the dumplings to cook unevenly or become soggy. Trust the process. Set a timer and walk away. The steam trapped inside the pot is what makes the dumplings light and fluffy.
Taste and Adjust the Broth Before Adding Dumplings. This is your last chance to season the broth. Once the dumplings go in, you can’t stir without breaking them. So, taste the broth after it simmers for 10 minutes. Is it savory enough? Does it need more salt or pepper? Adjust it now. I’ve had batches where I was too shy with the salt, and the whole dish felt flat. A little extra at this stage makes a big difference.
Multitasking is Your Friend. While the broth simmers, make the dumpling dough. While the dumplings cook, set the table and chop the parsley. This recipe is designed for busy cooks—use those pockets of time wisely. I often prep all the vegetables the night before, so dinner comes together in a flash.
Consistency is Key. The dumplings should be about the size of a heaping tablespoon. If they’re too small, they’ll cook too quickly and might be dry. Too large, and they might not cook through. A small cookie scoop is my secret weapon for uniform dumplings that cook evenly.
Variations & Adaptations
This recipe is wonderfully flexible. Here are a few ways to make it your own, based on what I’ve tried and what my family loves.
Make it Creamier. For an even richer broth, swap the 1 cup of whole milk for 1 cup of heavy cream. It adds a luxurious texture that’s perfect for a special occasion. I’ve done this for Sunday dinners, and it always feels indulgent.
Add More Vegetables. This is a great way to sneak in extra nutrients. Try adding a cup of diced mushrooms along with the onions for an earthy flavor. Or, stir in a handful of chopped kale or spinach right before adding the dumplings. My kids don’t even notice the greens when they’re wilted into the broth.
Go Gluten-Free. Use a 1:1 gluten-free flour blend in place of the all-purpose flour for both the roux and the dumplings. I’ve had good results with Bob’s Red Mill 1:1 Baking Flour. The dumplings will be slightly denser but still delicious. Also, make sure your chicken broth is gluten-free.
Try a Different Protein. This recipe works beautifully with leftover rotisserie chicken. Just skip the browning step and add the shredded chicken after the broth simmers. For a vegetarian version, use vegetable broth and add a can of drained chickpeas or white beans for protein. I’ve made it with leftover turkey after Thanksgiving, and it was a hit.
Spice It Up. For a little heat, add a pinch of red pepper flakes along with the garlic. Or, stir in a teaspoon of smoked paprika for a subtle smoky flavor. My husband loves the smoked paprika version—it gives the broth a whole new dimension.
Make it Dairy-Free. Use a high-quality plant-based butter and unsweetened oat milk or almond milk in place of the dairy. I’ve used Miyoko’s vegan butter and oat milk with great results. The dumplings might be slightly less tender, but the flavor is still spot on.
Serving & Storage Suggestions
This one-pot chicken and dumplings is a meal in itself, but here are a few ways to serve it and how to handle leftovers.
Serving Temperature and Presentation. Serve the chicken and dumplings piping hot, straight from the pot. Ladle into deep bowls so everyone gets plenty of broth. A sprinkle of fresh parsley on top adds a pop of color and freshness. For a complete meal, serve with a simple side salad dressed with a light vinaigrette to cut through the richness. Crusty bread is also a great option for soaking up every last drop of broth.
Complementary Dishes or Beverages. This dish pairs beautifully with a crisp white wine like a Sauvignon Blanc or a light Pinot Grigio. For a non-alcoholic option, try a sparkling water with a squeeze of lemon. If you’re serving it for a cozy dinner, a warm apple cider is a lovely accompaniment.
Storage Instructions. Store leftovers in an airtight container in the refrigerator for up to 3 days. The dumplings will absorb some of the broth and soften, but the flavor will still be excellent. In fact, I find the flavors meld even more overnight. To freeze, let the dish cool completely, then transfer to a freezer-safe container. It will keep for up to 3 months. Thaw overnight in the refrigerator before reheating.
Reheating Methods. The best way to reheat is on the stovetop over low heat. Add a splash of chicken broth or milk to loosen the sauce, as it will have thickened. Stir gently to avoid breaking the dumplings. You can also reheat individual portions in the microwave, but the dumplings will be softer. For a crispier dumpling, reheat in a 350°F oven for 10-15 minutes, uncovered.
How Flavors Develop Over Time. Like many stews and soups, this dish tastes even better the next day. The flavors have time to meld and deepen. The dumplings will soften, but the broth becomes even more savory. I often make a double batch just for the leftovers. It’s one of those rare dishes that’s just as good—if not better—on day two.
Nutritional Information & Benefits
This one-pot chicken and dumplings is a hearty, balanced meal that provides comfort without being overly indulgent. Here’s a quick look at the nutritional profile per serving (based on 6 servings).
- Calories: Approximately 420 per serving
- Protein: 28 grams – Thanks to the chicken, this dish is a great source of lean protein, which helps keep you full and satisfied.
- Carbohydrates: 35 grams – The dumplings and flour provide energy, while the carrots and peas add fiber and natural sugars.
- Fat: 18 grams – Mostly from the butter and chicken thighs. Using thighs adds flavor and moisture, but you can swap for breasts to reduce the fat content.
- Fiber: 4 grams – From the carrots, celery, and peas. This supports healthy digestion.
Health Benefits of Key Ingredients. Carrots are rich in beta-carotene, which supports eye health. Celery is a good source of vitamin K and antioxidants. Garlic and onions contain compounds that may boost immune function. And the buttermilk in the dumplings provides calcium and probiotics for gut health.
Dietary Considerations. This recipe is not gluten-free or dairy-free in its standard form, but it can be adapted as noted in the variations section. It’s naturally nut-free and egg-free. For those watching their sodium, use low-sodium broth and adjust the added salt to your preference. I find that a little salt goes a long way when you’re using good-quality ingredients.
Potential Allergens. This recipe contains wheat (gluten) and dairy. If you have sensitivities, refer to the gluten-free and dairy-free adaptations above. Always check your broth labels for hidden allergens.
From a personal wellness perspective, this dish is a wonderful way to enjoy a classic comfort food without feeling weighed down. It’s filling but not heavy, and the vegetables add a nutritional boost that makes it a meal you can feel good about serving to your family.
FAQs
Can I use chicken breasts instead of thighs?
Absolutely. Boneless, skinless chicken breasts work fine. Just be aware that they cook faster and can dry out if overcooked. Reduce the initial browning time to 3-4 minutes per side, and shred them as soon as they’re cool enough to handle. The broth will still be delicious, but the meat might be slightly less juicy than with thighs.
Why are my dumplings dense and heavy?
This usually happens from overmixing the dough or using warm butter. When you mix the dough, stir just until the flour is incorporated—a few lumps are fine. Also, make sure your butter and buttermilk are cold. If the butter melts into the flour, the dumplings won’t have that light, fluffy texture. Finally, make sure your baking powder is fresh. Old baking powder loses its leavening power.
Can I make this in a slow cooker?
Yes, with a few adjustments. Brown the chicken and sauté the vegetables on the stovetop first, then transfer everything (except the peas and dumpling dough) to a slow cooker. Cook on low for 6-8 hours or on high for 3-4 hours. About 30 minutes before serving, stir in the peas. Then, drop the dumpling dough on top, cover, and cook on high for another 30 minutes, until the dumplings are cooked through. The dumplings won’t get a golden top, but they’ll still be tender.
How do I prevent the broth from being too thin or too thick?
The key is the roux. Make sure you cook the flour with the vegetables for a full 1-2 minutes—this helps it thicken properly. If the broth is too thin after simmering, you can mix 1 tablespoon of cornstarch with 2 tablespoons of cold water and stir it in. Let it simmer for a few more minutes to thicken. If it’s too thick, add a splash of chicken broth or milk to thin it out. The dumplings will also absorb some liquid as they cook, so the final consistency should be just right.
Can I use canned biscuit dough instead of making the dumplings from scratch?
You can, but the texture will be different. Canned biscuits are denser and will absorb more broth, becoming more like dumplings. If you’re in a hurry, it’s a fine shortcut. Cut each biscuit into quarters and drop them into the simmering broth. Cook covered for 10-12 minutes, until they’re cooked through. The homemade version is fluffier and more flavorful, but the canned version works in a pinch.
Conclusion
This one-pot chicken and dumplings with buttermilk biscuits is more than just a recipe—it’s a little piece of that diner magic, recreated in your own kitchen. It’s the kind of meal that brings everyone to the table, fills the house with a warm, savory aroma, and leaves you with a clean pot and happy faces. I love how forgiving it is, how it adapts to what you have on hand, and how it always delivers on comfort. Whether you’re making it for a busy weeknight or a lazy Sunday, it’s a recipe you’ll come back to again and again.
Now, I encourage you to make it your own. Maybe you’ll add extra vegetables, or a pinch of cayenne for heat, or you’ll double the dumplings because your family loves them as much as mine does. That’s the beauty of cooking—you can tweak and adjust until it’s perfect for you. I’d love to hear how it turns out. Drop a comment below and let me know what variations you tried, or share a photo of your creation. Happy cooking, friends. This one’s a keeper.
Pin This Recipe!
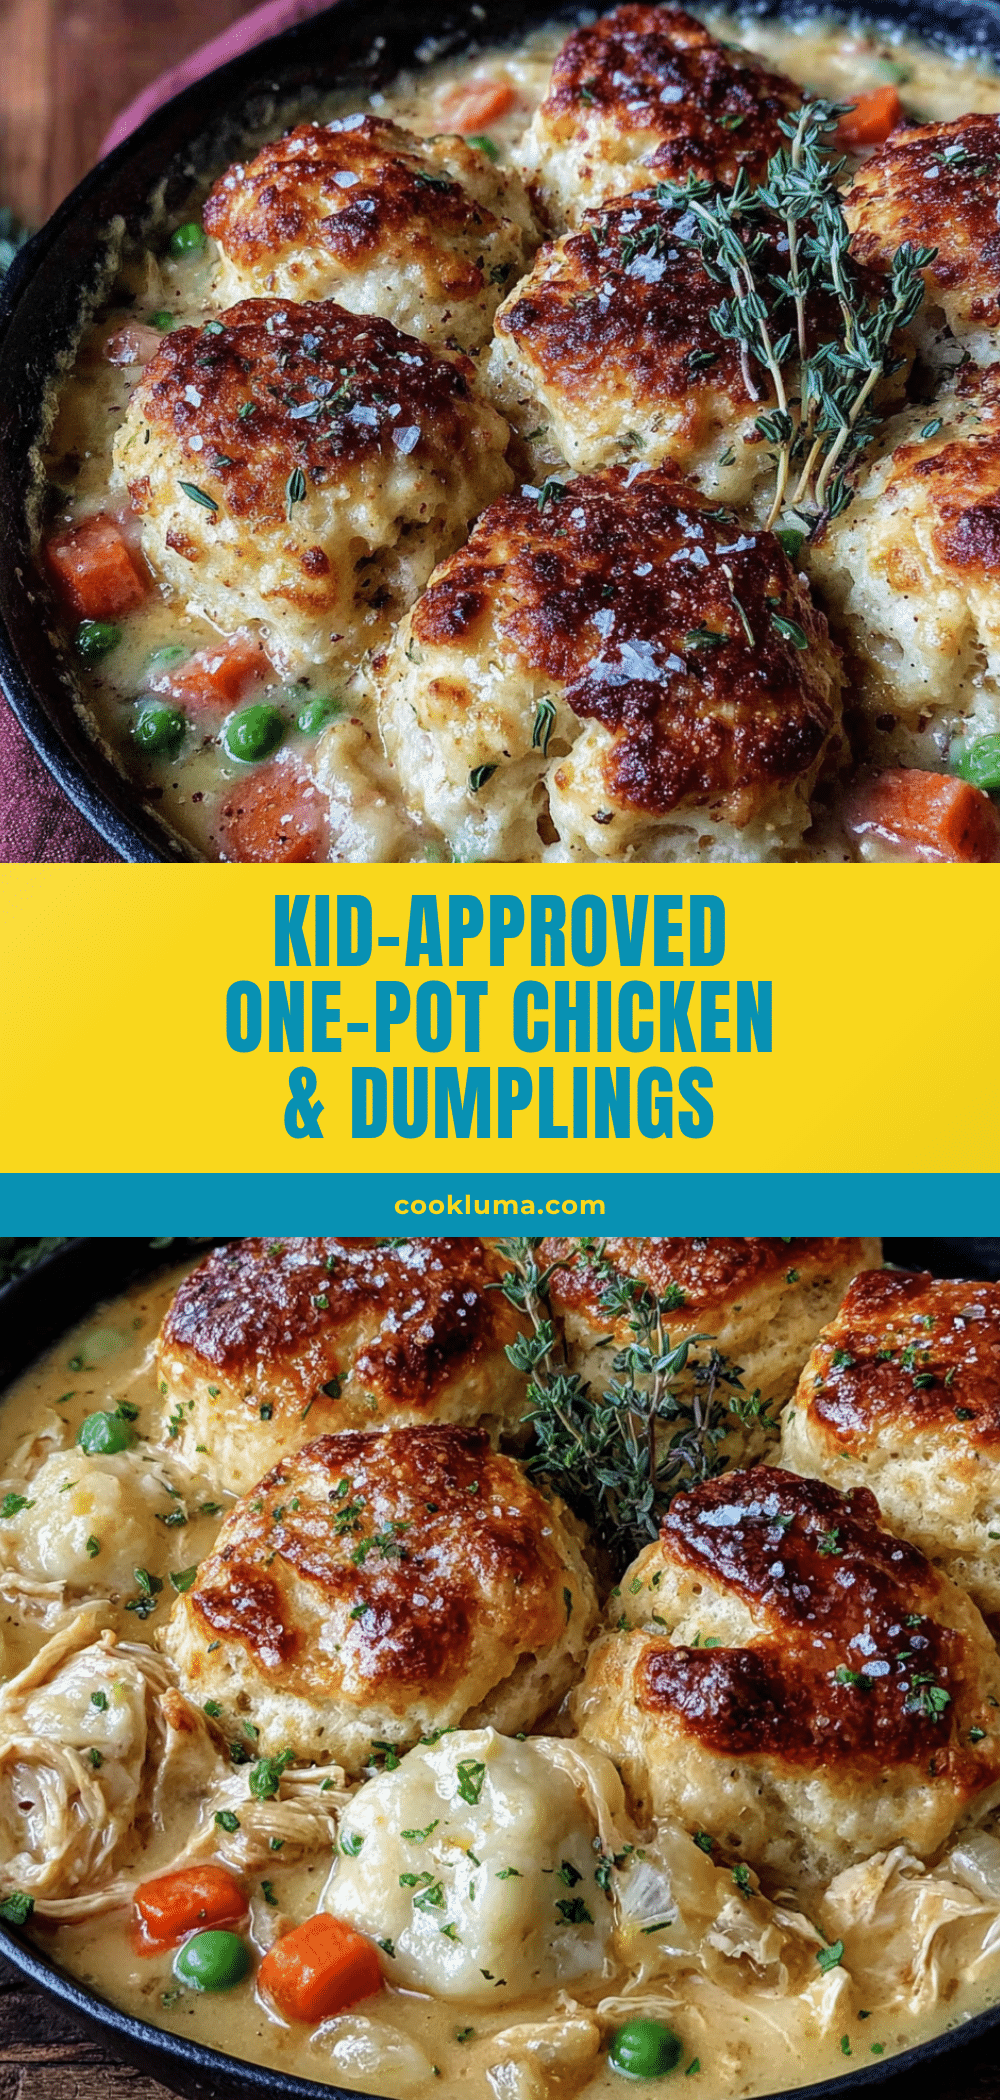
One-Pot Kid-Approved Chicken & Dumplings with Buttermilk Biscuits
A rich, velvety broth with impossibly fluffy buttermilk biscuit dumplings, all made in one pot. This comforting, family-friendly recipe recreates diner magic with simple ingredients and is ready in under 45 minutes.
- Prep Time: 15 minutes
- Cook Time: 30 minutes
- Total Time: 45 minutes
- Yield: 6 servings 1x
- Category: Main Course
- Cuisine: American
Ingredients
- 1 ½ pounds boneless, skinless chicken thighs (about 4–5 thighs)
- 2 tablespoons unsalted butter
- 1 medium yellow onion, diced (about 1 cup)
- 2 medium carrots, peeled and diced (about 1 cup)
- 2 celery stalks, diced (about ½ cup)
- 3 cloves garlic, minced
- 1/3 cup all-purpose flour
- 4 cups low-sodium chicken broth
- 1 cup whole milk
- 1 teaspoon dried thyme
- ½ teaspoon dried rosemary
- ½ teaspoon black pepper
- 1 teaspoon salt, plus more to taste
- 1 cup frozen peas
- 1 ½ cups all-purpose flour (for dumplings)
- 2 teaspoons baking powder
- ½ teaspoon baking soda
- ½ teaspoon salt (for dumplings)
- 4 tablespoons cold unsalted butter, cut into small cubes (for dumplings)
- ¾ cup buttermilk, cold (for dumplings)
- 1 tablespoon fresh parsley, chopped (optional, for garnish)
Instructions
- Heat a Dutch oven over medium-high heat. Add 2 tablespoons butter and let it melt until it sizzles. Pat chicken thighs dry, season lightly with salt and pepper, and place in the pot in a single layer. Cook undisturbed for 4-5 minutes until golden brown, then flip and cook for another 3-4 minutes. Transfer browned thighs to a plate and set aside.
- Reduce heat to medium. Add diced onion, carrots, and celery to the pot. Stir, scraping up browned bits, and cook for 5-6 minutes until onions are translucent and carrots have softened. Add minced garlic and cook for 30 seconds until fragrant.
- Sprinkle 1/3 cup flour over the vegetables. Stir constantly for 1-2 minutes until flour is incorporated and turns light golden.
- Slowly pour in 4 cups chicken broth while stirring continuously. Add 1 cup milk, dried thyme, dried rosemary, ½ teaspoon black pepper, and 1 teaspoon salt. Stir and bring to a gentle simmer.
- While broth comes to a simmer, shred the browned chicken thighs using two forks into bite-sized pieces. Return shredded chicken and any accumulated juices to the pot.
- Let the broth simmer gently for 10 minutes, stirring occasionally. Taste and adjust salt and pepper. Stir in frozen peas.
- While broth simmers, make dumpling dough: In a small bowl, whisk together 1 ½ cups flour, 2 teaspoons baking powder, ½ teaspoon baking soda, and ½ teaspoon salt. Add cold butter cubes and cut into flour using a pastry cutter or fingertips until mixture resembles coarse crumbs with some pea-sized butter pieces. Pour in cold buttermilk and stir with a fork just until a shaggy dough forms. Do not overmix.
- Using a spoon or small cookie scoop, drop heaping tablespoons of dough onto the simmering broth (about 12-14 dumplings). Space them out slightly.
- Cover the pot with a tight-fitting lid. Reduce heat to low so broth is at a gentle simmer. Cook undisturbed for 15 minutes. Do not lift the lid.
- Optional: For a golden top, preheat oven broiler. If pot is oven-safe, transfer to oven and broil for 2-3 minutes until dumpling tops are golden brown. Watch closely.
- Remove pot from heat and let rest for 5 minutes. Ladle into bowls, garnish with fresh parsley if desired, and serve warm.
Notes
For best dumpling texture, use cold butter and cold buttermilk. Do not overmix the dough. Resist lifting the lid while dumplings cook. Broth can be adjusted for thickness with a cornstarch slurry if needed. Leftovers keep for up to 3 days in the refrigerator or 3 months in the freezer.
Nutrition
- Serving Size: 1 serving (about 1.5
- Calories: 420
- Sugar: 6
- Sodium: 780
- Fat: 18
- Saturated Fat: 8
- Carbohydrates: 35
- Fiber: 4
- Protein: 28
Keywords: chicken and dumplings, one-pot meal, buttermilk biscuits, comfort food, family dinner, easy weeknight dinner


