My sister-in-law wasn’t trying to impress anyone. I’d stopped by to drop off a casserole dish I’d borrowed, and the smell of chocolate and something warm hit me before I even got through the back door. It was a Tuesday afternoon in early November, and she was standing at the counter with a bag of Oreos in one hand and a stick of butter in the other. Her two kids were bouncing around her feet like popcorn kernels about to pop.
“Oh, this?” she said when I asked what she was making. “It’s nothing. Just something to keep them busy while I prep the turkey tomorrow.” She shrugged like she was boiling water. But I watched her crush those cookies, stir in the butter, and let her six-year-old press the crust into the pan with sticky fingers. It was messy, loud, and honestly kind of chaotic. And I couldn’t stop thinking about it for days.
That’s how this No-Bake Thanksgiving Cookie Cake with Oreo Crust came into my life. It wasn’t a fancy holiday centerpiece or a recipe from a famous chef. It was just a mom figuring out how to get her kids involved in Thanksgiving without handing them a sharp knife or a hot stove. And you know what? It worked. The kids felt proud, the adults went back for seconds, and nobody turned on the oven once. Maybe you’ve been there — staring down a holiday menu, wondering how to get the little ones excited without adding more stress to your plate. This cake is the answer you didn’t know you needed.
Why You’ll Love This Recipe
Let me tell you why this No-Bake Thanksgiving Cookie Cake with Oreo Crust has become a permanent fixture on our holiday table. It’s not just because it tastes incredible — though it absolutely does. It’s because this recipe solves real problems for real families.
- No Oven Required: Your oven is already working overtime with the turkey and sides. This dessert doesn’t need it, so you can make it while the bird rests or even the day before.
- Kid-Approved and Kid-Made: My nephew was so proud of pressing that Oreo crust into the pan. Kids can crush, mix, and layer with zero danger. It’s the perfect “helping hands” recipe.
- Budget-Friendly Ingredients: Oreos, cream cheese, chocolate pudding mix — these are pantry staples, not specialty items. You won’t need to take out a second mortgage for this dessert.
- Feeds a Crowd: This cake makes 12 generous slices. Perfect for Thanksgiving dinner, Friendsgiving, or any gathering where dessert needs to stretch.
- Make-Ahead Magic: This cake actually gets better after a few hours in the fridge. You can make it the night before and cross one thing off your to-do list.
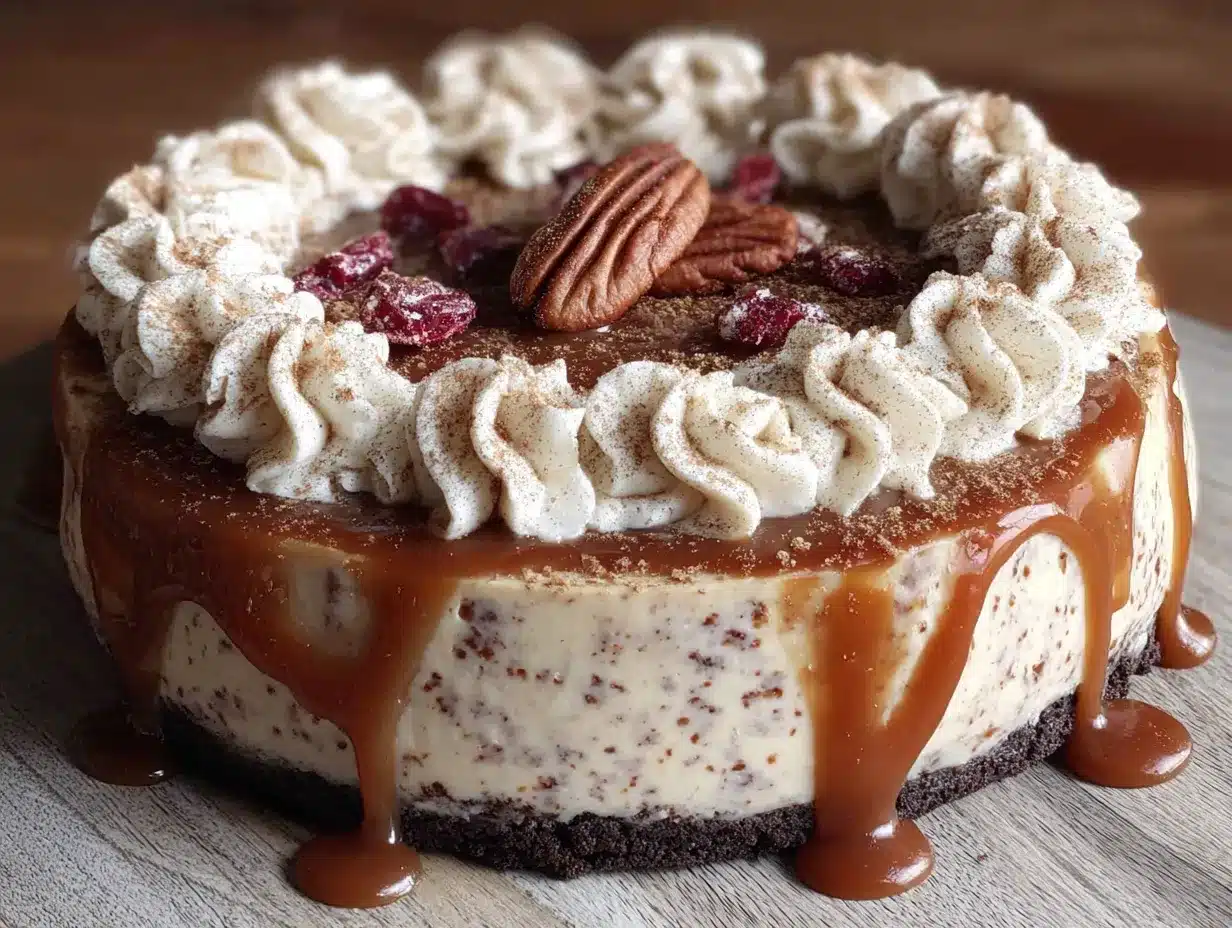
What makes this recipe different from every other no-bake dessert out there? It’s the combination of textures. You get that crunchy, chocolatey Oreo crust, a silky cream cheese layer, and a rich chocolate pudding topping that sets up perfectly. It’s not just another version of chocolate pudding pie — it’s the version your family will request every single Thanksgiving.
Honestly, this recipe is the kind that makes you close your eyes after the first bite. It’s comfort food reimagined for a busy holiday. Perfect for impressing guests without stress, or turning a simple family meal into something memorable.
What Ingredients You Will Need
This No-Bake Thanksgiving Cookie Cake with Oreo Crust uses simple, wholesome ingredients to deliver bold flavor and satisfying texture without the fuss. Most of these are pantry staples you probably already have on hand, which is part of the magic.
For the Oreo Crust
- 24 Oreo cookies (regular, not double-stuffed) — You’ll crush these into fine crumbs. I recommend using a food processor for speed, but a zip-top bag and rolling pin work great too. The kids love this part.
- 5 tablespoons unsalted butter, melted — This binds the crumbs together. I use salted butter in a pinch and just skip the extra salt.
For the Cream Cheese Layer
- 8 ounces cream cheese, softened — Let it sit on the counter for 30 minutes. Cold cream cheese makes lumps you can’t fix.
- 1/2 cup powdered sugar — Adds sweetness without graininess.
- 1 teaspoon vanilla extract — Pure vanilla makes a difference, but imitation works fine here.
- 1 cup heavy whipping cream — You’ll whip this into stiff peaks. Cold cream whips better, so keep it chilled until you’re ready.
For the Chocolate Pudding Layer
- 1 (3.9-ounce) box instant chocolate pudding mix — I prefer Jell-O brand for consistent results. Don’t use cook-and-serve; it won’t set properly.
- 2 cups cold whole milk — Whole milk gives the richest texture. Two percent works, but avoid skim — the pudding won’t be as creamy.
For the Topping
- 1 cup heavy whipping cream — For the whipped cream topping.
- 2 tablespoons powdered sugar — To sweeten the whipped cream.
- 1/2 teaspoon vanilla extract — Optional, but nice.
- Thanksgiving sprinkles or crushed Oreos for garnish — Let the kids go wild here. Orange and brown sprinkles are perfect for fall.
One thing I learned the hard way — check your pudding mix expiration date. I once grabbed a box that was six months past, and the pudding never set. It was a sad, soupy mess. Also, if you’re dairy-free, you can use dairy-free cream cheese and coconut cream in place of heavy cream. The texture will be slightly different, but it still tastes great.
Equipment Needed
- 9-inch springform pan — This makes removal so much easier. If you don’t have one, a deep-dish pie plate works, but slices won’t be as clean.
- Food processor or zip-top bag and rolling pin — For crushing Oreos. The food processor is faster, but the bag method is more fun for kids.
- Electric hand mixer or stand mixer — Whipping cream by hand is possible, but your arm will thank you for using a mixer.
- Medium mixing bowls (2-3) — One for crust, one for cream cheese layer, one for pudding.
- Spatula — For spreading layers evenly.
- Measuring cups and spoons — Precision matters for the pudding mix.
- Plastic wrap — To cover the cake while it chills.
If you’re on a budget, skip the springform pan and use a 9×9-inch square baking dish. The slices won’t be as elegant, but the taste is identical. I’ve done it both ways, and honestly, my family doesn’t care about the shape.
Preparation Method
- Make the Oreo crust. Place 24 Oreo cookies in a food processor and pulse until they become fine crumbs. If you’re using the bag method, put the cookies in a zip-top bag and let the kids crush them with a rolling pin. It’s messy but worth it. Pour the crumbs into a medium bowl, add 5 tablespoons melted butter, and stir until every crumb is coated. The mixture should look like wet sand. Press this firmly into the bottom of your 9-inch springform pan. Use the bottom of a measuring cup to really pack it down. Pop it in the fridge while you work on the next layer.
- Make the cream cheese layer. In a medium bowl, beat 8 ounces softened cream cheese with 1/2 cup powdered sugar and 1 teaspoon vanilla extract until smooth. It should be completely lump-free — take your time here. In a separate bowl, whip 1 cup heavy whipping cream until stiff peaks form. This takes about 3-4 minutes with an electric mixer on medium-high. You’ll know it’s ready when you lift the beaters and the cream stands up in peaks that don’t flop over. Gently fold the whipped cream into the cream cheese mixture. Don’t stir — use a folding motion to keep it light and airy. Spread this over the chilled Oreo crust. Put it back in the fridge.
- Make the chocolate pudding layer. In a medium bowl, whisk together 1 box instant chocolate pudding mix and 2 cups cold whole milk. Whisk for about 2 minutes until it thickens. It will start out thin, then suddenly get thick. That’s when you know it’s ready. Let it sit for 5 minutes to set up completely. Then spread it gently over the cream cheese layer. Try to spread it evenly without disturbing the layer underneath. Back into the fridge it goes.
- Make the whipped cream topping. In a clean bowl, whip 1 cup heavy whipping cream with 2 tablespoons powdered sugar and 1/2 teaspoon vanilla extract until stiff peaks form. Spread this over the chocolate pudding layer. Use a spatula to create swirls or peaks — whatever looks pretty to you.
- Chill and garnish. Cover the cake with plastic wrap and refrigerate for at least 4 hours, but overnight is better. The longer it sits, the cleaner your slices will be. Before serving, let the kids add Thanksgiving sprinkles or crushed Oreos on top. Run a knife around the edge of the springform pan, release the clasp, and slice.
One thing I always forget — let the cake sit at room temperature for 10 minutes before slicing. Straight from the fridge, the cream cheese layer is too firm. That 10-minute rest makes all the difference.
Cooking Tips & Techniques
I’ve made this No-Bake Thanksgiving Cookie Cake with Oreo Crust at least a dozen times, and I’ve learned a few things the hard way. Let me save you some trouble.
Don’t skip the chilling time. I know it’s tempting to rush this cake into the fridge for an hour and call it done. But the layers need time to set. Four hours is the minimum. Overnight is ideal. The first time I made this, I served it after two hours, and the slices were a beautiful mess — delicious, but they fell apart on the plate. Now I always make it the day before.
Whip your cream to stiff peaks. Soft peaks will deflate and make your cream cheese layer dense. You want the cream to hold its shape. If you over-whip it, you’ll get butter, so stop as soon as the peaks stand firm. I usually check every 30 seconds after the three-minute mark.
Press the crust firmly. A loose crust will crumble when you slice the cake. Use the bottom of a glass or measuring cup to really pack those Oreo crumbs into the pan. I press down with serious intention — it makes a huge difference.
Room temperature cream cheese is non-negotiable. Cold cream cheese doesn’t blend smoothly. You’ll end up with white specks in your filling. Set it out 30 minutes before you start. If you forget, microwave it for 10 seconds on low power. Not more — you don’t want it melted.
Use a sharp knife for clean slices. Run the knife under hot water, wipe it dry, then slice. Wipe the blade between cuts. This gives you those beautiful, Instagram-worthy slices.
My biggest failure? I once used light cream cheese and fat-free milk to make it “healthier.” The texture was grainy, the pudding never set, and nobody ate more than two bites. Don’t do that. Use the real stuff — it’s a holiday dessert, not a diet plan.
Variations & Adaptations
This No-Bake Thanksgiving Cookie Cake with Oreo Crust is incredibly flexible. Here are some ways to make it your own.
Peanut Butter Lovers: Add 1/3 cup creamy peanut butter to the cream cheese layer. Beat it in with the cream cheese and sugar. It adds a salty, nutty kick that pairs beautifully with the chocolate. My brother-in-law requests this version every year.
Pumpkin Spice Twist: For a more Thanksgiving-appropriate flavor, add 1/2 cup pumpkin puree and 1 teaspoon pumpkin pie spice to the cream cheese layer. Reduce the heavy cream to 3/4 cup since the pumpkin adds moisture. This version tastes like fall in a slice.
Gluten-Free Option: Use gluten-free chocolate sandwich cookies for the crust. Most brands work well, but check the texture — some are crunchier than Oreos. You may need to adjust the butter amount slightly. Add a tablespoon at a time until the crumbs hold together.
Dairy-Free Version: Use dairy-free cream cheese, coconut cream (chilled, whipped), and almond milk with a dairy-free instant pudding mix. The texture will be a bit softer, but the flavor is still fantastic. I’ve made this for a friend with dairy allergies, and she said it was the best dessert she’d had in years.
Individual Servings: Instead of a springform pan, use 12 small mason jars or dessert cups. Layer the crust, cream cheese, pudding, and whipped cream in each jar. This is perfect for Thanksgiving buffets or kids’ tables. Plus, no slicing required.
I tried the pumpkin version last November, and honestly, it might be my new favorite. The cream cheese layer gets this subtle orange tint and the spice aroma fills the kitchen. It’s like pumpkin pie and chocolate cake had a baby.
Serving & Storage Suggestions
Serve this No-Bake Thanksgiving Cookie Cake with Oreo Crust cold, straight from the fridge. Let it sit at room temperature for 10 minutes before slicing for the cleanest cuts. I like to top each slice with a dollop of extra whipped cream and a sprinkle of cinnamon or crushed Oreos.
This cake pairs beautifully with a hot cup of coffee or a glass of cold milk. For a full Thanksgiving dessert spread, serve it alongside pumpkin pie or apple crisp. The chocolatey richness balances out the spiced flavors of traditional holiday desserts.
Storage: Cover the cake tightly with plastic wrap or store it in an airtight container in the refrigerator. It will keep for up to 5 days, but honestly, it never lasts that long in my house. The flavors actually meld together and improve after 24 hours.
Freezing: You can freeze this cake for up to 2 months. Make it completely, then wrap it tightly in plastic wrap and a layer of aluminum foil. Thaw it in the refrigerator overnight before serving. Note that the texture of the whipped cream may be slightly softer after freezing, but it’s still delicious.
Reheating: This is a no-bake dessert, so there’s no reheating involved. But if you like a slightly softer texture, let a slice sit at room temperature for 15-20 minutes before eating.
One thing I love about this cake — the flavors develop overnight. The Oreo crust softens just a bit, the cream cheese layer firms up perfectly, and everything melds together. It’s actually better on day two.
Nutritional Information & Benefits
Please note that these values are estimates and will vary based on specific brands and ingredient choices.
| Nutrient | Per Slice (1/12 of cake) |
|---|---|
| Calories | 385 |
| Total Fat | 26g |
| Saturated Fat | 15g |
| Cholesterol | 85mg |
| Sodium | 320mg |
| Total Carbohydrates | 35g |
| Dietary Fiber | 1g |
| Sugars | 24g |
| Protein | 5g |
While this is definitely a treat, there are some redeeming qualities. The cream cheese provides calcium and protein. The heavy cream adds vitamin A. And honestly, the biggest benefit is the joy it brings to the table — especially for kids who helped make it. This dessert is about connection, not perfection. It’s about letting your children feel proud of something they created, and that’s a benefit no nutrition label can measure.
For those with dietary concerns, this recipe contains dairy, gluten, and soy (from the Oreos). Use the variations above to adapt it to your needs.
Conclusion
This No-Bake Thanksgiving Cookie Cake with Oreo Crust is more than just a dessert. It’s a way to include your kids in the holiday preparations without adding stress to your day. It’s a way to feed a crowd without turning on your oven. And most importantly, it’s a way to create a new tradition that your family will look forward to every year.
I still think about that Tuesday afternoon at my sister-in-law’s house. The chaos, the laughter, the sticky fingers pressing crumbs into a pan. That cake wasn’t perfect — the crust was a little uneven, and the kids had put way too many sprinkles on top. But it was made with love, and you could taste it in every single bite.
I’d love to hear how yours turns out. Did your kids help make it? Did you try a variation? Drop a comment below and let me know. And if you loved this recipe, share it with a friend who needs a little less stress and a little more sweetness this Thanksgiving.
Frequently Asked Questions
Can I use a different type of cookie for the crust?
Absolutely. Graham crackers, vanilla wafers, or chocolate chip cookies all work. Just adjust the butter amount — different cookies absorb butter differently. Start with 4 tablespoons and add more if the crumbs seem dry.
How far in advance can I make this cake?
You can make it up to 2 days ahead. Store it covered in the refrigerator. The texture actually improves after 24 hours as the layers set and the flavors meld. Just add the sprinkles right before serving so they stay crisp.
Can I use sugar-free pudding mix?
Yes, but the texture will be slightly different. Sugar-free pudding tends to be less firm than regular. You may need to add an extra tablespoon of milk to get the right consistency. I’ve tried it, and it works fine — just don’t expect the same creamy richness.
My pudding layer didn’t set. What went wrong?
This usually happens for one of three reasons: you used cook-and-serve pudding instead of instant, your milk was too warm, or your pudding mix was expired. Always use instant pudding, cold milk, and check the expiration date. If it still doesn’t set, pop the whole cake in the freezer for 30 minutes to firm it up.
Can I make this without a springform pan?
Yes. Use a 9×9-inch square baking dish or a deep-dish pie plate. The slices won’t be as tall or as clean, but the taste is identical. For individual servings, use mason jars or dessert cups — no pan needed at all.
Pin This Recipe!
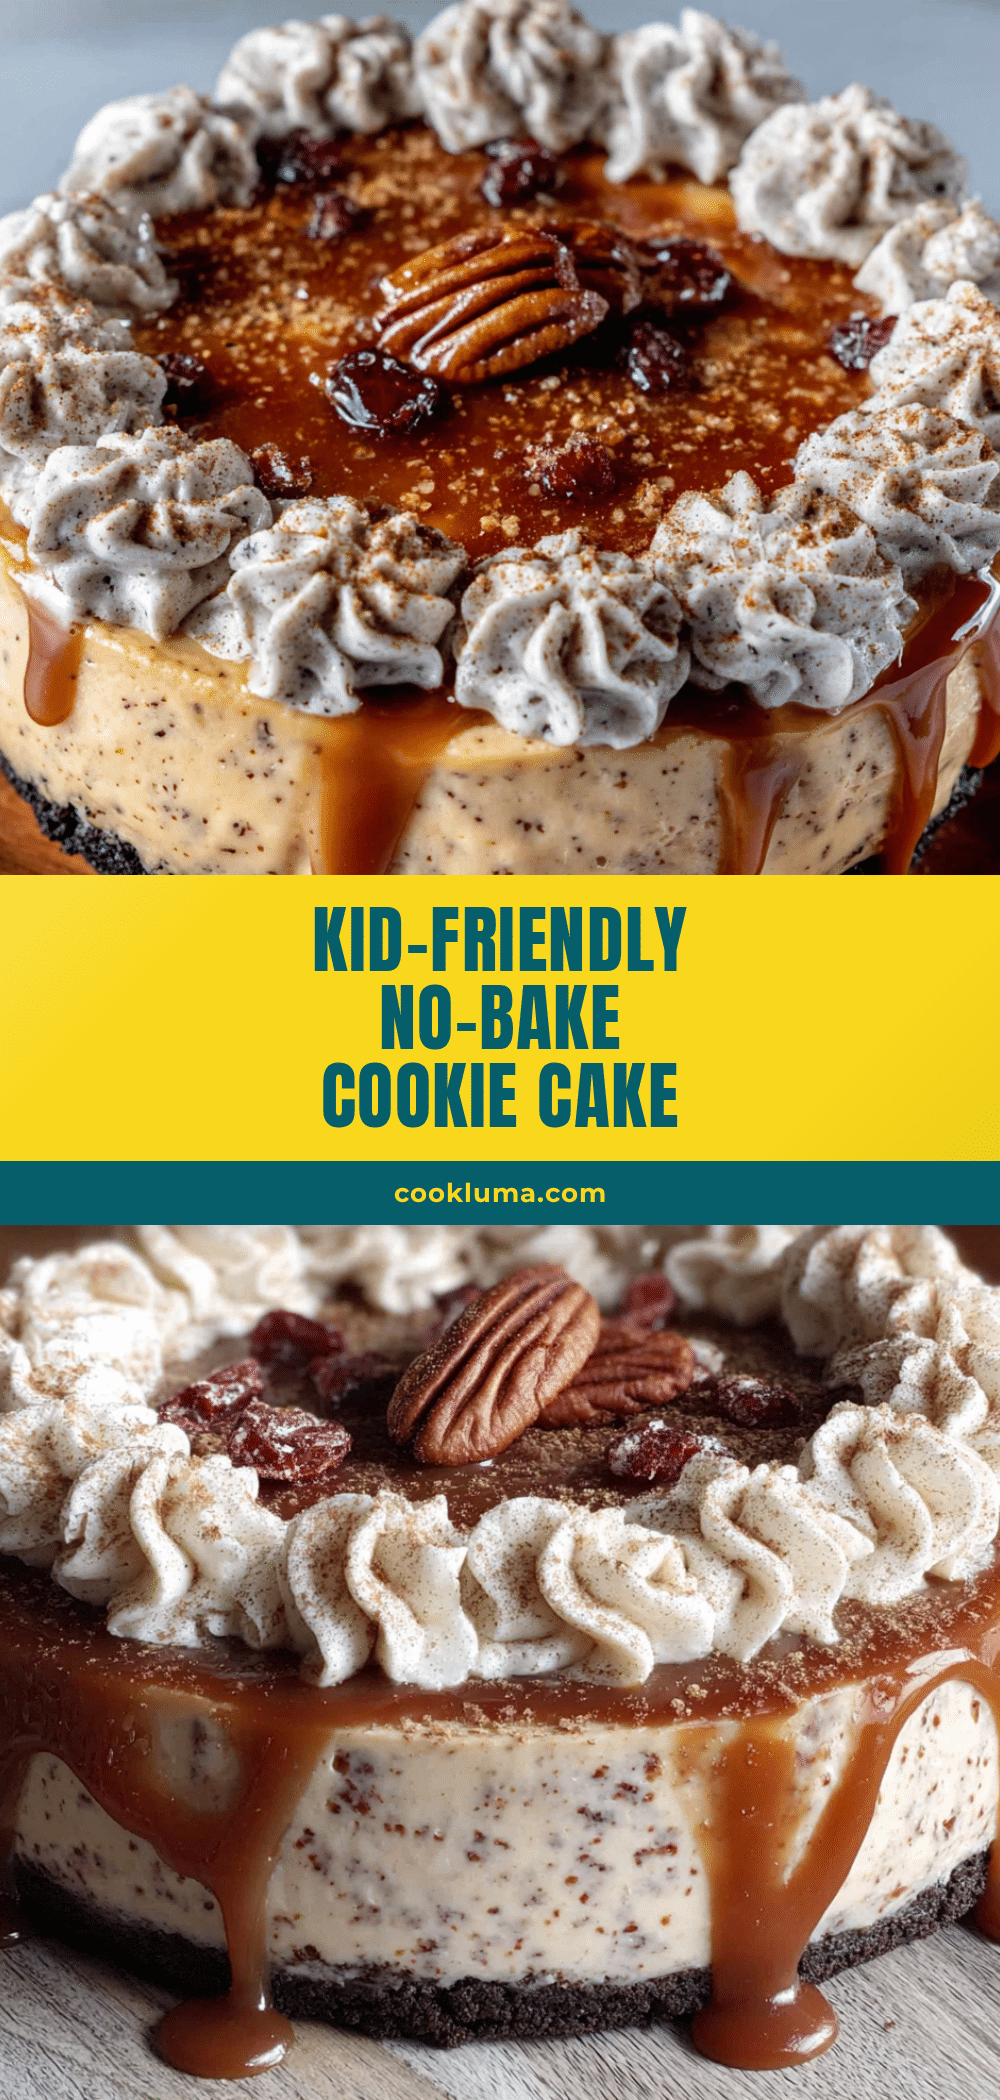
No-Bake Thanksgiving Cookie Cake with Oreo Crust – Easy Kids Dessert
A no-bake Thanksgiving dessert featuring an Oreo crust, creamy cheesecake layer, chocolate pudding, and whipped cream topping. Perfect for getting kids involved in holiday prep without using the oven.
- Prep Time: 30 minutes
- Cook Time: 0 minutes
- Total Time: 4 hours 30 minutes (includes chilling)
- Yield: 12 servings 1x
- Category: Dessert
- Cuisine: American
Ingredients
- 24 Oreo cookies (regular, not double-stuffed)
- 5 tablespoons unsalted butter, melted
- 8 ounces cream cheese, softened
- 1/2 cup powdered sugar
- 1 teaspoon vanilla extract
- 1 cup heavy whipping cream
- 1 (3.9-ounce) box instant chocolate pudding mix
- 2 cups cold whole milk
- 1 cup heavy whipping cream (for topping)
- 2 tablespoons powdered sugar (for topping)
- 1/2 teaspoon vanilla extract (for topping, optional)
- Thanksgiving sprinkles or crushed Oreos for garnish
Instructions
- Make the Oreo crust: Place 24 Oreo cookies in a food processor and pulse until fine crumbs. Alternatively, crush in a zip-top bag with a rolling pin. Pour crumbs into a medium bowl, add 5 tablespoons melted butter, and stir until coated. Press firmly into the bottom of a 9-inch springform pan using the bottom of a measuring cup. Refrigerate while preparing the next layer.
- Make the cream cheese layer: In a medium bowl, beat 8 ounces softened cream cheese with 1/2 cup powdered sugar and 1 teaspoon vanilla extract until smooth. In a separate bowl, whip 1 cup heavy whipping cream until stiff peaks form (about 3-4 minutes with an electric mixer on medium-high). Gently fold the whipped cream into the cream cheese mixture. Spread over the chilled Oreo crust and return to the fridge.
- Make the chocolate pudding layer: In a medium bowl, whisk together 1 box instant chocolate pudding mix and 2 cups cold whole milk for about 2 minutes until thickened. Let sit for 5 minutes to set. Spread gently over the cream cheese layer and return to the fridge.
- Make the whipped cream topping: In a clean bowl, whip 1 cup heavy whipping cream with 2 tablespoons powdered sugar and 1/2 teaspoon vanilla extract until stiff peaks form. Spread over the chocolate pudding layer, creating swirls or peaks.
- Chill and garnish: Cover the cake with plastic wrap and refrigerate for at least 4 hours, preferably overnight. Before serving, let the kids add Thanksgiving sprinkles or crushed Oreos on top. Run a knife around the edge of the springform pan, release the clasp, and slice. Let the cake sit at room temperature for 10 minutes before slicing for cleaner cuts.
Notes
Don’t skip the chilling time—4 hours minimum, overnight is best. Use room temperature cream cheese for a smooth filling. Press the crust firmly to prevent crumbling. For clean slices, run a sharp knife under hot water, wipe dry, and slice, wiping the blade between cuts. Let the cake sit at room temperature for 10 minutes before slicing.
Nutrition
- Serving Size: 1 slice (1/12 of cak
- Calories: 385
- Sugar: 24
- Sodium: 320
- Fat: 26
- Saturated Fat: 15
- Carbohydrates: 35
- Fiber: 1
- Protein: 5
Keywords: no-bake Thanksgiving dessert, Oreo crust cookie cake, kids dessert, no-bake chocolate pudding cake, easy Thanksgiving dessert


