It was 11:47 PM on a Tuesday in early November, and I was wide awake with a very specific craving. I didn’t want a full-blown chicken pot pie—the kind that takes over your whole oven and your whole evening—but I wanted that same soul-warming feeling. I didn’t have a proper pie dish or enough puff pastry sheets, but I had a muffin tin, some leftover rotisserie chicken, and a wild idea that arrived out of nowhere. What if I just… made them bite-sized? Honestly, the late hour made me bold. I wasn’t thinking about presentation or whether it was a “real” recipe. I was just following a hunch.
I grabbed the muffin tin from the back of the cabinet—the one I usually only pull out for banana bread—and started pressing pie crust into the little cups. It was messy. The dough tore in a couple of spots, and I had to patch it with my fingers. Somewhere around midnight, I spilled flour all over the counter, and I just laughed. There’s something about cooking when no one’s watching that frees you up to try the weird stuff. I mean, who was I trying to impress at midnight on a Tuesday? Just me and my craving.
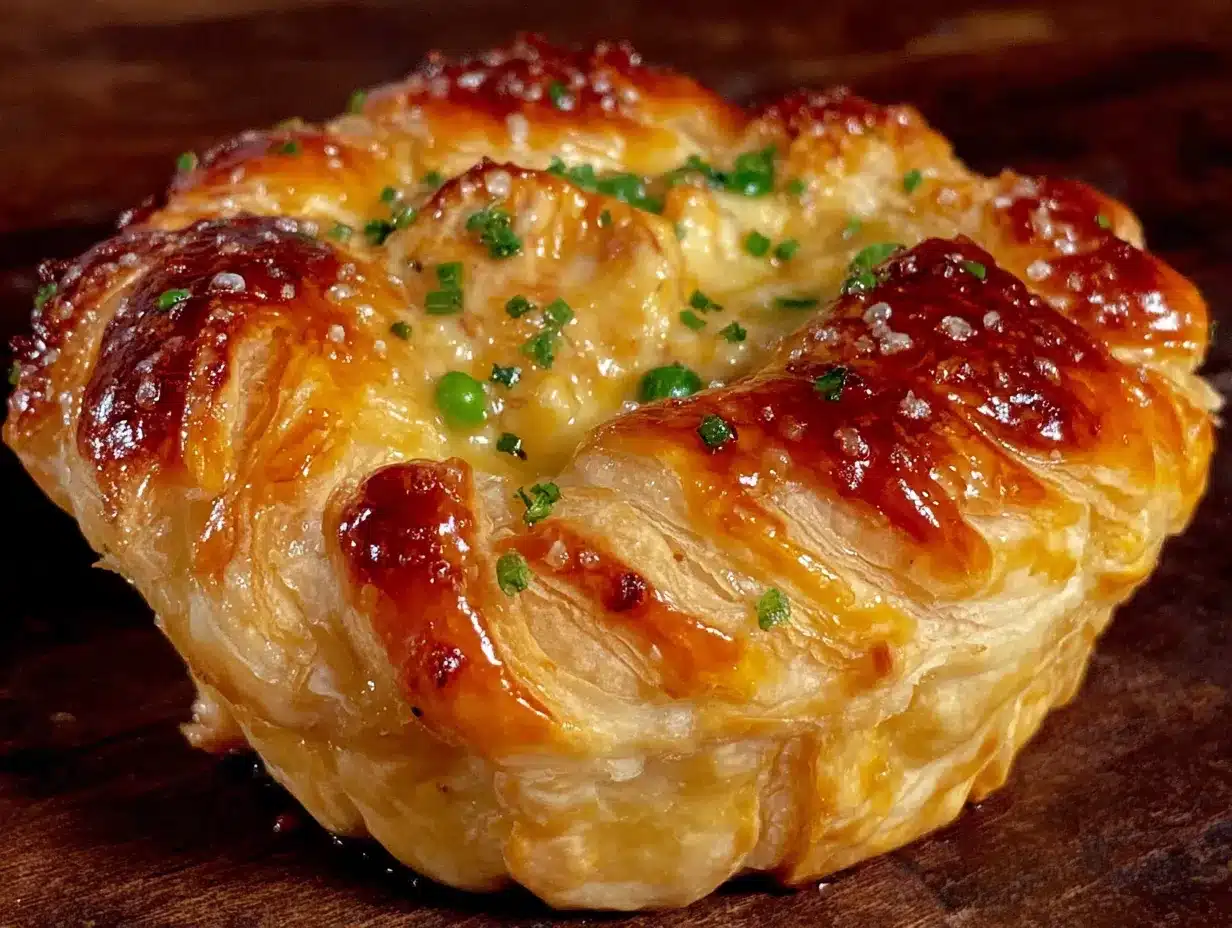
What came out of that oven twenty-five minutes later was nothing short of a revelation. The crust was flaky, the filling was creamy and rich, and each little pie was perfectly portioned. I stood at the counter eating three of them straight from the tin—burning my fingers on the hot pastry—and I knew I had stumbled onto something special. That’s the thing about late-night kitchen experiments. Sometimes they fail spectacularly, and sometimes they become the recipe your friends beg you to bring to every single party. These mini chicken pot pies? They’re the latter. And let me tell you, when I first served them to guests, I watched the whole tray disappear in under ten minutes. People love anything they can eat with their hands, and these little pies feel like a secret you’re letting them in on.
Why You’ll Love This Recipe
Let’s be real for a second—there are a million chicken pot pie recipes out there. I’ve tried a bunch of them. Some are too soupy. Some have that weird, gummy crust that tastes like cardboard. And most of them are way too much work for a Tuesday night. These mini pies solve every single one of those problems, and they do it with a little bit of style.
- Perfect for Hosting: This is the appetizer that steals the show. You can make a full batch of 24 mini pies, and they’ll be gone before you finish pouring the wine. Guests love anything bite-sized and indulgent.
- Make-Ahead Magic: You can assemble these completely the day before your party. Just pop them in the oven when guests arrive, and your kitchen smells amazing in twenty minutes.
- Simple Ingredients: No fancy grocery store trips. You likely have rotisserie chicken in your fridge, frozen peas in the freezer, and pie crust in the refrigerator section. This is pantry cooking at its finest.
- No Special Equipment: If you own a muffin tin, you’re already set. No pie dishes, no tart pans, no rolling pins needed.
- Crowd-Pleaser Guaranteed: I’ve served these at Super Bowl parties, bridal showers, and casual dinners. Kids and adults go equally crazy for them. There’s something about the individual portions that makes everyone feel special.
What makes this recipe different from the rest is the filling. I spent about six batches perfecting the ratio of creaminess to chunkiness. You want enough sauce to coat everything without making the crust soggy. The secret is letting the filling cool slightly before spooning it into the crusts. That little trick keeps the bottom from getting sad and limp. Trust me, I learned that one the hard way after a particularly soggy batch that I still had to eat because wasting food feels wrong.
These pies aren’t just good—they’re the kind of appetizer that makes people close their eyes after the first bite. I’ve seen it happen at least a dozen times. Someone takes a bite, their eyebrows go up, and they just stop talking for a second. That’s the reaction you want when you’re hosting. It’s comfort food reimagined as a party food, and honestly, it works perfectly.
What Ingredients You Will Need
This recipe uses simple, wholesome ingredients to deliver bold flavor and satisfying texture without the fuss. Most of these are probably already in your kitchen, which makes this perfect for those “I need to bring something to a party in two hours” moments.
For the Filling:
- 2 cups cooked chicken, shredded or diced (Rotisserie chicken works beautifully here. I prefer the breast meat for texture, but use whatever you have. If you’re cooking chicken specifically for this, poach two boneless breasts in salted water for about 15 minutes.)
- 1 cup frozen mixed vegetables (Peas, carrots, corn—the classic mix. Don’t thaw them first. They’ll cook perfectly in the sauce. I’ve tried fresh vegetables, and honestly, frozen works better here because they don’t turn mushy.)
- 1/2 cup frozen peas (Extra peas because I’m obsessed with them. Skip if you’re not a pea person, but you’re missing out.)
- 1/4 cup unsalted butter (I use Kerrygold because the flavor is richer, but any unsalted butter works. If you only have salted butter, reduce the added salt by half.)
- 1/3 cup all-purpose flour (This thickens the sauce. You can use gluten-free all-purpose flour if needed, but the texture will be slightly different—still good, just less stretchy.)
- 1 1/2 cups chicken broth (Low-sodium is best so you can control the salt. I like Swanson’s because it has a clean flavor that doesn’t overpower the other ingredients.)
- 1/2 cup whole milk or heavy cream (Heavy cream makes it extra luxurious. Milk works if you want it lighter. I’ve used oat milk in a pinch, and it was fine, but the sauce was thinner.)
- 1/2 teaspoon garlic powder (Not fresh garlic—powdered blends in more smoothly. Fresh garlic can create little chunks that feel weird in the sauce.)
- 1/2 teaspoon onion powder (Same logic. Powdered gives you the flavor without the texture.)
- 1/2 teaspoon dried thyme (This is the herb that makes it taste like pot pie. Don’t skip it. I once tried rosemary instead, and it was too piney.)
- 1/4 teaspoon black pepper (Freshly ground if you have it, but pre-ground works too.)
- 1/2 teaspoon salt, plus more to taste (Add this at the end after tasting. Broths vary wildly in saltiness.)
For the Crust:
- 2 refrigerated pie crusts, at room temperature (I use Pillsbury because they’re reliable and flaky. If you’re feeling ambitious, homemade pie crust works beautifully. Just make sure it’s rolled thin enough to fit into the muffin cups.)
- 1 egg, beaten with 1 tablespoon water (This is the egg wash that gives the crust that gorgeous golden color. Don’t skip it—it makes them look bakery-quality.)
- Optional: Flaky sea salt for sprinkling (Maldon salt is my favorite. That little crunch on top is incredible.)
Equipment Needed
The beauty of this recipe is that you don’t need much. Here’s what you’ll need to grab from your kitchen drawers and cabinets.
- Standard 12-cup muffin tin: This is non-negotiable. You need the cups to hold the shape. I use a non-stick one from Wilton that I’ve had for years. If your muffin tin is old and sticky, spray it generously with non-stick spray even if it says non-stick. Trust me on this.
- 2-inch round biscuit cutter or round cookie cutter: This cuts the crust circles to fit the muffin cups. If you don’t have one, use the rim of a drinking glass. I’ve done it. It works fine.
- Medium saucepan: For making the filling. A 3-quart size is perfect. Anything smaller and you’ll splash sauce everywhere.
- Wooden spoon or silicone spatula: For stirring the filling. Wooden spoons are great because they don’t scratch your pans and they give you good leverage for scraping the bottom.
- Small bowl: For the egg wash. Any bowl works. I use a cereal bowl.
- Pastry brush: For brushing the egg wash. If you don’t have one, use a paper towel folded into a square. It’s not as elegant, but it gets the job done.
- Measuring cups and spoons: Standard set. Nothing fancy.
- Cutting board and knife: For shredding or dicing the chicken. A sharp knife makes this so much easier.
Budget-friendly tip: You don’t need expensive equipment for this recipe. I made my first batch using a drinking glass as a cutter and a paper towel as a pastry brush. The pies came out perfect. Save your money for good butter and quality chicken broth—those make a real difference in the final dish.
Preparation Method
Alright, let’s get cooking. I’ve broken this down into clear steps so you don’t miss anything. Read through the whole thing once before you start, and you’ll be golden.
- Preheat your oven to 375°F (190°C). This is important because the oven needs to be fully hot when the pies go in. While it’s heating, take your pie crusts out of the fridge and let them sit on the counter for about 15 minutes. Cold crust cracks when you try to cut it, and nobody wants that.
- Make the filling. In your medium saucepan, melt the butter over medium heat. Once it’s fully melted and starting to bubble, whisk in the flour. Keep whisking for about 2 minutes. You’re making a roux here, and it should smell nutty and look like wet sand. Don’t rush this step—raw flour taste is not your friend.
- Slowly pour in the chicken broth while whisking constantly. Keep whisking until the mixture is smooth and starts to thicken, about 3 minutes. Then pour in the milk or cream and whisk again. The sauce should be thick enough to coat the back of a spoon. If it looks too thin, let it simmer for another minute. If it looks too thick, add a splash more broth.
- Add the seasonings. Stir in the garlic powder, onion powder, dried thyme, pepper, and salt. Taste it here. This is your chance to adjust before the chicken and vegetables go in. I always add a little more pepper than I think I need because the flavors mellow as it cooks.
- Add the chicken and vegetables. Stir in the shredded chicken, frozen mixed vegetables, and extra peas. Let everything cook together for about 3 minutes, stirring occasionally. The frozen vegetables will thaw and warm through. Remove the pan from the heat and let the filling cool for 5 to 10 minutes. This step matters—hot filling will make the crust soggy before it even hits the oven. I learned this after my first batch turned into a mess of wet dough.
- Prepare the muffin tin. Lightly spray each cup of the muffin tin with non-stick cooking spray. Even if your tin is non-stick, do this anyway. The pies will release much more easily.
- Cut the crust circles. Unroll your first pie crust on a clean, lightly floured surface. Use your 2-inch biscuit cutter or glass rim to cut out circles. You should get about 6 circles from each crust if you cut them close together. Press the scraps together and re-roll them to get a few more circles if needed. Don’t overwork the dough, or it’ll get tough.
- Press the crust into the muffin cups. Gently press one circle into each muffin cup, making sure the dough comes up the sides. Don’t stretch the dough—just ease it in. If it tears, press it back together with your fingers. Nobody will see the bottom anyway.
- Fill the cups. Spoon the cooled filling into each crust-lined cup, filling them almost to the top. You want them generous but not overflowing. A heaping tablespoon per cup is usually perfect.
- Add the top crusts. Cut smaller circles from the second pie crust—about 1.5 inches wide. Place one on top of each filled cup. Press the edges gently to seal. If you want to get fancy, use a fork to crimp the edges. I usually just press with my fingers because I’m lazy and it looks rustic.
- Brush with egg wash and cut vents. Brush the top of each pie with the beaten egg wash. Use a sharp knife to cut a small slit in the top of each pie. This lets steam escape and prevents the tops from bubbling open. Sprinkle with flaky sea salt if you’re using it.
- Bake for 20 to 25 minutes. The pies are done when the crust is golden brown and the filling is bubbling up through the vents. Let them cool in the pan for 5 minutes before removing. Use a small spoon or offset spatula to gently lift them out. They’ll be delicate while warm, so be patient.
Cooking Tips & Techniques
I’ve made this recipe about twenty times now, and I’ve learned a few things along the way. Here are the tips that’ll save you from making the same mistakes I did.
Don’t overfill the cups. I know it’s tempting to pile the filling high, but too much filling makes the pies impossible to seal. The tops will pop open, and you’ll end up with a mess in your oven. Fill them to just below the rim, and you’ll get perfect little domes.
Let the filling cool completely. This is the number one tip I give everyone. If you spoon hot filling into the crust, the bottom will turn into a soggy, sad mess. I learned this the hard way when I was rushing to make these for a party and ended up with pies that fell apart when I tried to lift them out. Let the filling sit for at least 10 minutes. Better yet, make it the night before and refrigerate it.
Use room-temperature crust. Cold crust cracks and tears. Let it sit on the counter for 15 to 20 minutes before you start cutting. If your kitchen is cold, give it a little longer. The dough should be pliable but not sticky.
Double up the bottom crust for extra sturdiness. If you’re serving these at a party where people will be walking around with them, the bottom crust can get a little fragile. I’ve started using two layers of crust on the bottom for gatherings. Just press two circles into each cup instead of one. It makes a huge difference in sturdiness.
Watch the oven like a hawk at the end. Ovens vary wildly. My friend’s oven bakes these in 18 minutes. Mine takes 23. Start checking at 18 minutes, and look for that deep golden color. If the edges start browning too fast, tent the pan loosely with foil.
Variations & Adaptations
One of the best things about this recipe is how flexible it is. I’ve tried several variations, and they’ve all been delicious in their own way.
Vegetarian Version: Swap the chicken for 2 cups of diced mushrooms and an extra cup of mixed vegetables. Sauté the mushrooms in the butter before making the roux. They release moisture, so cook them until most of the liquid evaporates. I’ve also used canned jackfruit, shredded and seasoned, and it was surprisingly good.
Cheesy Chicken Pot Pies: Stir in 1/2 cup of shredded cheddar cheese into the filling right before spooning it into the crusts. The cheese adds a whole new layer of richness. I used sharp cheddar once, and it was incredible. Gruyère would also be amazing if you’re feeling fancy.
Herb Garden Twist: Add 2 tablespoons of fresh chopped parsley and 1 tablespoon of fresh dill to the filling. Fresh herbs brighten everything up and make it taste like spring. I tried this version for Easter brunch, and my aunt asked for the recipe three times.
Gluten-Free Adaptation: Use a gluten-free pie crust mix and gluten-free all-purpose flour for the roux. The texture will be slightly crumblier, but the flavor is still there. I’ve tested this with King Arthur’s gluten-free pie crust mix, and it worked beautifully.
Spicy Kick: Add 1/2 teaspoon of red pepper flakes and a dash of hot sauce to the filling. This version is great for game day parties. I made these for a Super Bowl party, and they disappeared faster than the wings.
Serving & Storage Suggestions
These mini pies are incredibly versatile when it comes to serving. Here’s how I handle them for different occasions.
For parties and gatherings: Arrange the pies on a large platter, slightly overlapping in a circle. Sprinkle fresh parsley over the top for color. Serve them warm—not piping hot, but warm enough that the filling is still creamy. I usually let them cool for about 10 minutes after baking before transferring to the serving platter. They hold their heat surprisingly well.
What to serve alongside: A simple green salad with lemon vinaigrette cuts through the richness beautifully. If you’re serving these as a main course, pair them with roasted asparagus or steamed green beans. For parties, I set out small dishes of honey mustard and hot sauce for dipping. You’d be surprised how good honey mustard is with chicken pot pie.
Storage instructions: Store leftover pies in an airtight container in the refrigerator for up to 4 days. The crust will soften slightly, but they’re still delicious. To reheat, place them on a baking sheet in a 350°F oven for about 8 minutes. The microwave works in a pinch, but the crust gets chewy. I don’t recommend freezing these after baking—the crust loses its flakiness. However, you can freeze the unbaked pies on a baking sheet, then transfer them to a freezer bag. Bake from frozen, adding about 5 minutes to the baking time.
Make-ahead note: These are my secret weapon for stress-free hosting. I assemble everything the night before, cover the muffin tin with plastic wrap, and pop it in the fridge. The next day, I brush with egg wash and bake. The filling actually gets more flavorful overnight as the herbs meld together.
Nutritional Information & Benefits
Let’s be honest—these are comfort food, not health food. But they’re not as bad as you might think, especially if you make a few smart swaps.
| Nutrient | Per Mini Pie (1 serving) |
|---|---|
| Calories | 185 |
| Total Fat | 11g |
| Saturated Fat | 5g |
| Cholesterol | 35mg |
| Sodium | 320mg |
| Total Carbohydrates | 15g |
| Dietary Fiber | 2g |
| Sugar | 3g |
| Protein | 9g |
The chicken provides lean protein, and the vegetables add fiber and vitamins A and C. If you use whole milk instead of heavy cream, you save about 30 calories per pie. The crust is where most of the calories live, but honestly, life’s too short to skip the flaky pastry. I look at these as a treat—something to enjoy when you’re gathering with people you love. And if you’re serving them as appetizers, most people only eat two or three, which keeps the portions reasonable.
For those watching their sodium, use low-sodium broth and skip the added salt until the end. You can also use a whole wheat pie crust for extra fiber, though the texture is a bit denser.
Conclusion
These mini chicken pot pies have become my signature party dish, and I’m honestly a little protective of the recipe. There’s something magical about watching people’s faces light up when they bite into one of these little pies. It’s the kind of food that makes people feel cared for, even at a crowded party where you’re juggling drinks and small talk.
I hope you try them for your next gathering. Don’t be afraid to make them your own—swap in different vegetables, add cheese, or spice them up. The base recipe is forgiving and loves to be customized. And if you make them at midnight on a Tuesday like I did, even better. Some of the best recipes come from those quiet, impulsive moments in the kitchen.
I’d love to hear how yours turn out. Drop a comment below and let me know what variations you tried, or tag me in your photos on social media. Happy cooking, and here’s to recipes that make hosting feel effortless—and make you look like a rockstar.
Frequently Asked Questions
Can I use homemade pie crust instead of refrigerated?
Absolutely. Homemade pie crust works beautifully here. Just roll it out to about 1/8-inch thickness and cut your circles. The flavor is even better, but the texture will be slightly more delicate. I recommend blind baking the bottom crust for 5 minutes if you’re using homemade, just to prevent sogginess.
Can I make these in a mini muffin tin for smaller appetizers?
Yes, but you’ll need to adjust the baking time. Mini muffin tins bake in about 12 to 15 minutes. Use a smaller cutter for the crust—about 1.5 inches for the bottom and 1 inch for the top. These are perfect for cocktail parties where guests are standing and mingling.
Can I use turkey instead of chicken?
Definitely. This is a fantastic way to use up leftover Thanksgiving turkey. The flavor is almost identical. Just make sure the turkey is well-shredded and not too dry. If your turkey is on the drier side, add an extra splash of broth to the filling.
Why did my bottom crust turn out soggy?
This usually happens for one of two reasons: the filling was too hot when you spooned it in, or you didn’t let the pies cool in the pan long enough. Let the filling cool for at least 10 minutes before assembling, and let the baked pies rest in the pan for 5 minutes before removing. If the problem persists, try brushing the bottom crust with a thin layer of egg wash before adding the filling—it creates a barrier.
How far in advance can I assemble these before baking?
You can assemble them up to 24 hours in advance. Keep the unbaked pies covered in the refrigerator. Brush with egg wash right before baking—if you brush them too early, the wash can make the crust soggy. If you’re planning further ahead, freeze the unbaked pies on a baking sheet, then transfer to a freezer bag. They’ll keep for up to 3 months.
Pin This Recipe!

Mini Chicken Pot Pies in Muffin Tins: Easy Guest Appetizer

These bite-sized chicken pot pies are made in a muffin tin for a perfect party appetizer. Flaky crust, creamy filling, and easy to make ahead.
- Prep Time: 20 minutes
- Cook Time: 25 minutes
- Total Time: 45 minutes
- Yield: 24 mini pies 1x
- Category: Appetizer
- Cuisine: American
Ingredients
- 2 cups cooked chicken, shredded or diced
- 1 cup frozen mixed vegetables (peas, carrots, corn)
- 1/2 cup frozen peas
- 1/4 cup unsalted butter
- 1/3 cup all-purpose flour
- 1 1/2 cups chicken broth, low-sodium
- 1/2 cup whole milk or heavy cream
- 1/2 teaspoon garlic powder
- 1/2 teaspoon onion powder
- 1/2 teaspoon dried thyme
- 1/4 teaspoon black pepper
- 1/2 teaspoon salt, plus more to taste
- 2 refrigerated pie crusts, at room temperature
- 1 egg, beaten with 1 tablespoon water
- Flaky sea salt for sprinkling (optional)
Instructions
- Preheat your oven to 375°F (190°C). Let pie crusts sit at room temperature for 15 minutes.
- In a medium saucepan, melt butter over medium heat. Whisk in flour and cook for 2 minutes until nutty and sand-like.
- Slowly pour in chicken broth while whisking constantly. Cook until thickened, about 3 minutes. Add milk or cream and whisk until smooth.
- Stir in garlic powder, onion powder, dried thyme, pepper, and salt. Taste and adjust seasoning.
- Add shredded chicken, frozen mixed vegetables, and extra peas. Cook for 3 minutes, then remove from heat and let cool for 5-10 minutes.
- Lightly spray a 12-cup muffin tin with non-stick cooking spray.
- Unroll one pie crust on a floured surface. Cut out 2-inch circles (about 6 per crust). Press scraps together and re-roll if needed.
- Press one circle into each muffin cup, easing dough up the sides without stretching.
- Spoon cooled filling into each crust-lined cup, filling almost to the top (about a heaping tablespoon per cup).
- Cut smaller circles (about 1.5 inches) from the second pie crust. Place one on top of each filled cup and press edges to seal.
- Brush tops with egg wash. Cut a small slit in each top for steam to escape. Sprinkle with flaky sea salt if desired.
- Bake for 20-25 minutes until golden brown and filling bubbles. Cool in pan for 5 minutes before removing.
Notes
Let filling cool completely before spooning into crusts to prevent soggy bottoms. For sturdier pies, double up the bottom crust. Can be assembled up to 24 hours ahead and refrigerated. Unbaked pies can be frozen for up to 3 months.
Nutrition
- Serving Size: 1 mini pie
- Calories: 185
- Sugar: 3
- Sodium: 320
- Fat: 11
- Saturated Fat: 5
- Carbohydrates: 15
- Fiber: 2
- Protein: 9
Keywords: mini chicken pot pies, muffin tin appetizer, bite-sized pot pie, party appetizer, chicken pot pie cups


