This was supposed to be a simple batch of chocolate peanut butter brownies for a Halloween party. I had the whole thing planned out—a rich, fudgy base, a thick swirl of peanut butter, and maybe some candy pieces on top. But somewhere between measuring the cocoa powder and realizing I was out of butter, the plan fell apart. I grabbed the wrong thing from the fridge—Greek yogurt instead of sour cream—and the kitchen was already a mess, the dog was barking, and I was running late. What came out of the oven was nothing like the plan. And honestly? It was better.
The brownies were lighter, almost airy, but still deeply chocolatey. The peanut butter swirl held its shape in a way I hadn’t expected. And that spiderweb pattern I’d been trying to create? It actually worked—better than it ever had before. I stood there staring at the pan, spatula in hand, thinking, “How did this happen?”
I mean, let’s be real. I’ve had plenty of kitchen disasters that ended up in the trash. But this one? This one stuck. I’ve made these brownies at least a dozen times since that night, tweaking the yogurt ratio, testing different peanut butters, and every single time, they turn out just right. Maybe you’ve been there—the moment when a mistake turns into something you actually want to repeat. That’s this recipe. It’s the happy accident that became a staple.
Why You’ll Love This Recipe
Let me tell you why these brownies have earned a permanent spot in my rotation. First off, they’re quick and easy. From start to finish, you’re looking at about 35 minutes, which is perfect for those last-minute cravings or when you need a dessert for a gathering and forgot to plan ahead. I’ve tested this recipe on busy weeknights, lazy Sunday afternoons, and even during a power outage (long story), and it holds up every time.
- Simple Ingredients: You probably have most of these in your pantry right now. No fancy grocery trips needed. Greek yogurt, cocoa powder, peanut butter, sugar, eggs—that’s the backbone of this recipe.
- Perfect for Halloween or Any Day: The spiderweb pattern makes it a showstopper for spooky season, but honestly, I make these year-round. They’re great for potlucks, bake sales, or just because.
- Crowd-Pleaser: I’ve served these to kids, adults, and even my picky neighbor who “doesn’t like healthy desserts.” They disappear every time.
- Unbelievably Delicious: The texture is what gets me. They’re fudgy but not heavy, chocolatey but not overwhelming, and that peanut butter swirl adds just the right amount of saltiness.
What makes this recipe different from the rest? It’s the yogurt. Using Greek yogurt instead of butter cuts the calories and fat without sacrificing moisture. I’ve tried other “light” brownie recipes that taste like cardboard, but this one? It’s the real deal. The first time I made them, I actually checked the pan to make sure I hadn’t accidentally used regular butter. Nope. It’s the yogurt doing the heavy lifting.
This recipe isn’t just good—it’s the kind that makes you close your eyes after the first bite. It’s comfort food reimagined: lighter, faster, but with the same soul-soothing satisfaction. Perfect for impressing guests without stress, or turning a simple Tuesday into something special.
What Ingredients You Will Need
This recipe uses simple, wholesome ingredients to deliver bold flavor and satisfying texture without the fuss. Most of these are pantry staples, which makes this an easy last-minute dessert.
For the Brownie Base
- 1/2 cup unsweetened cocoa powder (I prefer Ghirardelli or Hershey’s Special Dark for a richer flavor)
- 1/2 cup all-purpose flour (spooned and leveled—don’t scoop directly from the bag)
- 1/2 teaspoon baking powder
- 1/4 teaspoon salt
- 1/2 cup granulated sugar
- 1/4 cup brown sugar, packed (adds moisture and a hint of caramel)
- 2 large eggs, room temperature
- 1/2 cup plain Greek yogurt (full-fat or 2% works best; avoid non-fat as it can be too thin)
- 1 teaspoon vanilla extract
- 1/4 cup unsweetened applesauce (adds sweetness and keeps them moist)
For the Peanut Butter Swirl
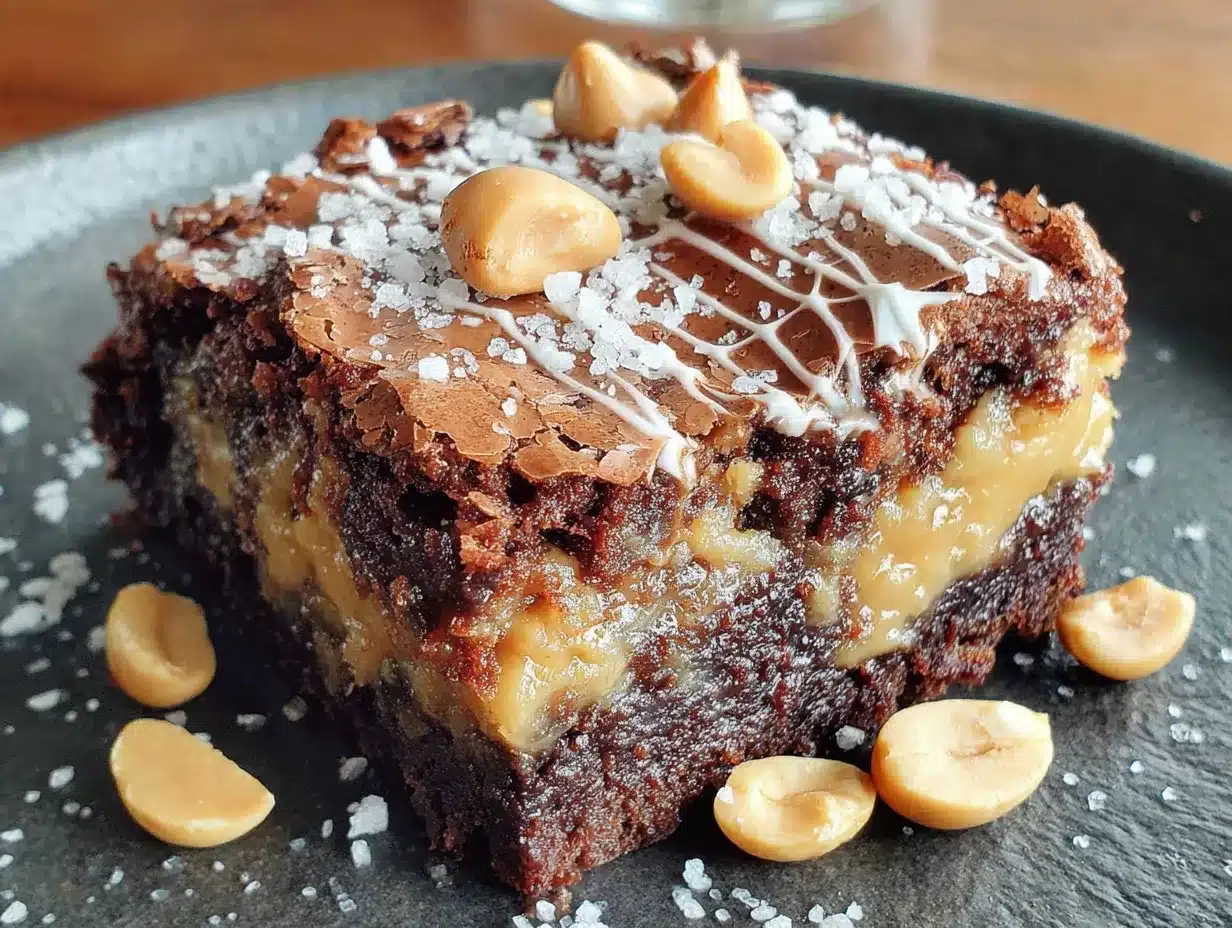
- 1/3 cup creamy peanut butter (I use natural peanut butter with no added sugar—just peanuts and salt)
- 2 tablespoons powdered sugar (helps the swirl hold its shape)
- 1 tablespoon milk (any kind works; add more if needed for consistency)
For the Spiderweb Design
- 2 tablespoons white chocolate chips, melted (or use a white candy melt for easier piping)
- 1 teaspoon coconut oil (helps thin the white chocolate for piping)
Ingredient selection tip: Look for a thick, creamy peanut butter for the swirl. The runny natural kind can make the pattern blur. If your peanut butter is too thin, stir in a little extra powdered sugar to thicken it up.
Substitution guidance: For a gluten-free version, swap the all-purpose flour with a 1:1 gluten-free baking blend. For a dairy-free option, use a dairy-free yogurt (like coconut-based) and dairy-free white chocolate. The texture will be slightly different but still delicious.
Equipment Needed
You don’t need a professional kitchen to pull these off. Here’s what you’ll need:
- 8×8-inch baking pan (glass or metal both work; I prefer metal for even baking)
- Parchment paper (for easy removal—trust me on this one)
- Mixing bowls (one large, one small)
- Whisk (for the dry ingredients)
- Rubber spatula (for folding the batter)
- Toothpick or skewer (for creating the spiderweb pattern)
- Small piping bag or zip-top bag (for the white chocolate)
- Measuring cups and spoons
If you don’t have a piping bag, no worries. Just snip a tiny corner off a zip-top bag and use that. I’ve done it a hundred times. For the baking pan, if you only have a 9×9, the brownies will be slightly thinner—just reduce the baking time by 2-3 minutes.
Budget-friendly tip: Skip the fancy piping tools. A toothpick and a zip-top bag cost pennies and work perfectly. I actually prefer the toothpick method because it gives you more control.
Preparation Method
- Preheat your oven to 350°F (175°C). Line your 8×8 pan with parchment paper, leaving some overhang on two sides. This makes lifting the brownies out a breeze later. Lightly spray the parchment with non-stick spray.
- Mix the dry ingredients. In a large bowl, whisk together the cocoa powder, flour, baking powder, and salt. Make sure there are no lumps—cocoa powder can be stubborn. I usually sift it if I’m feeling fancy, but whisking works fine.
- Combine the wet ingredients. In a separate bowl, whisk together the granulated sugar, brown sugar, eggs, Greek yogurt, vanilla extract, and applesauce until smooth. The mixture should be thick and glossy. Don’t overmix—just until combined.
- Fold the wet into the dry. Pour the wet mixture into the dry ingredients and fold gently with a rubber spatula. Stop as soon as you don’t see any more flour streaks. Overmixing will make the brownies tough, and nobody wants that.
- Pour the batter into the pan. Spread it evenly with the spatula. The batter will be thick—that’s normal. Take your time to get it into the corners.
- Make the peanut butter swirl. In a small bowl, mix the peanut butter, powdered sugar, and milk until smooth. It should be thick but spreadable. If it’s too thick, add another teaspoon of milk. Drop spoonfuls of the peanut butter mixture over the brownie batter, spacing them out evenly.
- Create the swirl. Use a toothpick or skewer to drag the peanut butter through the batter in a figure-eight motion. Don’t overdo it—you want distinct ribbons, not a muddy mess. I usually do about 5-6 passes.
- Add the spiderweb. Melt the white chocolate chips with the coconut oil in the microwave in 15-second bursts, stirring between each. Transfer to a small piping bag or zip-top bag. Pipe small dots of white chocolate in a circle pattern on top of the brownies. Then, use a toothpick to drag through the dots from the center outward, creating a web effect. Wipe the toothpick clean between each line for crisp results.
- Bake for 22-25 minutes. The edges should be set and slightly pulling away from the pan, but the center should still look slightly underdone. A toothpick inserted in the center should come out with a few moist crumbs—not raw batter. Overbaking is the enemy of fudgy brownies.
- Cool completely in the pan. This is crucial. Let them cool for at least 30 minutes at room temperature, then refrigerate for another 30 minutes before slicing. This helps the spiderweb set and makes for cleaner cuts. Use the parchment overhang to lift the whole block out onto a cutting board.
Sensory cue: When they’re done, the kitchen will smell like a chocolate peanut butter dream. The top should look matte, not shiny, and the edges will be slightly cracked. If you press gently on the center, it should spring back.
Cooking Tips & Techniques
I’ve made these brownies more times than I can count, and I’ve learned a few things the hard way. Here’s what I wish someone had told me:
Don’t skip the cooling step. I know it’s tempting to dig in while they’re warm, but the spiderweb pattern will smudge if the brownies are too hot. I once served them at a party straight from the oven, and the web turned into a white chocolate puddle. Still tasted great, but the presentation was a mess.
Use room temperature eggs. Cold eggs can seize the batter and make the brownies dense. If you forgot to take them out ahead of time, place the eggs in a bowl of warm water for 5 minutes. Problem solved.
Measure your flour correctly. Scooping directly from the bag packs in too much flour, which leads to dry brownies. Spoon the flour into your measuring cup and level it off with a knife. This one change made a huge difference in my baking.
For a cleaner spiderweb, chill the brownie batter for 10 minutes before adding the white chocolate. The cold batter helps the white chocolate hold its shape. I discovered this by accident when I got distracted mid-recipe and left the batter in the fridge. Now I do it on purpose.
Multitasking tip: While the brownies are cooling, make the white chocolate mixture. That way, you’re not rushing at the end. I usually do this during the last 5 minutes of baking.
Variations & Adaptations
One of the best things about this recipe is how adaptable it is. Here are some variations I’ve tried and loved:
Vegan Version
Swap the eggs for flax eggs (1 tablespoon ground flaxseed + 3 tablespoons water per egg). Use dairy-free yogurt and dairy-free white chocolate. The texture will be slightly more cake-like, but still delicious. I tested this for a friend’s vegan birthday party, and nobody could tell the difference.
Gluten-Free Option
Use a 1:1 gluten-free baking blend instead of all-purpose flour. I like Bob’s Red Mill for this. Add 1/4 teaspoon xanthan gum if your blend doesn’t already include it. The brownies will be a bit more delicate, so handle them gently.
Flavor Twists
Swap the peanut butter for almond butter or sunflower seed butter for a nut-free version. Add a teaspoon of espresso powder to the dry ingredients for a mocha kick. Or fold in 1/4 cup of chocolate chips for extra richness. I once added a pinch of cinnamon and cayenne pepper for a Mexican chocolate vibe—it was amazing.
Different Patterns
The spiderweb is fun for Halloween, but you can skip it entirely and just swirl the peanut butter. Or use dark chocolate instead of white chocolate for a more subtle design. I’ve even done a heart pattern for Valentine’s Day by piping hearts instead of webs.
Serving & Storage Suggestions
These brownies are best served at room temperature or slightly chilled. The peanut butter swirl firms up nicely when cold, which makes for cleaner slices. I like to cut them into 16 small squares—they’re rich enough that a little goes a long way.
For presentation, dust the tops with a little powdered sugar or cocoa powder right before serving. It adds a nice contrast against the spiderweb. If you’re serving them at a Halloween party, arrange them on a black platter for maximum spooky effect.
Complementary pairings: A glass of cold milk is the classic choice. For a more adult option, try them with a dark roast coffee or a glass of red wine (a fruity Zinfandel works surprisingly well). Vanilla ice cream on the side never hurts.
Storage instructions: Store leftover brownies in an airtight container at room temperature for up to 3 days, or in the refrigerator for up to a week. I actually prefer them cold—the texture gets fudgier. For longer storage, wrap them individually in plastic wrap and freeze for up to 3 months. Thaw at room temperature for about 30 minutes before serving.
Reheating tip: If you want that just-baked warmth, microwave a single brownie for 10-15 seconds. Be careful not to overheat, or the chocolate will melt into a puddle.
Flavor development note: These brownies actually taste better the next day. The flavors meld together overnight, and the texture becomes even more fudgy. So if you can resist, make them a day ahead.
Nutritional Information & Benefits
Here’s the thing—these are lighter brownies, but they still feel indulgent. One serving (1/16 of the recipe) contains approximately:
- Calories: 145
- Fat: 6g
- Carbohydrates: 20g
- Protein: 4g
- Fiber: 2g
- Sugar: 14g
Compared to traditional brownies, you’re saving about 80-100 calories per serving, thanks to the Greek yogurt and applesauce replacing some of the butter and oil. The Greek yogurt also adds a nice protein boost, and the cocoa powder is rich in antioxidants. The peanut butter provides healthy fats and a little more protein.
Dietary considerations: This recipe is vegetarian. For gluten-free or vegan options, see the variations section above. The brownies contain dairy (yogurt, white chocolate) and peanuts, so keep that in mind for allergies.
My personal take? I love that I can enjoy a brownie without the sugar crash that usually follows. These satisfy my chocolate cravings without making me feel heavy. That’s a win in my book.
Conclusion
These Lighter Spiderweb Chocolate Peanut Butter Brownies started as a mistake, but they’ve become one of my most-requested recipes. They’re proof that you don’t need a ton of butter and sugar to make something truly delicious. The combination of rich chocolate, creamy peanut butter, and that fun spiderweb design makes them perfect for Halloween, but honestly, they’re too good to save for just one season.
I hope you give them a try and make them your own. Maybe you’ll add a different nut butter, or skip the web pattern, or double the batch because one pan is never enough. Whatever you do, I’d love to hear about it. Drop a comment below and let me know how yours turned out—did you make any changes? Did the spiderweb hold? Did you eat three in one sitting? (No judgment here.)
Thanks for stopping by, and happy baking! Remember, sometimes the best recipes come from the moments when everything goes wrong. So don’t be afraid to experiment, make mistakes, and end up with something better than you planned.
Frequently Asked Questions
Can I use regular yogurt instead of Greek yogurt?
You can, but the brownies will be slightly less fudgy. Greek yogurt is thicker and has more protein, which helps with texture. If you use regular yogurt, reduce the applesauce slightly to compensate for the extra moisture.
How do I get clean cuts without the brownies crumbling?
Use a sharp knife and wipe it clean between each cut. For the cleanest slices, refrigerate the brownies for at least 30 minutes before cutting. I also recommend using a plastic knife—it glides through without dragging the topping.
Can I make these brownies ahead of time?
Absolutely. They actually taste better the next day. Bake them a day ahead, cool completely, and store in an airtight container. Add the spiderweb design after they’ve cooled to keep it looking sharp.
My peanut butter swirl disappeared into the batter. What went wrong?
Your peanut butter mixture might have been too thin. Make sure you’re using a thick, creamy peanut butter and enough powdered sugar to give it body. Also, don’t over-swirl—a few gentle passes are enough.
Can I freeze these brownies?
Yes! Wrap individual brownies in plastic wrap, then place them in a freezer-safe bag. They’ll keep for up to 3 months. Thaw at room temperature for about 30 minutes, or microwave for 15 seconds for a warm treat.
Pin This Recipe!
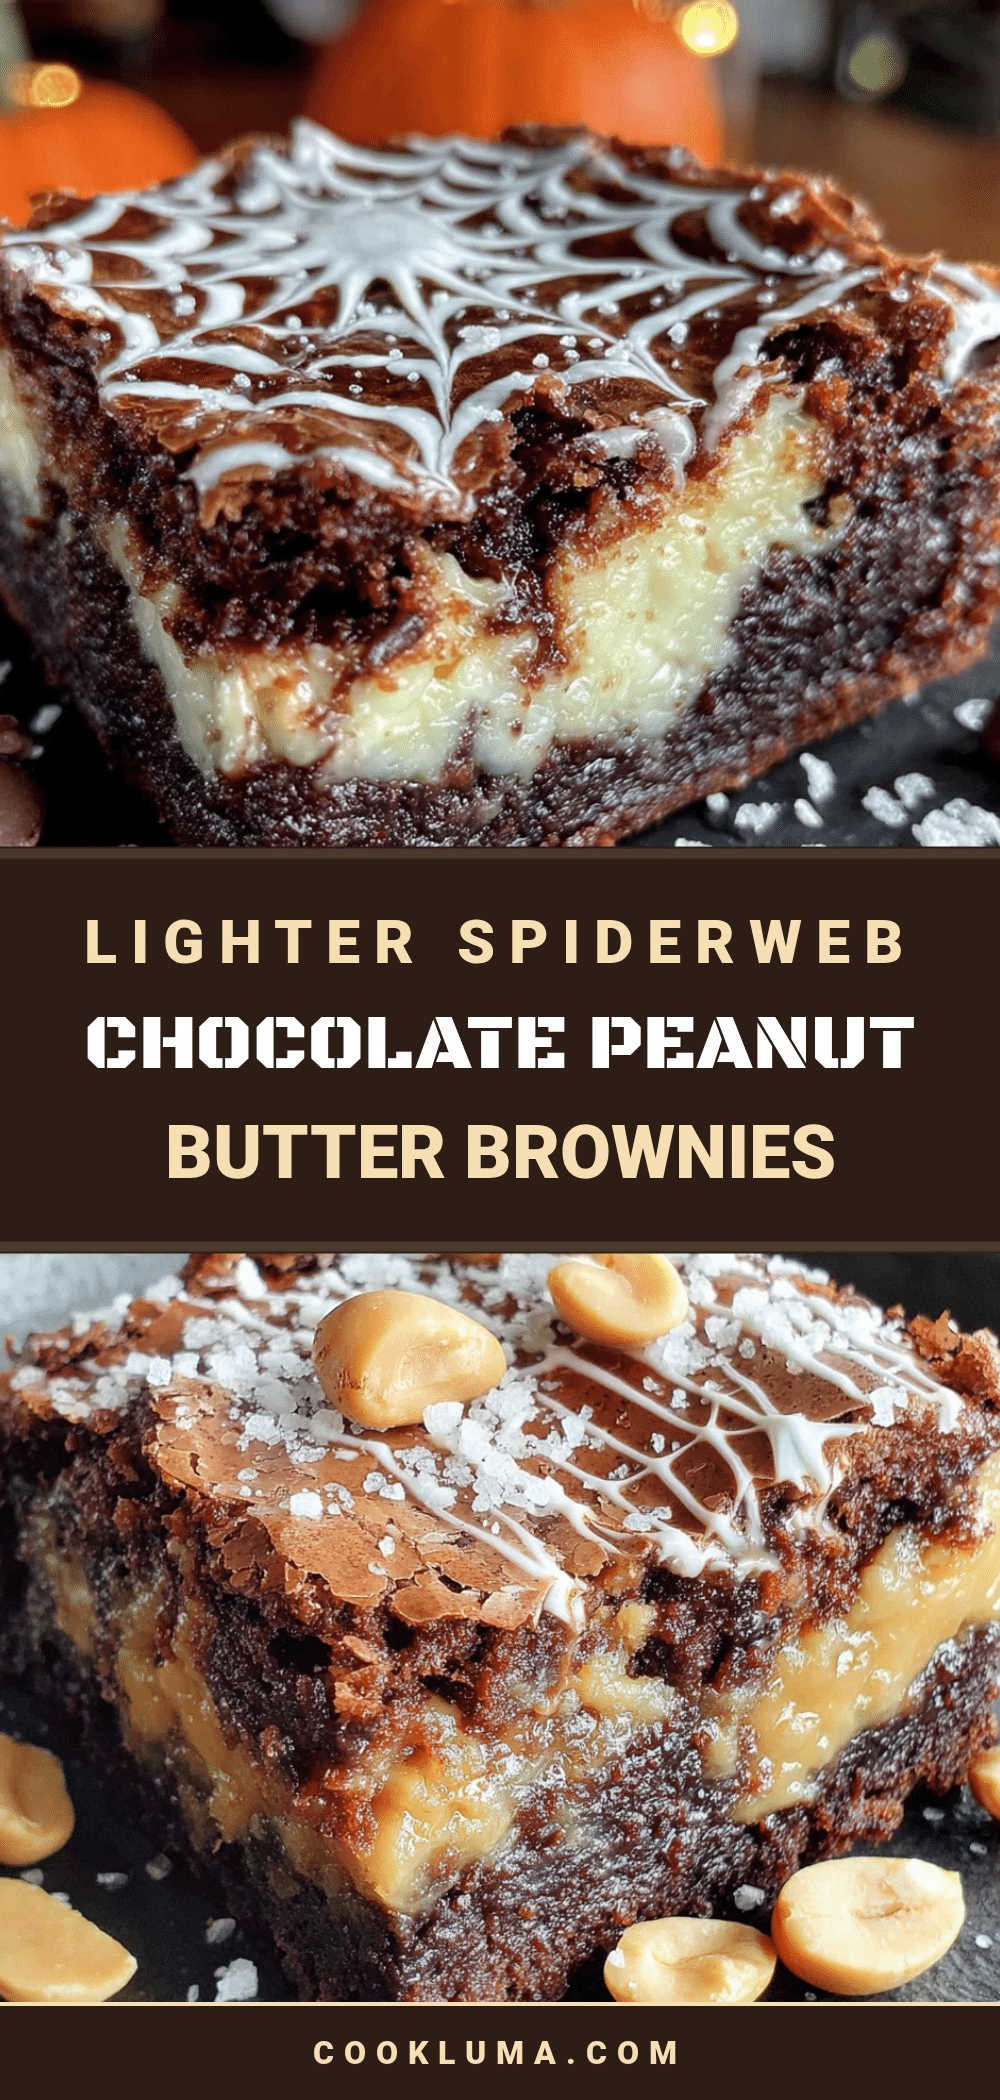
Lighter Spiderweb Chocolate Peanut Butter Brownies
A happy accident turned into a staple recipe—these lighter brownies are fudgy, chocolatey, and topped with a creamy peanut butter swirl and a fun spiderweb design. Made with Greek yogurt and applesauce instead of butter, they’re lower in calories but still incredibly delicious.
- Prep Time: 15 minutes
- Cook Time: 25 minutes
- Total Time: 40 minutes
- Yield: 16 servings 1x
- Category: Dessert
- Cuisine: American
Ingredients
- 1/2 cup unsweetened cocoa powder
- 1/2 cup all-purpose flour
- 1/2 teaspoon baking powder
- 1/4 teaspoon salt
- 1/2 cup granulated sugar
- 1/4 cup brown sugar, packed
- 2 large eggs, room temperature
- 1/2 cup plain Greek yogurt (full-fat or 2%)
- 1 teaspoon vanilla extract
- 1/4 cup unsweetened applesauce
- 1/3 cup creamy peanut butter
- 2 tablespoons powdered sugar
- 1 tablespoon milk
- 2 tablespoons white chocolate chips, melted
- 1 teaspoon coconut oil
Instructions
- Preheat your oven to 350°F (175°C). Line an 8×8-inch baking pan with parchment paper, leaving overhang on two sides. Lightly spray with non-stick spray.
- In a large bowl, whisk together cocoa powder, flour, baking powder, and salt until no lumps remain.
- In a separate bowl, whisk together granulated sugar, brown sugar, eggs, Greek yogurt, vanilla extract, and applesauce until smooth and glossy.
- Pour the wet mixture into the dry ingredients and fold gently with a rubber spatula until just combined. Do not overmix.
- Pour the batter into the prepared pan and spread evenly with a spatula.
- In a small bowl, mix peanut butter, powdered sugar, and milk until smooth and spreadable. Drop spoonfuls of the peanut butter mixture over the brownie batter.
- Use a toothpick or skewer to drag the peanut butter through the batter in a figure-eight motion, creating swirls. Do not over-swirl.
- Melt white chocolate chips with coconut oil in the microwave in 15-second bursts, stirring between each. Transfer to a small piping bag or zip-top bag. Pipe small dots of white chocolate in a circle pattern on top of the brownies. Use a toothpick to drag through the dots from the center outward to create a spiderweb effect. Wipe the toothpick clean between each line.
- Bake for 22-25 minutes, until edges are set and center looks slightly underdone. A toothpick inserted in the center should come out with a few moist crumbs.
- Cool completely in the pan for at least 30 minutes at room temperature, then refrigerate for another 30 minutes before slicing. Use parchment overhang to lift the block out onto a cutting board.
Notes
Don’t skip the cooling step—the spiderweb pattern will smudge if brownies are too hot. Use room temperature eggs for best texture. Measure flour by spooning and leveling. For a cleaner spiderweb, chill the batter for 10 minutes before adding white chocolate. These brownies taste even better the next day.
Nutrition
- Serving Size: 1 brownie (1/16 of r
- Calories: 145
- Sugar: 14
- Sodium: 120
- Fat: 6
- Saturated Fat: 2
- Carbohydrates: 20
- Fiber: 2
- Protein: 4
Keywords: lighter brownies, spiderweb brownies, chocolate peanut butter brownies, low-calorie brownies, Halloween brownies, Greek yogurt brownies


