My neighbor across the hall, a retired pastry chef named Diane, watched me haul yet another grocery bag full of heavy cream and chocolate into my apartment. She didn’t say anything at first. Then she just shook her head and smiled. A few days later, a small container appeared outside my door with a sticky note that read, “Try these. No heavy cream needed.” Inside were these absurdly creamy white chocolate truffles that somehow felt light. I was skeptical, honestly. White chocolate and light usually don’t belong in the same sentence. But after one bite, I was hooked. I mean, I spent the next week tweaking her recipe, swapping out ingredients, and testing them on anyone who walked past my door.
The thing that got me about her version was how rich they tasted without that heavy, greasy feeling you sometimes get from no-bake treats. You know that sensation where you eat one and immediately regret it? These are the opposite. They satisfy that sweet craving without making you want to take a nap. I kept making them, adjusting the ratios until I landed on this version that uses a clever swap for the usual cream cheese or butter base. It took me, let me tell you, about five failed batches before I figured out the right balance. One batch was too soft, another was too crumbly. But that fourth batch? That was the one where I actually fist-pumped in my tiny kitchen.
What I love most about these Lighter No-Bake White Chocolate Oreo Balls is how they solve a real problem. You want something sweet, something indulgent, but you also want to feel good about what you’re eating. Maybe you’ve been there, staring into the fridge at 9 p.m. wondering if you should just give up and order dessert. These come together in minutes, and they use ingredients that won’t derail your whole week. They’ve become my go-to for potlucks, for movie nights, and honestly, for those days when I just need a little something sweet without overthinking it. Diane moved out a few months later, but her recipe stayed. It’s one of those rare finds that feels like a secret worth sharing.
Why You’ll Love This Recipe
Let me be real with you. I’ve tested this recipe more times than I care to count, and each time I’m surprised by how well it works. These Lighter No-Bake White Chocolate Oreo Balls are the kind of treat that makes people do a double-take when you tell them what’s in them. Here’s why they’ve become a staple in my kitchen:
- Quick & Easy: You can make these in under 30 minutes, and most of that time is just waiting for them to chill. Perfect for those last-minute cravings or unexpected guests.
- Simple Ingredients: Three main ingredients, and you probably already have two of them in your pantry right now. No specialty stores required.
- Perfect for Any Occasion: These work for birthday parties, holiday cookie exchanges, or just a Tuesday night treat. They’re fancy enough to impress but simple enough to make on a whim.
- Crowd-Pleaser: I’ve brought these to work events, family gatherings, and friend hangouts. Every single time, someone asks for the recipe. Kids love them, adults love them, and nobody believes they’re lighter.
- Unbelievably Delicious: The combo of creamy white chocolate and crunchy Oreo pieces is next-level. And the texture? Perfectly fudgy without being heavy.
What makes this recipe different from other no-bake truffles is the secret ingredient swap. Instead of using cream cheese or butter as the binder, I use a combination that cuts the fat significantly while keeping that luxurious mouthfeel. I’ve tested this with full-fat, low-fat, and even dairy-free alternatives, and this version hits the sweet spot between indulgence and lightness. It’s not about deprivation; it’s about making smarter choices that still feel like a treat.
This recipe isnt just good; it is the kind that makes you close your eyes after the first bite. It’s comfort food reimagined—healthier, faster, but with the same soul-soothing satisfaction. Perfect for impressing guests without stress, or turning a simple evening into something memorable.
What Ingredients You Will Need
This recipe uses simple, wholesome ingredients to deliver bold flavor and satisfying texture without the fuss. Most of these are pantry staples, and the substitutions are forgiving if you need to adapt.
For the Truffle Base
- 1 package (14.3 oz) Oreo cookies (regular or reduced-fat works great; I prefer the reduced-fat version for a lighter result)
- 4 oz (113g) cream cheese, softened (use reduced-fat or Neufchatel cheese for fewer calories; I’ve had great results with Philadelphia brand)
- 1 cup (175g) white chocolate melting wafers or white chocolate chips (look for ones with cocoa butter for best flavor; Ghirardelli or Guittard are my go-tos)
- 1 tablespoon coconut oil or vegetable shortening (optional, for thinning the white chocolate coating)
Optional Add-Ins and Toppings
- 1/2 teaspoon vanilla extract (adds warmth and depth to the white chocolate)
- Pinch of sea salt (balances the sweetness beautifully)
- Crushed Oreo crumbs for garnish (makes them look extra fancy)
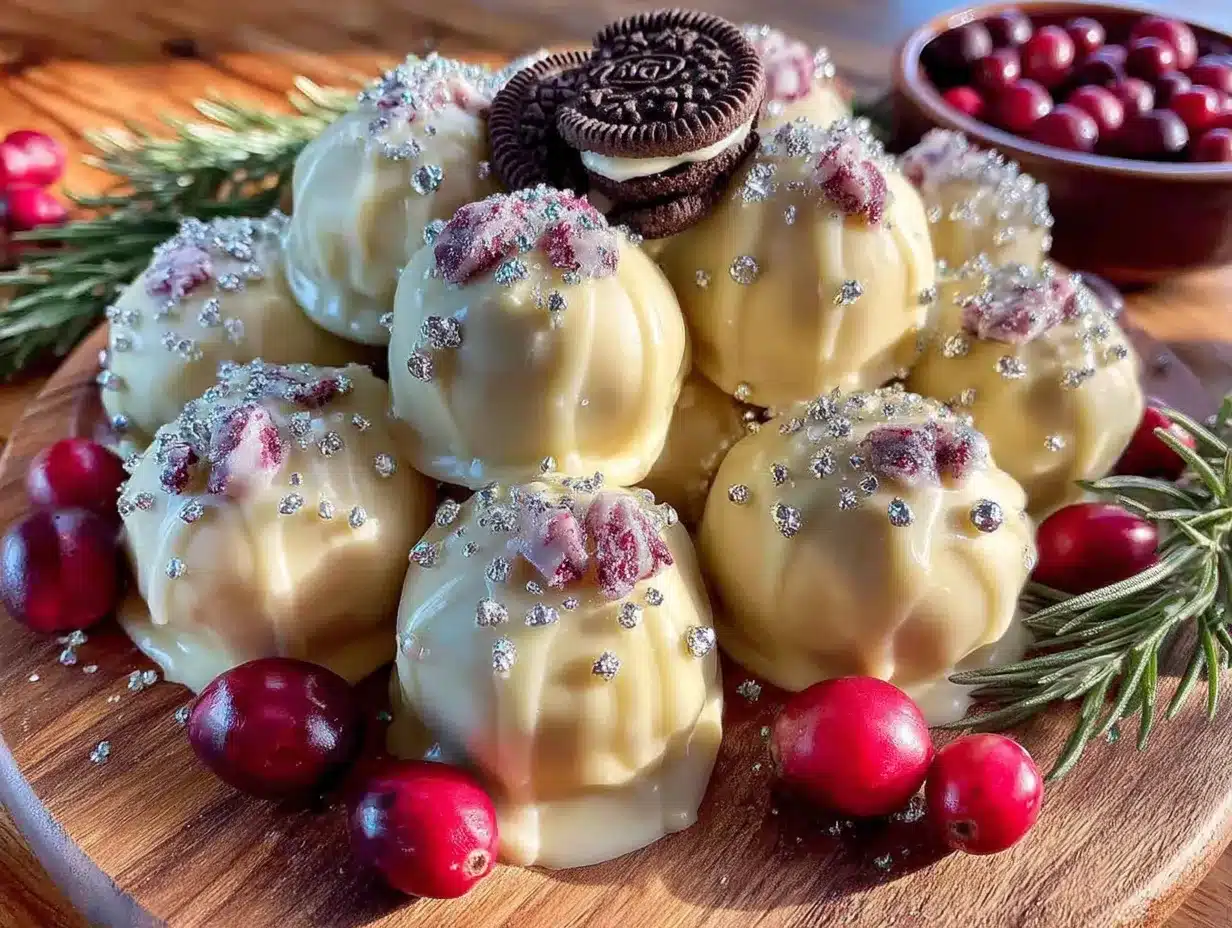
- White sanding sugar or edible glitter (for holiday versions)
Ingredient Selection Tips: For the Oreos, regular or reduced-fat both work. I’ve tried double-stuf and they make the balls too sweet and a bit greasy. Stick with classic Oreos. For the cream cheese, make sure it’s truly softened to room temperature. If it’s cold, you’ll end up with lumps that are hard to mix out. For the white chocolate, avoid “white baking chips” that are artificially flavored. Real white chocolate with cocoa butter melts more smoothly and tastes significantly better. I recommend Ghirardelli white chocolate melting wafers for the most reliable results.
Substitution Guidance: Need a dairy-free version? Use dairy-free cream cheese (like Kite Hill or Tofutti) and dairy-free white chocolate chips. The texture will be slightly softer, so plan to keep them refrigerated until serving. For a gluten-free option, use gluten-free sandwich cookies like Glutino or Kinnikinnick. Just note that the texture might be a bit different since gluten-free cookies are often crumblier. If you’re watching sugar, use sugar-free Oreos and sugar-free white chocolate chips. I’ve tested this and they work, though the coating can be a bit trickier to melt smoothly.
Equipment Needed
You don’t need a fancy kitchen to make these Lighter No-Bake White Chocolate Oreo Balls. Here’s what you’ll need:
- Food processor (a good one makes all the difference; I use a Cuisinart 14-cup and it pulverizes the Oreos in seconds)
- Mixing bowl (medium-sized, preferably glass or stainless steel)
- Spatula (silicone is best for scraping every bit of the mixture)
- Baking sheet (lined with parchment paper or a silicone baking mat)
- Small cookie scoop or melon baller (for uniform balls; I use a 1-tablespoon scoop)
- Microwave-safe bowl (for melting the white chocolate)
- Fork or dipping tool (for coating the truffles in chocolate)
- Refrigerator space (make room on a shelf for the baking sheet)
Alternatives: No food processor? Place the Oreos in a resealable bag and crush them with a rolling pin. It’s a great arm workout, honestly. No cookie scoop? Use a regular spoon and roll the mixture into balls with your hands. Just make sure your hands are slightly cold so the mixture doesn’t stick. For melting the chocolate, you can use a double boiler instead of the microwave if you prefer more control.
Budget-Friendly Tip: A basic food processor under $50 works just fine for this recipe. You don’t need a high-end model since you’re only crushing cookies. And honestly, the rolling pin method costs nothing and works perfectly.
Preparation Method
Making these Lighter No-Bake White Chocolate Oreo Balls is straightforward, but a few details make the difference between good and great. Follow these steps carefully.
- Crush the Oreos: Place all the Oreo cookies (cream filling included) into your food processor. Pulse about 10-15 times until you get fine, sandy crumbs. You want them consistent without any large chunks. If you’re using the bag-and-rolling-pin method, crush until you can’t feel any large pieces through the bag. This should take about 3-4 minutes of steady crushing.
- Add the cream cheese: Cut the softened cream cheese into small cubes and add it to the food processor with the Oreo crumbs. Pulse again until the mixture comes together into a cohesive dough. It should look like dark, slightly sticky cookie dough. If it seems too dry, add a teaspoon of milk or water. If it’s too sticky, add a few more crushed Oreos. Scrape down the sides of the bowl once or twice to make sure everything is combined evenly.
- Chill the mixture: Transfer the mixture to a bowl, cover it with plastic wrap, and refrigerate for 15-20 minutes. This makes it much easier to roll into balls. Don’t skip this step, or you’ll end up with sticky fingers and misshapen truffles. I learned this the hard way when I tried to rush the process and ended up with more mixture on my hands than on the baking sheet.
- Form the balls: Using a small cookie scoop or your hands, portion the mixture into 1-tablespoon-sized balls (about 20-24 balls total). Roll them between your palms until they’re smooth and round. Place them on the parchment-lined baking sheet. If the mixture starts to get too soft, pop it back in the fridge for 5 minutes. Work quickly but gently; you don’t want to overheat the mixture with your hands.
- Freeze the balls: Place the baking sheet with the formed balls in the freezer for 15-20 minutes. This is crucial for the coating step. The balls need to be very firm so they don’t fall apart when you dip them in the warm white chocolate. While they’re freezing, prepare your coating.
- Melt the white chocolate: Place the white chocolate wafers and coconut oil (if using) in a microwave-safe bowl. Microwave in 30-second intervals, stirring thoroughly after each interval. White chocolate burns easily, so don’t walk away. It should be completely smooth and slightly warm to the touch. If it’s too thick, add another teaspoon of coconut oil. If it seizes up (becomes grainy), you’ve overheated it. Start over with fresh chocolate.
- Dip the truffles: Remove the frozen truffle balls from the freezer. Working with one ball at a time, drop it into the melted white chocolate. Use a fork to gently roll it around until fully coated. Lift it out with the fork, letting the excess chocolate drip off. Gently tap the fork on the edge of the bowl to remove any excess. Transfer the coated ball back to the parchment-lined baking sheet. Repeat with all the balls. If the white chocolate starts to thicken, reheat it in 10-second bursts.
- Add garnish (optional): While the white chocolate is still wet, sprinkle a few crushed Oreo crumbs or a pinch of sea salt on top of each truffle. This adds visual appeal and a little texture contrast.
- Set the coating: Place the baking sheet back in the refrigerator for at least 30 minutes, or until the white chocolate is completely firm. The coating should be snappy when you bite into it.
Cooking Tips & Techniques
After making these Lighter No-Bake White Chocolate Oreo Balls more times than I can count, I’ve picked up a few tricks that make the process smoother and the results better.
Temperature is everything. The cream cheese must be at room temperature. I’ve tried using cold cream cheese straight from the fridge, and the mixture ends up lumpy and uneven. Take it out at least 30 minutes before you start. Similarly, the truffle balls need to be frozen solid before dipping. If they’re even slightly soft, they’ll crumble in the warm chocolate. I once forgot a batch in the freezer overnight, and they were actually easier to dip the next day.
Don’t over-process the Oreos. You want fine crumbs, not Oreo dust. If you over-process, the cookies release too much oil from the filling, and the mixture becomes greasy. Pulse in short bursts and check the consistency frequently. The crumbs should look like wet sand when you’re done.
White chocolate is temperamental. It’s more sensitive to heat than dark or milk chocolate. Never microwave it for more than 30 seconds at a time, and always stir between intervals. If you see any lumps forming, stop immediately and stir vigorously. If the chocolate seizes, add a teaspoon of coconut oil and stir gently. Sometimes that saves it. If not, you’re better off starting fresh than trying to salvage seized chocolate.
Work in small batches. Don’t take all the frozen truffle balls out of the freezer at once. They warm up quickly and become difficult to dip. Take out 4-5 at a time, dip them, and then get the next batch. This keeps everything manageable and prevents meltdowns (literal and figurative).
Use a dipping fork or a skewer. A regular fork works, but a dipping fork with two prongs gives better coverage and makes it easier to tap off excess chocolate. If you don’t have one, a wooden skewer works well too. Just pierce the truffle, dip it, and then slide it off the skewer onto the parchment.
Variations & Adaptations
One of the best things about this recipe is how adaptable it is. Here are some variations I’ve tried and loved:
Flavor Variations
- Mint Chocolate: Add 1/4 teaspoon peppermint extract to the Oreo mixture and use dark chocolate for coating instead of white. The mint and chocolate combo is refreshing and perfect for the holidays.
- Peanut Butter Cup: Swap 1/4 cup of the Oreo crumbs for crushed peanut butter cookies. Add 2 tablespoons of creamy peanut butter to the mixture. Coat in milk chocolate and sprinkle with crushed peanuts.
- Cookies and Cream Deluxe: Fold in 1/2 cup of mini white chocolate chips into the Oreo mixture before rolling. This gives you little pockets of extra sweetness in every bite.
Dietary Adaptations
- Vegan: Use dairy-free cream cheese and dairy-free white chocolate. I’ve tested this with Kite Hill cream cheese and Enjoy Life white chocolate chips, and it works beautifully. The texture is slightly softer, so keep them refrigerated.
- Gluten-Free: Use gluten-free sandwich cookies. The texture will be a bit more delicate, so handle them gently when dipping.
- Lower Sugar: Use sugar-free Oreos and sugar-free white chocolate chips. The coating might be a bit trickier to melt, but the end result is still delicious.
Seasonal Twists
- Spring: Add 1 teaspoon of freeze-dried strawberry powder to the mixture for a fruity pink version. Coat in white chocolate and top with a tiny dried strawberry piece.
- Fall: Add 1/2 teaspoon of pumpkin pie spice to the mixture. Coat in white chocolate and sprinkle with cinnamon.
- Winter Holidays: Add 1/4 teaspoon of peppermint extract and coat in white chocolate. Top with crushed candy canes for a festive look.
Serving & Storage Suggestions
These Lighter No-Bake White Chocolate Oreo Balls are best served cold, straight from the refrigerator. The texture is firm but creamy, and the white chocolate coating has a satisfying snap. If you let them sit at room temperature for more than 15 minutes, they’ll soften significantly. They’re still delicious, just less structured.
Presentation Ideas: Arrange them on a white platter for a clean, elegant look. For parties, place them in mini paper liners (the kind used for truffles or cupcakes). They look professional and make it easy for guests to grab one without touching the others. For gifting, layer them in a small box with tissue paper or parchment paper between layers.
Storage: Store the truffles in an airtight container in the refrigerator for up to 2 weeks. I like to layer them between sheets of parchment paper to prevent sticking. They also freeze beautifully. Place them in a single layer on a baking sheet, freeze until solid, then transfer to a freezer-safe bag or container. They’ll keep for up to 3 months in the freezer. To thaw, transfer them to the refrigerator overnight or let them sit at room temperature for about 20 minutes.
Flavor Development: These actually taste better after a day or two in the fridge. The flavors meld together, and the texture becomes more uniform. If you can resist eating them immediately, make them a day ahead of time for the best results. I’ve noticed the white chocolate coating also sets more firmly after 24 hours.
Nutritional Information & Benefits
Here’s the thing about these Lighter No-Bake White Chocolate Oreo Balls: they satisfy that intense sweet craving without the heavy feeling you get from traditional truffles. Each truffle (based on a batch of 22) contains approximately:
- Calories: 110-120
- Fat: 7g (4g saturated)
- Carbohydrates: 12g (9g sugar)
- Protein: 1g
- Fiber: 0.5g
Health Benefits: Using reduced-fat cream cheese cuts the saturated fat by about 30% compared to traditional truffle recipes. The Oreo cookies provide a small amount of iron and calcium. And honestly, the biggest benefit is portion control. Because they’re individually portioned, it’s easier to enjoy one or two without mindlessly eating an entire batch.
Dietary Considerations: This recipe can be adapted for gluten-free, vegan, and lower-sugar diets. It contains dairy and wheat in its standard form. If you’re following a low-carb or keto diet, this isn’t the best option due to the sugar content from the Oreos and white chocolate.
Conclusion
These Lighter No-Bake White Chocolate Oreo Balls are proof that you don’t need to sacrifice flavor to make smarter choices. They’re quick, simple, and incredibly satisfying. Whether you’re making them for a party, a holiday treat, or just because it’s Tuesday and you deserve something sweet, they deliver every single time.
I love how versatile this recipe is. You can dress them up for special occasions or keep them simple for everyday snacking. The base recipe is forgiving, and the variations are endless. Don’t be afraid to experiment with different flavors or coatings. That’s half the fun.
I’d love to hear how yours turn out! Drop a comment below and let me know if you tried any variations or if these became a new favorite in your kitchen. And if you’re looking for another easy treat, check out my 3-ingredient peanut butter cookies or these no-bake chocolate oat bars. Happy baking, friends!
Frequently Asked Questions
Can I use double-stuf Oreos for this recipe?
I wouldn’t recommend it. Double-stuf Oreos have significantly more cream filling, which makes the mixture too soft and greasy. The truffles won’t hold their shape as well, and they’ll feel heavier. Stick with classic Oreos for the best texture.
Why did my white chocolate coating crack?
This usually happens when the truffle balls are too cold when you dip them. If they’re frozen solid, the temperature shock can cause the white chocolate to crack as it sets. Try letting the frozen balls sit at room temperature for 2-3 minutes before dipping. Also, make sure your white chocolate isn’t too hot.
Can I make these without a food processor?
Absolutely! Place the Oreos in a large resealable bag and crush them with a rolling pin or the bottom of a heavy pan. It takes a few minutes and some elbow grease, but it works perfectly. Just make sure the crumbs are fine and consistent.
How long do these keep at room temperature?
These are best kept refrigerated. At room temperature, they’ll soften after about 15-20 minutes. If you’re serving them at a party, take them out just before serving and put any leftovers back in the fridge within an hour. They’ll last up to 2 weeks in the refrigerator.
Can I use milk or dark chocolate instead of white chocolate?
Yes! Milk chocolate and dark chocolate both work beautifully as coatings. Dark chocolate is especially nice if you want to balance the sweetness of the Oreo filling. Just use the same melting technique and adjust the timing as needed.
Pin This Recipe!
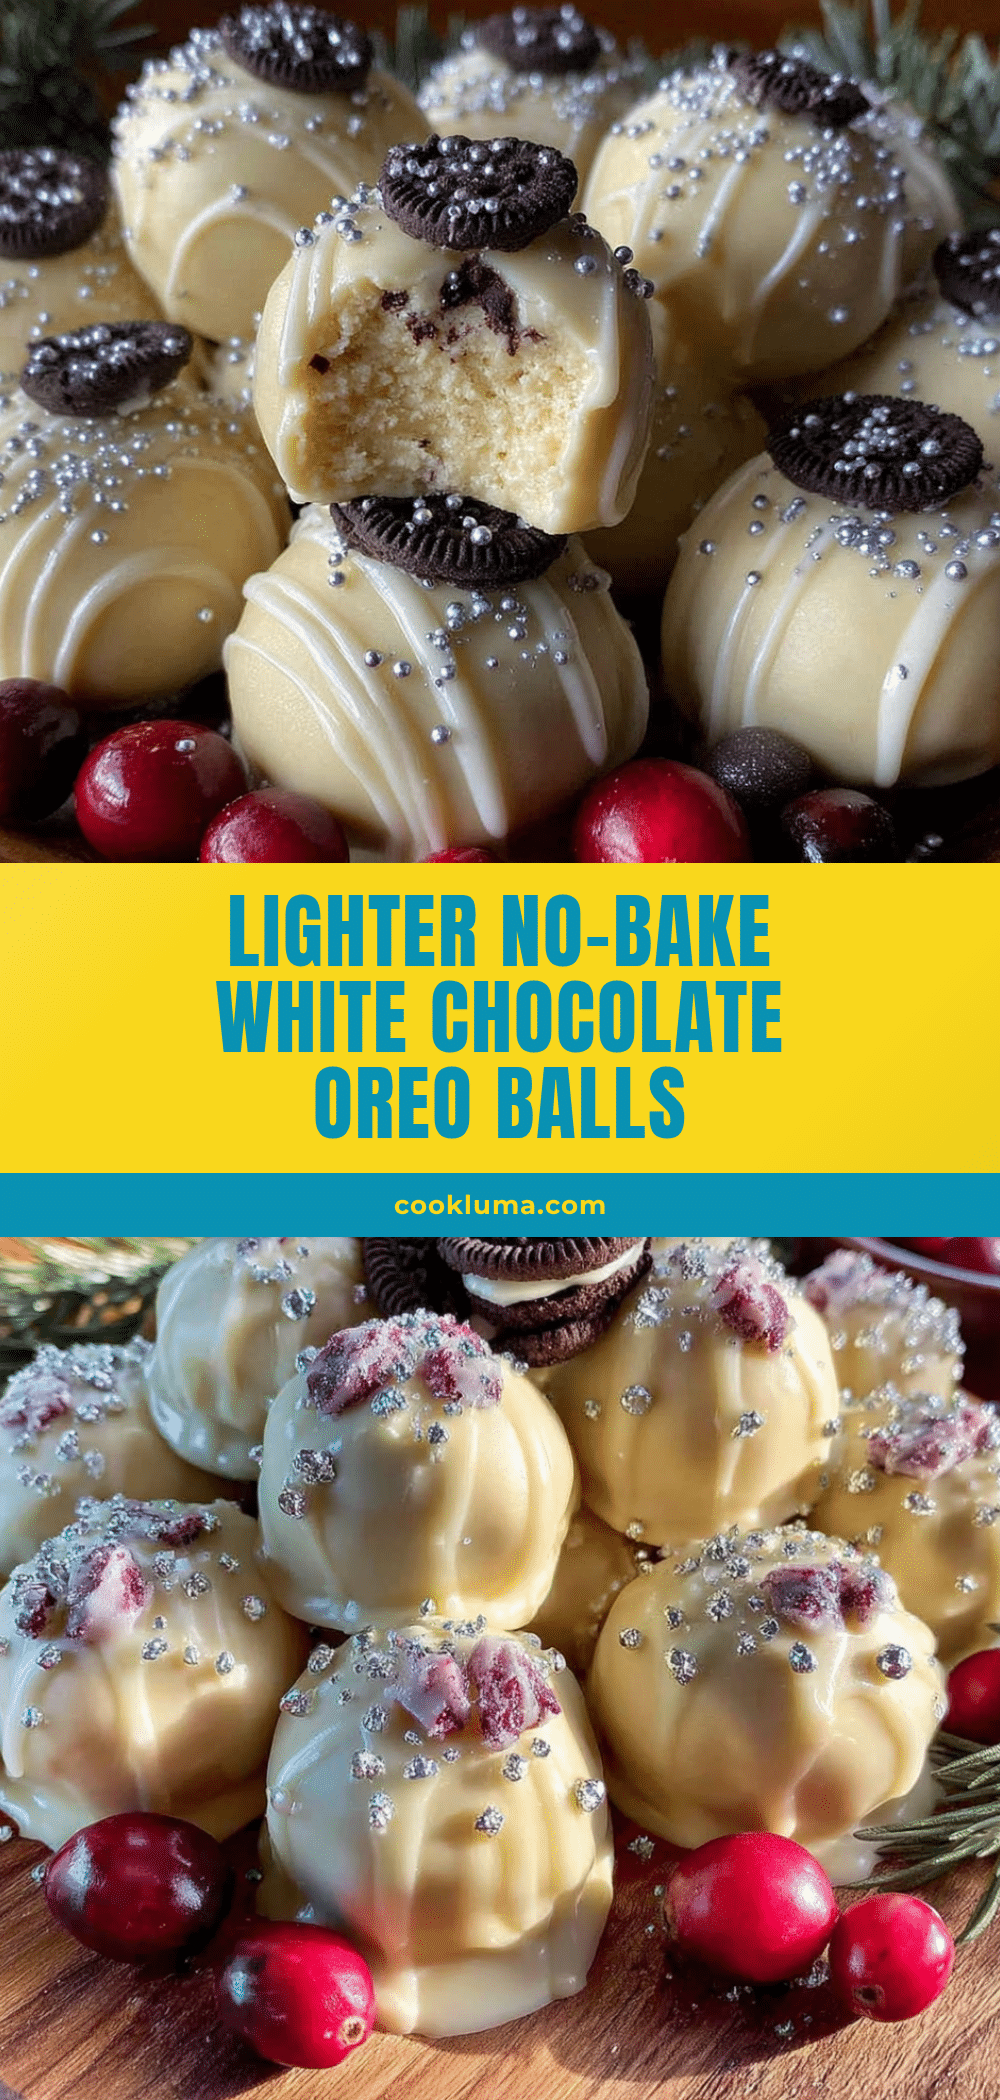
Lighter No-Bake White Chocolate Oreo Balls
These Lighter No-Bake White Chocolate Oreo Balls are a quick and easy 3-ingredient treat that satisfies sweet cravings without the heavy feeling. Perfect for any occasion, they combine creamy white chocolate and crunchy Oreo pieces for a deliciously fudgy texture.
- Prep Time: 15 minutes
- Cook Time: 0 minutes
- Total Time: 1 hour 15 minutes (includes chilling and setting time)
- Yield: 22 servings 1x
- Category: Dessert
- Cuisine: American
Ingredients
- 1 package (14.3 oz) Oreo cookies (regular or reduced-fat)
- 4 oz (113g) cream cheese, softened (reduced-fat or Neufchatel recommended)
- 1 cup (175g) white chocolate melting wafers or white chocolate chips
- 1 tablespoon coconut oil or vegetable shortening (optional, for thinning coating)
- 1/2 teaspoon vanilla extract (optional)
- Pinch of sea salt (optional)
- Crushed Oreo crumbs for garnish (optional)
- White sanding sugar or edible glitter (optional)
Instructions
- Crush the Oreos: Place all Oreo cookies (cream filling included) into a food processor. Pulse 10-15 times until fine, sandy crumbs form. Alternatively, crush in a resealable bag with a rolling pin.
- Add the cream cheese: Cut softened cream cheese into small cubes and add to the food processor with Oreo crumbs. Pulse until a cohesive dough forms. If too dry, add a teaspoon of milk or water; if too sticky, add more crushed Oreos.
- Chill the mixture: Transfer mixture to a bowl, cover with plastic wrap, and refrigerate for 15-20 minutes.
- Form the balls: Using a small cookie scoop or hands, portion mixture into 1-tablespoon-sized balls (about 20-24 total). Roll smooth and place on a parchment-lined baking sheet.
- Freeze the balls: Place baking sheet in freezer for 15-20 minutes until firm.
- Melt the white chocolate: Place white chocolate wafers and coconut oil (if using) in a microwave-safe bowl. Microwave in 30-second intervals, stirring after each, until smooth and slightly warm.
- Dip the truffles: Remove frozen balls from freezer. Drop one at a time into melted white chocolate, roll with a fork until coated, lift out, tap off excess, and place back on parchment. Repeat with all balls.
- Add garnish (optional): While white chocolate is wet, sprinkle crushed Oreo crumbs or sea salt on top.
- Set the coating: Refrigerate baking sheet for at least 30 minutes until white chocolate is firm.
Notes
Temperature is key: cream cheese must be at room temperature; truffle balls must be frozen solid before dipping. White chocolate burns easily—microwave in short bursts. Work in small batches to prevent truffles from warming up. These taste better after a day in the fridge.
Nutrition
- Serving Size: 1 truffle
- Calories: 115
- Sugar: 9
- Sodium: 85
- Fat: 7
- Saturated Fat: 4
- Carbohydrates: 12
- Fiber: 0.5
- Protein: 1
Keywords: no-bake, white chocolate, Oreo, truffles, easy dessert, 3-ingredient, lighter, quick treat


