My roommate asked why I couldn’t just use melted butter instead of waiting for it to soften. I started to explain why that wouldn’t work—then stopped. Honestly, I had no good reason. It was just how I’d always done it. So I shrugged, handed her the bowl, and watched her pour warm melted butter straight into the sugar.
The dough came together in about ninety seconds flat. No waiting. No planning ahead. And when those cookies came out of the oven? They were lighter than anything I’d ever made with the traditional method. I stood there holding a cracked spatula, completely proved wrong by a girl who’d never baked a cookie in her life. That was three years ago, and I haven’t softened butter for snickerdoodles since.
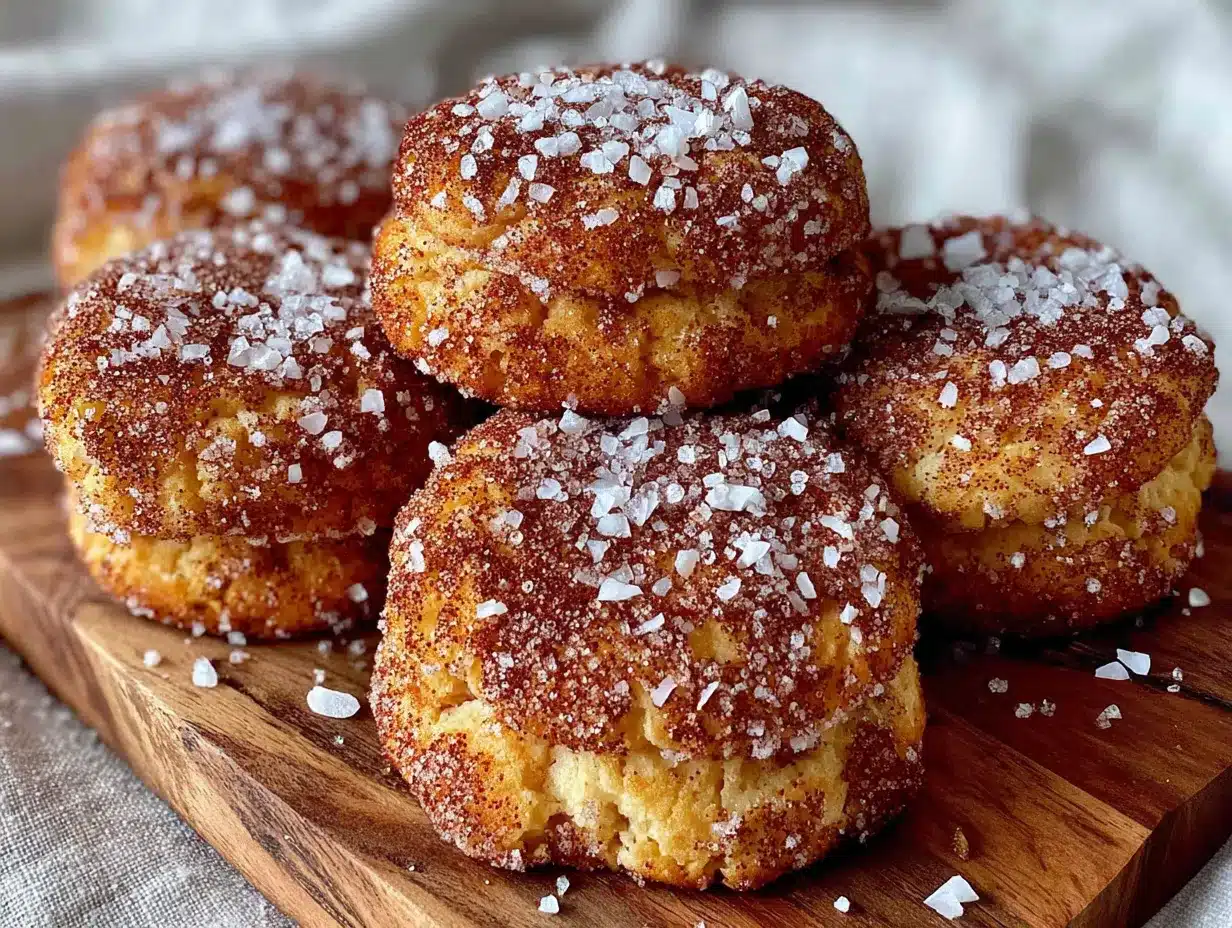
These light and fluffy snickerdoodle cookies use just six ingredients and come together faster than you’d believe. They have that perfect cinnamon-sugar crunch on the outside, but inside they’re so tender they practically melt. I’ve made them for holiday parties, lazy Sunday afternoons, and that one time I needed dessert in twenty minutes flat. They’ve never let me down. Maybe you’ve had that moment where you’re sure a recipe needs to be complicated to be good—let me tell you, this one will surprise you.
Why You’ll Love This Recipe
I’ve tested this recipe at least a dozen times to get it just right. The first batch came out too flat. The second was too cakey. By batch number five, I’d figured out the exact ratio of melted butter to sugar that gives you that cloud-like texture without losing the classic snickerdoodle chew. This is the version I now make for every single bake sale, potluck, and last-minute guest situation.
- Quick & Easy: From start to finish, these cookies take about 20 minutes. No chilling required, no fancy techniques—just mix, roll, and bake.
- Simple Ingredients: You need butter, sugar, flour, eggs, cream of tartar, and cinnamon. That’s it. You probably have all of them right now.
- Perfect for Any Occasion: Holiday cookie exchanges, afternoon tea, midnight cravings—these fit everywhere. They’re not too sweet, not too plain.
- Crowd-Pleaser: I’ve watched kids grab three at a party and adults sneak extras when they thought no one was looking. The texture wins everyone over.
- Unbelievably Delicious: The outside has that signature cinnamon crunch, but the inside stays soft and pillowy. It’s the kind of cookie you close your eyes for after the first bite.
What makes this recipe different is the melted butter trick. Most snickerdoodle recipes insist on softened butter, but using melted butter creates a lighter, more tender crumb. It’s not just another version—it’s the version I wish I’d found years ago. This is comfort food reimagined: faster, simpler, but with the same soul-soothing satisfaction of a classic cookie.
What Ingredients You Will Need
This recipe keeps things refreshingly simple. Every ingredient has a specific job, and none of them are fussy or hard to find. Here’s what you’ll need and why each one matters.
For the Cookie Dough
- Unsalted butter, melted (½ cup / 113g) — Use melted butter for that ultra-light texture. I prefer Land O’Lakes for consistent results. Let it cool slightly before mixing so it doesn’t scramble the egg.
- Granulated sugar (1 cup / 200g) — Standard white sugar gives the cookies structure and sweetness. Don’t substitute brown sugar here—it changes the texture too much.
- Large egg (1, room temperature) — The egg binds everything together and adds richness. If you forget to take it out of the fridge, place it in warm water for 5 minutes.
- All-purpose flour (1½ cups / 180g) — Spoon and level your flour for the best results. Scooping directly from the bag packs it down and makes cookies dense.
- Cream of tartar (1 teaspoon) — This is the secret ingredient that gives snickerdoodles their signature tangy flavor and soft texture. Don’t skip it—baking powder won’t work the same way.
For the Cinnamon-Sugar Coating
- Granulated sugar (2 tablespoons) — Mixed with cinnamon for that crunchy, sparkly exterior.
- Ground cinnamon (1 tablespoon) — Use fresh cinnamon for the best flavor. I like McCormick or Simply Organic brands.
That’s genuinely everything. No vanilla extract, no baking soda, no complicated additions. The cream of tartar does double duty—it reacts with the butter to create lift and adds that slightly tangy flavor that makes snickerdoodles distinct from sugar cookies. If you’re out of cream of tartar, I’ve tested this with ½ teaspoon of baking powder plus ½ teaspoon of lemon juice, and it works in a pinch, but the texture isn’t quite as tender.
Equipment Needed
You don’t need a professional kitchen for these cookies. Here’s what I use every time:
- Large mixing bowl — Any medium-to-large bowl works. I use a glass one so I can see if the butter and sugar are fully combined.
- Whisk — For mixing the wet ingredients together smoothly. A fork works in a pinch.
- Rubber spatula or wooden spoon — For folding in the flour without overmixing.
- Small bowl — For the cinnamon-sugar coating. A shallow dish or plate works too.
- Baking sheet — A standard half-sheet pan is perfect. If you only have dark nonstick pans, watch the cookies closely—they brown faster.
- Parchment paper or silicone baking mat — These cookies spread slightly, and parchment makes cleanup so much easier. I’ve used both and prefer parchment for the crispiest bottoms.
- Cookie scoop or tablespoon — For consistent cookie sizes. I use a 1½-tablespoon scoop for evenly baked cookies every time.
- Cooling rack — Essential for letting the cookies set properly. If you leave them on the hot pan, they’ll continue cooking and get too firm.
I bought my silicone baking mat for about eight dollars at a home goods store, and it’s lasted through hundreds of batches. If you’re just starting out, parchment paper works just as well and costs pennies per sheet.
Preparation Method
This process moves fast, so read through everything once before you start. You’ll have cookies in the oven within ten minutes of walking into the kitchen.
- Preheat your oven to 350°F (175°C). Line a baking sheet with parchment paper or a silicone mat. Getting the oven hot first means you won’t be waiting around later.
- Melt the butter. Place ½ cup (113g) unsalted butter in a microwave-safe bowl and heat in 20-second bursts until fully melted. Let it sit for 2-3 minutes to cool slightly. You want it warm, not hot—if it’s too hot, it’ll cook the egg when you add it.
- Mix the wet ingredients. In a large bowl, combine the melted butter and 1 cup (200g) granulated sugar. Whisk vigorously for about 30 seconds until the mixture looks smooth and slightly thickened. Add 1 large egg and whisk until fully incorporated. The batter should look glossy and pale yellow.
- Add the dry ingredients. Sprinkle 1½ cups (180g) all-purpose flour and 1 teaspoon cream of tartar over the wet mixture. Use a rubber spatula to fold everything together gently. Stop as soon as you don’t see any white streaks of flour. Overmixing at this stage makes cookies tough—I learned this the hard way when my first batch came out like hockey pucks.
- Make the cinnamon-sugar coating. In a small bowl, stir together 2 tablespoons granulated sugar and 1 tablespoon ground cinnamon until evenly combined.
- Shape the cookies. Scoop out about 1½ tablespoons of dough. Roll it between your palms into a smooth ball—the dough will be slightly sticky, so work quickly. Drop the ball into the cinnamon-sugar mixture and roll it around until fully coated. Place it on the prepared baking sheet, spacing each ball about 2 inches apart. You should get about 12 cookies.
- Bake. Place the baking sheet in the preheated oven and bake for 9-11 minutes. The cookies will look puffed, slightly cracked on top, and barely golden around the edges. They’ll still look soft in the center—that’s exactly what you want. Don’t wait for them to turn brown, or they’ll be overbaked.
- Cool properly. Let the cookies rest on the baking sheet for exactly 3 minutes. This step is crucial—they need that time to set up so they don’t fall apart when you move them. After 3 minutes, transfer them to a wire cooling rack. If you leave them on the hot pan longer, they’ll keep cooking and lose that soft center.
When you pull these out of the oven, the kitchen smells like a bakery. The tops will be crackled and dusted with cinnamon sugar, and the bottoms will be just barely golden. Let them cool completely if you can resist—the texture really sets in after about 10 minutes on the rack.
Cooking Tips & Techniques
After making these cookies more times than I can count, I’ve picked up a few tricks that make a real difference. Here’s what I wish someone had told me earlier.
Don’t overmix the dough. This is the number one mistake I see. Once you add the flour, mix just until it disappears. If you keep stirring, you develop gluten, and gluten makes cookies dense and tough. I stopped counting how many batches I ruined before I learned to stop at “no white streaks.”
Use a cookie scoop for even sizing. I used to eyeball it, and my cookies would come out all different sizes—some burned, some underdone. A 1½-tablespoon scoop gives you perfectly uniform cookies that bake evenly. It costs about five dollars and saves so much frustration.
Watch the oven like a hawk. These cookies go from perfectly soft to overbaked in about sixty seconds. I set a timer for 9 minutes, then check every minute after that. When the edges are just barely golden and the centers still look puffy and soft, pull them out. They’ll continue cooking on the hot pan during those 3 minutes of resting time.
Let them rest. I know it’s tempting to grab one right away, but the 3-minute rest on the baking sheet is non-negotiable. The cookies need that time to firm up enough to hold their shape. I once tried to move one after 60 seconds and it basically fell apart in my hands. Lesson learned.
Rotate the pan halfway through. Every oven has hot spots. I rotate my baking sheet at the 5-minute mark to ensure even browning. This small step prevents the cookies on the back edge from getting too dark while the front ones stay pale.
Variations & Adaptations
This base recipe is flexible, and I’ve tried several variations over the years. Here are my favorites.
Gluten-Free Version: Substitute the all-purpose flour with a 1:1 gluten-free baking flour blend. I’ve tested this with Bob’s Red Mill 1-to-1 Baking Flour, and the texture is nearly identical—still light and fluffy, just slightly more delicate. Add an extra tablespoon of flour if the dough feels too sticky.
Vegan Adaptation: Replace the butter with melted coconut oil or vegan butter, and use a flax egg (1 tablespoon ground flaxseed mixed with 3 tablespoons water, let sit for 5 minutes). The cookies won’t be quite as tender, but they’re still delicious. I made these for a friend’s vegan birthday party, and no one guessed they were dairy-free.
Spiced Snickerdoodles: Add ½ teaspoon of nutmeg and ¼ teaspoon of cardamom to the cinnamon-sugar coating. The warm spices complement the tangy cream of tartar beautifully. I tried this during the holidays, and it’s become my go-to for Christmas cookie exchanges.
Chocolate-Dipped Version: After the cookies cool completely, dip half of each cookie into melted dark chocolate and let it set on parchment paper. The combination of cinnamon sugar and rich chocolate is absolutely addictive. I did this on a whim one rainy Sunday, and now I can’t go back.
Larger Cookies: Use 3 tablespoons of dough per cookie and bake for 12-14 minutes. You’ll get about 6 giant cookies. They’re perfect for ice cream sandwiches—just sandwich a scoop of vanilla ice cream between two cookies and roll the edges in extra cinnamon sugar.
Serving & Storage Suggestions
These cookies are best served slightly warm, about 10 minutes after they come out of the oven. The centers are still soft and pillowy, and the cinnamon sugar coating is perfectly crunchy. They pair beautifully with a cold glass of milk, a hot cup of coffee, or a mug of spiced chai tea.
For a dessert spread, I like to arrange them on a wooden board with fresh apple slices, a bowl of vanilla ice cream, and maybe some dark chocolate squares. They’re also fantastic crumbled over vanilla yogurt for a quick breakfast treat—not that I’ve done that more than a few times.
Room Temperature Storage: Place the cookies in an airtight container at room temperature. They’ll stay fresh for up to 5 days. Layer them with parchment paper between stacks so the cinnamon sugar doesn’t rub off. I’ve found they actually taste even better on day two—the flavors meld together and the texture softens slightly.
Freezer Instructions: These cookies freeze beautifully. Let them cool completely, then place them in a single layer in a freezer-safe container or zip-top bag. They’ll keep for up to 3 months. To thaw, just leave them at room temperature for about 30 minutes. You can also freeze the unbaked dough balls—just roll them in the cinnamon sugar first, freeze on a baking sheet, then transfer to a bag. Bake from frozen, adding 2-3 extra minutes to the baking time.
Reheating: Pop a cookie in the microwave for 8-10 seconds to bring back that just-baked softness. Or warm them in a 300°F oven for 3-4 minutes if you’re serving a group.
Nutritional Information & Benefits
Here’s the approximate nutritional breakdown for one cookie (based on 12 cookies per batch):
| Nutrient | Amount per Cookie |
|---|---|
| Calories | 165 |
| Total Fat | 8g |
| Saturated Fat | 5g |
| Cholesterol | 35mg |
| Sodium | 15mg |
| Total Carbohydrates | 22g |
| Sugars | 13g |
| Protein | 2g |
These cookies are a treat, not a health food, but they do have a few redeeming qualities. The cream of tartar adds a small amount of potassium. The cinnamon is packed with antioxidants and may help regulate blood sugar. And because they’re made with simple, recognizable ingredients, you’re not getting any artificial preservatives or weird additives.
For a lighter option, you can reduce the sugar in the dough to ¾ cup and use a sugar substitute in the coating. I’ve tested this with monk fruit sweetener, and the texture holds up surprisingly well—the cookies are just slightly less tender. If you’re watching your intake, one cookie satisfies that sweet craving without derailing your whole day.
Conclusion
These light and fluffy snickerdoodle cookies prove that you don’t need a dozen ingredients or complicated techniques to make something truly special. Six ingredients, twenty minutes, and you’ve got a batch of cookies that disappear faster than I can explain how easy they were to make. That melted butter trick my roommate stumbled into? It genuinely changed how I bake.
I love that this recipe works for every occasion—holiday parties, lazy afternoons, or those moments when you just need a warm cookie and a quiet cup of tea. It’s forgiving enough for beginners and reliable enough for experienced bakers who want something quick without sacrificing quality. Feel free to play with the spices, dip them in chocolate, or double the batch for a crowd. The base recipe can handle it.
I’d love to hear how yours turn out. Did you try a variation? Did your family devour them in five minutes? Drop a comment below and share your experience. And if you make these for a special occasion, tag me in your photos—I genuinely get excited seeing these cookies out in the world. Happy baking, friend. You’ve got this.
Frequently Asked Questions
Can I use salted butter instead of unsalted?
Yes, you can. Just reduce the added salt in the recipe by a pinch. The cookies will have a slightly saltier flavor, which actually pairs nicely with the cinnamon sugar. I’ve done it when I ran out of unsalted butter, and they still turned out great.
Why do my snickerdoodles come out flat?
Flat cookies usually mean the butter was too warm or the dough was overmixed. Make sure your melted butter has cooled slightly before adding the egg. Also, check that your cream of tartar is fresh—it loses potency over time and won’t give the cookies enough lift. I replace mine every six months.
Can I make the dough ahead of time?
Absolutely. You can refrigerate the dough for up to 3 days. Just roll it into balls and coat them in cinnamon sugar right before baking. If the dough feels too firm to roll, let it sit at room temperature for 10 minutes. The cookies might spread a tiny bit less, but they’ll still be delicious.
What can I use instead of cream of tartar?
If you’re in a pinch, substitute with ½ teaspoon of baking powder plus ½ teaspoon of lemon juice or white vinegar. The acid helps create that signature tangy flavor and soft texture. It’s not an exact match, but it works well enough for a last-minute baking session.
How do I know when the cookies are done baking?
Look for puffed centers with slightly cracked tops and edges that are just barely golden. The cookies will still look soft in the middle—that’s intentional. Don’t wait for them to turn brown all over. They’ll continue setting up during the 3-minute rest on the baking sheet. Trust the process, and you’ll get perfectly soft cookies every time.
Pin This Recipe!

Light & Fluffy Snickerdoodle Cookies – Easy 6 Ingredient Recipe

These light and fluffy snickerdoodle cookies use just six ingredients and come together faster than you’d believe. They have that perfect cinnamon-sugar crunch on the outside, but inside they’re so tender they practically melt.
- Prep Time: 10 minutes
- Cook Time: 10 minutes
- Total Time: 20 minutes
- Yield: 12 cookies 1x
- Category: Dessert
- Cuisine: American
Ingredients
- ½ cup (113g) unsalted butter, melted
- 1 cup (200g) granulated sugar
- 1 large egg, room temperature
- 1½ cups (180g) all-purpose flour
- 1 teaspoon cream of tartar
- 2 tablespoons granulated sugar (for coating)
- 1 tablespoon ground cinnamon (for coating)
Instructions
- Preheat your oven to 350°F (175°C). Line a baking sheet with parchment paper or a silicone mat.
- Melt the butter. Place ½ cup (113g) unsalted butter in a microwave-safe bowl and heat in 20-second bursts until fully melted. Let it sit for 2-3 minutes to cool slightly.
- Mix the wet ingredients. In a large bowl, combine the melted butter and 1 cup (200g) granulated sugar. Whisk vigorously for about 30 seconds until the mixture looks smooth and slightly thickened. Add 1 large egg and whisk until fully incorporated.
- Add the dry ingredients. Sprinkle 1½ cups (180g) all-purpose flour and 1 teaspoon cream of tartar over the wet mixture. Use a rubber spatula to fold everything together gently. Stop as soon as you don’t see any white streaks of flour.
- Make the cinnamon-sugar coating. In a small bowl, stir together 2 tablespoons granulated sugar and 1 tablespoon ground cinnamon until evenly combined.
- Shape the cookies. Scoop out about 1½ tablespoons of dough. Roll it between your palms into a smooth ball. Drop the ball into the cinnamon-sugar mixture and roll it around until fully coated. Place it on the prepared baking sheet, spacing each ball about 2 inches apart. You should get about 12 cookies.
- Bake. Place the baking sheet in the preheated oven and bake for 9-11 minutes. The cookies will look puffed, slightly cracked on top, and barely golden around the edges.
- Cool properly. Let the cookies rest on the baking sheet for exactly 3 minutes. After 3 minutes, transfer them to a wire cooling rack.
Notes
Don’t overmix the dough. Use a cookie scoop for even sizing. Watch the oven closely—cookies go from perfectly soft to overbaked in about sixty seconds. Let them rest on the baking sheet for exactly 3 minutes. Rotate the pan halfway through baking for even browning.
Nutrition
- Serving Size: 1 cookie
- Calories: 165
- Sugar: 13
- Sodium: 15
- Fat: 8
- Saturated Fat: 5
- Carbohydrates: 22
- Protein: 2
Keywords: snickerdoodle cookies, light and fluffy, easy recipe, 6 ingredients, cinnamon sugar, quick cookies, no chilling


