I wasn’t expecting to find my new favorite Halloween appetizer recipe while getting my oil changed, but there I was, sitting in the waiting room of a garage that smelled like rubber and old coffee, listening to a mechanic named Dave tell me about deviled eggs. He was wiping grease off his hands with a red rag, and somehow, between explaining why my car needed new brake pads, he started describing these spider deviled eggs his wife makes every year for their neighborhood Halloween block party. I mean, I had my phone out and was taking notes before I even realized what I was doing. Dave was meticulous about the details—the exact way to place the olive legs, the trick to getting the yolk filling perfectly smooth, the specific brand of black olives that worked best. It was the last place on earth I expected to find culinary inspiration, but honestly, that’s usually how the best recipes find you, right?
The whole thing felt a little ridiculous at first. There I was, nodding along to a man in a grease-stained coverall, completely captivated by his description of “spider bodies” made from halved black olives. But you know that feeling when someone talks about food with genuine passion? It’s contagious. Dave wasn’t just telling me a recipe—he was telling me about the year his neighbor’s kid screamed with delight when she saw the spiders, and the time he accidentally used pimento-stuffed olives instead of black ones and ended up with “alien spiders.” I was hooked. I drove home with a dozen eggs in my trunk and a mission.
That first batch was a disaster, honestly. The olive legs kept sliding off, the filling was too runny, and my spiders looked more like sad, squashed beetles. But I tweaked things, called my mom for her deviled egg wisdom, and by the third try, I had it. These Halloween spider deviled eggs are now the thing I’m asked to bring to every October gathering. They’re creepy in the cutest way possible, surprisingly easy once you get the hang of them, and they always, always get people talking. Maybe you’ve been there—stuck in an unexpected conversation that ends up changing your whole approach to a holiday, or just looking for that one appetizer that steals the show without stealing your sanity. Either way, this recipe is for you.
Why You’ll Love This Recipe
Let me tell you why these Halloween spider deviled eggs have become my non-negotiable October recipe. I’ve tested this about a dozen times across different gatherings, and I can say with confidence that this version is the one that works. Here’s what makes it special:
- Quick & Easy: You can have these ready in about 35 minutes, and most of that is just hard-boiling and cooling the eggs. Perfect for last-minute Halloween party invites or when you realize tomorrow is the school costume parade and you promised to bring snacks.
- Simple Ingredients: Eggs, mayonnaise, mustard, paprika, and black olives. That’s it. No specialty stores, no weird ingredients you’ll never use again. You probably have everything except the olives right now.
- Perfect for Halloween: These aren’t just cute—they’re conversation starters. Kids love the spider design, adults appreciate the classic deviled egg flavor, and everyone takes a picture before eating them. They fit right in at costume parties, trunk-or-treat events, or even just a spooky movie night at home.
- Crowd-Pleaser: I’ve brought these to parties where people were skeptical about “weird Halloween food,” and they disappeared within twenty minutes. Even people who claim they don’t like deviled eggs try one because of the spider design, and then they’re hooked.
- Unbelievably Delicious: The filling is perfectly creamy with just the right tang from the mustard and a hint of smokiness from the paprika. The briny pop of the black olives against the rich yolk mixture is honestly a match made in heaven. It’s classic comfort food with a spooky twist.
What makes this recipe different from all the other spider deviled eggs out there? It’s the technique. I figured out the secret to making the olive legs actually stay in place (hint: it involves a tiny dab of filling as glue), and I perfected the filling consistency so it pipes beautifully and holds its shape. This isn’t just another version—it’s the one that looks impressive without making you want to pull your hair out.
These spider deviled eggs are the kind of appetizer that makes you close your eyes after the first bite. It’s comfort food reimagined for Halloween—familiar, satisfying, but with that little thrill of something delightfully creepy. Perfect for impressing guests without stress, or turning a simple gathering into something memorable.
What Ingredients You Will Need
This recipe uses simple, wholesome ingredients to deliver that classic deviled egg flavor with a spooky Halloween twist. Most of these are pantry staples, and the star ingredient—black olives—is easy to find at any grocery store.
For the Deviled Eggs
- 12 large eggs (look for older eggs for easier peeling—fresh eggs are notoriously difficult to peel after boiling)
- 1/3 cup mayonnaise (I prefer Hellmann’s or Duke’s for the creamiest texture; avoid Miracle Whip unless you want a tangier flavor)
- 2 teaspoons yellow mustard (or Dijon if you want a sharper kick)
- 1 teaspoon white vinegar (adds brightness and helps balance the richness)
- 1/2 teaspoon salt
- 1/4 teaspoon black pepper
- 1/2 teaspoon paprika (plus extra for garnish—smoked paprika adds a lovely depth)
For the Spider Decoration
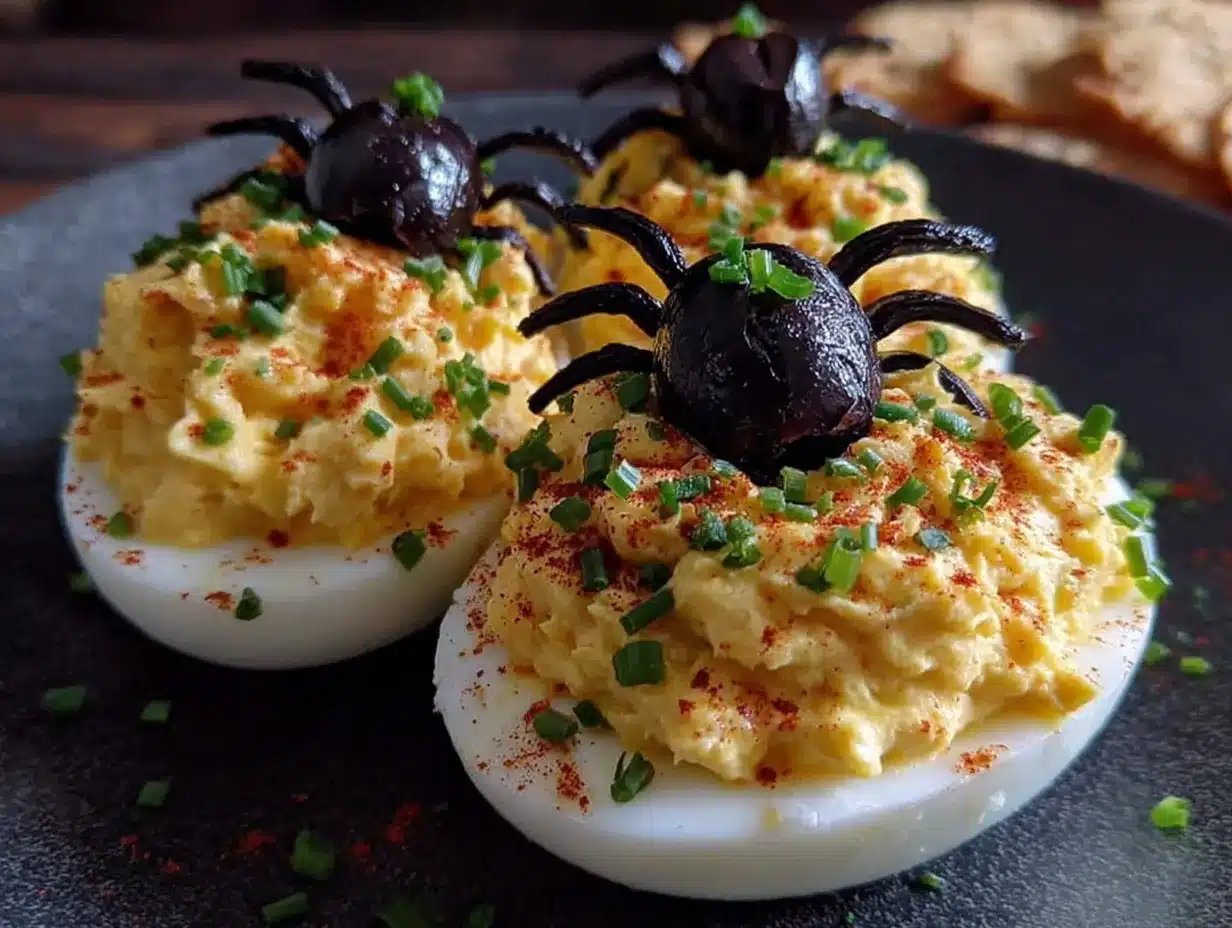
- 1 can (6 ounces) large black olives (look for jumbo or colossal size—you need them big enough to cut legs and bodies)
- 1 small jar pimento strips (optional, for spider eyes—or use tiny dots of paprika)
A few ingredient selection tips I’ve learned the hard way. First, don’t skimp on the olives. I tried using generic store-brand olives once, and they were too small and flimsy—the legs broke apart when I tried to cut them. Spend the extra dollar for a good brand like Lindsay or Pearls. Second, the eggs matter more than you think. Farm-fresh eggs are wonderful for eating, but for deviled eggs, you want eggs that are at least a week old. The air pocket inside older eggs makes them significantly easier to peel. If you’re not sure how old your eggs are, do the float test—if they stand on end in a glass of water but don’t tip over, they’re perfect for boiling.
For substitutions, you can use Greek yogurt instead of mayonnaise for a lighter filling, though the texture will be slightly less creamy. If you’re avoiding eggs entirely, this recipe obviously won’t work, but you can use the olive-spider concept on other appetizers like stuffed mushrooms or even deviled potato bites. For a dairy-free version, just make sure your mayonnaise is dairy-free (most are, but check the label). And if you can’t find jumbo olives, you can use regular large olives—just be prepared for very tiny spiders. Honestly, some people think the tiny ones are even cuter.
Equipment Needed
You don’t need anything fancy for these Halloween spider deviled eggs, which is part of the beauty. Here’s what you’ll need:
- Large saucepan or pot for boiling the eggs (deep enough to cover them with at least an inch of water)
- Mixing bowl (medium size works well)
- Sharp knife and cutting board for halving eggs and slicing olives
- Small spoon or melon baller for scooping out yolks
- Fork or potato masher for mashing the yolks
- Piping bag or zip-top bag (a gallon-size freezer bag works perfectly if you don’t have a piping bag)
- Small offset spatula or butter knife for smoothing filling (optional but helpful)
- Deviled egg tray or large plate for serving
If you don’t have a piping bag, don’t worry. I’ve made these more times with a zip-top bag than with an actual piping bag. Just fill the bag, snip off a small corner, and you’re good to go. The hole should be about 1/4 inch wide. If you cut it too big, the filling comes out too fast and makes a mess. Trust me on this one—I learned the hard way and ended up with filling everywhere except inside the eggs.
For the deviled egg tray, I recommend one with individual egg-shaped indentations. They keep the eggs from sliding around while you’re decorating, which is crucial when you’re trying to place tiny spider legs. A regular plate works fine, but you might need to use a bit of filling under each egg half to keep them from sliding.
Preparation Method
Alright, let’s make some spiders! I’ve broken this down into clear steps with all the little tricks I’ve picked up along the way.
Step 1: Hard-Boil the Eggs (15 minutes + cooling time)
Place your eggs in a single layer in a large saucepan. Cover them with cold water by about an inch. Bring the water to a rolling boil over high heat—you’ll see big, vigorous bubbles. Once it’s boiling, turn off the heat, cover the pot, and let it sit for exactly 10 minutes. While the eggs are resting, prepare an ice bath by filling a large bowl with cold water and plenty of ice cubes. After 10 minutes, use a slotted spoon to transfer the eggs to the ice bath. Let them cool completely, about 10-15 minutes. This rapid cooling stops the cooking process and makes the eggs much easier to peel.
Here’s where I always mess up if I’m not careful: don’t skip the ice bath. I once let the eggs cool slowly on the counter because I was distracted, and the yolks developed that unappealing greenish-gray ring around the outside. Not the end of the world flavor-wise, but it doesn’t look as nice for your spider display.
Step 2: Peel and Halve the Eggs (5 minutes)
Gently tap each egg on the counter to crack the shell all over, then roll it between your palms to loosen the shell. Start peeling from the wider end where the air pocket is—the membrane usually comes off easier there. Rinse each peeled egg under cold water to remove any tiny shell fragments. Pat them dry with a paper towel.
Using a sharp knife, slice each egg in half lengthwise. Carefully pop out the yolks into a medium mixing bowl. Arrange the egg white halves on your serving tray, cut side up. If they wobble, trim a tiny sliver off the bottom to make them sit flat. I usually do this with a small paring knife—just a thin slice from the rounded bottom.
Step 3: Make the Filling (5 minutes)
Add the mayonnaise, yellow mustard, white vinegar, salt, pepper, and paprika to the bowl with the egg yolks. Mash everything together with a fork until smooth. You want the mixture to be creamy with no lumps. Taste it and adjust the seasoning—I sometimes add a pinch more mustard or an extra dash of paprika depending on my mood.
For the smoothest filling, I actually run the yolks through a fine-mesh sieve before mixing. It’s an extra step, but it makes the filling incredibly silky. You just press the yolks through the sieve with the back of a spoon. If you’re short on time, mashing thoroughly with a fork works fine too.
Step 4: Fill the Egg Whites (5 minutes)
Spoon the filling into a piping bag or a sturdy zip-top bag. If using a zip-top bag, press the filling into one corner, twist the top, and snip off about 1/4 inch from the corner. Pipe the filling into each egg white half, mounding it slightly. You want a nice rounded shape that looks like a spider’s body. If you don’t have a piping bag, you can use a small spoon to carefully fill each egg white, then smooth the top with a small offset spatula.
I usually pipe a little extra filling into the center of each egg—it makes the spider look more rounded and substantial. But don’t overfill, or the olive spider body won’t sit properly on top.
Step 5: Create the Spider Legs (10 minutes)
This is the fun part. Drain your black olives and pat them dry with a paper towel. For each spider, you’ll need one olive for the body and another olive for the legs. Cut one olive in half lengthwise—each half will be a spider body. Take the second olive and slice it crosswise into thin rounds, about 1/8 inch thick. You should get about 5-6 slices per olive. Each slice will give you two legs when you cut it in half. You need 8 legs per spider, so plan accordingly.
For each spider body (one olive half, cut side down), carefully place 4 olive leg pieces on each side. Gently press them into the filling so they stay in place. I find it easiest to arrange all the legs first, then place the body on top. The filling acts like glue, so don’t worry if the legs shift a little—you can adjust them with a toothpick.
Step 6: Add the Eyes (2 minutes)
For the finishing touch, add tiny eyes to each spider. You can use small pieces of pimento strip (cut into tiny dots), or simply dab a tiny amount of paprika on the front of each olive body. I prefer the pimento eyes because they stand out more and look genuinely creepy. If you’re using pimento, just press two tiny dots into the front of the olive body.
And that’s it! Your Halloween spider deviled eggs are ready to serve. Refrigerate them for at least 30 minutes before serving to let the filling set. The legs will hold better after they’ve chilled.
Cooking Tips & Techniques
I’ve made these spider deviled eggs enough times to have a pretty good handle on what works and what doesn’t. Here are my best tips, learned through plenty of trial and error.
Perfect hard-boiled eggs every time. The biggest mistake people make is overcooking the eggs. That green ring around the yolk? That’s from cooking them too long or at too high a temperature. The method I shared—bring to a boil, then turn off the heat and let them sit for 10 minutes—is foolproof. Also, older eggs peel better. If you’re planning to make these, buy your eggs at least a week ahead of time.
Keep the filling cold. Deviled egg filling is best when it’s cold. If your kitchen is warm, the filling can get soft and runny, making it harder to pipe and decorate. I sometimes pop the bowl of filling in the fridge for 10 minutes before piping if the room is particularly warm.
Use a toothpick for precision. When placing those tiny olive legs, a toothpick is your best friend. Use it to nudge the legs into position without smudging the filling. I keep a bowl of toothpicks nearby whenever I’m assembling these.
Prep ahead for less stress. You can hard-boil and peel the eggs up to two days in advance. Store them in an airtight container in the fridge. You can also make the filling a day ahead and keep it in a piping bag in the refrigerator. Assemble the spider legs and bodies just before serving for the freshest look.
Don’t overthink the spider design. I spent way too long on my first batch trying to make every spider look identical. They don’t need to be perfect. In fact, slightly uneven legs and misshapen bodies make them look more authentically creepy. Embrace the imperfection—it’s Halloween, after all.
One failure I’ll never forget: I tried to make the spider legs by cutting the olives lengthwise into strips instead of crosswise into rounds. Big mistake. The strips were too flimsy and broke apart when I tried to place them. Stick with the crosswise slices—they’re sturdier and look more like actual spider legs.
Variations & Adaptations
Once you’ve mastered the basic spider deviled eggs, there are so many fun ways to change things up. Here are some variations I’ve tried and loved.
Spicy Spider Eggs. Add 1/2 teaspoon of cayenne pepper or a dash of hot sauce to the yolk mixture. The heat pairs surprisingly well with the briny olives, and it gives your spiders a little extra kick. I made these for a Halloween party where everyone was doing spicy food challenges, and they were a hit.
Avocado Deviled Spiders. Replace half the mayonnaise with mashed avocado. The filling turns a lovely green color, which makes the black olive spiders really pop. Add a squeeze of lime juice to prevent the avocado from browning. This version is a bit healthier and has a fresher, lighter flavor.
Bacon-Wrapped Spiders. Because everything is better with bacon. Cook a few strips of bacon until crispy, then crumble it over the filled eggs before adding the olive spiders. The salty, smoky crunch adds another layer of texture. Just make sure the bacon is fully cooled so it doesn’t make the filling greasy.
Gluten-Free and Keto-Friendly. These deviled eggs are naturally gluten-free and low-carb, so they’re perfect for guests with dietary restrictions. Just double-check your mayonnaise label to make sure it’s gluten-free (most are, but some specialty brands add malt vinegar).
Mini Spider Bites. If you’re serving a crowd and want more portions, use quail eggs instead of chicken eggs. They’re smaller, so you’ll get more spiders per batch. The boiling time is shorter—about 3 minutes for soft-boiled, then plunge into ice water. Peeling quail eggs is a bit tedious, but the result is adorable.
I tried a smoked paprika version last year that was incredible. I used smoked paprika in the filling and also dusted the finished spiders with a tiny bit more. It gave the whole dish a subtle smoky flavor that everyone commented on. Definitely worth trying if you have smoked paprika on hand.
Serving & Storage Suggestions
These Halloween spider deviled eggs are best served cold, straight from the refrigerator. The filling firms up nicely after chilling, and the olive legs stay in place better when everything is cold. I usually arrange them on a black or dark purple platter to make the spiders really stand out—the contrast is striking.
For presentation, I like to add a few decorative touches around the platter. A sprinkle of black sesame seeds looks like tiny spider eggs, and a few fake spider webs from the Halloween store draped around the edges of the platter add to the spooky vibe. You can also arrange them on a bed of fresh arugula or spinach to look like a creepy garden.
These pair beautifully with other Halloween appetizers. I often serve them alongside a cheese board with orange cheddar and gouda, some black olive tapenade, and pumpkin-shaped crackers. For drinks, a crisp white wine like Sauvignon Blanc or a dry hard cider complements the richness of the eggs perfectly. For a non-alcoholic option, sparkling apple cider with a splash of pomegranate juice looks delightfully blood-red.
Storage: Leftover spider deviled eggs can be stored in an airtight container in the refrigerator for up to 2 days. The olive legs may soften slightly over time, but they’ll still look good. I don’t recommend freezing them—the texture of the filling becomes grainy and the eggs get watery when thawed.
Reheating: You don’t need to reheat these—they’re meant to be served cold. If you’ve stored them in the fridge, just take them out about 10 minutes before serving to take the chill off. The flavor is actually better when they’re not ice-cold.
One thing I’ve noticed: the flavors actually meld together and improve after a few hours in the fridge. The olive brine subtly seasons the filling, and the paprika deepens. So if you can make these a few hours ahead of time, they’ll taste even better.
Nutritional Information & Benefits
Each Halloween spider deviled egg (one half) contains approximately:
- Calories: 65-75
- Protein: 5-6 grams
- Fat: 5-6 grams
- Carbohydrates: 1-2 grams
- Fiber: 0 grams
- Sugar: 0 grams
- Sodium: 150-180 mg
These numbers will vary slightly depending on the exact brands of mayonnaise and mustard you use. If you’re watching your sodium, you can use low-sodium olives or reduce the added salt in the filling.
Eggs are a fantastic source of high-quality protein, and they contain all nine essential amino acids. They’re also rich in choline, which is important for brain health, and lutein and zeaxanthin, which support eye health. The black olives add a small amount of healthy monounsaturated fats and iron.
For those with dietary concerns, these spider deviled eggs are naturally gluten-free, low-carb, and keto-friendly. They’re also suitable for vegetarian diets. The main allergens are eggs and, depending on your mayonnaise, soy or eggs again. If you’re serving guests with allergies, make sure to use an egg-free mayonnaise alternative and clearly label the dish.
From my own wellness perspective, I love that these are a protein-packed appetizer that actually satisfies you. Unlike a lot of party snacks that are mostly empty carbs, deviled eggs give you sustained energy and keep you from overindulging on less nutritious options. They’re indulgent enough to feel like a treat, but wholesome enough that you don’t regret eating three or four.
Conclusion
These Halloween spider deviled eggs are proof that the best recipes often come from the most unexpected places—like a mechanic named Dave who just really loves his wife’s party food. They’re fun, they’re delicious, and they bring a little bit of playful spookiness to any October gathering without requiring a ton of effort or fancy ingredients.
I hope you give these a try and make them your own. Maybe you’ll add extra spice, or swap in avocado, or find a way to make the spiders even creepier. That’s the beauty of a simple recipe like this—it’s a canvas for your creativity. And honestly, even if your spiders end up looking a little lopsided or your olive legs fall off on the way to the party, they’ll still taste amazing. That’s the part that really matters.
I’d love to hear how yours turn out! Drop a comment below and tell me about your Halloween party, or share a photo of your spider deviled eggs. Did you add any twists? Did your kids help decorate? Did anyone scream (with delight or horror)? Let me know! And if you’re looking for more spooky appetizer ideas, be sure to check out our spooky Halloween dip recipes and our mummy pigs in a blanket for a full Halloween spread.
Happy Halloween, and happy cooking! May your spiders be creepy, your eggs be creamy, and your party be unforgettable.
Frequently Asked Questions
Can I make these spider deviled eggs ahead of time?
Yes! You can hard-boil and peel the eggs up to 2 days in advance. You can also make the filling a day ahead and store it in a piping bag in the fridge. Assemble the spiders no more than 4 hours before serving for the best appearance.
How do I keep the olive legs from falling off?
The filling acts as natural glue. Just press the leg pieces gently into the filling before placing the olive body on top. Chilling the assembled eggs for 30 minutes helps everything set and stay in place.
Can I use a different type of olive?
Large black olives work best because they’re firm and hold their shape when sliced. Green olives are too soft and briny, and kalamata olives are too small. Stick with jumbo or colossal black olives for the best results.
How long do these last in the fridge?
Assembled spider deviled eggs will keep in an airtight container in the refrigerator for up to 2 days. The olive legs may soften slightly, but they’ll still be delicious. Do not freeze them.
Can I make these without a piping bag?
Absolutely! A zip-top bag with a small corner snipped off works perfectly. If you don’t have that, you can use a small spoon to fill the eggs and then smooth the tops with a butter knife or small offset spatula.
Pin This Recipe!
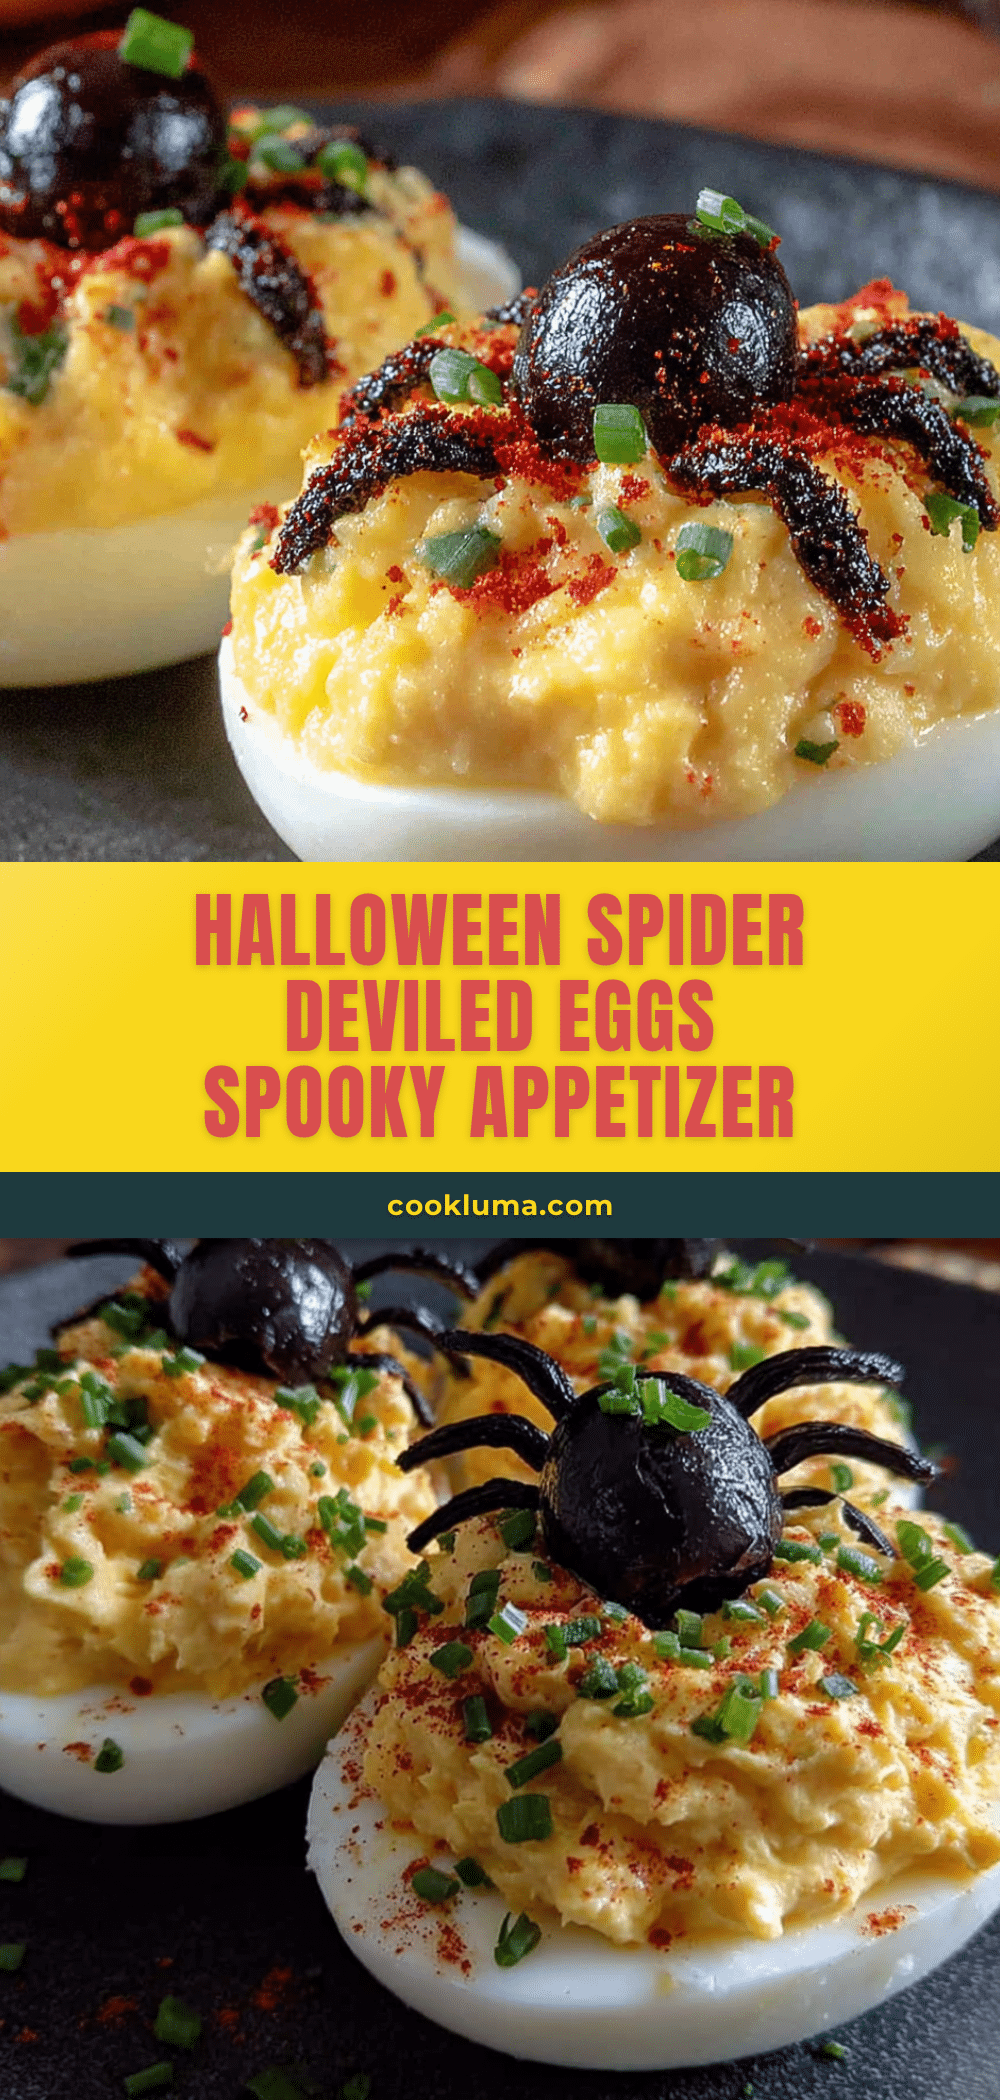
Halloween Spider Deviled Eggs: Easy Spooky Appetizer
These Halloween spider deviled eggs are a fun and easy spooky appetizer perfect for any October gathering. With a creamy, tangy filling and black olive spiders, they’re a crowd-pleasing conversation starter.
- Prep Time: 20 minutes
- Cook Time: 15 minutes
- Total Time: 35 minutes
- Yield: 24 servings 1x
- Category: Appetizer
- Cuisine: American
Ingredients
- 12 large eggs
- 1/3 cup mayonnaise
- 2 teaspoons yellow mustard
- 1 teaspoon white vinegar
- 1/2 teaspoon salt
- 1/4 teaspoon black pepper
- 1/2 teaspoon paprika (plus extra for garnish)
- 1 can (6 ounces) large black olives (jumbo or colossal)
- 1 small jar pimento strips (optional, for spider eyes)
Instructions
- Hard-boil the eggs: Place eggs in a single layer in a large saucepan. Cover with cold water by about an inch. Bring to a rolling boil over high heat, then turn off heat, cover, and let sit for exactly 10 minutes. Meanwhile, prepare an ice bath. Transfer eggs to ice bath and cool completely, about 10-15 minutes.
- Peel and halve the eggs: Gently crack and peel each egg. Rinse under cold water and pat dry. Slice each egg in half lengthwise. Pop out yolks into a medium bowl. Arrange egg white halves on a serving tray, cut side up. Trim a tiny sliver off the bottom if needed to make them sit flat.
- Make the filling: Add mayonnaise, yellow mustard, white vinegar, salt, pepper, and paprika to the bowl with yolks. Mash together with a fork until smooth and creamy. Taste and adjust seasoning if desired.
- Fill the egg whites: Spoon filling into a piping bag or sturdy zip-top bag. Snip off about 1/4 inch from the corner. Pipe filling into each egg white half, mounding slightly. Alternatively, use a small spoon to fill and smooth with a spatula.
- Create the spider legs: Drain and pat dry black olives. For each spider, cut one olive in half lengthwise for the body. Slice a second olive crosswise into thin rounds (about 1/8 inch thick). Cut each round in half to create two legs. You need 8 legs per spider.
- Assemble the spiders: For each spider body (olive half, cut side down), carefully place 4 leg pieces on each side, pressing gently into the filling. Place the olive body on top. Use a toothpick to adjust legs if needed.
- Add the eyes: Add tiny eyes using small pieces of pimento strip or a dab of paprika on the front of each olive body.
- Chill and serve: Refrigerate assembled eggs for at least 30 minutes before serving to let the filling set. Serve cold.
Notes
Use older eggs for easier peeling. For the smoothest filling, press yolks through a fine-mesh sieve before mixing. The filling acts as glue for the olive legs; chilling helps them stay in place. You can hard-boil and peel eggs up to 2 days ahead. Assemble spiders no more than 4 hours before serving for best appearance.
Nutrition
- Serving Size: 1 deviled egg half
- Calories: 70
- Sodium: 165
- Fat: 5.5
- Saturated Fat: 1.5
- Carbohydrates: 1.5
- Protein: 5.5
Keywords: Halloween, deviled eggs, spider, appetizer, spooky, party food, easy, black olives


