My neighbor Deb had sworn off Halloween baking for years. “Too much sugar, too much mess, and the kids never even eat half of it,” she’d announce every October, arms crossed, watching me haul grocery bags of candy corn and sprinkles into my house. I believed her, honestly. I figured she was just more sensible than me, the kind of parent who stuck to store-bought and called it a night. Then last year, on the 30th, I caught her. I’d popped over to borrow an egg—classic last-minute baker move—and there she was, standing at her kitchen island, a bag of pretzel rods in one hand and a green-tipped icing bottle in the other. She froze like I’d caught her doing something illegal. “These aren’t for the kids,” she mumbled, trying to hide a tray of what were clearly witch fingers behind a stack of mail. “They’re for me.” I mean, I almost laughed. The woman who refused to make anything spooky had spent an hour turning pretzels into creepy little witch fingers, just for herself. That’s the thing about this recipe, you know? It’s not really about the kids. It’s about that tiny moment of quiet, silly satisfaction you get from making something that looks absolutely ridiculous and delicious at the same time. I asked if I could try one, and she begrudgingly handed me a pretzel rod coated in green candy melt, with a slivered almond nail stuck on the end. It was salty, sweet, and honestly? Perfect. I’ve been making them every Halloween since, and maybe you’ve been there too—standing in your kitchen, tired from work, wanting to do something festive but absolutely not willing to spend three hours on a complicated cake. These witch finger pretzel rods are your answer. They’re the treat you make for yourself, and then share with everyone else.
Why You’ll Love This Recipe
Let’s be real for a second. Halloween treats are usually a whole production. You’ve got the Pinterest-perfect cakes that take six hours, the cookies that require royal icing piping skills you simply don’t have, and the elaborate desserts that leave your kitchen looking like a candy factory exploded. Not these. These quick witch finger pretzel rods are the anti-fuss Halloween treat, and that’s exactly why you’ll fall in love with them.
- 20 Minutes Flat: From start to finish, you’re looking at about twenty minutes. That’s less time than it takes to watch a single episode of your favorite show. Melt, dip, decorate, done. Perfect for those weeknights when you want to do something fun but don’t have hours to spare.
- Simple Ingredients: You need pretzel rods, green candy melts, slivered almonds, and a tiny bit of red icing. That’s it. No fancy grocery runs, no obscure extracts, no specialty flours. Chances are, you already have the almonds in your pantry from that salad you made last week.
- Perfect for Halloween Parties or a Quiet Night In: These work for the big costume party, the classroom treat exchange, or honestly, just for yourself while you watch a scary movie. They’re versatile like that.
- Crowd-Pleaser: Kids love the gross-out factor. Adults love the salty-sweet combo. Everyone loves that they’re ready in under half an hour. I’ve brought these to three different Halloween gatherings and they disappeared every single time, no lie.
- Unbelievably Delicious: There’s something about the crunch of the pretzel rod, the creamy sweetness of the candy melt, and the slight nuttiness of the almond that just works. It’s not just a gimmick—it actually tastes amazing.
What makes these different from every other witch finger recipe out there? It’s the texture. Most versions use cookie dough or shortbread, which can be dry and crumbly. These are crisp, sturdy, and satisfying. Plus, they don’t require any baking time, which means your oven stays free for the actual dinner you’re probably scrambling to make. This isn’t just another Halloween recipe—it’s your best version of a last-minute treat that looks like you spent way more effort than you actually did. And honestly, isn’t that the dream?
What Ingredients You Will Need
This recipe uses simple, pantry-friendly ingredients to create something that looks spooky but tastes completely addictive. No weird stuff here—just the basics, transformed.
For the Witch Fingers
- Pretzel rods (12-15 rods): Look for thick, sturdy pretzel rods, not the thin, fragile ones. I personally prefer the Utz brand for their consistent thickness and crunch. They hold up better during dipping and don’t snap as easily. You want a solid base for your witch fingers.
- Green candy melts (1 cup or 6 ounces): These are the star of the show. Wilton brand works great and is widely available at craft stores or online. You can also use green melting wafers from Ghirardelli if you want a slightly richer flavor. The color should be a vibrant, witchy green—not too neon, not too pale. If you can only find white candy melts, you can tint them with oil-based green food coloring, but avoid water-based coloring as it will seize the chocolate.
- Slivered almonds (about 30-40 pieces): These become the fingernails. You want raw, blanched slivered almonds for that perfect nail shape. Toasted almonds will work too, but they’ll be darker and less “witch-like.” Pick out the longest, most uniform pieces for the best effect. Some will break—that’s fine, just use the good ones.
- Red decorating gel or icing (1 small tube): This is for the bloody cuticle detail. You only need a tiny dot per finger, so one tube will last you through multiple batches. Wilton or Betty Crocker brand both work well. You can also use red food coloring mixed with a tiny bit of corn syrup if you’re in a pinch.
Optional Decorations

- Edible glitter or sanding sugar (green or black): Adds a creepy, sparkly finish. Totally optional but fun for a more dramatic look.
- Purple or black candy melts: For variety. You can make a mix of colored fingers if you want a more colorful Halloween platter.
- Coconut oil (1 teaspoon): Helps thin the candy melts for smoother dipping. Not always necessary, but helpful if your melts are thick.
That’s genuinely all you need. No butter, no eggs, no flour. Just three main ingredients plus a tiny tube of red gel. This is the kind of recipe you can decide to make at 7 PM on a Tuesday and have done by 7:20. I love that about it.
Equipment Needed
You don’t need a fancy kitchen setup for these witch finger pretzel rods. A few basic tools will do the job nicely.
- Microwave-safe bowl (medium size): For melting the candy melts. Glass or ceramic works best. Avoid plastic bowls as they can retain odors or warp with heat.
- Parchment paper or silicone baking mat: To place the dipped pretzels on. The candy melts won’t stick to these surfaces, making cleanup a breeze. Wax paper can work in a pinch, but parchment is more reliable.
- Baking sheet or large plate: To hold the parchment paper and pretzels while they set. A baking sheet is ideal because you can slide it into the fridge easily.
- Small offset spatula or butter knife: For spreading the candy melt evenly on the pretzel rods. A spoon works too, but the spatula gives you more control.
- Tweezers or small tongs: For placing the almond fingernails precisely. Your fingers work too, but tweezers are less messy when the candy melt is sticky.
- Toothpick: For adding the red gel dot. Gives you a tiny, precise application point.
- Piping bag or zip-top bag (small): Optional, but makes applying the candy melt cleaner. Snip a tiny corner off the bag and pipe the melt onto the pretzel rod instead of dipping.
I’ve made these with just a bowl, a spoon, and a plate before. The tweezers and spatula are nice-to-haves, not must-haves. Don’t let missing equipment stop you from making these—improvisation is part of the fun.
Preparation Method
Alright, let’s get to the good part. Follow these steps and you’ll have a tray of witch fingers in no time. I’ve included all the little details that make the difference between okay witch fingers and absolutely terrifying ones.
- Prep your workspace (2 minutes): Line a baking sheet with parchment paper or a silicone mat. Make sure it’s completely flat and stable. Have your pretzel rods, slivered almonds, and red gel ready. Open the bag of almonds and pick out the longest, most nail-like pieces. Set them aside in a small bowl. You want everything within arm’s reach because once the candy melt is melted, you need to move fast.
- Melt the candy melts (2-3 minutes): Place the green candy melts in a microwave-safe bowl. Microwave in 30-second intervals at 50% power, stirring well after each interval. This is crucial—full power will burn the melts and turn them into a grainy, unusable mess. After about 60-90 seconds total, they should be mostly melted. Stir until completely smooth. If the mixture is too thick, add 1 teaspoon of coconut oil and stir. It should be the consistency of warm honey, not watery.
- Dip the pretzel rods (10 minutes): Hold a pretzel rod by one end. Dip the other end into the melted candy, rotating gently to coat about two-thirds of the rod. Lift it out and let the excess drip back into the bowl for a few seconds. You want a fairly even coating, but a few bumps and ridges are fine—they actually make the fingers look more realistic and gnarled. Place the coated pretzel on the parchment paper. Repeat with all pretzel rods, working quickly before the candy sets. If the melt starts to thicken, reheat it for 10 seconds in the microwave.
- Add the fingernails (5 minutes): While the candy melt is still wet, press a slivered almond onto the tip of each pretzel rod. Position it so the pointed end extends slightly past the end of the pretzel, like a fingernail growing past the fingertip. Press gently but firmly so it sticks. Use tweezers for precision if you have them. If the almond slides around, the melt has started to set—just hold it in place for 10 seconds. Work in batches of 3-4 pretzels at a time to keep the melt wet.
- Create the knuckle wrinkles (3 minutes): Once all the almonds are attached, use a toothpick or the tip of a knife to gently draw 2-3 horizontal lines across the middle of the coated section of each pretzel. These mimic knuckle wrinkles. Don’t press too hard—you’re just creating a slight indentation in the candy. If the candy has set too much to mark, it’s fine to skip this step. The fingers will still look creepy without them.
- Add the bloody cuticles (2 minutes): Squeeze a tiny dot of red decorating gel at the base of each almond nail, where it meets the green candy. This is the “blood” detail that really sells the witch finger look. Use a toothpick to smear it slightly if you want a more gruesome effect. A little goes a long way—you’re going for creepy, not gory mess.
- Set the pretzels (10-15 minutes): Place the baking sheet in the refrigerator for 10-15 minutes to set the candy completely. Don’t skip this step—room temperature setting can take 30-40 minutes and the coating might be soft and prone to smudging. Once set, the candy should be firm and snap cleanly when you bite into it.
- Serve or store: Once set, arrange the witch finger pretzel rods on a platter. Arrange them in a loose pile, like a hand that’s been severed, for maximum creep factor. Serve immediately or store as directed below.
Cooking Tips & Techniques
I’ve made these witch finger pretzel rods about a dozen times now, and I’ve learned a few things the hard way. Let me save you some trouble.
Don’t overheat the candy melts. This is the number one mistake people make. Candy melts are sensitive. If you microwave them on high for too long, they’ll seize up into a thick, clumpy paste that’s impossible to work with. Always use 50% power and stir frequently. If they do seize, you can try adding a teaspoon of coconut oil or vegetable shortening and stirring vigorously, but honestly, it’s better to just start over with fresh melts. I’ve ruined two batches learning this lesson. Learn from my impatience.
Work in small batches. Don’t try to dip all 15 pretzel rods at once before adding the almonds. Dip 3-4, add their almond nails, then move to the next batch. The candy melt sets quickly, especially if your kitchen is cool, and you’ll end up with almonds that won’t stick. I made this mistake my first time and ended up with a tray of fingerless witch hands. Still tasty, but not nearly as creepy.
Use room temperature pretzels. If your pretzel rods are cold from the pantry, they can cause the warm candy melt to seize slightly on contact. Let them sit at room temperature for 10 minutes before dipping. This ensures a smooth, even coating.
Don’t skip the fridge setting. I know it’s tempting to just leave them on the counter and hope for the best, but the fridge step is non-negotiable. It firms up the candy quickly and prevents the almond nails from sliding off. Plus, it gives you time to clean up your workspace. Trust me on this one.
Vary the finger lengths. For a more realistic (and disturbing) look, break a few pretzel rods in half before dipping. This gives you some shorter fingers, like pinkies and ring fingers, mixed in with the longer ones. It adds variety and makes the final platter look more like a real hand.
Keep a wet paper towel nearby. Candy melts are sticky stuff. Keep a damp paper towel on your workspace to wipe your fingers off between steps. It saves you from leaving green fingerprints all over your countertops.
Variations & Adaptations
One of the best things about this recipe is how easy it is to customize. Here are some variations I’ve tried and loved.
Spooky Spider Web Fingers: After dipping the pretzels in green candy melt, let them set for 5 minutes in the fridge. Then, using a piping bag with white candy melt, drizzle thin lines across the coated section to create a spider web effect. Add a small candy spider on top for extra creepiness. This version takes a bit more time but looks incredible on a dessert table.
Gluten-Free Witch Fingers: Swap the pretzel rods for gluten-free pretzel rods. Several brands make them now, and they work exactly the same way. Just check the label to make sure they’re certified gluten-free if that’s important for your guests. The taste is slightly different but still delicious.
Monster Mash Color Mix: Instead of using just green candy melts, make a batch of purple, green, and orange fingers. Melt each color separately and dip different pretzels. Arrange them on a platter in a rainbow of spooky colors. This is great for kids’ parties where variety is key. I did this for a neighborhood Halloween block party and the kids went absolutely wild for the purple ones.
Dark Chocolate Witch Fingers: For a less sweet version, use dark chocolate melting wafers instead of green candy melts. The bitterness of the dark chocolate pairs beautifully with the saltiness of the pretzel. Add a drop of green food coloring to the dark chocolate if you still want that witchy green hue, or leave it as is for a more subtle, elegant look. This is my personal favorite for adult gatherings.
Nut-Free Alternative: If you’re serving these at a school event or have nut allergies to consider, skip the almond nails. Instead, use small candy corn pieces or orange candy melts piped into a nail shape. You can also use sliced dried banana chips for a nut-free, crunchy alternative. They won’t look exactly like fingernails, but they’ll still be recognizable and delicious.
Extra Spicy Fingers: Add a pinch of cayenne pepper or chili powder to the melted candy for a sweet-and-spicy kick. The heat plays off the saltiness of the pretzel and the sweetness of the candy in a really interesting way. Start with just a pinch—you can always add more, but you can’t take it out.
Serving & Storage Suggestions
These witch finger pretzel rods are best served cold or at room temperature, but a few tricks will keep them looking and tasting their best.
Serving Temperature: Serve them straight from the fridge for the firmest texture. The candy coating will be snappy and the pretzel will be crunchy. If you’re serving them at a party, take them out of the fridge about 10 minutes before serving so they’re not ice-cold. Room temperature is fine too, but they’ll be slightly softer.
Presentation Ideas: Arrange the fingers on a black platter or a dark-colored cutting board for maximum visual impact. Scatter a few candy eyeballs or plastic spider rings around the base for extra spooky vibes. You can also stand them upright in a small jar or mug filled with black beans or crushed cookies to look like a hand reaching up from the ground. For a really dramatic display, arrange them in a fan shape on a large plate, with the almond nails pointing outward like a creepy hand.
Complementary Treats: Serve these alongside a bowl of warm caramel dip or chocolate ganache for dipping. The salty-sweet combination is irresistible. They also pair well with pumpkin-shaped cookies, ghost meringues, or a simple bowl of candy corn. For drinks, try them with hot apple cider, pumpkin spice lattes, or a cold glass of milk.
Storage Instructions: Store the finished witch finger pretzel rods in an airtight container at room temperature for up to 5 days. If your kitchen is warm or humid, store them in the refrigerator to prevent the candy coating from getting sticky. Layer them between sheets of parchment paper to prevent them from sticking together. Do not stack them too high or the pretzels may break.
Freezing Instructions: You can freeze these for up to 2 months. Place them in a single layer on a baking sheet and freeze for 1 hour until solid. Then transfer to a freezer-safe container or zip-top bag, separating layers with parchment paper. Thaw in the refrigerator overnight or at room temperature for 30 minutes before serving. The texture holds up surprisingly well.
Flavor Development: These are actually best after they’ve sat for a few hours or overnight. The candy coating firms up completely, and the flavors meld together. If you’re making them for a party, prepare them the day before and store them in the fridge. They’ll look and taste even better.
Nutritional Information & Benefits
Let’s be honest—these are a treat, not a health food. But here’s what you’re getting in each witch finger pretzel rod.
Estimated Nutritional Values (per pretzel rod): Approximately 120-150 calories, 6-8g fat (from candy melts and almonds), 15-18g carbohydrates, 2-3g protein, and 10-12g sugar. These numbers will vary based on the specific brands you use and how much coating you apply.
Health Benefits of Key Ingredients: The pretzel rods provide a quick source of carbohydrates for energy, and the almonds offer a small dose of healthy fats, vitamin E, and magnesium. Almonds are also a good source of protein and fiber, which can help balance out the sugar rush from the candy coating. The dark chocolate variation adds antioxidants, which is always a nice bonus.
Dietary Considerations: This recipe is naturally egg-free and dairy-free if you use dairy-free candy melts. It’s also vegetarian and can be made gluten-free with appropriate pretzel rods. However, it is not vegan if you use standard candy melts (many contain milk solids). Check the labels if you have specific dietary needs.
Potential Allergens: This recipe contains wheat (pretzels), tree nuts (almonds), and may contain dairy (candy melts). If you’re serving these at a gathering, always label them clearly or ask about allergies beforehand. The nut-free variation using candy corn or banana chips is a great alternative for classrooms or events.
My Personal Wellness Perspective: Look, I’m not going to pretend these are healthy. They’re candy-coated pretzels. But I believe in the power of treats made with intention. Taking twenty minutes to create something fun and festive is good for your mental health, even if it’s not good for your waistline. Balance is everything. Make these, enjoy them, and don’t feel guilty about it. Halloween comes once a year.
Conclusion
These witch finger pretzel rods are the Halloween treat you didn’t know you needed. They’re quick, they’re easy, and they deliver that perfect blend of salty and sweet that keeps everyone coming back for more. Whether you’re making them for a classroom party, a Halloween gathering, or just for yourself while you binge-watch scary movies, they’re guaranteed to bring a smile to your face.
What I love most about this recipe is how forgiving it is. You don’t need to be a professional baker. You don’t need fancy tools. You just need a few simple ingredients and twenty minutes. The imperfections—the slightly uneven coating, the almond that’s a little crooked, the knuckle wrinkles that aren’t perfectly straight—those are what make them look like real witch fingers. They’re supposed to look a little creepy and a little messy. That’s the whole point.
I’d love to see your versions of these witch finger pretzel rods. Did you try a different color? Add extra decorations? Make them with your kids? Drop a comment below and share your experience. And if you’re looking for more quick and easy Halloween treats, check out my halloween popcorn balls or these spider web dip recipes—they’re just as simple and just as fun.
Happy Halloween, friends. Go make something spooky. And don’t forget to save one for yourself—you deserve it.
Frequently Asked Questions
Can I use white chocolate instead of candy melts?
Yes, you can. White chocolate chips or bars will work, but you’ll need to add green food coloring to achieve the witchy color. Use oil-based food coloring to prevent the chocolate from seizing. White chocolate is also softer than candy melts, so the coating won’t be as firm. Candy melts are generally easier to work with for this recipe.
How far in advance can I make these?
You can make these up to 5 days in advance if stored properly in an airtight container at room temperature or in the refrigerator. For best results, make them 1-2 days ahead. They actually taste better after the flavors have had time to meld. Just keep them away from heat and humidity.
Can I use regular pretzel sticks instead of pretzel rods?
You can, but they’ll be much thinner and more delicate. The witch finger effect works best with thick, sturdy pretzel rods that resemble actual fingers. If you use thin pretzel sticks, they’ll be more like witch pinkies. Just be careful when dipping—they break more easily.
My candy melts are too thick. What should I do?
Add 1 teaspoon of coconut oil or vegetable shortening to the melted candy and stir well. This will thin it out without affecting the taste or color. Do not add water or milk—this will cause the candy melts to seize and become unusable. Add the oil a little at a time until you reach the desired consistency.
Can I make these without a microwave?
Absolutely. Melt the candy melts in a double boiler or a heatproof bowl set over a pot of simmering water. Stir frequently until smooth and fully melted. This method takes a bit longer but gives you more control over the temperature. Just make sure no water gets into the bowl, or the candy will seize.
Pin This Recipe!
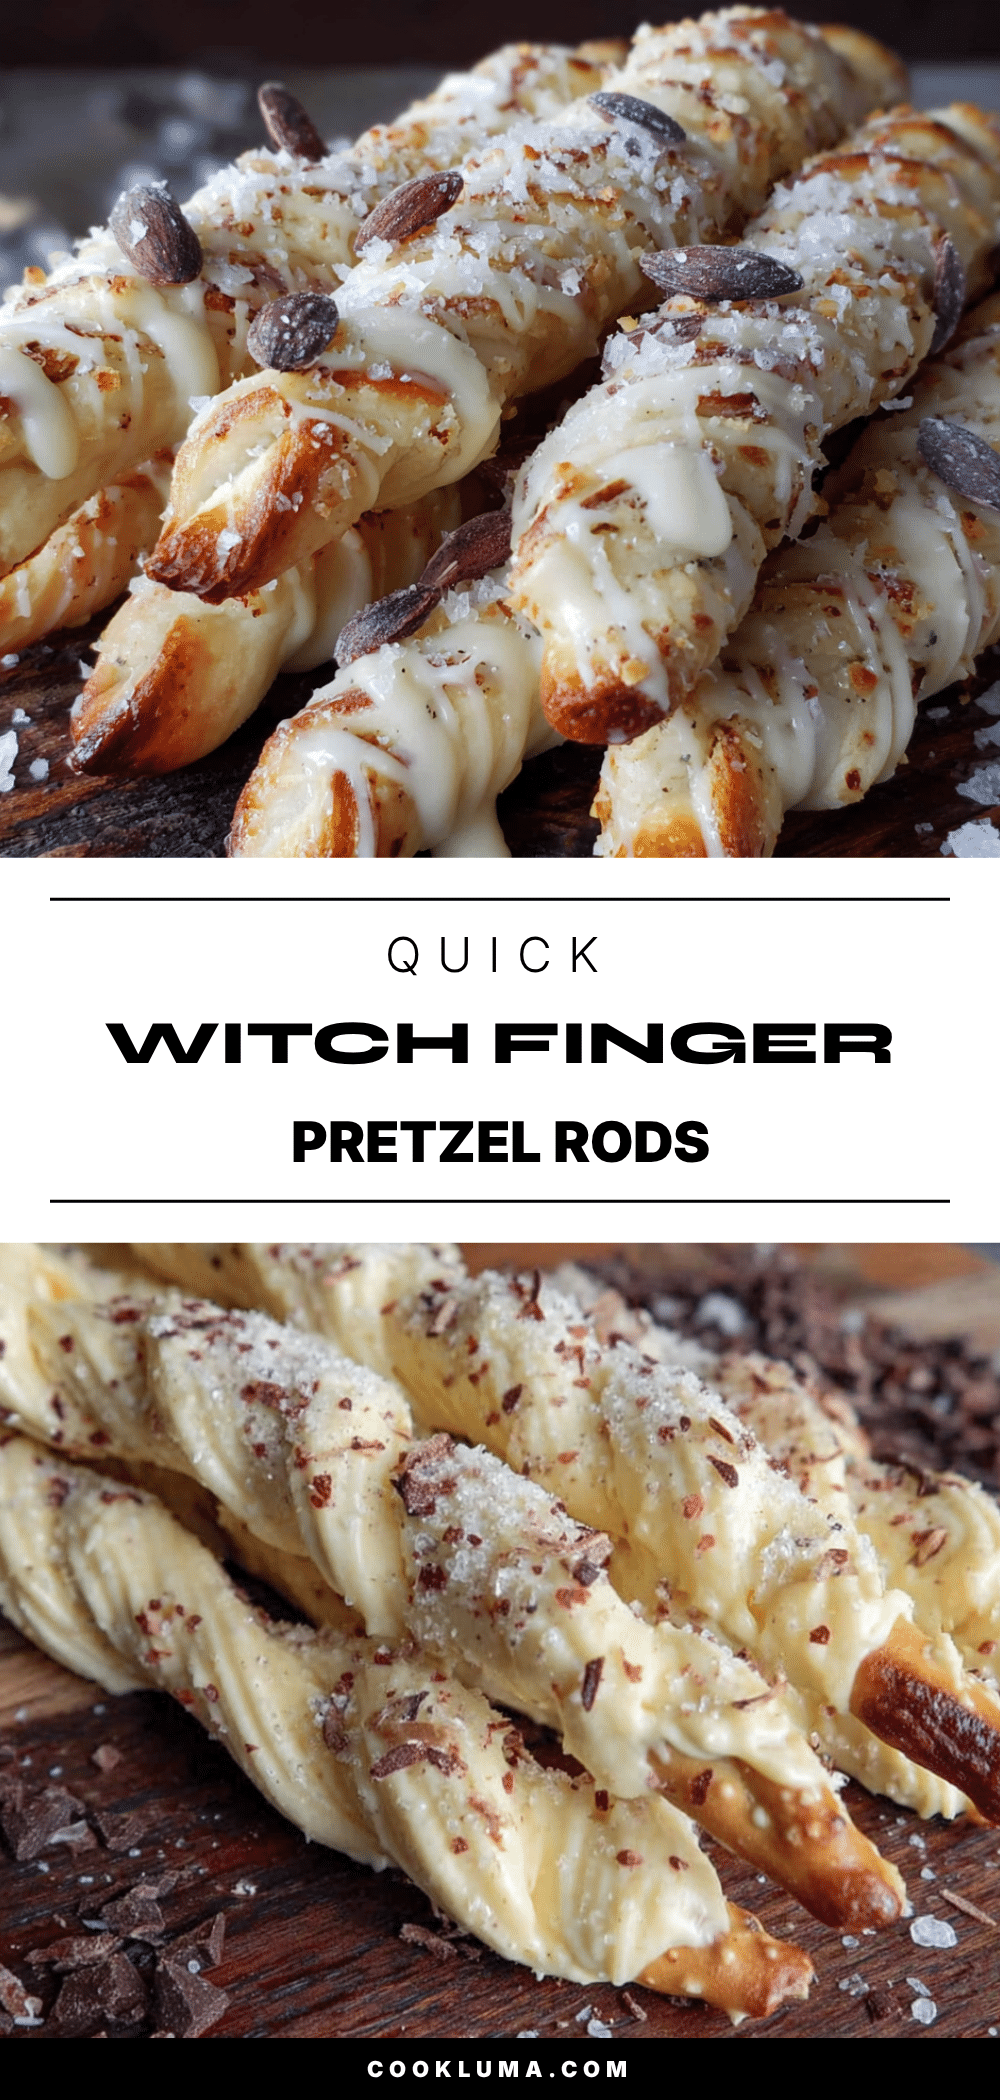
Easy Witch Finger Pretzel Rods: 20-Minute Halloween Treat

These quick and easy witch finger pretzel rods are a fun, no-bake Halloween treat made with pretzel rods, green candy melts, and slivered almonds. Ready in just 20 minutes, they’re perfect for parties or a quiet night in.
- Prep Time: 10 minutes
- Cook Time: 10 minutes
- Total Time: 20 minutes
- Yield: 12-15 servings 1x
- Category: Dessert
- Cuisine: American
Ingredients
- 12–15 pretzel rods (thick, sturdy ones like Utz brand)
- 1 cup (6 ounces) green candy melts (e.g., Wilton or Ghirardelli)
- 30–40 slivered almonds (raw, blanched)
- 1 small tube red decorating gel or icing
- Optional: edible glitter or sanding sugar (green or black)
- Optional: purple or black candy melts
- Optional: 1 teaspoon coconut oil (to thin candy melts)
Instructions
- Prep your workspace: Line a baking sheet with parchment paper or a silicone mat. Have pretzel rods, slivered almonds, and red gel ready. Pick out the longest almond pieces for nails.
- Melt the candy melts: Place green candy melts in a microwave-safe bowl. Microwave in 30-second intervals at 50% power, stirring well after each interval, until smooth (about 60-90 seconds total). If too thick, stir in 1 teaspoon coconut oil.
- Dip the pretzel rods: Hold a pretzel rod by one end. Dip the other end into melted candy, rotating to coat about two-thirds of the rod. Let excess drip off, then place on parchment paper. Repeat with all pretzels, working quickly.
- Add the fingernails: While candy is still wet, press a slivered almond onto the tip of each pretzel rod, pointed end extending past the end. Press gently to stick. Work in batches of 3-4 pretzels.
- Create knuckle wrinkles: Use a toothpick or knife tip to gently draw 2-3 horizontal lines across the coated section of each pretzel to mimic knuckles.
- Add bloody cuticles: Squeeze a tiny dot of red decorating gel at the base of each almond nail. Use a toothpick to smear slightly if desired.
- Set the pretzels: Place baking sheet in the refrigerator for 10-15 minutes until candy is firm.
- Serve or store: Arrange on a platter and serve immediately or store as directed.
Notes
Don’t overheat candy melts; use 50% power. Work in small batches to keep candy wet. Use room temperature pretzels. Refrigerate to set quickly. Vary finger lengths by breaking some pretzels in half. Keep a damp paper towel nearby for sticky fingers.
Nutrition
- Serving Size: 1 pretzel rod
- Calories: 135
- Sugar: 11
- Sodium: 180
- Fat: 7
- Saturated Fat: 3
- Carbohydrates: 16
- Fiber: 1
- Protein: 2
Keywords: Halloween treats, witch fingers, pretzel rods, no-bake, quick dessert, spooky snacks, easy Halloween recipe


