My neighbor wasn’t trying to impress anyone. I’d stopped by to borrow a lug wrench—mine had mysteriously vanished from the trunk—and the smell of butter and something savory hit me before I even got past her screen door. It was late October, and her kitchen looked like a flour bomb had gone off. There were little strips of dough everywhere, and she was wrapping them around hot dogs like she was putting tiny sweaters on them.
“Halloween party at my kid’s school tomorrow,” she said, not even looking up. “These are nothing, honestly. Takes ten minutes.”
But here’s the thing—they weren’t nothing. They were adorable. Little mummies with tiny mustard eyes, lined up on a baking sheet like they were about to rise from the dead and ask for ketchup. I stood there holding my borrowed wrench, completely transfixed by these silly, perfect little things. She handed me one straight off the pan—still warm, the crescent dough all flaky and golden, the hot dog juicy inside—and I swear, I closed my eyes for a second.
Maybe you’ve been there. You see a recipe that seems almost too simple to bother with, and then you take one bite and realize simple is exactly what you needed. That’s these Spooky Crescent Mummy Hot Dogs. They’re not fancy. They’re not complicated. But they are the kind of thing that makes people smile—kids, adults, everyone—and honestly, that’s kind of the whole point of Halloween, isn’t it?
I kept making them every October after that day. They showed up at my own kid’s school parties, at our pre-trick-or-treat dinner, at a grown-up Halloween potluck where I was nervous they’d be too silly—and they disappeared first. Every single time. So now I’m passing them along to you, exactly the way my neighbor made them that day. No fuss. No stress. Just flaky, buttery, slightly ridiculous little mummies that taste like fall.
Why You’ll Love This Recipe
Let me tell you something—I’ve tested this recipe about a dozen times over the years, tweaking the dough-to-dog ratio, trying different hot dog brands, even attempting a gluten-free version. And you know what I learned? The original version is still the best. That’s the beauty of something this simple. Here’s why you’re going to love it:
- Quick & Easy: We’re talking 20 minutes from start to finish. Seriously. You can make these after work, before the party, or when the doorbell is about to start ringing. No stress.
- Simple Ingredients: Two main ingredients. That’s it. Crescent rolls and hot dogs. You probably already have both in your kitchen right now.
- Perfect for Halloween: Whether it’s a classroom party, a family movie night, or your annual pumpkin-carving gathering, these fit right in. They’re festive without being fussy.
- Crowd-Pleaser: I’ve watched grown adults argue over the last one. Kids love them because they’re fun. Adults love them because they’re delicious and nostalgic.
- Unbelievably Delicious: The flaky, buttery crescent dough wrapped around a juicy hot dog is comfort food at its most basic and brilliant. Add a little mustard eye, and suddenly it’s art.
What makes this recipe different from every other mummy dog out there? It’s the wrapping technique. I learned the hard way that if you wrap too tight, the dough tears. Too loose, and the mummy looks more like a sad burrito. My method gives you that perfect balance—the dough stays intact, the hot dog stays juicy, and the mummy actually looks like a mummy. Not a blob. Not a mess. A mummy.
And honestly? This recipe is the kind that makes you feel like a kitchen hero without actually doing much. You hand someone a plate of these, and they think you spent an hour. You didn’t. You spent twenty minutes, and you watched half a episode of your show while the oven did the work. That’s the kind of recipe I want in my life, and I bet you do too.
What Ingredients You Will Need
This recipe uses the simplest ingredients you can imagine. That’s the whole point. No fancy grocery trips, no obscure spices, no hunting down specialty items. Just two main components, plus a few optional touches for decoration.
For the Mummy Dogs
- 1 can (8 oz) refrigerated crescent roll dough – I recommend Pillsbury for the most consistent results. The dough is flaky, buttery, and rolls out perfectly every time. Look for the original or butter crescent rolls—avoid the reduced-fat version if you can, because the dough tends to tear more easily.
- 8 hot dogs – Use your favorite brand. I personally like beef hot dogs for their flavor and snap, but turkey or chicken hot dogs work great too. For a slightly more indulgent option, try jumbo hot dogs and adjust your dough strips accordingly.
- Mustard or ketchup – For the mummy eyes. Yellow mustard gives the most classic “mummy” look, but ketchup works if you’re feeding mustard-haters. You could even use small dots of sriracha for a spicy mummy.
For Serving (Optional but Recommended)
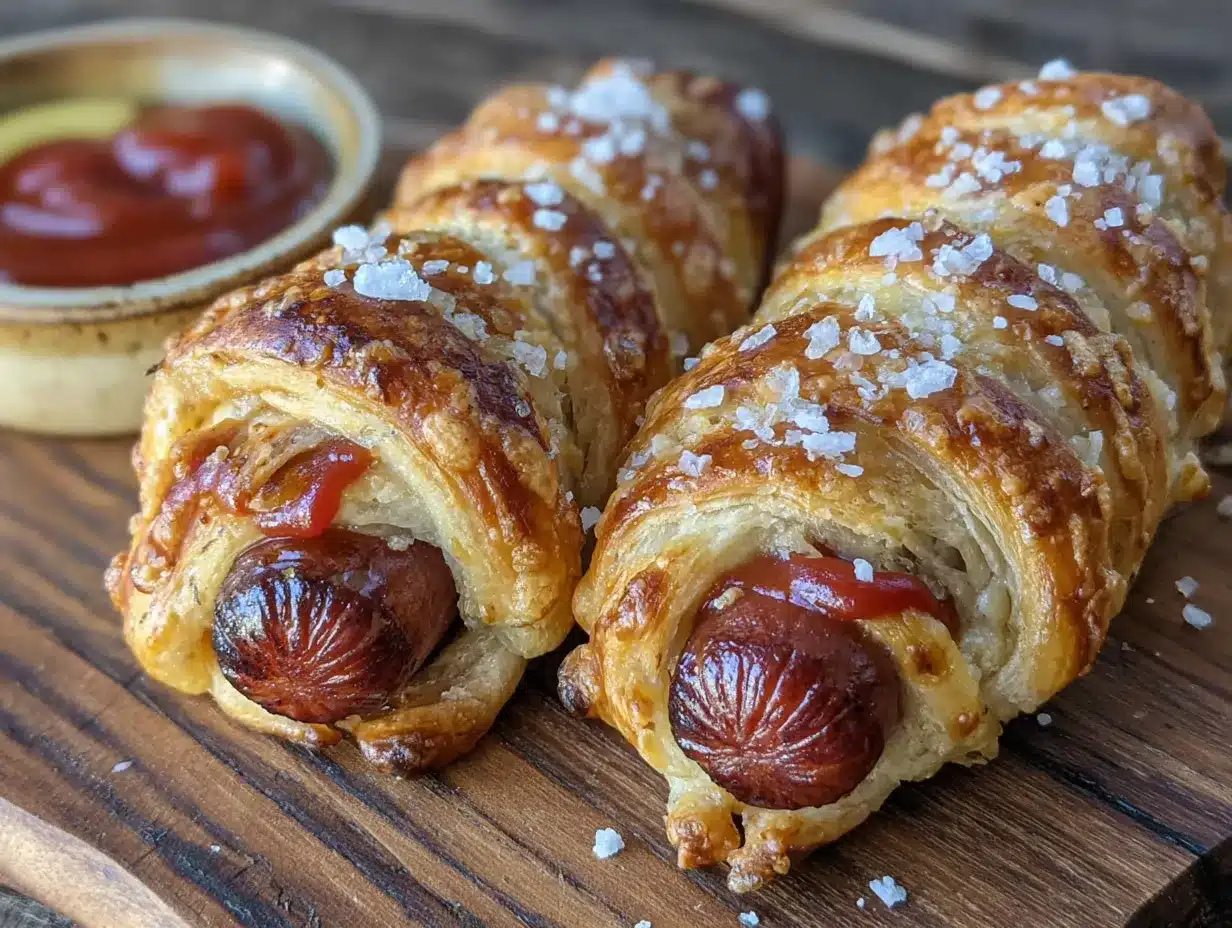
- Ketchup – For dipping. Because mummies need a bath sometimes.
- Mustard – For dipping. Because mummies are fancy like that.
- Ranch dressing – I know it sounds weird, but trust me. Kids go wild for it.
Here’s a little tip I picked up from my neighbor that day: take the crescent dough out of the fridge about 5 minutes before you start working with it. Cold dough is harder to separate and tends to crack. Let it sit on the counter while you preheat the oven, and it’ll be much more cooperative. I learned this after my first attempt ended with dough stuck to my fingers and a lot of frustrated muttering.
One more thing—the hot dogs. If you’re using regular-sized hot dogs, one can of crescent rolls will make exactly 8 mummy dogs. If you’re using jumbo hot dogs, you might only get 6, and you’ll want to use wider strips of dough. I’ve done it both ways, and honestly, the jumbo version is a little more satisfying if you’re feeding hungry teenagers or adults. But the classic size is perfect for little hands.
For a seasonal twist, try using smoked sausages or bratwurst instead of hot dogs. The flavor is richer, and the texture is a little more substantial. I made a batch with apple chicken sausages last fall, and they were gone before the regular ones. Just saying.
Equipment Needed
You don’t need much for this recipe. That’s part of the charm. Here’s what you’ll need:
- Baking sheet – A standard half-sheet pan works perfectly. Line it with parchment paper or a silicone baking mat for easy cleanup. Trust me on this—the dough can stick, and scraping burnt crescent roll off a pan is not how you want to spend your Halloween.
- Sharp knife or pizza cutter – For cutting the crescent dough into strips. A pizza cutter makes this job infinitely easier and faster. I used a regular knife the first time, and let’s just say my strips looked like they’d been cut by a toddler.
- Small bowl – For the mustard or ketchup eyes. You’ll dip a toothpick or the tip of a knife into the condiment and dot it onto the dough.
- Toothpick or small skewer – For applying the eyes. A toothpick gives you the most control. I’ve also used the back of a small spoon, but it’s harder to get that perfect dot.
- Cooling rack – Optional, but nice if you want the mummies to stay crispy on the bottom. If you let them cool directly on the baking sheet, the steam can make the bottom a little soft.
If you don’t have a pizza cutter, don’t worry. A sharp knife works fine. Just make sure it’s sharp—dull knives will tear the dough instead of cutting it cleanly. I learned that one the hard way, and my first batch of mummies looked like they’d been through a battle.
Preparation Method
Alright, let’s make some mummies. I’ll walk you through every step, including the little tricks I’ve picked up along the way.
- Preheat your oven to 375°F (190°C). Line a baking sheet with parchment paper or a silicone mat. This is non-negotiable for easy cleanup. Trust me, you don’t want to be scrubbing baked-on dough on Halloween night.
- Unroll the crescent dough. Carefully separate the dough along the perforated lines. You should have 8 triangles. If the dough cracks a little, don’t panic—just press it back together gently. It’s forgiving stuff.
- Cut each triangle into thin strips. Using a sharp knife or pizza cutter, slice each triangle lengthwise into 3-4 thin strips. The strips should be about 1/4 to 1/2 inch wide. Don’t worry about being perfect—mummies are supposed to look a little messy. For a more authentic mummy look, make some strips wider than others. It adds character.
- Wrap the hot dogs. Take one hot dog and start wrapping a dough strip around it, leaving a small gap near the top for the mummy’s face. Overlap the strips slightly as you go. The dough should cover most of the hot dog, but leave about 1/2 inch exposed at the top for the eyes. Don’t wrap too tight—the dough needs room to expand as it bakes. Too loose, and the mummy looks like it’s wearing a bathrobe. Too tight, and the dough tears. You’re aiming for “cozy but not suffocating.”
- Repeat with remaining hot dogs. Place each wrapped mummy on the prepared baking sheet, spacing them about 2 inches apart. They’ll puff up a little as they bake, so give them room to breathe.
- Bake for 12-15 minutes, or until the dough is golden brown and the hot dogs are heated through. The exact time depends on your oven and how thick your strips are. Start checking at 12 minutes. The dough should be puffed and golden, not pale and doughy. If the bottoms are browning too fast, move the baking sheet to a higher rack.
- Add the eyes. Remove the mummies from the oven and let them cool for 2-3 minutes. While they’re still warm, use a toothpick to dot two small eyes on the exposed hot dog area. Yellow mustard gives the most classic mummy look, but ketchup works too. You can also use small dots of sriracha for a spicy mummy, or even tiny circles of black olive if you’re feeling fancy.
- Serve warm. These are best straight out of the oven, when the dough is still flaky and the hot dog is juicy. Set them out with dipping sauces and watch them disappear.
A few notes from experience: if the dough strips stick to your fingers, dust them lightly with flour. If the dough tears while wrapping, just press it back together—the heat of the oven will seal it. And if you’re making these ahead of time for a party, bake them without the eyes, then add the eyes just before serving. The mustard can dry out and look less appealing if it sits too long.
One more thing—don’t overbake. The crescent dough can go from golden to burnt very quickly. Set a timer, and check them at the 12-minute mark. You want them golden, not brown. Burnt mummies are sad mummies.
Cooking Tips & Techniques
I’ve made these mummy dogs more times than I can count, and I’ve learned a few things along the way. Some of these lessons came from successes. Some came from failures. All of them will make your mummies better.
Keep the dough cold but not frozen. Cold dough is easier to cut into clean strips. But if it’s too cold, it cracks when you try to wrap it. Let the dough sit at room temperature for about 5 minutes before you start. That sweet spot makes all the difference. I once tried to rush the process with ice-cold dough, and my strips shattered like glass. Not my finest moment.
Don’t overwork the dough. The more you handle crescent dough, the tougher it gets. Cut your strips quickly, wrap efficiently, and get them in the oven. The less you touch it, the flakier it’ll be. This is one of those recipes where speed actually improves the outcome.
Leave the face exposed. I know it’s tempting to wrap the whole hot dog, but leaving a small gap at the top for the eyes is what makes these look like mummies instead of dough-wrapped sausages. About 1/2 inch of exposed hot dog is perfect. If you cover the whole thing, you lose the mummy effect entirely.
Space them out. The dough expands as it bakes. If your mummies are too close together, they’ll bake into each other and become one giant, tangled mummy blob. Give them at least 2 inches of space on the baking sheet. I learned this the hard way when my first batch came out looking like a mummy orgy.
Use parchment paper. I cannot stress this enough. Crescent dough has a tendency to stick, and nothing ruins a beautiful batch of mummies like having them peel apart when you try to lift them off the pan. Parchment paper or a silicone mat is your best friend here.
Double the batch. Seriously. These disappear fast. I’ve never made a single batch that was enough. If you’re serving more than four people, make at least two batches. Trust me on this one.
Variations & Adaptations
One of the best things about this recipe is how easy it is to adapt. Here are some variations I’ve tried over the years, along with a few I’m planning to try next Halloween.
Cheesy Mummy Dogs: Before wrapping the hot dog, cut a slit lengthwise down the center and stuff it with a strip of cheddar or mozzarella cheese. The cheese melts as it bakes, creating a gooey, delicious surprise inside. I tried this with pepper jack once, and the spicy kick was incredible.
Spicy Mummy Dogs: Brush the dough strips with a mixture of melted butter and hot sauce before wrapping. The heat bakes into the dough and gives the mummies a little kick. Sriracha or Tabasco both work great. My neighbor tried this version and said it was the only way she makes them now.
Vegetarian Mummy Dogs: Use vegetarian hot dogs or sausages instead of meat-based ones. The wrapping technique is exactly the same, and the result is just as satisfying. I’ve tested this with both plant-based brats and tofu dogs, and the brats were definitely the winner.
Breakfast Mummy Dogs: Swap the hot dogs for breakfast sausages and use the same crescent dough. These are perfect for a Halloween morning breakfast before school. My kids went absolutely nuts for these last year.
Gluten-Free Mummy Dogs: Use gluten-free crescent roll dough if you can find it. The texture is slightly different—a little more crumbly—but the flavor is still great. I’ve also tried using gluten-free puff pastry, which works but gives a different texture entirely.
Mini Mummy Bites: Cut the hot dogs into thirds and use smaller strips of dough. These are perfect for appetizers or for little hands. Bake for slightly less time—about 8-10 minutes—since the pieces are smaller.
My personal favorite variation? The breakfast version with maple sausage links. Something about the sweet and savory combination with the buttery crescent dough is just… perfect. I made them for a Halloween brunch party last year, and they were the first thing to disappear. Every single person asked for the recipe.
Serving & Storage Suggestions
These mummy dogs are best served warm, straight from the oven. The dough is at its flakiest, the hot dog is at its juiciest, and the mustard eyes are still bright and fresh. But I understand that real life doesn’t always cooperate with “serve immediately,” so here are some tips.
Serving Temperature: Warm is ideal, but room temperature works too. If you’re serving these at a party, you can bake them ahead of time and keep them warm in a low oven (200°F) for up to 30 minutes. Just don’t cover them with foil, or the steam will make the dough soggy.
Presentation Ideas: Arrange the mummies on a platter with a small bowl of ketchup or mustard for dipping. For extra Halloween flair, add a few plastic spider rings or fake cobwebs to the platter. I once served them on a black platter with “blood” (ketchup) drizzled around the edges, and the kids thought it was hilarious.
Complementary Dishes: These pair well with other Halloween-themed snacks like spooky pumpkin dip, witch’s brew punch, or a simple green salad if you’re trying to pretend you’re being healthy. For a full Halloween meal, serve them alongside mummy pizza rolls and creepy crawly veggie platters.
Storage Instructions: Leftover mummy dogs can be stored in an airtight container in the refrigerator for up to 3 days. The dough will soften as it sits, so they won’t be as crispy as fresh ones. To reheat, pop them in a 350°F oven for 5-7 minutes, or until heated through. The microwave works in a pinch, but the dough will be soft rather than flaky. I don’t recommend freezing these—the dough texture suffers too much.
Flavor Development: Honestly, these are best fresh. The dough loses its magic after a few hours. But if you have leftovers, they’re still tasty—just not as spectacular. I’ve been known to eat them cold out of the fridge the next day, and I’m not ashamed to admit it.
Nutritional Information & Benefits
Let’s be real for a second—these are not health food. They’re Halloween party snacks. But here’s the nutritional breakdown if you’re curious, along with a few ways to make them a little lighter if that matters to you.
Estimated Nutritional Values (per mummy dog):
- Calories: 220-250
- Protein: 7-9g
- Carbohydrates: 18-22g
- Fat: 14-17g
- Sodium: 550-650mg
These numbers vary depending on the brand of hot dogs and crescent rolls you use. Beef hot dogs tend to be higher in fat and calories, while turkey or chicken versions are lighter. The crescent dough is the main source of carbs and fat, so if you’re looking to lighten things up, you could try using reduced-fat crescent rolls—just be aware that the dough is more delicate and prone to tearing.
Health Benefits: Okay, I’m stretching here, but hot dogs do provide protein, and the dough gives you quick energy. If you use turkey or chicken hot dogs, you’re getting a leaner protein with less saturated fat. And honestly? The joy these bring to a Halloween party has its own mental health benefits. Sometimes food is about more than nutrients—it’s about connection, celebration, and making memories.
Dietary Considerations:
- Not gluten-free (unless you use gluten-free dough)
- Not vegetarian (unless you use veggie dogs)
- Contains dairy (crescent dough typically has butter or palm oil)
- Can be made lower-sodium by using low-sodium hot dogs
Potential Allergens: Wheat (gluten), dairy, and soy (often in hot dogs and dough). Check your specific brands for allergen information.
My personal perspective? These are a treat. They’re not meant to be a daily staple. But for a Halloween party, a movie night, or a fun family dinner, they’re perfect. Balance is key, and these fit beautifully into a balanced approach to eating—enjoy the fun stuff when it matters, and focus on whole foods the rest of the time.
Conclusion
These Spooky Crescent Mummy Hot Dogs are everything I want in a Halloween recipe. They’re simple enough that my kids can help make them. They’re fun enough that adults get excited about them too. And they’re delicious enough that I keep coming back to them year after year. That’s the mark of a truly great recipe—not the complexity, not the fancy ingredients, but the way it becomes part of your traditions.
I hope you give these a try. And I hope you make them your own—add cheese, switch up the dipping sauces, turn them into breakfast mummies, whatever feels right to you. The best recipes are the ones you adapt to fit your life. That’s what my neighbor did that day, and that’s what I’ve been doing ever since.
If you make these, I’d love to hear about it. Drop a comment below and tell me how they turned out. Did your kids love them? Did they disappear at your party? Did you come up with a brilliant variation I haven’t tried yet? I’m always looking for new ideas, and this community is full of creative cooks. Let’s keep the conversation going.
And hey—Happy Halloween. May your mummies be flaky, your candy bowl be full, and your kitchen be filled with the smell of butter and joy.
Frequently Asked Questions
Can I make these ahead of time?
Yes, but they’re best fresh. You can assemble them up to a few hours ahead and keep them in the refrigerator, then bake just before serving. If you need to bake them ahead, reheat in a 350°F oven for 5-7 minutes to restore some crispness.
Can I use puff pastry instead of crescent rolls?
Absolutely. Puff pastry will give you a flakier, more buttery result. Just cut it into strips the same way you would with crescent dough. The baking time might be slightly longer—start checking at 15 minutes.
What’s the best way to add the eyes?
Use a toothpick dipped in yellow mustard. Dot two small eyes on the exposed hot dog area. You can also use ketchup, sriracha, or even tiny circles of black olive for a different look. Just make sure to add the eyes after baking so they stay bright and don’t bake into the dough.
Can I freeze these?
I don’t recommend it. The crescent dough loses its texture when frozen and thawed. If you absolutely must, freeze them unbaked, then bake straight from frozen, adding 2-3 minutes to the baking time. But honestly, they’re so quick to make that freezing isn’t necessary.
How do I prevent the dough from tearing?
Let the dough sit at room temperature for 5 minutes before working with it. Cold dough is brittle and tears easily. Also, don’t wrap the hot dogs too tightly—the dough needs room to expand. If a strip does tear, just press it back together gently; the heat of the oven will seal it.
Pin This Recipe!
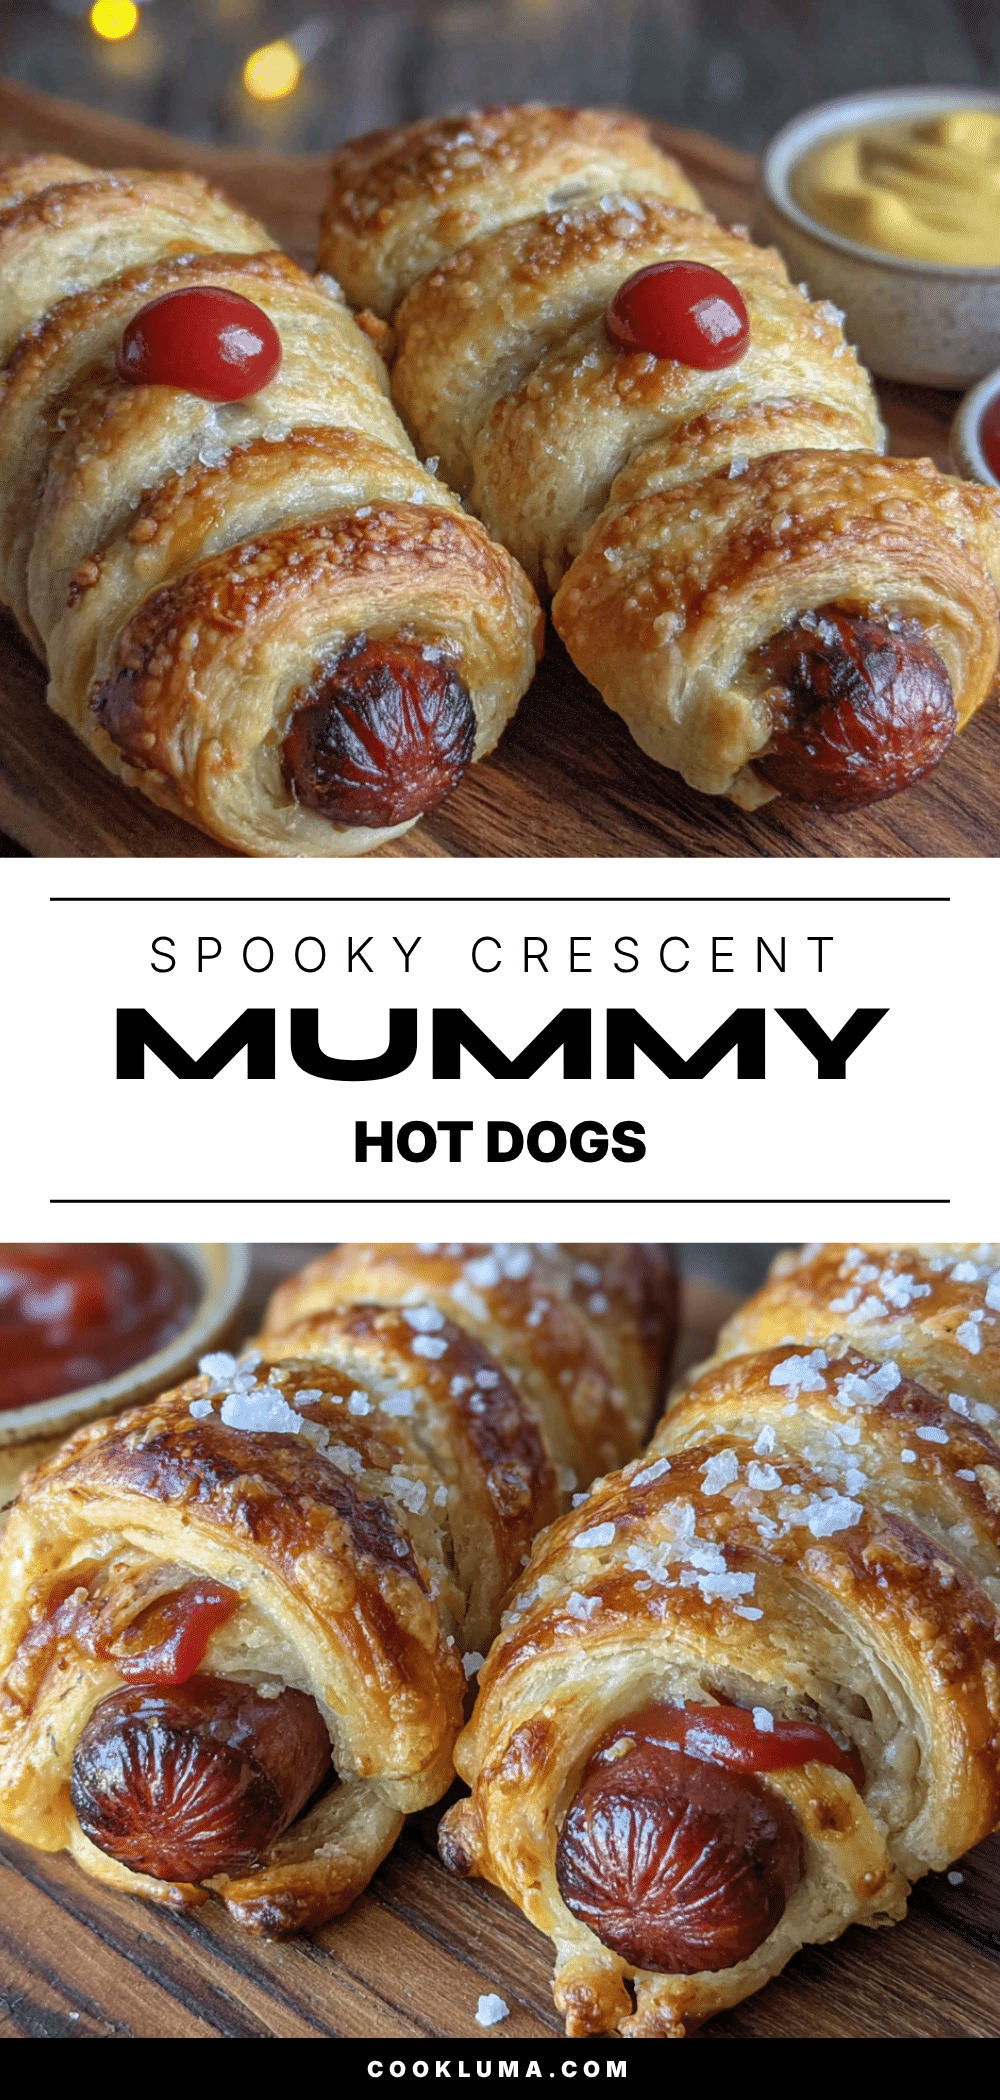
Easy Spooky Crescent Mummy Hot Dogs for Halloween

These Spooky Crescent Mummy Hot Dogs are a quick and easy Halloween treat made with just two main ingredients—crescent roll dough and hot dogs. They’re flaky, buttery, and perfect for parties, with a fun mummy look that kids and adults love.
- Prep Time: 10 minutes
- Cook Time: 15 minutes
- Total Time: 25 minutes
- Yield: 8 servings 1x
- Category: Appetizer
- Cuisine: American
Ingredients
- 1 can (8 oz) refrigerated crescent roll dough (e.g., Pillsbury original or butter)
- 8 hot dogs (beef, turkey, or chicken; regular or jumbo)
- Mustard or ketchup (for mummy eyes)
- Optional for serving: ketchup, mustard, ranch dressing (for dipping)
Instructions
- Preheat your oven to 375°F (190°C). Line a baking sheet with parchment paper or a silicone mat.
- Unroll the crescent dough and separate along the perforated lines to get 8 triangles.
- Using a sharp knife or pizza cutter, cut each triangle lengthwise into 3-4 thin strips, about 1/4 to 1/2 inch wide.
- Take one hot dog and wrap a dough strip around it, leaving about 1/2 inch exposed at the top for the mummy’s face. Overlap strips slightly, wrapping not too tight or too loose.
- Repeat with remaining hot dogs. Place wrapped mummies on the prepared baking sheet, spacing them about 2 inches apart.
- Bake for 12-15 minutes, until the dough is golden brown and the hot dogs are heated through. Start checking at 12 minutes.
- Remove from oven and let cool for 2-3 minutes. While still warm, use a toothpick to dot two small eyes on the exposed hot dog area with mustard or ketchup.
- Serve warm with dipping sauces.
Notes
For best results, let crescent dough sit at room temperature for 5 minutes before working with it to prevent tearing. Don’t overbake—check at 12 minutes. Add eyes after baking to keep them bright. For make-ahead, assemble and refrigerate unbaked, then bake just before serving. Reheat leftovers in a 350°F oven for 5-7 minutes.
Nutrition
- Serving Size: 1 mummy dog
- Calories: 235
- Sugar: 4
- Sodium: 600
- Fat: 15.5
- Saturated Fat: 5
- Carbohydrates: 20
- Protein: 8
Keywords: Halloween, mummy hot dogs, crescent rolls, easy appetizer, party food, spooky snacks, kid-friendly


