The little girl next door watched me from her side of the fence, her chin resting on her hands. I was pulling a tray of chocolate cupcakes out of the oven, and honestly, I was a bit sweaty and distracted—I’d forgotten to set the timer and had to guess by smell. She didn’t say anything at first. Then she pointed and said, “Those aren’t pink.”
Her name is Maya, and she’s seven. She’d heard through the grapevine (her mom, texting my mom) that I was working on red velvet cupcakes for a bake sale. In her world, red velvet meant one thing and one thing only: that bright, almost shocking red color you see in bakery windows. Mine were a deep, muddy maroon—natural cocoa and a modest amount of food coloring will do that. She wasn’t impressed.
I laughed and told her to come back tomorrow. That night, I played around with the recipe. I wanted something that would actually make a kid’s eyes light up, but I also didn’t want to use half a bottle of artificial dye. The solution, I found, was a bit more cocoa than usual (for that classic red velvet tang) and just enough gel color to get a cheerful, Valentine’s-worthy pinkish-red. I baked them in a heart-shaped muffin pan I’d picked up at a thrift store for a dollar, and I topped them with a cream cheese frosting that was more cream cheese than sugar—because honestly, that’s the part adults and kids can agree on.
Maya came back the next afternoon. She took one bite, got frosting on her nose, and said, “Okay, these are better than pink.” That’s the moment this recipe became a keeper. It’s not about perfection—it’s about making something that feels special without a ton of stress or fancy ingredients. Maybe you’ve been there, trying to please a picky eater or a little critic with a very specific vision. These cupcakes are for those moments.
Why You’ll Love This Recipe
Let’s be real—most red velvet recipes are either too dry, too sweet, or they rely on a whole bottle of red dye that stains everything it touches. These cupcakes are different. They’re moist, fluffy, and have that subtle cocoa-chocolate flavor that makes red velvet so beloved. And the cream cheese frosting? It’s the perfect balance of tangy and sweet—not the sickly-sweet buttercream you sometimes get.
- Kid-Approved & Parent-Friendly: My own kids, plus Maya and her friends, have tested these multiple times. The verdict is unanimous: they disappear fast. And for parents, the ingredient list is short and budget-friendly—no weird extracts or expensive specialty flours.
- Simple Ingredients, No Fuss: You probably have most of these in your pantry right now. All-purpose flour, sugar, cocoa powder, eggs, buttermilk (or a DIY version), oil, and a little red gel food coloring. No need to hunt down cake flour or sour cream.
- Perfect for School Events & Family Treats: These cupcakes are great for Valentine’s Day parties, classroom birthdays, or just a rainy Saturday baking project. They look impressive (heart-shaped! pink frosting!) but come together in under an hour.
- Crowd-Pleaser Across Ages: Kids love the color and the fun shape. Adults appreciate that the frosting isn’t cloying and the cupcake itself isn’t a sugar bomb. It’s a rare recipe that genuinely pleases everyone at the table.
- Unbelievably Moist Texture: The secret is using oil instead of butter and a touch of vinegar that reacts with the baking soda. This gives you a tender crumb that stays soft for days—if they last that long.
This isn’t just another red velvet recipe. It’s the one I’ve tweaked over a dozen times to get the balance right. The one where the cocoa flavor actually comes through. The one that makes you close your eyes after the first bite because it tastes like a hug. And the best part? You can make it with your kids without losing your mind.
What Ingredients You Will Need
This recipe uses simple, everyday ingredients that work together to create something special. Most are pantry staples, and I’ve included notes on substitutions where they work well. The key is getting the balance of cocoa, acid (from buttermilk and vinegar), and leavening just right—that’s what gives red velvet its signature flavor and texture.
For the Cupcakes
- All-purpose flour – 1 ½ cups (190g). Standard flour works perfectly here. No need for cake flour unless that’s what you have.
- Granulated sugar – 1 cup (200g). Adds sweetness and helps with browning. You can reduce to ¾ cup if you prefer less sweet cupcakes.
- Unsweetened cocoa powder – 2 tablespoons (10g). Use natural cocoa powder, not Dutch-processed. Natural cocoa is more acidic and gives that classic red velvet tang. I usually grab Hershey’s or store brand—both work fine.
- Baking soda – 1 teaspoon. This reacts with the vinegar and buttermilk to create lift.
- Salt – ½ teaspoon. Balances the sweetness and enhances the chocolate flavor.
- Vegetable oil – ½ cup (120ml). Keeps the cupcakes moist. Canola or any neutral oil works. Don’t use olive oil—the flavor is too strong.
- Buttermilk – ½ cup (120ml). Adds tang and tenderness. If you don’t have buttermilk, make a quick version: add 1 ½ teaspoons of white vinegar or lemon juice to ½ cup of milk, stir, and let it sit for 5 minutes until it curdles slightly.
- Large eggs – 2, at room temperature. Room temperature eggs mix more evenly into the batter. If you forgot to take them out early, place them in a bowl of warm water for 5 minutes.
- White vinegar – 1 teaspoon. This reacts with the baking soda for extra lift. Don’t skip it—it’s a classic red velvet trick.
- Vanilla extract – 1 teaspoon. Use pure vanilla if you have it, but imitation is fine for this recipe.
- Red gel food coloring – 1 to 2 teaspoons. Gel coloring is more concentrated than liquid, so you get a vibrant color without thinning the batter. Start with 1 teaspoon and add more if you want a deeper red. I use Wilton brand—it’s reliable and doesn’t have a weird aftertaste.
For the Cream Cheese Frosting
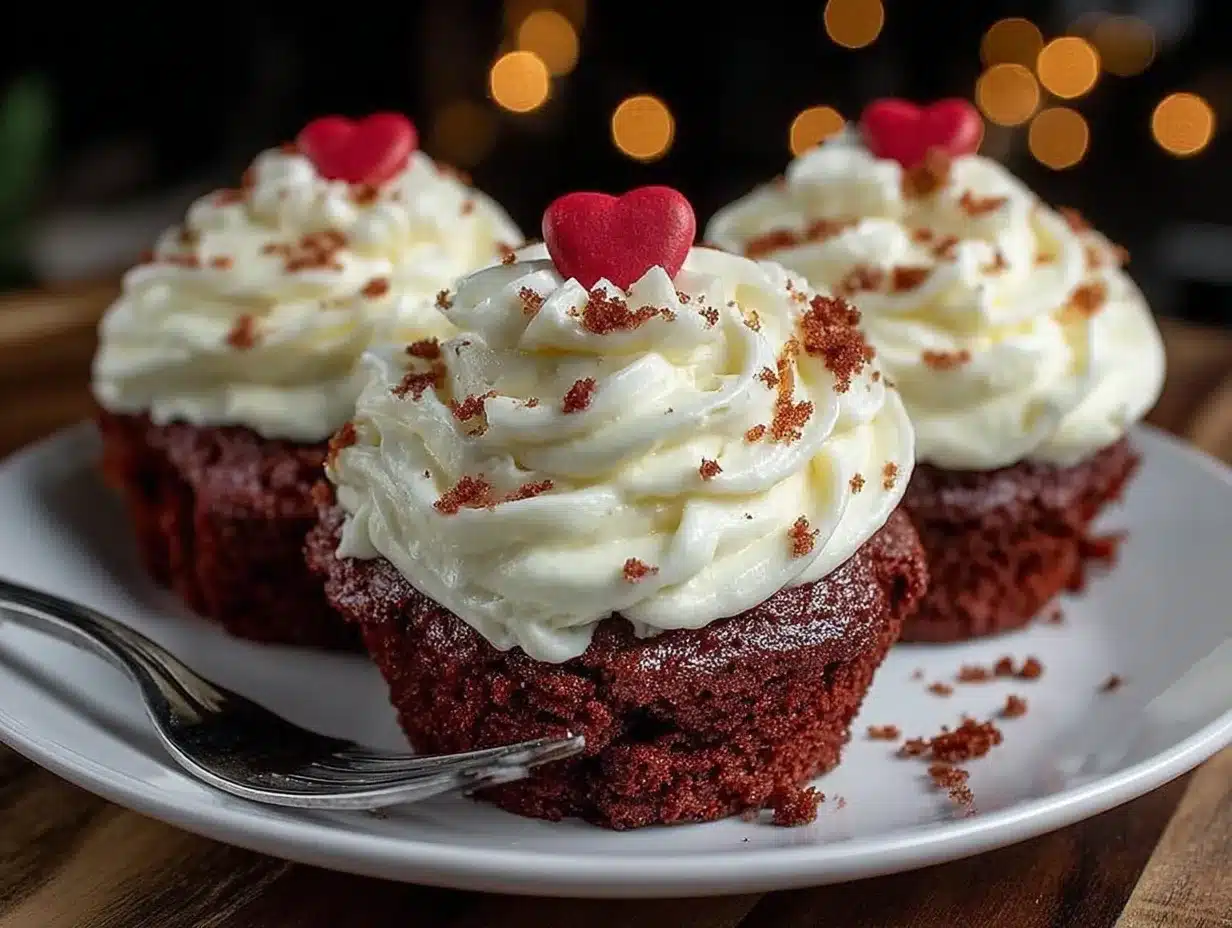
- Cream cheese – 8 ounces (226g), softened to room temperature. Full-fat cream cheese gives the best texture and flavor. Low-fat tends to make the frosting runny. I use Philadelphia—it’s consistent and easy to find.
- Unsalted butter – ¼ cup (½ stick or 57g), softened. Adds stability and richness to the frosting. If you only have salted butter, reduce the added salt to a pinch.
- Powdered sugar – 2 cups (240g), sifted if it’s lumpy. Sifting prevents little clumps of sugar in your smooth frosting.
- Vanilla extract – 1 teaspoon.
- Pinch of salt – Just a tiny bit to balance the sweetness.
Optional Decorations
- Sprinkles – Red, pink, or heart-shaped sprinkles add a fun touch. My kids love the little confetti-style ones.
- Fresh raspberries or strawberries – A berry on top looks gorgeous and adds a fresh pop of flavor.
Equipment Needed
You don’t need a fancy bakery setup for these cupcakes. Here’s what you’ll need, along with some budget-friendly alternatives.
- Heart-shaped muffin pan – This is the star of the show. I found mine at a thrift store, but you can get one online for around $10. If you don’t have one, a standard 12-cup muffin pan works perfectly—just skip the heart shape. The taste is the same.
- Cupcake liners – Use paper liners that fit your pan. For heart pans, you might need to look for specific heart-shaped liners, or you can grease the pan well and bake without liners. I’ve done both—without liners, the hearts come out cleaner.
- Mixing bowls – One large bowl for dry ingredients, one for wet ingredients. Any bowls you have will work.
- Whisk and spatula – A whisk for combining dry ingredients and a rubber spatula for folding the batter together. A wooden spoon works too, but a spatula helps scrape every bit of batter.
- Electric hand mixer or stand mixer – For the frosting, a mixer makes it much easier to get a smooth, fluffy texture. You can do it by hand with a whisk, but your arm will get a workout. I’ve done both—the mixer wins every time.
- Cooling rack – Letting cupcakes cool completely before frosting is crucial. A wire rack lets air circulate so they don’t get soggy on the bottom. If you don’t have one, a clean cutting board works in a pinch—just flip the cupcakes after 5 minutes.
- Piping bag or zip-top bag – For a pretty swirl of frosting, a piping bag with a star tip is ideal. But a zip-top bag with the corner snipped off works beautifully. I’ve used both—the zip-top bag is less intimidating for kids to help with.
Preparation Method
Let’s get baking! This recipe makes 12 standard cupcakes or about 10 heart-shaped ones (the heart pans are usually a bit deeper). Preheat your oven to 350°F (175°C) and position the rack in the center.
- Prep your pan. If using a heart-shaped pan, grease it generously with butter or non-stick spray, making sure to get into all the nooks and crannies. If using liners, place them in the pan. Set aside.
- Mix the dry ingredients. In a large bowl, whisk together the flour, sugar, cocoa powder, baking soda, and salt. Make sure there are no lumps of cocoa—sometimes it clumps up. Just press them against the side of the bowl with your whisk. This takes about 30 seconds.
- Combine the wet ingredients. In a separate medium bowl, whisk together the oil, buttermilk, eggs, vinegar, and vanilla extract. Whisk until the eggs are fully incorporated and the mixture looks smooth. It will be a pale beige color at this point—don’t worry, the color comes next.
- Add the food coloring. Add 1 teaspoon of red gel food coloring to the wet mixture and whisk until it’s evenly distributed. The batter should be a light pinkish-red. If you want a deeper, more dramatic red (like for a Valentine’s party), add another ½ to 1 teaspoon. Remember, the color will darken slightly as it bakes. I usually go for a medium red—bright enough to be fun, but not so dark that it looks artificial.
- Combine wet and dry. Pour the wet ingredients into the bowl of dry ingredients. Use a rubber spatula to fold them together gently. Stir just until you don’t see any more streaks of flour—overmixing will make the cupcakes tough. A few small lumps are perfectly fine. The batter will be thin and pourable, which is normal for red velvet.
- Fill the pan. Divide the batter evenly among the cups, filling each about ⅔ to ¾ full. For heart-shaped pans, this usually means about ¼ cup of batter per cavity. A cookie scoop or a measuring cup with a spout makes this mess-free. I use a ¼-cup measure and it works like a charm.
- Bake. Place the pan in the preheated oven and bake for 15 to 18 minutes. Start checking at 15 minutes—insert a toothpick into the center of a cupcake. If it comes out clean or with just a few moist crumbs, they’re done. If it’s wet batter, give them another 2 minutes and check again. The tops should spring back when lightly touched. My oven runs a bit hot, so I usually check at 14 minutes just to be safe.
- Cool completely. Let the cupcakes cool in the pan for 5 minutes. Then transfer them to a wire rack to cool completely before frosting. This is important—if the cupcakes are even slightly warm, the frosting will melt into a gooey mess. I’ve learned this the hard way. Patience is key here. It usually takes about 30 to 45 minutes for them to cool fully.
- Make the frosting. While the cupcakes are cooling, make the cream cheese frosting. In a large bowl (or the bowl of a stand mixer), beat the softened cream cheese and butter together on medium speed until smooth and creamy—about 2 minutes. Scrape down the sides of the bowl. Add the vanilla and salt, then beat again. Gradually add the powdered sugar, about ½ cup at a time, beating on low speed until incorporated. Once all the sugar is added, increase the speed to medium-high and beat for 2 to 3 minutes until the frosting is light, fluffy, and spreadable. If it seems too soft, refrigerate it for 10 to 15 minutes before piping.
- Frost the cupcakes. Once the cupcakes are completely cool, it’s time to decorate. Fit a piping bag with a star tip (like a 1M) and fill it with frosting. Pipe a swirl starting from the outside edge and working inward, or simply spread the frosting with a knife for a more rustic look. Let the kids help with this part—it’s messy and fun. Top with sprinkles or a fresh berry if you like.
Cooking Tips & Techniques
I’ve made these cupcakes more times than I can count, and I’ve definitely learned a few things along the way. Here are my best tips to help you avoid the mistakes I made.
- Don’t overmix the batter. This is the number one mistake I see with red velvet. Because the batter is thin, it’s tempting to keep stirring to make sure everything is combined. But overmixing develops the gluten in the flour, which leads to dense, tough cupcakes. Stir just until the flour disappears—a few lumps are okay.
- Use room temperature ingredients. Cold eggs and cold buttermilk won’t emulsify properly with the oil, which can make the cupcakes greasy. Take them out of the fridge about 30 minutes before you start baking. If you’re short on time, place the eggs in a bowl of warm water for 5 minutes, and microwave the buttermilk for 10 to 15 seconds—just until it’s no longer cold.
- Check your cocoa powder. Natural cocoa powder is acidic, which is what reacts with the buttermilk and vinegar to create that tender crumb. If you use Dutch-processed cocoa (which is alkalized), the reaction won’t happen the same way, and your cupcakes might not rise as well. Check the label—if it says “Dutch-processed” or “alkalized,” save it for another recipe.
- Gel food coloring is worth it. I tried liquid food coloring once. The batter was too thin, the color was pale, and the cupcakes had a faint chemical taste. Gel coloring is more concentrated, so you use less, and it doesn’t affect the texture. A little bottle lasts forever.
- Don’t overbake. Red velvet cupcakes go from perfectly moist to dry very quickly. Start checking at 15 minutes, and pull them out as soon as the toothpick comes out clean. They’ll continue to cook slightly in the hot pan for the first few minutes out of the oven.
- Chill the frosting if needed. Cream cheese frosting can be soft, especially if your kitchen is warm. If it’s too runny to pipe, pop it in the fridge for 15 to 20 minutes. It will firm up nicely and hold its shape better.
Variations & Adaptations
One of the best things about this recipe is how flexible it is. Here are some ways to make it your own.
- Gluten-Free Version: Swap the all-purpose flour with a 1-to-1 gluten-free baking flour blend. I’ve used Bob’s Red Mill with great results. The texture is slightly more delicate, so handle the batter gently. Everything else stays the same.
- Dairy-Free Adaptation: Use a plant-based buttermilk (mix ½ cup of unsweetened almond or oat milk with 1 ½ teaspoons of vinegar) and a dairy-free cream cheese alternative for the frosting. I’ve tried this with Kite Hill cream cheese, and it worked well—the frosting was a bit softer, so I chilled it longer before piping.
- Mini Cupcakes or Cake: For mini cupcakes, bake for 10 to 12 minutes. For a 9-inch round cake, bake for 25 to 30 minutes. The flavor is the same—just adjust the baking time and keep an eye on it.
- Chocolate-Red Velvet Hybrid: Add ½ cup of mini chocolate chips to the batter for extra chocolatey pockets. My kids love this version. The chips sink a bit, but that’s part of the fun.
- Peppermint Twist: Add ¼ teaspoon of peppermint extract to the frosting for a holiday version. Top with crushed candy canes. It’s a fun twist for Christmas or winter birthdays.
- Less Sugar Option: Reduce the sugar in the cupcakes to ¾ cup and use a sugar substitute like monk fruit in the frosting. The texture will be slightly less tender, but it still tastes great. I’ve done this for a friend who’s watching her sugar intake, and she loved them.
Serving & Storage Suggestions
These cupcakes are best served at room temperature, which lets the frosting soften slightly and the cake stay tender. If you’ve refrigerated them, let them sit out for about 20 minutes before serving.
For presentation, I like to arrange them on a pretty cake stand or a simple white platter. The red color pops beautifully against a neutral background. A few fresh raspberries scattered around the plate add a nice touch. For a school party or bake sale, place each cupcake in a clear treat bag tied with a red ribbon—it looks professional and keeps them fresh.
These pair wonderfully with a cold glass of milk (for the kids) or a cup of coffee (for the grown-ups). The tangy frosting and rich cake balance the bitterness of coffee perfectly. If you’re serving them for dessert after a family dinner, a scoop of vanilla ice cream on the side is never a bad idea.
Storage: Store unfrosted cupcakes in an airtight container at room temperature for up to 3 days. Frosted cupcakes should be stored in the refrigerator, also in an airtight container, for up to 5 days. The frosting will firm up in the fridge, so let them sit at room temperature for 15 to 20 minutes before serving for the best texture.
Freezing: You can freeze unfrosted cupcakes for up to 3 months. Wrap each one tightly in plastic wrap, then place them in a freezer-safe bag. Thaw at room temperature before frosting. I’ve also frozen the frosting separately in a piping bag—just thaw it in the fridge overnight and give it a quick stir before using. The flavor stays great.
One thing I love about these cupcakes is that the flavor actually improves after a day. The cocoa and tangy buttermilk meld together, and the texture stays moist. So if you’re making them for a party, baking them a day ahead is a smart move.
Nutritional Information & Benefits
Let’s be honest—these are a treat, not a health food. But that doesn’t mean they can’t fit into a balanced diet. Here’s a rough estimate per cupcake (with frosting):
| Nutrient | Amount per Cupcake |
|---|---|
| Calories | 320-350 |
| Total Fat | 18g |
| Saturated Fat | 8g |
| Carbohydrates | 40g |
| Sugar | 28g |
| Protein | 4g |
Pin This Recipe!
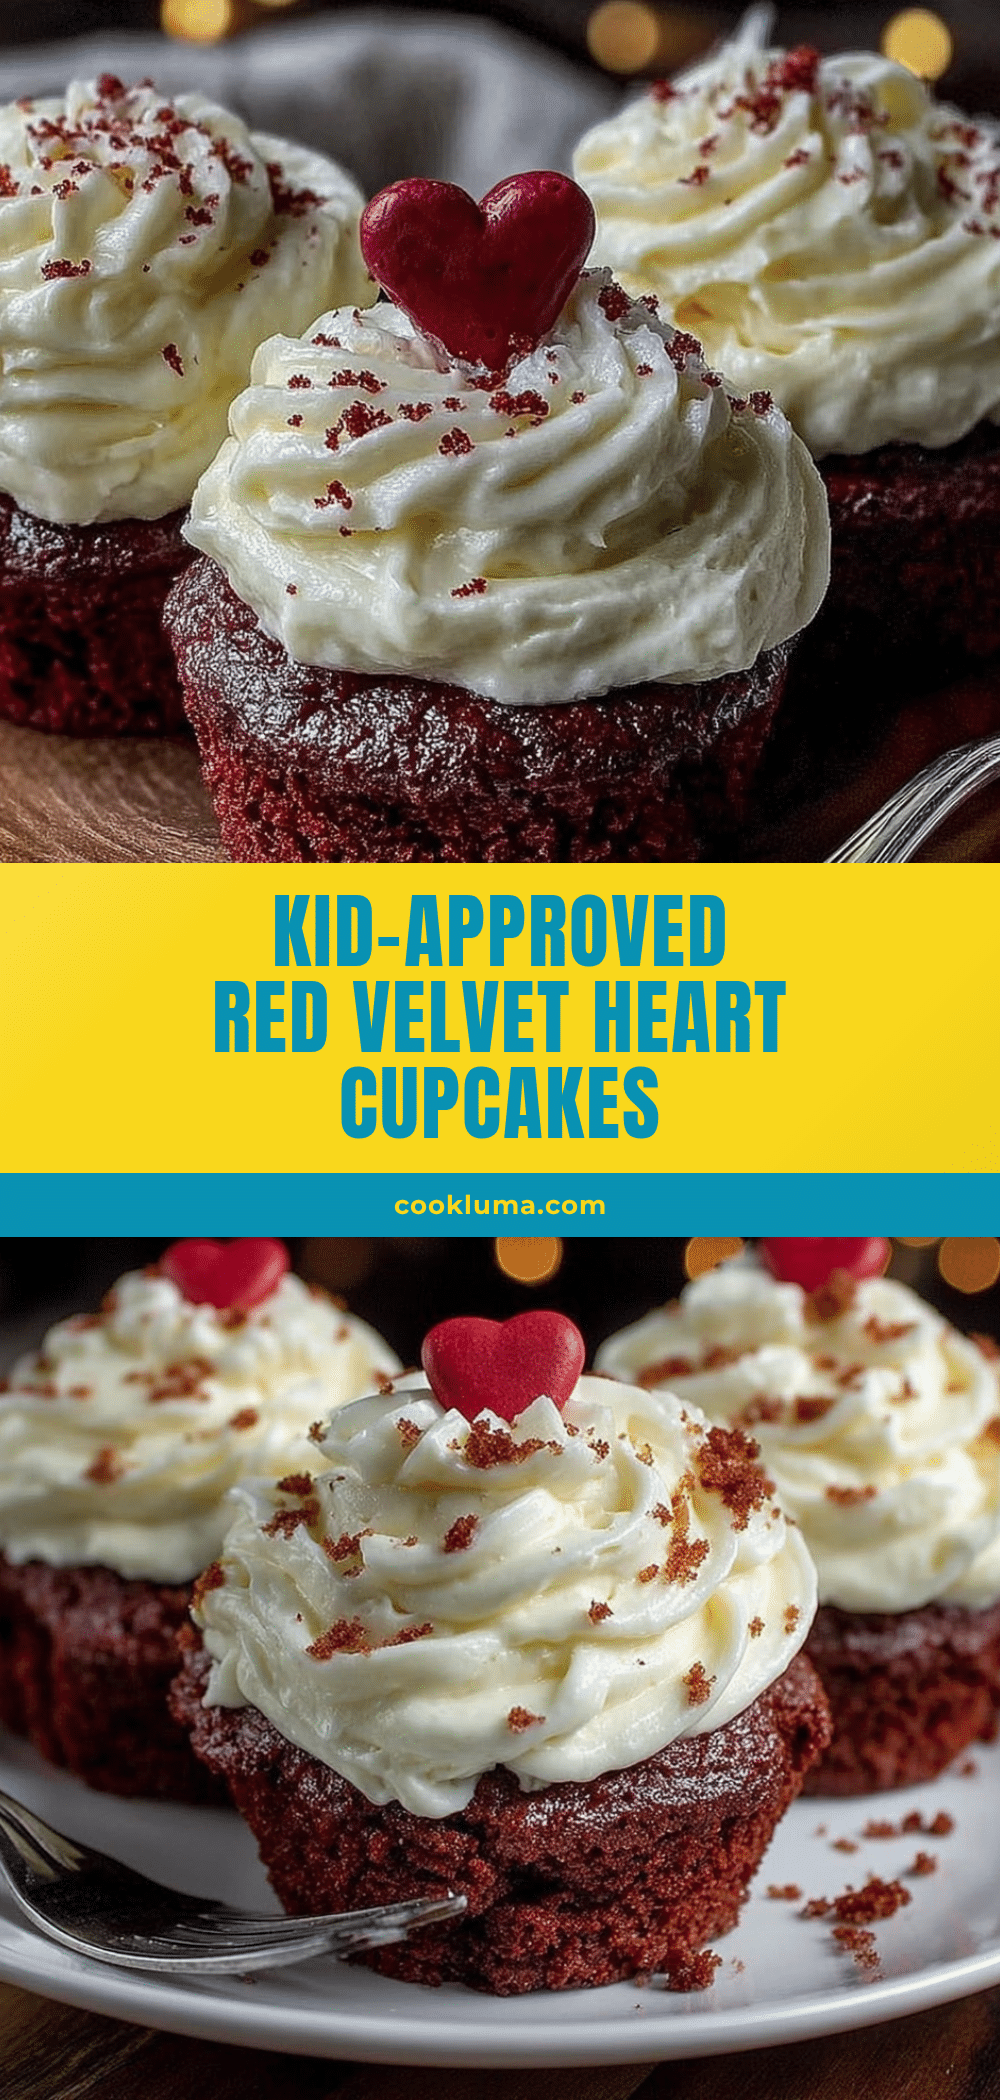
Easy Red Velvet Heart Cupcakes with Cream Cheese Frosting
Moist, fluffy red velvet cupcakes with a subtle cocoa-chocolate flavor, topped with a perfectly tangy cream cheese frosting. These kid-approved treats are made with simple ingredients and come together in under an hour, making them perfect for Valentine’s Day, school events, or any special occasion.
- Prep Time: 20 minutes
- Cook Time: 18 minutes
- Total Time: 1 hour 10 minutes (including cooling)
- Yield: 12 standard cupcakes or 10 heart-shaped cupcakes 1x
- Category: Dessert
- Cuisine: American
Ingredients
- 1 ½ cups (190g) all-purpose flour
- 1 cup (200g) granulated sugar
- 2 tablespoons (10g) unsweetened cocoa powder (natural, not Dutch-processed)
- 1 teaspoon baking soda
- ½ teaspoon salt
- ½ cup (120ml) vegetable oil
- ½ cup (120ml) buttermilk (or DIY: ½ cup milk + 1 ½ teaspoons white vinegar or lemon juice)
- 2 large eggs, at room temperature
- 1 teaspoon white vinegar
- 1 teaspoon vanilla extract
- 1 to 2 teaspoons red gel food coloring
- 8 ounces (226g) cream cheese, softened to room temperature
- ¼ cup (½ stick or 57g) unsalted butter, softened
- 2 cups (240g) powdered sugar, sifted if lumpy
- 1 teaspoon vanilla extract
- Pinch of salt
- Optional: sprinkles, fresh raspberries or strawberries for decoration
Instructions
- Preheat oven to 350°F (175°C). Grease a heart-shaped muffin pan generously with butter or non-stick spray, or line with cupcake liners. Set aside.
- In a large bowl, whisk together flour, sugar, cocoa powder, baking soda, and salt until no lumps remain.
- In a separate medium bowl, whisk together oil, buttermilk, eggs, vinegar, and vanilla extract until smooth and well combined.
- Add 1 teaspoon of red gel food coloring to the wet mixture and whisk until evenly distributed. Add more coloring if desired for a deeper red.
- Pour the wet ingredients into the dry ingredients. Fold gently with a rubber spatula until just combined—do not overmix. A few small lumps are fine. Batter will be thin.
- Divide batter evenly among the prepared muffin cups, filling each about ⅔ to ¾ full (about ¼ cup per cavity).
- Bake for 15 to 18 minutes, or until a toothpick inserted into the center comes out clean or with a few moist crumbs. Tops should spring back when lightly touched.
- Let cupcakes cool in the pan for 5 minutes, then transfer to a wire rack to cool completely (about 30 to 45 minutes) before frosting.
- While cupcakes cool, make the frosting: In a large bowl, beat softened cream cheese and butter on medium speed until smooth and creamy, about 2 minutes. Scrape down sides. Add vanilla and salt; beat again.
- Gradually add powdered sugar, about ½ cup at a time, beating on low speed until incorporated. Increase speed to medium-high and beat for 2 to 3 minutes until light, fluffy, and spreadable. If too soft, refrigerate for 10 to 15 minutes before piping.
- Once cupcakes are completely cool, frost using a piping bag fitted with a star tip (or a zip-top bag with corner snipped off). Pipe a swirl or spread with a knife. Top with sprinkles or fresh berries if desired.
Notes
Use natural cocoa powder, not Dutch-processed, for the classic red velvet tang. Gel food coloring is recommended over liquid for better color and texture. Do not overmix the batter to avoid dense cupcakes. Check for doneness at 15 minutes to prevent overbaking. Frosting can be chilled if too soft. Cupcakes can be made a day ahead; flavor improves after a day.
Nutrition
- Serving Size: 1 cupcake
- Calories: 335
- Sugar: 28
- Sodium: 280
- Fat: 18
- Saturated Fat: 8
- Carbohydrates: 40
- Fiber: 1
- Protein: 4
Keywords: red velvet cupcakes, cream cheese frosting, heart-shaped cupcakes, Valentine's Day cupcakes, easy red velvet, kid-friendly cupcakes, red velvet recipe


