My neighbor wasn’t making a big deal of it. I’d stopped by to grab a tool I’d borrowed weeks ago—a socket wrench, of all things—and the smell hit me before I even got past her screen door. That warm, toasty scent of peanut butter cookies baking, mixed with something sweet and chocolatey that I couldn’t quite place. I stood there for a second, just breathing it in, while she waved me inside like it was nothing.
She had a tray of these little cookies cooling on the counter, each one with a chocolate kiss pressed right into the center. I’m not kidding when I say I almost forgot about the wrench. She just shrugged and said, “Oh, those are just peanut butter blossom cookies. My kids love them.” Just. Like. That. Like she hadn’t just made the most perfect little cookie I’d seen in weeks.
I grabbed one while she was looking for the tool, and honestly? I think I let out a little noise. You know the one—that involuntary “mmm” that you can’t help when something is exactly right. The cookie was soft and chewy, the peanut butter flavor was spot-on, and that Hershey kiss on top? It was the perfect little chocolate button. I asked her for the recipe before I even left the driveway.
She scribbled it on a sticky note, and I’ve been making them ever since. These easy peanut butter blossom cookies have become my go-to for bake sales, holiday cookie exchanges, and honestly, random Tuesday afternoons when I need a little something sweet. They’re simple, they’re fast, and they taste like someone put a lot more effort into them than you actually did. Maybe you’ve been there—standing in someone’s kitchen, watching them whip up something incredible without breaking a sweat. That’s exactly how this recipe feels.
Why You’ll Love This Recipe
Let me tell you why these easy peanut butter blossom cookies have earned a permanent spot in my recipe box. I’ve tested this version more times than I can count, and I can confidently say it’s the one you want.
- Quick & Easy: From start to finish, these cookies take about 25 minutes. The dough comes together in one bowl, no chilling required. Perfect for those evenings when you remember you need a treat for tomorrow’s school event at 9 PM.
- Simple Ingredients: You probably have most of these in your pantry right now. Peanut butter, sugar, butter, an egg, flour—nothing fancy. The only special item is a bag of Hershey kisses, and those are easy to find at any grocery store.
- Perfect for Any Occasion: These cookies are chameleons. They work for holiday cookie platters, classroom parties, bake sales, or just because. I’ve brought them to potlucks and watched them disappear before the main course was even served.
- Crowd-Pleaser: Kids love them, adults love them, and I’ve never met someone who turned one down. The combination of peanut butter and chocolate is a classic for a reason.
- Unbelievably Delicious: The texture is what gets me every time. The cookie is soft and slightly crumbly, with that perfect peanut butter chew, and then you get that smooth chocolate kiss melting on your tongue. It’s comfort food in two bites.
What makes this recipe different from the rest? It’s the ratio. I’ve tweaked the butter and peanut butter amounts so the cookies stay soft for days, not just the first hour out of the oven. They don’t get that dry, crumbly texture that some peanut butter cookies have. Plus, the trick of rolling the dough balls in granulated sugar gives them a little sparkle and a slight crunch that contrasts beautifully with the soft center.
These easy peanut butter blossom cookies aren’t just good—they’re the kind that makes you close your eyes after the first bite. I mean that. Every time I make them, I still do it.
What Ingredients You Will Need
This recipe uses simple, everyday ingredients to create something special. Most of these are pantry staples, which is exactly what you want on a busy weeknight when a cookie craving hits.
- 1/2 cup unsalted butter, softened (I use Land O Lakes, but any brand works. Let it sit out for about 30 minutes before starting.)
- 1/2 cup creamy peanut butter (I recommend Skippy or Jif for the best texture. Natural peanut butter that separates can make the cookies greasy, so stick with the standard stuff here.)
- 1/2 cup granulated sugar, plus extra for rolling (About 1/4 cup extra for rolling the dough balls. Regular white sugar works perfectly.)
- 1/2 cup packed light brown sugar (This adds moisture and a slight caramel flavor. Dark brown sugar works too, but light is my preference.)
- 1 large egg, room temperature (If you forgot to take it out of the fridge, place it in a bowl of warm water for 5 minutes.)
- 1 teaspoon vanilla extract (Pure vanilla extract is best, but imitation works in a pinch.)
- 1 3/4 cups all-purpose flour (Spoon and level it into your measuring cup—don’t scoop directly or you’ll pack in too much flour.)
- 1 teaspoon baking soda (Make sure it’s fresh. Test it by dropping a little in vinegar—if it fizzes, it’s good.)
- 1/2 teaspoon salt (Regular table salt is fine. If you use salted butter, reduce this to 1/4 teaspoon.)
- 36 Hershey’s Kisses, unwrapped (Milk chocolate is classic, but I’ve used dark chocolate kisses too. You’ll need about one 10-ounce bag. Unwrapping them is the most tedious part of this recipe—get the kids to help.)
That’s it. Nothing complicated, nothing hard to find. The beauty of these easy peanut butter blossom cookies is that they don’t require a special trip to a fancy grocery store. You probably have everything except the kisses, and those are right in the baking aisle.
One thing I’ve learned: don’t use natural peanut butter. I tried it once because I was trying to be “healthier,” and the cookies spread too much and turned out greasy. Save the natural stuff for your morning toast and use the regular peanut butter here. Trust me on this.
Equipment Needed
You don’t need a lot of fancy equipment for these easy peanut butter blossom cookies. Here’s what you’ll need:
- Large mixing bowl (Any bowl will do, but I prefer a medium-sized one so the dough doesn’t fly everywhere when mixing.)
- Electric hand mixer or stand mixer (You can mix by hand with a wooden spoon, but it takes some elbow grease. A hand mixer makes it much easier to cream the butter and sugars together.)
- Measuring cups and spoons (Dry measuring cups for flour and sugar, liquid measuring cup for vanilla. Yes, it matters.)
- Rubber spatula (For scraping down the sides of the bowl. I always miss a little butter without one.)
- Baking sheets (Two standard baking sheets work well. I use light-colored metal pans—dark pans can cause the bottoms to brown too fast.)
- Parchment paper or silicone baking mat (Parchment paper is my go-to. It prevents sticking and makes cleanup a breeze. Silicone mats work great too.)
- Cooling rack (A wire rack lets the cookies cool evenly. If you don’t have one, you can let them cool on the baking sheet, but they’ll continue cooking a bit from the residual heat.)
- Small bowl (For the extra sugar you’ll roll the dough balls in.)
- Cookie scoop or tablespoon (A 1-tablespoon cookie scoop gives you evenly sized cookies. I got mine for about $5, and it’s worth every penny.)
If you don’t have a hand mixer, you can absolutely make this dough by hand. It just takes a little more muscle to cream the butter and sugars together. I’ve done it plenty of times when my mixer was in the dishwasher. It’s not hard, just a good arm workout.
Preparation Method
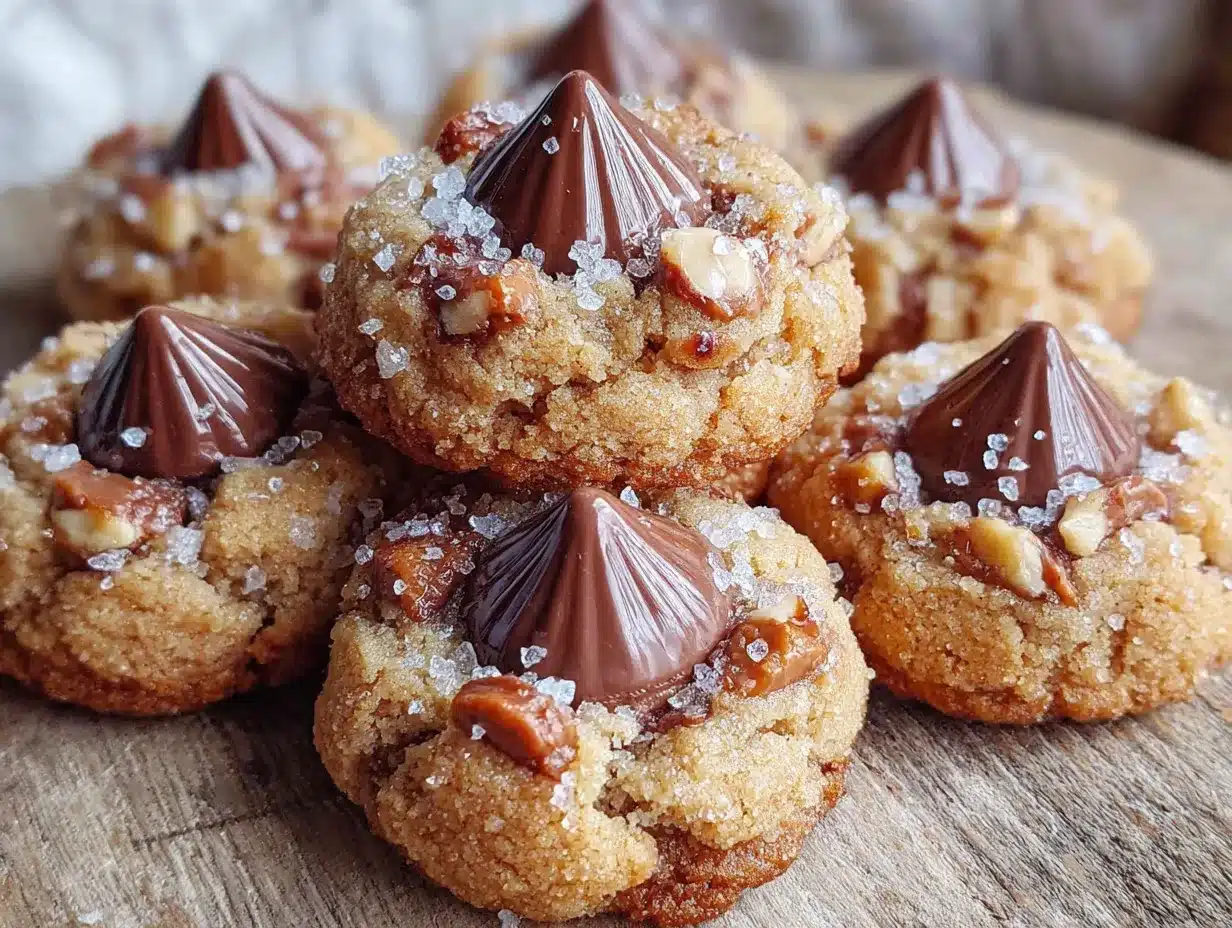
Alright, let’s make these easy peanut butter blossom cookies. I’ll walk you through every step so you get perfect cookies every time.
- Preheat your oven to 375°F (190°C). Line two baking sheets with parchment paper or silicone mats. This is important—don’t skip the parchment. It keeps the cookies from spreading too much and makes cleanup so much easier.
- Unwrap your Hershey kisses. I know, this is the most tedious part. Set the kids up with this task while you get the dough ready. You’ll need about 36 kisses, but unwrap a few extra in case some get damaged. Place them in a bowl and set aside.
- Cream the butter and sugars together. In your large mixing bowl, beat the softened butter, peanut butter, granulated sugar, and brown sugar together until light and fluffy. This takes about 2-3 minutes with an electric mixer on medium speed. Scrape down the sides of the bowl with your spatula halfway through. You’re looking for a smooth, creamy mixture with no lumps of butter.
- Add the egg and vanilla. Crack the egg into the mixture and add the vanilla extract. Beat on medium speed until everything is well combined, about 30 seconds. The mixture will look slightly glossy. Don’t overmix here—you just want it incorporated.
- Mix the dry ingredients. In a separate small bowl, whisk together the flour, baking soda, and salt. I know it’s an extra bowl to wash, but whisking them separately ensures the baking soda is evenly distributed. I learned this the hard way after biting into a cookie with a pocket of baking soda once. Trust me, it’s worth it.
- Combine the wet and dry ingredients. Gradually add the flour mixture to the peanut butter mixture, mixing on low speed. Add it in two or three batches, mixing just until the flour disappears. Don’t overmix, or your cookies will be tough. Stop as soon as you don’t see any more white streaks. The dough will be soft and slightly sticky.
- Prepare the sugar for rolling. Pour about 1/4 cup of granulated sugar into a small bowl. This is what you’ll roll the dough balls in before baking.
- Shape the dough balls. Using a 1-tablespoon cookie scoop or your hands, roll the dough into 1-inch balls. A level tablespoon is about the right size—think of a walnut. Roll each ball between your palms until smooth. If the dough feels too sticky, lightly wet your hands with water.
- Roll in sugar. Roll each dough ball in the bowl of granulated sugar until completely coated. Place the sugar-coated balls on the prepared baking sheets, spacing them about 2 inches apart. You should fit about 12 cookies per sheet.
- Bake the cookies. Place one baking sheet in the preheated oven and bake for 10-12 minutes. The cookies should look puffed and set around the edges but still soft in the center. They’ll look slightly underdone—that’s exactly what you want. For my oven, 11 minutes is the sweet spot. Start checking at 10 minutes if your oven runs hot.
- Add the kisses immediately. This is the crucial step. As soon as the cookies come out of the oven, gently press one Hershey kiss into the center of each cookie. Press it down until the cookie cracks slightly around the edges, but don’t push all the way through. The heat from the cookie will soften the chocolate just enough. Work quickly—if you wait too long, the cookies will cool and the kisses won’t stick.
- Cool on the baking sheet. Let the cookies cool on the baking sheet for about 5 minutes. This allows them to set up enough to transfer without breaking. The chocolate will still be soft at this point, so be gentle.
- Transfer to a wire rack. Using a spatula, carefully move the cookies to a wire rack to cool completely. The chocolate will firm up as they cool. If you’re impatient like me, you can eat one after about 10 minutes. Just watch out—the kiss might still be a little melty.
And that’s it. You’ve just made a batch of easy peanut butter blossom cookies that would make any neighbor proud.
Cooking Tips & Techniques
I’ve made these easy peanut butter blossom cookies more times than I can count, and I’ve learned a few things along the way. Here are my best tips to help you avoid the mistakes I’ve made.
Don’t overbake. This is the number one mistake people make. Peanut butter cookies can go from perfectly soft to dry and crumbly in about 60 seconds. Pull them out when they look puffed and the edges are just barely set. The centers should still look soft and slightly underdone. They’ll continue cooking on the hot baking sheet as they cool.
Use room temperature ingredients. I know, it sounds fussy, but it matters. Room temperature butter and egg cream together much more smoothly than cold ones. If your butter is too cold, you’ll end up with lumps. If your egg is too cold, it can seize the butter. Just let everything sit out for 20-30 minutes before you start.
Press the kisses in at the right angle. Push them straight down, not at an angle. I’ve had kisses tip over or slide off because I pressed them in crooked. A gentle, straight-down press gives you that classic look.
Work in batches. Don’t try to bake all the cookies at once unless you have a convection oven. Bake one sheet at a time on the middle rack for the most even results. While one sheet bakes, you can be rolling the next batch of dough balls.
Don’t skip the parchment. I tried baking these directly on a greased baking sheet once, and the cookies spread too much and stuck to the pan. Parchment paper or a silicone mat gives you perfect results every time.
Keep the kisses cool. If your kitchen is warm, the kisses can get soft and lose their shape when you press them in. I keep the unwrapped kisses in the fridge until I’m ready to use them. Cold kisses press in more cleanly and hold their shape better.
One of my biggest failures? I once forgot to add the sugar to the dough. I mixed everything together, rolled the balls, and baked them. They came out flat, sad, and barely sweet. I couldn’t figure out what went wrong until I realized the sugar was still sitting on the counter. Now I double-check my ingredients before I start mixing.
Variations & Adaptations
One of the best things about these easy peanut butter blossom cookies is how easy they are to customize. Here are some variations I’ve tried and loved.
Chocolate Peanut Butter Blossoms: Swap the peanut butter for chocolate-hazelnut spread like Nutella. The cookies will be a little softer and richer. Use milk chocolate kisses on top for a double-chocolate experience. I tried this for a friend who doesn’t like peanut butter, and she ate six of them.
Gluten-Free Version: Substitute the all-purpose flour with a 1:1 gluten-free baking flour blend. I use Bob’s Red Mill or King Arthur’s measure-for-measure blend. The cookies will be slightly more crumbly, but they taste just as good. Make sure your baking soda is fresh, as gluten-free flours need a little extra lift.
Holiday Twist: Use seasonal Hershey kisses for different occasions. Candy cane kisses for Christmas, pumpkin spice kisses for fall, or strawberry cream kisses for Valentine’s Day. You can also roll the dough balls in colored sugar instead of white. Red and green for Christmas, pastels for Easter—the possibilities are endless.
Extra Peanut Butter Flavor: Add 1/2 cup of mini chocolate chips to the dough along with the flour. Or use chunky peanut butter instead of creamy for little bits of peanut in every bite. I prefer creamy for texture, but my husband loves the chunky version.
Vegan Option: Use a flax egg (1 tablespoon ground flaxseed mixed with 3 tablespoons water) and vegan butter. The cookies will be a little less tender, but they still taste great. Use dairy-free chocolate kisses if you can find them—Enjoy Life makes a good option.
Keto/Low-Carb Version: Substitute the flour with almond flour and use a sugar substitute like monk fruit sweetener. The texture will be different—more tender and delicate—but the flavor is still wonderful. I made these for a friend on keto, and she said they were the best thing she’d eaten in months.
My favorite variation? I roll half the batch in cinnamon sugar instead of plain sugar. The warm spice pairs beautifully with the peanut butter and chocolate. It’s a small change that makes a big difference.
Serving & Storage Suggestions
These easy peanut butter blossom cookies are best served at room temperature. The cookie should be soft and chewy, and the chocolate kiss should be firm but not hard. If you’ve just baked them, let them cool completely on the wire rack before serving—about 20 minutes.
For a pretty presentation, arrange the cookies on a plate or platter with the kisses facing up. You can dust them lightly with powdered sugar for a snowy effect, especially during the holidays. I like to serve them alongside a glass of cold milk or a hot cup of coffee. The contrast of warm cookie and cold milk is unbeatable.
These cookies also pair beautifully with:
- A scoop of vanilla ice cream (crumble the cookie on top)
- A drizzle of chocolate sauce
- Fresh berries for a pop of color and tartness
- A sprinkle of flaky sea salt right before serving (trust me on this one)
Storage: Store these cookies in an airtight container at room temperature. They’ll stay fresh for up to 5 days, though I doubt they’ll last that long. Layer them between sheets of wax paper to prevent the kisses from sticking to each other.
Freezer Instructions: These cookies freeze beautifully. Place the cooled cookies in a single layer in a freezer-safe container, separating layers with wax paper. They’ll keep for up to 3 months. To thaw, let them sit at room temperature for about 30 minutes. You can also freeze the unbaked dough balls. Roll them in sugar, place them on a baking sheet, and freeze until solid. Then transfer to a freezer bag. Bake from frozen, adding 2-3 minutes to the baking time.
Reheating: If you want that just-baked experience, pop a cookie in the microwave for about 10 seconds. The chocolate will soften and the cookie will warm up. It’s not quite the same as fresh from the oven, but it’s pretty close.
One thing I’ve noticed: these cookies actually taste better the next day. The flavors meld together overnight, and the cookie becomes even softer. So don’t worry if you’re making them a day ahead—they’ll be perfect.
Nutritional Information & Benefits
Let’s be honest—these easy peanut butter blossom cookies are a treat, not a health food. But here’s what you should know about what’s in them.
Per cookie (based on 36 cookies):
- Calories: approximately 140-150
- Fat: 8g
- Saturated Fat: 3.5g
- Carbohydrates: 17g
- Sugar: 11g
- Protein: 3g
- Sodium: 95mg
Health Benefits: Peanut butter does offer some nutritional value. It’s a good source of protein and healthy monounsaturated fats. It also contains vitamin E, magnesium, and potassium. The Hershey kiss adds a small amount of antioxidants from the cocoa. But let’s not kid ourselves—these are cookies. They’re meant to be enjoyed in moderation.
Dietary Considerations:
- Contains: Peanuts, dairy (butter), eggs, gluten (flour), soy (in chocolate)
- Not suitable for: Vegan, dairy-free, or gluten-free diets (unless modified)
- Can be made: Gluten-free, vegan, or low-carb with substitutions (see Variations section)
My personal take? I don’t worry about the numbers when I’m making these. They’re a special treat, and that’s okay. Food is about more than just fuel—it’s about joy, connection, and sometimes, a really good cookie on a Tuesday night.
Conclusion
These easy peanut butter blossom cookies are exactly what a recipe should be: simple, reliable, and absolutely delicious. They’ve become a staple in my kitchen for a reason. Every time I make them, I think back to that afternoon at my neighbor’s house, standing in her doorway, completely caught off guard by the smell of peanut butter and chocolate.
I hope you give these a try. Don’t be afraid to make them your own—swap the kisses for a different flavor, roll them in colored sugar for a holiday, or add a pinch of cinnamon for a warm twist. The recipe is forgiving, and the results are consistently wonderful.
If you make these easy peanut butter blossom cookies, I’d love to hear about it. Leave a comment below and tell me how they turned out. Did you try a variation? Did the kids help unwrap the kisses? Did you eat three before they even cooled down? (No judgment here—I’ve done it too.)
Happy baking, friend. You’ve got this.
Frequently Asked Questions
Why did my cookies spread too much?
This usually happens if the butter was too soft or melted, or if you used natural peanut butter. Make sure your butter is softened but not melted, and stick with regular creamy peanut butter like Jif or Skippy. Chilling the dough for 15-20 minutes can also help if your kitchen is warm.
Can I use crunchy peanut butter instead of creamy?
Absolutely! Crunchy peanut butter adds little bits of peanut to the cookies. The texture will be slightly different, but they’ll still taste great. Just make sure it’s a standard brand, not natural peanut butter that separates.
How do I keep the Hershey kisses from melting completely?
Press the kisses into the cookies immediately after they come out of the oven. The cookies should be hot enough to soften the chocolate but not melt it completely. If your kisses are too warm, pop them in the fridge for 10 minutes before pressing them in. You want the kiss to hold its shape while softening slightly.
Can I make the dough ahead of time?
Yes! You can refrigerate the dough for up to 3 days. Roll the dough into balls and roll them in sugar just before baking. You can also freeze the dough balls for up to 3 months. Bake from frozen, adding 2-3 minutes to the baking time.
Why did my cookies turn out dry?
Overbaking is the most common culprit. Peanut butter cookies dry out quickly, so pull them out when they look puffed and the edges are just set. The centers should still look soft. Also, make sure you’re measuring your flour correctly—spoon it into the measuring cup and level it off, don’t scoop directly from the bag.
Pin This Recipe!
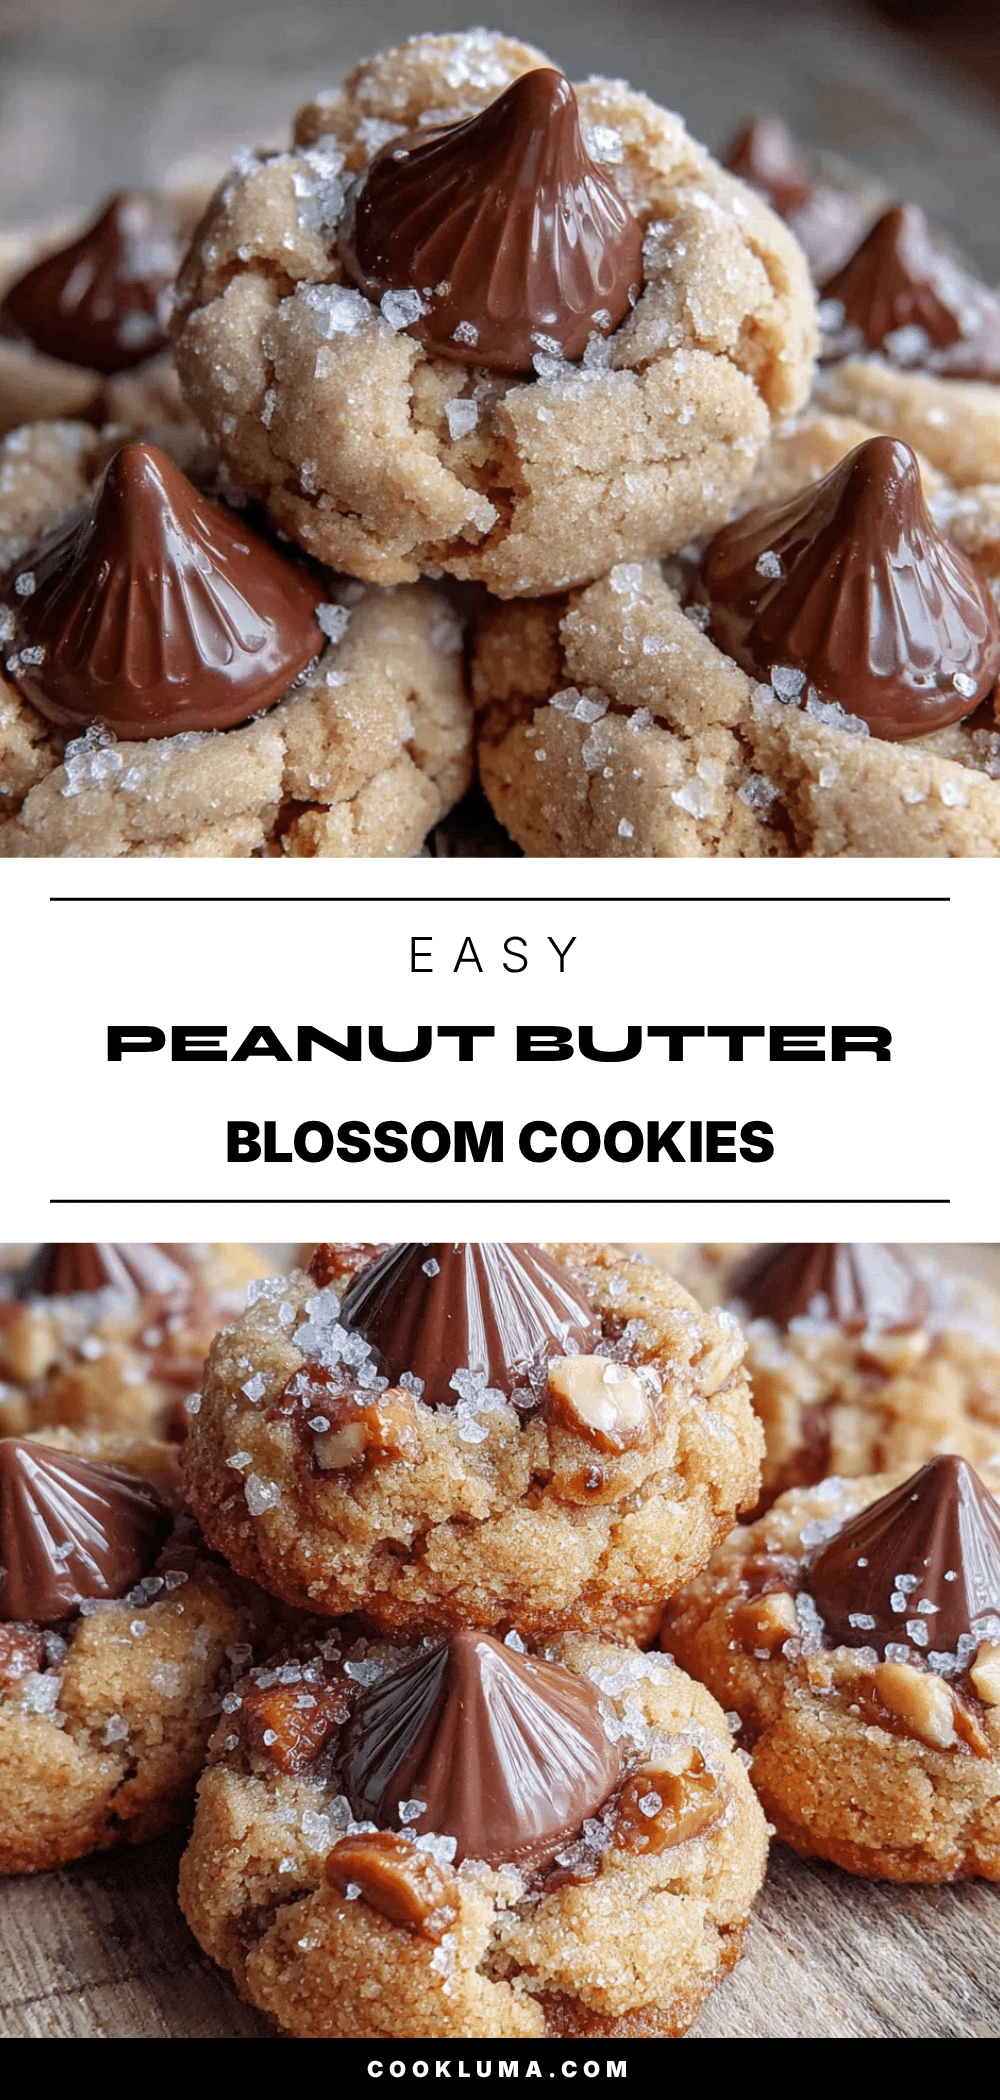
Easy Peanut Butter Blossom Cookies with Hershey Kisses
These easy peanut butter blossom cookies are soft, chewy, and topped with a chocolate Hershey kiss. They come together in one bowl with no chilling required, making them perfect for bake sales, holiday cookie exchanges, or a quick sweet treat.
- Prep Time: 15 minutes
- Cook Time: 11 minutes
- Total Time: 26 minutes
- Yield: 36 cookies 1x
- Category: Dessert
- Cuisine: American
Ingredients
- 1/2 cup unsalted butter, softened
- 1/2 cup creamy peanut butter (e.g., Skippy or Jif)
- 1/2 cup granulated sugar, plus extra for rolling (about 1/4 cup)
- 1/2 cup packed light brown sugar
- 1 large egg, room temperature
- 1 teaspoon vanilla extract
- 1 3/4 cups all-purpose flour
- 1 teaspoon baking soda
- 1/2 teaspoon salt
- 36 Hershey’s Kisses, unwrapped
Instructions
- Preheat oven to 375°F (190°C). Line two baking sheets with parchment paper or silicone mats.
- Unwrap Hershey kisses and set aside in a bowl.
- In a large mixing bowl, beat softened butter, peanut butter, granulated sugar, and brown sugar together until light and fluffy, about 2-3 minutes with an electric mixer on medium speed. Scrape down sides halfway through.
- Add egg and vanilla extract; beat on medium speed until well combined, about 30 seconds.
- In a separate small bowl, whisk together flour, baking soda, and salt.
- Gradually add flour mixture to peanut butter mixture, mixing on low speed in two or three batches until just combined. Do not overmix.
- Pour about 1/4 cup granulated sugar into a small bowl for rolling.
- Using a 1-tablespoon cookie scoop or hands, roll dough into 1-inch balls (about a walnut size). Roll each ball in sugar until completely coated.
- Place sugar-coated balls on prepared baking sheets, spacing about 2 inches apart (about 12 per sheet).
- Bake one sheet at a time for 10-12 minutes, until puffed and edges are set but centers still soft.
- Immediately after removing from oven, gently press one Hershey kiss into the center of each cookie until cookie cracks slightly around edges.
- Let cookies cool on baking sheet for 5 minutes, then transfer to a wire rack to cool completely.
Notes
Don’t overbake; cookies continue cooking on hot sheet. Use room temperature ingredients. Press kisses straight down. Work in batches. Keep kisses cool for cleaner pressing. For best texture, use standard creamy peanut butter, not natural.
Nutrition
- Serving Size: 1 cookie
- Calories: 145
- Sugar: 11
- Sodium: 95
- Fat: 8
- Saturated Fat: 3.5
- Carbohydrates: 17
- Fiber: 0.5
- Protein: 3
Keywords: peanut butter blossom cookies, Hershey kiss cookies, easy cookie recipe, peanut butter cookies, chocolate peanut butter cookies


