It was 10:47 PM on the Tuesday before Thanksgiving, and I was staring at a half-used jar of sourdough discard in my fridge. I’d already made the cranberry sauce, prepped the green beans, and brined the turkey. But something was missing — that bread basket everyone reaches for when the gravy boat starts making its rounds. I didn’t have the energy for a traditional loaf with all its kneading and shaping and waiting. But I had this starter that needed using, a bottle of good olive oil, and a wild idea that maybe — just maybe — I could pull off focaccia in my sleep.
The thing about late-night cooking is the rules get fuzzy. You stop second-guessing. You just go with what feels right. So I dumped that discard into a bowl, added some warm water and flour, and gave it a rough stir. No fancy folds. No stretch and rests. Just a shaggy, sticky dough that looked more like a mistake than a masterpiece. I covered it with a damp towel, left it on the counter, and went to bed figuring I’d deal with the consequences in the morning.
When I woke up, that ugly dough had transformed. It was bubbly and alive, doubled in size, and smelled like a bakery had moved into my kitchen overnight. I drizzled it with olive oil, dimpled it with my fingertips, sprinkled flaky salt on top, and baked it while the turkey rested. Forty minutes later, I pulled out the most gorgeous, golden-brown focaccia I’d ever made. My brother-in-law — who never compliments anything — ate half the pan before dinner even started. And that’s how this no-knead sourdough focaccia became my Thanksgiving secret weapon.
Why You’ll Love This Recipe
Let me be honest with you — I’ve tested a lot of focaccia recipes over the years. Some required hours of folding. Others needed a stand mixer and patience I simply don’t have on Thanksgiving morning. This one is different. It’s the recipe I turn to when I’m juggling three dishes at once and still want to look like I’ve got my act together.
- No Kneading Required — You don’t need to work that dough at all. Just mix, wait, and bake. Your arms get a holiday too.
- Uses Sourdough Discard — Perfect for using up that extra starter you’ve been feeding all week. No waste, all flavor.
- Make-Ahead Magic — You can prep the dough the night before and bake it fresh on Thanksgiving. One less thing to stress about.
- Minimal Cleanup — One bowl, one spoon, one baking pan. That’s it. No mixer attachments or extra gadgets to wash.
- Crowd-Pleaser Guaranteed — It’s soft, chewy, salty, and soaks up gravy like a dream. Even the pickiest eaters go back for seconds.
- Forgiving for Beginners — This dough doesn’t judge. Overproofed it a little? Still works. Forgot to dimple it? Fine. It’s hard to mess up.
What makes this recipe stand out from every other focaccia out there is the sourdough itself. The natural fermentation adds a subtle tang that cuts through the richness of Thanksgiving dinner. It’s not overpowering — just enough to make people ask, “What’s different about this bread?” And when you tell them it took almost no effort, they won’t believe you.
This isn’t just bread. It’s the thing that makes your Thanksgiving table feel complete without adding more chaos to your day. It’s the recipe that saves you time, uses up what you already have, and makes everyone think you’re a hero in the kitchen.
What Ingredients You Will Need
This recipe uses simple, everyday ingredients — most of which you probably already have in your pantry. The sourdough discard does the heavy lifting here, giving you that complex flavor without any extra work.
- Sourdough discard — 1 cup (240g), unfed and straight from the fridge. This is the key ingredient for that tangy flavor. I prefer using a 100% hydration starter for best results.
- All-purpose flour — 3 cups (375g). No need for bread flour here. All-purpose gives you a tender crumb with just enough chew. King Arthur Flour is my go-to for consistent results.
- Warm water — 1 cup (240ml), about 85°F. Not too hot or you’ll kill the yeast activity. Think bath water temperature.
- Olive oil — ¼ cup (60ml) plus extra for drizzling. Use a good quality extra virgin here — it’s a key flavor in focaccia. California Olive Ranch is reliable and widely available.
- Salt — 1½ teaspoons (9g) fine sea salt for the dough, plus flaky salt like Maldon for topping.
- Active dry yeast — ½ teaspoon (2g). Just a little boost to ensure a good rise, especially if your discard isn’t super active.
- Honey or sugar — 1 teaspoon (5ml). Helps feed the yeast and adds a subtle sweetness that balances the tang.
- Fresh rosemary — 2 tablespoons, chopped (optional but recommended for Thanksgiving). Adds that aromatic herbal note.
- Garlic cloves — 3 to 4, thinly sliced (optional). Roasted garlic flavor without the extra step — just press them into the dough before baking.
Ingredient Tips: If you don’t have sourdough discard, you can use 1 cup of active sourdough starter instead. Just reduce the yeast to ¼ teaspoon since your starter is already doing some work. For a gluten-free version, I’ve had success with Cup4Cup gluten-free flour blend, though the texture will be slightly denser. And if you’re out of fresh rosemary, dried works too — just use 2 teaspoons instead.
One thing I’ve learned the hard way: don’t skip the flaky salt on top. Regular table salt dissolves into the dough, but that crunchy, salty finish on the crust is what makes focaccia addictive. Trust me on this one.
Equipment Needed
The beauty of this recipe is that you don’t need much. Here’s what you’ll want to have on hand:
- Large mixing bowl — Any bowl works, but I prefer a wide, shallow one for mixing. My favorite is a simple ceramic bowl from Crate & Barrel that’s seen better days but still gets the job done.
- Wooden spoon or spatula — For mixing the dough. A Danish dough whisk is nice but totally unnecessary.
- 9×13-inch baking pan — Metal or glass both work. I’ve used a dark non-stick pan and a Pyrex dish — both gave great results. Just avoid glass if you want a crispier bottom crust.
- Plastic wrap or a damp kitchen towel — For covering the dough while it rises. A shower cap works in a pinch — don’t ask me how I know.
- Measuring cups and spoons — For accuracy. A kitchen scale is even better if you have one.
- Cooling rack — Helps the bottom stay crisp instead of getting soggy. If you don’t have one, just tilt the bread on its edge in the pan for a few minutes.
That’s it. No stand mixer, no bread machine, no fancy proofing basket. This recipe was designed for real kitchens with real limitations.
Preparation Method
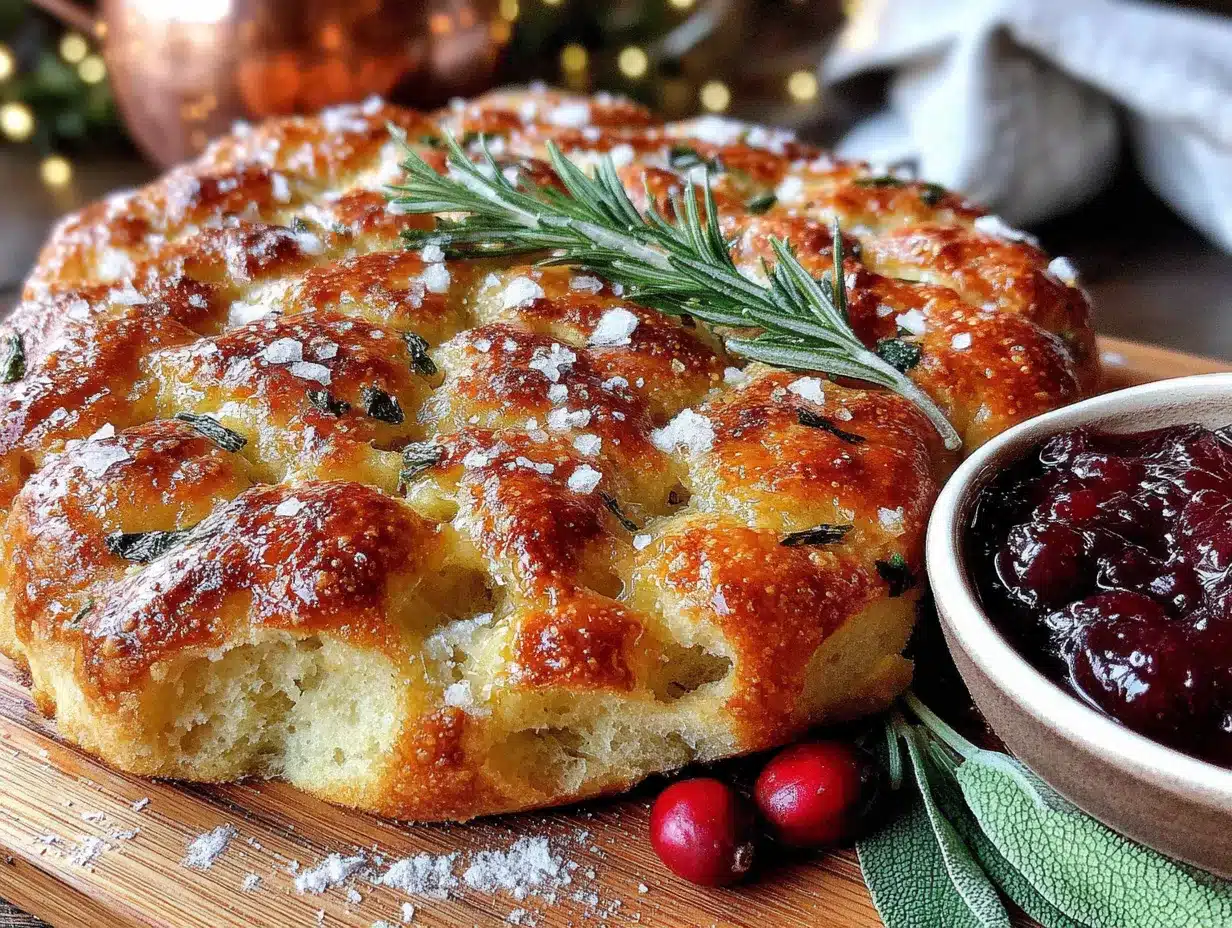
- Mix the dough: In a large bowl, combine the sourdough discard, warm water, honey, and active dry yeast. Let it sit for 5 minutes until it looks slightly foamy — this means your yeast is alive and happy. Add the flour and salt, then stir with a wooden spoon until a shaggy, sticky dough forms. It will look rough and uneven. That’s exactly what you want. Don’t overmix.
- First rise (at room temperature): Drizzle a little olive oil over the top of the dough, just enough to coat it. Cover the bowl with plastic wrap or a damp towel. Let it sit at room temperature for 8 to 12 hours. Overnight works perfectly — I usually mix it before bed and wake up to a bubbly, doubled dough. If your kitchen is cold (below 68°F), it might take closer to 14 hours. Be patient.
- Prepare the pan: Pour 2 to 3 tablespoons of olive oil into your 9×13-inch baking pan. Use your fingers to spread it all over the bottom and up the sides. This isn’t just for greasing — the oil helps create that crispy, golden crust.
- Transfer the dough: Gently scrape the dough into the oiled pan. It will be sticky and wobbly. Don’t try to shape it — just let it plop in there. Use oiled fingers to gently stretch it to the edges of the pan. If it resists, let it rest for 10 minutes and try again. The dough will relax.
- Second rise: Cover the pan loosely with plastic wrap or a towel. Let it rise for another 1 to 2 hours, until it’s puffy and nearly doubled. You’ll see bubbles forming on the surface — that’s a good sign.
- Preheat the oven: About 30 minutes before baking, preheat your oven to 425°F (220°C). Place a rack in the middle position. If you have a pizza stone or baking steel, put it on the rack below — it helps create a crispier bottom.
- Dimple the dough: Drizzle another tablespoon of olive oil over the top. Use your fingertips to press deep dimples all across the surface — go all the way down to the bottom of the pan. Don’t be shy. These dimples hold the oil and create those signature focaccia pockets. Press the sliced garlic into some of the dimples if using.
- Add toppings: Sprinkle the chopped rosemary evenly over the top. Finish with a generous pinch of flaky salt. This is where the magic happens.
- Bake: Place the pan in the preheated oven and bake for 25 to 30 minutes, until the top is deep golden brown and the bread sounds hollow when you tap it. Rotate the pan halfway through for even browning.
- Cool: Remove from the oven and let it cool in the pan for 5 minutes. Then transfer to a cooling rack. If you’re serving it warm (which I highly recommend), let it cool for at least 15 minutes before slicing. The texture sets as it cools.
Sensory Cue: When it’s done, the focaccia should feel light and airy when you pick it up. The crust will be crisp and crackly, and the inside will be soft with an open, holey crumb. If it feels dense or heavy, it might need a few more minutes next time.
Cooking Tips & Techniques
I’ve made this recipe probably two dozen times, and I’ve learned a few things the hard way. Here’s what I wish someone had told me:
Don’t stress about the first rise time. The window is wider than you think. I’ve let it go 14 hours on a cold winter night and 8 hours in a warm summer kitchen. Both worked. The dough tells you when it’s ready — it should look bubbly, smell slightly sour, and have doubled in size. If it’s not there yet, just wait.
Wet hands are your best friend. When handling this dough, keep a small bowl of water nearby. Dip your fingers in water before stretching or dimpling the dough. It prevents sticking without adding extra flour, which can make the bread dense.
The dimpling matters more than you think. I once got lazy and barely pressed into the dough. The result was a flat, uninteresting focaccia with no oil pools. Those deep dimples aren’t just for looks — they create pockets that trap olive oil and give you that signature texture. Press firmly and confidently.
Watch for over-browning. Every oven runs differently. If your focaccia is getting too dark on top but the bottom isn’t done, tent it loosely with foil for the last 5 to 10 minutes. I’ve had to do this with my convection oven more than once.
Don’t skip the cooling step. I know it’s tempting to tear into it right away. But cutting into hot bread compresses the crumb and makes it gummy. Give it at least 15 minutes. Use that time to finish your turkey or set the table.
One mistake I still make: Forgetting to check the water temperature. Too hot and you’ll kill the yeast. Too cold and the rise takes forever. I keep a kitchen thermometer by my sink now. It’s saved more than a few batches.
Variations & Adaptations
This focaccia is incredibly adaptable. Here are some variations I’ve tried and loved:
- Herb and Garlic: The classic Thanksgiving version — rosemary, thyme, and sliced garlic pressed into the dimples. Sage also works beautifully with turkey.
- Rosemary and Sea Salt: Simple and perfect. Just rosemary and flaky salt — let the sourdough flavor shine.
- Caramelized Onion and Thyme: Cook down 2 large onions in butter until golden and jammy, then scatter over the dough before baking. Sweet, savory, and absolutely incredible with roast chicken.
- Sun-Dried Tomato and Basil: Chop ¼ cup of oil-packed sun-dried tomatoes and sprinkle over the dough with fresh basil. A Mediterranean twist that works year-round.
- Everything Bagel: Skip the herbs and top with everything bagel seasoning (sesame seeds, poppy seeds, dried garlic, dried onion, salt). Great for breakfast or alongside soup.
- Gluten-Free Option: Substitute a 1:1 gluten-free flour blend. The texture will be slightly more cake-like, but the flavor is still fantastic. Reduce the water by 2 tablespoons since gluten-free flours absorb differently.
My personal favorite variation? A mix of rosemary and thinly sliced shallots. I tried it on a whim one Thanksgiving when I ran out of garlic, and it’s been my go-to ever since. The shallots get crispy and sweet in the oven.
Serving & Storage Suggestions
Serve this focaccia warm or at room temperature. It’s perfect straight from the pan, torn into rustic pieces for the bread basket. I like to set it out with a small dish of extra virgin olive oil and balsamic vinegar for dipping — it gives people something to snack on while the turkey rests.
For Thanksgiving, it pairs beautifully with roasted turkey, mashed potatoes, and gravy. Use it to soak up every last drop of sauce on your plate. It also works as a base for leftover turkey sandwiches the next day — just split it horizontally and toast it lightly.
Storage: Keep leftover focaccia in an airtight container at room temperature for up to 3 days. Do not refrigerate — it will dry out and go stale faster. If you need to store it longer, wrap it tightly in plastic wrap and freeze for up to 3 months.
Reheating: The best way to revive focaccia is in a 350°F oven for 5 to 7 minutes. It brings back the crisp crust and soft interior. A toaster oven works great too. Avoid the microwave — it turns the bread rubbery and sad.
Flavor Development: Here’s a secret — this focaccia actually tastes better on day two. The sourdough flavor deepens as it sits. I’ve been known to make it a day ahead on purpose, just for that extra tang.
Nutritional Information & Benefits
Per serving (based on 12 servings):
- Calories: 180
- Total Fat: 7g
- Saturated Fat: 1g
- Carbohydrates: 26g
- Fiber: 1g
- Protein: 4g
- Sodium: 290mg
Health Benefits: Sourdough fermentation breaks down some of the gluten and phytic acid in flour, making nutrients more bioavailable. It also has a lower glycemic index compared to regular bread, meaning it won’t spike your blood sugar as dramatically. The olive oil provides healthy monounsaturated fats and antioxidants. Plus, the rosemary is rich in anti-inflammatory compounds.
Dietary Considerations: This recipe is vegetarian and can be made dairy-free (it already is). For a vegan version, use maple syrup instead of honey. For gluten-free, use a quality gluten-free flour blend as mentioned above. It’s also nut-free and egg-free.
I’m not a nutritionist, but I’ve learned to appreciate how sourdough makes me feel compared to regular bread. Less bloated, more satisfied. That’s worth something on Thanksgiving when you’re eating your weight in mashed potatoes.
Conclusion
This no-knead sourdough focaccia has become my Thanksgiving tradition for a reason. It’s the bread that saves time, uses up discard, and makes everyone at the table happy. No fancy techniques, no stressful timing, no expensive ingredients. Just good bread that tastes like you spent hours on it — when really, you just let the dough do the work.
I love this recipe because it reminds me that cooking doesn’t have to be complicated to be memorable. Some of the best things come from late-night experiments and happy accidents. So go ahead — give it a try. Customize it with your favorite herbs, press in some garlic, or keep it simple with just salt and oil. Make it your own.
If you make this focaccia, I’d love to hear about it. Leave a comment below or tag me in your photos. Tell me what toppings you used, how it turned out, and whether your brother-in-law ate half the pan too. Happy Thanksgiving, and happy baking!
Frequently Asked Questions
Can I use active sourdough starter instead of discard?
Yes, absolutely. Use 1 cup of active starter and reduce the active dry yeast to ¼ teaspoon. The rise times may be slightly shorter since your starter is already active.
Can I make this gluten-free?
Yes, use a 1:1 gluten-free flour blend like Cup4Cup. Reduce the water by 2 tablespoons and expect a slightly denser, more cake-like texture. The flavor is still excellent.
Can I freeze the baked focaccia?
Yes, wrap it tightly in plastic wrap and then foil. Freeze for up to 3 months. Thaw at room temperature and reheat in a 350°F oven for 5 to 7 minutes to restore the crisp crust.
Why didn’t my dough rise?
Several possible reasons: your water was too hot (killed the yeast), too cold (slowed the yeast), or your sourdough discard was too old and acidic. Make sure your water is around 85°F and your discard is less than 2 weeks old for best results.
Can I add other toppings besides rosemary and garlic?
Definitely. Try caramelized onions, sun-dried tomatoes, olives, fresh thyme, or everything bagel seasoning. Just add them after dimpling and before baking.
Pin This Recipe!
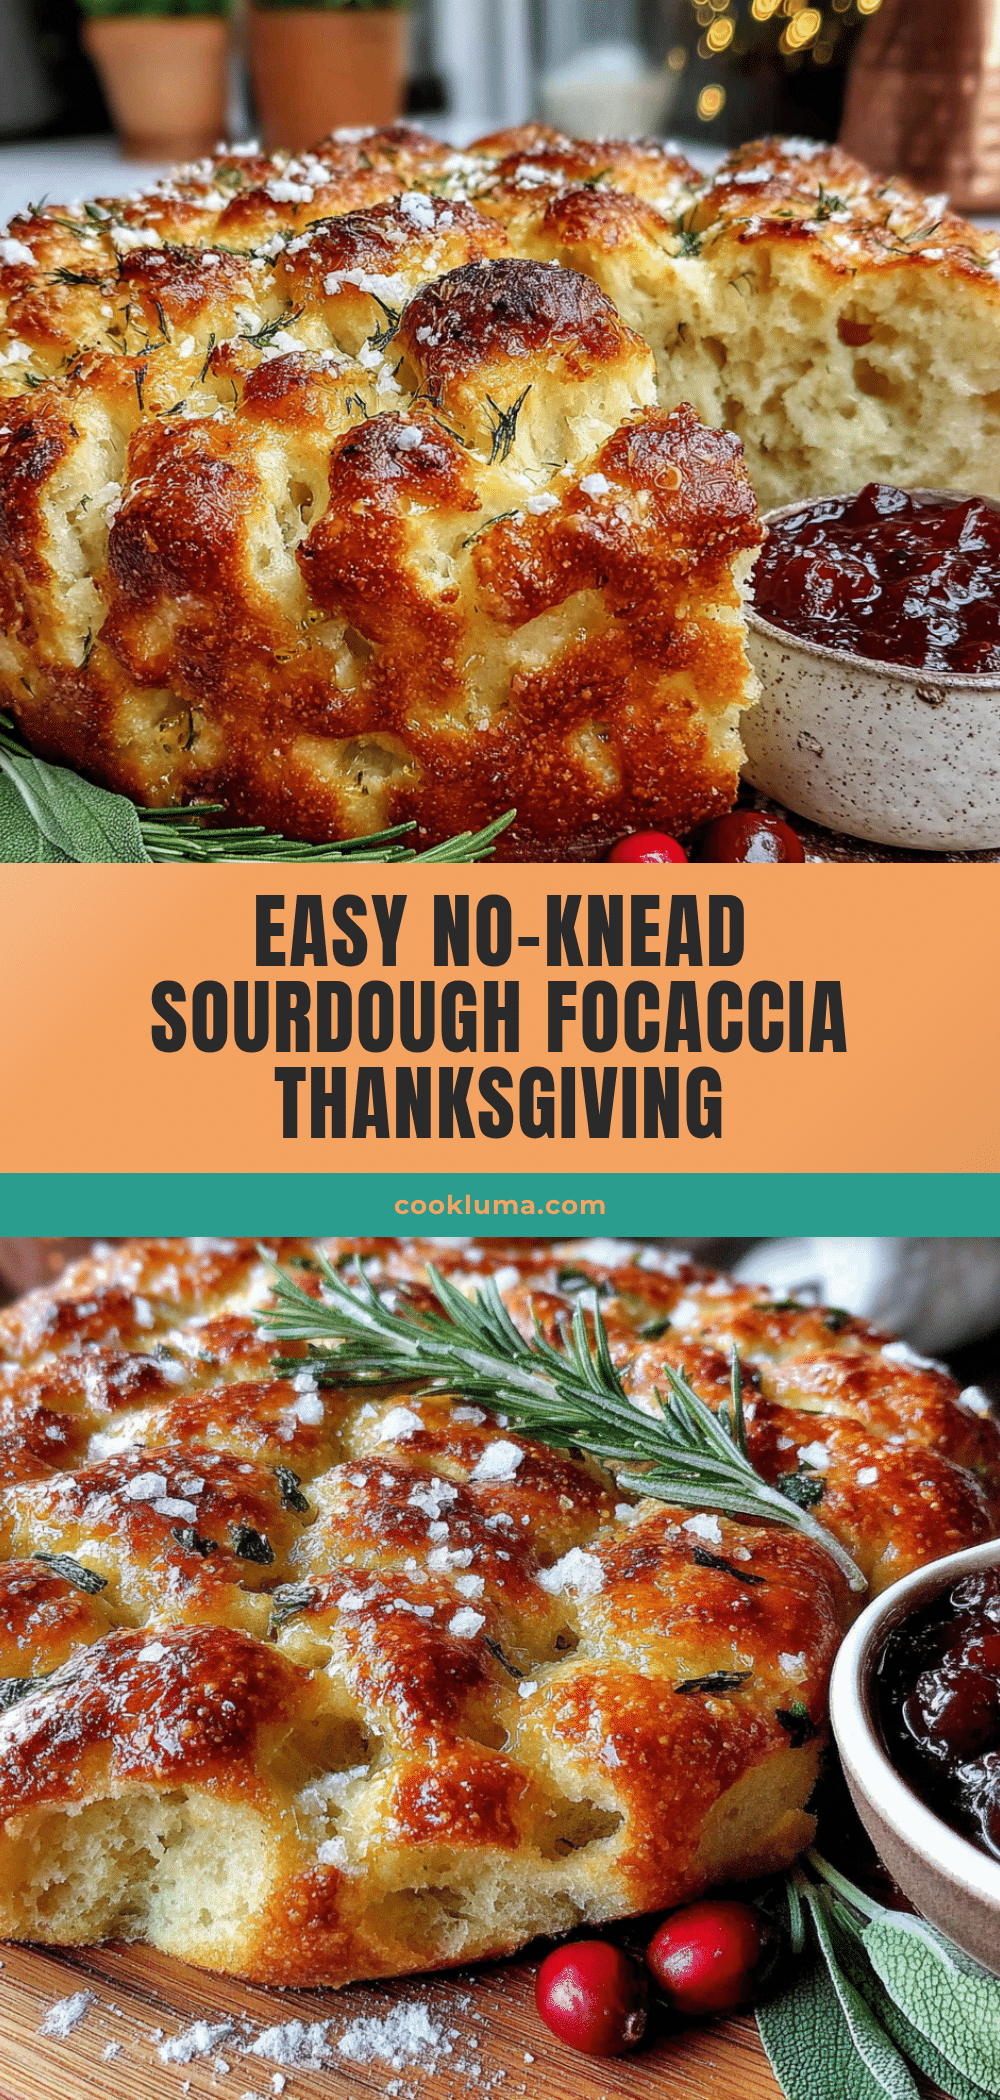
Easy No-Knead Sourdough Focaccia Perfect for Thanksgiving

This no-knead sourdough focaccia is the perfect Thanksgiving bread—minimal effort, maximum flavor. Made with sourdough discard, it’s soft, chewy, and soaks up gravy like a dream.
- Prep Time: 15 minutes
- Cook Time: 30 minutes
- Total Time: 8 hours 45 minutes (includes rising time)
- Yield: 12 servings 1x
- Category: Bread
- Cuisine: Italian-American
Ingredients
- 1 cup (240g) sourdough discard, unfed and straight from the fridge
- 3 cups (375g) all-purpose flour
- 1 cup (240ml) warm water (about 85°F)
- ¼ cup (60ml) olive oil, plus extra for drizzling
- 1½ teaspoons (9g) fine sea salt
- ½ teaspoon (2g) active dry yeast
- 1 teaspoon (5ml) honey or sugar
- 2 tablespoons fresh rosemary, chopped (optional)
- 3–4 garlic cloves, thinly sliced (optional)
- Flaky salt (like Maldon) for topping
Instructions
- Mix the dough: In a large bowl, combine the sourdough discard, warm water, honey, and active dry yeast. Let it sit for 5 minutes until slightly foamy. Add the flour and salt, then stir with a wooden spoon until a shaggy, sticky dough forms. Do not overmix.
- First rise (at room temperature): Drizzle a little olive oil over the dough to coat. Cover the bowl with plastic wrap or a damp towel. Let it sit at room temperature for 8 to 12 hours (or overnight) until doubled in size and bubbly.
- Prepare the pan: Pour 2-3 tablespoons of olive oil into a 9×13-inch baking pan. Spread it all over the bottom and up the sides.
- Transfer the dough: Gently scrape the dough into the oiled pan. Use oiled fingers to gently stretch it to the edges. If it resists, let it rest for 10 minutes and try again.
- Second rise: Cover the pan loosely with plastic wrap or a towel. Let it rise for another 1 to 2 hours until puffy and nearly doubled.
- Preheat the oven: About 30 minutes before baking, preheat your oven to 425°F (220°C) with a rack in the middle position.
- Dimple the dough: Drizzle another tablespoon of olive oil over the top. Use your fingertips to press deep dimples all across the surface. Press sliced garlic into some dimples if using.
- Add toppings: Sprinkle chopped rosemary evenly over the top. Finish with a generous pinch of flaky salt.
- Bake: Place the pan in the preheated oven and bake for 25-30 minutes until deep golden brown and the bread sounds hollow when tapped. Rotate the pan halfway through.
- Cool: Remove from the oven and let cool in the pan for 5 minutes. Transfer to a cooling rack and let cool for at least 15 minutes before slicing.
Notes
The dough is very forgiving. If it’s overproofed slightly, it still works. Don’t skip the flaky salt on top—it’s essential for the signature crunchy crust. For best results, use a kitchen scale for accuracy. The focaccia tastes even better on day two as the sourdough flavor deepens.
Nutrition
- Serving Size: 1 slice (1/12 of rec
- Calories: 180
- Sugar: 1
- Sodium: 290
- Fat: 7
- Saturated Fat: 1
- Carbohydrates: 26
- Fiber: 1
- Protein: 4
Keywords: sourdough focaccia, no-knead bread, Thanksgiving bread, sourdough discard recipe, easy focaccia, holiday bread


