There used to be a little bakery attached to a gas station just off Route 9 that made the most ridiculous Thanksgiving-themed cake pops you’ve ever seen. When they closed three years ago — just packed up and vanished one Tuesday — I honestly felt a little pang of grief. My kids had been obsessed with their turkey cake pops since my daughter was barely tall enough to see the display case. After sixteen tries — some of them truly tragic, let me tell you — I finally cracked the code. The power went out halfway through attempt number eleven, and I sat there in the dark holding a lopsided turkey head, wondering if I’d lost my mind. But now? These little guys are our family’s Thanksgiving tradition, and honestly, they’re better than the originals ever were.
You know that feeling when you find something that makes your kids actually excited about a holiday that’s usually all about the grown-ups? That’s what these turkey cake pops do. They’re silly, they’re cute, and they give the little ones something to brag about at the Thanksgiving table. I mean, my nephew once tried to trade his entire slice of pie for an extra cake pop — and that’s saying something.
These aren’t just any cake pops, either. They’re built to survive a kid’s enthusiastic grip, they use simple ingredients you won’t have to hunt down, and they come together in a way that won’t make you want to pull your hair out. After all that trial and error, I can tell you exactly what works and what doesn’t — so you don’t have to learn the hard way like I did.
Why You’ll Love This Recipe
Let’s face it — Thanksgiving is already a marathon of cooking, and the last thing you need is another complicated project. These turkey cake pops are different. They’re designed for real families with real budgets and real time constraints. I’ve tested these with my own kids, my sister’s picky eaters, and even a classroom of second-graders. They passed every test.
- Budget-Friendly: You probably already have most of the ingredients in your pantry. No fancy baking supplies needed — just a boxed cake mix, some frosting, and candy melts. This whole project costs less than a fancy coffee run.
- Kid-Approved: My kids helped me test every single version. The final recipe got two sticky thumbs up and a request to make them “for every holiday forever.” That’s the kind of review you can trust.
- Make-Ahead Friendly: These freeze beautifully, so you can prep them days before Thanksgiving. One less thing to stress about on the big day, right?
- No Special Skills Required: If you can crumble a cake and dip a lollipop stick, you can make these. I promise — my first attempt looked like a sad science experiment, and even that one got eaten.
- Perfect for Little Helpers: This is the kind of recipe where kids can actually pitch in. Rolling the cake balls, dipping them, adding the candy eyes — it’s all doable for small hands with a little supervision.
What makes these turkey cake pops stand out from every other version you’ve seen online? It’s the technique. I figured out that using a slightly firmer cake ball mixture keeps them from falling off the sticks — a problem that drove me absolutely crazy in the beginning. Plus, the candy corn feathers are actually secure, not wobbling around like they’re about to take flight. This isn’t just another recipe; it’s the one that works, every single time.
What Ingredients You Will Need
This recipe uses simple, everyday ingredients to create something special. Nothing exotic, nothing expensive — just good old-fashioned baking staples that won’t break the bank. Here’s what you’ll need to gather:
For the Cake Pops
- 1 box (15.25 oz) yellow or chocolate cake mix (I prefer Betty Crocker or Duncan Hines for consistent results)
- Ingredients called for on the cake mix box (usually eggs, oil, and water)
- 1/2 cup prepared chocolate or vanilla frosting (store-bought is fine — I use Pillsbury or store brand)
For the Turkey Decorations
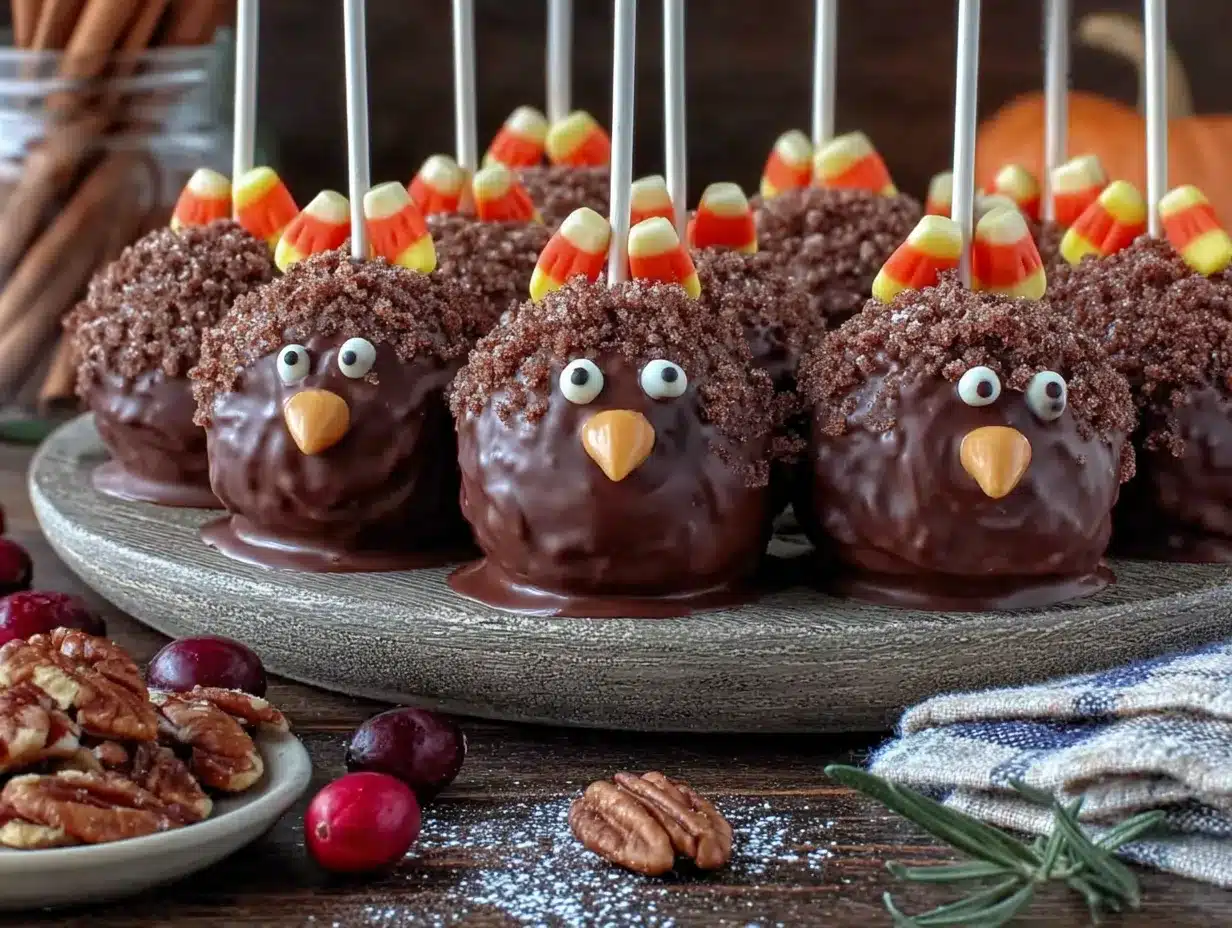
- 1 bag (12 oz) candy melts in orange or brown (Wilton brand works great, but store brands are fine too)
- 1 bag (12 oz) candy melts in white (for the base coating)
- 1 bag candy corn (about 40-50 pieces — get the regular size, not the mini)
- Candy eyes (about 40-50 pairs — available at craft stores or online)
- Orange or red candy melts or decorating icing (for the wattle — that’s the red dangly bit under the beak)
- Pretzel sticks (about 20-25, broken in half — these become the turkey legs)
- Lollipop sticks (about 20-25 — get the 6-inch size for easy handling)
Optional Decorations
- Orange sprinkles or sanding sugar (for the beak area, if you want extra texture)
- Coconut oil or shortening (1 teaspoon, to thin the candy melts if needed)
- White chocolate chips (you can melt these instead of candy melts if preferred)
Look for candy melts at your local craft store or grocery store baking aisle. If you can’t find orange candy melts, white ones with a few drops of orange food coloring work just fine — just make sure you use oil-based coloring, not water-based, or the chocolate will seize up. Trust me on that one. I learned that lesson the messy way.
Equipment Needed
You don’t need a professional bakery setup for these turkey cake pops. Here’s what you’ll actually use:
- Large baking sheet (lined with parchment paper or wax paper)
- Mixing bowls (one large, one medium)
- Electric hand mixer or stand mixer (for the cake batter — or you can mix by hand, no judgment)
- Lollipop sticks (20-25, 6-inch size)
- Styrofoam block or cardboard box (to hold the cake pops upright while they dry)
- Microwave-safe bowls (for melting the candy coating)
- Small cookie scoop or tablespoon (for portioning the cake balls evenly)
- Piping bags or small zip-top bags (for the decorating icing)
- Toothpicks (for applying small details)
If you don’t have a Styrofoam block, a cardboard box with holes poked in it works perfectly. I’ve used everything from a shoe box to an egg carton — whatever gets the job done. The key is having something to hold the pops upright while the coating sets.
Preparation Method
Alright, let’s get to the fun part. Here’s how to make these turkey cake pops step by step:
Step 1: Bake the Cake
Prepare the cake mix according to the package directions. Bake it in a 9×13-inch pan — this gives you the perfect texture for crumbling. Let the cake cool completely. I mean completely. If it’s even slightly warm, the frosting will melt and you’ll end up with a sticky mess instead of a firm cake ball mixture. Let it cool for at least an hour, or pop it in the fridge for 30 minutes if you’re in a hurry.
Step 2: Make the Cake Ball Mixture
Crumble the cooled cake into a large bowl. You want fine crumbs — no big chunks. Add 1/2 cup of frosting and mix with your hands (yes, get in there — it’s the best way). The mixture should hold together when squeezed but not be greasy or sticky. If it’s too dry, add a teaspoon more frosting. Too wet? Add a few more cake crumbs. This is where experience comes in — you want it to feel like Play-Doh.
Step 3: Form the Turkey Bodies
Scoop out about 2 tablespoons of the mixture and roll it into a ball. Place each ball on the parchment-lined baking sheet. You should get about 20-25 balls. Pop them in the freezer for 15-20 minutes — this makes them much easier to dip without falling apart.
Step 4: Prepare the Decorations
While the cake balls are chilling, get your decorations ready. Sort your candy corn — you want the pointy pieces for the feathers. Break the pretzel sticks in half for the turkey legs. Set up your candy eyes and have everything within reach. Trust me, once you start dipping, you won’t want to be hunting for supplies.
Step 5: Melt the Candy Coating
Melt the white candy melts according to package directions — usually 30-second intervals in the microwave, stirring between each. Add a teaspoon of coconut oil if the mixture seems too thick. You want it thin enough to coat the cake ball easily but not so thin that it runs off.
Step 6: Dip and Decorate
Remove the cake balls from the freezer. Dip the tip of a lollipop stick into the melted candy, then insert it about halfway into a cake ball. This acts like glue — keeps the pop from sliding off. Dip the entire cake ball into the melted candy, tap off the excess, and place it in your Styrofoam block. While the coating is still wet, add two candy corn pieces on the back for feathers, two candy eyes on the front, and a small piece of orange candy melt for the beak. Use a toothpick to add a tiny dot of red icing for the wattle. Insert two pretzel stick halves into the bottom for legs.
Step 7: Let Them Set
Let the cake pops dry completely — about 30 minutes at room temperature, or 15 minutes in the fridge. The coating should be firm to the touch before you handle them.
Cooking Tips & Techniques
After sixteen attempts, I’ve collected some hard-won wisdom. Here’s what I wish someone had told me:
- Don’t skip the freezer step. I tried making these without chilling the cake balls first, and they fell apart like a house of cards. Fifteen minutes in the freezer makes all the difference.
- Work in small batches. Only take out 4-5 cake balls from the freezer at a time. If they warm up, they’ll start sliding off the sticks. Keep the rest chilled until you’re ready for them.
- Tap, don’t swirl. When you dip the cake pop, tap the stick gently against the side of the bowl instead of swirling it around. Swirling creates air bubbles that leave holes in the coating.
- Use a deep container. A tall, narrow microwave-safe cup works better than a wide bowl for dipping. You want to submerge the whole cake ball without having to tilt it.
- Keep the candy melts warm. If the coating starts to thicken, pop it back in the microwave for 10 seconds. Thick coating leads to lumpy cake pops.
- Don’t overcrowd the decorations. I got too excited my first time and piled on the candy corn. Less is more — three to four feathers per turkey looks cleaner and cuter.
One of my biggest failures? Using water-based food coloring in the candy melts. It seized up into a grainy, unusable mess. Always use oil-based candy coloring or just buy pre-colored melts. Learn from my mistakes, friends.
Variations & Adaptations
Once you’ve mastered the basic turkey cake pop, the possibilities are endless. Here are some variations I’ve tried:
- Chocolate Version: Use chocolate cake mix and chocolate candy melts for the coating. The dark color makes the candy corn feathers really pop visually. My nephew declared these “the best ones yet.”
- Gluten-Free Option: Substitute a gluten-free cake mix — they work just as well for cake pops since you’re crumbling the cake anyway. Just make sure your candy melts are certified gluten-free too.
- Mini Turkey Pops: Use a teaspoon instead of a tablespoon to make smaller cake pops. These are perfect for little hands or for packing in lunch boxes the day after Thanksgiving.
- Pumpkin Spice Twist: Use a spice cake mix and add a teaspoon of pumpkin pie spice to the crumbled cake mixture. It gives the pops a warm, seasonal flavor that screams Thanksgiving.
- Dairy-Free Adaptation: Use a dairy-free cake mix and vegan frosting. Most candy melts are dairy-free, but double-check the label. Coconut oil works great for thinning the coating.
I tried a version with crushed graham crackers mixed into the cake balls for extra texture — it was interesting but not quite right. Stick with the basic recipe for your first batch, then get creative once you’ve got the technique down.
Serving & Storage Suggestions
These turkey cake pops are best served at room temperature. Arrange them on a platter with the legs pointing down — they look like a flock of little turkeys ready to parade across your Thanksgiving table. Kids love grabbing them by the stick, and they’re the perfect size for little appetites before the big meal.
For storage, place the finished cake pops in an airtight container in the refrigerator. They’ll keep for up to 5 days — though honestly, they never last that long in our house. The flavors actually develop a bit overnight, so they taste even better the next day.
To freeze, place the undecorated cake balls (before dipping) on a baking sheet and freeze until solid. Transfer to a freezer bag and store for up to 3 months. When you’re ready to decorate, thaw them in the refrigerator overnight, then dip and decorate as usual. This is my secret weapon for stress-free Thanksgiving prep.
For reheating — not that you’ll need to — just let them come to room temperature for about 15 minutes. Don’t microwave them, or the candy coating will melt into a sad puddle.
Nutritional Information & Benefits
Let’s be real — these are a treat, not a health food. But here’s a rough estimate per cake pop (based on 24 servings):
- Calories: Approximately 180-200
- Fat: 8-10g
- Carbohydrates: 25-30g
- Sugar: 18-22g
- Protein: 2-3g
The good news? They’re portion-controlled — one cake pop feels satisfying without being overindulgent. The cake provides a little bit of energy for running around with cousins, and hey, there’s something to be said for the joy of a homemade treat. Plus, making these together as a family creates memories that last longer than any nutrition label.
For those with allergies, note that these contain wheat, dairy, and eggs depending on the cake mix and frosting you choose. Always check labels if you’re serving guests with food sensitivities.
Conclusion
These turkey cake pops have become our family’s Thanksgiving signature, and I honestly can’t imagine the holiday without them anymore. They’re the kind of recipe that brings everyone together — kids helping in the kitchen, grandparents oohing and aahing over the cuteness, and everyone grabbing one (or two) before the turkey even hits the table.
Don’t worry if your first batch isn’t perfect. My first attempt looked like a turkey that had been through a windstorm, and my kids still devoured them. The beauty of these cake pops is that even the “ugly” ones taste amazing. So get in there, get your hands messy, and make some memories with your family.
I’d love to hear how yours turn out! Drop a comment below and let me know if your kids helped, what variations you tried, or if you discovered any tricks of your own. And if you snap a photo, tag me — I want to see your flock of turkey cake pops!
Frequently Asked Questions
Can I use a homemade cake recipe instead of a box mix?
Absolutely! Just make sure the cake is fully cooled and crumbled finely. Homemade cakes can be a bit more delicate, so you might need to adjust the frosting amount slightly. Start with 1/3 cup and add more as needed until the mixture holds together.
How far in advance can I make these turkey cake pops?
You can make the cake balls up to a week ahead and store them in the fridge, or freeze them for up to 3 months. The fully decorated pops are best within 3-4 days. I usually make the cake balls on Monday, dip and decorate on Wednesday, and serve them on Thanksgiving — works like a charm.
My cake pops keep falling off the sticks. What am I doing wrong?
This is the most common problem, and it’s usually because the cake balls are too warm or the coating is too thick. Make sure your cake balls are thoroughly chilled — 20 minutes in the freezer minimum. Also, dip the stick in melted candy before inserting it into the cake ball. That little bit of “glue” makes a huge difference.
Can I use white chocolate instead of candy melts?
You can, but white chocolate is trickier to work with. It’s more sensitive to heat and can seize up easily. If you’re using white chocolate, add a teaspoon of coconut oil to keep it smooth, and never let it get above 110°F. Candy melts are more forgiving for beginners.
How do I get the candy corn to stay on as feathers?
The trick is to press the candy corn into the coating while it’s still wet. If the coating has started to set, dip the back of the candy corn in a little melted candy first — it acts like glue. I learned this after watching my first batch of feathers slide off one by one.
Pin This Recipe!
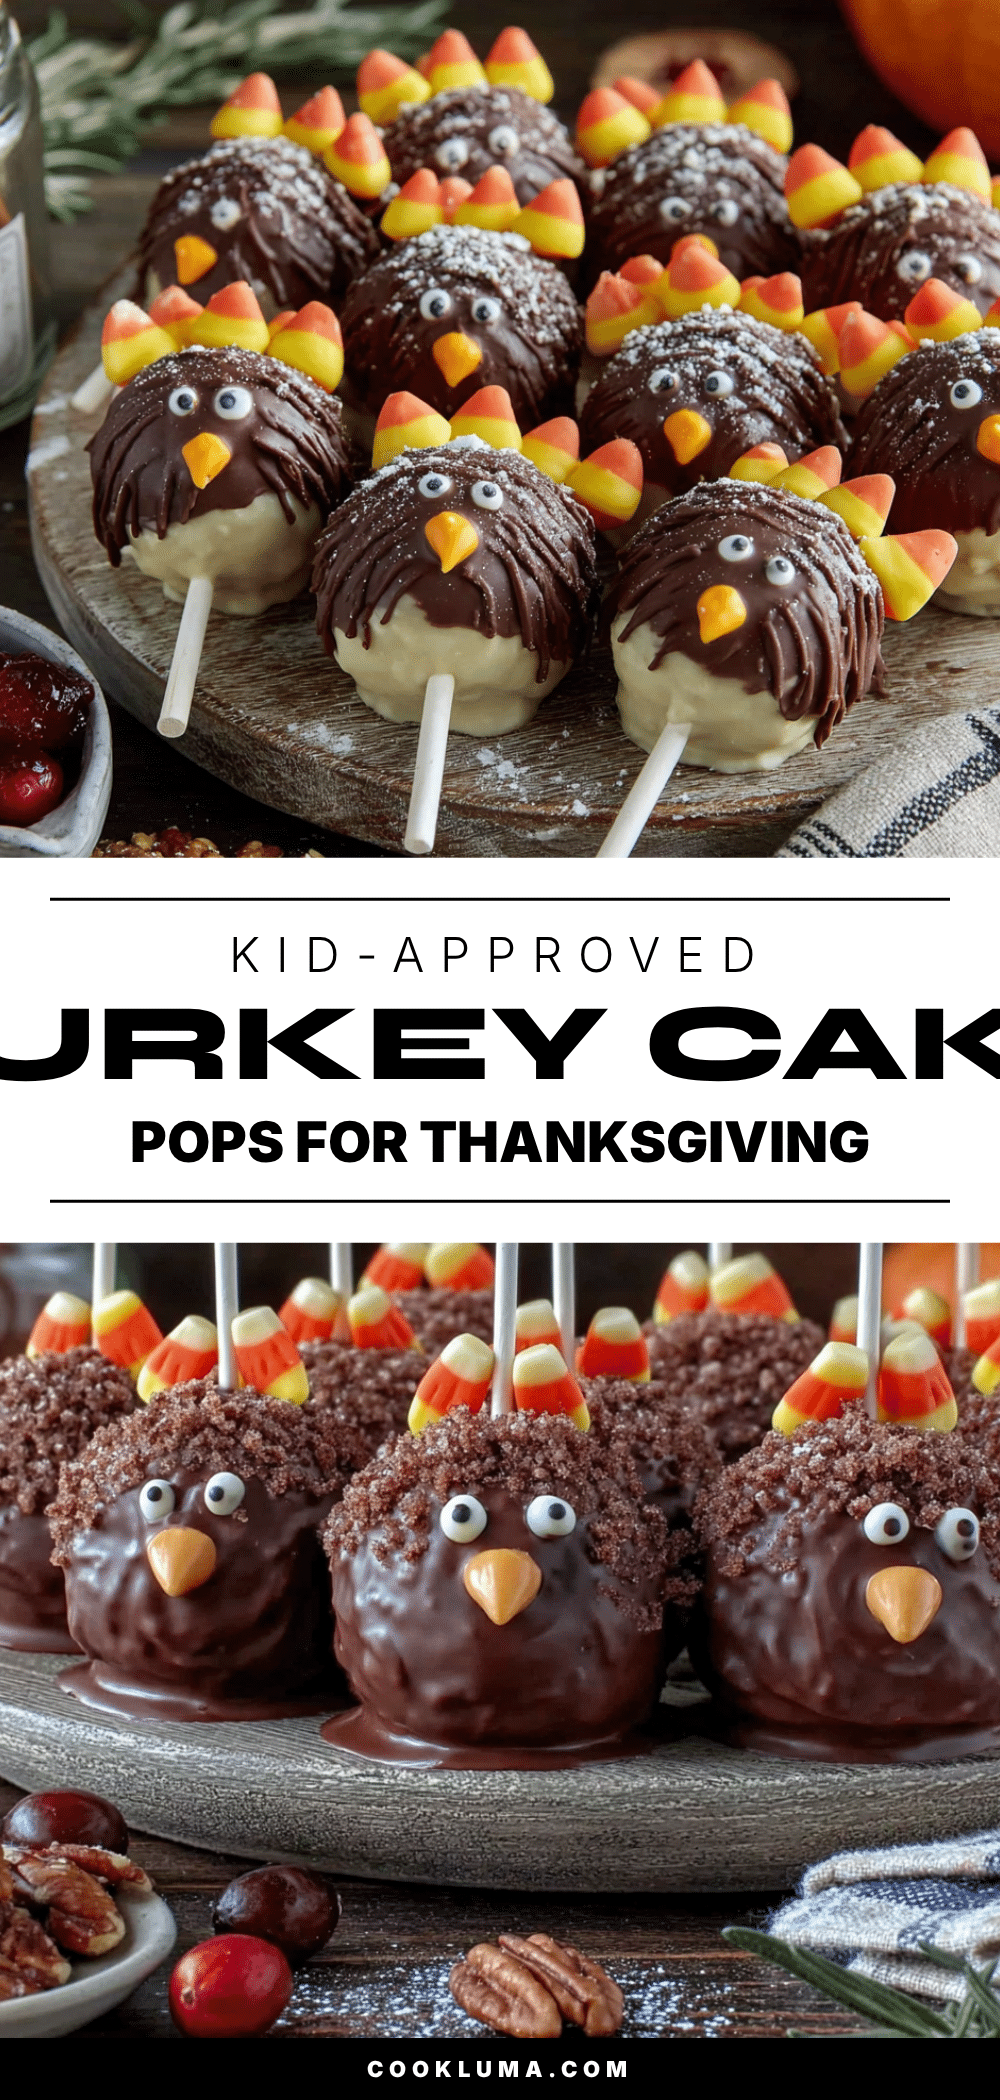
Easy Homemade Turkey Cake Pops Kids Love for Thanksgiving

These adorable turkey cake pops are a family-friendly Thanksgiving treat that kids love to help make and eat. With a simple cake ball base and festive candy corn feathers, they’re perfect for holiday gatherings.
- Prep Time: 30 minutes
- Cook Time: 30 minutes
- Total Time: 1 hour 30 minutes
- Yield: 20-25 servings 1x
- Category: Dessert
- Cuisine: American
Ingredients
- 1 box (15.25 oz) yellow or chocolate cake mix
- Ingredients called for on the cake mix box (eggs, oil, water)
- 1/2 cup prepared chocolate or vanilla frosting
- 1 bag (12 oz) candy melts in orange or brown
- 1 bag (12 oz) candy melts in white
- 1 bag candy corn (about 40–50 pieces)
- Candy eyes (about 40-50 pairs)
- Orange or red candy melts or decorating icing (for wattle)
- Pretzel sticks (about 20-25, broken in half)
- Lollipop sticks (about 20-25, 6-inch size)
- Orange sprinkles or sanding sugar (optional)
- Coconut oil or shortening (1 teaspoon, optional)
- White chocolate chips (optional)
Instructions
- Prepare the cake mix according to package directions and bake in a 9×13-inch pan. Let cool completely.
- Crumble the cooled cake into a large bowl. Add 1/2 cup frosting and mix with your hands until the mixture holds together like Play-Doh.
- Scoop about 2 tablespoons of the mixture and roll into balls. Place on a parchment-lined baking sheet. Freeze for 15-20 minutes.
- While cake balls chill, sort candy corn for feathers, break pretzel sticks in half for legs, and set out candy eyes and other decorations.
- Melt white candy melts in the microwave in 30-second intervals, stirring between each. Add 1 teaspoon coconut oil if needed to thin.
- Dip the tip of a lollipop stick into melted candy, then insert it about halfway into a cake ball. Dip the entire cake ball into the melted candy, tap off excess, and place in a Styrofoam block to dry.
- While coating is still wet, add two candy corn pieces on the back for feathers, two candy eyes on the front, a small piece of orange candy melt for the beak, and a tiny dot of red icing for the wattle. Insert two pretzel stick halves into the bottom for legs.
- Let cake pops dry completely at room temperature for about 30 minutes, or 15 minutes in the fridge, until coating is firm.
Notes
Don’t skip the freezer step—chilling the cake balls prevents them from falling apart. Work in small batches to keep cake balls cold. Use a deep container for dipping to submerge the whole cake ball. Keep candy melts warm to avoid lumps. For best results, use oil-based food coloring if tinting candy melts.
Nutrition
- Serving Size: 1 cake pop
- Calories: 180200
- Sugar: 1822
- Fat: 810
- Carbohydrates: 2530
- Protein: 23
Keywords: turkey cake pops, Thanksgiving dessert, cake pops, easy cake pops, kid-friendly Thanksgiving, turkey treats


