The man at the community garden plot next to mine—I still don’t know his full name, just that everyone calls him “Farmer Pete”—watched me wrestling with a tangle of carrot tops one cool September afternoon. I was trying to pull them without snapping the greens off, making a mess of it honestly. He didn’t say anything for a long minute. Then he just walked over, knelt down, and gently loosened the soil around a fat orange shoulder with his fingers. “Twist, don’t yank,” he said, handing me a perfect carrot. That was it. No lecture. Just a small, kind correction. I ended up with a grocery bag full of misshapen but beautiful carrots, and he told me, almost as an afterthought, “They’re sweetest with a little apple cider and time.”
I went home that night, tired from a long week of work, and stared at that bag of carrots. I had zero energy for a complicated side dish. But the idea of that sweetness—the apple cider, a little heat—stuck with me. So I scrubbed them (didn’t even peel them, I was that tired), sliced them on a bias, and threw them in a pan with some cider, butter, and a few sprigs of thyme I’d also snagged from the garden. The whole thing came together in under twenty minutes. The kitchen smelled like fall, and the carrots were tender, glossy, and just a little bit sticky in the best way. I ate them straight from the pan, standing at the counter. Maybe you’ve been there—a meal that’s more about survival than presentation, but somehow turns out to be exactly what you needed.
That’s the thing about this recipe for Easy Apple Cider Glazed Carrots with Thyme. It wasn’t born in a test kitchen. It came from a tired cook, a generous neighbor, and a bag of dirty carrots. It’s the kind of dish that proves you don’t need a dozen ingredients or a lot of time to make something genuinely memorable. The glaze is thin enough to coat every slice without being cloying, and the thyme adds this earthy, almost peppery note that keeps it from being too sweet. I keep making it because it’s the rare side dish that feels both rustic and special, and it asks almost nothing of you. It’s just a good, honest recipe that lets the main ingredient shine.
Why You’ll Love This Recipe
Let’s be real—weeknight side dishes can be a drag. They’re often an afterthought, a sad pile of steamed vegetables that nobody gets excited about. These glazed carrots are the opposite. They’re the side dish that steals the show, and they do it without any fuss.
- Quick & Easy: From start to finish, this dish is on the table in about 20 minutes. The active prep time is maybe five minutes—just scrub and slice the carrots. The rest is hands-off simmering. It’s perfect for those nights when you’re racing against the clock.
- Simple Ingredients: You probably have everything you need in your kitchen right now. Carrots, apple cider, butter, a little brown sugar, fresh thyme, salt, and pepper. No special trips to the store for exotic spices or hard-to-find items.
- Perfect for a Busy Weeknight: This recipe was designed with the tired, hungry cook in mind. It uses one pan, requires minimal attention, and cleans up in seconds. It pairs beautifully with a simple roasted chicken, a pork chop, or even a hearty grain bowl.
- Crowd-Pleaser: I’ve served these carrots to picky kids and adults who claim they “don’t like cooked carrots.” They always go back for seconds. The glaze is sweet and savory, and the carrots get perfectly tender without turning to mush.
- Unbelievably Delicious: The flavor here is a masterclass in balance. The apple cider reduces into a light syrup that clings to the carrots, while the fresh thyme cuts through the sweetness with an herbal, almost savory note. It’s comfort food that feels a little bit fancy.
What makes this recipe different from the hundreds of other glazed carrot recipes out there? It’s the technique. Most recipes call for boiling the carrots first, which leaches out flavor and leaves them waterlogged. Here, we simmer them directly in the apple cider and butter. The carrots cook in the liquid, absorbing that fruity sweetness, and then the liquid reduces into a beautiful glaze right in the same pan. It’s efficient, it concentrates the flavor, and it means one less pot to wash. This isn’t just another version—it’s the best version for a busy person who still wants to eat well.
This recipe connects on an emotional level because it’s not just about the food. It’s about the feeling of making something good for yourself and the people you care about, even when you’re short on time and energy. It’s the kind of dish that makes you close your eyes after the first bite, not because it’s overly complex, but because it’s simply, perfectly right.
What Ingredients You Will Need
This recipe uses a handful of simple, wholesome ingredients to deliver a surprisingly complex flavor. Everything is designed to be pantry-friendly and easy to find.
- Carrots (1 pound, about 6-8 medium): The star of the show. I recommend using standard orange carrots for their sweetness and consistent texture. Look for carrots that are firm, smooth, and have a vibrant color. You can use baby carrots in a pinch, but they tend to be less sweet and can be a bit watery. For the best texture, scrub the carrots well but don’t bother peeling them—the skin is thin and full of nutrients, plus it saves you time. I like to slice them on a diagonal bias, which gives them a nice, rustic look and a larger surface area for the glaze to cling to.
- Apple Cider (1 cup, 240 ml): This is the heart of the glaze. Use real, unfiltered apple cider for the best flavor. It has a deeper, more complex apple taste than apple juice, which can be too thin and sweet. The natural sugars in the cider caramelize as they reduce, creating a beautiful, glossy finish. If you don’t have apple cider, you can substitute with a good quality apple juice, but you might need to simmer it a little longer to get the same syrupy consistency.
- Unsalted Butter (2 tablespoons, 28 grams): Butter adds richness and helps the glaze become silky and smooth. I use unsalted butter so I can control the salt level. If you only have salted butter, just reduce the added salt by a pinch. For a dairy-free version, you can use a high-quality vegan butter or even a little coconut oil, though the flavor will change slightly.
- Light Brown Sugar (1 tablespoon, 12 grams): Just a touch of brown sugar helps to deepen the caramelization and adds a subtle molasses note that pairs beautifully with the apple cider. You can substitute with maple syrup or honey, but the final glaze will be a bit thinner and have a different flavor profile. I prefer brown sugar for its reliable texture and flavor.
- Fresh Thyme (4-5 sprigs, plus more for garnish): Fresh thyme is non-negotiable here. Its earthy, slightly floral, and peppery notes cut through the sweetness of the glaze and keep the dish from being one-note. Dried thyme won’t give you the same bright, fresh flavor, but in a pinch, you can use about 1/2 teaspoon of dried thyme. I like to add the whole sprigs to the pan and then remove them before serving—it infuses the glaze without leaving little leaves stuck in your teeth.
- Salt and Black Pepper (to taste): A good pinch of flaky sea salt, like Maldon, at the end is wonderful. It provides a little crunch and a burst of salty flavor that contrasts beautifully with the sweet glaze. Freshly cracked black pepper adds a gentle warmth. Don’t skip the pepper—it’s a key component in balancing the dish.
- Optional: A Pinch of Red Pepper Flakes: For a tiny bit of heat, add a pinch of red pepper flakes along with the thyme. It’s not traditional, but I love the little kick it provides. It’s completely optional, so leave it out if you’re sensitive to spice.
Equipment Needed
You don’t need a lot of fancy gear for this recipe, which is part of its charm. Here’s what you’ll need:
- A Large Skillet or Sauté Pan (10-12 inches): A wide pan is key. It gives the carrots room to cook in a single layer and allows the liquid to evaporate quickly, which is essential for a good glaze. A stainless steel or non-stick pan both work well. I prefer a stainless steel pan for this recipe because it helps the sugars caramelize a bit better, but a non-stick pan is perfectly fine and makes cleanup even easier.
- A Sharp Chef’s Knife and Cutting Board: You’ll need a good knife to slice the carrots on the bias. A dull knife is more dangerous than a sharp one, so take a minute to hone your blade. A standard wooden or plastic cutting board will do the job.
- A Vegetable Scrubber (Optional): Since we’re not peeling the carrots, a scrub brush or a clean sponge is helpful for getting the dirt off. I just use the rough side of a clean kitchen sponge.
- Tongs or a Spatula: For turning the carrots as they cook and for serving. Tongs give you a bit more control.
- Measuring Cups and Spoons: For the cider, butter, and brown sugar. I keep a set of dry measuring cups and a liquid measuring cup handy.
That’s it. No food processor, no mandoline, no special gadgets. This is a one-pan, one-knife recipe that’s designed for minimal cleanup. If you don’t have a skillet, you can use a large, wide saucepan, but the cooking time might be slightly longer because the liquid won’t evaporate as quickly.
Preparation Method

Let’s get cooking. This whole process takes about 20 minutes, and most of that is hands-off simmering. I’ll walk you through each step with tips I’ve learned from making this dish dozens of times.
- Prep the Carrots (2 minutes): Start by scrubbing your carrots thoroughly under cold running water. You don’t need to peel them, but make sure you get all the dirt off, especially around the tops. Trim off the green tops and the very tip of the root. Now, slice the carrots on a strong bias (a 45-degree angle) into pieces that are about 1/2-inch thick. Slicing on the bias creates oval-shaped pieces that look more elegant and cook more evenly. Try to make the pieces uniform in size so they all finish cooking at the same time.
- Start the Glaze (1 minute): Place your large skillet over medium-high heat. Add the 2 tablespoons of unsalted butter. Let it melt completely, swirling the pan occasionally. The butter should sizzle gently but not brown. Once it’s melted, add the 1 cup of apple cider and the 1 tablespoon of light brown sugar. Stir everything together with a whisk or a spatula until the sugar has dissolved. The liquid will look thin and cloudy at this point—that’s perfectly fine.
- Add the Carrots and Thyme (1 minute): Carefully add the sliced carrots to the skillet in a single layer. Don’t overcrowd the pan—if your skillet is too small, the carrots will steam instead of braise, and you won’t get a good glaze. Nestle the 4-5 sprigs of fresh thyme in among the carrots. Give everything a gentle stir to coat the carrots in the cider mixture.
- Simmer and Cook (12-15 minutes): Bring the liquid to a gentle boil, then reduce the heat to medium-low so it’s at a steady simmer. You want to see small bubbles breaking the surface, not a violent boil. Cover the skillet with a lid and let the carrots cook for about 8-10 minutes. They will steam and soften in the liquid. After 8 minutes, remove the lid and check the carrots. They should be just tender enough that a fork can pierce them with a little resistance.
- Reduce the Glaze (3-5 minutes): This is the most important step. Remove the lid and increase the heat back to medium-high. Let the liquid boil rapidly, uncovered. As the water evaporates, the cider and sugar will concentrate and start to form a syrupy glaze. Gently stir the carrots occasionally with a spatula or tongs to make sure they cook evenly and don’t stick to the bottom of the pan. You’ll see the liquid transform from a thin broth into a thick, glossy coating that clings to the carrots. This process usually takes about 3-5 minutes. Watch it carefully towards the end—the glaze can go from perfect to burnt very quickly. You’re looking for the liquid to be mostly gone, leaving behind a shiny, sticky coating on the carrots.
- Season and Finish (1 minute): Once the glaze has formed, remove the pan from the heat immediately. Use tongs to remove and discard the thyme sprigs—they’ve given up all their flavor. Season the carrots generously with salt and a few grinds of black pepper. Taste one and adjust the seasoning as needed. The salt is crucial here—it balances the sweetness and makes the carrot flavor pop. If you’re using the optional red pepper flakes, sprinkle them in now and stir to combine.
- Serve Immediately: Transfer the glazed carrots to a serving platter or bowl. Spoon any remaining glaze from the pan over the top. Garnish with a few fresh thyme leaves for a pop of color and a final hit of herbal flavor. Serve hot or warm.
A Note on Timing: If your carrots are very thick, they may need an extra 2-3 minutes of covered cooking. If they’re thin, check them earlier. The goal is a tender but not mushy carrot that still has a little bit of bite. The glaze will continue to thicken slightly as it cools, so don’t worry if it looks a little loose when you first pull the pan off the heat.
Cooking Tips & Techniques
I’ve learned a few things the hard way so you don’t have to. Here are my best tips for perfect glazed carrots every time.
Don’t Overcrowd the Pan. This is the number one mistake I see people make. If you pile too many carrots into the skillet, they will steam and release water, which thins out the glaze and makes the carrots soggy. They need space to braise and then for the liquid to evaporate around them. If you’re doubling the recipe, cook the carrots in two batches or use a very large, wide pan like a rondeau.
Resist the Urge to Stir Too Much. Once you add the carrots and start the simmering process, let them be. Stirring them too often can break them apart and prevent them from cooking evenly. A gentle stir every few minutes is all you need, especially during the final glaze-reduction phase.
Watch the Glaze Like a Hawk. The final reduction happens fast. One minute you have a pan full of liquid, and the next you have a sticky, caramelized coating. If you walk away, you risk burning the sugar, which will give your carrots a bitter, unpleasant flavor. Stay at the stove, keep an eye on it, and pull the pan off the heat as soon as the liquid is mostly gone and the carrots are glossy.
Use Good Salt. Don’t be shy with the salt. The sweetness of the cider and carrots needs that savory counterpoint to taste balanced. I love using a flaky sea salt like Maldon at the very end. It provides a little crunch and a burst of salty flavor that’s just delightful against the soft, sweet carrots.
My Biggest Failure: The first time I made this, I used a non-stick pan that was too small. I had to cram all the carrots in, and they ended up steaming in their own juice for 20 minutes before the liquid even started to reduce. The result was a watery, bland mess. The carrots were mushy, and the “glaze” was just sad, thin broth. I learned that day that the right pan and proper spacing are non-negotiable. Don’t be like me. Use the big pan.
Variations & Adaptations
This recipe is a fantastic base that you can tweak to fit your mood, your pantry, or your dietary needs. Here are some of my favorite ways to change it up.
- Herb Swaps: Not a fan of thyme? No problem. Rosemary is a wonderful substitute. Use one small sprig of fresh rosemary in place of the thyme. It has a more piney, robust flavor that pairs beautifully with apples and carrots. Sage is another excellent option—just use 2-3 leaves, whole, and remove them before serving.
- Spiced Version: For a warming, autumnal twist, add a cinnamon stick and a star anise pod to the pan along with the cider. Let them infuse as the carrots cook, then remove them before serving. The spices add a cozy, holiday-like aroma that’s perfect for a Sunday roast or Thanksgiving dinner.
- Maple-Balsamic Glaze: Swap the brown sugar for 1 tablespoon of pure maple syrup and add 1 tablespoon of balsamic vinegar along with the cider. The vinegar adds a tangy, acidic note that cuts through the sweetness and gives the glaze a beautiful, dark color. This version is particularly good with roasted pork or chicken.
- Make it Vegan: This is an easy swap. Just use a high-quality vegan butter in place of the dairy butter. The rest of the ingredients are already plant-based. The result is just as rich and delicious.
- Add Some Heat: I mentioned this in the ingredients section, but it’s worth repeating. A pinch of red pepper flakes or a small, thinly sliced fresh chili (like a serrano or Fresno) added in the last few minutes of cooking gives the carrots a lovely, subtle kick. The heat pairs surprisingly well with the sweet glaze.
A Personal Variation: Last fall, I had a surplus of fresh ginger, so I grated a 1-inch piece and added it to the pan with the cider. The spicy, zesty ginger flavor was incredible. It added a whole new dimension of warmth and complexity. I’ve been making it that way ever since.
Serving & Storage Suggestions
These carrots are incredibly versatile. Here’s how to serve them and what to do with leftovers (if you have any).
Serving: Serve the carrots hot or warm. They’re best straight from the pan, but they’re also delicious at room temperature, which makes them a great option for potlucks or holiday buffets. Transfer them to a shallow serving bowl and spoon any remaining glaze from the pan over the top. A final sprinkle of fresh thyme leaves and a pinch of flaky sea salt makes for a beautiful presentation.
What to Pair Them With: These carrots are a natural partner for roasted or grilled meats. They’re fantastic alongside a simple roast chicken, pan-seared pork chops, or a juicy steak. They also work beautifully with a hearty grain bowl—try serving them over quinoa or farro with some roasted chickpeas and a dollop of yogurt. For a vegetarian meal, pair them with a lentil loaf or a rich mushroom stroganoff.
Storage: Store any leftover carrots in an airtight container in the refrigerator for up to 4 days. The glaze will thicken and become more sticky as it cools, which is perfectly fine.
Reheating: The best way to reheat these carrots is in a skillet over medium-low heat. Add a splash of water or apple cider to the pan to help loosen the glaze, and stir gently until the carrots are heated through. You can also reheat them in the microwave, but the texture won’t be quite as nice—the carrots can become a little soft. I don’t recommend freezing these carrots, as the texture of the thawed carrots can become watery and mushy.
Flavor Development: These carrots are actually even better the next day. The flavors have time to meld together, and the glaze soaks into the carrots a bit more. They make a fantastic cold snack straight from the fridge, too—I won’t judge you.
Nutritional Information & Benefits
This dish is not only delicious but also surprisingly nutritious. Here’s a quick look at what you’re getting in a serving (about one-quarter of the recipe).
Estimated Nutritional Values (per serving):
- Calories: ~180
- Fat: ~8g
- Saturated Fat: ~5g
- Carbohydrates: ~28g
- Fiber: ~5g
- Sugar: ~18g
- Protein: ~2g
- Sodium: ~300mg (varies based on salt used)
Health Benefits: Carrots are a fantastic source of beta-carotene, which your body converts into vitamin A—essential for good vision, a healthy immune system, and glowing skin. They’re also packed with fiber, which aids digestion and helps you feel full and satisfied. The apple cider provides a small amount of vitamin C and antioxidants. The butter adds a little fat, which actually helps your body absorb the fat-soluble vitamins (like vitamin A) from the carrots. It’s a win-win.
Dietary Considerations: This recipe is naturally gluten-free and nut-free. It can easily be made vegan by substituting the butter. It is not low-carb due to the natural sugars in the carrots and cider, but it is a whole-food, nutrient-dense side dish that fits well into a balanced diet. The main allergen is dairy (from the butter).
My Perspective: I love that this recipe feels like a treat but is secretly good for you. It’s a great way to get more vegetables on the table in a way that everyone actually wants to eat. It’s not about deprivation—it’s about making healthy food taste irresistible.
Conclusion
So there you have it—my go-to recipe for Easy Apple Cider Glazed Carrots with Thyme. It’s a dish that proves you don’t need a lot of time, a long ingredient list, or a ton of culinary skill to make something that feels genuinely special. It’s born from a simple, kind exchange in a community garden, and it’s become a staple in my weeknight dinner rotation.
I love this recipe because it’s forgiving. You can use different herbs, swap in maple syrup, or add a little spice, and it still works. It’s a blueprint for making a humble vegetable shine. It’s the side dish that makes you look forward to the vegetables, and for a busy cook, that’s a huge win. I honestly make them at least once a week when carrots are in season.
Now I’d love to hear from you. Have you tried these carrots? Did you add your own twist? Let me know in the comments below! Share this recipe with a friend who could use a quick, delicious weeknight win, and don’t forget to pin it for later. Happy cooking, and remember—sometimes the best recipes come from a tired cook and a generous neighbor.
Frequently Asked Questions
Can I use baby carrots instead of whole carrots?
Yes, you can use baby carrots in a pinch. Keep in mind that they are usually less sweet and can be a bit more watery than whole carrots. You may need to simmer them a little longer for the glaze to thicken properly. I recommend slicing them in half lengthwise so they have more surface area for the glaze to cling to.
Can I make this recipe ahead of time?
Absolutely. You can make the carrots up to 2 days in advance. Store them in an airtight container in the refrigerator. To reheat, simply warm them in a skillet over medium-low heat with a splash of water or apple cider to refresh the glaze. The flavors actually meld together beautifully overnight.
My glaze is too thin. What did I do wrong?
This usually happens if the pan is too crowded or if you didn’t simmer the liquid long enough during the final reduction step. Make sure your carrots are in a single layer and that you let the liquid boil rapidly, uncovered, until it becomes syrupy. If the glaze is still thin after 5 minutes of boiling, the carrots may have released too much water. You can try transferring the carrots to a plate with a slotted spoon and boiling the remaining liquid on its own until it thickens, then pouring it back over the carrots.
Can I use dried thyme instead of fresh?
Fresh thyme is strongly recommended for this recipe because it has a much brighter, more aromatic flavor. If you only have dried thyme, use about 1/2 teaspoon. Add it along with the cider and brown sugar, as it needs time to rehydrate. The final result won’t be quite as vibrant, but it will still be tasty.
How do I keep the carrots from becoming mushy?
The key is to not overcook them. During the covered simmering phase, check the carrots after 8 minutes. They should be just tender enough that a fork can pierce them with a little resistance. They will continue to cook slightly during the final glaze-reduction step. If you cook them until they are completely soft during the covered phase, they will fall apart when you stir them later. Aim for a tender but firm texture.
Pin This Recipe!
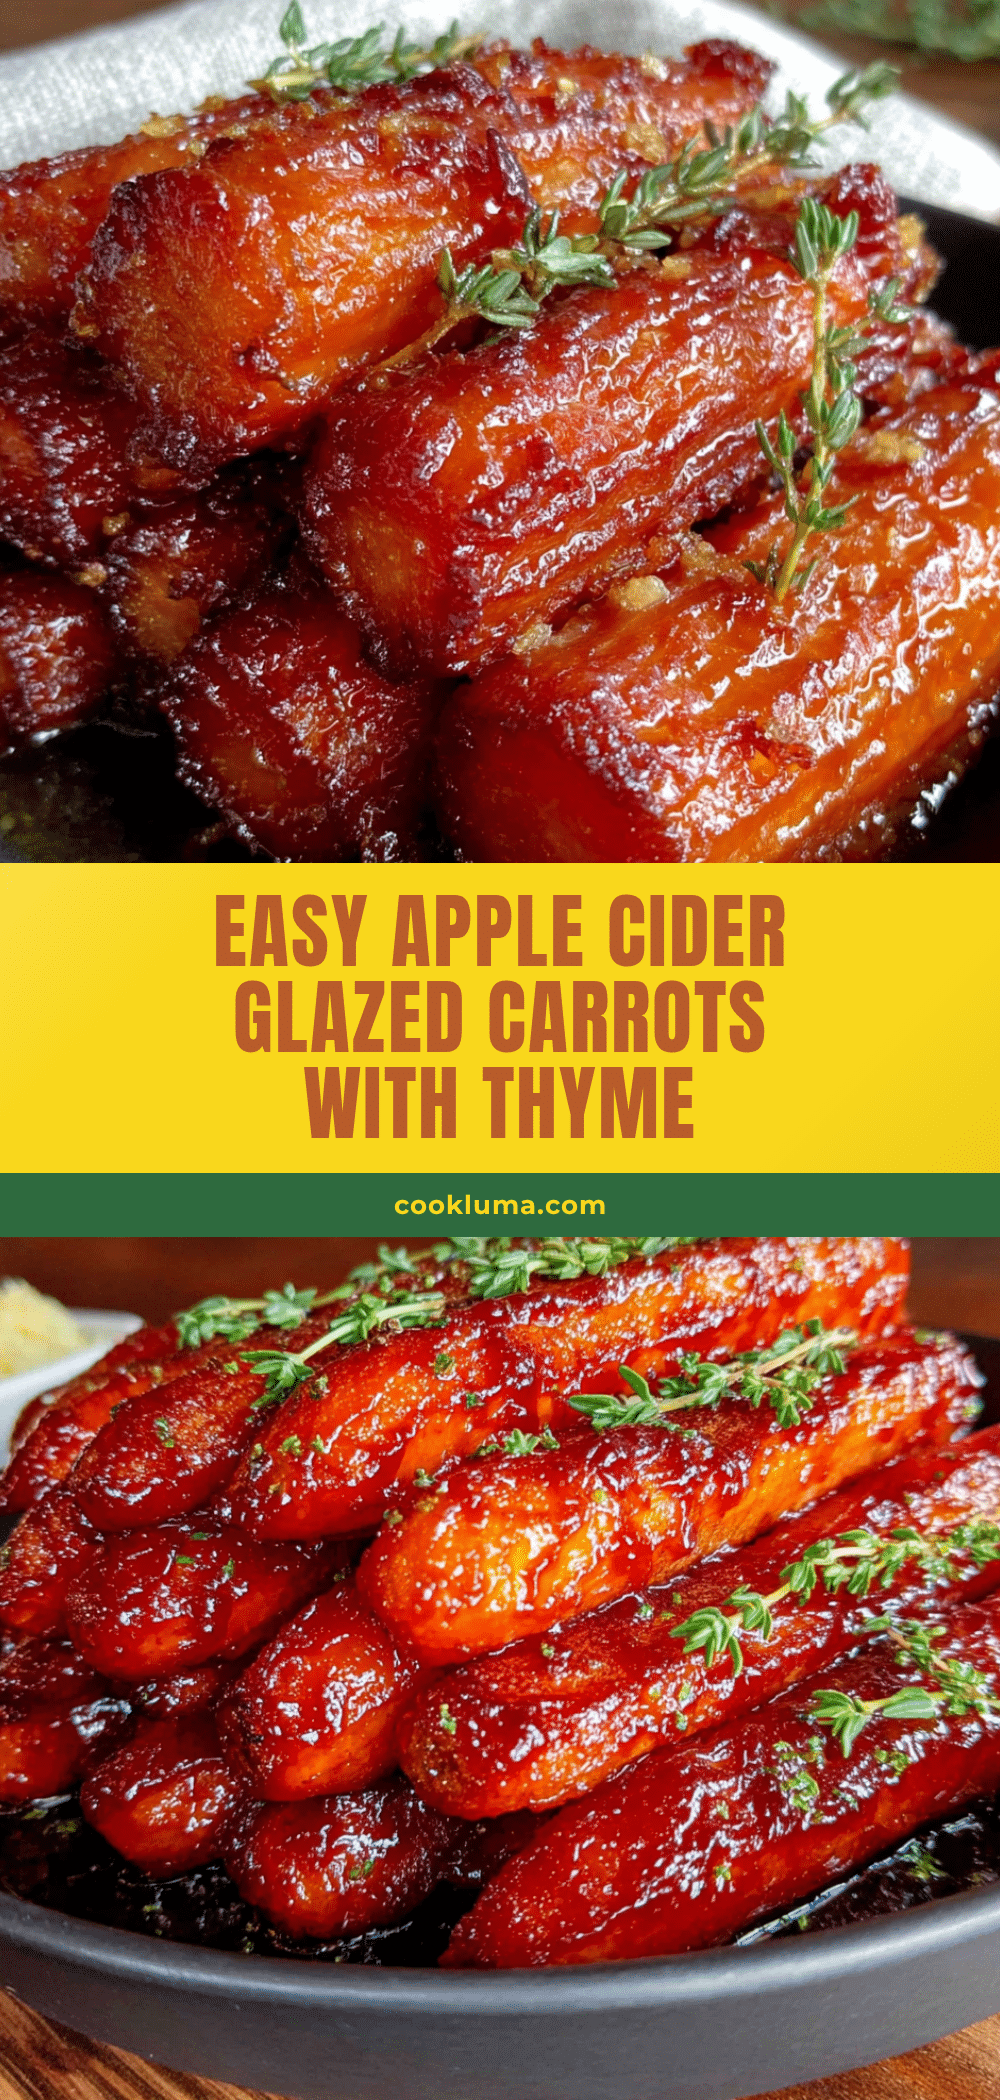
Easy Apple Cider Glazed Carrots with Thyme
Tender carrots are simmered in a sweet and savory apple cider glaze with fresh thyme, creating a quick and delicious side dish that’s perfect for busy weeknights.
- Prep Time: 5 minutes
- Cook Time: 15 minutes
- Total Time: 20 minutes
- Yield: 4 servings 1x
- Category: Side Dish
- Cuisine: American
Ingredients
- 1 pound (about 6–8 medium) carrots, scrubbed and sliced on a bias into 1/2-inch thick pieces
- 1 cup (240 ml) apple cider
- 2 tablespoons (28 grams) unsalted butter
- 1 tablespoon (12 grams) light brown sugar
- 4–5 sprigs fresh thyme, plus more for garnish
- Salt and black pepper to taste
- Optional: a pinch of red pepper flakes
Instructions
- Prep the Carrots: Scrub carrots thoroughly, trim tops and tips, and slice on a strong bias into 1/2-inch thick pieces.
- Start the Glaze: In a large skillet over medium-high heat, melt 2 tablespoons butter. Add 1 cup apple cider and 1 tablespoon brown sugar; stir until sugar dissolves.
- Add Carrots and Thyme: Add sliced carrots in a single layer and nestle thyme sprigs among them. Stir gently to coat.
- Simmer and Cook: Bring to a gentle boil, reduce heat to medium-low, cover, and simmer for 8-10 minutes until carrots are just tender.
- Reduce the Glaze: Remove lid, increase heat to medium-high, and boil rapidly for 3-5 minutes, stirring occasionally, until liquid reduces to a thick, glossy glaze.
- Season and Finish: Remove from heat, discard thyme sprigs, and season with salt and pepper to taste. Add optional red pepper flakes if desired.
- Serve Immediately: Transfer to a serving dish, spoon remaining glaze over top, and garnish with fresh thyme leaves. Serve hot or warm.
Notes
For best results, use a wide pan to avoid overcrowding. Watch the glaze carefully during the final reduction to prevent burning. The carrots are even better the next day as flavors meld.
Nutrition
- Serving Size: 1/4 of recipe
- Calories: 180
- Sugar: 18
- Sodium: 300
- Fat: 8
- Saturated Fat: 5
- Carbohydrates: 28
- Fiber: 5
- Protein: 2
Keywords: glazed carrots, apple cider carrots, easy side dish, fall recipe, quick vegetable side, thyme carrots


