My friend Jenna had refused to serve anything “themed” at her Halloween parties for years. A solid decade, maybe more. She’d roll her eyes at the spiderweb dip presentations and call the jack-o-lantern cheese balls “a little much.” Then last October, I showed up to her place with this veggie tray—honestly, just to have something healthy to snack on while everyone else dove into the candy bowl. I found her standing over the platter about twenty minutes later, a baby carrot bone in one hand, looking caught. “I’m just rearranging it,” she said, with hummus on her chin.
That moment kind of sums up what this tray is all about. It’s not trying to be the centerpiece of your party or some elaborate project that takes over your afternoon. It’s more like the quiet hero of the snack table—the thing you reach for when the sugar rush starts feeling a little much, or when you want something crunchy without committing to another handful of chips. I mean, let’s be real: Halloween food tends to lean heavy on the candy corn and caramel apples. And I love those things as much as the next person. But there’s something about having a platter of fresh veggies shaped into little skulls and bones that just feels right. It’s cozy, it’s clever, and it makes you feel like you’ve got your act together without actually having to do much work.
The first time I made this, I used a cookie cutter I found at a thrift store for fifty cents. It was one of those plastic ones with a crack running through the handle, and honestly? It worked better than any fancy metal cutter I’ve tried since. Maybe you’ve been there—you spend money on the “right” tool and the cheap one ends up being the winner. That’s this recipe in a nutshell. Simple ingredients, a little patience, and suddenly you’ve got a platter that makes people stop and smile. I keep making it because it never fails to surprise people, including myself.
Why You’ll Love This Recipe
Let me tell you why this veggie tray has earned a permanent spot in my Halloween rotation. I’ve tested it at three different parties now, tweaked the veggie combinations, and even let my niece “help” arrange the skulls (which mostly meant she ate the cheese cubes). Here’s what makes it special:
- Quick & Easy: You can put this together in about 20 minutes, plus a little chill time. Perfect for those last-minute Halloween gatherings or when you promised to bring something and totally forgot until the morning of.
- Simple Ingredients: No weird specialty items here. You’re working with standard grocery store veggies, a block of cream cheese, and maybe some olives. I bet you have most of this stuff already.
- Perfect for Parties: This isn’t just a snack—it’s a conversation starter. People love the skull and bone shapes, and it fits right in with the spooky theme without being over the top.
- Crowd-Pleaser: Even the picky eaters at my last party went for the veggies. Something about the shape makes them more fun to eat, I guess. Kids and adults both grab for these.
- Unbelievably Delicious: The cream cheese dip base with the ranch seasoning is honestly addictive. Paired with fresh, crunchy veggies? It’s comfort food that happens to be good for you.
What sets this recipe apart from other veggie trays is the attention to detail. Most Halloween veggie platters just throw some veggies on a plate and call it a day. But this one? It’s got those cute little skull shapes made from bell peppers and cucumber slices. The bone-shaped carrots add that extra touch. And the dip? I’ve perfected the ratio of cream cheese to sour cream so it’s thick enough to hold up to dipping but still creamy and smooth. It’s not just another version—it’s the version that makes you close your eyes after that first bite of cool, herby dip with a crunchy veggie.
This recipe connects to that feeling of wanting something cozy and familiar, even when you’re celebrating something a little spooky. It’s comfort food reimagined for Halloween—healthier, faster, but with the same soul-soothing satisfaction. Perfect for impressing guests without stress, or turning a simple snack into something memorable.
What Ingredients You Will Need
This recipe uses simple, wholesome ingredients to create a spooky spread that’s as fun to look at as it is to eat. Most of these are pantry staples or easy to find at your local grocery store. Here’s what you’ll need:
For the Veggie Tray
- Bell peppers, 2 large (one red, one orange for the skulls—I like the color contrast)
- English cucumber, 1 large (for skull shapes and round slices)
- Baby carrots, 1 bag (these become the “bones”—look for the straightest ones you can find)
- Celery stalks, 4-5 ribs (cut into finger-length pieces)
- Cherry tomatoes, 1 pint (adds pop of color, like little Halloween eyeballs)
- Broccoli florets, 1 cup (tree shapes fit the spooky forest vibe)
- Cauliflower florets, 1 cup (looks like little brains—perfect for Halloween)
- Black olives, 1 can (pitted, for skull eye sockets and decoration)
- Cream cheese, 8 oz block (softened to room temperature—trust me, this matters)
- Sour cream, 1/2 cup (I prefer full-fat for thickness, but light works too)
- Ranch seasoning mix, 1 packet (I like Hidden Valley for consistent flavor)
- Milk, 2-3 tablespoons (to thin the dip to your preferred consistency)
- Fresh chives, 2 tablespoons (chopped fine, for garnish and flavor)
- Skull-shaped cookie cutter, 2-3 inches wide (I found mine at a craft store for $3—any Halloween shape works, but skulls are the most recognizable)
- Small bone-shaped cookie cutter, optional but fun (or just use a paring knife to shape the carrots)
- Sharp chef’s knife, 8-inch (for cutting veggies cleanly—a dull knife will crush bell peppers)
- Cutting board, large (I prefer wood, but plastic works fine)
- Mixing bowl, medium-sized (for the dip)
- Hand mixer or stand mixer (you can mix the dip by hand, but a mixer makes it silky smooth)
- Spatula, rubber (for scraping every last bit of dip out of the bowl)
- Serving platter, large and preferably dark-colored (black or dark gray makes the veggies pop)
- Small serving bowl, for the dip (I use a small black ramekin that looks like a cauldron)
- Paper towels (for drying veggies after washing—wet veggies make the dip watery)
- Make the dip first (5 minutes): In your mixing bowl, combine the softened cream cheese, sour cream, and ranch seasoning packet. Beat with a hand mixer on medium speed until smooth and fluffy, about 2 minutes. Add milk one tablespoon at a time until the dip reaches your desired consistency. I like it thick enough to hold a veggie without dripping, so I usually stop at 2 tablespoons. Stir in the chopped chives. Cover and refrigerate while you prep the veggies.
- Prep the bell pepper skulls (10 minutes): Wash your bell peppers and cut off the tops and bottoms to create flat surfaces. Slice each pepper into 1/2-inch thick rings. Remove the seeds and white membranes from the inside of each ring. Place a ring flat on your cutting board and press the skull cookie cutter firmly through the pepper. You should get 1-2 skulls per ring, depending on the size. Gently push the skull shapes out of the cutter. Set them aside on a paper towel-lined plate. You’ll get about 8-10 skulls from two large peppers. Save the leftover pepper scraps for snacking or another recipe.
- Cut the cucumber skulls and rounds (5 minutes): Slice the cucumber into 1/2-inch thick rounds. Use the skull cutter on half of the rounds to create cucumber skulls. Leave the other half as plain rounds for variety. Pat them dry with paper towels—cucumbers are watery and can make the tray soggy if you don’t.
- Make the carrot bones (5 minutes): If using baby carrots, trim the pointy ends to make them more uniform. For a more bone-like look, use a paring knife to carve small notches at each end of the carrot—this creates the “knobby” ends of a bone. If you have the bone-shaped cutter, you can press it into larger carrot slices. It’s a little fiddly but the result is adorable.
- Prep the remaining veggies (5 minutes): Cut the celery into 3-inch sticks. Rinse the cherry tomatoes and leave them whole. Break the broccoli and cauliflower into bite-sized florets. Drain the olives and pat them dry. Arrange everything on a plate or in containers and refrigerate until you’re ready to assemble.
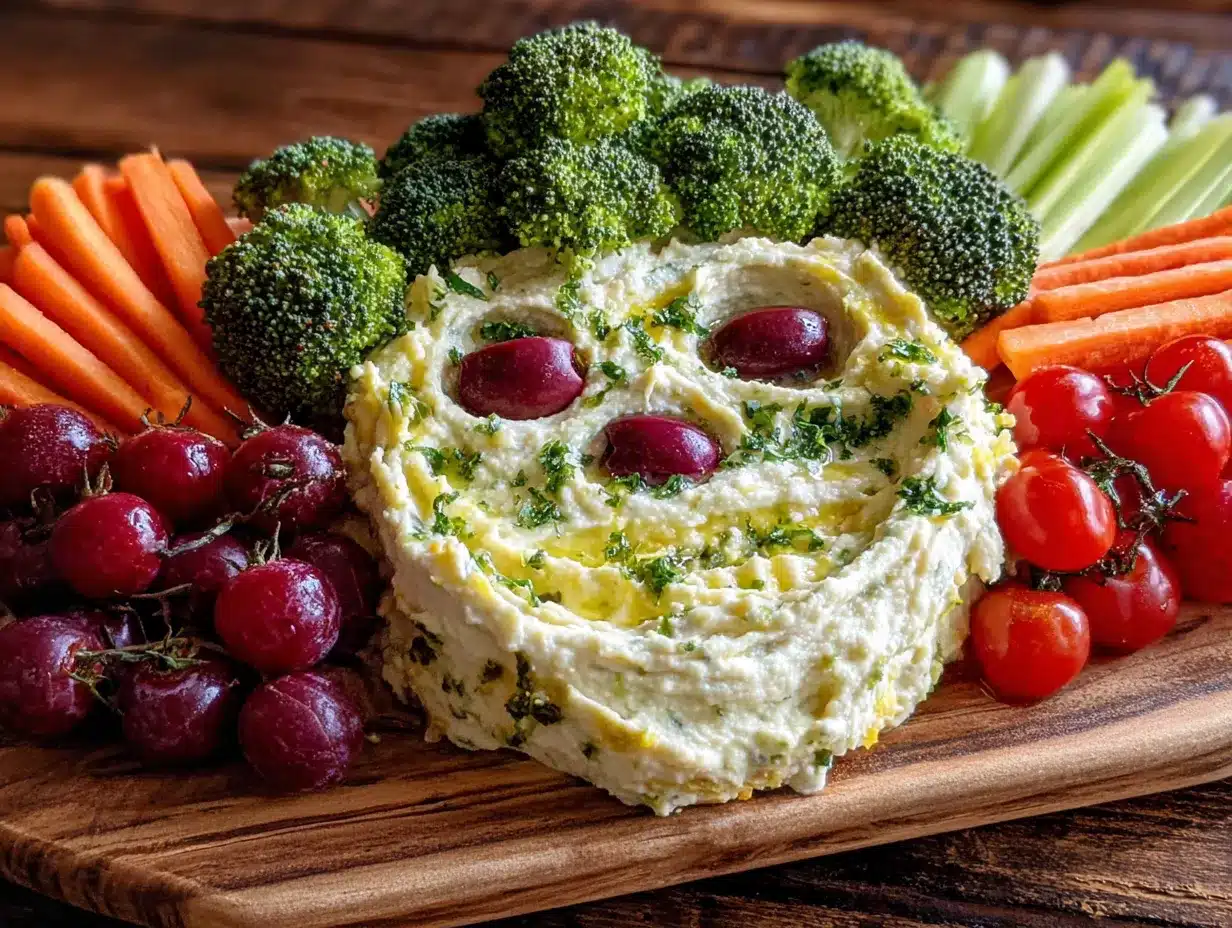
- Assemble the tray (10 minutes): Take your serving platter and place the bowl of dip in the center. This is your anchor. Arrange the bell pepper skulls and cucumber skulls around the dip bowl in a loose circle—like they’re guarding the dip. Place the carrot bones radiating outward from the skulls. Fill in the gaps with celery sticks, cucumber rounds, cherry tomatoes, broccoli, cauliflower, and olives. I like to group similar colors together for visual appeal. Nestle a few olives into the “eye sockets” of the bell pepper skulls for an extra spooky touch.
- Chill before serving (30 minutes minimum): Cover the assembled tray with plastic wrap and refrigerate for at least 30 minutes. This lets the flavors meld and makes the veggies extra crisp and cold. Don’t skip this step—it makes a difference in texture and taste.
- Garnish and serve (2 minutes): Just before serving, sprinkle a few extra chives over the dip and arrange any last-minute adjustments. Serve immediately and watch people’s faces light up when they see the skull shapes.
- Calories: 120-150
- Protein: 3-4 grams
- Fat: 8-10 grams (mostly from the cream cheese dip)
- Carbohydrates: 10-12 grams
- Fiber: 3-4 grams
- Sugar: 4-5 grams (natural sugars from veggies)
- Sodium: 250-300 mg (varies by seasoning mix)
For the Creamy Ranch Dip
Ingredient Tips and Substitutions
For the bell peppers, I recommend getting ones that are firm and have a nice rounded shape—they’re easier to cut into skull shapes. The English cucumber works better than regular cucumbers because it has fewer seeds and a more uniform shape. If you can’t find baby carrots, just cut regular carrots into 3-inch sticks and round the ends slightly with a vegetable peeler to make them look more bone-like.
For the dip, you can swap the sour cream with Greek yogurt if you want a lighter option. I’ve done it before and it works great, though the dip will be a little tangier. Use dairy-free cream cheese and coconut yogurt if you need this to be dairy-free. Just make sure the cream cheese is softened properly or you’ll end up with lumpy dip. Speaking from experience here—I once tried to rush it and ended up with little white chunks everywhere. Not cute.
If you’re not a ranch fan (I know, I know, but some people aren’t), you can use a dry herb blend instead. Mix together dried dill, parsley, garlic powder, onion powder, and a pinch of salt. It’s actually really good and feels a little more homemade. For a completely different flavor profile, try using taco seasoning mix—it gives the dip a southwestern twist that pairs surprisingly well with the veggies.
Equipment Needed
You don’t need much fancy equipment for this recipe, which is part of why I love it. Here’s what you’ll need:
If you don’t have a skull cookie cutter, don’t worry. You can freehand the shapes with a paring knife. I actually did that for my first few attempts before I found the cutter at the thrift store. It takes a little more time, but the imperfect skulls have their own charm. If you’re using a metal cookie cutter, dip it in flour or oil before cutting to prevent sticking. Plastic ones usually don’t stick as much.
Preparation Method
Alright, let’s get into the actual making of this thing. I’ve broken it down step by step so you don’t miss anything. Take your time with the skull shapes—they’re the star of the show.
Sensory cues at each stage: When you cut the bell peppers, you should hear a clean snap—that means they’re fresh. The dip should be thick enough that it holds its shape when you stop mixing. The cucumber skulls should feel cool and slightly damp to the touch. When you arrange the tray, step back and look at it—the contrast of the bright veggies against a dark platter is visually striking.
Cooking Tips & Techniques
I’ve made this tray enough times to learn a few things the hard way. Let me save you some trouble.
First, the cookie cutter trick: If your bell pepper skulls are sticking to the cutter, dip the cutter in a little vegetable oil before each press. This works like a charm. I learned this after my first attempt where half the skulls tore apart because they stuck to the plastic. Also, make sure your bell peppers are at room temperature—cold peppers are more brittle and prone to cracking.
Don’t overthink the shapes: Your skulls don’t need to be perfect. In fact, the imperfect ones look more authentic and spooky. One of my skulls came out with a lopsided eye socket and it honestly looked cooler than the symmetrical ones. Embrace the wonkiness.
Timing is everything: You can prep the veggies and dip up to 24 hours in advance, but don’t assemble the tray until a few hours before serving. The veggies start to release moisture and the dip can get watery if it sits too long. I learned this the hard way when I assembled it the night before a party and woke up to a soggy mess. Now I prep everything separately and assemble right before guests arrive.
Multitasking strategy: While the cream cheese is softening on the counter (takes about 30 minutes), wash and prep all your veggies. By the time the cream cheese is ready, you’ll have everything else done. Then make the dip while the veggies chill in the fridge. This flow saves time and keeps things organized.
Consistency tip: If your dip is too thick after refrigerating, let it sit at room temperature for 10 minutes before serving. Stir it well and add a splash of milk if needed. If it’s too thin, add a little more cream cheese. The texture should be like a thick, spreadable frosting—not runny, not stiff.
Variations & Adaptations
One of the best things about this recipe is how flexible it is. Here are some variations I’ve tried and loved:
The Spicy Southwest Version: Swap the ranch seasoning for taco seasoning and add a can of drained black beans and corn to the veggie lineup. Use jalapeño slices for the skull eye sockets instead of olives. The dip gets a smoky, spicy kick that’s perfect for adults. I made this version for a friend’s Halloween party and it disappeared faster than the candy bowl.
The All-Orange Halloween Theme: Use only orange bell peppers, orange cherry tomatoes (look for Sun Gold variety), and carrot bones. Add orange cauliflower if you can find it. The dip gets a pumpkin spice twist—mix in 2 tablespoons pumpkin puree and a pinch of cinnamon with the cream cheese base. This version feels extra festive and seasonal.
The Low-Carb/Keto Adaptation: Skip the carrots and use more cucumber, celery, and bell peppers. Add some radish slices cut into skull shapes (they’re naturally skull-sized!). The dip can be made with full-fat cream cheese and sour cream, which fits perfectly into a keto diet. I’ve done this for a low-carb friend and she said it was the best party snack she’d had in months.
The Kid-Friendly Version: Use milder veggies like sweet mini peppers, snap peas, and grape tomatoes. Let the kids help cut the shapes with the cookie cutters (with supervision, of course). Add a small bowl of ranch dressing on the side for dipping. My niece loves arranging the “bones” on the tray herself—it keeps her occupied while the adults set up the rest of the party.
Dietary Modifications: For a vegan version, use dairy-free cream cheese and coconut yogurt for the dip. Most ranch seasoning packets are accidentally vegan, but double-check the label. For gluten-free, this recipe is naturally gluten-free as long as your seasoning mix doesn’t contain wheat starch. Always check labels if you’re serving someone with celiac.
Serving & Storage Suggestions
This veggie tray is best served cold, straight from the fridge. The contrast between the cool, creamy dip and the crisp veggies is what makes it so satisfying. I like to serve it on a dark platter or a wooden board—the colors of the veggies really pop against a dark background. If you’re feeling extra festive, arrange some fake spiderwebs around the edges of the platter or scatter a few plastic spiders among the veggies.
What to serve alongside: This tray pairs beautifully with other Halloween snacks. Try it next to a bowl of popcorn tossed with nutritional yeast and smoked paprika (it looks like autumn leaves). It also goes well with warm pretzel bites and cheese sauce. For drinks, a crisp apple cider or a dark beer complements the fresh veggies nicely. If you’re doing cocktails, a bloody mary with a celery stick garnish fits the spooky theme perfectly.
Storage instructions: Leftover veggies can be stored in an airtight container in the refrigerator for up to 3 days. The dip keeps for about 5 days in a sealed container. Don’t store assembled leftovers—separate the veggies from the dip or they’ll get soggy. I usually pack the leftover skull shapes separately because they’re the most fun to snack on the next day.
Reheating (if needed): This is a cold dish, so no reheating required! But if your dip has been sitting out for a while and has softened, just pop it back in the fridge for 20 minutes to firm up. The flavors actually get better after a day in the fridge—the herbs meld together and the dip becomes more flavorful.
Flavor development note: The dip is actually better if you make it a day ahead. The ranch seasoning has time to fully hydrate and the flavors become more rounded. Just give it a good stir before serving. The veggies, however, are best enjoyed within 24 hours of cutting. After that, they start to lose their crunch.
Nutritional Information & Benefits
This veggie tray is one of those rare party snacks that’s actually good for you. Here’s the approximate nutritional breakdown per serving (about 1 cup of veggies with 2 tablespoons of dip):
Health benefits of key ingredients: Bell peppers are packed with vitamin C—more than an orange, actually. One red bell pepper provides over 150% of your daily vitamin C needs. Carrots are rich in beta-carotene, which supports eye health and immune function. Cucumbers are hydrating and contain antioxidants. The cream cheese dip provides calcium and protein, though it’s also the source of most of the fat and calories. If you swap in Greek yogurt, you’ll boost the protein content significantly.
Dietary considerations: This recipe is naturally gluten-free and can be made vegetarian, vegan, or dairy-free with simple substitutions. It’s low in sugar and contains no artificial colors or preservatives if you make the dip from scratch. The main allergens are dairy (cream cheese, sour cream) and possibly sulfites if you use pre-packaged ranch seasoning. Always check labels if serving guests with allergies.
Personal wellness perspective: I love that this recipe lets me enjoy Halloween parties without completely abandoning my healthy eating habits. It’s the kind of snack that fills you up with good stuff, so you’re less tempted to overdo it on the candy later. Plus, the act of arranging the skull shapes is oddly meditative—it’s a nice way to unwind before the party chaos begins.
Conclusion
This Cozy Skull & Bones Halloween Veggie Tray has become my go-to for every fall gathering, and I think it deserves a spot in your recipe collection too. It’s proof that Halloween food doesn’t have to be all sugar and artificial coloring. Sometimes the most satisfying snacks are the ones that make you feel good while still fitting the spooky theme.
I’d love for you to try this and make it your own. Maybe you’ll add different veggies, or experiment with a flavored dip. Maybe you’ll find a way to make the skull shapes even cuter than mine. That’s the beauty of this recipe—it’s a template, not a rulebook. Start with the basics and then let your creativity run wild.
If you make this for your next Halloween party, I’d love to hear how it went. Drop a comment below and let me know which veggies were the biggest hit, or share a photo of your tray. Tag me on social media if you’re feeling brave—I always love seeing your spooky creations. Until next time, happy snacking, and may your veggies always be crisp and your dip always be creamy!
Frequently Asked Questions
Can I use a different shape cookie cutter?
Absolutely! Ghosts, bats, pumpkins—any Halloween shape works. Just make sure your veggies are thick enough to accommodate the cutter. Bell peppers and cucumbers work best because they’re firm but not too hard.
How far in advance can I make this?
You can prep the veggies and dip up to 24 hours ahead, but don’t assemble the tray until 2-3 hours before serving. The veggies start to release moisture and the dip can get watery if it sits too long after assembly.
Can I make this without a cookie cutter?
Yes! Use a paring knife to freehand the skull shapes. It takes a little more time and patience, but the imperfect results have their own charm. You can also just arrange the veggies in a skull shape on the platter without cutting individual shapes.
What if I don’t like ranch dressing?
No problem! Use a dry herb blend instead (dill, parsley, garlic powder, onion powder) or try taco seasoning for a southwestern twist. You can also simply season the cream cheese with salt, pepper, and fresh herbs.
How do I keep the veggies from getting soggy?
Pat all veggies dry with paper towels after washing. Don’t assemble the tray too far in advance—within 2-3 hours of serving is ideal. If you’re prepping ahead, store the cut veggies in a container lined with paper towels to absorb excess moisture.
Pin This Recipe!
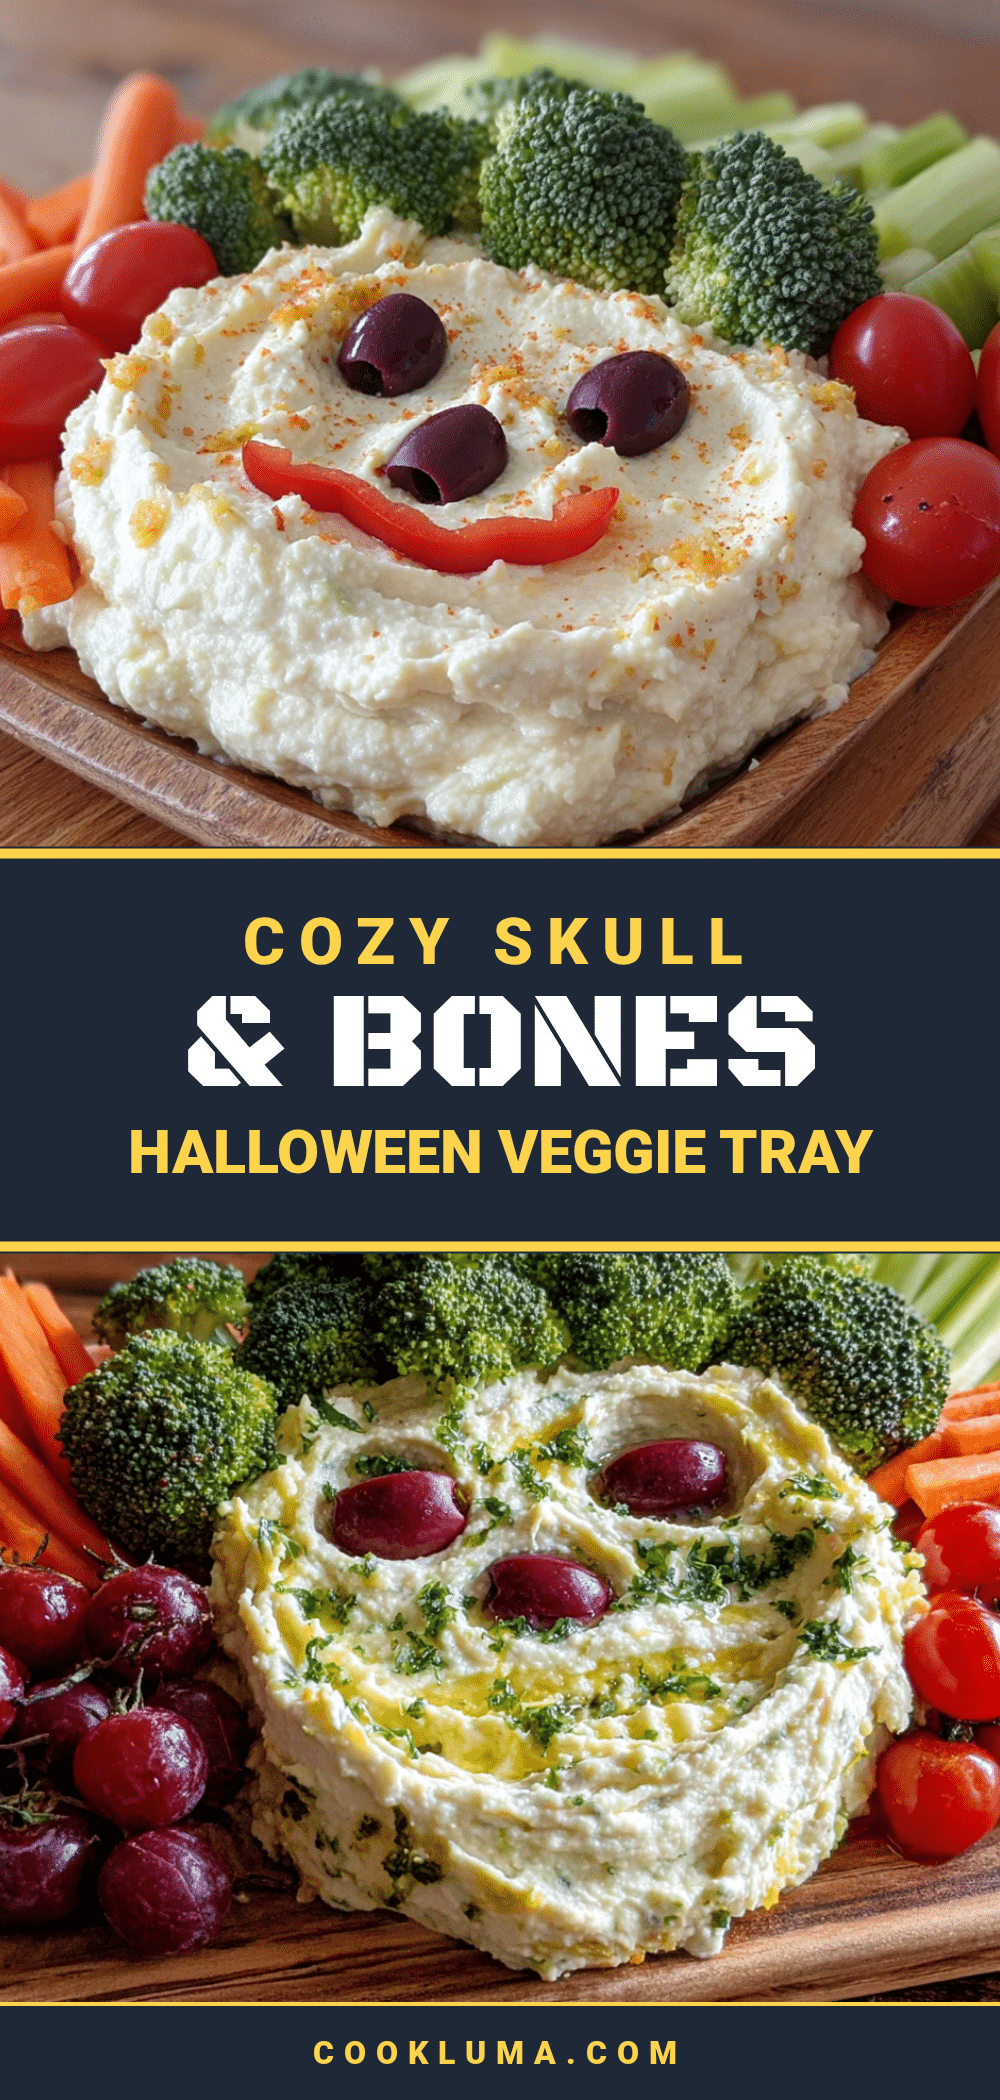
Cozy Skull & Bones Halloween Veggie Tray: Easy & Spooky Snack
A fun and healthy Halloween snack featuring veggie skulls and bones with a creamy ranch dip. Quick to assemble and perfect for parties.
- Prep Time: 20 minutes
- Cook Time: 0 minutes
- Total Time: 50 minutes (includes 30 minutes chilling)
- Yield: 8 servings 1x
- Category: Appetizer
- Cuisine: American
Ingredients
- 2 large bell peppers (one red, one orange)
- 1 large English cucumber
- 1 bag baby carrots
- 4–5 celery stalks
- 1 pint cherry tomatoes
- 1 cup broccoli florets
- 1 cup cauliflower florets
- 1 can black olives (pitted)
- 8 oz cream cheese (softened)
- 1/2 cup sour cream
- 1 packet ranch seasoning mix
- 2–3 tablespoons milk
- 2 tablespoons fresh chives (chopped)
Instructions
- Make the dip: In a mixing bowl, combine softened cream cheese, sour cream, and ranch seasoning. Beat with a hand mixer until smooth. Add milk one tablespoon at a time until desired consistency. Stir in chives. Cover and refrigerate.
- Prep bell pepper skulls: Wash peppers, cut off tops and bottoms, slice into 1/2-inch rings. Remove seeds and membranes. Press skull cookie cutter through rings to create skull shapes. Set aside.
- Cut cucumber skulls and rounds: Slice cucumber into 1/2-inch rounds. Use skull cutter on half the rounds. Pat dry.
- Make carrot bones: Trim pointy ends of baby carrots. Use a paring knife to carve small notches at each end to resemble bones.
- Prep remaining veggies: Cut celery into 3-inch sticks. Rinse cherry tomatoes. Break broccoli and cauliflower into bite-sized florets. Drain olives and pat dry.
- Assemble tray: Place dip bowl in center of platter. Arrange bell pepper and cucumber skulls around dip. Place carrot bones radiating outward. Fill gaps with celery, cucumber rounds, tomatoes, broccoli, cauliflower, and olives. Nestle olives into skull eye sockets.
- Chill: Cover and refrigerate for at least 30 minutes.
- Garnish and serve: Sprinkle extra chives over dip just before serving.
Notes
You can prep veggies and dip up to 24 hours ahead, but assemble tray only 2-3 hours before serving to prevent sogginess. If dip is too thick after chilling, let sit at room temperature for 10 minutes and stir. For vegan version, use dairy-free cream cheese and coconut yogurt.
Nutrition
- Serving Size: 1 cup veggies with 2
- Calories: 135
- Sugar: 4
- Sodium: 275
- Fat: 9
- Saturated Fat: 5
- Carbohydrates: 11
- Fiber: 3
- Protein: 3
Keywords: Halloween, veggie tray, skull, bones, spooky snack, healthy, party appetizer, ranch dip


