This was supposed to be a batch of pumpkin muffins. I had the flour measured, the cinnamon ready, and this beautiful sugar pumpkin sitting on my counter that I’d been eyeing all week. But somewhere between scooping out the seeds and dropping my phone into the mixing bowl—honestly, it was one of those days—I looked at that pile of stringy, slimy seeds and thought, “Well, I can’t just throw these away.” So I rinsed them, tossed them in oil, and threw them in the oven while I figured out what to do about the muffin situation. What came out was nothing like the plan—and better.
The kitchen smelled like fall had exploded in the best possible way. Warm, toasty, with that nutty aroma that makes you want to curl up under a blanket. I grabbed one straight from the baking sheet—burned my fingers, of course—and honestly, I almost cried. Not from the burn, but from how ridiculously good they were. Crunchy, salty, with that deep roasted flavor that store-bought seeds just can’t touch. My neighbor Karen knocked on my door twenty minutes later asking what I was baking. I handed her a bowl and she didn’t say a word for a full minute. Just crunched.
Maybe you’ve been there—standing over a pumpkin, wondering what to do with all those seeds. Or maybe you’ve never bothered because you thought they were too much work. Let me tell you, these cozy oven-roasted pumpkin seeds with sea salt are the easiest thing you’ll make all season, and they’ll ruin you for the bagged kind forever. I keep making them because they’re that perfect snack you didn’t know you needed—salty, satisfying, and somehow better than what I was originally trying to bake.
Why You’ll Love This Recipe
Let’s be real for a second. Pumpkin seeds are one of those things people either love or completely ignore. But these cozy oven-roasted pumpkin seeds with sea salt? They’re the kind of snack that makes you question every other seed you’ve ever eaten. Here’s why this version is different:
- So Simple, It’s Almost Embarrassing : You need exactly three main ingredients—pumpkin seeds, oil, and salt. That’s it. No fancy techniques, no complicated steps. If you can rinse and toss, you can make these.
- Perfect for Fall Gatherings : Whether it’s a Halloween party, Thanksgiving appetizer, or just a cozy night in with a movie, these seeds fit right in. They’re the snack everyone reaches for without thinking.
- Way Better Than Store-Bought : I’m not being dramatic here. The texture is crunchier, the flavor is deeper, and you control exactly how much salt goes on. Plus, they’re warm from the oven—that alone makes them better.
- Naturally Good for You : Pumpkin seeds are packed with magnesium, zinc, and healthy fats. So you can eat a handful (or three) and feel pretty good about it.
- Budget-Friendly Snacking : Instead of buying expensive pre-roasted seeds, you’re using something you’d normally toss in the compost. That’s basically free snack math.
What makes these different from every other roasted seed recipe out there is the method. I’ve tested this a dozen times—different temperatures, different drying methods, different oil amounts. And this version hits that perfect balance: crunchy all the way through, never burnt, with just the right amount of salt that clings to every seed. It’s not just another roasted seed recipe. It’s the one I keep coming back to, and the one my friends now request by name.
There’s something about that first bite—warm, salty, with that satisfying crunch—that just feels like comfort. Like the kind of snack you didn’t know you were missing until it was right there in your hand.
What Ingredients You Will Need
This recipe keeps things refreshingly simple. You don’t need a long grocery list or special ingredients. In fact, you probably already have everything except the pumpkin itself. Here’s what you’ll need:
For the Seeds
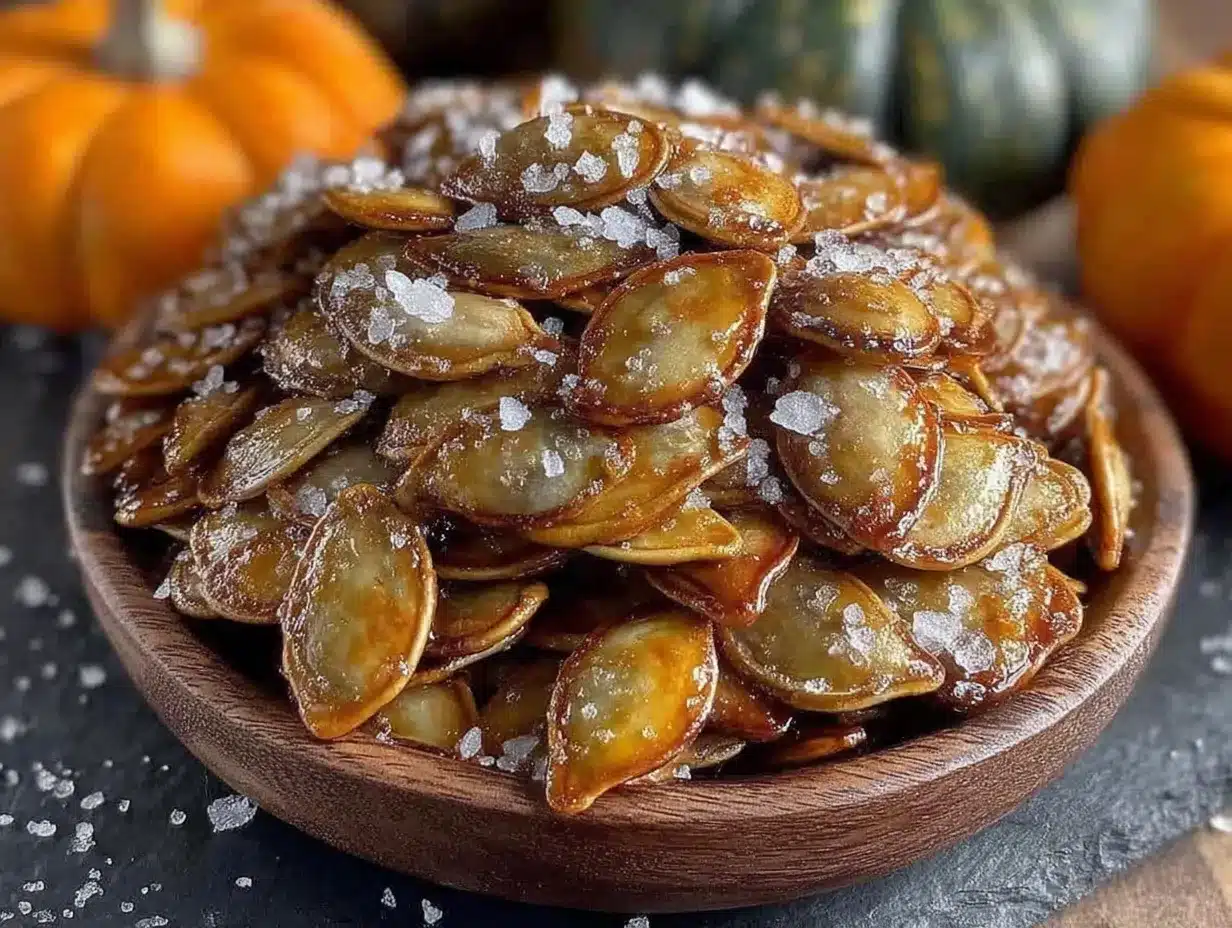
- Fresh pumpkin seeds – About 1 ½ cups, scooped straight from a medium pumpkin (sugar pumpkins work great, but any carving pumpkin will do). You want the seeds to be fresh, not dried or pre-roasted.
- Olive oil or melted butter – 1 ½ tablespoons. Olive oil gives a lighter, more neutral flavor, while butter adds richness. I’ve used both, and honestly? Butter wins for flavor, but oil wins for ease. (Use coconut oil if you want a subtle sweetness.)
- Flaky sea salt – 1 teaspoon, plus more for finishing. Maldon is my go-to, but any coarse sea salt works. Avoid fine table salt—it dissolves too quickly and doesn’t give that satisfying crunch.
Optional Add-Ins (Because Why Stop at Salt?)
- Garlic powder – ½ teaspoon, for savory lovers. I add this when I’m craving something more robust.
- Smoked paprika – ½ teaspoon, for a subtle warmth that’s perfect for fall.
- Cayenne pepper – ¼ teaspoon, if you like a little heat. Start small—you can always add more.
- Fresh rosemary – 1 teaspoon, finely chopped. This pairs beautifully with the nuttiness of the seeds.
A quick note on pumpkin selection: Sugar pumpkins (also called pie pumpkins) tend to have more seeds and they’re slightly smaller and more tender. But honestly, I’ve used seeds from carving pumpkins plenty of times, and they work just fine. The key is making sure the seeds are clean and dry before they hit the oven. Wet seeds steam instead of roast, and nobody wants soggy seeds.
I also recommend using a high-quality sea salt here. It’s one of the main flavors, so you want it to be good. I’ve tried this with cheap table salt, and it just doesn’t hit the same. The flaky stuff makes a real difference—it sticks to the seeds better and gives that little burst of saltiness with every bite.
Equipment Needed
You don’t need much for this recipe, which is part of the beauty. Here’s what you’ll want to have on hand:
- Baking sheet – A rimmed baking sheet works best to keep the seeds from rolling off. I use a half-sheet pan (about 13×18 inches).
- Parchment paper or silicone baking mat – Not strictly necessary, but it makes cleanup so much easier. Plus, it prevents sticking without adding extra oil.
- Large bowl – For tossing the seeds with oil and seasonings. Any mixing bowl will do.
- Colander – For rinsing the seeds. A fine-mesh strainer works even better.
- Paper towels or clean kitchen towel – For drying the seeds. This step matters more than you think.
- Spatula or wooden spoon – For stirring the seeds halfway through roasting.
- Measuring spoons – For getting the oil and salt amounts right. Eyeballing works, but measuring gives consistent results.
If you don’t have parchment paper, you can grease the baking sheet lightly with oil. And if you don’t have a colander, a regular strainer works fine. Honestly, I’ve made these with nothing more than a baking sheet and my hands. The equipment is flexible—don’t let a missing tool stop you.
Preparation Method
Alright, let’s get to the good part. Making these cozy oven-roasted pumpkin seeds with sea salt is almost too easy, but I’ll walk you through every step so you get perfect results every time.
- Scoop and separate the seeds – Cut your pumpkin open and scoop out the seeds and stringy pulp into a bowl. Don’t worry about getting every bit of pulp off right now—you’ll clean them in the next step. Just get the big clumps out. (I use my hands for this. It’s messy, but honestly, that’s half the fun.)
- Rinse the seeds – Place the seeds in a colander and rinse them under cool running water. Use your fingers to rub off the larger pieces of pumpkin flesh. Some small bits of stringy pulp will cling to the seeds—that’s okay. A little bit adds flavor. What you don’t want is big chunks of pumpkin that will burn in the oven. Rinse until the water runs mostly clear.
- Dry the seeds thoroughly – This is the most important step, and I can’t stress it enough. Spread the rinsed seeds on a clean kitchen towel or several layers of paper towels. Pat them dry, then let them sit for 10-15 minutes. You want them to feel dry to the touch, not wet and slippery. Wet seeds steam instead of roast, and you’ll end up with chewy, sad seeds. I learned this the hard way after my first batch came out more like boiled pumpkin seeds. Not good.
- Preheat your oven – Set your oven to 325°F (163°C). This lower temperature is key—it roasts the seeds slowly and evenly without burning the outsides before the insides are done. I’ve tried 350°F and even 375°F, and the seeds always came out uneven. 325°F is the sweet spot.
- Season the seeds – In a medium bowl, combine the dried seeds with the olive oil (or melted butter) and sea salt. Toss well with a spatula or your hands until every seed is coated. If you’re adding any optional seasonings like garlic powder or paprika, add them now. Taste one seed—it should taste pleasantly salty. If it doesn’t, add a pinch more salt.
- Spread on baking sheet – Line your baking sheet with parchment paper or a silicone mat. Spread the seasoned seeds in a single, even layer. Don’t pile them up—you want each seed to have room to roast. If they’re crowded, they’ll steam instead of crisp up.
- Roast for 20-25 minutes – Place the baking sheet on the middle rack of your oven. Roast for 10 minutes, then pull the sheet out and give the seeds a good stir with a spatula. This ensures even browning. Return to the oven and roast for another 10-15 minutes. Start checking at the 20-minute mark. The seeds are done when they’re golden brown and smell wonderfully toasty. They’ll continue to crisp up as they cool, so don’t wait until they look completely done in the oven.
- Cool completely – Remove the baking sheet from the oven and let the seeds cool right on the sheet. Don’t touch them yet—they’re hot and they need time to finish crisping. Let them sit for at least 15-20 minutes. I know it’s tempting to grab a handful immediately, but trust me, the wait is worth it.
- Add a final sprinkle of salt – Once the seeds are cool, give them one last light sprinkle of flaky sea salt. This final touch adds that fresh, crunchy saltiness that makes these seeds irresistible.
- Enjoy – Grab a handful and try not to eat the entire batch in one sitting. Good luck with that.
Cooking Tips & Techniques
After making these seeds more times than I can count, I’ve picked up a few tricks that make a real difference. Here’s what I’ve learned:
Don’t skip the drying step. I know it feels like an extra, unnecessary step. But moisture is the enemy of crispy seeds. If your seeds are even slightly damp when they go into the oven, they’ll steam instead of roast. I once rushed through this step because I was hungry, and the seeds came out chewy and sad. Patience pays off here.
Watch the oven like a hawk during the last 5 minutes. Seeds can go from perfectly golden to burnt in what feels like seconds. The difference between 22 minutes and 25 minutes can be dramatic. I’ve definitely had a batch where I walked away for “just a minute” and came back to a smoky kitchen. Set a timer and check early.
Use a rimmed baking sheet. I learned this one the hard way. Flat baking sheets let seeds roll right off when you stir them. A rimmed sheet keeps everything contained and makes stirring much easier.
Let them cool completely before storing. If you pack warm seeds into a container, the trapped steam will make them soft. I’ve made this mistake more than once—thinking I was being efficient by storing them right away, only to find limp seeds the next day. Patience, my friend.
Double the batch if you’re making them for a crowd. These seeds disappear fast. I made a single batch for a small gathering once, and they were gone in ten minutes. Now I always make at least two batches if I’m serving them at a party. Trust me on this.
Variations & Adaptations
One of the best things about this recipe is how easy it is to change up. Here are some of my favorite variations:
Spicy Chili Lime Seeds – Add ½ teaspoon chili powder, ½ teaspoon lime zest, and a pinch of cayenne pepper along with the salt. The lime adds a bright, fresh note that cuts through the richness. I made these for a taco night once, and they were gone before the main course even hit the table.
Sweet Cinnamon Sugar Seeds – Swap the salt for 1 tablespoon brown sugar and 1 teaspoon cinnamon. Skip the garlic and savory spices. These are dangerously good—like a healthier version of those cinnamon-sugar nuts you find at holiday markets. Just be careful not to burn them; the sugar can caramelize quickly.
Everything Bagel Seeds – After tossing with oil and salt, sprinkle with 1 tablespoon of everything bagel seasoning (poppy seeds, sesame seeds, garlic flakes, onion flakes, and salt). This is my current obsession. They taste like the best part of an everything bagel, but crunchy and snackable.
Ranch-Style Seeds – Mix 1 teaspoon dried dill, 1 teaspoon dried parsley, ½ teaspoon garlic powder, and ½ teaspoon onion powder with the salt. It tastes just like ranch dressing powder but without all the additives. Perfect for game day snacking.
Air Fryer Adaptation – If you don’t want to heat up your oven, you can make these in an air fryer. Set it to 300°F (149°C) and cook for 10-12 minutes, shaking the basket halfway through. Keep a close eye on them—air fryers run hot and seeds can burn quickly. The texture comes out even crunchier than oven-roasted, which is saying something.
Serving & Storage Suggestions
These cozy oven-roasted pumpkin seeds with sea salt are incredibly versatile. Here’s how to serve and store them:
Serving Ideas: Serve them warm or at room temperature in a bowl for snacking. They’re perfect on a charcuterie board alongside cheese, dried fruit, and nuts. Sprinkle them over salads for extra crunch—they’re especially good on autumn salads with apples, pecans, and goat cheese. Use them as a topping for soups like butternut squash or pumpkin. Or just eat them by the handful while watching a movie. No judgment here.
Storage Instructions: Store completely cooled seeds in an airtight container at room temperature. They’ll stay fresh and crunchy for up to 2 weeks—if they last that long. I keep mine in a glass jar on the counter, and they’re usually gone within a few days. If you live in a humid climate, you might notice them losing their crunch faster. In that case, you can refresh them in a 300°F oven for 3-5 minutes.
Freezer Option: You can freeze roasted pumpkin seeds for up to 3 months. Place them in a freezer-safe bag or container, squeeze out as much air as possible, and freeze. Thaw at room temperature for about 15 minutes before serving. They might lose a tiny bit of crunch, but they’re still delicious.
Flavor Development: These seeds actually taste even better the next day. The flavors meld together overnight, and the salt distributes more evenly. So if you can resist eating them all on day one, you’re in for a treat on day two.
Nutritional Information & Benefits
Let’s talk about why these little seeds are actually good for you. A quarter-cup serving of roasted pumpkin seeds (about one serving) contains approximately:
- Calories: 180-200
- Protein: 8-10 grams
- Fat: 15-18 grams (mostly healthy unsaturated fats)
- Carbohydrates: 4-6 grams
- Fiber: 2-3 grams
- Magnesium: 40% of the daily value
- Zinc: 20% of the daily value
Pumpkin seeds are a fantastic source of magnesium, which supports muscle function, sleep quality, and heart health. They’re also rich in zinc, which is important for immune function—especially relevant during cold and flu season. The healthy fats and protein make them a satisfying snack that keeps you full between meals.
For those watching their sodium, you can easily reduce the salt or use a salt substitute. And if you’re following a gluten-free or keto diet, these seeds fit right in. They’re naturally free of gluten, dairy, and refined sugars.
I personally love that I can snack on these without any guilt. They’re real food—simple, whole ingredients that nourish while they satisfy that crunchy, salty craving.
Conclusion
These cozy oven-roasted pumpkin seeds with sea salt started as an accident—a happy little mistake that turned into one of my favorite fall snacks. They’re proof that sometimes the best recipes come from things going wrong. Or at least, not going according to plan.
What I love most about this recipe is how it turns something you’d normally throw away into something you genuinely look forward to. There’s something satisfying about that—making something delicious from what most people consider scraps. It feels resourceful and a little bit clever, even though it’s the easiest thing in the world.
I hope you give these a try, whether you’re carving pumpkins for Halloween, prepping for Thanksgiving, or just craving a warm, salty snack on a chilly evening. Play around with the seasonings, make them your own, and don’t be afraid to double the batch. Trust me, you’ll want extras.
Have you tried making roasted pumpkin seeds before? What’s your favorite seasoning combination? I’d love to hear about your experiments in the comments below. And if you make these, tag me in your photos—I always love seeing your kitchen creations!
Frequently Asked Questions
Do I have to use fresh pumpkin seeds, or can I use store-bought raw seeds?
You can absolutely use store-bought raw pumpkin seeds (also called pepitas). Just skip the rinsing and drying steps and go straight to seasoning and roasting. The cooking time might be slightly shorter since store-bought seeds are already clean and dry.
Why did my pumpkin seeds turn out chewy instead of crunchy?
This usually happens for one of two reasons: either the seeds weren’t dried thoroughly before roasting, or they were crowded on the baking sheet. Make sure to pat them completely dry and spread them in a single layer. If they’re still chewy after roasting, pop them back in the oven for 3-5 more minutes.
Can I roast pumpkin seeds without oil?
Yes, but they won’t be as crispy and the seasoning won’t stick as well. If you’re avoiding oil, try using a light spray of cooking spray or tossing them with a tiny bit of water and seasoning. They’ll still be tasty, just less crunchy.
How do I know when the seeds are done roasting?
The seeds should be golden brown and smell nutty and toasty. They’ll also sound slightly hollow when you shake the baking sheet. Remember that they continue to crisp as they cool, so it’s better to take them out a minute early than a minute late.
Can I reuse the seeds from a carved pumpkin that’s been sitting out?
It’s best to use seeds from a pumpkin that’s been carved within the last 24 hours. If the pumpkin has been sitting out for longer, the seeds might have started to spoil or dry out. Fresh is always best for the most flavorful results.
Pin This Recipe!
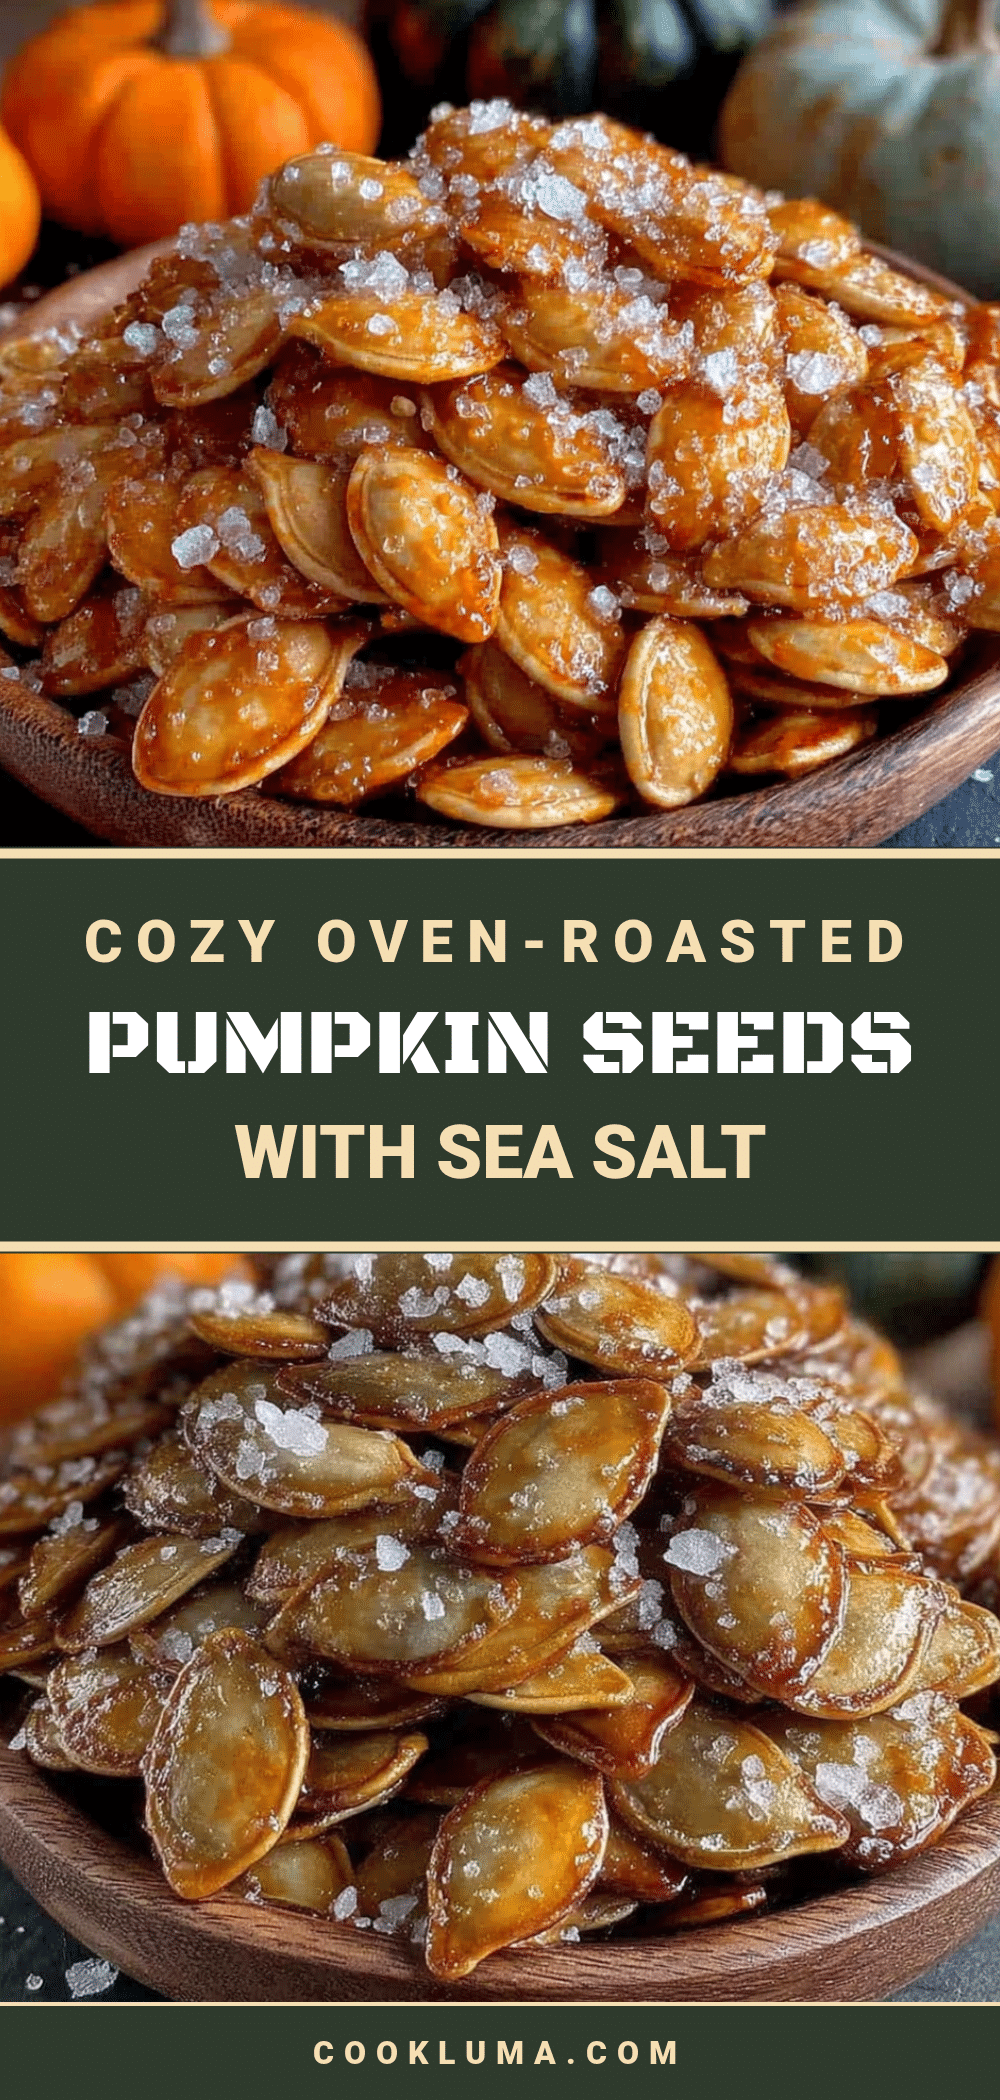
Cozy Oven-Roasted Pumpkin Seeds with Sea Salt
Crunchy, salty, and perfectly roasted pumpkin seeds that are way better than store-bought. This simple recipe turns pumpkin carving leftovers into an irresistible fall snack.
- Prep Time: 15 minutes
- Cook Time: 25 minutes
- Total Time: 40 minutes
- Yield: 4 servings 1x
- Category: Snack
- Cuisine: American
Ingredients
- 1 ½ cups fresh pumpkin seeds (from a medium pumpkin)
- 1 ½ tablespoons olive oil or melted butter
- 1 teaspoon flaky sea salt (plus more for finishing)
- ½ teaspoon garlic powder (optional)
- ½ teaspoon smoked paprika (optional)
- ¼ teaspoon cayenne pepper (optional)
- 1 teaspoon fresh rosemary, finely chopped (optional)
Instructions
- Scoop and separate the seeds: Cut your pumpkin open and scoop out the seeds and stringy pulp into a bowl. Remove large clumps of pulp.
- Rinse the seeds: Place the seeds in a colander and rinse under cool running water. Use your fingers to rub off larger pieces of pumpkin flesh. Rinse until the water runs mostly clear.
- Dry the seeds thoroughly: Spread the rinsed seeds on a clean kitchen towel or paper towels. Pat them dry, then let them sit for 10-15 minutes until they feel dry to the touch.
- Preheat your oven to 325°F (163°C).
- Season the seeds: In a medium bowl, combine the dried seeds with olive oil (or melted butter) and sea salt. Toss well until every seed is coated. Add any optional seasonings if desired.
- Spread on baking sheet: Line a rimmed baking sheet with parchment paper or a silicone mat. Spread the seasoned seeds in a single, even layer.
- Roast for 20-25 minutes: Roast for 10 minutes, then stir the seeds. Return to the oven and roast for another 10-15 minutes until golden brown and fragrant.
- Cool completely: Remove from the oven and let the seeds cool on the baking sheet for at least 15-20 minutes.
- Add a final sprinkle of flaky sea salt once cooled.
- Enjoy immediately or store in an airtight container.
Notes
Don’t skip drying the seeds thoroughly—wet seeds steam instead of roasting. Watch the oven closely during the last 5 minutes as seeds can burn quickly. Seeds continue to crisp as they cool, so remove them from the oven a minute early rather than late. Double the batch for a crowd as they disappear fast.
Nutrition
- Serving Size: ¼ cup
- Calories: 190
- Sodium: 290
- Fat: 16
- Saturated Fat: 2.5
- Carbohydrates: 5
- Fiber: 2.5
- Protein: 9
Keywords: roasted pumpkin seeds, pumpkin seeds, fall snack, Halloween snack, Thanksgiving appetizer, healthy snack, easy snack


