There used to be a tiny, quirky bakery on Elm Street called “The Midnight Muffin” that made the most incredible Halloween treats. When they closed their doors two years ago, I honestly felt a little pang of loss. It was the kind of place that made you feel like a kid again, especially around October. Their specialty? These ridiculously cute, no-bake eyeball cake pops that were the hit of every party. After about six tries — and one memorable batch that looked more like sad, zombie eyeballs than fun Halloween treats — I finally cracked the code. Let me tell you, this cozy no-bake Halloween eyeball cake pops recipe is the exact recreation of that bakery magic, and it’s way easier than you’d think.
You know that feeling when you find a recipe that’s both impressive and ridiculously simple? That’s this one. I mean, we’re talking about a 30-minute project that looks like you spent hours on it. The first time I made these for my niece’s Halloween party, she asked if I had secretly taken a baking class. Nope, just crumbled up some cake and got my hands a little messy. Honestly, the best part is the look on people’s faces when they realize these spooky little eyeballs are actually delicious.
So, if you’re looking for a Halloween treat that’s more cozy than creepy, and more fun than fussy, you’re in the right place. These cake pops are perfect for a movie night, a classroom party, or just because you want to do something a little different this October. Let’s get started, shall we?
Why You’ll Love This Recipe
I’ve tested this recipe about a dozen times to make sure it’s foolproof. From using different types of cake to experimenting with candy melts, I’ve got the tips and tricks to save you from my early mistakes. This isn’t just another Halloween dessert—it’s the one that will have everyone asking for the recipe.
- Quick & Easy: Ready in under 30 minutes with no oven required. Perfect for last-minute Halloween plans or when you just want a quick, satisfying project.
- Simple Ingredients: You only need a handful of store-bought items. No weird specialty ingredients or trips to a fancy baking supply store.
- Perfect for Halloween: Whether it’s a spooky movie night, a classroom party, or a Halloween potluck, these are the star of the show.
- Crowd-Pleaser: Kids and adults both go crazy for them. There’s something about a cake pop that just makes everyone smile.
- Unbelievably Delicious: The combination of moist cake, creamy frosting, and a crunchy candy shell is pure comfort food magic. It’s like a little hug in spooky disguise.
What makes this recipe different from the rest? It’s the perfect balance of creepy and cozy. Instead of using a complicated cake pop mold, we’re rolling everything by hand for that slightly imperfect, homemade look. Plus, the “eyeball” design is surprisingly easy to master. This isn’t just another version of a cake pop—it’s the one that actually works, every single time.
This recipe is for those moments when you need a little bit of whimsy without the stress. It’s the kind of treat that makes you close your eyes after the first bite, remembering why Halloween is so much fun. It’s comfort food reimagined—faster, easier, but with the same soul-soothing satisfaction as a favorite childhood treat.
What Ingredients You Will Need
This recipe uses simple, store-bought ingredients to create something that looks and tastes bakery-fresh. You probably already have most of these in your pantry, which makes this the perfect last-minute Halloween project.
For the Cake Pops
- 1 box (15.25 oz) chocolate or vanilla cake mix (I prefer Betty Crocker’s Super Moist for the best texture)
- Ingredients listed on the cake mix box (typically eggs, oil, and water)
- 1/2 cup (120 ml) prepared chocolate frosting (store-bought is fine; I use Duncan Hines Creamy Homestyle)
For the Coating and Decoration
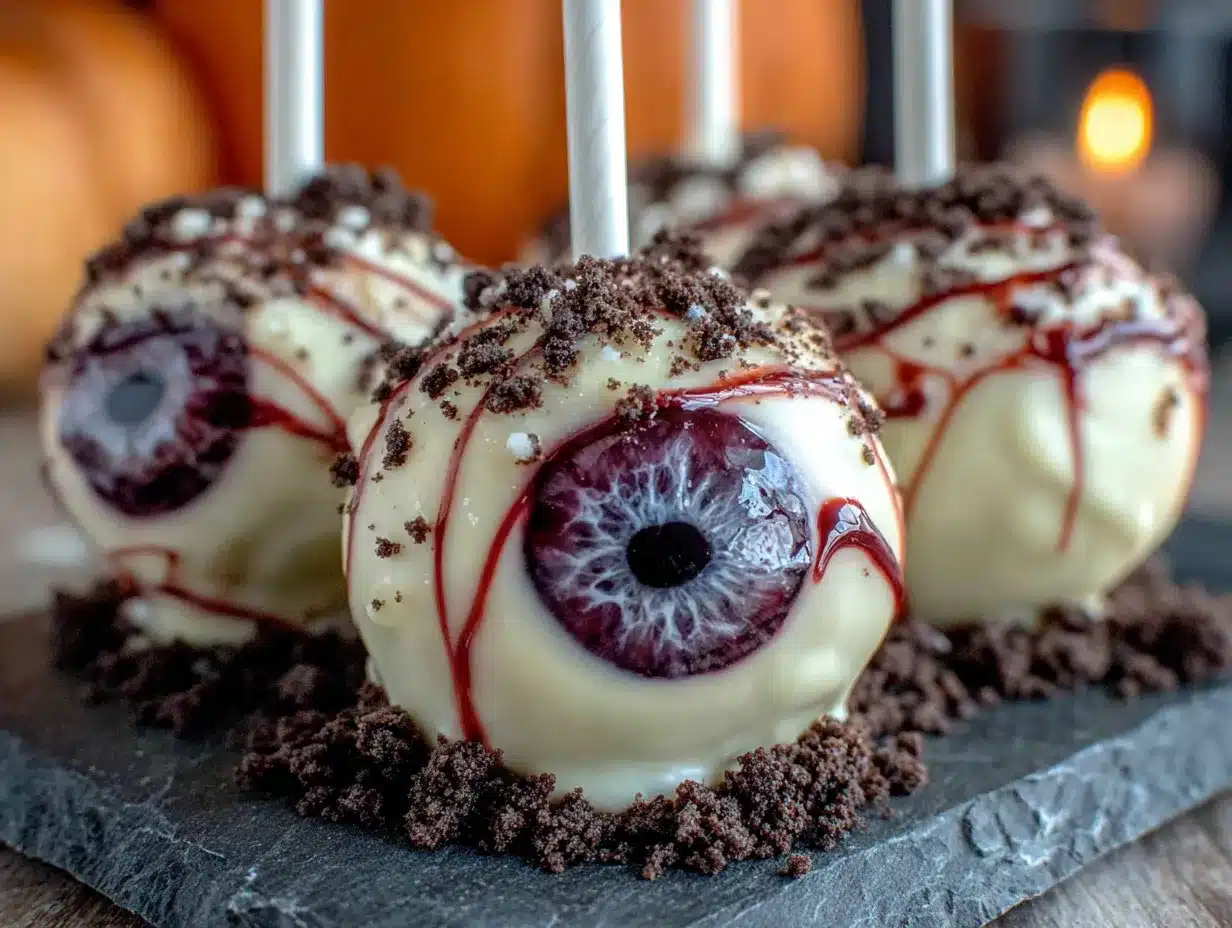
- 12 oz (340 g) white candy melts (I recommend Wilton’s for the smoothest melt)
- 1/2 cup (120 ml) green candy melts (for the iris of the eye)
- 1/4 cup (60 ml) black candy melts (for the pupil)
- 1 tablespoon (15 ml) coconut oil or shortening (for thinning the candy melts, if needed)
- Red gel food coloring (for the bloodshot veins)
- Lollipop sticks (at least 12)
Ingredient Tips: For the best texture, make sure your cake is completely cool before crumbling it. If you’re using a homemade cake, that works too—just make sure it’s not too moist. The frosting acts as a binder, so don’t skip it. If you’re dairy-free, you can use a dairy-free cake mix and frosting. For the candy melts, avoid white chocolate chips—they don’t melt as smoothly and can seize up. Trust me on this one, I learned the hard way!
Equipment Needed
You don’t need a lot of fancy equipment for this recipe, which is part of its charm. Here’s what you’ll need:
- Large mixing bowl (for crumbling the cake)
- Baking sheet or tray (lined with parchment paper)
- Small microwave-safe bowls (for melting the candy melts)
- Lollipop sticks (available at most craft stores or online)
- Styrofoam block or cardboard box (for drying the cake pops upright)
- Toothpicks (for adding the red veins)
- Piping bags or small zip-top bags (for the melted candy)
If you don’t have a Styrofoam block, you can poke holes in a cardboard box to hold the sticks upright. I’ve used an old egg carton in a pinch, and it worked perfectly. For the candy melts, a small glass bowl works better than plastic for even melting.
Preparation Method
Let’s get our hands dirty—well, a little bit. This process is simple and fun, perfect for getting the kids involved.
- Bake the cake: Prepare the cake mix according to the package directions. Bake in a 9×13 inch pan and let it cool completely. This is crucial—warm cake will make the pops fall apart. I usually bake mine the night before.
- Crumble the cake: Once the cake is completely cool, break it into large chunks and place them in a large mixing bowl. Use your hands to crumble it into fine, even crumbs. There should be no large pieces remaining. This takes about 3-4 minutes.
- Add the frosting: Add 1/2 cup of chocolate frosting to the crumbled cake. Mix with your hands until the mixture holds together when pressed. It should feel like damp sand. If it’s too dry, add a teaspoon more frosting. If it’s too wet, add a bit more cake crumb.
- Form the balls: Roll the mixture into 1-inch balls (about the size of a walnut). Place them on the parchment-lined baking sheet. You should get about 12-15 balls. Pop them in the freezer for 15 minutes to firm up. This makes them easier to dip.
- Melt the white candy: Place the white candy melts in a microwave-safe bowl. Microwave in 30-second intervals, stirring after each, until smooth. If the mixture is too thick, stir in 1 teaspoon of coconut oil or shortening.
- Dip the sticks: Remove the cake balls from the freezer. Dip the tip of a lollipop stick into the melted white candy, then insert it about halfway into a cake ball. This helps secure the stick. Repeat for all balls.
- Dip the cake pops: Holding the stick, dip each cake ball into the melted white candy until fully coated. Gently tap the stick on the edge of the bowl to remove excess candy. Place the pop upright in your Styrofoam block or cardboard box to set. Let them set completely, about 10 minutes.
- Add the green iris: Melt the green candy melts. Using a toothpick or a small piping bag, add a small green circle to the center of each cake pop. Let set for 5 minutes.
- Add the black pupil: Melt the black candy melts. Using a toothpick, add a small black dot in the center of the green circle. Let set.
- Add the bloodshot veins: Using a toothpick dipped in red gel food coloring, gently draw thin lines radiating from the center of the eye. Don’t overthink it—a few wobbly lines look more realistic!
- Final set: Let the cake pops set completely, about 15-20 minutes, before serving or storing.
Cooking Tips & Techniques
Here are some hard-earned lessons from my own cake pop adventures. Trust me, I’ve made every mistake in the book so you don’t have to.
The crumb test: After you’ve mixed the cake and frosting, squeeze a small handful. If it holds its shape without cracking, you’re good. If it falls apart, add a bit more frosting. If it feels greasy, you’ve added too much. It’s a fine line, but once you feel it, you’ll know.
The cold pop trick: Always freeze your cake balls for at least 15 minutes before dipping. This prevents them from falling off the stick into the melted candy. I once skipped this step and ended up with a bowl of chocolate soup with floating cake chunks. Not pretty.
Thinning the candy: If your candy melts are too thick, add a tiny bit of coconut oil or shortening. Do not add water or milk—this will cause the candy to seize up and become unusable. I learned this the hard way when I tried to thin my white chocolate with milk. Disaster.
Tap, tap, tap: After dipping, gently tap the stick on the side of the bowl. This helps the excess candy drip off and gives you a smoother finish. It also prevents the dreaded “teardrop” shape at the bottom of the pop.
Work in batches: Don’t try to dip all the pops at once. Work with 3-4 at a time, keeping the rest in the freezer. This prevents the candy from hardening before you’re done.
Variations & Adaptations
One of the best things about this recipe is how easy it is to customize. Here are some of my favorite variations:
- Pumpkin Spice Version: Use a spice cake mix and cream cheese frosting. Add a pinch of pumpkin pie spice to the crumb mixture. Use orange candy melts instead of white for the coating, and add a green candy stem on top.
- Vampire Bite Edition: After dipping in white candy, use a toothpick to add two small red dots on one side of the eyeball, like a vampire bite. Add a tiny drip of red gel food coloring running down from the “bite.”
- Mummy Pops: Instead of making eyeballs, wrap the cake pops with thin strips of white fondant or drizzle white candy in a crisscross pattern. Add two small candy eyes peeking through. These are always a hit with younger kids.
- Gluten-Free Option: Use a gluten-free cake mix (I like King Arthur’s) and a gluten-free frosting. The process is exactly the same, and no one will know the difference.
- Dairy-Free Version: Use a dairy-free cake mix and frosting. For the coating, use dairy-free white chocolate chips (Enjoy Life makes a good one) and add a bit of coconut oil for smooth melting.
I once made a batch of these for a friend’s “Zombie Apocalypse” themed party, and I added a bit of green food coloring to the white candy melts to make them look more undead. They were a hit, and honestly, they looked way cooler than the original version.
Serving & Storage Suggestions
These cozy no-bake Halloween eyeball cake pops are best served at room temperature. The candy shell should be firm but not hard, and the cake inside should be soft and fudgy. Arrange them on a platter with some fake spiderwebs or plastic spiders for a truly spooky presentation.
For a party: Stick them in a small pumpkin or a hollowed-out gourd for a fun serving display. You can also place them in a tall glass jar or vase filled with black jelly beans or candy corn.
Storage: Store any leftover cake pops in an airtight container in the refrigerator for up to 5 days. Let them sit at room temperature for about 10 minutes before serving to soften the cake slightly.
Freezing: You can freeze the undipped cake balls for up to 3 months. Just place them on a baking sheet in a single layer, freeze until solid, then transfer to a freezer bag. When you’re ready to use them, thaw in the refrigerator overnight, then dip as directed.
Reheating: These are best enjoyed cold or at room temperature. If you want to refresh the candy shell, you can give them a quick 5-second blast in the microwave, but honestly, they’re perfect as is.
Flavor development: These cake pops actually taste better the next day! The flavors meld together, and the cake becomes even more moist and fudgy. So if you’re making them for a party, feel free to make them a day ahead.
Nutritional Information & Benefits
Let’s be real—these are a treat, not a health food. But here’s the estimated nutritional breakdown for one cake pop (based on 12 servings):
| Nutrient | Amount per Serving |
|---|---|
| Calories | 285 |
| Total Fat | 12g |
| Saturated Fat | 7g |
| Carbohydrates | 42g |
| Sugar | 30g |
| Protein | 2g |
Health Benefits: Okay, so there aren’t many health benefits here, but let’s focus on the positives! The dark chocolate in the cake mix contains antioxidants, and if you use a whole wheat cake mix (yes, they exist), you’ll get a bit more fiber. Plus, making these at home means you control the ingredients and can avoid artificial preservatives.
Dietary Considerations: This recipe can easily be made gluten-free or dairy-free with simple substitutions. It is not suitable for a low-sugar or keto diet. If you have nut allergies, check your cake mix and candy melts for potential cross-contamination.
My Wellness Perspective: I believe in balance. These cake pops are a fun, occasional treat that brings joy and creates memories. They’re not an everyday snack, but for a Halloween party or a cozy night in? Absolutely worth it. Life is too short to skip the fun stuff.
Conclusion
So there you have it—my little tribute to The Midnight Muffin and their unforgettable Halloween treats. These cozy no-bake Halloween eyeball cake pops are more than just a dessert; they’re a little piece of nostalgia that you can recreate in your own kitchen. They’re proof that you don’t need a bakery or a ton of experience to make something truly special.
I hope you give these a try and make them your own. Maybe you’ll add a different color for the iris, or try a different cake flavor. The beauty of this recipe is how forgiving and adaptable it is. Don’t be afraid to get creative and have fun with it.
I’d love to hear how yours turn out! Drop a comment below and let me know if you tried any variations, or if these brought back any fun Halloween memories for you. And if you’re looking for more cozy Halloween treats, be sure to check out our spooky mummy brownies or these easy pumpkin spice cookies for more seasonal inspiration. Happy Halloween, and happy baking!
Frequently Asked Questions
Can I use a homemade cake instead of a box mix?
Absolutely! Just make sure your homemade cake is completely cool and not too moist. You want a crumb that holds together when mixed with the frosting. A dense pound cake or a simple vanilla cake works best.
Why did my cake pops fall off the stick?
This usually happens when the cake balls are too warm or the candy coating is too thick. Make sure your cake balls are thoroughly chilled (15 minutes in the freezer does the trick). Also, dipping the stick in melted candy before inserting it helps create a stronger bond.
Can I use chocolate chips instead of candy melts?
You can, but they won’t set as firmly and may not have the same smooth finish. Candy melts are specifically formulated for coating and will give you that professional-looking shell. If you use chocolate chips, add a teaspoon of coconut oil to help them melt smoothly.
How far in advance can I make these?
You can make the undipped cake balls up to 3 months ahead and freeze them. The fully decorated cake pops will keep in the refrigerator for up to 5 days. I actually think they taste better on day two!
Can I make these without lollipop sticks?
Yes! You can skip the sticks and just serve them as cake balls. Roll them slightly larger (about 1.5 inches) and place them in mini cupcake liners after dipping. They look adorable and are easier for little hands to hold.
Pin This Recipe!
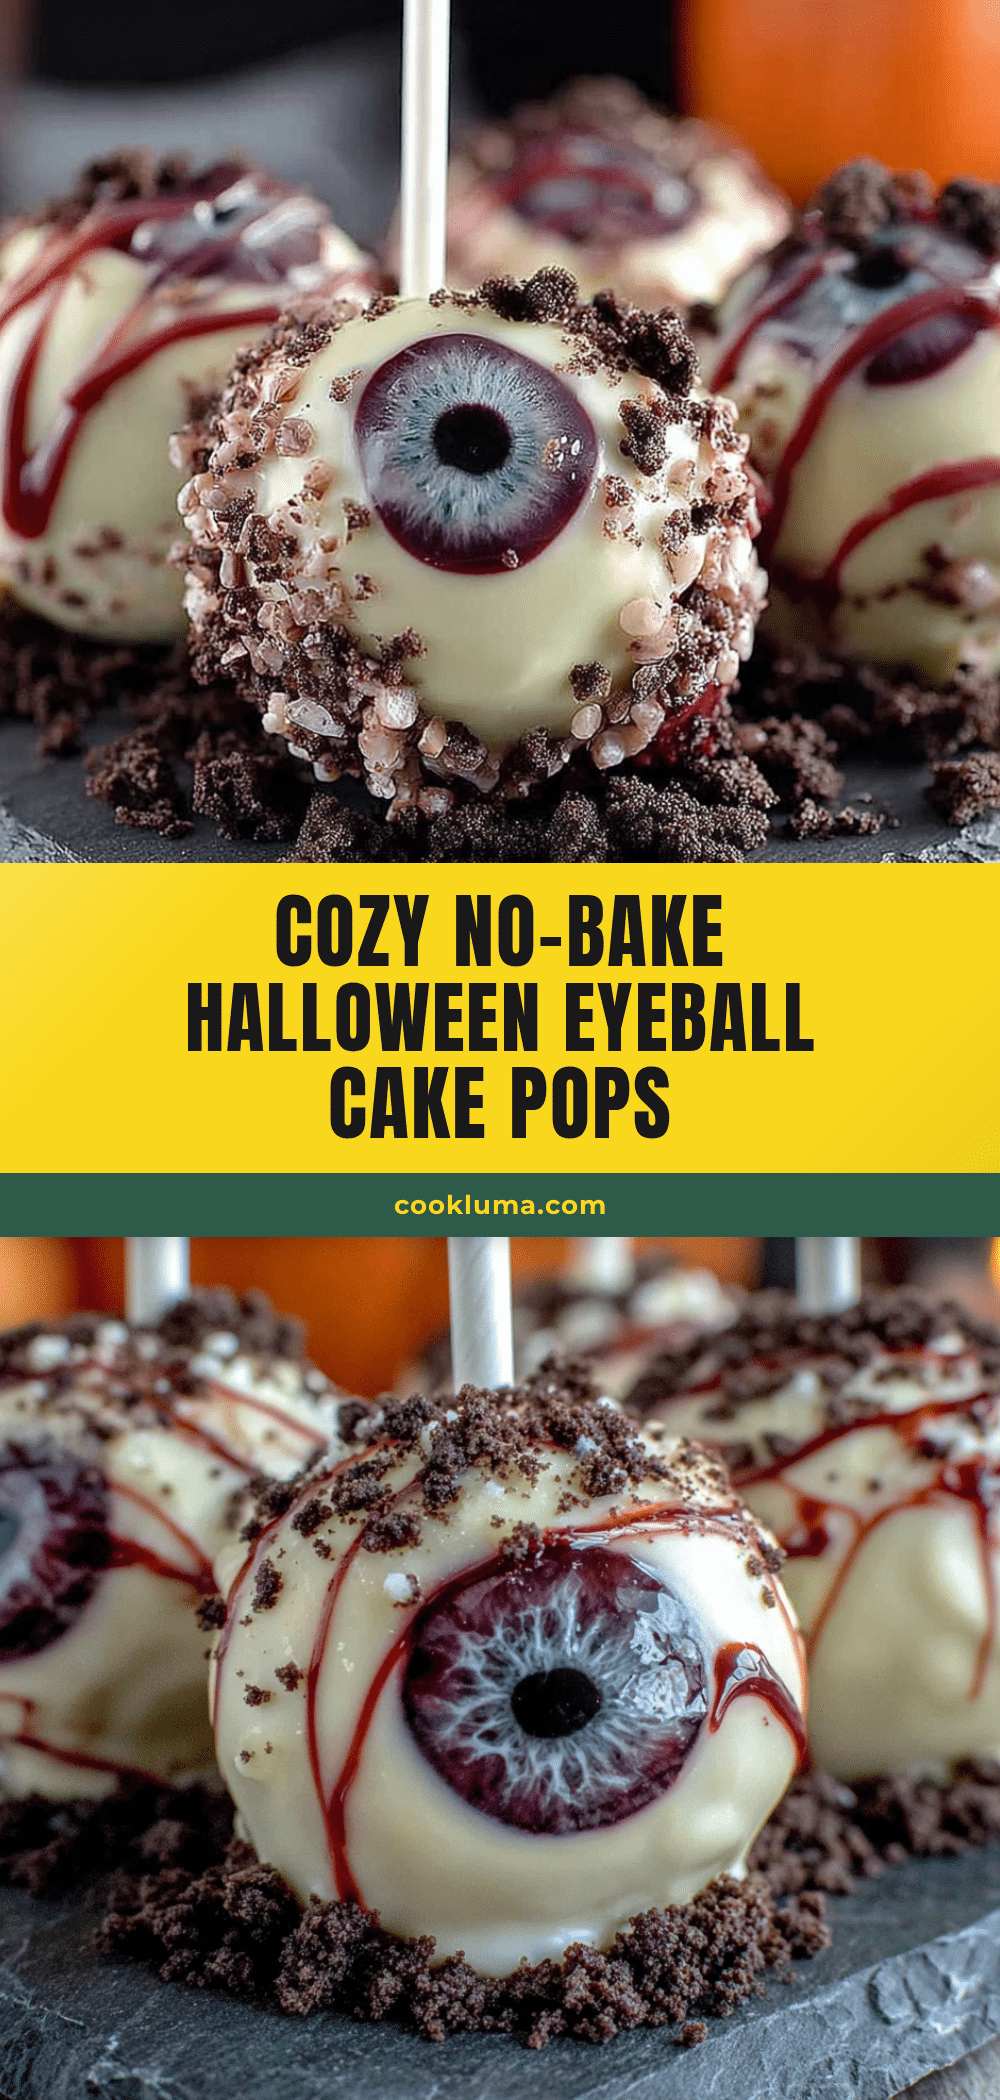
Cozy No-Bake Halloween Eyeball Cake Pops

These ridiculously cute, no-bake eyeball cake pops are the perfect Halloween treat. Ready in under 30 minutes with no oven required, they’re a fun and easy project that looks like you spent hours on it.
- Prep Time: 15 minutes
- Cook Time: 15 minutes
- Total Time: 30 minutes
- Yield: 12-15 servings 1x
- Category: Dessert
- Cuisine: American
Ingredients
- 1 box (15.25 oz) chocolate or vanilla cake mix
- Ingredients listed on the cake mix box (typically eggs, oil, and water)
- 1/2 cup (120 ml) prepared chocolate frosting
- 12 oz (340 g) white candy melts
- 1/2 cup (120 ml) green candy melts
- 1/4 cup (60 ml) black candy melts
- 1 tablespoon (15 ml) coconut oil or shortening (for thinning the candy melts, if needed)
- Red gel food coloring (for the bloodshot veins)
- Lollipop sticks (at least 12)
Instructions
- Bake the cake: Prepare the cake mix according to the package directions. Bake in a 9×13 inch pan and let it cool completely.
- Crumble the cake: Once the cake is completely cool, break it into large chunks and place them in a large mixing bowl. Use your hands to crumble it into fine, even crumbs.
- Add the frosting: Add 1/2 cup of chocolate frosting to the crumbled cake. Mix with your hands until the mixture holds together when pressed.
- Form the balls: Roll the mixture into 1-inch balls (about the size of a walnut). Place them on a parchment-lined baking sheet. Freeze for 15 minutes to firm up.
- Melt the white candy: Place the white candy melts in a microwave-safe bowl. Microwave in 30-second intervals, stirring after each, until smooth. If too thick, stir in 1 teaspoon of coconut oil or shortening.
- Dip the sticks: Remove the cake balls from the freezer. Dip the tip of a lollipop stick into the melted white candy, then insert it about halfway into a cake ball. Repeat for all balls.
- Dip the cake pops: Holding the stick, dip each cake ball into the melted white candy until fully coated. Gently tap the stick on the edge of the bowl to remove excess candy. Place upright in a Styrofoam block or cardboard box to set, about 10 minutes.
- Add the green iris: Melt the green candy melts. Using a toothpick or small piping bag, add a small green circle to the center of each cake pop. Let set for 5 minutes.
- Add the black pupil: Melt the black candy melts. Using a toothpick, add a small black dot in the center of the green circle. Let set.
- Add the bloodshot veins: Using a toothpick dipped in red gel food coloring, gently draw thin lines radiating from the center of the eye.
- Final set: Let the cake pops set completely, about 15-20 minutes, before serving or storing.
Notes
For best results, freeze cake balls for at least 15 minutes before dipping. Do not add water or milk to thin candy melts—use coconut oil or shortening. These taste even better the next day!
Nutrition
- Serving Size: 1 cake pop
- Calories: 285
- Sugar: 30
- Fat: 12
- Saturated Fat: 7
- Carbohydrates: 42
- Protein: 2
Keywords: Halloween, cake pops, no-bake, eyeball, easy, 30-minute, spooky, treat, dessert


