I was standing in the spice aisle of a grocery store last November when a jar of ground ginger slipped out of my hand and shattered on the linoleum floor. The smell that rose up—sharp, warm, sweet—hit me so hard I had to grip the shopping cart. And suddenly I was six years old at my neighbor Mrs. Kowalski’s kitchen table, her flour-dusted hands pressing a gingerbread cookie cutter into dough while snow piled up on the windowsill behind her. She passed away when I was twelve, and I hadn’t thought about those afternoons in decades. But that accidental cloud of ginger brought it all back—the way she’d let me lick the spoon, the creak of her oven door, the exact feeling of being small and safe and absolutely certain that something wonderful was about to come out of the heat.
I stood there for a full minute, just breathing it in, until a store employee asked if I was okay. “Fine,” I said, “just having a moment with a broken jar.” I bought replacements for everything I’d dropped—plus cream cheese, butter, and a bag of gingersnap cookies I had no plan for yet. Honestly, the idea for these gingerbread cheesecake bars didn’t come together until I got home and opened my fridge. I had the cream cheese for a different recipe, the molasses I’d grabbed on impulse, and suddenly my brain connected the dots. Maybe you’ve been there—when one random ingredient sparks a whole new idea that feels inevitable.
The first batch came out lopsided and the crust crumbled everywhere. But that bite—the tangy cream cheese against the deep, spiced gingerbread—made me close my eyes right there in my messy kitchen. It tasted like December feels. I’ve made them six times since then, tweaking and testing until the layers stayed put and the frosting felt just right. These bars are my way of holding onto that Mrs. Kowalski feeling, even if I can’t quite replicate her kitchen or her laugh. They’re what I make when I need the world to slow down and smell like ginger and cinnamon and something sweet baking in the oven.
Why You’ll Love This Recipe
Let me tell you why these gingerbread cheesecake bars have become my most-requested holiday dessert—and honestly, the one I make even when nobody’s asking. They hit that perfect sweet spot between impressive and totally doable, even on a Tuesday night when you’re tired.
- Simple Ingredients : No hunting down obscure spices or specialty flours. You probably have most of this in your pantry right now, minus maybe the cream cheese and molasses.
- Quick & Easy : The whole thing comes together in about 45 minutes of active time. The oven does the rest of the work while you go fold laundry or finally answer those texts.
- Perfect for the Holidays : These bars belong at cookie swaps, Thanksgiving dessert tables, Christmas brunches, or just a quiet evening with a cup of tea when you need something cozy.
- Crowd-Pleaser : I’ve watched people who “don’t like gingerbread” go back for seconds. The cream cheese layer mellows out the spice in a way that wins over skeptics.
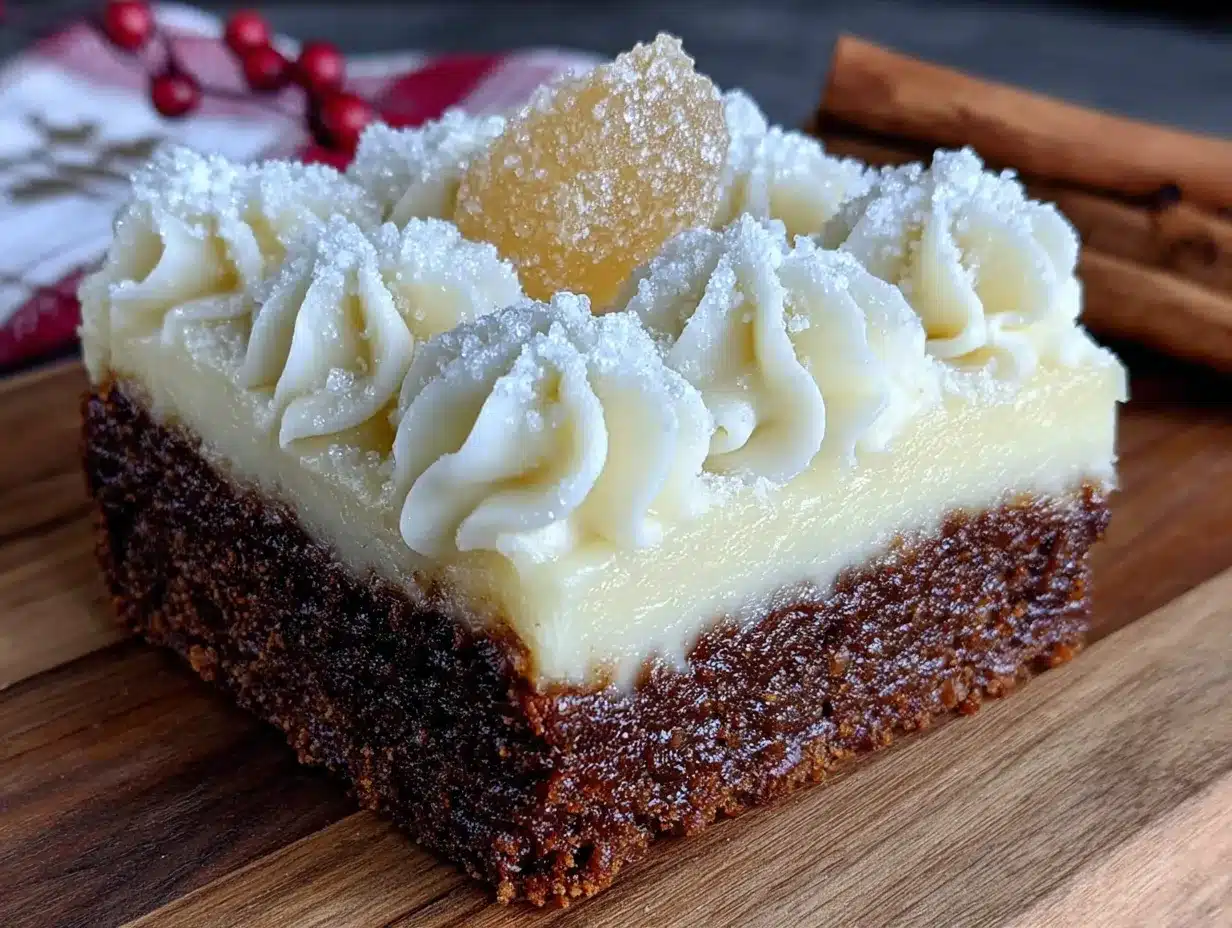
- Unbelievably Delicious : The contrast between the crunchy gingersnap crust, the smooth cheesecake layer, the spiced gingerbread cake, and that silky cream cheese frosting on top—it’s four textures in one bite, and it works.
What makes these different from every other gingerbread dessert out there? It’s the structure. Most gingerbread cheesecake bars either use a plain graham cracker crust or skip the crust entirely. This version uses crushed gingersnap cookies for the base, which doubles down on that ginger flavor and adds a texture that doesn’t get soggy. The cheesecake layer is baked right in the middle, not on top, so every bar has that creamy ribbon running through it. And the frosting? It’s not optional. It’s the cool, tangy finish that ties everything together.
These bars are the kind of dessert that makes people close their eyes after the first bite. They’re comfort food reimagined—familiar enough to feel like home, but special enough to feel like an occasion. Perfect for impressing guests without stress, or turning an ordinary Wednesday into something worth remembering.
What Ingredients You Will Need
This recipe uses simple, wholesome ingredients that come together to create something truly special. Most are pantry staples, especially if you do any holiday baking, and the few that aren’t are easy to find at any grocery store.
For the Gingersnap Crust
- 2 cups crushed gingersnap cookies (about 8 ounces, or roughly 40 cookies depending on brand—I prefer Nabisco or a bakery brand for the best spice kick)
- 6 tablespoons unsalted butter, melted (salted butter works too, just skip the added salt in the crust)
- 2 tablespoons granulated sugar (optional, but helps the crust hold together and adds a tiny bit of sweetness)
- Pinch of salt (skip if using salted butter)
For the Cream Cheese Layer
- 8 ounces full-fat cream cheese, softened (I really recommend full-fat here—low-fat gets grainy and doesn’t set up as nicely)
- 1/4 cup granulated sugar
- 1 large egg yolk (save the white for the gingerbread layer)
- 1/2 teaspoon vanilla extract
For the Gingerbread Cake Layer
- 1 1/2 cups all-purpose flour (spooned and leveled—don’t scoop straight from the bag or you’ll get too much)
- 1 teaspoon baking soda
- 1 1/2 teaspoons ground ginger (freshly opened if possible—old ginger loses its punch)
- 1 teaspoon ground cinnamon
- 1/2 teaspoon ground cloves
- 1/4 teaspoon ground nutmeg (freshly grated if you have it)
- 1/2 teaspoon salt
- 1/2 cup unsalted butter, softened
- 1/2 cup packed dark brown sugar (light brown works too, but dark gives deeper molasses flavor)
- 1 large egg (plus the leftover white from the cream cheese layer)
- 1/2 cup molasses (not blackstrap—regular or mild molasses keeps it from being too bitter)
- 1/2 cup hot water (this helps the gingerbread stay tender and moist)
For the Cream Cheese Frosting
- 4 ounces cream cheese, softened
- 2 tablespoons unsalted butter, softened
- 1 cup powdered sugar (sifted if it’s clumpy)
- 1/2 teaspoon vanilla extract
- 1-2 tablespoons milk or heavy cream (as needed for consistency)
A quick note on molasses: I’ve tested this with both Grandma’s Original and Brer Rabbit, and both work beautifully. Just avoid blackstrap unless you want a very intense, slightly bitter flavor. And if you’re dairy-free, you can substitute vegan butter and plant-based cream cheese—just make sure they’re the block style, not the spreadable tub kind, for the best texture.
Equipment Needed
You don’t need a fancy kitchen to pull these off, but a few specific tools make the process smoother. Here’s what I use every time:
- 9×9-inch baking pan (an 8×8 works too, but your bars will be thicker and need a few extra minutes of baking time)
- Parchment paper (non-negotiable for easy removal—let the ends hang over the sides like handles)
- Food processor or zip-top bag and rolling pin (for crushing the gingersnaps into fine crumbs)
- Electric hand mixer or stand mixer (you can do this by hand with some elbow grease, but the cream cheese layers really benefit from being smooth and lump-free)
- Medium mixing bowls (at least three—one for crust, one for cheesecake, one for gingerbread batter)
- Small saucepan or microwave-safe bowl (for melting butter)
- Rubber spatula (for scraping every last bit of batter—waste not)
- Offset spatula or butter knife (for spreading the frosting evenly)
- Wire cooling rack (essential for even cooling so the frosting doesn’t melt)
If you don’t have a food processor, no worries. Put the gingersnaps in a sturdy zip-top bag, seal out the air, and go to town with a rolling pin or even a heavy skillet. It’s a little arm workout, but it works perfectly. And if you don’t have a 9×9 pan, a disposable aluminum one from the grocery store will do the job—just watch the baking time closely since those tend to conduct heat differently.
Preparation Method
Let’s walk through this step by step. I’ve numbered everything clearly, and I’ll include the little signs to look for so you know you’re on the right track. Take your time—rushing is the main reason things go sideways.
- Preheat your oven to 350°F (175°C). Line your 9×9-inch baking pan with parchment paper, leaving about 2 inches of overhang on two opposite sides. These will be your handles later. Lightly grease the parchment with butter or non-stick spray.
- Make the crust. Pulse the gingersnap cookies in a food processor until they become fine crumbs. You should have about 2 cups. Transfer to a medium bowl, add the melted butter, sugar, and salt (if using). Stir with a fork until the mixture looks like wet sand and holds together when you squeeze it. Press this mixture firmly and evenly into the bottom of your prepared pan. I use the bottom of a flat measuring cup to really pack it down—this prevents a crumbly crust later. Bake for 10 minutes, then set aside to cool slightly while you make the fillings. The crust should smell intensely gingery and look slightly darker at the edges.
- Make the cream cheese layer. In a medium bowl, beat the softened cream cheese with an electric mixer until smooth and fluffy, about 2 minutes. Add the sugar and beat another minute. Add the egg yolk and vanilla, beating just until combined. Don’t overmix or the cheesecake can crack during baking. Set this aside at room temperature while you make the gingerbread batter.
- Make the gingerbread cake layer. In a small bowl, whisk together the flour, baking soda, ginger, cinnamon, cloves, nutmeg, and salt. In a larger bowl, beat the softened butter and brown sugar together until light and fluffy, about 3 minutes. Add the egg and the reserved egg white, beating well after each addition. Beat in the molasses—it will look a little separated at first, that’s normal. Now, add half the flour mixture and beat on low until just combined. Add the hot water and beat until smooth. Add the remaining flour mixture and beat just until no streaks of flour remain. The batter will be thin—thinner than you expect. That’s exactly right. Don’t panic.
- Assemble the bars. Pour about two-thirds of the gingerbread batter over the pre-baked crust and spread it evenly with a spatula. Drop spoonfuls of the cream cheese mixture over the batter, then gently spread it into an even layer. It’s okay if it mixes slightly with the gingerbread—that creates the marbled effect. Pour the remaining gingerbread batter over the cream cheese layer and spread carefully. Don’t worry if it doesn’t cover perfectly; it will spread as it bakes.
- Bake. Place the pan in the preheated oven and bake for 30-35 minutes, or until a toothpick inserted into the center comes out with just a few moist crumbs (not wet batter). The edges should look set and slightly pulling away from the sides. The center might still jiggle a tiny bit—that’s fine, it will set as it cools. Let the bars cool completely in the pan on a wire rack. This takes about 2 hours. Then refrigerate for at least 2 hours, or overnight. Chilling is essential for clean slices.
- Make the frosting. Once the bars are fully chilled, beat the softened cream cheese and butter together until smooth. Add the powdered sugar and vanilla, beating on low until combined, then increase speed and beat until fluffy. Add milk or cream one tablespoon at a time until the frosting is spreadable but not runny. Spread over the chilled bars in an even layer.
- Slice and serve. Use the parchment handles to lift the entire block out of the pan. Place on a cutting board and use a sharp knife to slice into 16 squares (4 rows by 4 rows). For the cleanest cuts, wipe the knife clean between each slice. I learned this the hard way after my first batch looked like a frosting massacre.
A few notes as you go: If your cream cheese isn’t softened enough, you’ll end up with lumps. Leave it on the counter for a full 30 minutes before starting. And when you press the crust, really press it—I use the bottom of a glass and put my whole weight into it. A loose crust makes sad bars.
Cooking Tips & Techniques
After making these bars more times than I care to count (and messing up plenty along the way), here are the things I wish someone had told me from the start.
Room temperature ingredients matter. I know, I know—every recipe says this and it feels like a hassle. But cold cream cheese creates lumps that never fully smooth out, and cold butter doesn’t cream properly with sugar. Set everything out at least 30 minutes before you start. If you forgot, cut the cream cheese into small cubes and microwave it in 5-second bursts until it’s soft but not melted. It’s not perfect, but it works in a pinch.
Don’t overmix the gingerbread batter. Once you add the flour, mix just until you don’t see white streaks. Overmixing develops the gluten and makes the cake layer tough instead of tender. You want it soft and almost fluffy when baked.
The hot water trick is real. Adding hot water to gingerbread batter might seem weird, but it’s an old technique that keeps the cake incredibly moist. The hot liquid partially hydrates the flour and creates steam during baking, which gives you that tender crumb. Don’t skip it or substitute cold water.
Patience with cooling is not optional. I once tried to speed things up by putting the warm pan in the fridge. The top cracked, the crust got soggy, and the frosting slid right off. Let the bars cool completely at room temperature first—at least 2 hours—then refrigerate. The full chill time of 4 hours (or overnight) is what gives you those clean, Instagram-worthy slices.
Use a sharp knife for slicing. A dull blade drags through the frosting and smears it everywhere. Run your knife under hot water, dry it off, and slice with one clean motion. Wipe between each cut. It takes an extra minute and makes the difference between “homemade” and “homemade-looking.”
One failure I’ll confess: My third batch, I forgot the sugar in the cream cheese layer. It was edible but weirdly savory, like cheesecake-flavored butter. My husband ate it anyway (bless him), but I learned to always double-check my ingredients before I start mixing.
Variations & Adaptations
These bars are surprisingly flexible. Here are some ways to make them your own, depending on what you have on hand or who you’re feeding.
Gluten-Free Version: Substitute the all-purpose flour with a 1:1 gluten-free baking flour blend (I like King Arthur or Bob’s Red Mill). For the crust, use gluten-free gingersnap cookies—there are several good brands now, or you can make your own with almond flour and spices. The texture will be slightly more tender, but the flavor holds up beautifully.
Dairy-Free Adaptation: Use vegan butter sticks (not tub margarine) and block-style vegan cream cheese. Miyoko’s and Violife both work well. The crust might be a bit more crumbly, so press it extra firmly. The frosting will be slightly softer, so refrigerate the frosted bars for at least an hour before slicing.
Spice It Up or Down: Not everyone loves cloves—I get it. If you’re feeding a crowd with varied tastes, reduce the cloves to 1/4 teaspoon and add an extra 1/4 teaspoon of cinnamon. For a bolder gingerbread, add 1/2 teaspoon of black pepper (trust me, it just adds warmth, not heat) or use fresh grated ginger in the batter.
Pumpkin Gingerbread Variation: Swap half the hot water for pumpkin puree. Reduce the molasses to 1/3 cup. You’ll get a softer, more cake-like texture with a beautiful orange tint. This version is especially good for Thanksgiving.
Individual Mini Bars: Press the crust into a greased muffin tin (about 2 tablespoons per cup), add the fillings, and bake for 18-22 minutes. These are perfect for parties or portion control. You’ll get about 12-14 minis.
I once made a version with a swirl of caramel sauce on top before frosting. It was messy but delicious—the caramel crystallized a bit on top and added a crunchy-sweet contrast. Not something I’d serve to company, but for a late-night kitchen experiment, it hit the spot.
Serving & Storage Suggestions
These bars are best served chilled or at cool room temperature. If they’re too warm, the frosting gets soft and the layers can slide apart. I usually pull them out of the fridge about 15 minutes before serving—just enough to take the chill off without losing the structure.
Presentation ideas: Cut into neat squares and arrange on a white platter for maximum contrast. Dust very lightly with powdered sugar or cinnamon right before serving. A tiny sprig of rosemary or a few candied ginger pieces on top makes them look extra festive without much effort.
What to serve with them: A dollop of lightly sweetened whipped cream is lovely if you want to gild the lily. For drinks, spiced chai, hot apple cider, or a dark roast coffee all complement the gingerbread flavors. If you’re feeling indulgent, a scoop of vanilla bean ice cream melting over a warm bar is next-level.
Storage instructions: Keep the bars in an airtight container in the refrigerator for up to 5 days. Place a sheet of parchment paper between layers if you’re stacking them. The flavors actually get better on day two—the spices meld and the cream cheese layer firms up perfectly.
Freezing: These freeze beautifully. Wrap individual bars (unfrosted) tightly in plastic wrap, then place in a freezer-safe bag or container. They’ll keep for up to 3 months. When you’re ready to serve, thaw in the refrigerator overnight, then add the frosting fresh. The frosting can also be frozen separately in a zip-top bag—just snip the corner and pipe it on after thawing.
Reheating: I actually prefer these cold, but if you want a warm dessert experience, microwave a single bar for 10-15 seconds. The gingerbread softens while the cheesecake stays coolish—it’s a nice contrast. Don’t overdo it or the frosting will melt into a puddle.
Nutritional Information & Benefits
Let’s be real—these are a treat, not a health food. But here’s the estimated breakdown per bar (based on 16 servings):
| Nutrient | Amount per Bar |
|---|---|
| Calories | 320 |
| Total Fat | 18g |
| Saturated Fat | 11g |
| Cholesterol | 65mg |
| Sodium | 280mg |
| Total Carbohydrates | 38g |
| Dietary Fiber | 1g |
| Sugars | 24g |
| Protein | 4g |
Now for the bright side: Ginger has genuine anti-inflammatory properties and can help with nausea and digestion. Cinnamon may help regulate blood sugar. Molasses contains iron, calcium, and magnesium—more than refined sugar. And cream cheese provides a small amount of protein and calcium. So while I wouldn’t call these “healthy,” they’re not empty calories either. They’re the kind of dessert that feels nourishing in a different way—the way something made with care and shared with people you love can be good for the soul.
If you’re watching your sugar intake, you can reduce the sugar in the crust and frosting slightly, but I wouldn’t recommend cutting it in the gingerbread layer—the molasses needs the sugar for proper structure and texture.
These bars contain gluten, dairy, and eggs. Not suitable for vegan, gluten-free, or egg-free diets without the substitutions mentioned earlier.
Conclusion
These cozy gingerbread cheesecake bars have become my go-to for every winter gathering, every quiet night when I need something sweet, every time I want to fill my kitchen with that unmistakable holiday smell. They’re not the fanciest dessert I make, and they’re not the most complicated. But they are the one that makes people smile—the one that disappears fastest from the plate, the one someone always asks me for the recipe.
I love that they let me hold onto a little piece of Mrs. Kowalski’s kitchen, even though I can’t go back there. I love that they’re forgiving enough for a Tuesday night but impressive enough for a Christmas party. And I love that every time I make them, I learn something new—a slightly better way to press the crust, a more efficient way to layer the batters, a reminder that some things are worth the extra dishes.
I’d love to hear how yours turn out. Did you try a variation? Did you serve them at a holiday dinner? Did you eat three in one sitting like I definitely did during the testing phase? Drop a comment below and let me know—I read every single one, and your tweaks might inspire my next batch. Happy baking, friends. May your kitchen smell like gingerbread and your heart feel a little fuller.
Frequently Asked Questions
Can I make these gingerbread cheesecake bars ahead of time?
Absolutely. In fact, they’re better made a day ahead. The chilling time helps the layers set and the flavors deepen. Bake, cool, refrigerate overnight, then add the frosting the next day. They’ll be easier to slice and taste even better.
Why did my cheesecake layer crack?
This usually happens from overmixing or overbaking. Beat the cream cheese mixture just until smooth—don’t whip air into it. And pull the bars out when the center still has a slight jiggle. It will continue to set as it cools. Cracks are purely cosmetic anyway; the frosting covers them beautifully.
Can I use fresh ginger instead of ground?
You can, but the flavor will be different. Fresh ginger is more pungent and spicy, while ground ginger is warmer and more aromatic. If you want to try it, grate about 1 tablespoon of fresh ginger and add it with the molasses. Reduce the ground ginger to 1 teaspoon to keep the balance.
My crust is too crumbly. What went wrong?
Two possible issues: not enough butter, or the crust wasn’t pressed firmly enough. Make sure your crumbs are evenly coated with melted butter—the mixture should clump when squeezed. And really pack it down. I use the bottom of a measuring cup and put my weight into it. A pre-bake of 10 minutes also helps set the crust.
Can I double this recipe for a 9×13 pan?
Yes! Double all ingredients and bake in a 9×13-inch pan lined with parchment. The baking time will increase to about 40-45 minutes. Check for doneness the same way—a toothpick with a few moist crumbs. You’ll get about 24 bars instead of 16.
Pin This Recipe!
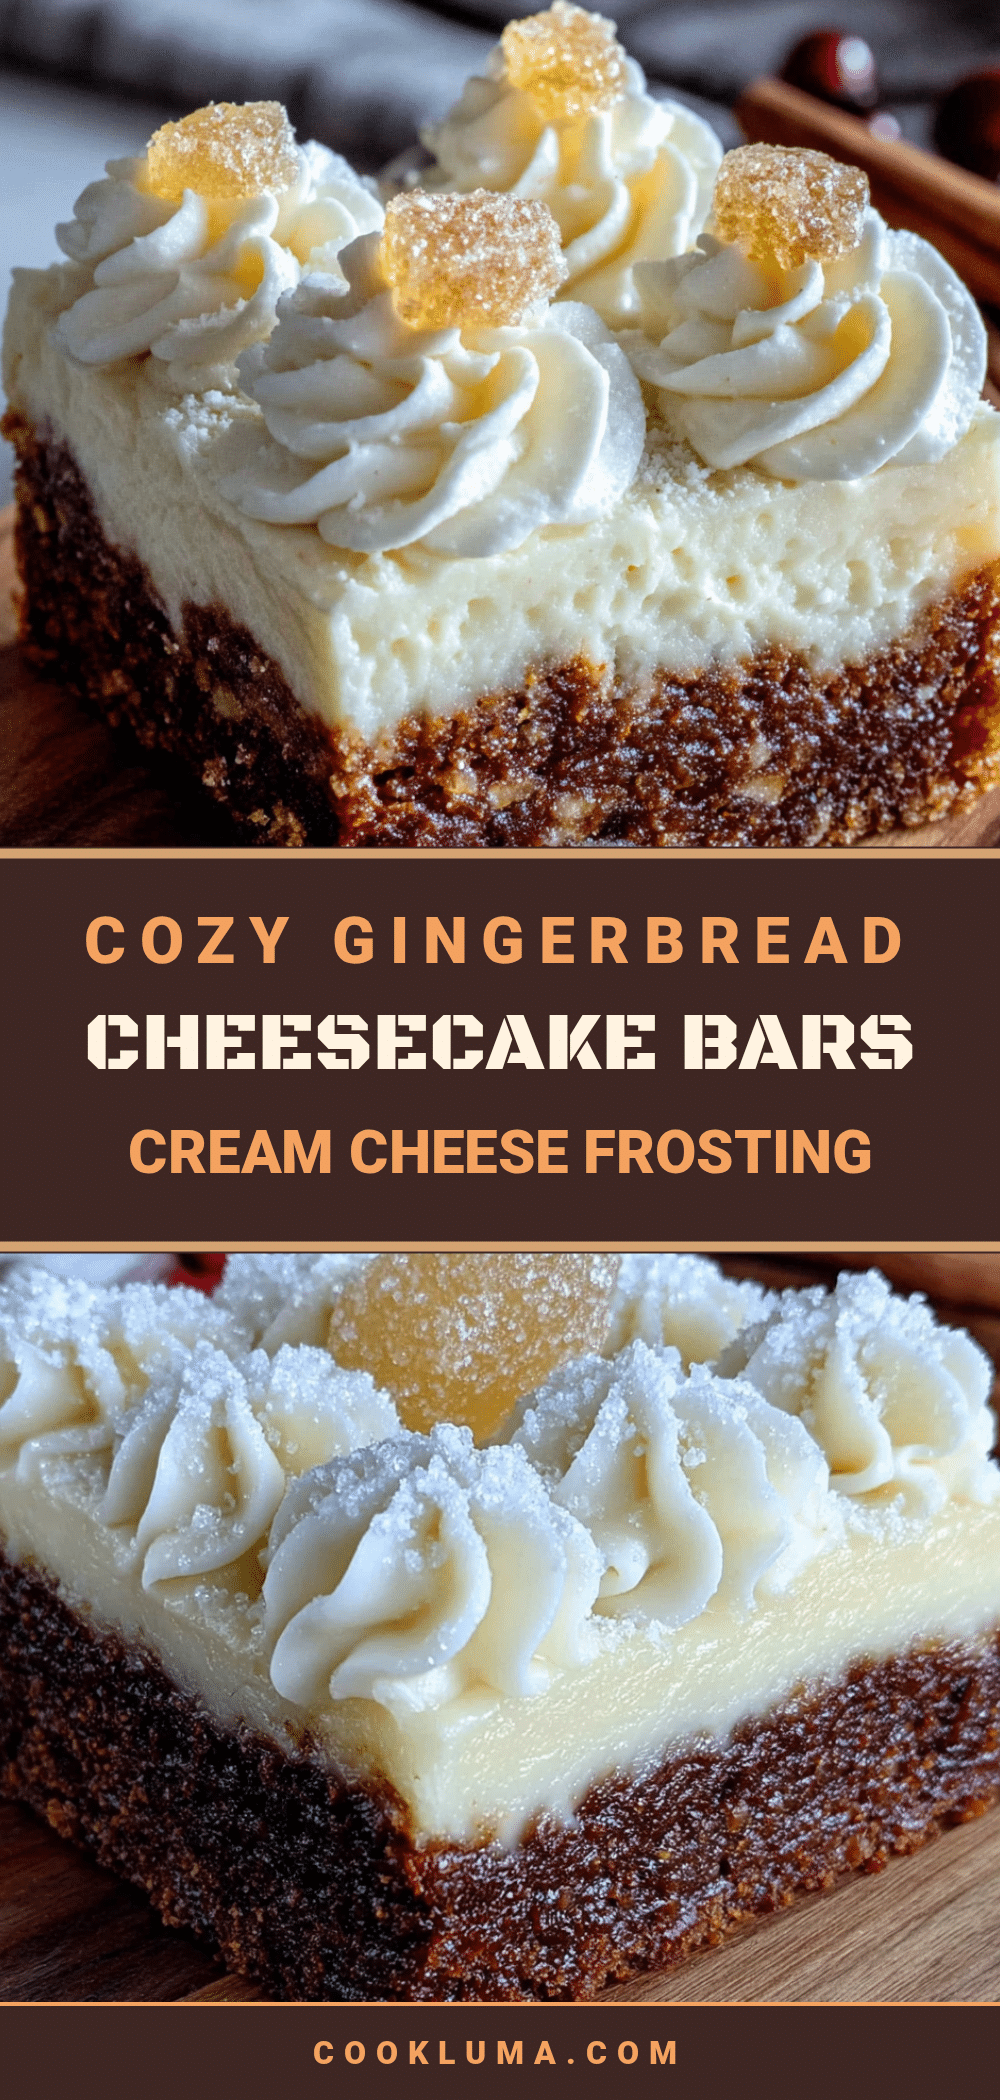
Cozy Gingerbread Cheesecake Bars: Easy & Best Homemade
These gingerbread cheesecake bars feature a crunchy gingersnap crust, a creamy cheesecake layer, and a spiced gingerbread cake, all topped with a silky cream cheese frosting. They’re the perfect holiday dessert that’s both impressive and easy to make.
- Prep Time: 45 minutes
- Cook Time: 35 minutes
- Total Time: 2 hours 20 minutes (plus chilling)
- Yield: 16 servings 1x
- Category: Dessert
- Cuisine: American
Ingredients
- 2 cups crushed gingersnap cookies (about 8 ounces or 40 cookies)
- 6 tablespoons unsalted butter, melted
- 2 tablespoons granulated sugar
- Pinch of salt (skip if using salted butter)
- 8 ounces full-fat cream cheese, softened
- 1/4 cup granulated sugar
- 1 large egg yolk
- 1/2 teaspoon vanilla extract
- 1 1/2 cups all-purpose flour (spooned and leveled)
- 1 teaspoon baking soda
- 1 1/2 teaspoons ground ginger
- 1 teaspoon ground cinnamon
- 1/2 teaspoon ground cloves
- 1/4 teaspoon ground nutmeg
- 1/2 teaspoon salt
- 1/2 cup unsalted butter, softened
- 1/2 cup packed dark brown sugar
- 1 large egg
- 1/2 cup molasses (not blackstrap)
- 1/2 cup hot water
- 4 ounces cream cheese, softened
- 2 tablespoons unsalted butter, softened
- 1 cup powdered sugar (sifted if clumpy)
- 1/2 teaspoon vanilla extract
- 1–2 tablespoons milk or heavy cream
Instructions
- Preheat oven to 350°F (175°C). Line a 9×9-inch baking pan with parchment paper, leaving overhang on two sides. Lightly grease the parchment.
- Make the crust: Pulse gingersnap cookies in a food processor until fine crumbs. Transfer to a bowl, add melted butter, sugar, and salt. Stir until mixture resembles wet sand. Press firmly into the bottom of the prepared pan. Bake for 10 minutes, then set aside to cool slightly.
- Make the cream cheese layer: In a medium bowl, beat softened cream cheese with an electric mixer until smooth and fluffy, about 2 minutes. Add sugar and beat another minute. Add egg yolk and vanilla, beating just until combined. Set aside at room temperature.
- Make the gingerbread cake layer: In a small bowl, whisk together flour, baking soda, ginger, cinnamon, cloves, nutmeg, and salt. In a larger bowl, beat softened butter and brown sugar until light and fluffy, about 3 minutes. Add egg and reserved egg white, beating well after each addition. Beat in molasses. Add half the flour mixture and beat on low until just combined. Add hot water and beat until smooth. Add remaining flour mixture and beat just until no streaks remain.
- Assemble the bars: Pour about two-thirds of the gingerbread batter over the pre-baked crust and spread evenly. Drop spoonfuls of cream cheese mixture over the batter, then gently spread into an even layer. Pour remaining gingerbread batter over the cream cheese layer and spread carefully.
- Bake for 30-35 minutes, until a toothpick inserted into the center comes out with a few moist crumbs. Let cool completely in the pan on a wire rack (about 2 hours). Then refrigerate for at least 2 hours, or overnight.
- Make the frosting: Beat softened cream cheese and butter together until smooth. Add powdered sugar and vanilla, beating until fluffy. Add milk or cream one tablespoon at a time until spreadable. Spread over chilled bars.
- Slice and serve: Use parchment handles to lift the block out of the pan. Slice into 16 squares with a sharp knife, wiping clean between cuts.
Notes
Room temperature ingredients are crucial for smooth cream cheese layers. Don’t overmix the gingerbread batter to keep it tender. The hot water trick ensures a moist cake. Patience with cooling is essential for clean slices. Use a sharp knife for slicing and wipe between cuts.
Nutrition
- Serving Size: 1 bar
- Calories: 320
- Sugar: 24
- Sodium: 280
- Fat: 18
- Saturated Fat: 11
- Carbohydrates: 38
- Fiber: 1
- Protein: 4
Keywords: gingerbread cheesecake bars, holiday dessert, gingerbread, cheesecake, bars, Christmas dessert, easy dessert


