I was standing in the middle of the spice aisle at our local grocery store last October when a woman walked past me, and the air shifted. It was that smell—sweet corn cooking down with butter, a little bit of heat, a little bit of something smoky. And suddenly I was seven years old, sitting on a wobbly stool in my Aunt Lena’s farmhouse kitchen, watching her shuck corn into a brown paper bag. She’d toss the silk into the compost bucket with this practiced flick of her wrist, and she’d hum—off-key, always—some country song I never recognized. She passed away when I was twelve, and I swear I haven’t smelled that exact combination of sweet corn and butter and something spicy since. Until that aisle. I grabbed a can of creamed corn without even thinking, tossed in some jalapeños, and spent the next three days trying to chase down that moment. This casserole is what came out of it. Honestly, it took me a few tries to get it right. I burned the first batch because I got distracted watching football, and the second one was so spicy my husband couldn’t finish his plate. But the third try? That was it. That sweet-and-spicy balance, the creamy corn against the little pops of heat, the crispy top that cracks when you dig in with a spoon. Maybe you’ve been there—trying to recreate a taste from childhood that you can barely describe. This is that taste. And it’s exactly right for a crisp October evening when the leaves are turning and everyone’s craving something warm.
Why You’ll Love This Recipe
This isn’t just another corn casserole that shows up at every potluck and sits there looking beige. This is the one people ask for by name. Here’s why it stands out from the crowd:
- Quick & Easy: Comes together in under an hour with only 10 minutes of active prep. Perfect for those busy weeknights when you still want something that feels special.
- Simple Ingredients: Everything you need is probably already in your pantry and fridge. No chasing down obscure ingredients at specialty stores.
- Perfect for Fall Gatherings: Whether it’s Thanksgiving, a football watch party, or just a cozy Sunday dinner, this casserole fits right in. The sweet corn feels like autumn on a plate.
- Crowd-Pleaser: I’ve served this to picky kids, spice-averse in-laws, and serious foodies. Everyone goes back for seconds. The sweetness hooks them, and the subtle heat keeps them coming back.
- Unbelievably Delicious: The texture is what gets me every time. Creamy on the inside, golden and slightly crispy on top, with little bursts of jalapeño heat that sneak up on you.
What makes this recipe different from the dozens of corn casseroles out there? It’s the balance. Most versions are either cloyingly sweet or one-note spicy. This one uses a technique I picked up from a chef friend—blotting the canned corn to remove excess liquid before mixing. It sounds small, but it prevents that watery, soggy texture that plagues so many casseroles. The result is creamy, not soupy. And the jalapeños? I use both fresh and pickled. Trust me on this one. The fresh ones give you that bright, grassy heat, while the pickled ones add a tangy depth that makes the whole thing sing.
This is the kind of dish that makes you close your eyes after the first bite. It’s comfort food, sure, but it’s comfort food that’s been tweaked and tested and perfected. It’s the dish you’ll bring to every fall gathering from now on.
What Ingredients You Will Need
This recipe uses straightforward ingredients, but each one plays an important role in building that sweet-and-spicy magic. Here’s what you’ll need and why each ingredient matters.
For the Casserole Base
- 2 cans (15.25 oz each) whole kernel corn, drained – I prefer Del Monte or Green Giant for consistent sweetness. Drain them well, then blot with paper towels. This step is non-negotiable for avoiding a watery casserole.
- 1 can (14.75 oz) cream-style corn – This is what gives the casserole its creamy texture without needing heavy cream. I’ve tried making my own, and honestly, the canned version works better here. Libby’s is my go-to.
- 1 box (8.5 oz) Jiffy corn muffin mix – The backbone of the casserole. It adds sweetness, structure, and that slightly crumbly texture on top. Don’t substitute with a different brand unless you’re prepared to adjust the sugar and leavening.
- 1 cup sour cream – Full-fat is best for richness, but light sour cream works in a pinch. Let it come to room temperature before mixing so it incorporates smoothly.
- ½ cup unsalted butter, melted – Salted butter will make the final dish too salty, so stick with unsalted. I use Kerrygold when I’m feeling fancy, but store-brand works fine.
- 2 large eggs, lightly beaten – Room temperature eggs blend more evenly. If you forget to take them out ahead of time, place them in a bowl of warm water for 5 minutes.
- 1 tablespoon granulated sugar – Just a little extra sweetness to balance the heat. Skip this if you prefer a more savory casserole.
- 1 teaspoon salt – Use fine sea salt. Kosher salt is too bulky for this recipe and won’t distribute evenly.
- ½ teaspoon black pepper – Freshly ground is always better, but pre-ground works.
For the Sweet & Spicy Kick
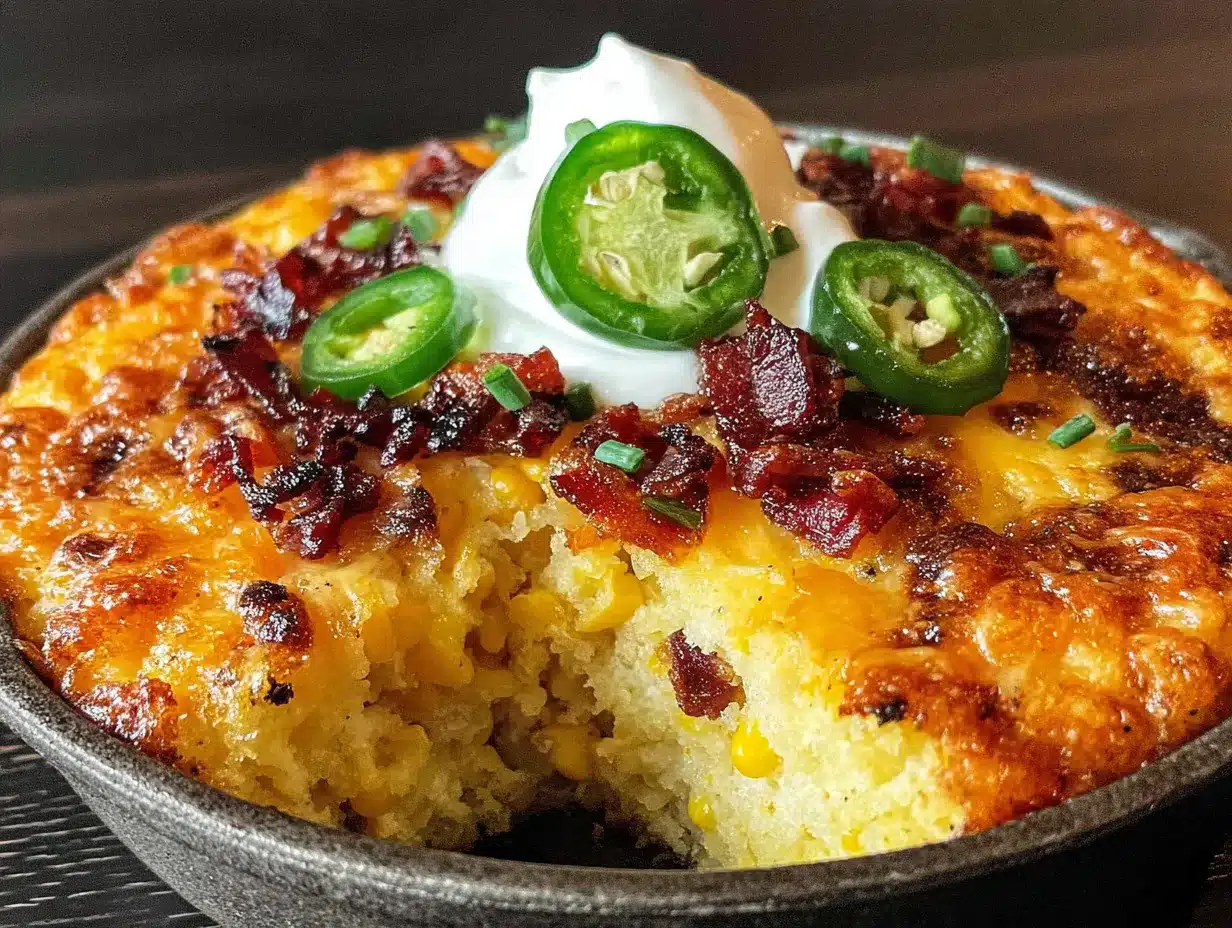
- 2 fresh jalapeños, finely diced – Leave the seeds in if you want more heat, remove them for a milder version. I usually keep the seeds in one and remove them from the other for a balanced kick.
- ¼ cup pickled jalapeños, chopped – The tanginess from the pickling brine adds a whole other dimension. I love the homemade pickled jalapeños my neighbor makes, but store-bought works perfectly.
- 1 cup shredded sharp cheddar cheese – Sharp cheddar stands up to the heat better than mild. Shred it yourself from a block—the pre-shredded stuff has anti-caking agents that prevent it from melting smoothly.
- ½ cup shredded Monterey Jack cheese – Adds creaminess without overpowering. Pepper Jack works too if you want extra heat.
For the Topping
- ½ cup panko breadcrumbs – They create a much crispier topping than regular breadcrumbs. I’ve tried both, and panko wins every time.
- 2 tablespoons melted butter – For tossing with the panko to help it brown.
- Optional: ¼ teaspoon smoked paprika – Adds a subtle smokiness that complements the jalapeños beautifully.
Substitution Notes: For a gluten-free version, use a gluten-free corn muffin mix and gluten-free panko. For a dairy-free option, substitute the sour cream with dairy-free yogurt, use vegan butter, and skip the cheese or use a plant-based alternative. The texture will be slightly different, but the flavor still works.
Equipment Needed
You don’t need a fancy kitchen to pull this off. Here’s what you’ll actually use:
- 9×13-inch baking dish – Glass or ceramic works best. Metal pans can sometimes react with the acidity from the jalapeños and give a slight metallic taste. I use a Pyrex dish that’s survived three moves and one dropped spatula.
- Large mixing bowl – Big enough to hold everything without splashing. I use my grandmother’s old ceramic bowl, but any large bowl works.
- Whisk – For beating the eggs and mixing the wet ingredients smoothly.
- Rubber spatula – For folding everything together without overmixing. A wooden spoon works too, but the spatula gets every last bit.
- Chef’s knife and cutting board – For dicing the jalapeños. Use a sharp knife—dull knives slip, and you really don’t want jalapeño juice in a cut finger. Trust me on this one.
- Small skillet – For toasting the panko topping if you want extra crunch. Not strictly necessary, but worth the extra 3 minutes.
- Measuring cups and spoons – Accurate measurements matter in baking, even for a casserole.
Budget-Friendly Alternatives: No 9×13 dish? Use a 10-inch cast iron skillet instead. The cooking time might need to be reduced by 5 minutes, and you’ll get a nice crispy edge. No whisk? Two forks held together work in a pinch. No rubber spatula? A large spoon does the job.
Preparation Method
Let’s walk through this step by step. I’ve made this casserole at least twenty times, so I’ve figured out where things can go wrong and how to avoid them.
- Preheat your oven to 350°F (175°C). Place the rack in the center position. While it’s heating, grease your 9×13 baking dish with butter or non-stick spray. I use butter because it adds flavor to the edges.
- Drain and blot the whole kernel corn. Open both cans, pour them into a colander, and let them drain for about 2 minutes. Then spread the kernels on a clean kitchen towel or paper towels and pat them dry. This step seems fussy, but I promise it’s the difference between a creamy casserole and a watery one. I learned this the hard way after my first attempt came out soupy.
- Prep the jalapeños. Wash the fresh jalapeños, cut off the stems, and slice them in half lengthwise. Decide how much heat you want. For medium heat, keep the seeds in one half and remove them from the rest. For mild, remove all seeds and membranes. Dice them into small pieces—about ¼-inch. Chop the pickled jalapeños to the same size. Set them aside separately.
- Melt the butter. Place ½ cup of unsalted butter in a microwave-safe bowl and heat in 20-second intervals until fully melted. Let it cool slightly while you mix the other ingredients. Hot butter can cook the eggs if you add it too quickly.
- Mix the wet ingredients. In your large mixing bowl, whisk together the sour cream, melted butter, and beaten eggs until smooth. The mixture should look pale yellow and slightly thick. If it looks separated, you’ve added the butter too fast—just whisk vigorously until it comes back together.
- Add the corn and corn muffin mix. Stir in the drained whole kernel corn, cream-style corn, and the box of Jiffy mix. Mix until just combined—about 15 strokes. Overmixing will make the casserole tough. A few small lumps are perfectly fine.
- Add the sugar, salt, and pepper. Sprinkle them over the top and fold them in gently. Taste the batter if you want—it should be sweet with a hint of savory. Adjust the salt if needed.
- Fold in the jalapeños and cheese. Add the fresh jalapeños, pickled jalapeños, and both shredded cheeses. Fold them in with your rubber spatula, being careful not to overmix. You want the jalapeños and cheese distributed evenly, not mashed into the batter.
- Pour into the prepared dish. Scrape every last bit of batter into the greased baking dish. Spread it evenly with the spatula. Give the dish a gentle tap on the counter to release any air bubbles.
- Make the topping. In a small bowl, toss the panko breadcrumbs with 2 tablespoons of melted butter and the smoked paprika if you’re using it. Sprinkle this mixture evenly over the top of the casserole. Don’t press it in—you want it to stay on top and get crispy.
- Bake for 40-45 minutes. Place the dish in the preheated oven and bake until the edges are golden brown and the center is set. You’ll know it’s done when a knife inserted in the center comes out clean, or when the internal temperature reaches 165°F (74°C). The top should be golden and slightly cracked.
- Let it rest for 10 minutes. This is the hardest part, I know. But letting the casserole rest allows it to set up properly. If you cut into it right away, it will fall apart. Use this time to set the table or make a quick salad.
Cooking Tips & Techniques
After making this casserole more times than I can count, I’ve collected a few tricks that make a real difference. Here are the ones I wish someone had told me before my first attempt.
Don’t skip blotting the corn. I know it feels like an extra step that doesn’t matter, but it absolutely does. Canned corn is packed in water or brine, and that extra liquid turns your casserole into corn soup. Spread the kernels on a paper towel-lined baking sheet and let them sit for 5 minutes if you’re short on time.
Toast the panko first for extra crunch. If you have 3 extra minutes, toast the panko in a dry skillet over medium heat until golden before mixing it with butter. It adds a nutty flavor and ensures the topping stays crispy even if the casserole sits out for a while.
Watch your oven temperature. Every oven runs differently. My old apartment oven ran 25 degrees hot, and I burned two casseroles before I figured it out. If your casserole is browning too quickly on top but isn’t set in the middle, tent it loosely with foil and continue baking.
Let the eggs come to room temperature. Cold eggs can cause the melted butter to seize up, leaving you with lumpy batter. If you forget to take them out early, place them in a bowl of warm water for 5 minutes. It works every time.
Use the right baking dish. Glass and ceramic dishes retain heat better than metal, which means more even baking. If you’re using a metal pan, reduce the oven temperature by 25 degrees and check for doneness 5 minutes early.
Don’t overmix. I’m guilty of this one. When you’re folding in the cheese and jalapeños, stop as soon as they’re distributed. Overmixing develops the gluten in the corn muffin mix and makes the casserole dense instead of tender.
Make it ahead of time. This casserole actually gets better after sitting in the fridge overnight. The flavors meld together, and the heat from the jalapeños mellows out. Assemble it the night before, cover it with foil, and bake it the next day. Just add 10 minutes to the baking time since you’re starting from cold.
Variations & Adaptations
One of the things I love about this recipe is how flexible it is. Here are some variations I’ve tried and loved.
Loaded Southwest Casserole: Add 1 cup of cooked, crumbled chorizo or black beans, ½ cup of diced red bell pepper, and ¼ cup of chopped cilantro. Swap the cheddar for pepper jack. This version is hearty enough to be a main dish, and it’s become my go-to for game day gatherings.
Milder Version for Sensitive Palates: Use only pickled jalapeños and rinse them before chopping to remove some of the brine. Replace the fresh jalapeños with ½ cup of diced green bell pepper for color and crunch without the heat. My mother-in-law, who thinks black pepper is spicy, actually ate two servings of this version.
Extra Spicy for Heat Seekers: Keep all the seeds in the fresh jalapeños and add 1 tablespoon of finely chopped serrano pepper. Stir in ½ teaspoon of cayenne pepper with the dry ingredients. Top with sliced fresh jalapeños before baking for a dramatic presentation. Fair warning: this version has made a few people cry, including me once when I touched my eye after chopping peppers.
Gluten-Free Adaptation: Substitute the Jiffy mix with a gluten-free corn muffin mix. I’ve had good results with Bob’s Red Mill Gluten-Free Cornbread Mix. Use gluten-free panko for the topping. The texture is slightly more crumbly, but the flavor is still excellent.
Smoky Bacon Version: Cook 6 strips of bacon until crispy, crumble them, and stir half into the batter. Reserve the rest for topping. Replace the smoked paprika in the topping with actual bacon fat instead of butter. This version disappeared fastest at our last family dinner.
Vegetarian and Vegan Options: For vegetarian, just skip the bacon variations. For vegan, use dairy-free sour cream, vegan butter, and plant-based cheddar shreds. The texture will be a bit less creamy, but the flavor still holds up. I’ve served this to vegan friends who asked for the recipe.
Serving & Storage Suggestions
This casserole is versatile enough to fit into almost any meal. Here’s how I like to serve and store it.
Serving Temperature: Serve it warm, straight from the oven. The cheese is melty, the top is crispy, and the flavors are at their peak. If you’re bringing it to a potluck, keep it covered with foil to retain heat. It’s still good at room temperature, but the texture is best within the first hour out of the oven.
Presentation Ideas: Garnish with a sprinkle of fresh cilantro or chopped green onions right before serving. A dollop of sour cream on top adds a nice cool contrast to the heat. For a more dramatic look, arrange a few whole pickled jalapeños on top before baking.
What to Serve With It: This casserole pairs beautifully with slow-cooked pulled pork or grilled chicken. It’s also fantastic alongside a simple green salad with lime vinaigrette. For a full fall spread, serve it with roasted turkey, mashed potatoes, and cranberry sauce. It works for Thanksgiving, but it’s also perfect with a simple weeknight chili.
Storage Instructions: Leftovers keep well in the refrigerator for up to 5 days. Store them in an airtight container. The topping will lose some of its crunch, but the flavor actually improves as the ingredients meld together.
Freezing Instructions: This casserole freezes beautifully. Bake it completely, let it cool, then wrap it tightly in plastic wrap and foil. Freeze for up to 3 months. To reheat, thaw overnight in the refrigerator, then bake at 350°F for 20-25 minutes until warmed through. You can also freeze individual portions for easy lunches.
Reheating Tips: The microwave works in a pinch, but the oven gives you better results. Place leftovers in a 350°F oven for 10-15 minutes. If the top is getting too dark, cover with foil. For a quick fix, use a toaster oven. The topping won’t be as crispy as day one, but it’ll still be delicious.
How Flavors Develop: Here’s something interesting—the casserole actually tastes better on day two. The heat from the jalapeños mellows out, and the sweetness of the corn becomes more pronounced. If you’re making this for a special occasion, consider assembling it a day ahead and baking it fresh. The flavors will be more balanced, and you’ll save yourself some stress on the day of the event.
Nutritional Information & Benefits
Let’s be real—this is comfort food, not health food. But it does have some redeeming qualities worth mentioning.
Estimated Nutritional Values (per serving, based on 12 servings):
– Calories: 285
– Total Fat: 16g
– Saturated Fat: 9g
– Cholesterol: 65mg
– Sodium: 520mg
– Total Carbohydrates: 30g
– Dietary Fiber: 2g
– Sugars: 8g
– Protein: 7g
Health Benefits of Key Ingredients: Corn is a good source of fiber, which supports digestive health. It also contains lutein and zeaxanthin, antioxidants that are beneficial for eye health. Jalapeños are rich in vitamin C and capsaicin, which has anti-inflammatory properties. The capsaicin in jalapeños can also boost metabolism slightly—not enough to cancel out the butter and cheese, but hey, every little bit helps.
Dietary Considerations: This recipe contains dairy, eggs, and gluten. For a gluten-free version, use a gluten-free corn muffin mix. For a dairy-free version, use plant-based alternatives. The recipe can be made vegetarian as written. It is not suitable for vegan diets without significant substitutions.
Potential Allergens: This recipe contains milk, eggs, and wheat. Jalapeños can cause skin irritation for some people—wear gloves when handling them if you have sensitive skin.
My Personal Wellness Perspective: I believe in balance. This casserole isn’t something I eat every day, but it’s absolutely worth making for special occasions. The vegetables (corn and jalapeños) do offer some nutritional value, and the protein from the eggs and cheese helps make it more satisfying. Serve it alongside a big green salad, and you’ve got a pretty well-rounded meal. Life’s too short to skip the butter.
Conclusion
This sweet and spicy jalapeño corn casserole has become my signature dish for fall gatherings, and I think it’s going to become yours too. It hits that perfect balance between creamy and crispy, sweet and spicy, familiar and surprising. Every time I make it, I think about Aunt Lena’s kitchen and that moment in the grocery store aisle. It’s funny how a simple dish can carry so much memory.
But here’s the thing—this casserole doesn’t need a backstory to be good. It stands on its own. The sweetness of the corn, the kick of the jalapeños, the crunch of the panko topping, the way the cheese stretches when you pull out a spoonful. It’s comfort food that actually delivers on its promise.
I’d love to hear how it turns out for you. Did you add bacon? Make it extra spicy? Serve it at Thanksgiving? Drop a comment below and let me know. And if you make it for your next fall gathering, tag me in your photos—I genuinely love seeing your versions.
Go ahead, preheat that oven. Your kitchen is about to smell amazing.
Frequently Asked Questions
Can I use frozen corn instead of canned?
Yes, you can. Thaw 3 cups of frozen corn and blot it dry just like you would with canned corn. The texture will be slightly firmer, and the flavor might be a bit brighter. I’ve made this with frozen corn in the winter when I wanted something summery, and it worked great. Just make sure to drain any excess liquid after thawing.
How do I reduce the spiciness if I’m sensitive to heat?
Remove all the seeds and white membranes from the fresh jalapeños—that’s where most of the heat lives. You can also replace one of the fresh jalapeños with green bell pepper for color without the burn. Rinsing the pickled jalapeños before chopping them also helps remove some of the brine’s heat. The result will be mildly warm rather than spicy.
Can I make this casserole ahead of time?
Absolutely. Assemble the casserole completely, cover it with foil, and refrigerate for up to 24 hours before baking. When you’re ready to bake, add about 10 minutes to the baking time since you’re starting from cold. The flavors actually meld together beautifully overnight. I often do this when I’m hosting Thanksgiving to free up oven space.
Why did my casserole turn out watery?
The most common culprit is not draining the canned corn thoroughly enough. Canned corn contains a surprising amount of liquid, and if you don’t blot it dry, that liquid ends up in your casserole. Another possible cause is overmixing, which can break down the corn muffin mix and prevent it from setting properly. Next time, blot the corn more thoroughly and mix just until combined.
Can I double this recipe for a crowd?
Yes, and I do it all the time for potlucks. Double all the ingredients and bake in a 9×13 dish and an 8×8 dish, or use a large roasting pan. The baking time will increase by about 10-15 minutes for a larger pan. Check for doneness by inserting a knife in the center—it should come out clean. Just make sure your oven has enough space for air to circulate around both dishes.
Pin This Recipe!
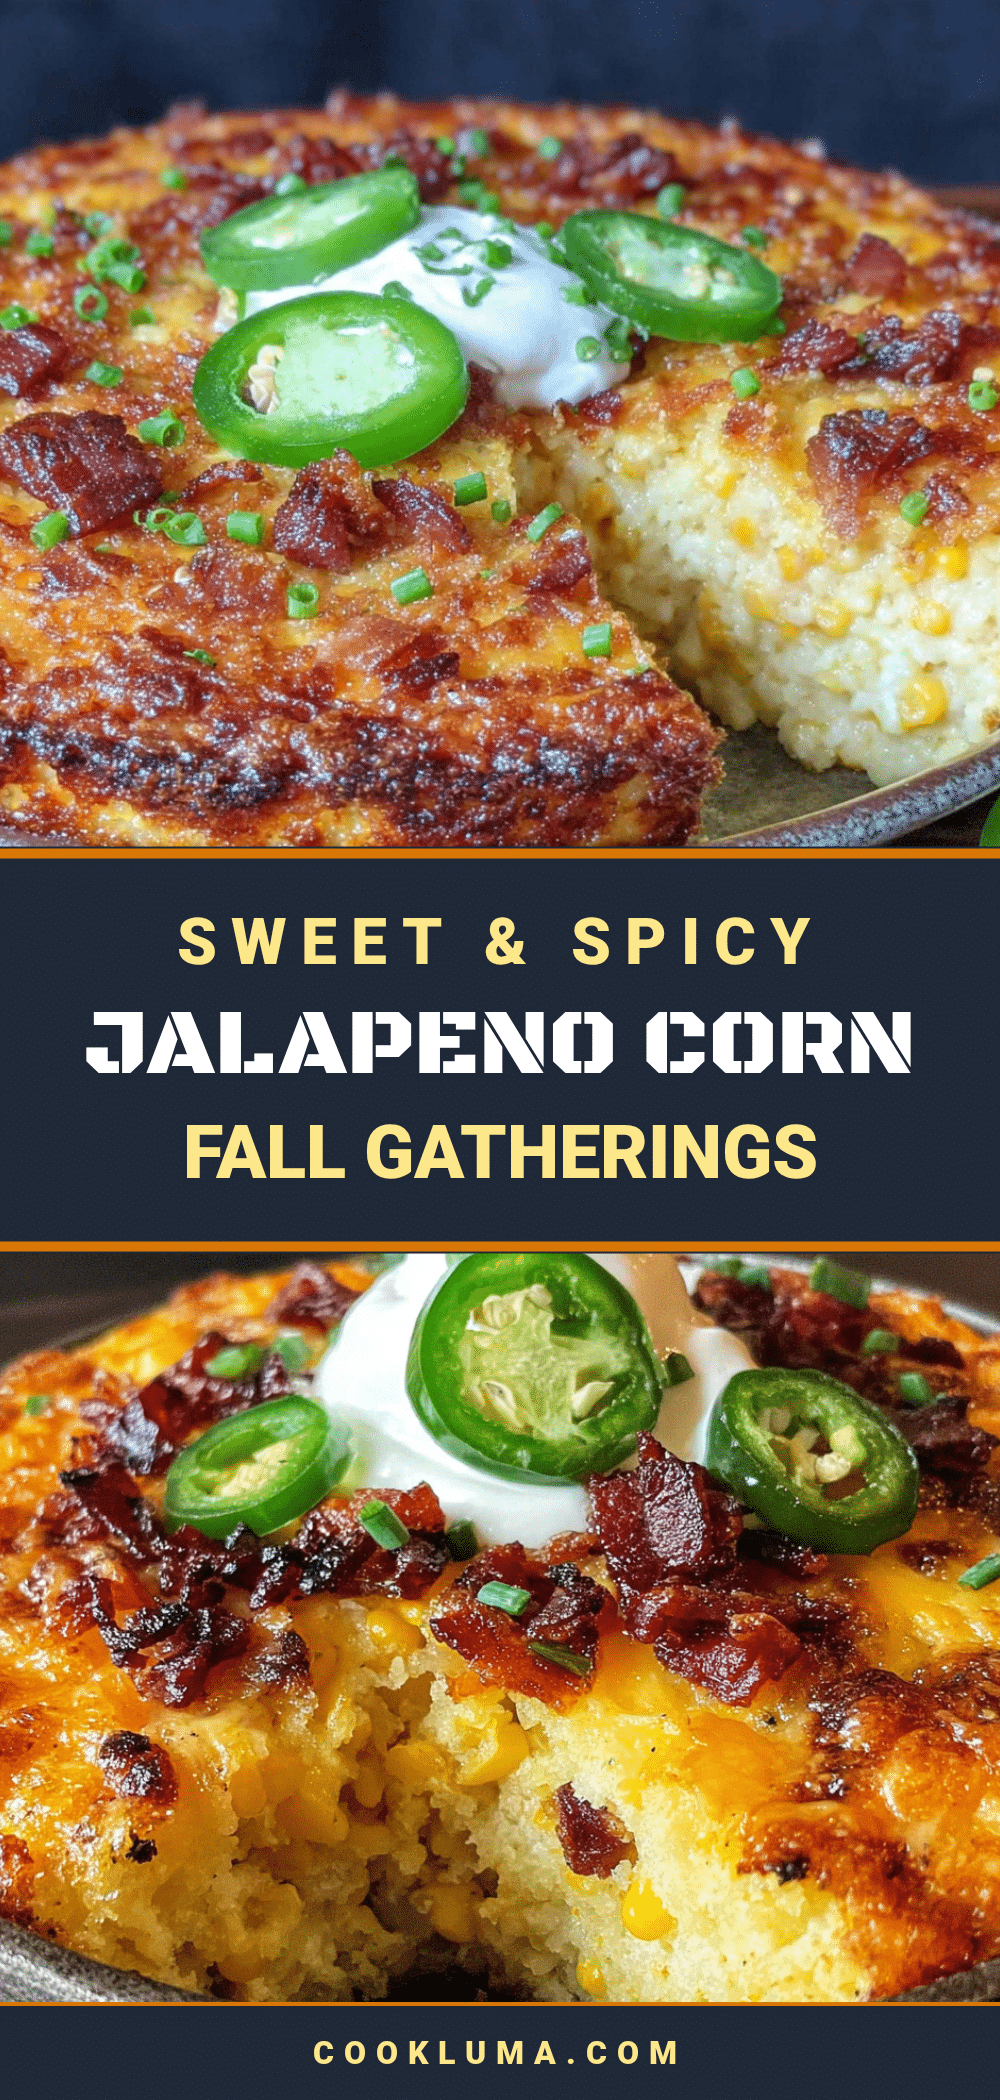
Best Sweet & Spicy Jalapeño Corn Casserole Recipe

This sweet and spicy jalapeño corn casserole hits the perfect balance between creamy and crispy, sweet and spicy. It’s comfort food that actually delivers on its promise, with a golden panko topping and bursts of jalapeño heat.
- Prep Time: 10 minutes
- Cook Time: 45 minutes
- Total Time: 55 minutes
- Yield: 12 servings 1x
- Category: Side Dish
- Cuisine: American
Ingredients
- 2 cans (15.25 oz each) whole kernel corn, drained and blotted dry
- 1 can (14.75 oz) cream-style corn
- 1 box (8.5 oz) Jiffy corn muffin mix
- 1 cup sour cream
- ½ cup unsalted butter, melted
- 2 large eggs, lightly beaten
- 1 tablespoon granulated sugar
- 1 teaspoon fine sea salt
- ½ teaspoon black pepper
- 2 fresh jalapeños, finely diced (seeds in for more heat, removed for milder)
- ¼ cup pickled jalapeños, chopped
- 1 cup shredded sharp cheddar cheese
- ½ cup shredded Monterey Jack cheese
- ½ cup panko breadcrumbs
- 2 tablespoons melted butter (for topping)
- ¼ teaspoon smoked paprika (optional)
Instructions
- Preheat your oven to 350°F (175°C). Grease a 9×13-inch baking dish with butter or non-stick spray.
- Drain the whole kernel corn in a colander for about 2 minutes. Spread the kernels on a clean kitchen towel or paper towels and pat them dry.
- Wash the fresh jalapeños, cut off the stems, and slice in half lengthwise. Remove seeds as desired. Dice into small pieces (about ¼-inch). Chop the pickled jalapeños to the same size. Set aside separately.
- Melt ½ cup unsalted butter in a microwave-safe bowl in 20-second intervals. Let cool slightly.
- In a large mixing bowl, whisk together the sour cream, melted butter, and beaten eggs until smooth and pale yellow.
- Stir in the drained whole kernel corn, cream-style corn, and Jiffy corn muffin mix. Mix until just combined (about 15 strokes). A few small lumps are fine.
- Sprinkle the sugar, salt, and pepper over the top and fold them in gently.
- Fold in the fresh jalapeños, pickled jalapeños, and both shredded cheeses until evenly distributed. Do not overmix.
- Pour the batter into the prepared baking dish and spread evenly. Tap the dish gently on the counter to release air bubbles.
- In a small bowl, toss the panko breadcrumbs with 2 tablespoons melted butter and smoked paprika (if using). Sprinkle evenly over the top. Do not press in.
- Bake for 40-45 minutes, until the edges are golden brown and the center is set. A knife inserted in the center should come out clean, or internal temperature should reach 165°F (74°C).
- Let the casserole rest for 10 minutes before serving.
Notes
Don’t skip blotting the canned corn—it prevents a watery casserole. For best results, let eggs come to room temperature before mixing. The casserole can be assembled a day ahead and refrigerated; add 10 minutes to baking time if starting from cold. Leftovers keep in the refrigerator for up to 5 days and freeze well for up to 3 months.
Nutrition
- Serving Size: 1 serving (1/12 of r
- Calories: 285
- Sugar: 8
- Sodium: 520
- Fat: 16
- Saturated Fat: 9
- Carbohydrates: 30
- Fiber: 2
- Protein: 7
Keywords: corn casserole, jalapeño corn casserole, sweet and spicy corn casserole, fall side dish, Thanksgiving side dish, comfort food, potluck recipe


