I was standing in the baking aisle of our local grocery store last December when a woman walked past me, and the scent of her perfume—something floral mixed with a hint of vanilla—hit me like a freight train. Suddenly I was seven years old at my Aunt Rita’s tiny kitchen table, the afternoon sun slanting through her yellow-checkered curtains, and she was placing a bowl of royal icing in front of me. The smell wasn’t exactly the same, but close enough to crack something open inside my chest. Aunt Rita passed away five years ago, and I’d never once tried to make her gingerbread house icing from scratch. Honestly, I’d been scared to. What if I couldn’t get it right, and that memory got ruined?
So I bought the tubed stuff that year, and the year after that, and let me tell you—it was never the same. The flavor was off, the texture was wrong, and my gingerbread walls kept sliding apart like they had somewhere better to be. Maybe you’ve been there, staring at a lopsided house with frosting that refuses to hold, wondering if store-bought royal icing is secretly plotting against you. I finally decided last November that I had to try making it myself. I mean, how hard could it be? Powdered sugar, egg whites, a little patience. Turns out, the real magic isn’t in the ingredients—it’s in the whisking and the waiting and the way your kitchen smells when you’re done.
This homemade royal icing recipe for gingerbread houses is the one I’ve been chasing ever since that grocery store moment. It’s sturdy enough to hold walls together, dries with a beautiful matte finish, and tastes like actual vanilla instead of that weird chemical sweetness. I’ve tested it six times now—yes, six—and my kitchen counter still has a faint dusting of powdered sugar I can’t quite scrub off. But every time I pipe a little roof tile or a tiny door, I feel Aunt Rita nodding somewhere, and that’s worth a messy counter any day.
Why You’ll Love This Recipe
Let me be straight with you—this isn’t just another royal icing recipe floating around the internet. This is the one I’ve tweaked and tested until my mixer practically groaned in protest. Here’s why this homemade royal icing recipe for gingerbread houses is going to become your new December tradition:
- Holds Like Cement : This icing dries rock hard, so your gingerbread walls won’t slide apart while you’re trying to get that roof on straight. I’ve tested it with heavy candy decorations and it doesn’t budge.
- Simple Ingredients : You probably have everything in your pantry right now. No fancy grocery store runs, no weird specialty items that cost a fortune and sit in your cupboard for three years.
- Perfect for Families : This recipe makes enough for a whole house, plus some extra for the inevitable toddler finger-dipping incident. And trust me, there will be finger-dipping.
- Budget-Friendly : A batch costs about two dollars to make, compared to eight bucks for those tiny tubes at the store. For a family feeding everyone on a sensible budget, that adds up fast.
- Actually Tastes Good : Store-bought royal icing has this weird plasticky aftertaste. This one tastes like vanilla and sugar, the way it should. Your kids will pick off every last bit of icing before they even touch the gingerbread.
What makes this recipe different from all the others? It’s the consistency. Most recipes leave you guessing—too thick, too runny, too frustrating. I’ve broken down exactly how the icing should look and feel at every stage, so you’re never left wondering if you messed up. Plus, I use cream of tartar, which stabilizes the egg whites and gives you a smoother, more reliable result every single time. No more weeping icing or separated batches.
This homemade royal icing recipe for gingerbread houses is the kind that makes you close your eyes after that first successful wall connection. It’s comfort baking reimagined—faster than you think, cheaper than store-bought, but with the same soul-soothing satisfaction of creating something beautiful with your own hands. Perfect for impressing the neighbors without stressing yourself out, or turning a simple Saturday afternoon into a memory your kids will talk about for years.
What Ingredients You Will Need
This homemade royal icing recipe for gingerbread houses uses simple, pantry-friendly ingredients to deliver that perfect pipeable consistency and rock-hard finish. No exotic finds, no expensive imports—just honest ingredients that work together beautifully.
- 4 cups (480g) powdered sugar , sifted — Sifting is non-negotiable here, friends. Lumps will clog your piping tip and ruin your smooth finish. I recommend Domino or C&H for consistent results.
- 3 large egg whites , room temperature — Room temperature whites whip up fluffier and more stable. If you’re in a hurry, place your eggs in a bowl of warm water for five minutes.
- 1 teaspoon cream of tartar — This is my secret weapon. It stabilizes the egg whites and prevents the icing from separating or getting weepy over time. Don’t skip it.
- 1 teaspoon vanilla extract , clear if you want pure white icing — Clear vanilla extract keeps your icing bright white, which matters if you’re planning to color it. Regular vanilla works fine but gives a slight ivory tint.
- Pinch of salt — Just a tiny pinch to balance the sweetness. You won’t taste it, I promise.
- 2-3 tablespoons water , as needed for consistency — Add this slowly. The humidity in your kitchen affects how much you’ll need. On rainy days, you might need less. On dry winter days, you might need more.
Ingredient Substitutions : If you’re concerned about raw eggs, you can substitute 3 tablespoons of meringue powder mixed with 6 tablespoons of warm water for the egg whites. The texture will be slightly different—a bit less fluffy—but it works in a pinch. For a vegan version, use aquafaba (the liquid from a can of chickpeas) in place of egg whites, but be warned that the drying time is longer and the finish is slightly less glossy. I’ve tried both, and honestly, the real egg white version is worth it for the structural integrity of your gingerbread house.
Sourcing Tips : Look for cream of tartar in the spice aisle of any grocery store—it’s usually near the cinnamon and nutmeg. A small jar costs about three dollars and lasts for years. For the powdered sugar, avoid the “confectioners’ sugar blend” that contains cornstarch; plain powdered sugar works best. And please, please use real vanilla extract, not imitation. The flavor difference is night and day, and your gingerbread house deserves the good stuff.
Equipment Needed
You don’t need a professional bakery setup to make this homemade royal icing recipe for gingerbread houses. Here’s what you’ll actually use:
- Stand mixer or hand mixer — A stand mixer makes this easier, but a hand mixer works perfectly fine. I’ve made this recipe with both, and the results are identical. Your arm will just get more of a workout with the hand mixer.
- Large mixing bowl — Glass or stainless steel works best. Plastic bowls can retain grease, which will ruin your egg white structure.
- Fine-mesh sieve — For sifting that powdered sugar. A regular colander won’t cut it—you need something fine enough to catch those tiny lumps.
- Rubber spatula — For scraping down the bowl and folding in the last bits of sugar.
- Piping bags and tips — I use disposable piping bags for easy cleanup. A small round tip (like a Wilton #2 or #3) works for detail work, and a larger tip (like a #10 or #12) is great for filling in larger areas. If you don’t have piping bags, a zip-top bag with the corner snipped off works in a pinch.
- Small offset spatula — For spreading icing on tricky spots. Not essential, but nice to have.
- Toothpicks — For popping air bubbles and making tiny adjustments. You’ll thank me later.
Budget-Friendly Alternatives : Skip the fancy piping tips and use a zip-top bag with a tiny corner snipped off. It won’t give you perfect stars or shells, but it’ll get the job done. I spent my first three years of gingerbread house making with a plastic bag and a pair of scissors, and my houses looked just fine.
Preparation Method
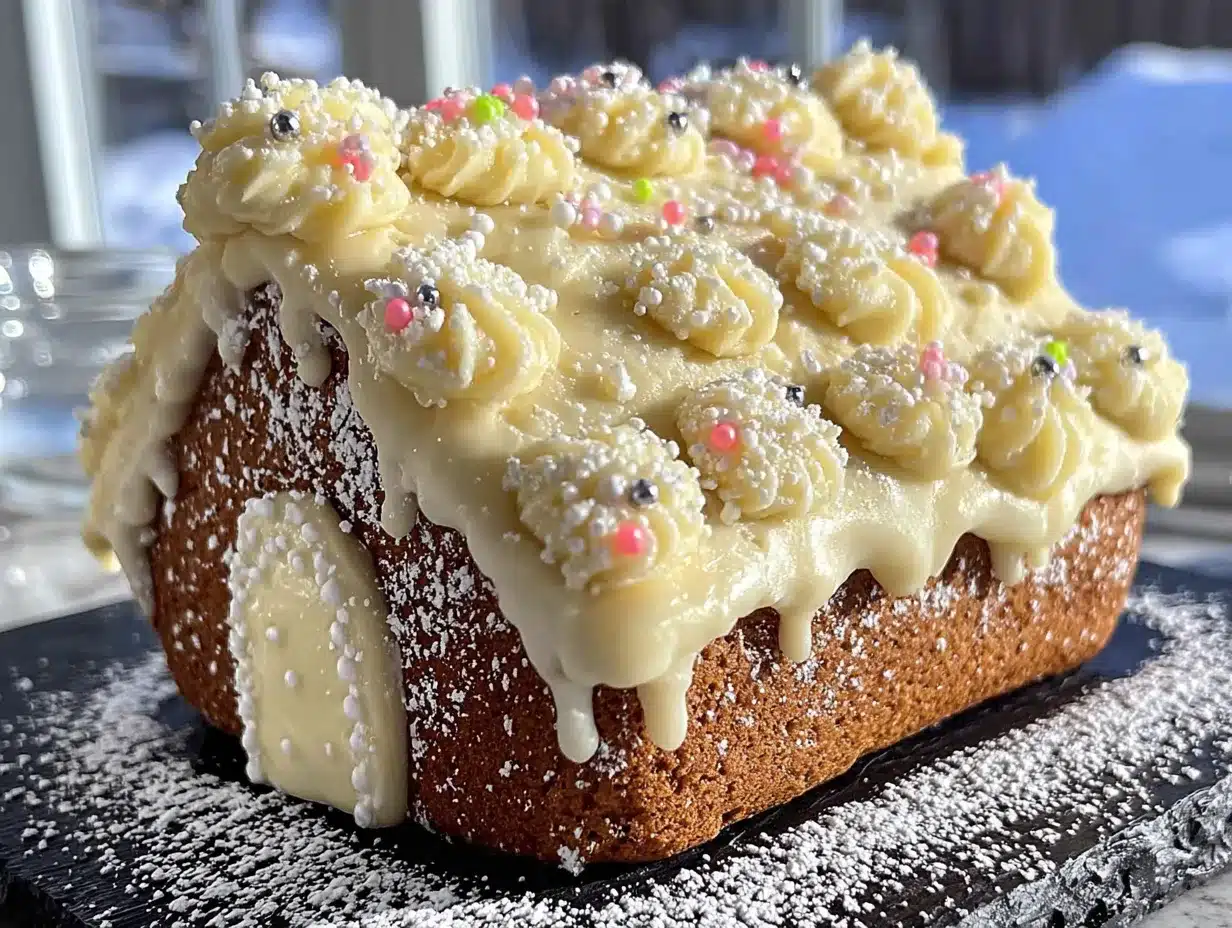
Making this homemade royal icing recipe for gingerbread houses is straightforward, but there are a few tricks that make the difference between a house that stands and a house that collapses. Follow these steps carefully, and you’ll be golden.
- Sift your powdered sugar into a large bowl. I know sifting feels like an unnecessary step, but trust me—those tiny lumps will clog your piping tip every single time. Take the extra two minutes. Your future self will thank you.
- In your stand mixer bowl (or a large bowl if using a hand mixer), combine the egg whites and cream of tartar. Beat on medium speed for about 2 minutes, until frothy and slightly opaque. You’re looking for soft peaks that barely hold their shape—like a gentle wave that collapses back into itself.
- Gradually add the sifted powdered sugar , about 1/2 cup at a time, with the mixer running on low speed. Scrape down the sides of the bowl after each addition. This slow incorporation prevents a sugar cloud from exploding in your face—learned that one the hard way, let me tell you.
- Add the vanilla extract and salt , then increase the speed to medium-high. Beat for 5-7 minutes, until the icing is thick, glossy, and holds stiff peaks. You’ll know it’s ready when you lift the beater and the icing forms a point that stands straight up without drooping. If it droops, keep beating for another minute or two.
- Test the consistency by dipping a spoon into the icing and holding it upside down. The icing should stay put without sliding off. If it slides, add a tiny bit more powdered sugar (about 1 tablespoon at a time) and beat again.
- Divide the icing into separate bowls if you’re using multiple colors. Cover each bowl with a damp paper towel to prevent the icing from drying out while you work. Royal icing develops a crust quickly, and that crust is your enemy.
- Add water 1 teaspoon at a time if you need a thinner consistency for flooding (filling in large areas). For piping structural elements like walls and roofs, keep it thick. For writing or detail work, aim for a consistency that’s thick but still flows through the tip without forcing.
- Transfer to piping bags fitted with your chosen tips. Fill the bags only halfway to prevent overflow—another lesson learned the messy way. Twist the top of the bag closed and squeeze a tiny bit onto a paper towel to test the flow before you start decorating.
Sensory Cues : The icing should look like marshmallow fluff when it’s done—thick, glossy, and utterly irresistible. It should smell like vanilla sugar, not eggy or sulfurous. If it smells eggy, your egg whites weren’t fresh, and you might want to start over. The texture should feel smooth and spreadable, like a thick paste that holds its shape when you stop mixing.
Troubleshooting : If your icing is too runny, you added too much water. Beat in more powdered sugar, 1 tablespoon at a time, until it thickens up. If it’s too stiff to pipe, add water 1/2 teaspoon at a time and beat on low until it loosens. If your icing separates or looks curdled, you probably over-beat it or added liquid too quickly. Unfortunately, there’s no fixing curdled royal icing—you have to start over. I’ve done it three times, and it’s always heartbreaking.
Cooking Tips & Techniques
After making this homemade royal icing recipe for gingerbread houses more times than I care to count, I’ve collected a few hard-won lessons. Here are the ones that matter most:
Keep it covered, always. Royal icing dries out faster than you’d expect. Every time you’re not actively using a bowl of icing, cover it with a damp paper towel and then plastic wrap. I once left a bowl uncovered for ten minutes while I answered the phone, and by the time I came back, the top layer had formed a crust that ruined the entire batch. Learn from my mistake.
Pipe in layers. If you’re doing detailed decorations, pipe the outline first, let it dry for about 15 minutes, then fill in the center with thinner icing. This technique, called “flooding,” gives you clean, professional-looking results. The outline acts like a dam that holds the thinner icing in place.
Let it dry completely between steps. This is the hardest lesson for impatient bakers (guilty as charged). Each layer of icing needs at least 2-3 hours to dry completely before you add the next layer. If you rush it, everything will smear and slide. I ruined an entire gingerbread roof because I couldn’t wait the full drying time. Now I start my decorating in the morning and let it dry while I make dinner.
Use the right consistency for the job. Thick icing for structural elements (walls, roofs, foundations). Medium icing for piping details (windows, doors, trim). Thin icing for flooding (filling in large areas). Getting this right is the difference between a house that looks like a professional built it and one that looks like a toddler decorated it (which, honestly, has its own charm).
Humidity is your enemy. Royal icing hates humid weather. On rainy days, your icing will take longer to dry and might never get completely hard. If you live in a humid climate, consider running a dehumidifier in the room where your gingerbread house is drying, or plan to make it on a dry, cool day.
Variations & Adaptations
This homemade royal icing recipe for gingerbread houses is wonderfully adaptable. Here are some variations I’ve tried and loved:
Flavor Variations : Swap the vanilla extract for almond extract for a subtle nutty flavor that pairs beautifully with gingerbread. Use lemon extract for a bright, citrusy twist that cuts through the sweetness. Or try peppermint extract for a holiday-themed house that smells like Christmas morning. Just remember that extracts vary in strength—start with 1/2 teaspoon and adjust to taste.
Color Variations : Gel food coloring is your best friend here. Liquid food coloring will thin out your icing and mess with the consistency. I use Wilton gel colors and add them a tiny drop at a time with a toothpick. For a classic gingerbread house, you’ll want red and green for the wreaths, white for the snow, and maybe some yellow for the windows. I once made a purple gingerbread house for my niece, and she loved it even though it looked like something from a fairy tale.
Dietary Adaptations : For an egg-free version, substitute 3 tablespoons of meringue powder mixed with 6 tablespoons of warm water for the egg whites. The texture will be slightly less fluffy, but it works. For a vegan version, use aquafaba (the liquid from a can of chickpeas) in place of egg whites. Beat the aquafaba with the cream of tartar until frothy, then add the powdered sugar. The drying time is longer, and the finish is less glossy, but it’s a solid alternative. I’ve made both versions, and while the traditional recipe is my favorite, the vegan version is a close second.
Consistency Variations : For a thinner “flood” consistency, add water 1 teaspoon at a time until the icing flows like honey. For a thicker “pipe” consistency, add extra powdered sugar until the icing holds a stiff peak. For a “glue” consistency (perfect for attaching candies), keep it as thick as possible without being crumbly.
Serving & Storage Suggestions
Your finished gingerbread house is a work of art, and it deserves proper care. Here’s how to serve and store it:
Serving : Display your gingerbread house at room temperature on a cake stand or decorative platter. It looks beautiful as a centerpiece for holiday gatherings. If you’re serving it as a dessert, break it apart and serve pieces with a side of hot cocoa or coffee. The combination of gingerbread and royal icing with a warm drink is pure comfort.
Storage : A fully decorated gingerbread house will last for weeks if stored properly. Keep it in a cool, dry place away from direct sunlight and humidity. Do not refrigerate—the moisture will soften the icing and ruin the structure. If you live in a humid climate, store it in an airtight container with a silica gel packet to absorb excess moisture.
Reheating : You don’t typically reheat a gingerbread house, but if you’re eating it, the gingerbread itself gets softer and more cake-like after a few days. Some people prefer it this way. If you want crisp gingerbread, eat it within the first 2-3 days.
Flavor Development : The gingerbread actually gets better after a day or two as the spices meld together. The royal icing stays hard and sweet, creating a lovely textural contrast. I’ve had gingerbread houses that tasted amazing even three weeks after decorating—the flavors just keep getting deeper and more complex.
Leftover Icing : If you have leftover royal icing, store it in an airtight container in the refrigerator for up to two weeks. When you’re ready to use it again, let it come to room temperature and beat it on low speed to restore the texture. You might need to add a tiny bit of water if it’s too stiff.
Nutritional Information & Benefits
Let’s be real—royal icing is basically sugar and egg whites, so it’s not exactly health food. But here’s the nutritional breakdown for those who want to know:
Per 2-tablespoon serving (about 30g):
- Calories: 120
- Fat: 0g
- Carbohydrates: 30g
- Sugar: 29g
- Protein: 1g
- Sodium: 15mg
Health Benefits : The egg whites provide a small amount of protein, and the cream of tartar adds potassium. But honestly, this is a treat, not a health food. The real benefit is the joy of creating something beautiful with your family and the memories you make while decorating. That’s worth more than any nutritional value.
Dietary Considerations : This recipe contains eggs and is not suitable for those with egg allergies (unless you use the meringue powder substitute). It’s gluten-free, dairy-free, and nut-free, making it safe for many common dietary restrictions. It’s not suitable for vegans unless you use the aquafaba version.
Allergen Warning : The raw egg whites in this recipe carry a small risk of salmonella. If you’re serving this to pregnant women, young children, elderly individuals, or anyone with a compromised immune system, consider using the meringue powder version instead. I’ve made that switch for holiday parties and no one noticed the difference.
Conclusion
This homemade royal icing recipe for gingerbread houses is more than just a list of ingredients and steps—it’s a way to create something beautiful with your own hands, to make memories with your family, and to carry on traditions that matter. Every time I pipe a tiny window or a snowy roof, I think of Aunt Rita and that yellow-checkered kitchen, and I feel connected to something bigger than myself.
I hope you’ll give this recipe a try, even if you’ve never made royal icing from scratch before. Start simple—a basic gingerbread house with white icing and a few candies. Let your kids help, even if they make a mess. Embrace the imperfections, because that’s where the charm lives. And when someone asks how you got your icing so perfect, you can smile and say, “It’s just a little homemade magic.”
I’d love to hear how your gingerbread house turns out! Drop a comment below and tell me about your decorating adventures—did you use a fancy piping tip or a zip-top bag? Did your roof stay on or slide off? Did anyone sneak a taste of the icing before it was done? Share your photos, your tips, and your happy accidents. And if you have a favorite variation I haven’t tried, please share that too. Happy baking, friends!
Frequently Asked Questions
How long does royal icing take to dry on a gingerbread house?
Royal icing typically takes 2-3 hours to dry completely between layers, and a fully decorated gingerbread house needs at least 12-24 hours of drying time before you can move or display it. Humidity affects drying time significantly—on humid days, it can take twice as long. Be patient and let each layer dry fully before adding the next.
Can I make royal icing without cream of tartar?
Yes, you can substitute 1 teaspoon of lemon juice or white vinegar for the cream of tartar. The acid stabilizes the egg whites and helps the icing hold its structure. However, cream of tartar gives the most reliable results and doesn’t affect the flavor, so I recommend using it if you have it on hand.
Why is my royal icing not getting stiff?
Several things could be going wrong. Your egg whites might have had any trace of yolk or grease in them, which prevents them from whipping properly. You might have added too much liquid. Or you might not have beaten it long enough—royal icing needs a full 5-7 minutes of beating to reach stiff peaks. Try adding more powdered sugar, 1 tablespoon at a time, and beating for another 2-3 minutes.
Can I use pasteurized egg whites for royal icing?
Absolutely! Pasteurized egg whites are a great option if you’re concerned about raw eggs. They whip up just like fresh egg whites, though they might take a minute or two longer to reach stiff peaks. You can find pasteurized egg whites in cartons in the refrigerated section of most grocery stores. Use the same amount—3 tablespoons of liquid egg whites equals about one large egg white.
How do I fix royal icing that’s too runny?
If your royal icing is too runny, you’ve added too much water. The fix is simple: add more sifted powdered sugar, 1 tablespoon at a time, and beat on low speed until the icing thickens to your desired consistency. Keep in mind that the icing will thicken slightly as it sits, so don’t overcorrect. It’s better to add sugar gradually than to dump in too much at once.
Pin This Recipe!

Best Homemade Royal Icing Recipe for Gingerbread Houses

This homemade royal icing recipe for gingerbread houses is sturdy enough to hold walls together, dries with a beautiful matte finish, and tastes like actual vanilla instead of that weird chemical sweetness. It’s the one I’ve tweaked and tested until my mixer practically groaned in protest.
- Prep Time: 15 minutes
- Cook Time: 0 minutes
- Total Time: 15 minutes
- Yield: 4 cups (enough for one gingerbread house) 1x
- Category: Dessert
- Cuisine: American
Ingredients
- 4 cups (480g) powdered sugar, sifted
- 3 large egg whites, room temperature
- 1 teaspoon cream of tartar
- 1 teaspoon vanilla extract (clear for pure white icing)
- Pinch of salt
- 2–3 tablespoons water, as needed for consistency
Instructions
- Sift your powdered sugar into a large bowl.
- In your stand mixer bowl (or a large bowl if using a hand mixer), combine the egg whites and cream of tartar. Beat on medium speed for about 2 minutes, until frothy and slightly opaque, with soft peaks that barely hold their shape.
- Gradually add the sifted powdered sugar, about 1/2 cup at a time, with the mixer running on low speed. Scrape down the sides of the bowl after each addition.
- Add the vanilla extract and salt, then increase the speed to medium-high. Beat for 5-7 minutes, until the icing is thick, glossy, and holds stiff peaks. The icing should form a point that stands straight up without drooping when you lift the beater.
- Test the consistency by dipping a spoon into the icing and holding it upside down. The icing should stay put without sliding off. If it slides, add a tiny bit more powdered sugar (about 1 tablespoon at a time) and beat again.
- Divide the icing into separate bowls if you’re using multiple colors. Cover each bowl with a damp paper towel to prevent the icing from drying out while you work.
- Add water 1 teaspoon at a time if you need a thinner consistency for flooding (filling in large areas). For piping structural elements like walls and roofs, keep it thick. For writing or detail work, aim for a consistency that’s thick but still flows through the tip without forcing.
- Transfer to piping bags fitted with your chosen tips. Fill the bags only halfway to prevent overflow. Twist the top of the bag closed and squeeze a tiny bit onto a paper towel to test the flow before you start decorating.
Notes
Keep icing covered with a damp paper towel and plastic wrap when not in use to prevent crusting. Pipe in layers: outline first, let dry 15 minutes, then flood with thinner icing. Let each layer dry 2-3 hours before adding the next. Humidity affects drying time; avoid making on rainy days. For egg-free version, substitute 3 tablespoons meringue powder mixed with 6 tablespoons warm water for egg whites. For vegan version, use aquafaba (liquid from canned chickpeas) but expect longer drying time and less glossy finish.
Nutrition
- Serving Size: 2 tablespoons (30g)
- Calories: 120
- Sugar: 29
- Sodium: 15
- Carbohydrates: 30
- Protein: 1
Keywords: royal icing, gingerbread house, homemade icing, Christmas baking, holiday recipe, cookie decorating


