My friend Jenna asked why I couldn’t just put the mini pumpkin pies right on the charcuterie board instead of serving them separately on a dessert plate. I started to explain why that wouldn’t work—something about the board getting crowded, the pies getting squished, the whole aesthetic falling apart. Then I stopped. Honestly, I had no good reason. I was just being stubborn about how things are “supposed” to look. So I shrugged and said, “Fine, let’s try it.” And let me tell you, that decision changed everything about how I host Friendsgiving now.
It was a Tuesday afternoon, three days before our annual gathering, and I was standing in my kitchen with flour on my jeans and a half-crushed graham cracker crust under my fingernails. Jenna had stopped by to help me test the menu, and she kept eyeing the tiny pies cooling on the counter. “They’re so cute,” she said. “Why hide them away on a separate table?” I opened my mouth to explain proper dessert presentation etiquette—then closed it. She was right. Who made up these rules anyway?
That first Friendsgiving with the pies on the board was a mess in the best way. Someone’s elbow knocked a pie sideways, and the whipped cream got smeared across the prosciutto. But you know what? Nobody cared. People were grabbing a slice of apple, a piece of cheese, and a mini pie all in one trip. It was efficient. It was fun. It was the kind of happy chaos that makes Friendsgiving better than the formal holiday dinners. Maybe you’ve been there—the moment when you realize the “rules” of hosting are just getting in the way of actually having a good time.
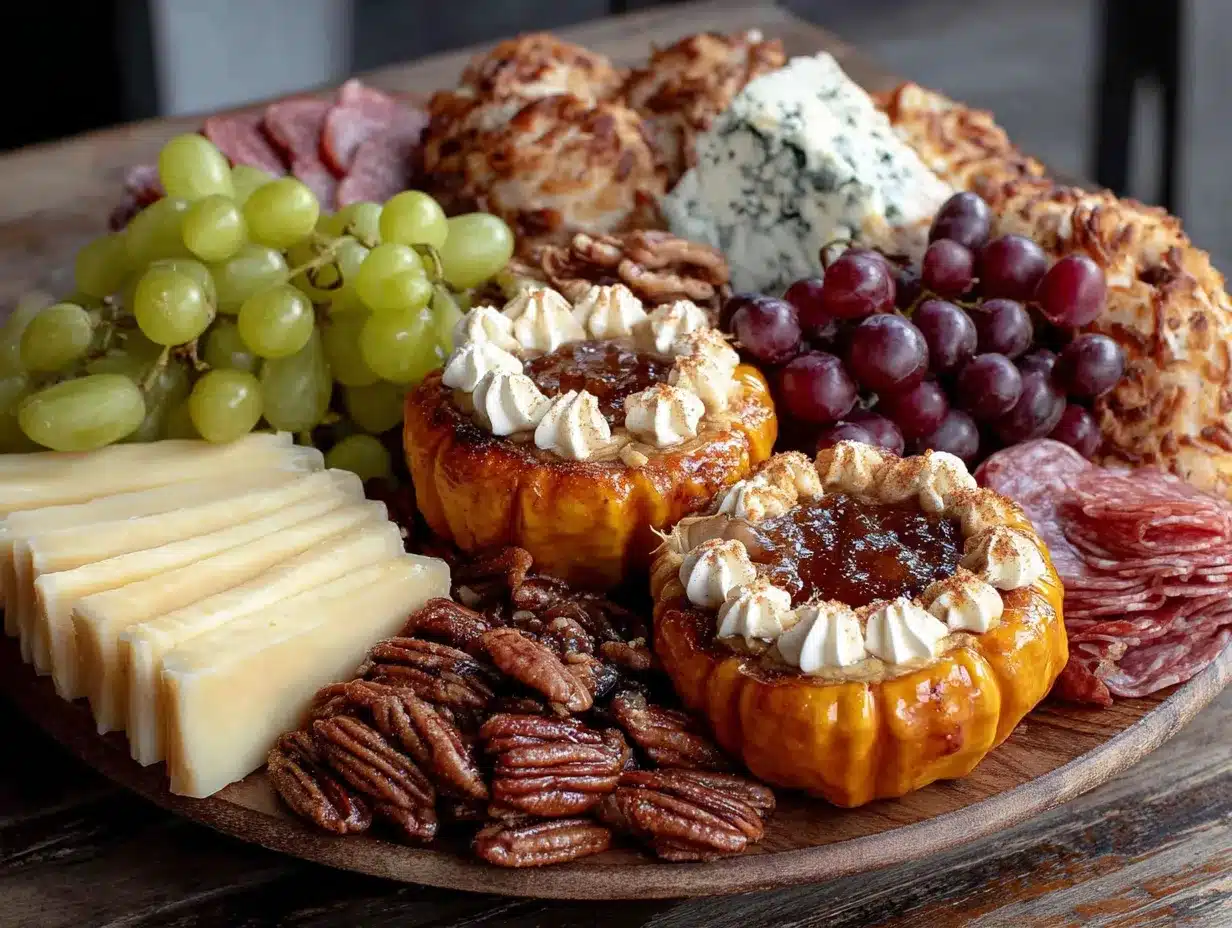
So here’s the thing: this Best Friendsgiving Charcuterie Board with Mini Pumpkin Pies isn’t about perfection. It’s about putting everything your people love on one massive board and watching them go crazy for it. The sweet and savory combo works because pumpkin pie spice and sharp cheddar are basically soulmates. And honestly? It’s the only way I’ll serve dessert now. The pies stay right there, nestled between the cheese and the grapes, waiting to be grabbed whenever someone gets the urge. It’s casual, it’s gorgeous, and it makes everyone feel like they’re in on a secret. Which, I guess, they are.
Why You’ll Love This Recipe
This isn’t just another charcuterie board—it’s the centerpiece of your Friendsgiving celebration. I’ve tested this combination at four different gatherings now, and every single time, people stand around it like it’s a campfire. There’s something about having those tiny pumpkin pies right there with the cheese and crackers that makes everyone’s eyes light up.
- Stress-Free Hosting : Everything goes on one board. No separate dessert table, no multiple serving platters to wash. Just one epic spread that does all the work for you.
- Perfect for a Crowd : This board feeds 8-10 people easily, and you can scale it up or down without any complicated math. Just add more of everything.
- Make-Ahead Friendly : The mini pies can be baked two days ahead. The cheese can be sliced the night before. On game day, you’re just arranging things on a board.
- Sweet and Savory Magic : That moment when someone bites into a mini pie after eating a piece of aged cheddar? Pure genius. The flavors actually complement each other.
- Instagram-Worthy Without the Stress : This board looks impressive even if you just toss everything on there. The colors—orange pies, green grapes, yellow cheese, red apples—do the work for you.
What makes this different from every other charcuterie board out there is the intentional sweet-savory pairing. I didn’t just throw some pies on a board and call it done. I thought about which cheeses would actually taste good with pumpkin pie spice. I tested different crackers to find ones that wouldn’t overpower the delicate pie crust. I even figured out which fruits hold up best when they’re sitting next to warm pies. This is a board designed for eating, not just looking at.
This is the kind of spread that makes your friends text you the next day asking for the recipe. It’s comfort food turned into a shared experience—everyone gathered around, grabbing what they want, talking with their mouths full, laughing at someone who dropped a cranberry in their wine. That’s what Friendsgiving should feel like. And honestly, it’s the only way I want to host anymore.
What Ingredients You Will Need
This board uses simple, seasonal ingredients to create that perfect balance of sweet, salty, creamy, and crunchy. Most of these are easy to find at any grocery store, and I’ve included my favorite brands where it really matters.
For the Mini Pumpkin Pies
- 1 package refrigerated pie crusts (I prefer Pillsbury for consistency, but homemade works beautifully if you have time)
- 1 can (15 oz) pumpkin puree (not pumpkin pie filling—make sure it’s 100% pumpkin)
- 1 cup heavy cream (adds richness that milk just can’t match)
- 2 large eggs (room temperature for smoother filling)
- 1/2 cup brown sugar (packed firmly for that molasses depth)
- 1 teaspoon pumpkin pie spice (or make your own: 1/2 tsp cinnamon, 1/4 tsp ginger, 1/8 tsp nutmeg, 1/8 tsp cloves)
- 1 teaspoon vanilla extract (pure, not imitation—trust me on this)
- Pinch of salt (brings out all the other flavors)
For the Charcuterie Board
- 8 oz aged cheddar (sharp and crumbly—Cabot or Tillamook are my go-to)
- 8 oz brie (let it come to room temperature for that perfect spreadable texture)
- 6 oz prosciutto (ask for it sliced thin at the deli counter)
- 6 oz salami (I like genoa salami for its peppery kick)
- 1 cup mixed olives (kalamata and castelvetrano are a great combo)
- 1 cup grapes (red and green both work—red are sweeter)
- 2 apples (honeycrisp or fuji for crispness and sweetness)
- 1 cup dried figs or dates (adds that chewy, caramel-like sweetness)
- 1 cup candied pecans or walnuts (store-bought is fine, but homemade is amazing)
- 1 box crackers (I use a mix of water crackers and rosemary crackers)
- Fresh rosemary sprigs (for garnish—makes the board look fancy with zero effort)
- Honey or fig jam (for drizzling on brie—optional but highly recommended)
A few notes on ingredient selection: For the pumpkin puree, Libby’s is the gold standard. It’s consistently thick and not watery. If you can only find store brand, just drain off any excess liquid before using. For the cheese, don’t skimp on quality—you’ll taste the difference. And for the prosciutto, ask them to slice it paper-thin. It melts on your tongue that way.
If you’re feeding a crowd that includes vegetarians, the charcuterie part is easy to adapt. Just double up on the cheeses and add some marinated artichoke hearts or roasted red peppers. The mini pies are already vegetarian-friendly, so everyone can enjoy those.
Equipment Needed
You don’t need a ton of fancy equipment for this board, but a few tools make the process smoother. Here’s what I use every time:
- Large wooden or slate board (at least 18×12 inches—bigger is better for a crowd)
- Mini muffin tin (for the pies—standard size works, but mini is cuter and more board-friendly)
- 2-inch round cookie cutter (or a small glass if you don’t have one)
- Rolling pin (even with pre-made crust, it helps to roll it out a bit thinner)
- Parchment paper (for lining the board if you’re worried about mess)
- Small bowls or ramekins (for olives, honey, or jam—keeps liquids from making everything soggy)
- Cheese knives (at least two—one for soft cheese, one for hard)
- Small offset spatula (for removing pies from the tin without breaking them)
If you don’t have a large board, a baking sheet lined with parchment paper works just as well. I’ve done it that way when I’ve hosted at a friend’s apartment. It’s not as photogenic, but it tastes exactly the same. For the mini muffin tin, any standard 24-cup tin works. Just make sure it’s not nonstick that’s been scratched—the pies will stick.
Preparation Method
Let’s break this down into manageable steps. The pies take about 45 minutes total, and the board assembly takes 15 minutes. You can do the pies a day ahead, which makes hosting so much less stressful.
Make the Mini Pumpkin Pies
- Preheat your oven to 375°F. Pull the pie crusts out of the fridge and let them sit on the counter for 10 minutes—they’re easier to roll when slightly softened.
- Roll out the pie crusts on a lightly floured surface until they’re about 1/8 inch thick. Use your 2-inch cookie cutter to cut out rounds. You should get about 24 rounds from two crusts. If you’re short, gather the scraps and re-roll them once.
- Press each round into a mini muffin cup. Gently press the dough into the bottom and up the sides. Don’t worry if the edges are a little uneven—it looks rustic and homemade. Prick the bottoms with a fork a few times to prevent bubbling.
- Pre-bake the crusts for 5 minutes. This keeps them from getting soggy when you add the filling. They should look dry but not brown. Set them aside while you make the filling.
- In a large bowl, whisk together the pumpkin puree, heavy cream, eggs, brown sugar, pumpkin pie spice, vanilla extract, and salt. Whisk until completely smooth—no streaks of egg white or lumps of sugar. The mixture should be thick but pourable, like a milkshake.
- Spoon the filling into each crust, filling almost to the top. A small cookie scoop works perfectly here—about 1 tablespoon per pie. Don’t overfill, or they’ll spill over during baking.
- Bake for 18-20 minutes, until the filling is set around the edges but still slightly jiggly in the center. They’ll continue to set as they cool. The tops should be a deep golden orange.
- Cool in the pan for 10 minutes, then carefully remove them with your offset spatula. Transfer to a wire rack to cool completely. If you’re making them ahead, store in an airtight container in the fridge for up to 2 days.
Assemble the Charcuterie Board
- Start with the bowls and cheese. Place your small bowls of olives, honey, or jam on the board first. Then put the brie and cheddar in different spots—you want people to have to move around the board to get everything.
- Add the meats. Fold the prosciutto into loose ribbons and pile them near the brie. Fan out the salami slices in a row or stack them in a small pile. Don’t lay them flat—they look better with some height.
- Place the mini pies. Arrange them in clusters of 3-4 around the board. I like to put some near the cheese and some near the fruit. This is the star of the show, so give them visual space.
- Fill in with fruit and nuts. Scatter the grapes, apple slices, dried figs, and candied pecans in the gaps. This is where the board starts to look full and abundant. Don’t be afraid to pile things up.
- Add crackers in small stacks or fanned out in empty spaces. Tuck some under the cheese for a layered look. You want crackers available everywhere, not just in one spot.
- Garnish with fresh rosemary sprigs tucked here and there. The green adds a pop of color and makes everything look intentional. Plus, it smells amazing.
- Serve immediately or cover with plastic wrap and refrigerate for up to 2 hours. If you’re refrigerating, take it out 30 minutes before serving to let the cheese come to room temperature.
Cooking Tips & Techniques
I’ve made this board about eight times now, and I’ve learned a few things the hard way. Let me save you some trouble.
Don’t overwork the pie dough. The first time I made these, I kept re-rolling the scraps until I had every last round. The crusts came out tough. Now I accept that I’ll lose a few scraps and just buy an extra pie crust. Your guests won’t notice the missing 2% of dough.
Watch the filling consistency. If your pumpkin puree looks watery, pat it dry with paper towels before mixing. Too much liquid makes the pies runny, and nobody wants a soggy crust. I learned this when I used a generic brand that was thinner than Libby’s—total disaster.
Temperature matters for the board. Take the brie out of the fridge an hour before serving. Cold brie is rubbery and sad. Room temperature brie is creamy and luxurious. Same goes for the prosciutto—it tastes better when it’s not straight from the fridge.
Strategize your board layout. Put items that need knives (brie, cheddar) near the edge so people can reach them easily. Put the grab-and-go items (grapes, nuts, mini pies) in the middle. This prevents the “excuse me, just trying to reach the cheese” shuffle.
Make extra mini pies. I always make 24, even if I’m only serving 8 people. They disappear fast, and having extras means you can refill the board without running to the kitchen. Plus, cold mini pies the next morning with coffee? Chef’s kiss.
Variations & Adaptations
This board is endlessly adaptable. Here are some variations I’ve tried and loved:
Gluten-Free Version: Use gluten-free pie crust for the mini pies (Wholly Gluten Free makes a good one). Swap the crackers for gluten-free crackers or sliced cucumber rounds. Everything else on the board is naturally gluten-free.
Vegan Option: Use a vegan pie crust and replace the heavy cream with coconut cream. For the filling, use a flax egg (1 tablespoon flaxseed meal + 3 tablespoons water). Skip the cheese and meats, and load up on roasted vegetables, marinated mushrooms, and vegan cheese alternatives. Violife makes a decent brie-style cheese.
Fall Harvest Board: Swap the apples for sliced pears and add roasted butternut squash cubes. Use maple-glazed pecans instead of candied ones. Add a small bowl of warm apple cider caramel for drizzling on everything.
Spicy Twist: Add a pinch of cayenne pepper to the pumpkin pie filling. Serve with a spicy honey on the side—mix honey with red pepper flakes and a splash of apple cider vinegar. The heat cuts through the richness beautifully.
Breakfast Board: Yes, I’ve done this. Serve the mini pies with bacon, scrambled eggs, and fresh fruit. It’s the most decadent brunch you’ll ever have. My friends still talk about the “Pie-Thanksgiving Brunch” from last year.
Serving & Storage Suggestions
This board is best served at room temperature, so take everything out of the fridge 30 minutes before your guests arrive. Arrange the board on a large table where people can gather around it—this isn’t a “plate and pass” situation. It’s a grazing experience.
For drinks, I love serving this with a dry sparkling wine or a crisp apple cider. The bubbles cut through the richness of the cheese and pie. If you’re doing cocktails, a bourbon cider or a sage-infused gin and tonic pairs beautifully with the fall flavors.
Storage: Leftover mini pies keep in the fridge for up to 4 days. Store them in an airtight container. The charcuterie components should be separated and stored individually—cheese in wax paper, meats in a sealed container, fruit in the fridge. Don’t store assembled leftovers; everything will get soggy.
Reheating: Mini pies are delicious cold, but if you want them warm, pop them in a 300°F oven for 5 minutes. Don’t microwave them—the crust gets rubbery. If you’re reheating for a second gathering, warm them just before serving.
The flavors actually get better after a day. The pumpkin spice settles into the crust, and the filling becomes denser and more custard-like. I sometimes make the pies two days ahead on purpose just for this reason.
Nutritional Information & Benefits
Let’s be real—this is a celebration board, not a health food. But there are some redeeming qualities! Each mini pie (without toppings) has about 120 calories, 7g fat, 14g carbs, and 2g protein. A full serving, including a few pieces of cheese and meat, comes to around 350-400 calories.
Pumpkin is packed with vitamin A and fiber, so you’re getting some nutrients in that pie. The cheese provides calcium and protein, and the nuts offer healthy fats and vitamin E. The grapes and apples add antioxidants and natural sweetness.
If you’re watching your sugar, skip the honey and dried figs. If you’re low-carb, load up on the cheese and meat and have just one mini pie. This board is flexible enough to accommodate different dietary needs without making anyone feel left out.
I personally love that this board lets people eat intuitively—grabbing what sounds good, stopping when they’re full, going back for more pie when the craving hits. There’s no “you must eat this much of everything” pressure. It’s freedom on a board.
Conclusion
This Best Friendsgiving Charcuterie Board with Mini Pumpkin Pies is the kind of recipe that makes hosting feel like a joy instead of a chore. It’s impressive without being complicated, delicious without being fussy, and it brings people together in that perfect way that only food can. I’ve made it for my closest friends, my coworkers, and even my picky aunt—and every single time, someone asks for the recipe.
What I love most is how customizable it is. You can swap in your favorite cheeses, add your family’s special crackers, or go crazy with the garnishes. The mini pies are the anchor, but the board is yours to play with. That’s the beauty of charcuterie—it’s a framework, not a rulebook.
So go ahead and give it a try. Put those little pies right on the board. Let people grab them with the same hands that just picked up a piece of salami. Watch your friends’ faces light up when they discover how good pumpkin pie and aged cheddar taste together. And when someone asks why you didn’t do this sooner, just smile and say, “I don’t know, but I’m never going back.”
I’d love to hear how your board turns out! Drop a comment below with your favorite additions, tag me in your photos, and share this with a friend who needs a little Friendsgiving inspiration. Happy hosting, friends.
Frequently Asked Questions
Can I make the mini pumpkin pies ahead of time?
Absolutely! You can bake them up to 2 days in advance. Store them in an airtight container in the fridge, and let them come to room temperature before arranging on the board. They actually taste better on day two—the flavors have time to meld.
How many people does this board serve?
This board comfortably serves 8-10 people as part of a larger Friendsgiving spread. If it’s the main event with just a few sides, it serves 6-8. For a crowd of 12 or more, double the mini pies and add an extra cheese and meat.
What if I don’t have a mini muffin tin?
No problem! You can make the filling in a regular 9-inch pie crust and cut it into small wedges. Or use a standard muffin tin for slightly larger pies—just increase the baking time by 3-5 minutes. They won’t be as cute, but they’ll taste the same.
Can I use store-bought mini pie crusts?
Yes! If you can find pre-made mini graham cracker crusts, they work beautifully. Just skip the pre-baking step and fill them directly. I’ve used Keebler’s ready-made crusts in a pinch, and nobody complained. Just make sure they’re the mini size, not the regular.
How do I keep the board from getting messy?
Use small bowls for anything wet—olives, honey, jam. Place the cheese on a separate small board or piece of parchment if you’re worried about crumbs mixing. And don’t be afraid to refresh the board halfway through the party. I usually do a quick tidy-up and add more crackers and fruit after an hour.
Pin This Recipe!
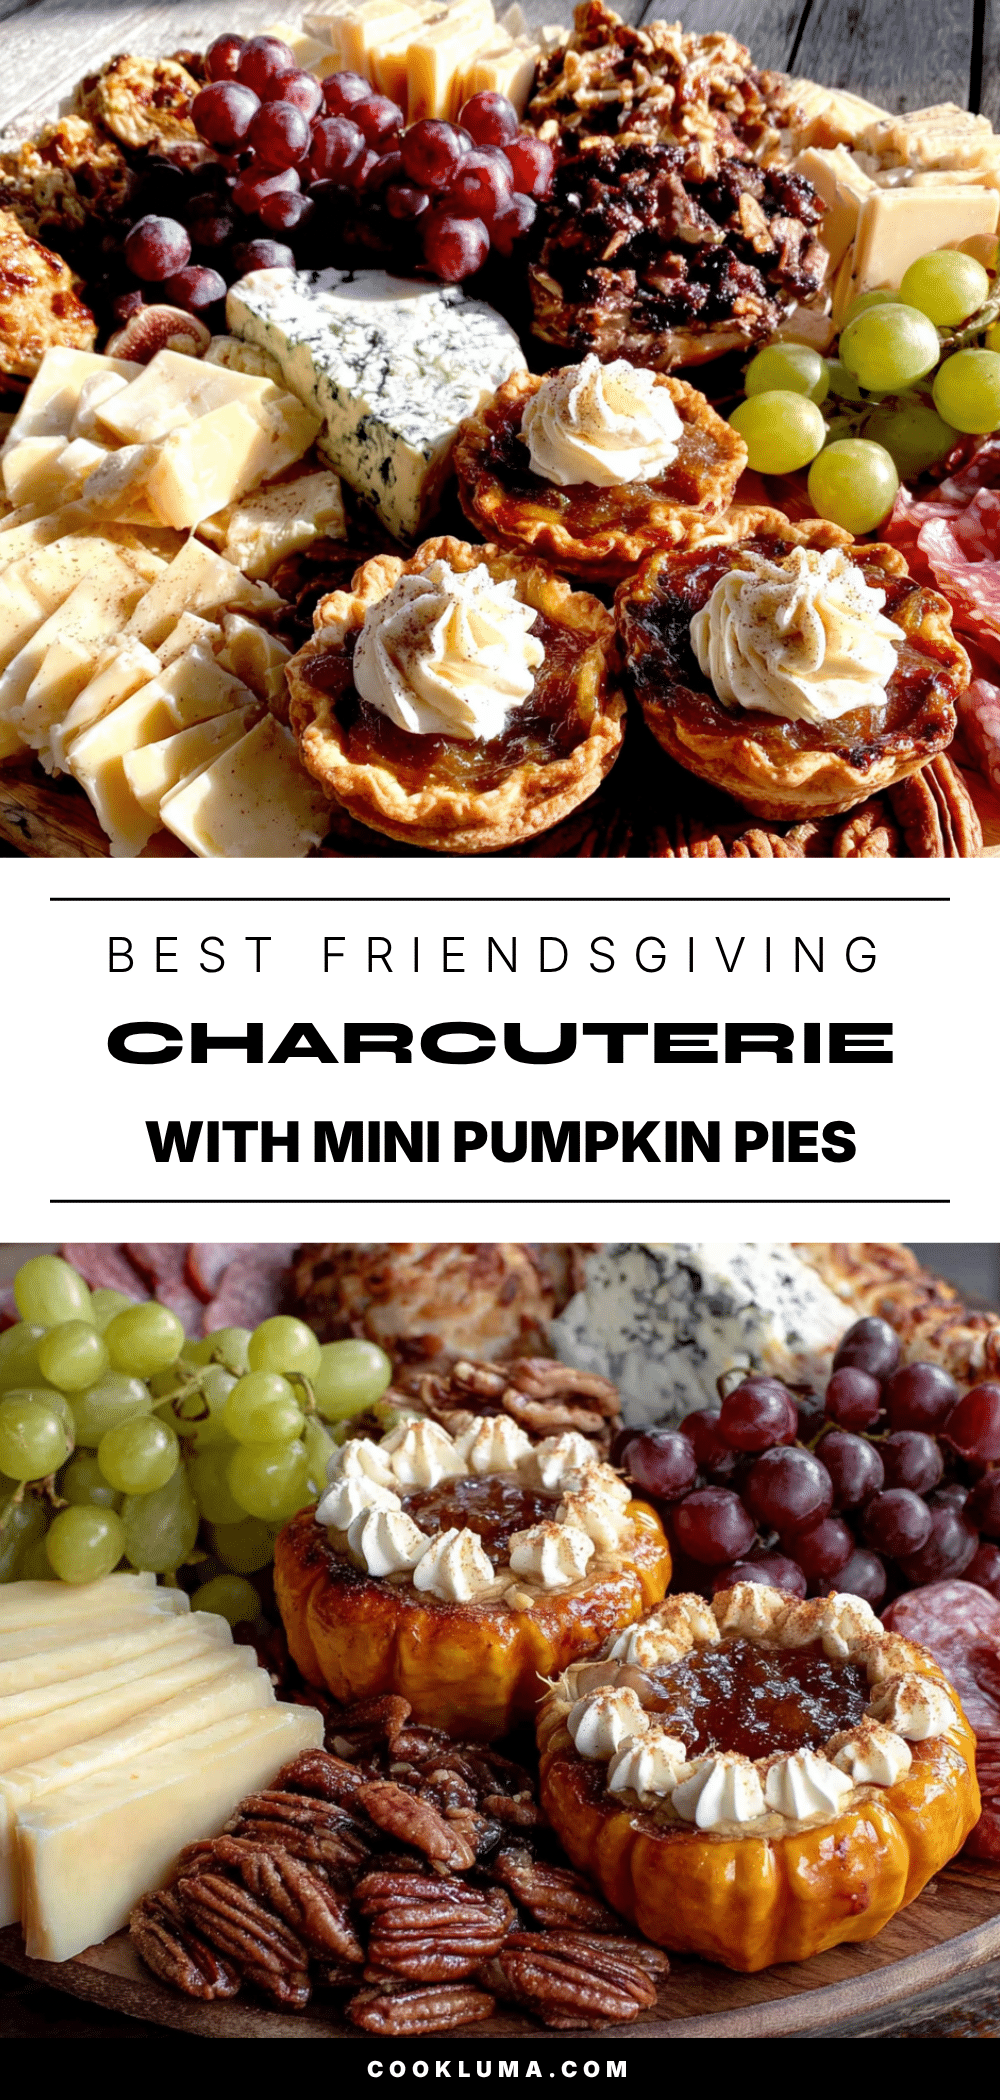
Best Friendsgiving Charcuterie Board with Mini Pumpkin Pies
This isn’t just another charcuterie board—it’s the centerpiece of your Friendsgiving celebration. Mini pumpkin pies nestled between cheese, meats, and fruit create a sweet and savory experience that brings people together.
- Prep Time: 30 minutes
- Cook Time: 25 minutes
- Total Time: 55 minutes
- Yield: 8-10 servings 1x
- Category: Appetizer
- Cuisine: American
Ingredients
- 1 package refrigerated pie crusts (Pillsbury preferred)
- 1 can (15 oz) pumpkin puree (100% pumpkin, not pie filling)
- 1 cup heavy cream
- 2 large eggs (room temperature)
- 1/2 cup brown sugar (packed)
- 1 teaspoon pumpkin pie spice (or homemade blend: 1/2 tsp cinnamon, 1/4 tsp ginger, 1/8 tsp nutmeg, 1/8 tsp cloves)
- 1 teaspoon vanilla extract (pure)
- Pinch of salt
- 8 oz aged cheddar (sharp and crumbly, e.g., Cabot or Tillamook)
- 8 oz brie (room temperature)
- 6 oz prosciutto (thinly sliced)
- 6 oz genoa salami
- 1 cup mixed olives (kalamata and castelvetrano)
- 1 cup grapes (red or green)
- 2 apples (honeycrisp or fuji)
- 1 cup dried figs or dates
- 1 cup candied pecans or walnuts
- 1 box crackers (mix of water crackers and rosemary crackers)
- Fresh rosemary sprigs (for garnish)
- Honey or fig jam (optional)
Instructions
- Preheat oven to 375°F. Let pie crusts sit at room temperature for 10 minutes.
- Roll out pie crusts on a lightly floured surface to 1/8 inch thick. Cut out rounds using a 2-inch cookie cutter (about 24 rounds).
- Press each round into a mini muffin cup. Prick bottoms with a fork.
- Pre-bake crusts for 5 minutes until dry but not brown. Set aside.
- In a large bowl, whisk together pumpkin puree, heavy cream, eggs, brown sugar, pumpkin pie spice, vanilla extract, and salt until smooth.
- Spoon filling into each crust, filling almost to the top (about 1 tablespoon per pie).
- Bake for 18-20 minutes until filling is set around edges but slightly jiggly in center.
- Cool in pan for 10 minutes, then transfer to a wire rack to cool completely. Can be stored in fridge for up to 2 days.
- To assemble board: Place small bowls of olives, honey, or jam on the board first.
- Add brie and cheddar in different spots on the board.
- Fold prosciutto into loose ribbons and pile near brie. Fan out salami slices.
- Arrange mini pies in clusters of 3-4 around the board, near cheese and fruit.
- Fill gaps with grapes, apple slices, dried figs, and candied pecans.
- Add crackers in small stacks or fanned out in empty spaces.
- Garnish with fresh rosemary sprigs.
- Serve immediately or cover and refrigerate for up to 2 hours. Remove 30 minutes before serving to bring cheese to room temperature.
Notes
Mini pies can be made up to 2 days ahead. Take brie out of fridge 1 hour before serving. For gluten-free, use gluten-free pie crust and crackers. For vegan, use vegan pie crust, coconut cream, flax egg, and skip cheese/meats. Leftover mini pies keep in fridge for up to 4 days. Reheat in 300°F oven for 5 minutes (do not microwave).
Nutrition
- Serving Size: 1 serving (approx. 2
- Calories: 375
- Sugar: 18
- Sodium: 520
- Fat: 22
- Saturated Fat: 12
- Carbohydrates: 35
- Fiber: 3
- Protein: 10
Keywords: Friendsgiving, charcuterie board, mini pumpkin pies, fall appetizer, holiday entertaining, sweet and savory, cheese board


