The PTA Halloween potluck was in six hours and I’d completely forgotten. Every other parent would be bringing Pinterest-perfect mummy pizzas, graveyard dirt cakes with hand-piped tombstones, and those elaborate pretzel broomsticks that take a whole afternoon to assemble. I had a dozen eggs, some black olives, and a half-empty jar of mayonnaise that expired next week. Honestly, I almost swung by the grocery store for a store-bought veggie tray just to save face. But something stopped me — maybe stubbornness, maybe the memory of my kid’s face when she saw the spider cupcakes I’d attempted last year (they looked more like sad blobs with legs). I grabbed the eggs, told myself this was going to be fine, and started boiling. Three hours later, my phone was blowing up with texts from other parents asking for the recipe. The spooky spider deviled eggs were the first thing to disappear from the table — before the pizza, before the cookies, even before the candy. The kids called them “the coolest things ever” and the moms kept asking how I got the legs to stay on. I just laughed and said it was nothing, but honestly? I was just as surprised as they were.
You know that feeling when you’re scrambling and something just works? That was this recipe. It’s funny how the simplest things often end up being the biggest hits. I mean, deviled eggs are already a crowd-pleaser at any gathering, but turn them into little spiders for Halloween? Suddenly you’re the cool parent who brought the themed food that actually tastes amazing. No fancy tools, no expensive ingredients, no stress. Let me tell you, I’ve learned the hard way that kids don’t care if something took you four hours or four minutes — they care if it’s fun and if it tastes good. These check both boxes and then some.
Why You’ll Love This Recipe
Let’s be real — Halloween can get expensive fast. Between costumes, candy, decorations, and school party contributions, the costs add up. That’s why this recipe is a total game-changer for families watching their budget. It uses ingredients you probably already have in your kitchen, and it comes together in under 30 minutes of actual work. Here’s why it works so well:
- Budget-Friendly: A dozen eggs costs about the same as a bag of chips. Black olives are maybe a dollar. You’re looking at under $5 for a platter that feeds a crowd.
- Kid-Approved: My own kids helped me make these, and they had a blast placing the olive legs. It’s a fun activity that doubles as dinner prep.
- Quick & Easy: From start to finish, you’re looking at about 30 minutes of active time. The hardest part is peeling the eggs, and we’ve got tips for that below.
- Naturally Gluten-Free: No special flours or substitutes needed. These work for guests with dietary restrictions too.
- Make-Ahead Friendly: You can prep the deviled egg filling a day ahead and assemble the spiders right before serving. Perfect for busy Halloween schedules.
- Picky Eater Approved: Something about the “spider” presentation makes even the most skeptical kids want to try one. It’s like magic.
What makes this recipe different from other Halloween deviled eggs you’ve seen? It’s the technique for the spider legs — no toothpicks, no skewers, no weird props. Just olives cut in a specific way that makes them look like real spider legs. I tested three different methods before landing on this one, and trust me, this is the one that stays put and looks the creepiest. Plus, the filling has a secret ingredient that makes it extra creamy and tangy — just a tiny splash of pickle juice. Trust me on this one.
These deviled eggs aren’t just Halloween food — they’re the kind of thing that makes your kids proud to bring to school parties. My daughter told me they were “the best thing I’ve ever made” and that’s saying something considering I make her pancakes every Saturday. They’re also perfect for neighborhood potlucks, trunk-or-treat events, or even just a fun family dinner on Halloween night. And let’s be honest — anything that gets kids excited about eating protein instead of sugar is a win in my book.
What Ingredients You Will Need
This recipe keeps things simple with just a handful of everyday ingredients. Most of these are probably already in your fridge and pantry, which is exactly what you want when you’re planning a last-minute Halloween treat. Here’s everything you’ll need:
For the Deviled Eggs
- 12 large eggs — Look for older eggs if possible (they peel easier). I’ve found that eggs bought a week ahead of time peel much cleaner than fresh ones.
- 1/3 cup mayonnaise — I prefer Hellmann’s or Duke’s for the creamiest texture. Avoid Miracle Whip here — it’s too tangy and sweet for this recipe.
- 1 teaspoon yellow mustard — Just regular yellow mustard, nothing fancy. It adds that classic deviled egg color and a mild tang.
- 1 tablespoon pickle juice — This is my secret ingredient! It adds brightness and helps thin the filling to the perfect consistency. Dill pickle juice works best.
- 1/4 teaspoon salt — Fine sea salt or table salt dissolves best.
- 1/8 teaspoon black pepper — Freshly ground if you have it, but pre-ground works fine.
- 1/4 teaspoon paprika — For garnish and a subtle smoky flavor. Smoked paprika is even better if you have it.
For the Spider Decorations
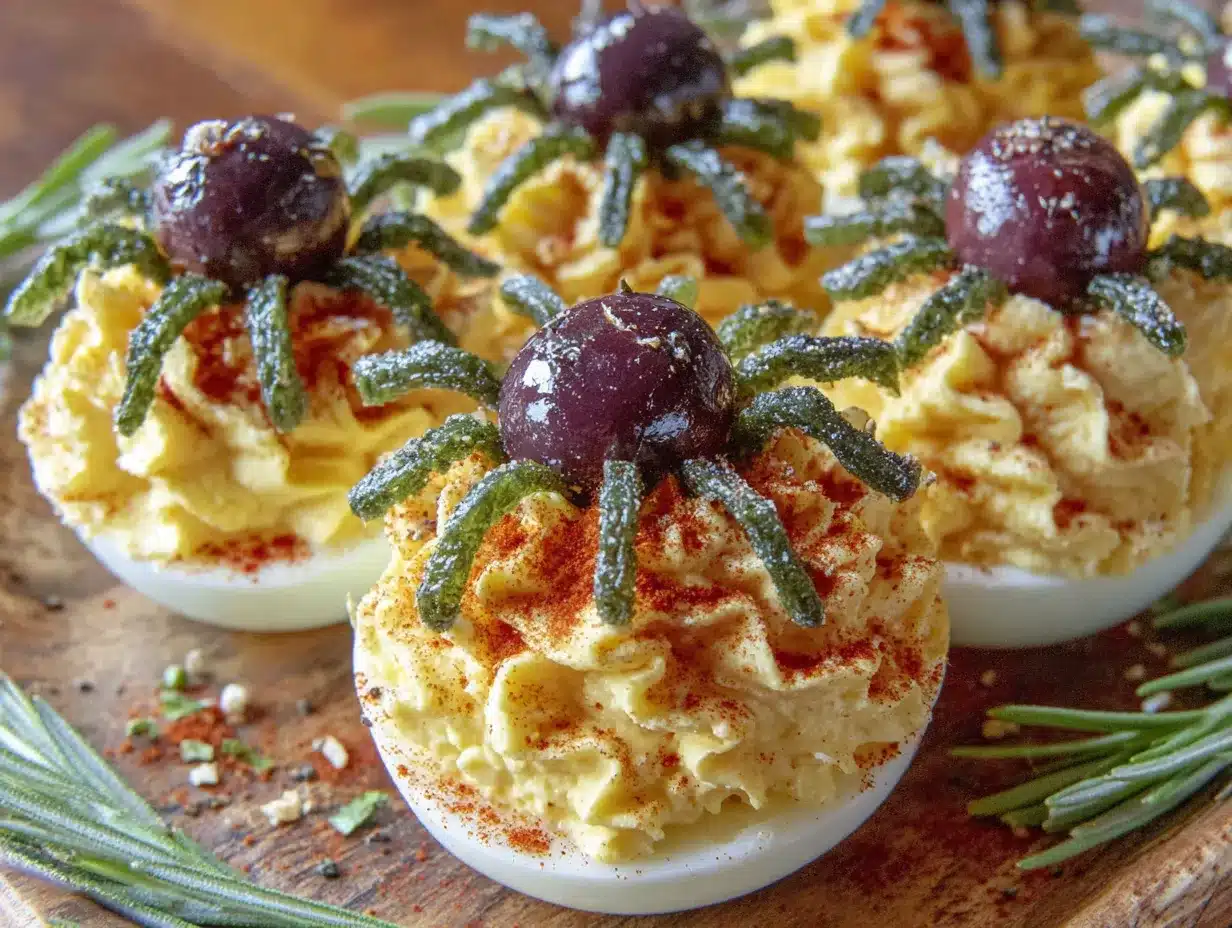
- 1 can (6 ounces) black olives — Whole, pitted olives. I recommend Lindsay or store brand — just make sure they’re the large, whole variety, not sliced.
- 1 tablespoon olive oil — For brushing the olives to give them a shiny, creepy look (optional but recommended).
That’s it! Twelve ingredients, most of which you probably already have. The beauty of this recipe is that it doesn’t require any specialty Halloween items or expensive garnishes. No black food coloring, no edible googly eyes, no weird ingredients you’ll never use again. Just eggs, olives, and basic pantry staples.
A quick note on egg selection: I’ve tested this with both white and brown eggs, and honestly, white eggs look creepier for spiders because the contrast with the black olives is more dramatic. But brown eggs work fine too — the filling covers the white anyway. For the olives, make sure you get whole pitted olives, not sliced or chopped. You need them intact to create the spider bodies and legs. If you can find jumbo olives, even better — they make for chunkier, more spider-like bodies.
One more tip: If you’re serving these to very young kids, you might want to cut the olive legs a bit shorter so they’re easier to eat. My four-year-old nephew had a little trouble with the full-length legs, so I trimmed them down for him. Just a thought if you have little ones at your party.
Equipment Needed
You don’t need any fancy kitchen gadgets for this recipe. Here’s what you’ll need:
- Large saucepan or pot — Big enough to hold a dozen eggs in a single layer. I use my 4-quart pot.
- Medium mixing bowl — For making the filling. Any bowl works, but a glass or ceramic one is easiest to clean.
- Sharp knife — A paring knife works best for cutting the olives into spider shapes. A serrated knife can crush the olives.
- Cutting board — Preferably a small one just for the olives so you don’t have to wash a big one.
- Small piping bag or zip-top bag — For piping the filling into the egg whites. A zip-top bag with the corner snipped off works perfectly and costs nothing.
- Slotted spoon — For transferring the boiled eggs to the ice bath.
- Baking sheet or platter — For arranging the finished spiders. A white platter makes them really pop.
If you don’t have a piping bag, honestly, a zip-top bag works just as well. I’ve been using the same trick for years — just spoon the filling into the corner of the bag, snip off the tip, and pipe away. If you don’t have a zip-top bag, you can use a small spoon to fill the eggs, though it won’t look as neat. For the olive legs, a small paring knife is really the best option. I’ve tried using kitchen scissors, but they tend to squish the olives. A sharp knife gives you cleaner cuts.
Preparation Method
Alright, let’s make some spiders! This recipe breaks down into three main parts: boiling the eggs, making the filling, and assembling the spiders. Take it step by step and you’ll be fine.
Step 1: Boil the Eggs
- Place the 12 eggs in a large saucepan in a single layer. Don’t stack them — they need to cook evenly.
- Cover the eggs with cold water, about an inch above the tops of the eggs.
- Place the pot on the stove over high heat and bring to a rolling boil.
- Once the water is boiling vigorously, cover the pot, turn off the heat, and let the eggs sit in the hot water for exactly 12 minutes. Set a timer — this is crucial for perfectly cooked yolks.
- While the eggs are cooking, prepare an ice bath by filling a large bowl with cold water and a generous amount of ice cubes.
- After 12 minutes, use a slotted spoon to transfer the eggs immediately to the ice bath. Let them sit for at least 5 minutes, or until completely cool to the touch.
Pro tip: If you want eggs that peel like a dream, add a teaspoon of baking soda to the water before boiling. Something about the alkaline water helps loosen the shells. I learned this trick from my grandmother and it’s never failed me.
Step 2: Peel and Prepare the Eggs
- Gently tap each egg on the counter to crack the shell all over. Start peeling from the wider end where the air pocket is — it’s usually easier to get under the shell there.
- Peel under running cold water. The water helps separate the shell from the egg white and washes away any tiny shell fragments.
- Once all eggs are peeled, rinse them gently to remove any remaining shell bits.
- Using a sharp knife, slice each egg in half lengthwise. Wipe the knife clean between cuts for smooth edges.
- Carefully pop the yolks out into your medium mixing bowl. Place the egg white halves on your serving platter, cut side up.
Heads up: If a few eggs don’t peel perfectly and the whites get a little torn, don’t panic. You can still use them — just put the damaged ones at the back of the platter or chop them up and add them to the filling for extra protein. No one will know.
Step 3: Make the Filling
- To the bowl with the yolks, add the mayonnaise, yellow mustard, pickle juice, salt, and pepper.
- Use a fork to mash everything together until smooth and creamy. You can also use a potato masher or even a hand mixer for an ultra-smooth texture.
- Taste the filling and adjust seasoning if needed. I usually add a tiny pinch more salt at this point.
- Spoon the filling into a piping bag or a zip-top bag. If using a zip-top bag, press the filling into one corner, then snip off about 1/4 inch from the tip.
- Pipe the filling into each egg white half, dividing it evenly. You should have enough for all 24 halves with a little left over if you want to pile it high.
- Sprinkle a light dusting of paprika over the filled eggs for color and flavor.
My personal touch: Sometimes I add a tiny dash of hot sauce to the filling for a subtle kick. Just a few drops — not enough to make it spicy, but enough to add depth. The kids never notice, but the adults always comment on how flavorful they are.
Step 4: Create the Spider Decorations
- Drain the can of black olives and pat them dry with a paper towel.
- Select 24 olives for the spider bodies. Set them aside.
- Take the remaining olives and slice them into thin rounds, about 1/8 inch thick. You’ll need 96 slices total (4 legs per spider, 24 spiders).
- For each spider, take one whole olive and place it on top of a deviled egg, centered on the filling.
- Take four olive slices and arrange them around the whole olive as legs — two on each side, slightly angled to look like a spider walking.
- Gently press the legs into the filling so they stay in place.
- Repeat for all 24 deviled eggs.
Pro tip: If the olive legs won’t stay put, you can use a tiny dab of the filling as “glue” to hold them in place. Just put a speck of filling under each leg and press gently. This works like a charm and is completely edible.
Step 5: Finishing Touches
- If desired, lightly brush the olive spiders with olive oil to give them a shiny, creepy appearance.
- Arrange the finished spiders on a platter. A black or dark orange platter creates a dramatic Halloween look.
- Refrigerate for at least 30 minutes before serving to let the filling set and the flavors meld.
Visual cue: The finished spiders should look like they’re crawling across the platter. The contrast between the creamy yellow filling, white egg white, and black olives is striking. Kids will literally squeal when they see them.
Cooking Tips & Techniques
I’ve made these deviled eggs more times than I can count, and I’ve learned a few things along the way. Here are my best tips for spider success:
Perfect hard-boiled eggs every time: The 12-minute off-heat method is foolproof. Don’t boil the eggs for 12 minutes on the heat — that’s how you get rubbery whites and green-ringed yolks. The residual heat from the water does the cooking gently. If you’re at high altitude, add an extra minute or two to the off-heat time.
Peeling without the fight: I mentioned the baking soda trick, but here’s another one: gently roll the cooled egg on the counter under your palm to crack the shell into tiny pieces before peeling. The shell comes off in bigger pieces this way. Also, older eggs peel much easier than fresh ones. If you’re planning ahead, buy your eggs a week before you need them.
Making the filling ahead: You can make the filling up to two days in advance. Store it in a piping bag or airtight container in the fridge. When you’re ready to assemble, let it sit at room temperature for 10 minutes to soften slightly before piping.
Keeping the legs on: This was my biggest struggle the first time. The olive legs would slide off or fall over. The solution? Pipe the filling slightly higher in the center of each egg white, then press the whole olive body into the filling so it creates a little well. The legs fit into this well and stay put. Also, make sure your filling isn’t too runny — if it’s too soft, the legs will sink.
Timing strategy: Boil and peel the eggs the night before. Make the filling the morning of your event. Assemble the spiders an hour before serving. This breaks the work into manageable chunks and keeps you from feeling rushed.
What I learned the hard way: My first attempt at these, I used sliced olives for the legs instead of slicing them myself. The pre-sliced olives were too thin and floppy — they looked more like sad little worms than spider legs. Taking the extra two minutes to slice whole olives makes a huge difference in the final look. Also, I once tried to use toothpicks to hold the legs in place, thinking it would be easier. Don’t do this. The toothpicks poke through the eggs and it’s a mess. Trust the filling — it’s sticky enough to hold everything together.
Variations & Adaptations
One of the best things about this recipe is how easy it is to customize. Here are some fun variations I’ve tried:
Dietary Adaptations
- Dairy-Free: This recipe is naturally dairy-free as written, but double-check your mayonnaise — some brands contain dairy. Vegenaise or Just Mayo are great dairy-free options.
- Keto-Friendly: Deviled eggs are naturally low-carb and keto-friendly. These fit perfectly into a low-carb Halloween celebration.
- Whole30: Use a Whole30-compliant mayonnaise (like Primal Kitchen) and skip the pickle juice if it contains sugar. The mustard is fine.
Flavor Variations
- Spicy Spider: Add 1/2 teaspoon of sriracha or chipotle powder to the filling for a smoky heat. The kids might not go for this one, but adults will love it.
- Herby Spider: Mix in 1 tablespoon of fresh chopped dill or chives into the filling. It adds a fresh, bright flavor that pairs beautifully with the olives.
- Bacon Spider: Crumble cooked bacon on top of the filling before adding the olive body. Because everything is better with bacon, right?
Presentation Twists
- Web Effect: Drizzle a little sriracha mayo or sour cream in a web pattern on the platter before placing the spiders. It’s an extra touch that looks amazing.
- Spider Babies: Use quail eggs instead of chicken eggs for mini spiders. They’re adorable and perfect for little hands. Just adjust the boiling time to 5 minutes.
- Colorful Webs: Add a drop of green or purple food coloring to the mayonnaise for a colored web design on the platter. Kids love this.
My personal favorite variation is the “Crawling Spider” — instead of placing the spider body centered on the egg, I place it slightly off-center with the legs angled forward, like the spider is in mid-stride. It adds a dynamic, slightly creepier look that always gets comments.
Serving & Storage Suggestions
These spooky spider deviled eggs are best served chilled, straight from the fridge. The cold filling holds its shape better and the olive legs stay firmly in place. Here’s how to serve and store them:
Serving Temperature: Take the platter out of the fridge about 10 minutes before serving to take the chill off, but don’t let them sit out longer than 2 hours total (food safety rule for egg dishes). During a Halloween party, I usually put out a small batch at a time and keep the rest chilled.
Presentation Ideas: Arrange the spiders on a black platter or a bed of purple cabbage leaves for a creepy effect. You can also scatter a few plastic spiders around the platter for extra Halloween flair. I like to put a small sign next to the platter that says “Creepy Crawlers” — the kids get a kick out of it.
Complementary Dishes: These pair beautifully with other Halloween finger foods like mummy hot dogs (crescent rolls wrapped around hot dogs with mustard eyes), pumpkin-shaped cheese balls, or a platter of fresh veggies with ranch dip. For drinks, a pitcher of “witch’s brew” punch (limeade with sherbet) is a fun addition.
Storage Instructions: Store leftover deviled eggs in an airtight container in the refrigerator for up to 3 days. The olive decorations may shift slightly during storage, so you might need to rearrange them before serving leftovers. Do not freeze deviled eggs — the texture of the filling becomes watery and grainy when thawed.
Reheating: Deviled eggs are served cold, so no reheating is needed. If you’ve made the eggs ahead and they seem a bit dry, you can brush them with a tiny bit of olive oil before serving to refresh them.
Flavor Development: Honestly, these taste even better the next day. The flavors meld together overnight and the filling becomes even creamier. If you’re making them for a party, I actually recommend making them a day ahead (without the olive decorations) and adding the spiders right before serving.
Nutritional Information & Benefits
Deviled eggs are a surprisingly nutritious option for a Halloween party spread. Here’s the breakdown per spider (one deviled egg with olive decorations):
| Nutrient | Amount per Serving |
|---|---|
| Calories | 85 |
| Protein | 6g |
| Fat | 6g |
| Saturated Fat | 1.5g |
| Carbohydrates | 1g |
| Fiber | 0g |
| Sugar | 0.5g |
| Sodium | 180mg |
| Cholesterol | 185mg |
Health Benefits: Eggs are an excellent source of high-quality protein, which helps keep kids full and satisfied. They’re also rich in choline, a nutrient important for brain development. Olives provide healthy monounsaturated fats and vitamin E, which supports immune function. The mayonnaise adds a small amount of vitamin K and healthy fats.
Dietary Considerations: This recipe is naturally gluten-free, nut-free, and dairy-free (check your mayonnaise label). It’s also low-carb and keto-friendly. The main allergen concern is eggs, so be sure to label the platter clearly if serving at a school event or party. For a lower-fat version, you can substitute half the mayonnaise with plain Greek yogurt — it adds protein and tang while cutting calories.
My wellness perspective: I love that this Halloween treat actually has nutritional value. In a season where kids are drowning in candy and sugar, having a protein-rich option that still feels festive is a win. My kids eat these without complaint, and I feel good knowing they’re getting real food instead of just empty calories. It’s all about balance, right?
Conclusion
These spooky spider deviled eggs are proof that Halloween treats don’t have to be complicated or expensive to be a hit. With just a dozen eggs, a can of olives, and basic pantry staples, you can create something that looks impressive, tastes amazing, and actually has some nutritional value. The kids will love the creepy presentation, and you’ll love how easy they are to put together.
I honestly make these every Halloween now, and they never fail to get compliments. There’s something about watching a room full of kids (and adults!) get excited about deviled eggs that just makes my day. The best part? You can customize them to fit your family’s tastes and dietary needs. Add bacon, spice them up, or keep them classic — these spiders are versatile.
So go ahead, give these a try for your next Halloween party, school event, or family dinner. They’re the kind of recipe that makes you look like a Pinterest pro without the stress. And hey, if your kids end up fighting over the last spider? Well, that’s just the sign of a successful recipe.
I’d love to hear how yours turn out! Drop a comment below with your spider creations, or tag me in your photos if you share them online. Happy Halloween, and happy cooking!
Frequently Asked Questions
Can I make these spider deviled eggs ahead of time?
Yes! You can boil and peel the eggs up to 3 days in advance. Make the filling up to 2 days ahead and store it in a piping bag in the fridge. Assemble the spiders no more than 4 hours before serving for the best presentation.
How do I keep the olive legs from falling off?
Pipe the filling slightly higher in the center of each egg white, then gently press the whole olive body into the filling to create a small well. Place the olive slice legs into this well and use a tiny dab of filling as “glue” if needed. Chilling the assembled eggs for 30 minutes helps everything set.
Can I use a different type of olive?
Black olives work best for the spider look, but you can use green olives for a different color scheme. Kalamata olives have a stronger flavor that might overpower the deviled egg filling. For the legs, stick with large, whole pitted olives so you can slice them evenly.
How long do these keep at a party?
For food safety, deviled eggs should not sit out at room temperature for more than 2 hours. If you’re serving them at a long event, put out a small batch at a time and keep the rest refrigerated. You can also set the platter on a bed of ice to keep them cold longer.
Can I make these for kids with egg allergies?
Unfortunately, deviled eggs are centered around eggs, so there’s no good substitute for the main ingredient. For an egg-free alternative, you could try making stuffed mini peppers with a similar filling using silken tofu or chickpea flour as a base. The olive spider decorations would work on those too!
Pin This Recipe!
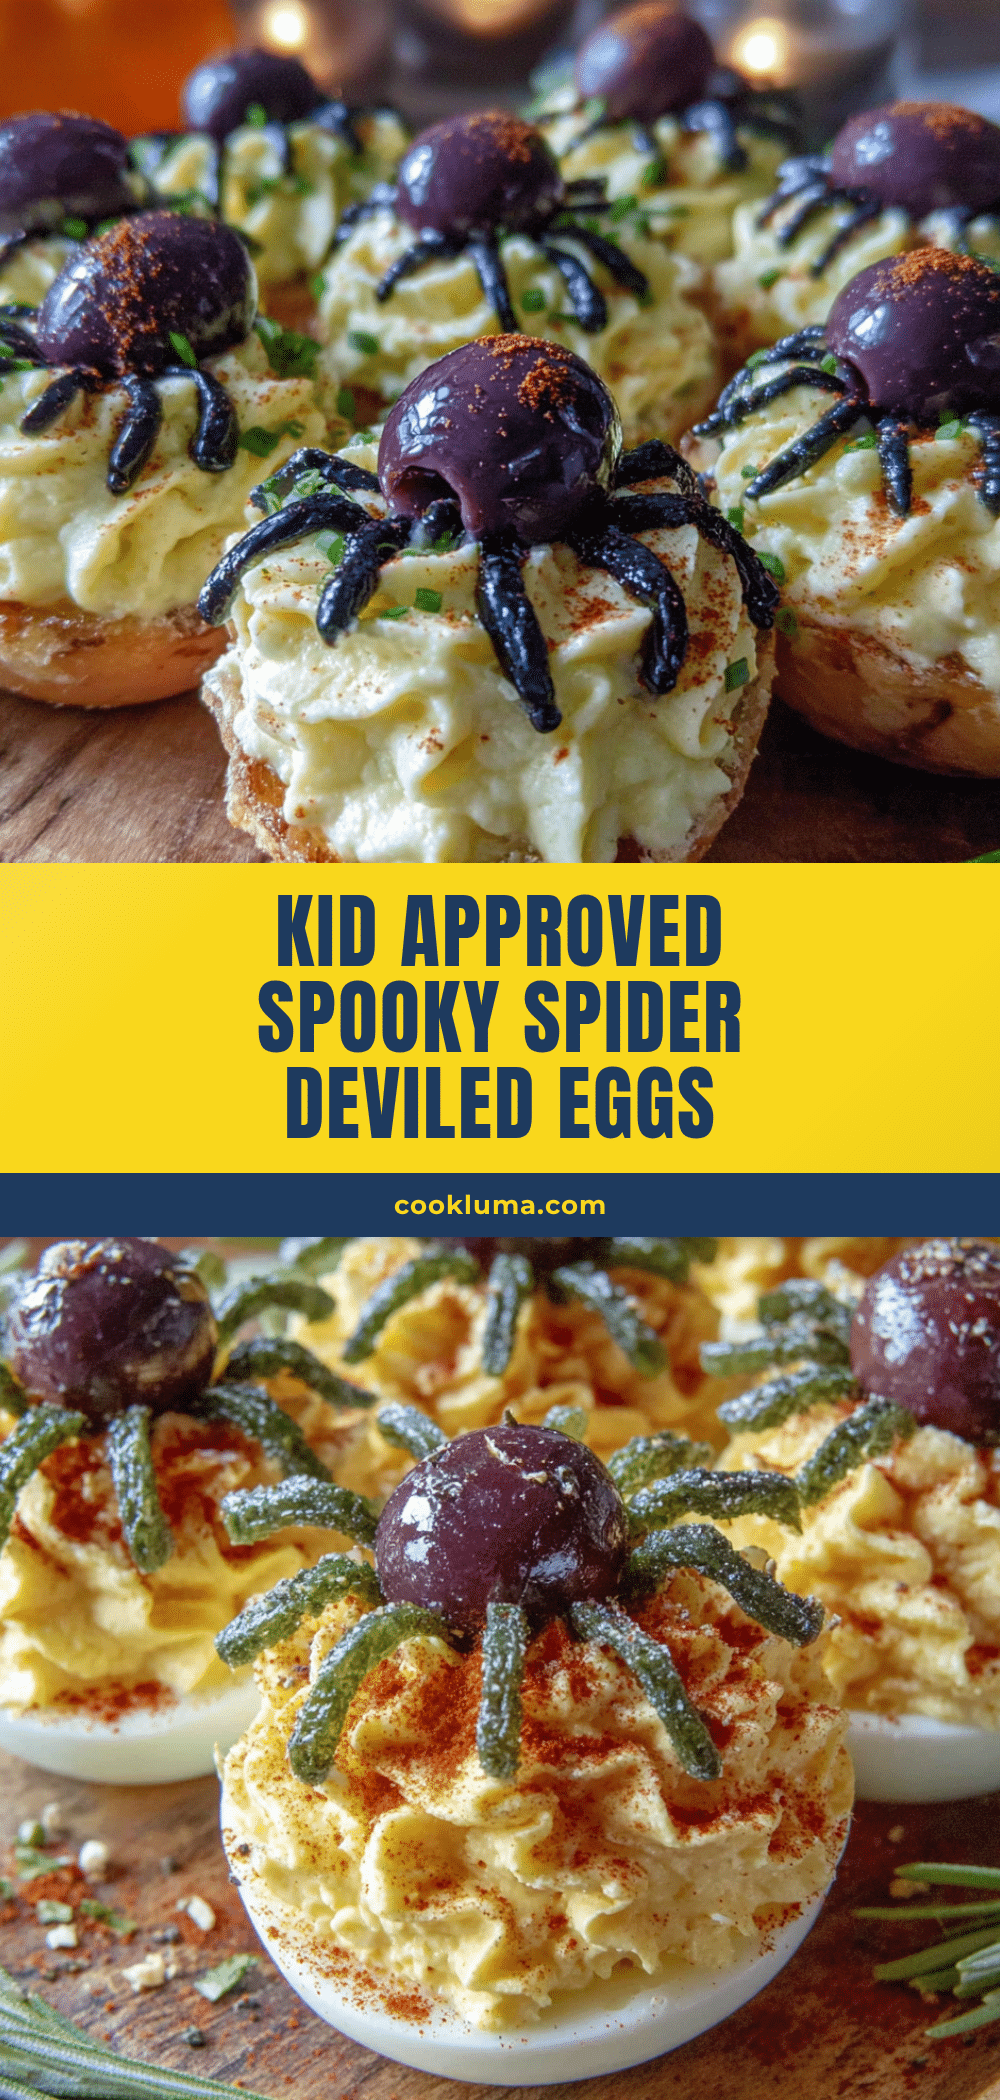
Best Easy Spooky Spider Deviled Eggs Recipe for Halloween
Turn classic deviled eggs into creepy-crawly spiders for Halloween with just eggs, black olives, and pantry staples. This budget-friendly, kid-approved recipe comes together in under 30 minutes and is naturally gluten-free.
- Prep Time: 20 minutes
- Cook Time: 12 minutes
- Total Time: 32 minutes
- Yield: 24 spiders (12 servings of 2 each) 1x
- Category: Appetizer
- Cuisine: American
Ingredients
- 12 large eggs
- 1/3 cup mayonnaise
- 1 teaspoon yellow mustard
- 1 tablespoon pickle juice
- 1/4 teaspoon salt
- 1/8 teaspoon black pepper
- 1/4 teaspoon paprika
- 1 can (6 ounces) whole pitted black olives
- 1 tablespoon olive oil (optional, for brushing)
Instructions
- Place the 12 eggs in a large saucepan in a single layer. Cover with cold water, about an inch above the tops of the eggs.
- Bring to a rolling boil over high heat. Once boiling, cover the pot, turn off the heat, and let sit for exactly 12 minutes.
- Prepare an ice bath with cold water and ice. Transfer eggs to the ice bath using a slotted spoon and let cool for at least 5 minutes.
- Peel the eggs under running cold water. Slice each egg in half lengthwise and pop the yolks into a medium mixing bowl. Place the egg white halves on a serving platter.
- To the yolks, add mayonnaise, yellow mustard, pickle juice, salt, and pepper. Mash with a fork until smooth and creamy. Taste and adjust seasoning.
- Spoon the filling into a piping bag or zip-top bag. Snip off the corner and pipe the filling into each egg white half. Sprinkle with paprika.
- Drain and pat dry the black olives. Select 24 olives for spider bodies. Slice the remaining olives into thin rounds (about 1/8 inch thick) to make 96 leg slices.
- For each spider, place one whole olive on top of a deviled egg, centered on the filling. Arrange four olive slices around it as legs—two on each side, slightly angled.
- If desired, lightly brush the olive spiders with olive oil for a shiny look. Refrigerate for at least 30 minutes before serving.
Notes
For easier peeling, add a teaspoon of baking soda to the water before boiling. Use older eggs (bought a week ahead) for cleaner peeling. If olive legs won’t stay, use a tiny dab of filling as ‘glue’. Make filling up to 2 days ahead; assemble spiders no more than 4 hours before serving. For a spicier version, add 1/2 teaspoon sriracha or chipotle powder to the filling.
Nutrition
- Serving Size: 2 spiders
- Calories: 170
- Sugar: 1
- Sodium: 360
- Fat: 12
- Saturated Fat: 3
- Carbohydrates: 2
- Protein: 12
Keywords: Halloween deviled eggs, spider deviled eggs, spooky deviled eggs, Halloween appetizer, easy Halloween recipe, gluten-free Halloween, kid-friendly Halloween


