My neighbor, a retired baker named Frank, watched me wrestling with a bag of chocolate chips through his kitchen window one Tuesday afternoon. I was trying to break the seal with my teeth, which, honestly, was a terrible idea. He didn’t say anything at first. He just slid his screen door open, walked over with a small saucepan, and set it on my counter. “Brown the butter first,” he said, like it was the most obvious thing in the world. “It’ll change your life.”
I was skeptical, I’ll admit it. I mean, I’d been making chocolate chip cookies since I was tall enough to reach the mixer. My recipe was fine—good, even. But Frank had a way of making things sound simple, not like a chef giving a lecture. He showed me how the butter would foam and then turn this deep, nutty amber color, filling the whole kitchen with a smell I can only describe as warm caramel and toasted hazelnuts. “That’s the secret,” he said, and then he just went back to his yard.
Let me tell you, the first batch I made with that browned butter was a revelation. The cookies came out of the oven with these perfectly crinkled tops and edges that were crisp but gave way to a center so soft and chewy, it practically melted. I brought a plate over to Frank the next day, and he just nodded, taking one. “You got it,” he said. And that was it. That simple exchange, that one tip from a neighbor who didn’t make a big deal out of it, completely changed how I bake cookies. Maybe you’ve been there—stuck in a rut with a recipe that’s fine but not *that* good. I know I was. This is the recipe that broke me out of it, and honestly, I haven’t looked back since.
Why You’ll Love This Recipe
Let’s be real for a second. Weeknights are chaos. You’re tired, the kids are hungry, and the last thing you want is a complicated baking project that requires a trip to three different stores. This recipe is the opposite of that. It’s designed for the days when you need a batch of cookies on the table in under an hour, and you need them to be absolutely amazing.
- Quick & Easy: From start to finish, you’re looking at about 30 minutes. No chilling the dough required—yes, you read that right. We’re skipping the long wait because who has time for that?
- Simple Ingredients: You probably have everything in your pantry right now. Butter, sugar, eggs, flour, chocolate chips. The only “special” step is browning the butter, and I promise it’s easier than it sounds.
- Perfect for Weeknight Cravings: These cookies are the ultimate fix for that after-dinner sweet tooth. They come together fast enough to make on a whim, even after a long day.
- Crowd-Pleaser: I’ve brought these to potlucks, school bake sales, and casual get-togethers. They disappear every single time. Kids love them, adults sneak extra ones.
- Unbelievably Delicious: The brown butter adds a layer of flavor that regular cookies just can’t match. It’s nutty, rich, and slightly caramel-like. The texture is the perfect balance of crisp edges and a soft, chewy center.
What makes this recipe different from all the other chocolate chip cookie recipes out there? It’s the technique. Browning the butter isn’t just a gimmick—it’s a game-changer. It deepens the flavor profile without adding any extra ingredients. Plus, I’ve tweaked the sugar ratio to ensure you get that signature chewiness every single time. This isn’t just another version of the classic cookie. It’s the best version, and it’s designed to fit into your busy life without any fuss.
What Ingredients You Will Need
This recipe relies on a handful of pantry staples, but a few key choices make all the difference. Here’s what you’ll need to grab, along with a few notes from my own kitchen trials.
- 1 cup (2 sticks or 226g) unsalted butter: This is the star of the show. I recommend using a good-quality unsalted butter like Kerrygold or Land O’Lakes for the best flavor. The browning process is where the magic happens, so don’t skimp here.
- 1 ½ cups (300g) packed light brown sugar: Brown sugar is key for that chewy texture. It has more moisture than white sugar, which keeps the cookies soft. I like Domino or C&H.
- ½ cup (100g) granulated sugar: A little white sugar helps with spreading and gives the edges a slight crispness.
- 2 large eggs, at room temperature: Room temperature eggs incorporate more easily into the butter mixture, creating a smoother dough. If you forgot to take them out, place them in a bowl of warm water for 5 minutes.
- 2 teaspoons vanilla extract: Pure vanilla extract is worth it here. It complements the nuttiness of the brown butter beautifully. Avoid imitation vanilla if you can.
- 2 ¼ cups (280g) all-purpose flour: Spoon and level your flour for the most accurate measurement. Scooping directly from the bag can pack in too much flour, leading to dry cookies.
- 1 teaspoon baking soda: This helps the cookies spread and become golden brown.
- 1 teaspoon salt: Salt balances the sweetness and enhances the brown butter flavor. I use fine sea salt.
- 2 cups (340g) semi-sweet chocolate chips or chunks: I prefer a mix of chips and roughly chopped chocolate bars for varied texture. Ghirardelli or Guittard are my go-to brands. You can also use dark chocolate or milk chocolate depending on your preference.
- Flaky sea salt for finishing (optional but highly recommended): A sprinkle of Maldon sea salt right after baking takes these cookies to another level. It’s that sweet-and-salty combo that’s just irresistible.
Equipment Needed
You don’t need a fancy bakery setup to nail these cookies. Here’s the basic gear that will get the job done.
- Small to medium saucepan: For browning the butter. A light-colored pan is helpful so you can see the color change.
- Large mixing bowl: For combining the wet and dry ingredients.
- Whisk: For mixing the wet ingredients together.
- Rubber spatula or wooden spoon: For folding in the flour and chocolate chips.
- Baking sheets (2): I recommend using light-colored, rimmed baking sheets. Dark sheets can cause the bottoms to brown too quickly.
- Parchment paper or silicone baking mats: These prevent sticking and ensure even baking. Silicone mats are a great investment for consistent results.
- Cookie scoop (about 1.5 tablespoons): This makes portioning the dough quick and uniform. If you don’t have one, you can use two spoons.
- Cooling rack: Essential for letting the cookies cool without getting soggy bottoms.
If you don’t have a cookie scoop, just eyeball it—the cookies will still taste amazing. I’ve used a regular tablespoon in a pinch, and it works fine.
Preparation Method
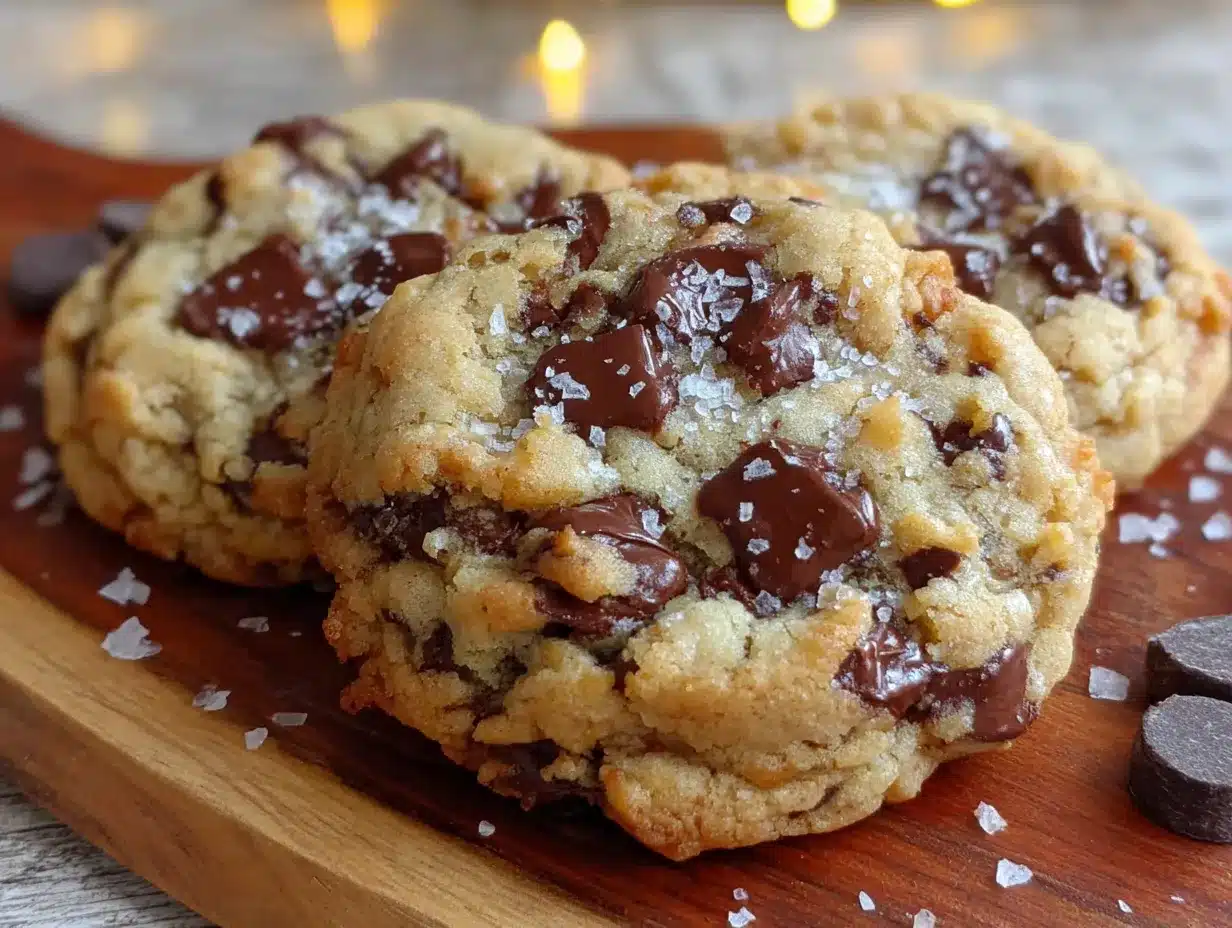
Alright, let’s get to the good part. Follow these steps, and you’ll have a batch of incredible cookies in no time. I’ve included some sensory cues so you know exactly what to look for.
- Brown the butter: Place the butter in your small saucepan over medium heat. Let it melt completely, then continue cooking, swirling the pan occasionally. The butter will start to foam and crackle. After about 5-7 minutes, the foam will subside, and you’ll see small brown specks forming at the bottom of the pan. The butter will smell nutty and toasty. Once it turns a deep amber color, immediately remove it from the heat and pour it into a large mixing bowl (including all the brown bits). Let it cool for about 10 minutes. Don’t walk away during this step—butter can go from browned to burnt very quickly.
- Mix the sugars and butter: Add the brown sugar and granulated sugar to the bowl with the cooled brown butter. Whisk vigorously until the mixture is smooth, glossy, and looks like wet sand. This should take about 1-2 minutes.
- Add the eggs and vanilla: Crack in the eggs one at a time, whisking well after each addition. Then add the vanilla extract. The mixture should look thick, shiny, and slightly lighter in color. It might look a little separated at first, but keep whisking—it will come together.
- Combine the dry ingredients: In a separate medium bowl, whisk together the flour, baking soda, and salt. This ensures the leavening agent is evenly distributed.
- Fold in the flour mixture: Gradually add the dry ingredients to the wet ingredients, using a rubber spatula or wooden spoon. Fold gently until just a few streaks of flour remain. Do not overmix, or your cookies will be tough.
- Add the chocolate chips: Fold in the chocolate chips and any chopped chocolate until they are evenly distributed throughout the dough. The dough will be thick and slightly sticky.
- Portion the dough: Preheat your oven to 375°F (190°C). Line your baking sheets with parchment paper or silicone mats. Using your cookie scoop or a spoon, portion out rounded tablespoons of dough (about 1.5 tablespoons each) and place them 2 inches apart on the prepared sheets. No need to roll them into perfect balls—a slightly craggy shape gives the cookies a more rustic look.
- Bake: Bake one sheet at a time on the middle rack for 9-11 minutes. The cookies should be golden brown around the edges but still look slightly soft and underdone in the center. They will continue to set on the hot baking sheet. For a chewier cookie, bake on the shorter side; for a crisper cookie, bake a minute longer.
- Cool and finish: Let the cookies cool on the baking sheet for 5 minutes. This is crucial—it allows them to firm up without becoming hard. Then, transfer them to a wire rack to cool completely. If using flaky sea salt, sprinkle a tiny pinch on each cookie right after you take them out of the oven while they’re still warm.
And that’s it! In about 30 minutes, you have a batch of cookies that taste like you spent hours on them.
Cooking Tips & Techniques
I’ve made a lot of mistakes in the kitchen, and I’m happy to share them so you don’t have to. Here are a few things I’ve learned the hard way.
Don’t skip cooling the brown butter. I know you’re eager, but if you add the eggs to hot butter, you’ll end up with scrambled eggs in your cookie dough. Trust me, it’s not a good look. Let it cool for a solid 10 minutes until it’s warm but not hot.
Use a light-colored pan for browning. The first time I tried this, I used a dark non-stick pan, and I couldn’t see the color change at all. I ended up with burnt butter that tasted bitter. A stainless steel or light-colored saucepan makes it much easier to monitor.
Weigh your flour if you can. I know it’s an extra step, but it’s the most accurate way to measure. 280 grams of all-purpose flour is the sweet spot. If you don’t have a scale, spoon the flour into your measuring cup and level it off with a knife. Don’t scoop directly from the bag.
Chill the dough if you have time. I said you don’t need to chill it, and you truly don’t. But if you have an extra 30 minutes, popping the portioned dough in the fridge will result in thicker, even chewier cookies. It’s a nice option if you’re planning ahead.
Bake one sheet at a time. I know it’s tempting to cram both sheets in the oven to save time, but the heat won’t circulate evenly. You’ll end up with some cookies overdone and some underdone. It’s worth the extra few minutes to bake them in batches.
Variations & Adaptations
One of the best things about this recipe is how easy it is to tweak. Here are a few ways I’ve adapted it over the years.
- Gluten-Free Option: Swap the all-purpose flour with a good 1:1 gluten-free baking flour blend, like the one from Bob’s Red Mill. The texture will be slightly more delicate, but the flavor is still spot-on.
- Add Some Nuts: Toasted walnuts or pecans add a wonderful crunch and complement the brown butter flavor. Fold in ½ cup of chopped, toasted nuts along with the chocolate chips.
- Double Chocolate Version: Reduce the flour to 2 cups and add ½ cup of unsweetened cocoa powder. Use white chocolate chips or dark chocolate chunks for a rich, decadent twist.
- Spiced Cookies: Add 1 teaspoon of cinnamon and ½ teaspoon of nutmeg to the dry ingredients for a warm, cozy flavor. This is perfect for fall or the holidays.
- Sea Salt Caramel Swirl: After portioning the dough, press a small piece of soft caramel candy into the center of each ball and pinch the dough around it. The caramel will melt into a gooey center as the cookies bake.
I personally love the version with toasted pecans. The nuttiness of the pecans and the brown butter together is just a perfect match. It feels a little more grown-up, but my kids still devour them.
Serving & Storage Suggestions
These cookies are best enjoyed warm, when the chocolate is still a little melty. But let’s be honest, they’re fantastic at room temperature too.
Serving: Serve them on a nice plate with a glass of cold milk or a hot cup of coffee. For a dessert platter, they pair beautifully with vanilla ice cream or a dollop of whipped cream. I also love crumbling them over a bowl of yogurt for a quick dessert parfait.
Storage: Store leftover cookies in an airtight container at room temperature for up to 5 days. To keep them extra soft, add a slice of bread to the container—it absorbs excess moisture and the cookies stay chewy. The bread will get hard, but the cookies will be perfect.
Freezing: You can freeze the baked cookies for up to 3 months. Place them in a single layer in a freezer-safe bag or container. Thaw at room temperature or warm them in a 300°F oven for a few minutes. You can also freeze the raw dough balls. Portion them out, freeze them on a baking sheet until solid, then transfer to a freezer bag. Bake from frozen, adding 1-2 minutes to the baking time.
Reheating: For that just-baked experience, pop a cookie in the microwave for about 10-15 seconds. Or, reheat them in a toaster oven at 350°F for 3-4 minutes.
The flavor of these cookies actually deepens after a day or two. The brown butter notes become more pronounced, so if you can resist eating them all immediately, you’re in for a treat.
Nutritional Information & Benefits
Let’s be honest—these are cookies, not a health food. But that doesn’t mean you can’t enjoy them mindfully. Here’s a rough estimate of the nutritional values per cookie (based on 24 cookies).
- Calories: ~210
- Fat: 11g
- Carbohydrates: 28g
- Protein: 3g
- Sugar: 18g
- Sodium: 120mg
The brown butter adds a small amount of healthy fats, and the dark chocolate provides antioxidants. If you use a high-quality dark chocolate with at least 70% cocoa, you’ll get a bit more flavanol content. For a slightly lighter option, you can reduce the sugar by ¼ cup, though it will affect the texture slightly. This recipe is also naturally nut-free if you skip the optional nuts, making it safe for school bake sales.
I like to think of these cookies as a treat that’s worth every single calorie. They’re made with real ingredients, no preservatives, and a whole lot of love. And honestly, sometimes that’s exactly what you need.
Conclusion
So there you have it—the best easy chewy brown butter chocolate chip cookies you’ll ever make. This recipe came to me through a simple act of neighborly kindness, and it has become a staple in my kitchen ever since. It’s proof that sometimes the smallest tweak—like browning the butter—can make the biggest difference.
I hope you give these cookies a try, whether it’s for a busy weeknight treat, a bake sale, or just because you deserve something delicious. Feel free to make them your own with the variations I shared. That’s the beauty of baking—it’s a living, breathing thing that adapts to your taste.
If you make them, I’d love to hear about it! Leave a comment below and let me know how they turned out. Did you try a variation? Did you add flaky salt? Share your photos and tag me on social media—I can’t wait to see your creations. Happy baking, friends!
Frequently Asked Questions
Can I use salted butter instead of unsalted?
Yes, you can. Just reduce the added salt in the recipe to ¼ teaspoon to avoid the cookies being too salty.
Why did my cookies turn out flat?
Flat cookies are usually a sign that the butter was too warm or the dough wasn’t chilled enough. Make sure your brown butter has cooled down before mixing, and if the dough feels very soft, pop it in the fridge for 15 minutes before baking.
Can I make the dough ahead of time?
Absolutely! You can prepare the dough, cover it tightly, and refrigerate it for up to 48 hours. Let it sit at room temperature for about 10 minutes before scooping and baking.
How do I know when the butter is properly browned?
Look for a deep amber color and a nutty aroma. You’ll see small brown specks forming at the bottom of the pan. It usually takes about 5-7 minutes over medium heat.
Can I use milk chocolate chips instead of semi-sweet?
Yes, you can. Just keep in mind that milk chocolate is sweeter and creamier, so the cookies will be a bit less rich and more sugary. I prefer semi-sweet to balance the sweetness of the brown sugar.
Pin This Recipe!
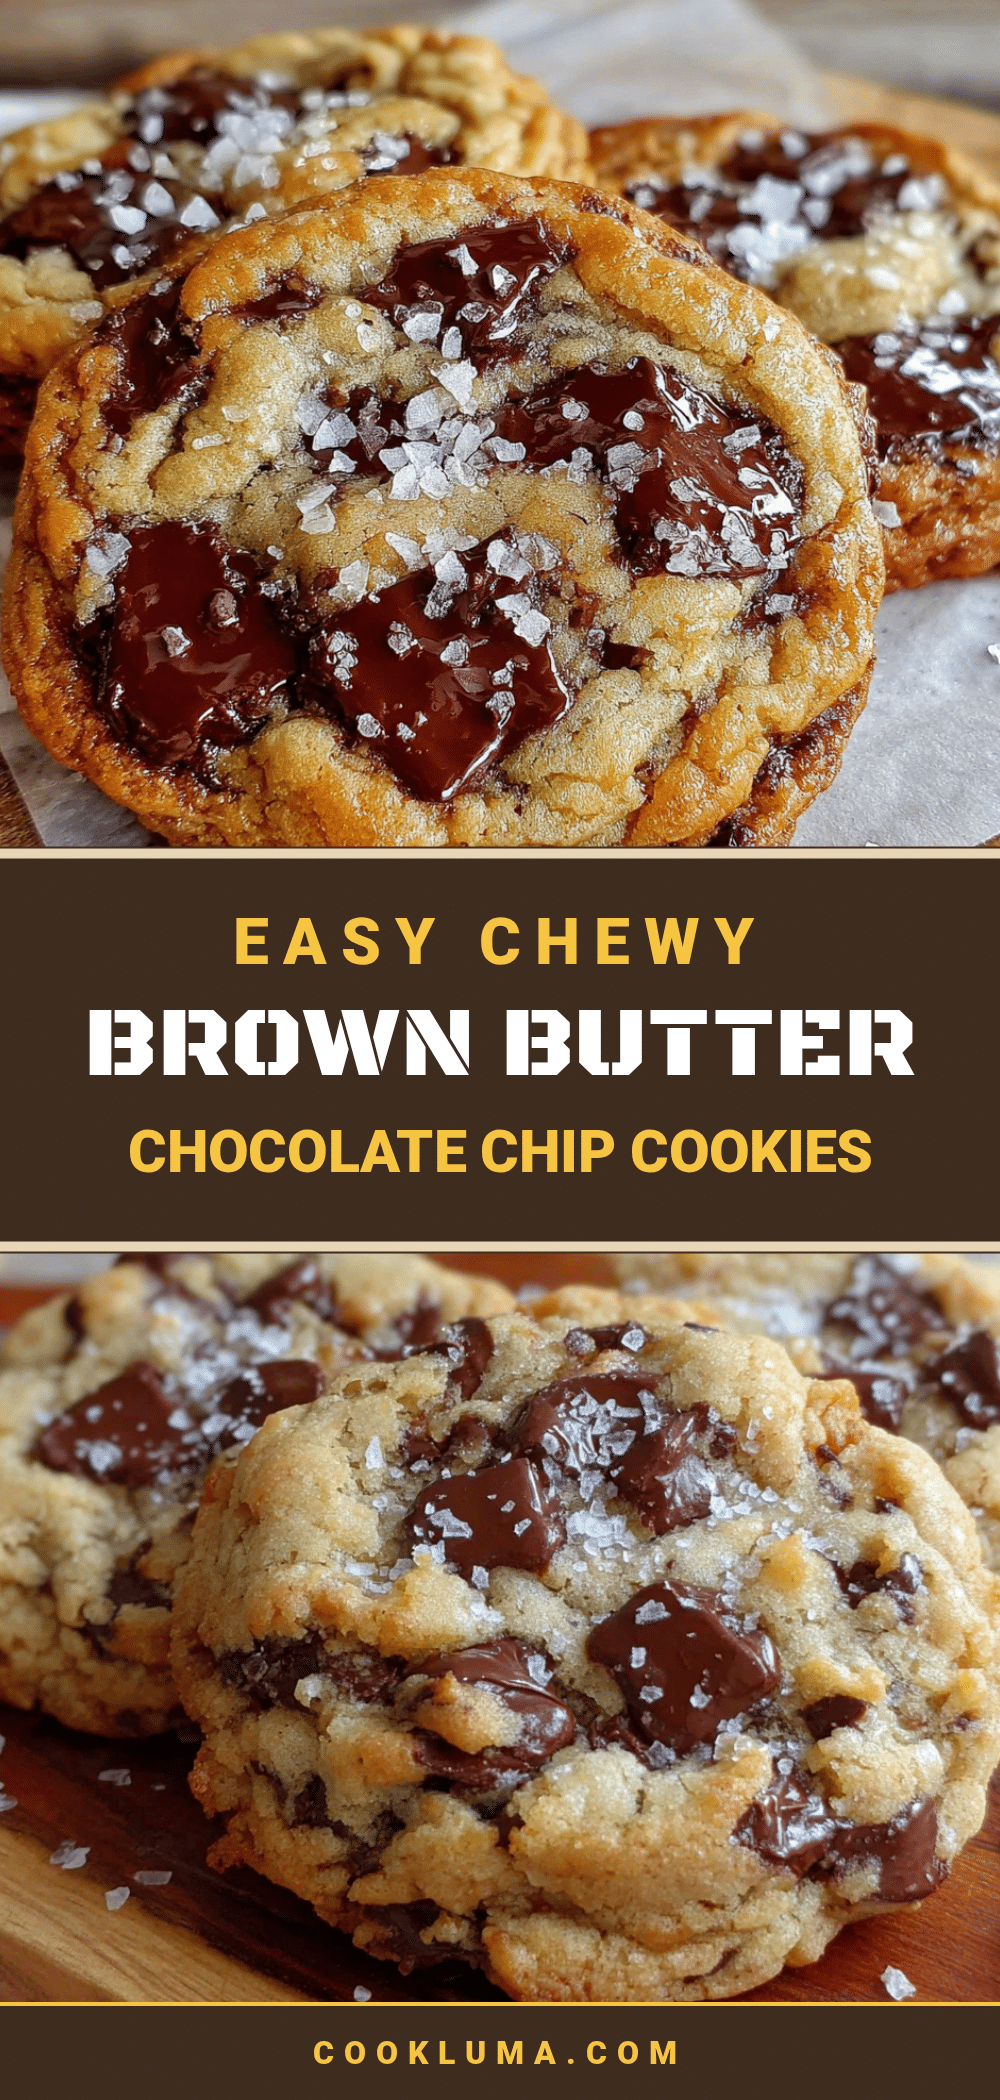
Best Easy Chewy Brown Butter Chocolate Chip Cookies
These brown butter chocolate chip cookies are incredibly chewy with crisp edges and a nutty, caramel-like flavor. Made with simple ingredients and no chilling required, they’re the perfect quick and easy weeknight treat.
- Prep Time: 15 minutes
- Cook Time: 10 minutes
- Total Time: 30 minutes
- Yield: 24 cookies 1x
- Category: Dessert
- Cuisine: American
Ingredients
- 1 cup (2 sticks or 226g) unsalted butter
- 1 ½ cups (300g) packed light brown sugar
- ½ cup (100g) granulated sugar
- 2 large eggs, at room temperature
- 2 teaspoons vanilla extract
- 2 ¼ cups (280g) all-purpose flour
- 1 teaspoon baking soda
- 1 teaspoon salt
- 2 cups (340g) semi-sweet chocolate chips or chunks
- Flaky sea salt for finishing (optional)
Instructions
- Brown the butter: Place the butter in a small saucepan over medium heat. Melt completely, then continue cooking, swirling occasionally, until the butter foams, crackles, and turns a deep amber color with brown specks (about 5-7 minutes). Immediately remove from heat and pour into a large mixing bowl, including all brown bits. Let cool for 10 minutes.
- Mix the sugars and butter: Add brown sugar and granulated sugar to the cooled brown butter. Whisk vigorously until smooth, glossy, and looks like wet sand (about 1-2 minutes).
- Add the eggs and vanilla: Crack in eggs one at a time, whisking well after each. Add vanilla extract. Whisk until thick, shiny, and slightly lighter in color.
- Combine the dry ingredients: In a separate medium bowl, whisk together flour, baking soda, and salt.
- Fold in the flour mixture: Gradually add dry ingredients to wet ingredients using a rubber spatula or wooden spoon. Fold gently until just a few streaks of flour remain. Do not overmix.
- Add the chocolate chips: Fold in chocolate chips and any chopped chocolate until evenly distributed. Dough will be thick and slightly sticky.
- Portion the dough: Preheat oven to 375°F (190°C). Line baking sheets with parchment paper or silicone mats. Using a cookie scoop or spoon, portion out rounded tablespoons of dough (about 1.5 tablespoons each) and place 2 inches apart on prepared sheets.
- Bake: Bake one sheet at a time on the middle rack for 9-11 minutes. Cookies should be golden brown around the edges but still soft in the center.
- Cool and finish: Let cookies cool on baking sheet for 5 minutes, then transfer to a wire rack to cool completely. If using flaky sea salt, sprinkle a tiny pinch on each cookie while still warm.
Notes
Don’t skip cooling the brown butter before adding eggs to avoid scrambling. Use a light-colored pan to monitor browning. For thicker, chewier cookies, chill the portioned dough for 30 minutes if time allows. Bake one sheet at a time for even results. Store in an airtight container at room temperature for up to 5 days; add a slice of bread to keep them soft. Freeze baked cookies for up to 3 months or freeze raw dough balls for baking later.
Nutrition
- Serving Size: 1 cookie
- Calories: 210
- Sugar: 18
- Sodium: 120
- Fat: 11
- Carbohydrates: 28
- Protein: 3
Keywords: brown butter chocolate chip cookies, chewy cookies, easy cookie recipe, no chill cookies, weeknight dessert


