My nephew took one bite, looked at me with those huge, serious five-year-old eyes, and whispered, “Auntie, I don’t want to eat his face.” That was the moment I knew these Easy Mummy Meatball Skewers were a Halloween success. The plate was half-gone before I even sat down with my own dinner, and somehow, that felt like a bigger win than any complicated main course I’d ever made.
I wasn’t trying to reinvent the wheel. Honestly, I was just tired of the same old candy-centric Halloween spread that left everyone with a sugar crash before the first trick-or-treater even rang the bell. I wanted something that felt fun and festive but would actually fill up the hungry little goblins (and adults) running around my house. So, I grabbed a bag of frozen meatballs, some biscuit dough, and a little food coloring, figuring I could at least make dinner look the part.
What came out of the oven was way better than I expected. These mummy skewers are goofy, a little bit spooky, and surprisingly satisfying. They make everyone laugh, and they are genuinely delicious. It’s the kind of recipe that proves you don’t need to stress over a perfect Halloween dinner. You just need a good idea and a little bit of dough.
Why You’ll Love This Recipe
Look, I’ve tested a lot of Halloween recipes over the years. Some are way too complicated for a busy weeknight, and others are just snacks disguised as dinner. These Easy Mummy Meatball Skewers hit that sweet spot where fun meets actual food. Here is why they work so well for our family—and I bet yours too:
- Quick & Easy: From start to finish, these skewers come together in about 30 minutes. You can prep them while the kids are getting into their costumes, and they bake up fast. No all-day projects here.
- Simple Ingredients: You likely have most of these things in your fridge and pantry right now. Frozen meatballs, canned biscuit dough, and string cheese are the stars of the show. No fancy grocery store runs required.
- Perfect for a Halloween Dinner: These are filling enough to be a main course but playful enough to feel like a party. They work for a quiet family dinner or a table full of costumed guests.
- Crowd-Pleaser: Kids love the mummy look, and adults love that it’s not just candy. I have watched picky eaters devour three of these in a row. The cheese pull is irresistible.
- Unbelievably Delicious: The meatballs get sticky and caramelized from the sauce, the biscuit dough bakes up flaky and golden, and the melted cheese brings it all together. It’s comfort food with a spooky twist.
What makes this recipe different from the dozens of other mummy meatball ideas out there? It’s the balance. I use a simple homemade glaze on the meatballs that adds a savory-sweet kick, and I wrap the dough loosely so it bakes up crispy, not doughy. This isn’t just a cute idea that tastes mediocre—it actually delivers on flavor. The first time I made these, my brother-in-law (who claims he “doesn’t do themed food”) ate four of them without stopping. That’s when I knew I had something good.
What Ingredients You Will Need
This recipe uses simple, everyday ingredients to create something that feels special. The magic is in how you put them together, not in hunting down obscure items. Here is everything you need to make these mummy skewers come to life:
For the Meatballs & Sauce
- 1 (24-ounce) bag frozen fully cooked meatballs (I prefer the homestyle or Italian-style variety for best flavor. Look for a brand that lists beef and pork as the first ingredients, like Rosina or Farm Rich.)
- 1/2 cup ketchup (Use a good quality ketchup with a rich tomato taste. It forms the base of the glaze.)
- 2 tablespoons brown sugar, packed (Adds sweetness and helps the glaze caramelize in the oven.)
- 1 tablespoon Worcestershire sauce (Gives the glaze a deep, savory umami note that balances the sweetness.)
- 1 teaspoon garlic powder (Don’t skip this—it adds a subtle savory layer to the meatballs.)
- 1/2 teaspoon onion powder (Works with the garlic to round out the flavor profile.)
For the Mummy Wraps
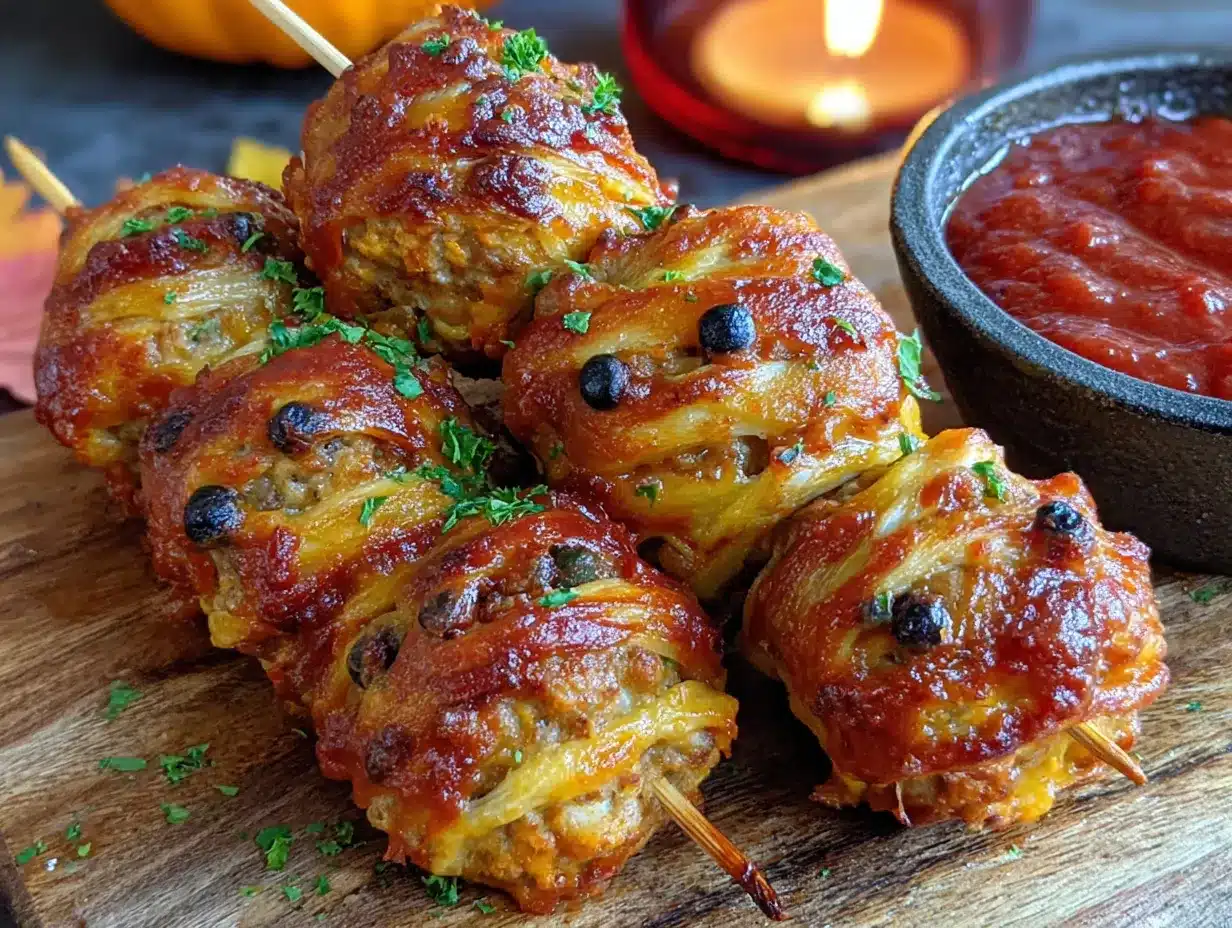
- 1 (16.3-ounce) can refrigerated biscuit dough (I use Pillsbury Grands! Buttermilk biscuits. You need the flaky layers for the best texture. Do not use the smaller, denser biscuits.)
- 4 sticks string cheese (mozzarella), cut into 1-inch pieces (You will need about 16 small cheese cubes. Full-fat mozzarella melts the best and gives that perfect stretchy pull.)
For the Eyes & Garnish
- 24 candy eyeballs (You can find these at most grocery stores in the baking aisle, or online. Wilton makes a good version.)
- 1 large egg, beaten (For an egg wash that gives the biscuit dough a beautiful golden-brown finish.)
- 1 tablespoon sesame seeds (optional) (Adds a little texture and makes the mummies look even more authentic—like little crusty bandages.)
- Marinara sauce, for dipping (Warm it up and serve it on the side. Trust me on this one.)
Substitution Notes
If you want to make your own meatballs from scratch, go for it! Use a simple mix of ground beef, breadcrumbs, egg, and Italian seasoning. Just make sure they are fully cooked before you wrap them. For a dairy-free option, use a plant-based mozzarella shred on top instead of string cheese. And if you cannot find candy eyeballs, you can pipe a tiny dot of cream cheese and a smaller dot of black olive on top. It’s a little more work, but it works in a pinch.
Equipment Needed
You don’t need a fancy kitchen to pull these off. Here is what you will need:
- Baking sheet (A standard half-sheet pan works perfectly. Line it with parchment paper for easy cleanup.)
- Small mixing bowl (For whisking together the glaze ingredients.)
- Pastry brush (For brushing the glaze onto the meatballs and the egg wash onto the dough. A silicone one is easiest to clean.)
- Sharp knife or pizza cutter (For cutting the biscuit dough into thin strips. A pizza cutter makes this job much faster.)
- Cutting board (A clean surface for rolling and cutting the dough.)
- Wooden or metal skewers (I use 6-inch wooden skewers. If you use metal ones, just be careful when handling them—they get hot in the oven.)
I have made these with both wooden and metal skewers, and honestly, I prefer the wooden ones for this recipe. They are cheap, disposable, and they don’t conduct heat, so the kids can grab them without burning their fingers. Just remember to soak wooden skewers in water for 20 minutes before baking so they don’t scorch in the oven. I learned that one the hard way after a batch of slightly charred skewers.
Preparation Method
Alright, let’s get into the fun part. This is where the mummies come to life. Take your time with the wrapping step—it is the most important part of the whole process.
- Preheat your oven to 375°F (190°C). Line a large baking sheet with parchment paper. This makes cleanup so much easier, and it prevents the dough from sticking.
- Make the glaze. In a small bowl, whisk together the ketchup, brown sugar, Worcestershire sauce, garlic powder, and onion powder until smooth. Set it aside. This will be the sticky, sweet coating that makes the meatballs irresistible.
- Prepare the meatballs. If your frozen meatballs are stuck together, let them sit at room temperature for about 10 minutes so you can separate them. Place them in a medium bowl and pour the glaze over the top. Toss gently until every meatball is well coated. Use your hands if you need to—just wash them first.
- Thread the meatballs onto skewers. Take a wooden skewer and thread 2 glazed meatballs onto it, leaving a little space between them. Repeat with the remaining meatballs and skewers. You should end up with about 12 skewers total (24 meatballs). Place the skewers on the prepared baking sheet, making sure they are not touching each other.
- Cut the biscuit dough. Open the can of biscuits and separate them. You will have 8 biscuits total. Take one biscuit and flatten it slightly with your fingers or a rolling pin. Using a sharp knife or pizza cutter, cut the biscuit into thin strips, about 1/4-inch wide. You want them to look like little bandages. Repeat with the remaining biscuits.
- Wrap the mummies. Now for the fun part. Take a strip of dough and wrap it around the meatballs on a skewer, starting at the top and working your way down. Leave a small gap at the top of the meatballs so you can add the eyes later. The dough should look like loose bandages—do not wrap it too tightly, or it will puff up and hide the meatballs completely. I like to leave a little bit of the meatball peeking through in a few spots. It makes them look more like real mummies.
- Add the cheese. Tuck a small piece of string cheese between the dough strips on top of each meatball. This will melt and look like little mummy bandages. Don’t worry if it sticks out a bit—it will melt into the dough as it bakes.
- Apply the egg wash. In a small bowl, beat the egg with a tablespoon of water. Using a pastry brush, gently brush the egg wash over the exposed dough strips. This gives the mummies a beautiful golden-brown finish. Sprinkle a few sesame seeds on top if you are using them.
- Bake. Place the baking sheet in the preheated oven and bake for 12-15 minutes, or until the dough is golden brown and the meatballs are heated through. The cheese should be melted and bubbly. Keep an eye on them during the last few minutes—you want the dough cooked all the way through but not burnt.
- Add the eyes and serve. Remove the skewers from the oven and let them cool on the baking sheet for 2-3 minutes. While they are still warm, gently press two candy eyeballs onto the exposed meatball at the top of each skewer. The heat from the meatball will help the eyes stick. Serve immediately with warm marinara sauce for dipping.
Pro Tip: If the candy eyeballs won’t stick, you can use a tiny dab of ketchup or mustard as “glue.” It sounds weird, but it works perfectly and adds a little extra flavor.
Cooking Tips & Techniques
I have made these mummy meatball skewers about a dozen times now, and I have definitely learned a few things along the way. Here are my best tips to help you nail it on the first try:
Don’t overwork the dough. Biscuit dough is delicate. When you cut it into strips, handle it as little as possible. If you squish it too much, the layers will compress, and the dough will turn out dense instead of flaky. Just cut it and wrap it—no need to stretch or roll it out perfectly.
Leave gaps in the wrapping. I know it is tempting to wrap the meatballs completely in dough, but resist the urge. The mummies look best when you can see the meatball peeking through in a few places. It makes them look more like actual mummies, and it also allows the glaze to caramelize on the exposed meatball. That sticky, sweet spot is the best part.
Watch the baking time. Every oven runs a little differently. My old oven used to take a full 15 minutes, but my new one does the job in 12. Start checking at the 10-minute mark. You want the dough to be a deep golden brown and the cheese to be fully melted. If the dough is still pale, give it another 2-3 minutes.
Make ahead for parties. If you are hosting a Halloween party, you can assemble the skewers completely (minus the egg wash and eyes) up to 24 hours in advance. Cover them tightly with plastic wrap and store them in the refrigerator. When you are ready to bake, just brush on the egg wash and pop them in the oven. It saves so much stress on the day of the party.
My biggest failure: The first time I made these, I used too much dough and wrapped the meatballs way too tightly. They came out of the oven looking like sad, bloated breadsticks with no meatball in sight. I was so disappointed. Now I use a light hand and leave those intentional gaps. It makes all the difference.
Variations & Adaptations
One of the best things about this recipe is how easy it is to customize. Here are a few ways I have changed it up depending on what I have on hand or who I am feeding:
Spicy Mummy Skewers: Add 1-2 teaspoons of sriracha or chili garlic sauce to the glaze mixture. It gives the meatballs a nice little kick that pairs beautifully with the sweet ketchup. My husband loves this version.
Turkey Meatball Version: If you prefer a leaner option, use frozen turkey meatballs instead of beef or pork. They work just as well, though you might need to add an extra tablespoon of brown sugar to the glaze to balance the leanness. I have also made these with homemade turkey meatballs, and they were fantastic.
Gluten-Free Adaptation: Use a gluten-free biscuit dough or puff pastry sheet instead of the regular canned biscuits. There are several good brands available now. Just follow the same cutting and wrapping instructions. The texture will be slightly different, but the flavor is still spot-on.
Veggie-Packed Option: You can thread small chunks of bell pepper, zucchini, or cherry tomatoes onto the skewers between the meatballs. It adds color and a little extra nutrition. Just make sure the vegetables are cut into bite-sized pieces so they cook through in the same amount of time.
No-Skewer Bites: If you are serving very young kids, you can skip the skewers entirely. Just place the glazed meatballs on the baking sheet, wrap them with dough and cheese, and bake them as individual “mummy bites.” They are easier for little hands to grab and eat.
I tried a version with barbecue sauce instead of the ketchup glaze once, and honestly, it was a hit. The smoky flavor worked really well with the biscuit dough. If you have a favorite BBQ sauce, give it a shot.
Serving & Storage Suggestions
These skewers are best served warm, straight from the oven, when the cheese is still stretchy and the dough is at its flakiest. I like to arrange them on a large platter with a bowl of warm marinara sauce in the center for dipping. The contrast of the red sauce against the golden mummies is very Halloween-appropriate.
For a full Halloween dinner spread, I pair these skewers with a simple side salad or some roasted vegetables. If you are looking for something more festive, try serving them alongside a bowl of creamy roasted tomato basil soup for dipping. The combination is pure comfort. I also love putting out a plate of easy mummy Reese’s peanut butter no-bake truffles for dessert—it keeps the mummy theme going without any extra work.
Storage: If you have leftovers (which is rare in my house), let the skewers cool completely, then store them in an airtight container in the refrigerator for up to 3 days. The dough will soften slightly, but they are still delicious.
Reheating: To bring back the crispiness, reheat the skewers in a 350°F oven for 5-7 minutes. Do not use the microwave—it will turn the dough into a sad, soggy mess. I learned that one the hard way after a late-night snack attempt.
Freezing: You can freeze the assembled, unbaked skewers for up to 1 month. Place them on a baking sheet and freeze until solid, then transfer them to a freezer bag. When you are ready to bake, add 2-3 minutes to the baking time. No need to thaw them first.
Nutritional Information & Benefits
While these skewers are definitely a treat, they are a more balanced option than most Halloween fare. Here is an approximate breakdown per skewer (2 meatballs with dough and cheese):
- Calories: 310
- Protein: 18g
- Fat: 16g
- Carbohydrates: 22g
- Fiber: 1g
- Sugar: 8g
These numbers will vary depending on the specific brands you use, but it gives you a general idea. The protein from the meatballs and cheese helps keep everyone full and satisfied, which is a nice change from a night of candy and chips. The biscuit dough provides quick energy for all that running around the neighborhood.
If you are watching your sodium intake, look for low-sodium meatballs and use a reduced-sugar ketchup in the glaze. You can also use a low-fat string cheese to trim some of the fat. This recipe is not gluten-free as written, but the adaptation I mentioned above works well for those with gluten sensitivities.
Conclusion
These Easy Mummy Meatball Skewers have become a non-negotiable part of our Halloween tradition. They are the dinner that makes everyone stop, laugh, and actually sit down at the table before the sugar rush begins. I love that they are simple enough for a busy weeknight but special enough to feel like a real celebration.
I hope you give them a try and make them your own. Maybe you will use a different sauce, or add some extra veggies, or let the kids help with the wrapping. However you make them, I promise they will be a hit. And if your nephew looks at you with those big eyes and says he doesn’t want to eat the mummy’s face, just smile and tell him to start with the bandages.
I would love to hear how yours turn out. Leave a comment below and let me know if your family loved them as much as mine does. Happy Halloween, and happy cooking!
Frequently Asked Questions
Can I use homemade meatballs instead of frozen ones?
Absolutely! Homemade meatballs work beautifully in this recipe. Just make sure they are fully cooked before you wrap them in the dough. I recommend baking or pan-frying them first, then glazing them and proceeding with the recipe as written.
How do I keep the candy eyeballs from falling off?
Press the eyes onto the meatball while it is still warm from the oven. The heat helps the icing on the back of the candy eyes soften and stick. If they still won’t stay, use a tiny dab of ketchup or mustard as edible glue. It works like a charm.
Can I make these in an air fryer?
Yes, you can! Preheat your air fryer to 350°F. Place the skewers in the basket in a single layer (you may need to work in batches). Cook for 8-10 minutes, or until the dough is golden brown and the meatballs are heated through. Keep an eye on them—air fryers cook faster than ovens.
What can I use instead of candy eyeballs?
If you don’t have candy eyeballs, you can make your own using cream cheese and black olives. Pipe a small dot of cream cheese onto the meatball, then place a tiny sliver of black olive on top. It is a little more work, but it gives the mummies a funny, slightly creepy look that is perfect for Halloween.
Can I prep these the night before?
Yes! Assemble the skewers completely, but do not add the egg wash or the eyes. Cover them tightly with plastic wrap and store them in the refrigerator. When you are ready to bake, brush on the egg wash and add a few extra minutes to the baking time to account for the cold start.
Pin This Recipe!
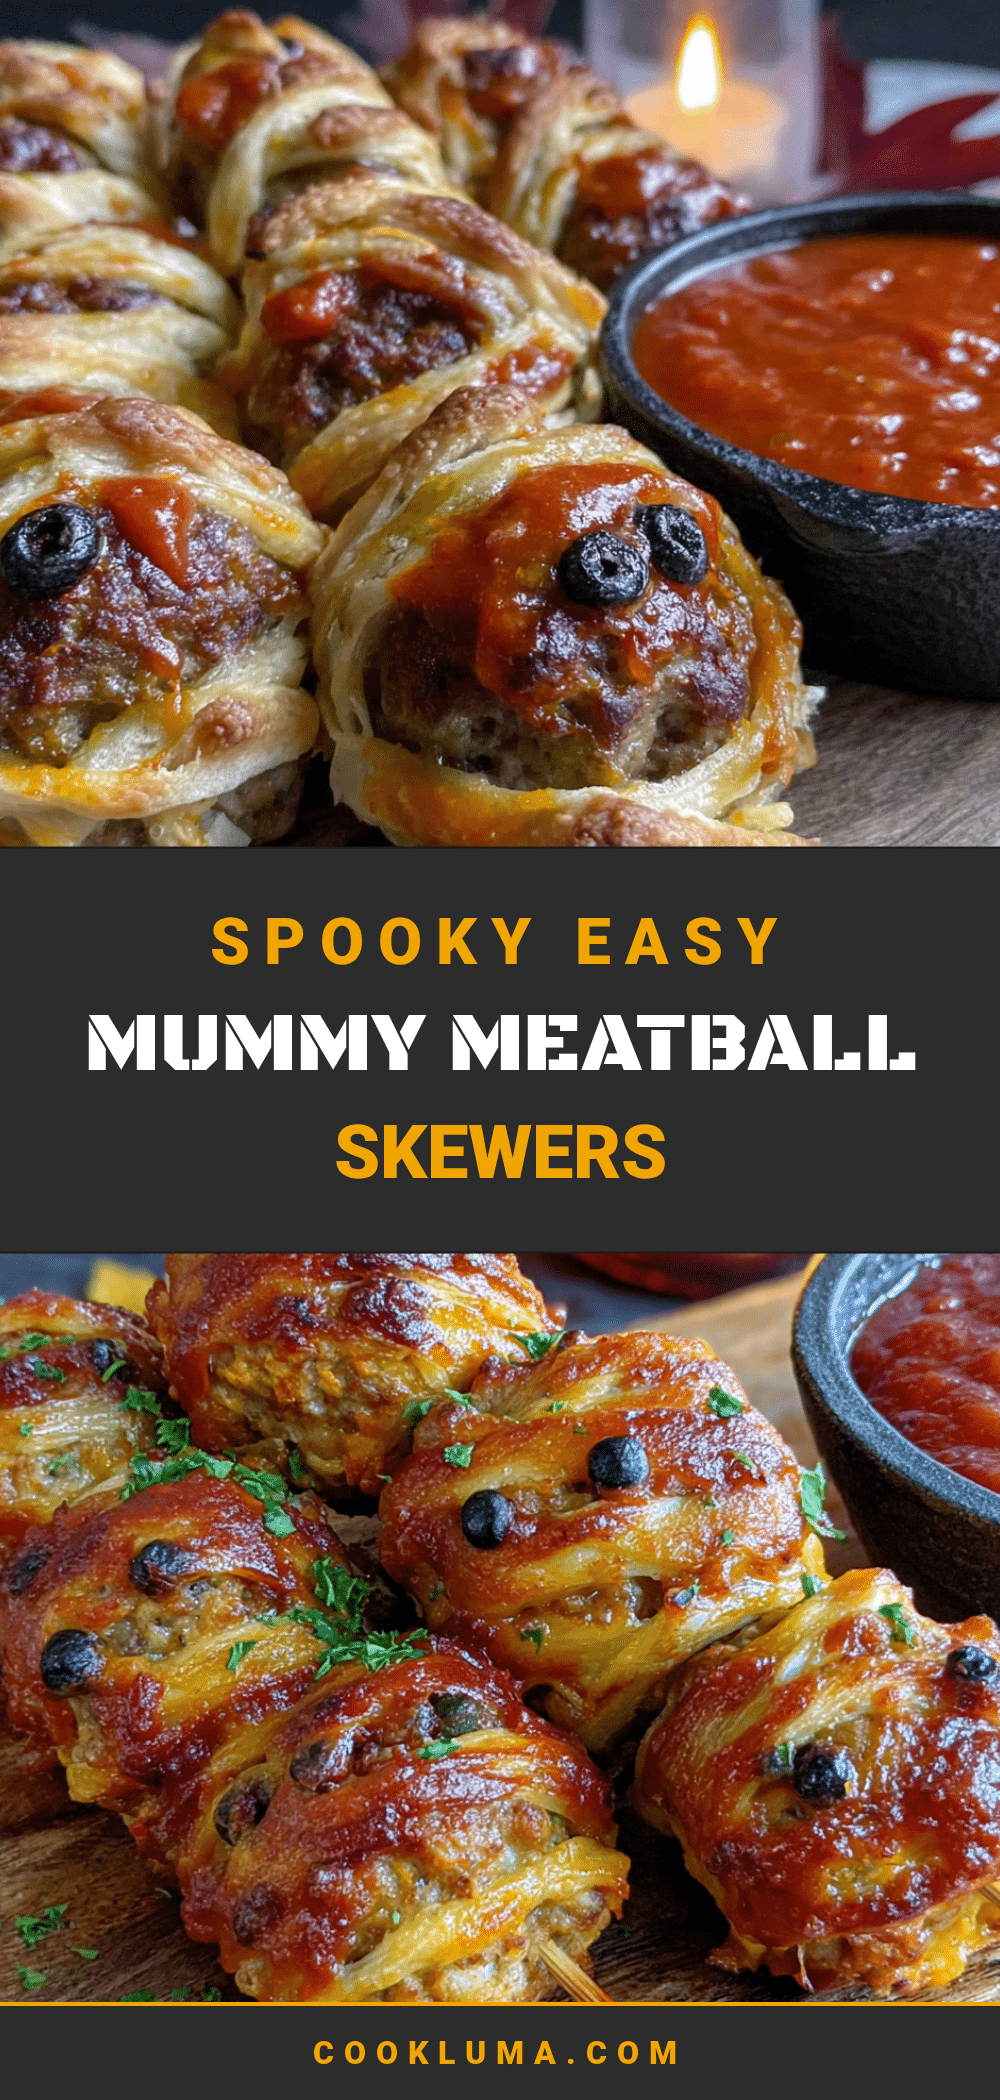
Easy Mummy Meatball Skewers: Best Halloween Dinner

These Easy Mummy Meatball Skewers are a fun and festive Halloween dinner that comes together in about 30 minutes. With frozen meatballs, biscuit dough, and string cheese, they are a crowd-pleaser that kids and adults will love.
- Prep Time: 15 minutes
- Cook Time: 15 minutes
- Total Time: 30 minutes
- Yield: 12 skewers (24 meatballs) 1x
- Category: Main Course
- Cuisine: American
Ingredients
- 1 (24-ounce) bag frozen fully cooked meatballs
- 1/2 cup ketchup
- 2 tablespoons brown sugar, packed
- 1 tablespoon Worcestershire sauce
- 1 teaspoon garlic powder
- 1/2 teaspoon onion powder
- 1 (16.3-ounce) can refrigerated biscuit dough
- 4 sticks string cheese (mozzarella), cut into 1-inch pieces
- 24 candy eyeballs
- 1 large egg, beaten
- 1 tablespoon sesame seeds (optional)
- Marinara sauce, for dipping
Instructions
- Preheat your oven to 375°F (190°C). Line a large baking sheet with parchment paper.
- Make the glaze: In a small bowl, whisk together the ketchup, brown sugar, Worcestershire sauce, garlic powder, and onion powder until smooth. Set aside.
- Prepare the meatballs: If frozen meatballs are stuck together, let them sit at room temperature for about 10 minutes to separate. Place them in a medium bowl and pour the glaze over the top. Toss gently until every meatball is well coated.
- Thread the meatballs onto skewers: Take a wooden skewer and thread 2 glazed meatballs onto it, leaving a little space between them. Repeat with the remaining meatballs and skewers (about 12 skewers total). Place the skewers on the prepared baking sheet, making sure they are not touching.
- Cut the biscuit dough: Open the can of biscuits and separate them (8 biscuits total). Take one biscuit and flatten it slightly with your fingers or a rolling pin. Using a sharp knife or pizza cutter, cut the biscuit into thin strips, about 1/4-inch wide. Repeat with the remaining biscuits.
- Wrap the mummies: Take a strip of dough and wrap it around the meatballs on a skewer, starting at the top and working your way down. Leave a small gap at the top of the meatballs for the eyes. Do not wrap too tightly; leave some meatball peeking through.
- Add the cheese: Tuck a small piece of string cheese between the dough strips on top of each meatball.
- Apply the egg wash: In a small bowl, beat the egg with a tablespoon of water. Using a pastry brush, gently brush the egg wash over the exposed dough strips. Sprinkle a few sesame seeds on top if using.
- Bake: Place the baking sheet in the preheated oven and bake for 12-15 minutes, or until the dough is golden brown and the meatballs are heated through. The cheese should be melted and bubbly.
- Add the eyes and serve: Remove the skewers from the oven and let them cool on the baking sheet for 2-3 minutes. While still warm, gently press two candy eyeballs onto the exposed meatball at the top of each skewer. Serve immediately with warm marinara sauce for dipping.
Notes
Soak wooden skewers in water for 20 minutes before baking to prevent scorching. If candy eyeballs won’t stick, use a tiny dab of ketchup or mustard as edible glue. For make-ahead, assemble skewers (minus egg wash and eyes) up to 24 hours in advance and refrigerate.
Nutrition
- Serving Size: 1 skewer (2 meatball
- Calories: 310
- Sugar: 8
- Sodium: 720
- Fat: 16
- Saturated Fat: 6
- Carbohydrates: 22
- Fiber: 1
- Protein: 18
Keywords: Halloween dinner, mummy meatball skewers, easy Halloween recipe, meatball appetizer, spooky dinner, kid-friendly Halloween


