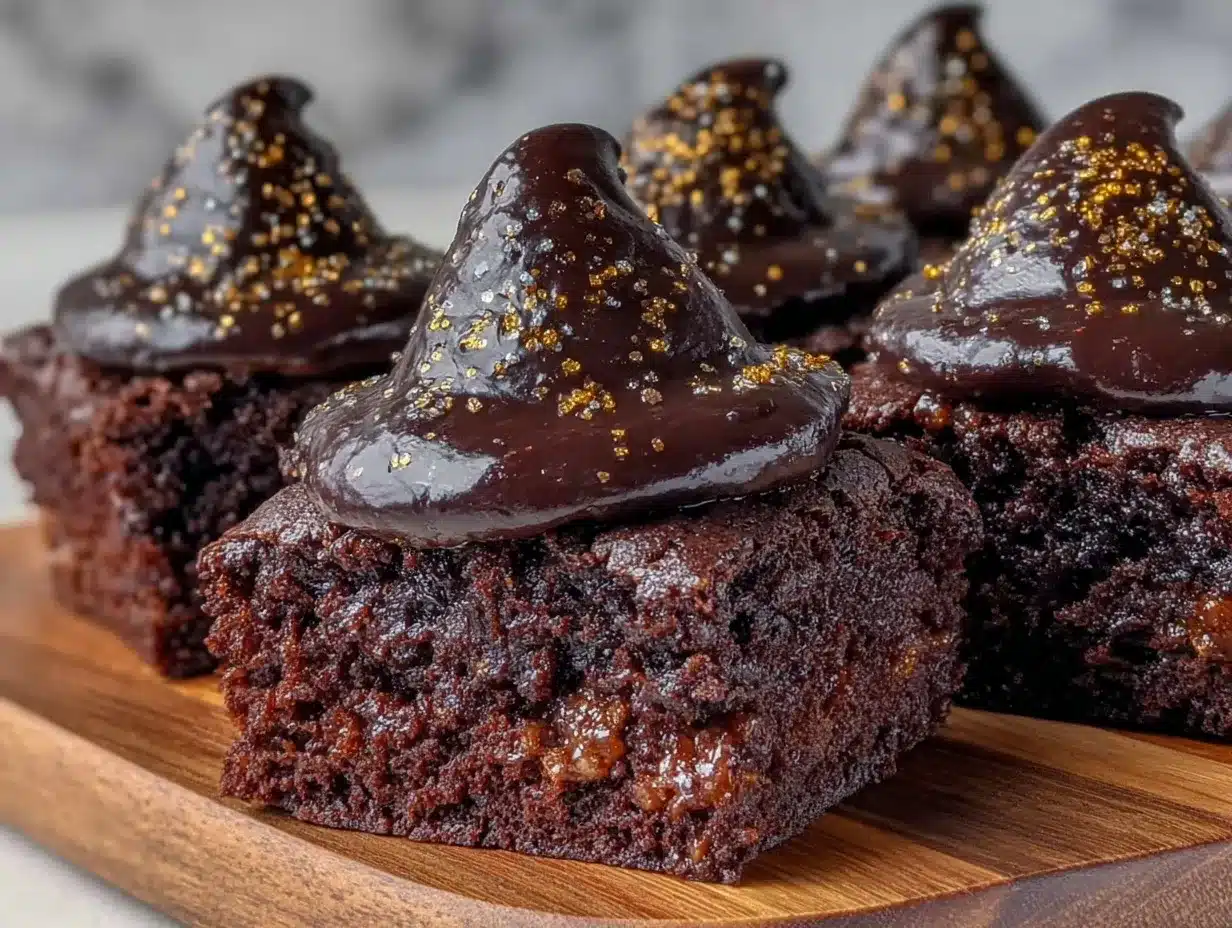
Velvety smooth, coal-black frosting swirled into a glossy peak atop a dense, fudgy brownie base—that’s the whole point. The way the frosting catches the light just so, almost like the brim of a witch’s hat casting a shadow, is what I made these brownies for—everything else is secondary. I remember the moment I first tried shaping the frosting into that perfect cone, the texture cold and creamy under my fingertips, teasing me with its richness before I even took a bite. The brownie underneath has just the right crumb—moist but firm enough to hold its shape when stacked and dipped, a little crumbly at the edges but strong enough to support the whimsical hat. It’s a tactile experience as much as a taste one.
Wintery October evenings always have me craving something that’s not just tasty but visually arresting, and honestly, these Witch Hat Brownie Bites hit that mark every time. The contrast between the dark frosting and the chocolatey base makes you want to reach in and grab one before you even hear the “trick or treat” at the door. I’ve made plenty of Halloween desserts that rely on pumpkin spice or orange hues, but this recipe is all about the texture and the drama—the sharp edges of the brownie, the soft swirl of the black velvet frosting, and the playful candy “hatband” that ties it all together.
These bites stuck with me because they’re not just cute; they’re satisfying in a way that feels like a little celebration for your eyes and your fingertips first, then your taste buds. It’s the kind of recipe you trust to impress without stress, a small indulgence that feels special and a bit mysterious. And you know, once you’ve got the frosting swirl down, these come together faster than you’d expect—perfect for when you’ve got a few minutes between the pumpkin carving and the costume prepping.
Why You’ll Love This Recipe
Having whipped up these Perfect Witch Hat Brownie Bites more times than I can count, I can say they’ve earned a spot in my seasonal favorites for a few reasons:
- Quick & Easy: You can have these decadent bites ready in under an hour, making them perfect for last-minute Halloween party plans or spontaneous spooky cravings.
- Simple Ingredients: No need for specialty stores—basic pantry staples like cocoa powder, butter, sugar, and eggs form the brownie base, while the black velvet frosting uses familiar ingredients like cream cheese and powdered sugar.
- Perfect for Halloween Entertaining: These mini treats are bite-sized, easy to serve, and scream festive without going overboard on the sugar or decorations.
- Crowd-Pleaser: Kids love the playful witch hat shape, and adults appreciate the rich, fudgy texture paired with the silky frosting.
- Unbelievably Delicious: The texture combo of a chewy brownie with creamy, slightly tangy black velvet frosting is next-level comfort food—perfect for cozy fall nights.
This recipe stands out because of the black velvet frosting’s texture—smooth but firm enough to hold shape, thanks to a touch of cream cheese and just the right chilling time. Plus, the little candy “hatband” detail adds a pop of color and crunch that’s more than just decoration; it’s a flavor surprise. It’s not just about making a cute Halloween dessert; it’s about crafting a little moment of joy with every bite.
Honestly, this is the kind of treat that makes you pause and smile after the first taste—a tiny celebration of texture and flavor that feels indulgent but not overwhelming. It’s the kind of recipe I trust for both impressing guests and satisfying my own sweet tooth without hassle.
What Ingredients You Will Need
This recipe uses simple, wholesome ingredients to deliver bold chocolate flavor and a smooth, velvety frosting without fuss. Most of these you likely have on hand, and substitutions are easy if needed.
- For the Brownie Base:
- Unsalted butter, 1/2 cup (113g), melted (adds richness and moist texture)
- Granulated sugar, 1 cup (200g)
- Large eggs, 2, room temperature (helps bind the batter)
- Vanilla extract, 1 teaspoon (deepens flavor)
- All-purpose flour, 3/4 cup (95g), sifted (for structure)
- Unsweetened cocoa powder, 1/3 cup (35g), preferably Dutch-processed for a smoother taste
- Salt, 1/4 teaspoon (balances sweetness)
- Baking powder, 1/4 teaspoon (for slight lift)
- For the Black Velvet Frosting:
- Cream cheese, 4 oz (115g), softened (for that creamy, tangy base)
- Unsalted butter, 1/4 cup (57g), softened
- Powdered sugar, 1 1/2 cups (180g), sifted (to keep frosting smooth)
- Vanilla extract, 1 teaspoon
- Black gel food coloring, a few drops (use a trusted brand like AmeriColor for best results)
- For Decoration:
- Mini chocolate chips or small candy pieces for the “hatband”
- Optional: edible glitter or sprinkles for extra spooky flare
If you prefer a dairy-free option, swap cream cheese with a vegan cream cheese alternative and use dairy-free butter. For a gluten-free twist, almond flour can replace all-purpose flour, but expect a slightly different crumb. The cocoa powder choice matters too—Dutch-processed will give you a more mellow chocolate flavor, which I personally prefer in this recipe.
Equipment Needed
- Mixing bowls: One medium and one large for batter and frosting
- Electric mixer or stand mixer: Makes beating the frosting smooth and fluffy much easier
- 9×9-inch (23×23 cm) square baking pan: Ideal for even brownie thickness
- Parchment paper: For lining the pan and easy removal of brownies
- Offset spatula or butter knife: Helpful for spreading frosting evenly
- Piping bag with a large round or star tip (optional): For creating the witch hat swirl effect on top
- Cooling rack: To cool brownies evenly and avoid sogginess
If you don’t have a piping bag, a sturdy zip-top plastic bag with a tiny corner snipped off can work just fine. For mixing, a hand whisk will do in a pinch, but the electric mixer really speeds things up and smooths the frosting better. I’ve tried different pans over the years, and a metal pan gives the best heat conduction for an even bake, but glass works if that’s what you have. Just keep an eye on baking time.
Preparation Method
- Prep your pan and preheat the oven: Line your 9×9-inch pan with parchment paper, leaving an overhang on the sides for easy removal. Preheat your oven to 350°F (175°C). This sets the stage for perfect brownies that won’t stick or crumble.
- Make the brownie batter: In a medium bowl, whisk together the flour, cocoa powder, salt, and baking powder. Set aside. In a large bowl, beat the melted butter and granulated sugar until combined but not grainy—this takes about 1-2 minutes by hand or less with a mixer.
- Add eggs and vanilla: Beat in the eggs one at a time, mixing well after each addition, then stir in the vanilla extract. The mixture should look shiny and smooth now.
- Combine dry and wet ingredients: Gradually fold the dry ingredients into the wet mixture using a spatula, mixing just until no streaks remain. Overmixing can toughen the brownies, so patience here pays off.
- Bake: Pour batter into the prepared pan, spreading evenly. Bake for 20-25 minutes, or until a toothpick inserted near the center comes out with a few moist crumbs—don’t overbake, or you’ll lose that fudgy texture.
- Cool completely: Transfer the pan to a cooling rack and let the brownies cool fully before frosting—this usually takes at least 1 hour. I know waiting is tough, but frosting warm brownies can cause melting and slipping.
- Prepare the black velvet frosting: In a clean bowl, beat softened cream cheese and butter together until smooth and creamy, about 2-3 minutes. Gradually add powdered sugar, continuing to beat until fluffy. Stir in vanilla and a few drops of black gel food coloring, mixing until the color is even and deep black.
- Cut and frost: Once brownies are cooled, use a sharp knife to cut into 1.5-inch (4 cm) squares. Transfer frosting to a piping bag fitted with your chosen tip. Pipe a swirl on top of each brownie square, starting from the outside and spiraling up to form a cone reminiscent of a witch’s hat.
- Decorate: Add mini chocolate chips or candy pieces around the base of the frosting swirl to mimic the hatband. If you like, sprinkle a little edible glitter for that extra magic.
- Serve or chill: The bites are best enjoyed chilled or at room temperature. You can refrigerate for 30 minutes to firm up the frosting before serving.
Tip: If frosting feels too soft to pipe, pop it in the fridge for 15 minutes. If your brownie edges get too crispy, cover the pan loosely with foil halfway through baking next time. These little tweaks helped me nail the texture balance every time.
Cooking Tips & Techniques
Getting the texture right on these Witch Hat Brownie Bites is all about balance. Here are some pointers I picked up along the way:
- Melting the butter: Melt it gently—too hot and you risk cooking the eggs when mixing, which can cause grainy brownies. I usually microwave in short bursts, stirring in between.
- Mixing the batter: Fold in the dry ingredients carefully. Overmixing develops gluten and leads to cakey instead of fudgy brownies, which isn’t what you want here.
- Frosting texture: The cream cheese and butter need to be at room temperature for a smooth, spreadable consistency. If you use cold ingredients, the frosting will be lumpy and hard to pipe.
- Food coloring: Use gel colors instead of liquid—they give a more intense black without thinning the frosting. I learned this the hard way after a runny batch!
- Chilling the frosting: Don’t skip chilling after piping if your kitchen is warm. It helps the frosting hold its hat shape and makes serving less messy.
- Cutting brownies: Use a sharp knife wiped clean between cuts for neat squares—crumbs on the blade will tear the edges otherwise.
One time, I tried piping the frosting on warm brownies and ended up with a messy slide show instead of neat hats—lesson learned! Now I’m a strict cooler. Also, multitasking by prepping the frosting while brownies bake saves time and keeps things moving smoothly.
Variations & Adaptations
These Witch Hat Brownie Bites are versatile, so you can tweak them to fit your style or dietary needs:
- Gluten-Free: Swap all-purpose flour for a 1:1 gluten-free baking flour blend. The texture will be slightly different but still delicious.
- Dairy-Free: Use vegan cream cheese and vegan butter alternatives for the frosting. Coconut-based options work well.
- Flavor Twists: Add a teaspoon of espresso powder to the batter for a mocha depth or a pinch of cinnamon for a warm fall note.
- Alternative Decorations: Instead of candy “hatbands,” try crushed peppermint for a wintery twist or edible gold stars for a magical touch.
- Mini Cupcake Version: Pour batter into mini muffin tins and pipe the frosting on after baking for bite-sized party favors.
Personally, I once swapped the black frosting for a cream cheese-based pumpkin spice frosting topped with a tiny candy pumpkin—it was a hit at a fall potluck! You can also adjust the sweetness of the frosting by cutting back powdered sugar if you prefer less sweet bites.
Serving & Storage Suggestions
Serve these bites chilled or at room temperature for the best texture contrast. They’re perfect on a Halloween dessert platter alongside other spooky treats like mummy brownie pops or a rich chocolatey Halloween cake.
Pair with a cup of hot cocoa or a spiced black tea to balance the sweetness and enjoy the full cozy experience. For parties, arrange them on a tiered stand to show off the hat shape.
To store, keep the bites in an airtight container in the refrigerator for up to 4 days. The frosting holds up well chilled and actually firms up nicely, making them easier to handle. If you want to store longer, freeze unfrosted brownies in a sealed container for up to 3 months, then frost after thawing.
Reheat brownies gently at room temperature before frosting, or warm briefly in the microwave (about 15 seconds) if you prefer them soft. The frosting is best left chilled; warming it can cause it to lose shape.
Nutritional Information & Benefits
Each Witch Hat Brownie Bite is a small indulgence—roughly 120-150 calories depending on size and frosting amount. The brownies provide antioxidants from the cocoa powder, and the cream cheese adds a bit of protein and calcium.
This recipe is naturally gluten-free adaptable and can be made dairy-free, making it suitable for many dietary needs. It’s not low-calorie by any means, but I like to think of it as a special seasonal treat that brings joy without guilt when enjoyed in moderation.
Chocolate is known to boost serotonin, and I swear the texture contrast here makes it feel like a tiny hug. For a healthier balance, you might enjoy pairing these with a light, fresh salad like the fresh crispy cucumber feta salad to cleanse the palate.
Conclusion
The Perfect Witch Hat Brownie Bites with Black Velvet Frosting are more than just a Halloween dessert—they’re a little ritual of texture and shape that makes the season feel special. Their fudgy, rich brownie base paired with that smooth, tangy black frosting is a combo I keep coming back to every fall. Whether you’re making them for a kid’s party, a casual get-together, or just because the season calls for it, these bites are easy to customize and fun to assemble.
I hope you find as much joy in the process—especially the frosting swirl—as I do. Remember, no need to stress about perfect piping; every “hat” has its charm. When you make these, I’d love to hear how you personalized them or any spooky twists you added. Sharing little moments like this is what makes cooking feel like a celebration.
Go ahead, get your hands a bit messy, and enjoy the magic of these witchy treats.
FAQs
Can I make these Witch Hat Brownie Bites ahead of time?
Yes! You can bake the brownies up to 2 days ahead and store them in an airtight container. Frost them the day you plan to serve for the freshest texture.
What if I don’t have black gel food coloring?
You can mix blue and red gel colors to create a deep black, but it’s tricky to get right. Using a quality black gel color like AmeriColor is easiest and gives the best results.
Can I use boxed brownie mix instead of homemade batter?
Absolutely! A good boxed mix works fine if you want to save time—just bake according to package instructions and cool completely before frosting.
How do I store leftover Witch Hat Brownie Bites?
Keep them in an airtight container in the refrigerator for up to 4 days. For longer storage, freeze the unfrosted brownies and frost after thawing.
What can I use instead of mini chocolate chips for decoration?
Try small candy-coated chocolates, edible glitter, or even colored sugar sprinkles. Just pick something that contrasts nicely with the black frosting for that “hatband” effect.
Pin This Recipe!
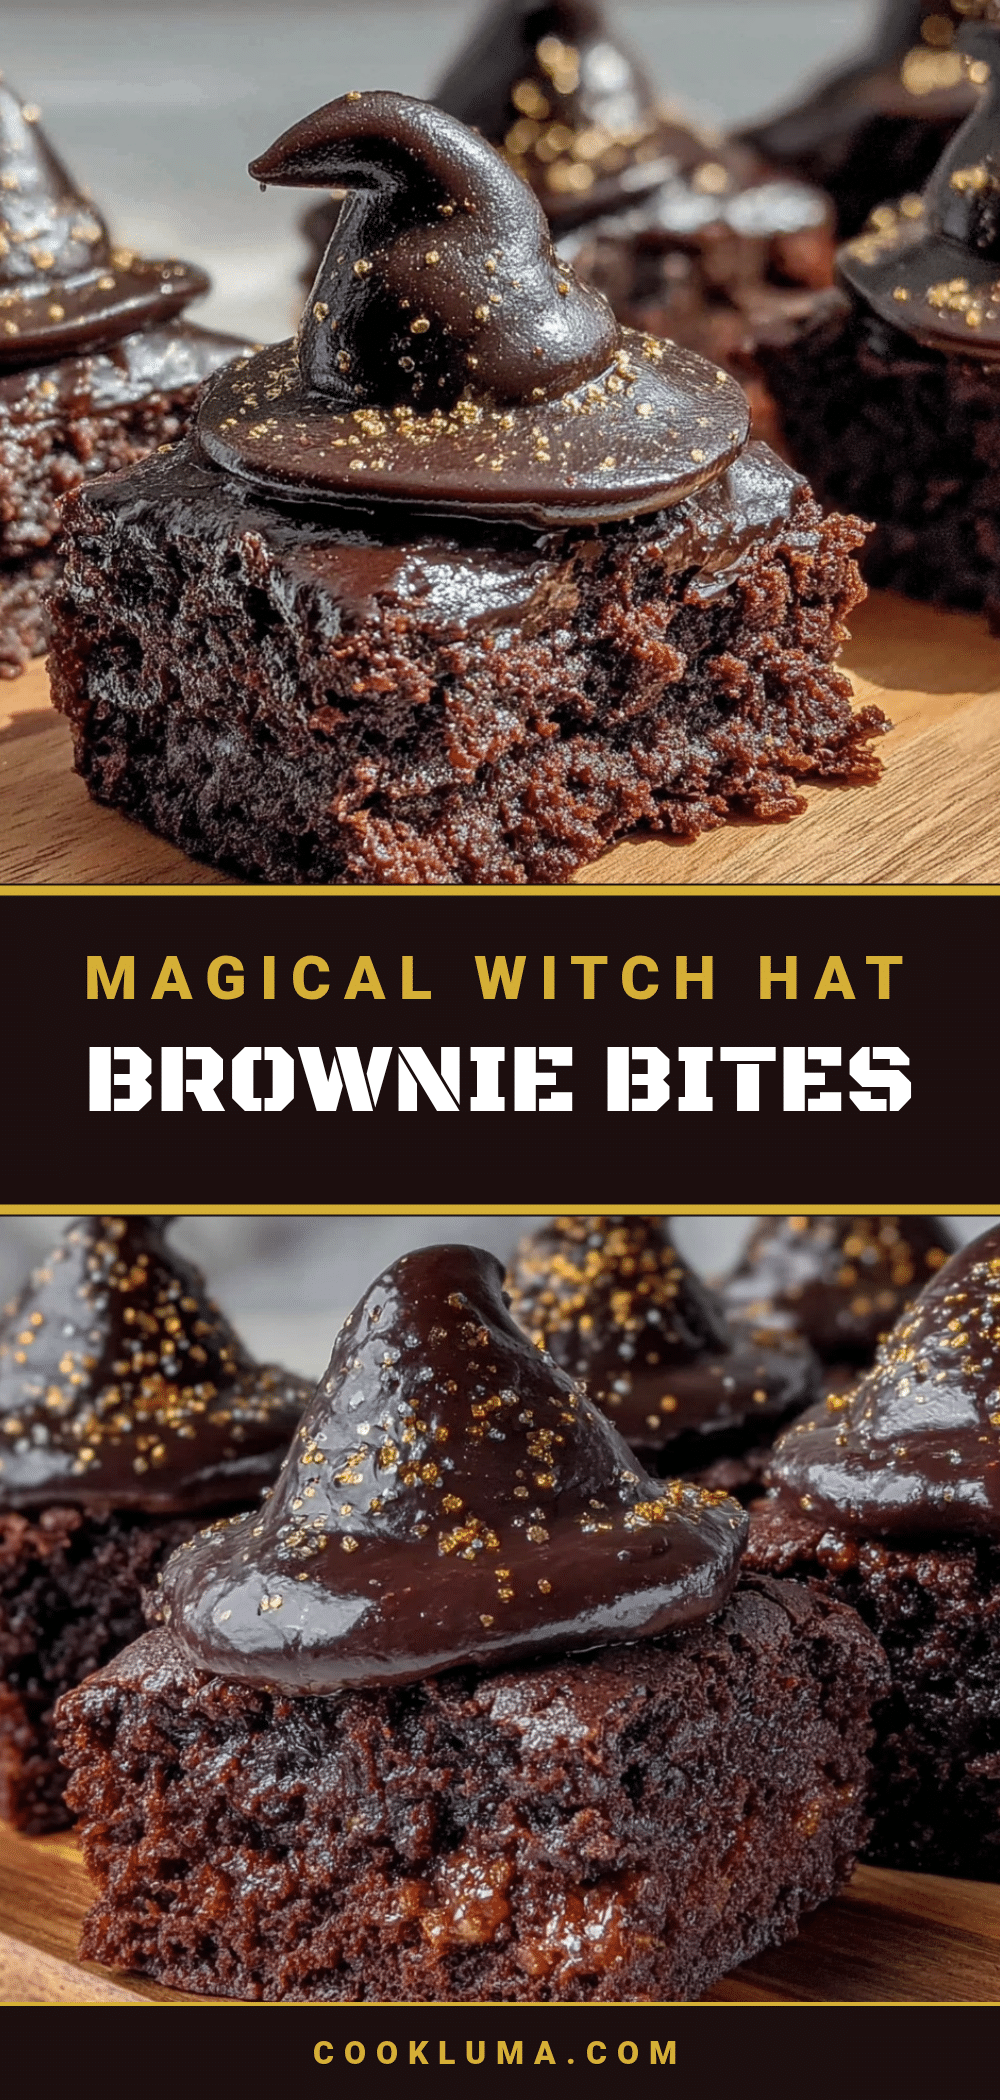
Perfect Witch Hat Brownie Bites
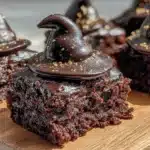
Velvety smooth, coal-black frosting swirled into a glossy peak atop a dense, fudgy brownie base, creating a visually arresting and delicious Halloween treat.
- Prep Time: 15 minutes
- Cook Time: 25 minutes
- Total Time: 1 hour 40 minutes
- Yield: 16 servings 1x
- Category: Dessert
- Cuisine: American
Ingredients
- 1/2 cup (113g) unsalted butter, melted
- 1 cup (200g) granulated sugar
- 2 large eggs, room temperature
- 1 teaspoon vanilla extract
- 3/4 cup (95g) all-purpose flour, sifted
- 1/3 cup (35g) unsweetened cocoa powder, preferably Dutch-processed
- 1/4 teaspoon salt
- 1/4 teaspoon baking powder
- 4 oz (115g) cream cheese, softened
- 1/4 cup (57g) unsalted butter, softened
- 1 1/2 cups (180g) powdered sugar, sifted
- 1 teaspoon vanilla extract
- A few drops black gel food coloring
- Mini chocolate chips or small candy pieces for the hatband
- Optional: edible glitter or sprinkles for decoration
Instructions
- Line a 9×9-inch baking pan with parchment paper, leaving an overhang for easy removal. Preheat oven to 350°F (175°C).
- In a medium bowl, whisk together flour, cocoa powder, salt, and baking powder. Set aside.
- In a large bowl, beat melted butter and granulated sugar until combined but not grainy, about 1-2 minutes.
- Beat in eggs one at a time, mixing well after each addition, then stir in vanilla extract until smooth and shiny.
- Gradually fold dry ingredients into wet mixture using a spatula until no streaks remain; avoid overmixing.
- Pour batter into prepared pan and spread evenly. Bake for 20-25 minutes or until a toothpick inserted near the center comes out with a few moist crumbs.
- Transfer pan to a cooling rack and let brownies cool completely, about 1 hour.
- In a clean bowl, beat softened cream cheese and butter until smooth and creamy, about 2-3 minutes.
- Gradually add powdered sugar, beating until fluffy. Stir in vanilla extract and black gel food coloring until evenly colored.
- Cut cooled brownies into 1.5-inch squares.
- Transfer frosting to a piping bag fitted with a large round or star tip. Pipe a swirl on each brownie square, starting from the outside and spiraling up to form a cone.
- Decorate the base of the frosting swirl with mini chocolate chips or candy pieces to mimic a hatband. Optionally, sprinkle edible glitter.
- Serve chilled or at room temperature. Refrigerate for 30 minutes to firm frosting if desired.
Notes
If frosting is too soft to pipe, chill for 15 minutes. Use gel food coloring for best black color. Avoid overmixing batter to keep brownies fudgy. Cool brownies completely before frosting to prevent melting. Use a sharp knife wiped clean between cuts for neat squares. For dairy-free, substitute vegan cream cheese and butter. For gluten-free, replace flour with gluten-free baking blend.
Nutrition
- Serving Size: 1 brownie bite (appr
- Calories: 135
- Sugar: 14
- Sodium: 90
- Fat: 7
- Saturated Fat: 4
- Carbohydrates: 18
- Fiber: 1
- Protein: 2
Keywords: Halloween dessert, brownie bites, witch hat brownies, black velvet frosting, easy Halloween treats, fudgy brownies, cream cheese frosting