Three-time-in-a-week and I’m still fiddling with the swirl pattern of the white chocolate ganache on these mummy brownie pops. Honestly, it’s borderline ridiculous how often I’ve remade these little treats, but every batch feels like a new puzzle. The first time I tried, the ganache was too runny, turning my delicate mummy wraps into a gooey mess. By the third round, the ganache was thick enough to pipe perfectly, but the stick placement kept wobbling. It’s like these pops have a personality, and I’m just trying to keep up.
These Perfect Mummy Brownie Pops with White Chocolate Ganache began as a Halloween experiment gone slightly overboard. What started as a simple idea to dress up brownies on sticks turned into a full-on weekend project. I found myself tweaking the brownie texture for that perfect fudgy bite, testing different white chocolate brands for the ganache, and hunting down edible eyes that wouldn’t melt or slide off. I swear, those eyes are the real MVP here.
The texture contrast between the rich, fudgy brownie and the creamy white chocolate is what keeps pulling me back. And the looks on people’s faces when they bite into these mummy pops—utter surprise and delight—well, that’s the real reward. No matter how many versions I make, there’s this tiny thrill in getting that perfect spooky swirl and bite combination just right. It’s a weird little obsession, but hey, isn’t that what good baking is all about? These little mummy brownie pops aren’t just a treat; they’re a tiny celebration of persistence and fun in the kitchen.
In a quiet moment, I realized it’s not just the recipe that stuck with me—it’s the joy of making something festive, fun, and a bit messy. These pops are my way of turning a simple brownie into a conversation starter, and maybe, just maybe, a new seasonal favorite.
Why You’ll Love This Perfect Mummy Brownie Pops Recipe
Honestly, making these mummy brownie pops feels like a little kitchen victory every time. I’ve tested this recipe enough to know it hits all the right notes, and here’s why it’s worth your time:
- Quick & Easy: You can whip these up in under an hour, making them perfect for last-minute Halloween parties or whenever a spooky craving hits.
- Simple Ingredients: No need to hunt down weird stuff. Basic pantry staples plus a few Halloween extras bring this recipe to life.
- Perfect for Parties: These pops are a showstopper at potlucks, school events, or cozy family gatherings. They’re bite-sized and fun to eat.
- Crowd-Pleaser: Kids adore the playful mummy look, and adults appreciate the rich brownie beneath that smooth white chocolate ganache.
- Unbelievably Delicious: The creamy sweetness of the ganache perfectly balances the deep chocolate flavor of the brownies—comfort food with a fun twist.
This isn’t your average brownie pop. The white chocolate ganache calls for a gentle melting and thickening process that gives the mummy wraps their signature look and texture. Plus, I’ve learned to use firm, fudgy brownies rather than cakey ones so they hold up on the sticks without crumbling.
It’s the kind of recipe that makes you close your eyes after the first bite—rich yet sweet, festive yet familiar. And honestly, if you want to impress without stress, these pops have you covered. They’re the perfect balance of playful and indulgent, turning a simple dessert into a mini celebration.
What Ingredients You Will Need
This recipe uses simple, wholesome ingredients to deliver bold flavor and that satisfying texture without any fuss. Most are pantry staples, and a few seasonal items give it that perfect spooky vibe.
- For the Brownies:
- Unsalted butter, 1/2 cup (115g), melted (adds richness)
- Granulated sugar, 1 cup (200g)
- Large eggs, 2, room temperature
- Pure vanilla extract, 1 teaspoon
- All-purpose flour, 3/4 cup (95g)
- Cocoa powder, unsweetened, 1/3 cup (35g)
- Salt, 1/4 teaspoon
- For the White Chocolate Ganache:
- White chocolate chips or chopped white chocolate, 1 cup (170g) — I like Ghirardelli for smooth melting
- Heavy cream, 1/4 cup (60ml)
- Unsalted butter, 1 tablespoon (14g), optional for extra glossiness
- Decoration:
- Mini candy eyes, about 30 pairs (look for firm ones that hold shape)
- Black edible gel or melted dark chocolate for mummy wraps (optional)
- Brownie pop sticks or sturdy lollipop sticks
If you want gluten-free options, almond flour works well in place of all-purpose flour, though the texture will be slightly different. For dairy-free, swap heavy cream for coconut cream and use dairy-free white chocolate.
The ingredients here are straightforward but choosing good-quality white chocolate really makes a difference in the ganache’s smooth finish. And those candy eyes? Totally worth hunting down—they bring the whole mummy to life.
Equipment Needed
- 9×9-inch (23×23 cm) baking pan – perfect size for brownies to get that fudgy thickness
- Mixing bowls – at least two, one for wet ingredients, one for dry
- Hand mixer or whisk – I tend to prefer a whisk for better control when mixing brownies
- Small saucepan – for gently heating the cream when making ganache
- Heatproof bowl – for melting white chocolate over a double boiler or microwave
- Spatula – for folding ingredients and scraping down the bowl
- Brownie pop sticks or lollipop sticks – sturdy enough to hold the brownie pops
- Baking sheet or tray – to place pops on while ganache sets
- Parchment paper or silicone mat – to prevent sticking during set up
If you don’t have a dedicated brownie pan, any square or rectangular pan that allows a 1-inch thick batter spread will do. For melting white chocolate, a microwave-safe bowl is easiest, but I often use a double boiler to avoid overheating.
Pro tip: Use a small offset spatula or butter knife to help smooth the ganache on the pops. It’s not essential but makes your mummy wraps look neat.
Preparation Method
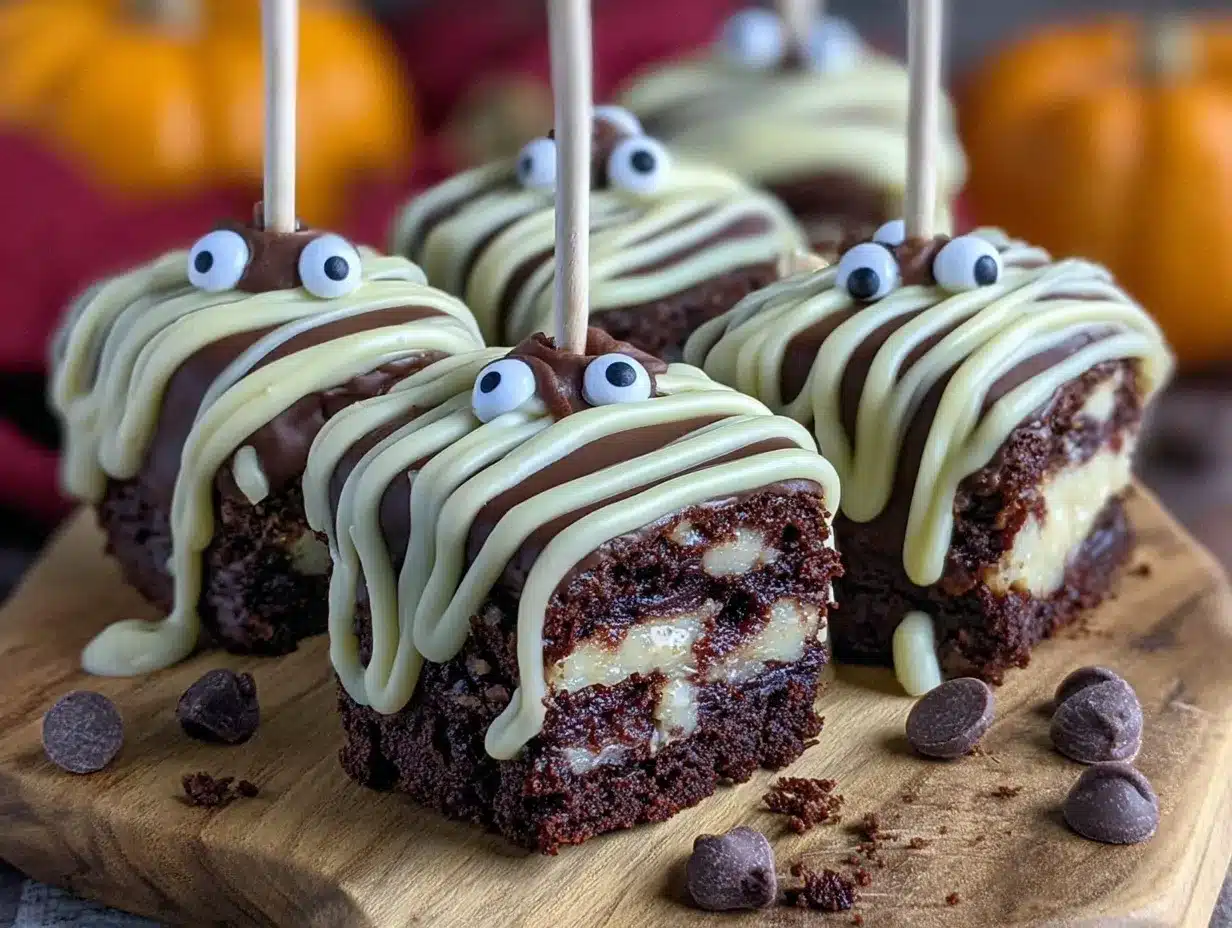
- Prepare the Brownie Batter: Preheat your oven to 350°F (175°C). In a bowl, whisk melted butter and sugar until combined but not overly fluffy (about 1-2 minutes). Add eggs one at a time, mixing well after each addition, then stir in vanilla extract.
- Mix Dry Ingredients: In a separate bowl, sift together flour, cocoa powder, and salt. Slowly fold the dry mix into the wet ingredients with a spatula until just combined. Don’t overmix—streaks of flour are okay.
- Bake the Brownies: Pour batter into your greased 9×9-inch pan, smoothing the top evenly. Bake for 20-25 minutes or until a toothpick inserted near the center comes out with a few moist crumbs (not wet batter). Let cool completely in the pan.
- Cut and Insert Sticks: Once cooled, carefully lift brownies out and cut into approximately 1.5-inch (4 cm) squares. Insert a pop stick gently into each square, about halfway through, being careful not to crumble the edges. Place on parchment-lined baking sheet.
- Make the White Chocolate Ganache: Heat the heavy cream in a small saucepan over medium heat until just simmering (do not boil). Pour over the white chocolate in a heatproof bowl. Let sit 1-2 minutes, then stir gently until smooth. Stir in butter if using for a glossy finish. Let ganache cool slightly to thicken, about 10 minutes.
- Coat the Brownie Pops: Dip each brownie pop into the ganache, tilting and turning to coat evenly. Allow excess to drip off. Place back on parchment paper.
- Create the Mummy Wraps: While ganache is still wet, use a spoon or small piping bag to drizzle thin lines of ganache or melted dark chocolate over the pops for the mummy effect. Add candy eyes while the chocolate is tacky so they stick.
- Set the Pops: Let the coated pops set at room temperature for 30 minutes or refrigerate for 15 minutes to firm up the ganache before serving.
Watch out for ganache that’s too warm—it’ll run off the brownie and create a mess. Conversely, if it’s too cool, it won’t coat smoothly, so timing is key. If your ganache gets too thick, gently rewarm it in short bursts, stirring often.
Tip from my repeated trials: chilling the brownies before inserting sticks helps keep them firm and less crumbly. Also, don’t stab the sticks too close to the edge, or they might break off.
Cooking Tips & Techniques
Getting these mummy brownie pops just right involves a few tricks I picked up after some not-so-pretty batches:
- Brownie Texture Matters: Fudgy brownies hold up best on sticks. If your batter is cakey, the pops might crumble or fall apart.
- Ganache Consistency: Aim for a ganache that’s pourable but thick enough to coat without dripping excessively. Let it cool after melting white chocolate to get that perfect texture.
- Stick Stability: Chill brownies before inserting sticks. If they’re too soft, the stick won’t hold.
- Mummy Wrap Effect: Use a small piping bag or a plastic bag with a tiny cut at the tip for neat lines. If you don’t have that, a spoon works fine—just go slow.
- Edible Eyes Placement: Add the candy eyes while the chocolate is still tacky but not too wet. Otherwise, they might slide off.
- Storage: Keep the pops in a single layer to avoid smudging the ganache and decorations.
One lesson I learned the hard way: don’t skip the parchment paper on your tray. Without it, the ganache sticks and ruins your pretty mummy wraps when you lift the pops.
Variations & Adaptations
Feel like mixing things up? Here are some fun twists and alternatives I’ve tried or would try next time:
- Flavor Variations: Swap cocoa powder for espresso powder in the brownie batter for a mocha mummy pop. Or add a pinch of cinnamon for a warm spice note.
- Chocolate Swaps: Use dark or milk chocolate ganache instead of white chocolate for a less sweet, richer option.
- Dietary Adjustments: Use almond or coconut flour for gluten-free brownies. Swap heavy cream for coconut cream in the ganache to make it dairy-free.
- Seasonal Twists: Add crushed peppermint candy to the ganache for a holiday vibe or mix in orange zest for a subtle citrus hint.
- Decor Customizations: Use different candy eyes sizes or create spider web patterns with black icing for a creepy-crawly effect.
Personally, I once tried adding a thin layer of peanut butter between the brownie and ganache, which added a surprise nutty creaminess that was a hit with my family. It’s a fun way to personalize your mummy pops.
Serving & Storage Suggestions
These mummy brownie pops are best enjoyed fresh but can be stored with a little care:
- Serving: Serve at room temperature for the best texture—soft brownie with smooth ganache. They also pair wonderfully with a warm cup of coffee or a festive hot chocolate.
- Presentation: Arrange on a decorative platter or stick them upright in floral foam or a decorated box for a fun display at parties.
- Storage: Store in an airtight container at room temperature for up to 2 days or refrigerate for up to 5 days. If refrigerated, let them sit at room temperature for 15 minutes before serving to soften the ganache.
- Freezing: Wrap each pop individually in plastic wrap and freeze for up to 1 month. Thaw overnight in the fridge before serving.
- Flavor Development: Ganache gets a bit firmer and the brownie moistens slightly if stored, making these pops even richer after a day or two.
Nutritional Information & Benefits
Each mummy brownie pop is a small indulgence, roughly estimated at 180-220 calories depending on size and decoration. The key ingredients bring some perks:
- Cocoa Powder: Rich in antioxidants which may support heart health.
- Dark Chocolate or White Chocolate: Provides energy and a mood boost, though white chocolate is higher in sugar.
- Butter and Eggs: Offer essential fats and protein.
This recipe isn’t low-calorie, but it’s great for occasional treats. For those watching carbs, swapping in almond flour and reducing sugar can help make a lower-carb version. Keep in mind, these pops contain common allergens: dairy, eggs, gluten (unless substituted), and chocolate.
Personally, I see these as a festive treat that brings joy more than a health food, but I always try to balance such indulgences with wholesome meals like a fresh quinoa and kale power bowl I often make during the week.
Conclusion
In the end, these Perfect Mummy Brownie Pops with White Chocolate Ganache have become a little slice of seasonal joy for me. They’re not just dessert; they’re a project, a challenge, and a fun way to bring a bit of spooky whimsy to the kitchen. You can switch up the flavors, decorations, and even the ganache to suit your style, making them your own.
Whether you’re baking for a Halloween bash or just want a playful treat to brighten a chilly evening, these pops deliver on taste and fun. Honestly, I can’t wait to try pairing them with some cozy fall drinks—maybe something like the spicy tamarind chili mango margarita for an unexpected contrast.
So grab your ingredients, stick with the process, and enjoy the sweet rewards. I’d love to hear how your mummy pops turn out or any creative twists you try—don’t be shy about sharing your spooky baking wins!
FAQs About Perfect Mummy Brownie Pops
Can I make these mummy brownie pops ahead of time?
Yes! You can bake and cut the brownies a day ahead, then assemble and decorate the pops on the day you plan to serve for the freshest look.
What if I don’t have candy eyes?
You can use small dots of melted dark chocolate or edible markers to create eyes, or skip them altogether and focus on the mummy wraps for decoration.
Can I use milk or dark chocolate instead of white chocolate ganache?
Definitely. Milk or dark chocolate ganache works well, but the mummy wraps won’t be as bright or spooky-looking. The taste will be richer and less sweet.
How do I prevent the brownie pops from falling off the sticks?
Chill the brownies before inserting sticks and be gentle when pushing sticks in. Also, using fudgier brownies rather than cakey ones helps them hold better.
Can I freeze the finished mummy brownie pops?
Yes, wrap them individually and freeze for up to a month. Thaw in the fridge overnight before serving to keep the ganache firm but soft.
Pin This Recipe!
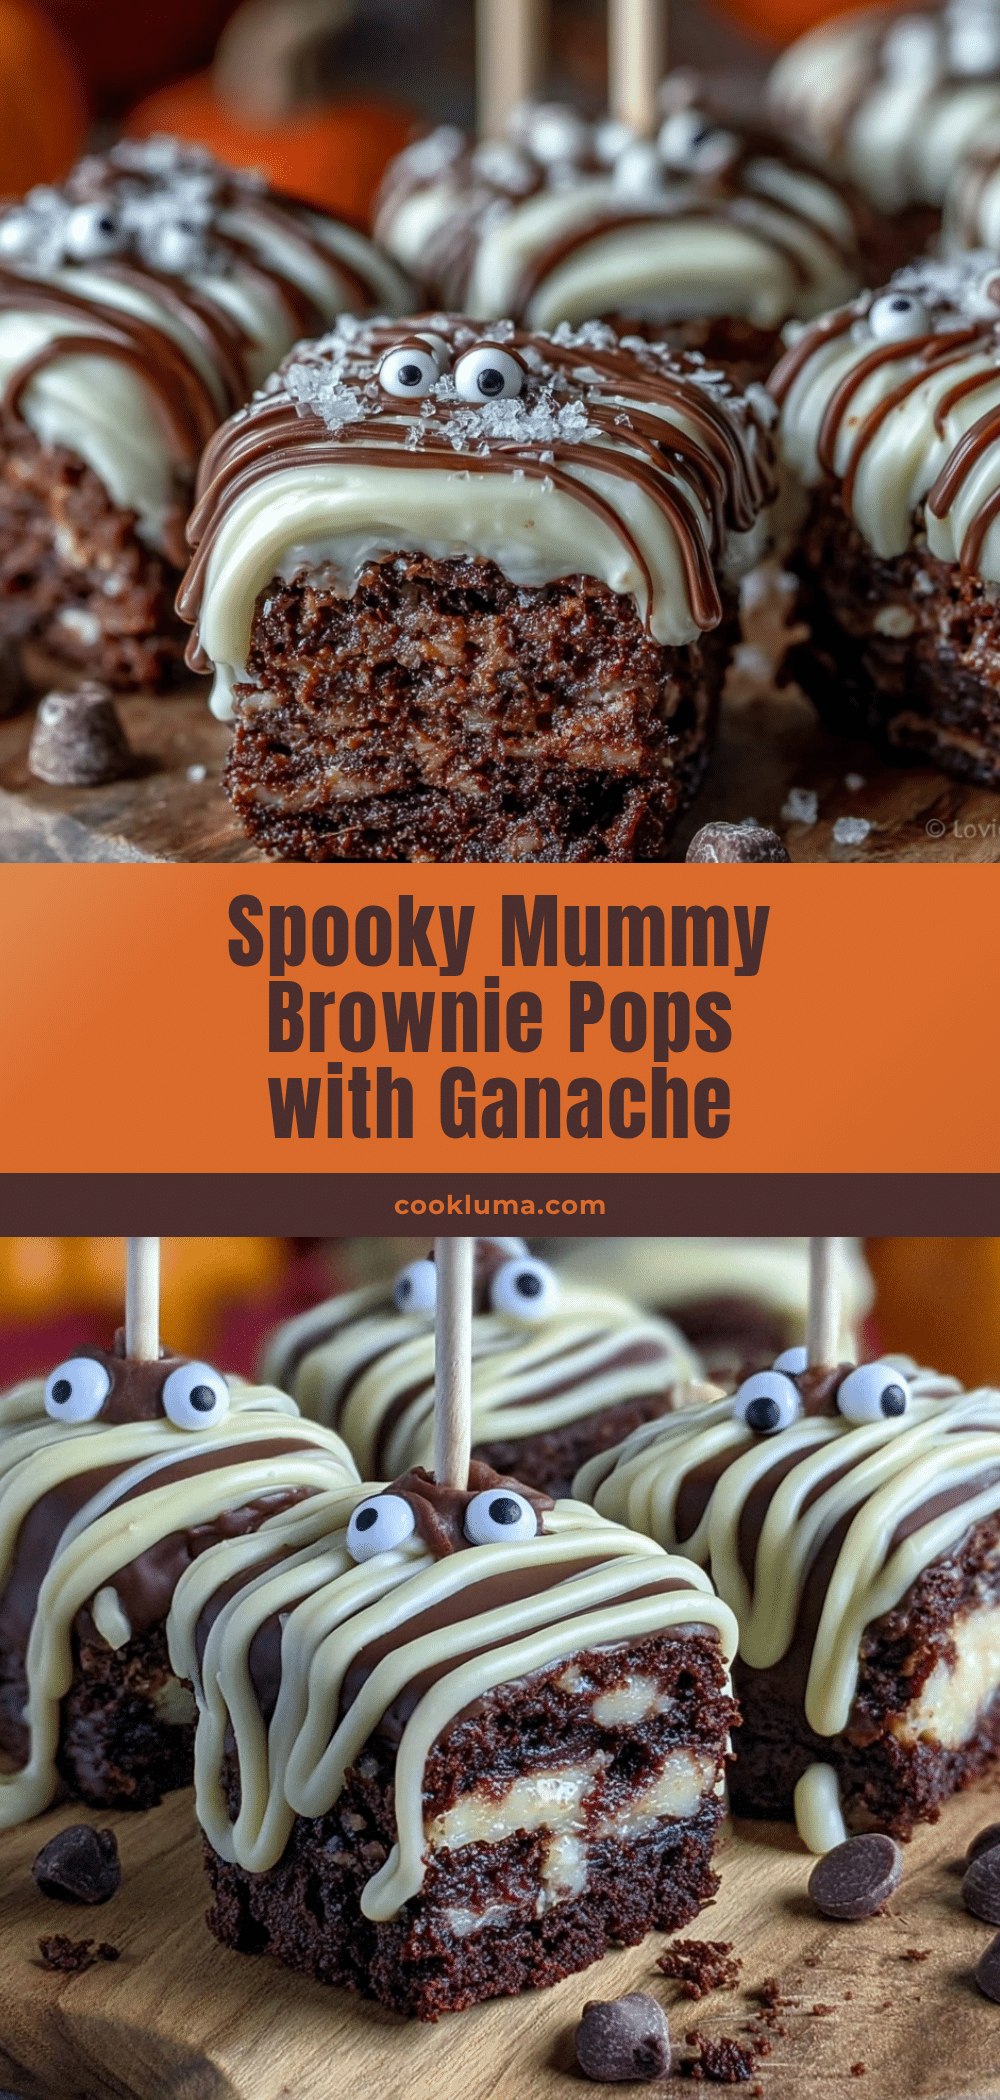
Perfect Mummy Brownie Pops with White Chocolate Ganache
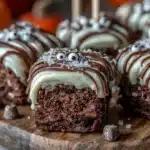
These festive mummy brownie pops feature fudgy brownies coated in creamy white chocolate ganache with playful mummy wraps and candy eyes, perfect for Halloween parties or fun treats.
- Prep Time: 15 minutes
- Cook Time: 25 minutes
- Total Time: 40 minutes
- Yield: 30 pops 1x
- Category: Dessert
- Cuisine: American
Ingredients
- 1/2 cup (115g) unsalted butter, melted
- 1 cup (200g) granulated sugar
- 2 large eggs, room temperature
- 1 teaspoon pure vanilla extract
- 3/4 cup (95g) all-purpose flour
- 1/3 cup (35g) unsweetened cocoa powder
- 1/4 teaspoon salt
- 1 cup (170g) white chocolate chips or chopped white chocolate
- 1/4 cup (60ml) heavy cream
- 1 tablespoon (14g) unsalted butter (optional, for extra glossiness)
- About 30 pairs mini candy eyes
- Black edible gel or melted dark chocolate for mummy wraps (optional)
- Brownie pop sticks or sturdy lollipop sticks
Instructions
- Preheat oven to 350°F (175°C). In a bowl, whisk melted butter and sugar until combined but not overly fluffy (about 1-2 minutes). Add eggs one at a time, mixing well after each addition, then stir in vanilla extract.
- In a separate bowl, sift together flour, cocoa powder, and salt. Slowly fold the dry mix into the wet ingredients with a spatula until just combined. Do not overmix; streaks of flour are okay.
- Pour batter into a greased 9×9-inch baking pan, smoothing the top evenly. Bake for 20-25 minutes or until a toothpick inserted near the center comes out with a few moist crumbs (not wet batter). Let cool completely in the pan.
- Once cooled, carefully lift brownies out and cut into approximately 1.5-inch (4 cm) squares. Insert a pop stick gently into each square about halfway through, being careful not to crumble the edges. Place on parchment-lined baking sheet.
- Heat heavy cream in a small saucepan over medium heat until just simmering (do not boil). Pour over white chocolate in a heatproof bowl. Let sit 1-2 minutes, then stir gently until smooth. Stir in butter if using for a glossy finish. Let ganache cool slightly to thicken, about 10 minutes.
- Dip each brownie pop into the ganache, tilting and turning to coat evenly. Allow excess to drip off. Place back on parchment paper.
- While ganache is still wet, use a spoon or small piping bag to drizzle thin lines of ganache or melted dark chocolate over the pops for the mummy effect. Add candy eyes while the chocolate is tacky so they stick.
- Let the coated pops set at room temperature for 30 minutes or refrigerate for 15 minutes to firm up the ganache before serving.
Notes
Use fudgy brownies rather than cakey for better stick stability. Chill brownies before inserting sticks to prevent crumbling. Timing ganache temperature is key: too warm and it runs off, too cool and it won’t coat smoothly. Use a small offset spatula or butter knife to smooth ganache for neat mummy wraps. Store pops in a single layer to avoid smudging. Wrap individually to freeze up to 1 month.
Nutrition
- Serving Size: 1 brownie pop
- Calories: 200
- Sugar: 18
- Sodium: 90
- Fat: 11
- Saturated Fat: 6
- Carbohydrates: 26
- Fiber: 2
- Protein: 3
Keywords: brownie pops, mummy brownies, white chocolate ganache, Halloween treats, fudgy brownies, candy eyes, spooky dessert