The neighborhood holiday potluck was in three hours and I’d completely forgotten. Everyone else would be bringing those elaborate, multi-day preparations—the kind with handmade pastries and slow-braised meats that take a whole weekend. I had a can of corn, some shredded cheddar, and a box of crackers that were honestly getting a little stale. My kitchen counter looked like a hostage situation. I stood there, phone in hand, staring at the group chat where people were already posting photos of their contributions. Let me tell you, the panic was real. I mean, I’d volunteered to bring a side dish weeks ago and then promptly erased it from my memory.
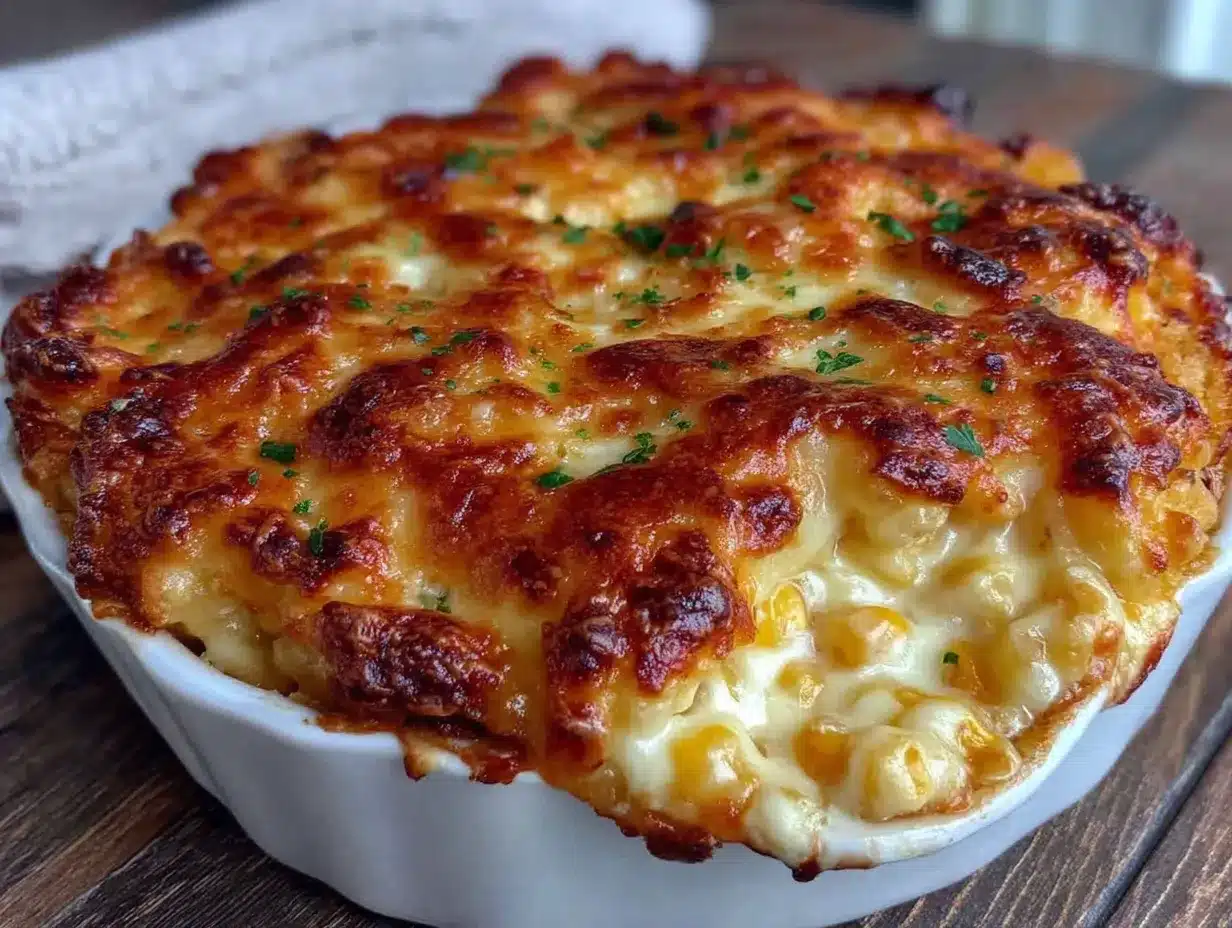
So I did what any reasonable person would do under pressure: I started tossing things together without a plan. I figured if it tasted decent, I’d just call it a “rustic casserole” and hope for the best. Honestly, I was already planning my apology speech. But something weird happened when I pulled that dish out of the oven. The top was golden and crispy, the edges were bubbling, and the smell—it was like butter and cheese having a very happy reunion. I walked into that potluck feeling like I was bringing a last-minute science experiment. By the end of the night, three people had asked for the recipe, and someone actually said it was the best thing on the table. Maybe you’ve been there, showing up with something simple while everyone else went all out, only to watch it disappear first. That was the moment this Best Cheesy Corn Casserole with Buttery Cracker Topping became my secret weapon for every gathering. It’s the recipe that taught me you don’t need hours in the kitchen to steal the show.
Why You’ll Love This Recipe
Let me be real with you—I’ve tested this casserole about a dozen times to get it just right. I wanted something that felt special enough for a dinner party but simple enough that you wouldn’t stress while your guests are arriving. After tweaking the ratios and trying different cracker brands, I landed on a version that hits every single note. Here’s why this one stands out from the crowd:
- Quick & Easy: You can have this assembled in about 10 minutes flat. No chopping, no complicated steps, just mix and bake. It’s perfect for those moments when you realize the party starts in an hour.
- Simple Ingredients: You probably already have most of these in your kitchen right now. No fancy grocery runs or specialty items needed—just good old-fashioned pantry staples.
- Perfect for Hosting: This dish is made for gatherings. It scales beautifully for a crowd, stays warm for ages, and pairs with almost any main course you can think of.
- Crowd-Pleaser: I’ve watched kids go back for thirds right next to adults who claimed they were “watching carbs.” It’s that kind of magical.
- Unbelievably Delicious: The contrast between the creamy, cheesy corn base and that crispy, buttery cracker topping is honestly next-level comfort food. It’s the kind of dish that makes people close their eyes after the first bite.
What makes this different from every other corn casserole out there? It’s the balance. So many versions are either too wet or too dry, too bland or too salty. I spent time figuring out the exact proportions so the filling stays creamy without being soupy, and the topping stays crunchy without burning. Plus, I’m using a little trick with the cracker butter mixture that gives it that golden, toasty flavor you usually only get from something much more complicated. This isn’t just another recipe—it’s the one you’ll reach for every single time you need to impress without the stress.
What Ingredients You Will Need
This recipe relies on simple, honest ingredients that work together to create something truly memorable. Most of these are pantry staples, which is exactly what you want when you’re hosting and need something reliable. Let me walk you through each one and share a few tips I’ve picked up along the way.
- 2 cans (15.25 oz each) whole kernel corn, drained — I prefer the regular yellow corn here, but white corn works too. Make sure you drain it really well. Too much liquid will make your casserole soggy, and nobody wants that.
- 1 can (14.75 oz) cream-style corn — This is the secret to that luscious, creamy texture. Don’t skip it or try to substitute it with regular corn—it won’t be the same. I usually go with Del Monte or the store brand, both work great.
- 1 cup sour cream — Full-fat gives the best richness, but I’ve used light sour cream in a pinch and it still turned out pretty good. Let it come to room temperature for easier mixing.
- 1/2 cup unsalted butter, melted (divided) — We’re using some in the filling and some in the topping. I always use unsalted so I can control the salt level. If you only have salted, just reduce the added salt slightly.
- 1 cup shredded cheddar cheese — Sharp cheddar gives the most flavor, but a Mexican blend or colby jack works beautifully too. Shred it yourself if you have time—pre-shredded cheese has anti-caking agents that don’t melt as smoothly.
- 1/2 cup shredded mozzarella cheese — This adds that lovely stretchy texture. You can omit it and use all cheddar if you prefer, but I love the combination.
- 2 large eggs, lightly beaten — These help bind everything together and give the casserole structure. Make sure they’re at room temperature so they incorporate smoothly.
- 1 tablespoon granulated sugar — Just a touch to balance the savory flavors and bring out the corn’s natural sweetness. Trust me on this one.
- 1/2 teaspoon salt — I use fine sea salt. Adjust based on how salty your cheese and crackers are.
- 1/4 teaspoon black pepper — Freshly ground is always better, but pre-ground works in a pinch.
- 1 sleeve (about 40 crackers) buttery round crackers, crushed — Ritz is my go-to, but any buttery cracker will work. You want them crushed into coarse crumbs—some bigger pieces for texture, some finer for even coverage.
A quick note on substitutions: If you’re feeding a crowd, you can easily double this recipe and bake it in a 9×13-inch dish. Just add about 10 minutes to the baking time. For a gluten-free version, use gluten-free crackers and make sure your cream-style corn is certified gluten-free. And if you want to add a little heat, toss in a diced jalapeño or a pinch of cayenne pepper—I’ve done that for game day gatherings and it was a hit.
Equipment Needed
You don’t need a fancy kitchen to pull this off. Here’s what you’ll need:
- 8×8-inch baking dish — A glass or ceramic dish works best. I’ve used metal before and it cooks faster, so keep an eye on it. If you’re doubling, grab a 9×13-inch dish.
- Large mixing bowl — Any big bowl will do. I have a favorite ceramic one that’s seen better days, but it gets the job done.
- Whisk — For beating the eggs and mixing everything together smoothly.
- Small bowl — For mixing the cracker topping. You could use the same bowl if you wipe it out, but I’m lazy and just grab another one.
- Measuring cups and spoons — Standard set, nothing fancy. I’ve definitely eyeballed the cheese before and it worked out fine.
- Can opener — Obvious but essential. I once spent five minutes trying to open a can with a knife before remembering I owned one.
- Colander — For draining the canned corn. A fine-mesh strainer works too.
That’s it. No stand mixer, no food processor, no special gadgets. I’ve made this in a friend’s tiny vacation rental kitchen with mismatched bowls and a dull knife, and it still turned out perfect. The only thing I’d recommend is using a dish that’s the right size—too big and the casserole will be thin and dry out, too small and it might bubble over. My 8×8-inch dish has never let me down.
Preparation Method
Alright, let’s get cooking. This comes together so fast you’ll barely believe it. Here’s how I do it:
- Preheat your oven to 350°F (175°C). Give it a good 15 minutes to get hot. While that’s happening, lightly grease your 8×8-inch baking dish with butter or non-stick spray. I usually just rub a bit of butter around with a paper towel—old habits.
- Drain the canned corn. Open both cans of whole kernel corn and pour them into a colander. Let them sit for a minute to drain really well. You don’t want extra water diluting your casserole. I sometimes pat them gently with a paper towel if I’m feeling fancy.
- Mix the wet ingredients. In your large mixing bowl, whisk together the sour cream, 1/4 cup of the melted butter (save the rest for the topping), and the beaten eggs until everything is smooth and well combined. It should look pale yellow and creamy. This is where the magic starts.
- Add the corn and seasonings. Stir in the drained whole kernel corn, the entire can of cream-style corn, sugar, salt, and pepper. Mix until everything is evenly distributed. The mixture will look quite loose at this point—don’t worry, that’s normal. It sets up beautifully as it bakes.
- Fold in the cheese. Add the shredded cheddar and mozzarella, reserving about 1/4 cup of the cheddar for the top if you want an extra cheesy finish. Fold gently until the cheese is evenly distributed. I use a rubber spatula for this to avoid overmixing.
- Pour into the prepared dish. Transfer the mixture to your greased baking dish. Spread it out evenly with the spatula. Give the dish a gentle tap on the counter to settle everything and release any air bubbles.
- Make the cracker topping. In a small bowl, crush the sleeve of buttery crackers into coarse crumbs. I do this by putting them in a zip-top bag and smashing them with a rolling pin—it’s oddly satisfying. Pour the crumbs into the bowl and add the remaining 1/4 cup of melted butter. Stir until all the crumbs are coated. You want them evenly moistened but not soggy.
- Top the casserole. Sprinkle the buttered cracker crumbs evenly over the corn mixture. If you reserved some cheddar, sprinkle it over the crumbs now. This creates a beautiful golden crust.
- Bake for 35-40 minutes. Place the dish on the middle rack of your preheated oven. Bake until the edges are bubbly and the top is golden brown. The center should be set but still have a slight jiggle—it will continue to set as it cools. If the topping is browning too quickly, tent loosely with foil for the last 10 minutes.
- Let it rest. Remove from the oven and let it sit for 5-10 minutes before serving. This is crucial—it allows the casserole to set up properly so you get clean slices instead of a messy scoop. I know it’s hard to wait, but trust me.
A few things I’ve learned the hard way: Don’t overmix the batter or it can get gluey. And if you’re making this ahead, stop before adding the topping and refrigerate, then add the topping right before baking. That keeps it super crunchy.
Cooking Tips & Techniques
After making this casserole more times than I can count, I’ve picked up a few tricks that make a real difference. Let me share them so you can skip the trial and error.
Don’t skip draining the corn. I know it seems like an extra step, but extra liquid is the enemy of a good corn casserole. I once forgot to drain one can and ended up with a soupy mess that took forever to set. Learn from my mistake. Give that corn a good shake in the colander and let it drip for a minute.
Crush your crackers unevenly. This might sound weird, but you want some bigger pieces and some finer crumbs. The bigger bits give you those satisfying crunchy clusters, while the finer ones create an even crust. I crush about half the crackers finely and leave the rest in slightly bigger pieces. It makes the topping way more interesting.
Watch your oven temperature. Every oven runs a little differently. Mine tends to run hot, so I start checking at the 30-minute mark. If the top is getting too dark but the center isn’t set yet, tent it with foil and keep baking. You want that golden color without burnt edges.
Let it rest before serving. I cannot stress this enough. The casserole needs time to set up after coming out of the oven. If you dig in right away, it will be loose and runny. Give it at least 5 minutes, ideally 10. It’s the difference between a beautiful slice and a sad puddle on the plate.
Double-check your dish size. An 8×8-inch dish is perfect for this recipe. If you use something bigger, the casserole will be thin and dry out faster. If you use something smaller, it might bubble over and make a mess in your oven. I learned this one the hard way—cleaning burnt cheese off the bottom of the oven is no one’s idea of a good time.
Variations & Adaptations
One of the best things about this casserole is how easy it is to tweak. Here are some variations I’ve tried and loved:
Spicy Southwest Version: Add one diced jalapeño (seeds removed if you want less heat), a can of drained diced green chiles, and swap the cheddar for pepper jack cheese. I made this for a Super Bowl party and it disappeared in minutes. The little kick of heat pairs beautifully with the sweet corn.
Bacon Lover’s Dream: Cook 6 strips of bacon until crispy, crumble them, and stir half into the filling before baking. Sprinkle the rest on top along with the cracker crumbs. I did this for a brunch gathering and people actually fought over the last scoop. It adds that smoky, salty element that takes everything up a notch.
Herb & Garlic Version: Add 2 cloves of minced garlic and 2 tablespoons of fresh chopped chives or parsley to the filling. The garlic gets mellow and sweet as it bakes, and the herbs add a fresh pop of color and flavor. This is my go-to when I’m serving it alongside roasted chicken or pork.
Make It a Meal: Stir in 1 cup of cooked, shredded chicken or diced ham to turn this into a main dish. Add a side salad and you’ve got dinner. I’ve done this on busy weeknights when I needed something quick and satisfying.
Dairy-Free Adaptation: Use dairy-free sour cream, vegan butter, and your favorite dairy-free shredded cheese. The texture will be slightly different, but it still works. I tested this for a friend with lactose intolerance and she gave it two thumbs up.
Serving & Storage Suggestions
This casserole is incredibly versatile when it comes to serving. Here’s how I handle it:
Serving Temperature: Serve it warm, not piping hot. Let it rest for those 5-10 minutes after baking so it sets up properly. It’s also delicious at room temperature if you’re doing a buffet-style gathering. I’ve even eaten leftovers cold straight from the fridge and honestly? Still good.
What to Serve Alongside: This is the ultimate side dish. It pairs beautifully with grilled or roasted meats—think BBQ chicken, pulled pork, steak, or ham. It’s also fantastic alongside holiday mains like turkey or prime rib. For a potluck, bring it with something green like a simple salad or roasted broccoli to balance the richness.
Presentation Tips for Hosting: If you’re bringing this to a gathering, bake it in a nice dish you can serve from directly. Sprinkle some fresh chives or parsley on top right before serving for a pop of color. I sometimes add a little extra shredded cheese and a few whole crackers on top for visual appeal.
Storage Instructions: Leftovers keep in the refrigerator for up to 4 days in an airtight container. The topping will lose some of its crunch, but the flavor is still amazing. To reheat, pop individual portions in the microwave for about a minute, or reheat the whole thing in a 350°F oven for 10-15 minutes. If you want to restore some crunch, add a few fresh crushed crackers on top before reheating.
Freezer Tips: You can freeze this casserole either before or after baking. To freeze unbaked, assemble everything except the topping, cover tightly, and freeze for up to 3 months. Thaw in the refrigerator overnight, add the topping, and bake as directed. To freeze baked leftovers, let them cool completely, wrap tightly, and freeze. Reheat in the oven for best results.
Flavor Development: Honestly, this casserole tastes even better the next day. The flavors have time to meld together, and the texture becomes even creamier. I sometimes make it a day ahead on purpose. Just add the topping right before baking.
Nutritional Information & Benefits
Let’s talk numbers. Please keep in mind these are estimates and will vary based on your specific ingredients and portion sizes. This recipe makes about 8 servings.
| Nutrient | Amount Per Serving |
|---|---|
| Calories | 320 |
| Total Fat | 22g |
| Saturated Fat | 12g |
| Cholesterol | 85mg |
| Sodium | 580mg |
| Total Carbohydrates | 28g |
| Dietary Fiber | 2g |
| Sugars | 6g |
| Protein | 9g |
While this isn’t exactly health food, corn does offer some nutritional benefits. It’s a good source of fiber, which aids digestion, and contains antioxidants like lutein and zeaxanthin that support eye health. The dairy provides calcium and protein. If you’re looking to lighten it up, you can use reduced-fat sour cream and cheese, but honestly, this is a treat. I believe in balance—enjoy this casserole at gatherings and celebrations, and don’t feel guilty about it. It’s comfort food, and that has its own kind of value.
Dietary Considerations: This recipe contains dairy and gluten. For a gluten-free version, use gluten-free crackers. For a lower-carb option, you can reduce the sugar and use a low-carb cracker, but the texture will be different. Always check your ingredient labels if you’re cooking for someone with allergies.
Conclusion
Look, I’m not saying this Best Cheesy Corn Casserole with Buttery Cracker Topping will change your life. But I am saying it might just become your new favorite thing to bring to every gathering. It’s the recipe that saved me from potluck panic and turned me into the person who actually looks forward to showing up with a dish. There’s something special about watching people take that first bite and seeing their eyes light up. It’s simple, honest food that delivers every single time.
I hope you’ll give this one a try. Don’t be afraid to make it your own—swap in your favorite cheese, add some heat, or pile on the bacon. The beauty of this casserole is that it’s forgiving and adaptable. And when you bring it to your next dinner party or holiday gathering, just watch how fast it disappears. Trust me, you’ll be making it again and again.
Have you tried this recipe? I’d love to hear how it turned out! Drop a comment below and let me know what variations you tried or what you served it with. And if you loved it, share it with a friend who needs a last-minute potluck hero. Happy cooking, friends!
Frequently Asked Questions
Can I use frozen corn instead of canned?
Absolutely. If you’re using frozen corn, thaw it first and drain off any excess liquid. You’ll still need the cream-style corn for that creamy texture, so don’t skip that. I’ve done this when I ran out of canned and it worked great.
How do I keep the cracker topping from getting soggy?
The key is adding the topping right before baking and not overmixing the butter into the crumbs. You want them coated but not saturated. Also, make sure your corn is well-drained. If you’re making this ahead, store the topping separately and add it just before baking.
Can I make this in a slow cooker?
I don’t recommend it. The texture won’t be the same, and the cracker topping won’t get crispy. This recipe really needs the dry heat of an oven to develop that golden crust. If you’re short on oven space, you can bake it ahead and reheat it.
Why did my casserole turn out watery?
This usually happens when the corn isn’t drained well enough. Make sure you let the canned corn sit in a colander for a good minute or two. Another culprit could be using low-fat sour cream, which has more water content. Stick with full-fat for the best results.
Can I add other vegetables to this casserole?
Sure! Diced bell peppers, sautéed onions, or even some chopped spinach work well. Just make sure any vegetables you add are cooked and drained of excess moisture first. I’ve added roasted red peppers before and it was delicious.
Pin This Recipe!
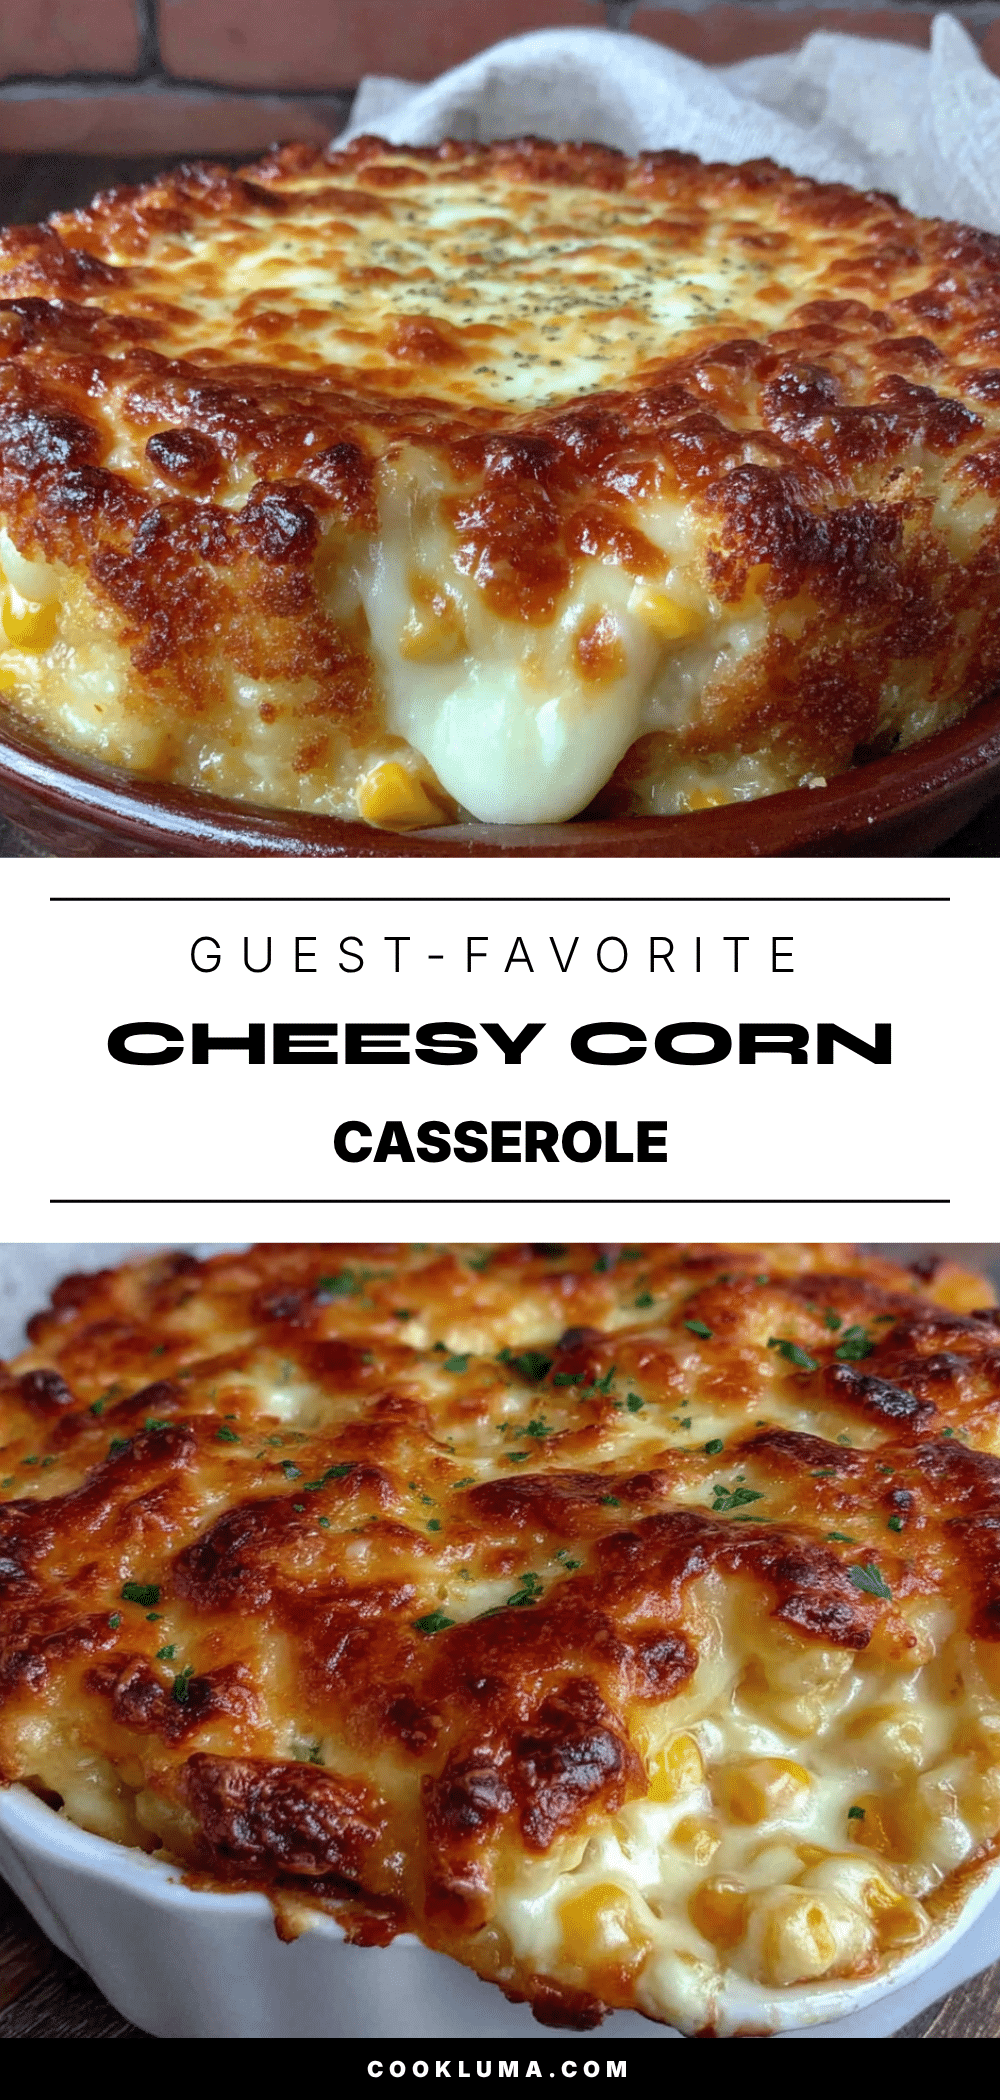
Best Cheesy Corn Casserole with Buttery Cracker Topping
A quick and easy corn casserole with a creamy, cheesy filling and a crispy, buttery cracker topping. Perfect for potlucks, holidays, or any gathering where you need a crowd-pleasing side dish.
- Prep Time: 10 minutes
- Cook Time: 35 minutes
- Total Time: 45 minutes
- Yield: 8 servings 1x
- Category: Side Dish
- Cuisine: American
Ingredients
- 2 cans (15.25 oz each) whole kernel corn, drained
- 1 can (14.75 oz) cream-style corn
- 1 cup sour cream
- 1/2 cup unsalted butter, melted (divided)
- 1 cup shredded cheddar cheese
- 1/2 cup shredded mozzarella cheese
- 2 large eggs, lightly beaten
- 1 tablespoon granulated sugar
- 1/2 teaspoon salt
- 1/4 teaspoon black pepper
- 1 sleeve (about 40 crackers) buttery round crackers, crushed
Instructions
- Preheat your oven to 350°F (175°C). Lightly grease an 8×8-inch baking dish with butter or non-stick spray.
- Drain the canned whole kernel corn in a colander and let it sit for a minute to drain well.
- In a large mixing bowl, whisk together the sour cream, 1/4 cup of the melted butter, and the beaten eggs until smooth.
- Stir in the drained whole kernel corn, cream-style corn, sugar, salt, and pepper until evenly distributed.
- Fold in the shredded cheddar and mozzarella cheese, reserving about 1/4 cup of cheddar for the top if desired.
- Pour the mixture into the prepared baking dish and spread evenly.
- In a small bowl, crush the buttery crackers into coarse crumbs. Add the remaining 1/4 cup melted butter and stir until all crumbs are coated.
- Sprinkle the buttered cracker crumbs evenly over the corn mixture. Top with reserved cheddar if using.
- Bake for 35-40 minutes, until the edges are bubbly and the top is golden brown. If the topping browns too quickly, tent with foil for the last 10 minutes.
- Remove from the oven and let rest for 5-10 minutes before serving.
Notes
For best results, drain the canned corn well to avoid a watery casserole. Let the casserole rest for 5-10 minutes after baking to set properly. The topping can be made ahead and added just before baking to keep it crunchy.
Nutrition
- Serving Size: 1 serving
- Calories: 320
- Sugar: 6
- Sodium: 580
- Fat: 22
- Saturated Fat: 12
- Carbohydrates: 28
- Fiber: 2
- Protein: 9
Keywords: corn casserole, cheesy corn casserole, buttery cracker topping, easy side dish, potluck recipe, holiday side dish


