My neighbor, Mrs. Gable, had lived in her house for over sixty years and swore she hated snow. The shoveling, the slush, the way it turned gray within hours—she had a complaint for every flake that fell. She’d stand at her kitchen window, arms crossed, muttering about the forecast like it was a personal betrayal. I’d nod sympathetically, bring her a cup of tea, and go back to my own shoveling, thinking that was just how things were. Then, last February, I caught her.
I was scraping ice off my car after a particularly heavy storm—the kind that leaves everything muffled and still—and I saw her through her back door. She was standing at the counter, spoon in hand, dipping it into a bowl of something white and fluffy. She looked around, like she was checking for witnesses, and took a bite. I mean, she actually closed her eyes. When she saw me watching, she froze, then laughed and waved me over. “Don’t you dare tell anyone,” she said, handing me a spoon. “I’ve been making this since I was a girl, and I’ll be darned if I’m gonna let a little cold stop me now.”
That was my first taste of snow ice cream. And honestly? It changed my whole perspective on winter. Here was this woman, who had spent decades complaining about the white stuff, secretly turning it into the most nostalgic, simple treat you could imagine. It took three ingredients and about five minutes. I felt like I’d been let in on a secret society. Maybe you’ve been there—that moment when you realize you’ve been looking at something all wrong, and someone shows you the magic you were missing. That’s this recipe. It’s not fancy, it’s not complicated, and it uses the very thing you’re probably grumbling about. It’s the reason I still smile when the first snow of the year starts falling.
Why You’ll Love This Recipe
Let’s be real for a second. Winter is long, and by February, most of us are running on fumes. The last thing you need is a complicated dessert that requires a trip to the store or a sink full of dishes. This snow ice cream is the opposite of that. It’s the kind of recipe that makes you feel like you’ve pulled a fast one on the universe—using nature’s own ingredient to make something genuinely delicious.
- Quick & Easy: I’m talking five minutes from start to finish. If you can stir, you can make this. It’s faster than a box of brownies and requires zero oven time.
- Simple Ingredients: You need three things. Maybe four if you count the snow. And you probably have all of them in your kitchen right now. No weird extracts or specialty items.
- Perfect for a Snow Day: This is the ultimate activity for kids (or for you, when you need a little joy). It turns a weather inconvenience into a moment of pure fun.
- Crowd-Pleaser: I’ve served this to skeptical adults and hyper-critical teenagers. Every single person has asked for a second bowl. It’s just… happy.
- Unbelievably Delicious: The texture is light, fluffy, and creamy. It’s not icy or watery. It tastes like a snowball fight and a warm blanket had a baby.
What makes this version different from the dozens of others out there? It’s the ratio. I’ve tested this exactly so you don’t end up with a soupy mess or a rock-hard block of ice. The trick is in how you handle the snow and the order you add things. This isn’t just another internet recipe—it’s the one that Mrs. Gable’s grandmother passed down, refined by decades of snowy winters. It’s the kind of treat that makes you close your eyes after the first bite, even if you swore you hated snow.
What Ingredients You Will Need
This recipe uses the simplest of ingredients to create something that feels like a special occasion. The magic is in the freshness of the snow and the balance of the flavors. No fancy grocery trips required—just a bowl and a willingness to get a little cold.
- 8 cups of fresh, clean snow (Packed lightly into the measuring cup. The fresher the better—ideally collected during or right after a snowfall. Avoid snow that has been sitting for more than 24 hours or has any discoloration. I like to collect it from our back deck, away from the road.)
- 1 can (14 ounces) of sweetened condensed milk (This is the non-negotiable base. It provides the sweetness and the creamy texture. I always use Eagle Brand for consistency, but any store brand works fine. Do not substitute with evaporated milk—it won’t be sweet enough and the texture will be off.)
- 1 teaspoon of vanilla extract (Pure vanilla extract gives the best flavor, but imitation vanilla works in a pinch. You can also experiment with other extracts—peppermint is fantastic for a holiday twist.)
- A pinch of salt (Optional, but I highly recommend it. A tiny pinch of fine sea salt balances the sweetness and makes the flavors pop. Mrs. Gable always added it, and she was right.)
Equipment Needed
You don’t need any fancy kitchen gadgets for this one. In fact, the simpler, the better. Here’s what you’ll need to grab:
- A large mixing bowl: Go for a metal or glass bowl. Metal bowls get nice and cold, which helps keep the snow from melting too fast. A plastic bowl will work, but it won’t stay as chilly.
- A sturdy spatula or large spoon: You’ll be folding the snow into the condensed milk mixture, so a flexible silicone spatula is ideal. A wooden spoon works too, but be gentle.
- A measuring cup: For the snow. I use an 8-cup Pyrex measuring cup, but any large cup will do. Just make sure you’re packing the snow lightly.
- Small bowls or cups for serving: This is best eaten immediately, so have your serving dishes ready before you start mixing. I like using small glass bowls so you can see the fluffy texture.
That’s it. No ice cream maker, no mixer, no churning. If you have a bowl and a spoon, you’re in business. I’ve made this in a pinch with a plastic takeout container and a chopstick. It worked. Not pretty, but it worked.
Preparation Method

The key to perfect snow ice cream is speed. You want to work quickly so the snow doesn’t melt into a puddle before you get to eat it. Here’s how I do it, step by step, with all the little tricks I’ve learned from years of making this.
- Go collect your snow. Grab your large mixing bowl and head outside. Scoop up the top layer of fresh snow, avoiding any that looks dirty or has ice crystals. Fill your bowl with about 8 cups of lightly packed snow. Don’t press it down—you want it airy. Work fast, because the snow will start melting the second it hits the warm bowl. If your bowl is room temperature, stick it in the freezer for 10 minutes before you go outside. It makes a huge difference.
- Mix the base. In a separate, smaller bowl, whisk together the entire can of sweetened condensed milk, the vanilla extract, and the pinch of salt. Whisk until it’s smooth and well combined. This takes about 30 seconds. The mixture will be thick and sticky—that’s normal. Set this bowl aside while you prepare the snow.
- Combine immediately. Bring your bowl of snow inside. Working quickly, pour the condensed milk mixture over the top of the snow. Do not stir yet. Just pour it evenly across the surface.
- Fold, don’t stir. Using your spatula or spoon, gently fold the mixture into the snow. Imagine you’re folding whipped cream into a batter—slow, gentle, sweeping motions. You want to incorporate the milk without deflating the snow. If you stir too aggressively, the snow will melt and you’ll end up with soup. It should take about 15 to 20 folds to get a uniform, creamy texture.
- Check the consistency. The finished snow ice cream should look like soft-serve ice cream—fluffy, light, and a little billowy. If it looks too dry, you can add a tiny splash of milk (like a tablespoon) and fold it in. If it looks too wet or slushy, you added too much milk or the snow was too old. Don’t panic—just pop the bowl in the freezer for 10 minutes and it will firm up.
- Serve immediately. Scoop the snow ice cream into your prepared bowls and eat it right away. This is not a recipe that waits. The texture is best within the first 5 minutes. If you try to save it for later, it will turn into a block of ice in the freezer or a puddle in the fridge. Trust me, I’ve learned this the hard way.
Pro tip from personal failure: The first time I made this, I used snow that had been sitting on my porch for two days. It had started to melt and refreeze, so it was more like ice shavings. The result was a crunchy, watery mess. Fresh snow is non-negotiable. If it’s been more than 24 hours since the last snowfall, wait for the next one.
Cooking Tips & Techniques
I’ve made this recipe at least thirty times, and I’ve messed it up in almost every way possible. Here’s what I’ve learned so you don’t have to repeat my mistakes.
The biggest mistake is using old snow. I know I said it already, but it bears repeating. Snow that has sat for a day or more has started to compact and lose its fluffy structure. It also picks up dust and debris. You want snow that falls fresh and is collected within an hour or two. The best snow I’ve ever used was collected during a storm, while the flakes were still falling. It was like scooping up clouds.
Temperature matters. Everything should be as cold as possible. Your bowl should be cold. Your milk mixture should be cold (I sometimes pop the can of condensed milk in the fridge for an hour before using). Your hands should even be cold—run them under cold water before handling the snow. Every degree of warmth is working against you.
Work in batches. If you’re making this for a crowd, don’t try to double the recipe in one bowl. The snow will melt before you can get it mixed. Instead, make two separate batches. It takes the same amount of time, and the texture will be much better. I learned this when I tried to make a quadruple batch for a party. I ended up with a bowl of sweet milk soup and a lot of disappointed faces.
Timing is everything. Have your serving bowls ready before you start mixing. Have your toppings ready if you’re using any. You don’t want to be hunting for sprinkles while your snow ice cream is turning into a puddle. I like to set everything up on the counter before I even put on my coat to go outside.
Variations & Adaptations
Once you’ve mastered the basic recipe, the possibilities are endless. Here are a few of my favorite ways to change it up, depending on my mood or what I have in the pantry.
Chocolate Snow Ice Cream: Whisk 2 tablespoons of unsweetened cocoa powder into the condensed milk mixture before adding it to the snow. Make sure it’s fully dissolved—no lumps. This turns the whole thing into a light, fluffy chocolate soft-serve. It’s dangerous how good this is.
Peppermint Snow Ice Cream: Substitute the vanilla extract with 1/2 teaspoon of peppermint extract. Fold in a handful of crushed candy canes or peppermint candies at the end. This is my go-to for Christmas Eve. It feels festive without any of the work of a real dessert.
Dairy-Free Version: You can use a can of full-fat coconut milk sweetened with 1/4 cup of maple syrup or honey instead of the sweetened condensed milk. The texture will be slightly less creamy, but it’s still delicious. I’ve made this for a friend who is lactose intolerant, and she cleaned her bowl.
Fruity Twist: Fold in 1/2 cup of fresh or frozen berries after the snow ice cream is mixed. Strawberries are my favorite, but blueberries or raspberries work great too. The cold berries get a little crunchy on the outside and soft on the inside—it’s a lovely texture contrast.
Serving & Storage Suggestions
This recipe is best eaten immediately. I cannot stress this enough. Snow ice cream is a moment, not a leftover. The texture is at its peak for about 5 to 10 minutes after you make it. After that, it starts to get icy or melt, depending on the temperature of your kitchen.
For serving: I like to serve it in small bowls or even little cups. Because it’s so light, people tend to eat more than they expect, so portion control is a good idea. Top it with sprinkles, a drizzle of chocolate syrup, or a few fresh berries. A dusting of cinnamon or nutmeg is also lovely. For a truly indulgent treat, serve it alongside a warm brownie or a piece of gingerbread. The hot-cold contrast is incredible.
Can you store it? Technically, yes. If you have leftovers (which almost never happens in my house), you can transfer the snow ice cream to an airtight container and put it in the freezer. However, it will freeze solid. To eat it later, let it sit on the counter for 10 to 15 minutes to soften, then fluff it with a fork. The texture won’t be the same—it will be more like a granita or shaved ice—but the flavor will still be good. I’ve done this when I made too much, and it’s fine for a quick fix.
Do not refrigerate it. The fridge will turn it into a puddle. If you need to keep it cold for a short time, set the bowl in a larger bowl filled with ice and salt, like you would for homemade ice cream. But honestly? Just eat it. That’s the whole point.
Nutritional Information & Benefits
Let’s be clear: this is a treat. It’s not health food, and I’m not going to pretend it is. But there are a few things worth noting about this recipe that might make you feel a little better about that second bowl.
Estimated nutritional values per serving (about 1 cup):
- Calories: 280
- Fat: 7g
- Carbohydrates: 48g
- Sugar: 45g
- Protein: 6g
- Calcium: 20% of daily value
The sweetened condensed milk provides a good amount of calcium and protein, which is more than you’d get from a typical scoop of ice cream. And because the base is snow—which is just frozen water—you’re getting a lot of volume for relatively few calories. A cup of this has fewer calories than a cup of premium ice cream, which can easily top 400 or 500 calories.
Dietary considerations: This recipe is naturally gluten-free and contains no eggs. For a dairy-free version, use the coconut milk and maple syrup substitution I mentioned earlier. The main allergen to be aware of is dairy, from the condensed milk. If you’re watching your sugar intake, you can reduce the amount of condensed milk, but the texture will be less creamy. I’d recommend using a sugar-free sweetened condensed milk if you can find it.
From a wellness perspective, I see this as a recipe for joy. Sometimes the best thing you can do for yourself is make something simple and delicious and eat it with a smile. That has its own nutritional value, if you ask me.
Conclusion
This 3-ingredient snow ice cream is proof that the best things in life really are the simplest. It’s a recipe that turns a winter inconvenience into a moment of pure, uncomplicated happiness. No fancy equipment, no stressful techniques, no long ingredient lists. Just you, a bowl, and the snow that’s already falling outside your window.
I still think about Mrs. Gable every time I make this. She passed away a few years ago, but every snowy day, I feel like she’s right there in the kitchen with me, handing me a spoon and telling me not to tell anyone. It’s become my own little winter ritual—a way to honor her secret and to remind myself that magic is often hiding in plain sight.
I’d love to hear how yours turns out. Did you add a twist? Did your kids go crazy for it? Did you, like me, catch someone who swore they hated snow sneaking a second bowl? Drop a comment below and let me know. And if you’re looking for more simple, comforting winter recipes, you might enjoy my cozy slow cooker hot chocolate or these easy no-bake peppermint bark cookies—they’re perfect for a snow day too.
Now go on. Grab a bowl. The snow is waiting.
Frequently Asked Questions
Is it safe to eat snow?
Yes, as long as you collect it from a clean source. Avoid snow that is near roads, has been plowed, or shows any discoloration. Freshly fallen snow from your backyard or a clean deck is perfectly fine. The snow itself is just frozen, distilled water.
Can I use snow that has been on the ground for a few days?
I wouldn’t recommend it. Older snow starts to compact and can pick up dirt, pollen, and other debris from the air. For the best texture and safety, collect snow within the first few hours of a snowfall.
My snow ice cream turned out soupy. What went wrong?
This usually happens for one of two reasons: the snow was too old or wet, or you stirred it too much. Make sure you’re using fresh, fluffy snow and folding gently. If it’s already soupy, you can try popping the bowl in the freezer for 10 to 15 minutes to firm it up.
Can I make this without sweetened condensed milk?
You can, but the texture will be different. Sweetened condensed milk provides the perfect balance of sweetness and creaminess. If you substitute with regular milk and sugar, you’ll need to adjust the ratios, and the result will be icier. I’ve had the best luck with a 1:1 ratio of heavy cream to sugar, but it’s not as foolproof.
How much does this recipe make?
This recipe makes about 4 to 6 servings, depending on how generous you are with the scoops. The snow fluffs up quite a bit, so it looks like a lot, but it melts quickly in your mouth. I usually plan for about 1 to 1.5 cups per person.
Pin This Recipe!
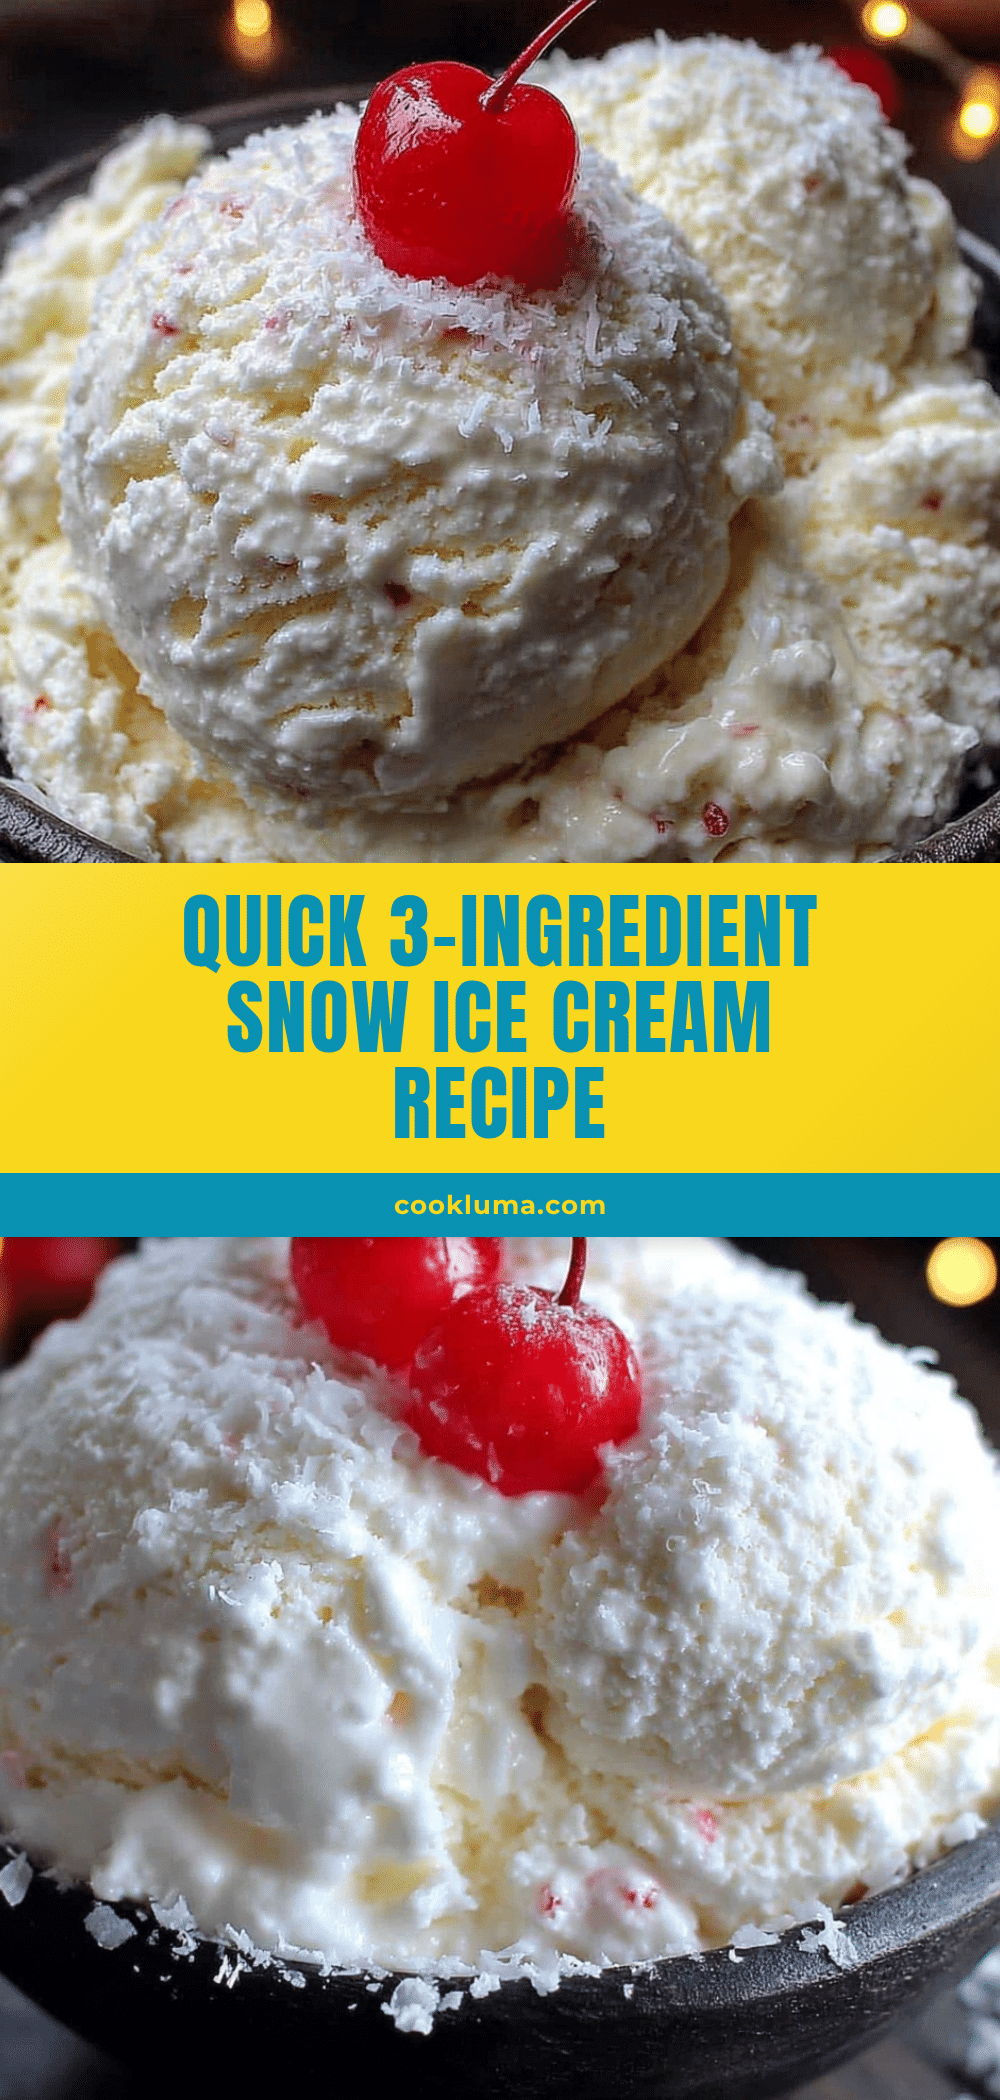
3-Ingredient Snow Ice Cream: The Easiest Winter Treat

This 3-ingredient snow ice cream is proof that the best things in life really are the simplest. It turns a winter inconvenience into a moment of pure, uncomplicated happiness with fresh snow, sweetened condensed milk, and vanilla extract.
- Prep Time: 5 minutes
- Cook Time: 0 minutes
- Total Time: 5 minutes
- Yield: 4-6 servings 1x
- Category: Dessert
- Cuisine: American
Ingredients
- 8 cups fresh, clean snow (packed lightly)
- 1 can (14 ounces) sweetened condensed milk
- 1 teaspoon vanilla extract
- Pinch of fine sea salt (optional)
Instructions
- Go collect your snow. Grab your large mixing bowl and head outside. Scoop up the top layer of fresh snow, avoiding any that looks dirty or has ice crystals. Fill your bowl with about 8 cups of lightly packed snow. Don’t press it down—you want it airy. Work fast, because the snow will start melting the second it hits the warm bowl. If your bowl is room temperature, stick it in the freezer for 10 minutes before you go outside.
- Mix the base. In a separate, smaller bowl, whisk together the entire can of sweetened condensed milk, the vanilla extract, and the pinch of salt. Whisk until it’s smooth and well combined. This takes about 30 seconds. The mixture will be thick and sticky—that’s normal. Set this bowl aside while you prepare the snow.
- Combine immediately. Bring your bowl of snow inside. Working quickly, pour the condensed milk mixture over the top of the snow. Do not stir yet. Just pour it evenly across the surface.
- Fold, don’t stir. Using your spatula or spoon, gently fold the mixture into the snow. Imagine you’re folding whipped cream into a batter—slow, gentle, sweeping motions. You want to incorporate the milk without deflating the snow. If you stir too aggressively, the snow will melt and you’ll end up with soup. It should take about 15 to 20 folds to get a uniform, creamy texture.
- Check the consistency. The finished snow ice cream should look like soft-serve ice cream—fluffy, light, and a little billowy. If it looks too dry, you can add a tiny splash of milk (like a tablespoon) and fold it in. If it looks too wet or slushy, you added too much milk or the snow was too old. Don’t panic—just pop the bowl in the freezer for 10 minutes and it will firm up.
- Serve immediately. Scoop the snow ice cream into your prepared bowls and eat it right away. This is not a recipe that waits. The texture is best within the first 5 minutes. If you try to save it for later, it will turn into a block of ice in the freezer or a puddle in the fridge.
Notes
Use fresh snow collected within 1-2 hours of snowfall. Avoid snow that has been sitting for more than 24 hours. Work quickly to prevent melting. For best results, chill your bowl in the freezer for 10 minutes before collecting snow. This recipe is best eaten immediately and does not store well. If you have leftovers, freeze in an airtight container and let soften for 10-15 minutes before serving.
Nutrition
- Serving Size: 1 cup
- Calories: 280
- Sugar: 45
- Sodium: 100
- Fat: 7
- Saturated Fat: 4
- Carbohydrates: 48
- Protein: 6
Keywords: snow ice cream, 3-ingredient, easy winter treat, snow day recipe, no-bake dessert, homemade ice cream, kids activity


