The church potluck was in three hours and I’d completely forgotten. Everyone else would be bringing their signature dishes—Aunt Marie’s legendary seven-layer dip, the Johnson twins’ from-scratch apple pie with a lattice crust that looked like a magazine cover. I had a can of pumpkin puree in the pantry, a store-bought pie crust in the freezer that I’d bought on a whim, and about fifteen dollars in my wallet until payday. Honestly, I wanted to just grab a bag of chips and call it a day. But my neighbor, Mrs. Gable, had specifically asked if I was bringing my “famous” dessert, and I didn’t have the heart to show up empty-handed. So, with a deep sigh and a prayer that no one would notice the shortcuts, I threw together a classic pumpkin pie. I used the last of the eggs, the half-and-half I’d been saving for my morning coffee, and a spice blend I eyeballed because I’d dropped the measuring spoon somewhere under the fridge. The pie went into the oven, and I spent the next hour cleaning the kitchen and mentally preparing for the polite, pitying smiles I was sure to get.
The power went out halfway through baking. Not a flicker, not a dim—a full, dramatic blackout. I stood there, staring at the dark oven, feeling the panic rise. The pie was maybe halfway set. I did the only thing I could think of—I finished it in the gas grill outside, watching the temperature gauge like a hawk and muttering to myself the whole time. When I finally pulled it out, it looked… fine. Not perfect, but fine. I let it cool on the counter while the power came back, and then I put it in the fridge to set, hoping for the best.
You know that feeling when you bring a dish to a potluck and you’re just hoping it doesn’t get left untouched? That was me. But when Mrs. Gable took the first slice, her eyes went wide. “Where did you get this?” she asked. “It’s better than the bakery.” The pie was gone in twenty minutes. People were asking for the recipe, scraping the last bits of filling from the dish. I stood there, sheepish and a little stunned, holding the empty pie plate. That’s when I realized—this simple, budget-friendly classic pumpkin pie recipe wasn’t just a backup plan. It was the star of the show. And I’ve been making it ever since, for every family gathering, every holiday, every time I need a dessert that feeds a crowd without breaking the bank.
Why You’ll Love This Recipe
Let me tell you why this is the only pumpkin pie recipe you’ll ever need. I’ve tested it a dozen times—sometimes on purpose, sometimes because I forgot an ingredient and had to improvise. It works every single time.
- Incredibly Budget-Friendly: This whole pie costs less than ten dollars to make, and it serves eight to ten people. You probably already have most of the ingredients in your pantry or fridge.
- Quick & Easy: From start to finish, you’re looking at about an hour of active time. The oven does the rest of the work. Perfect for a busy weeknight or a last-minute holiday dessert.
- Simple Ingredients: No fancy grocery trips needed. Canned pumpkin, eggs, sugar, a few spices, and some evaporated milk. That’s it. I promise you don’t need fresh pumpkin or heavy cream for this to taste amazing.
- Crowd-Pleaser: This pie has won over picky eaters, spice skeptics, and even my uncle who “doesn’t like pumpkin.” The texture is silky, the flavor is perfectly balanced—not too sweet, not too spicy.
- Unbelievably Delicious: The secret is in the spice blend and the way the filling bakes up. It’s rich, creamy, and has that classic pumpkin pie taste that just feels like fall in every bite.
What makes this recipe different from the rest? It’s the technique. I blend the filling a little longer than most recipes call for, which gives it an ultra-smooth, almost custard-like texture. And I use a slightly lower oven temperature to prevent cracking. It’s a small tweak, but it makes a huge difference. This isn’t just another pumpkin pie—it’s the one that will make you the hero of every potluck, every Thanksgiving, every family dinner. It’s comfort food reimagined: simpler, cheaper, but with the same soul-soothing satisfaction that makes you close your eyes after the first bite.
What Ingredients You Will Need
This recipe uses simple, wholesome ingredients to deliver that classic pumpkin pie flavor without any fuss. Most of these are pantry staples, so you likely won’t need a special trip to the store.
- 1 (15-ounce) can pumpkin puree (not pumpkin pie filling—make sure it’s 100% pumpkin). I like Libby’s for its consistent texture, but store brands work just fine.
- 1 (14-ounce) can sweetened condensed milk (or evaporated milk—see note below). This adds sweetness and creaminess. If you want to save a few cents, evaporated milk works, but you’ll need to add extra sugar.
- 2 large eggs, room temperature. Room-temperature eggs blend more smoothly into the filling. If you’re in a rush, place them in a bowl of warm water for five minutes.
- 1/2 cup granulated sugar. You can reduce this to 1/3 cup if you’re using sweetened condensed milk, but I like the full amount for a classic sweetness.
- 1 teaspoon ground cinnamon. The backbone of pumpkin pie spice. Use a good-quality cinnamon like Saigon or Ceylon for a warmer flavor.
- 1/2 teaspoon ground ginger. Adds a subtle warmth. Freshly ground is best, but ground works perfectly.
- 1/4 teaspoon ground nutmeg. Freshly grated is amazing, but pre-ground is fine. Just don’t overdo it—nutmeg can be overpowering.
- 1/4 teaspoon ground cloves. A little goes a long way. If you don’t have cloves, you can skip it or add a pinch of allspice.
- 1/2 teaspoon salt. Don’t skip this—it balances the sweetness and enhances the spices.
- 1 (9-inch) unbaked pie crust. Homemade is wonderful, but a store-bought crust from the refrigerated section works beautifully and keeps this recipe budget-friendly. I’ve used Pillsbury and generic brands with equal success.
Substitution Guidance: If you want a dairy-free version, use full-fat coconut milk instead of sweetened condensed milk and add 1/3 cup of sugar. For a gluten-free option, use a gluten-free pie crust. You can also swap the granulated sugar for coconut sugar or brown sugar for a deeper flavor—just know it will darken the filling slightly.
Equipment Needed
You don’t need a lot of fancy tools for this recipe, which is part of its charm. Here’s what you’ll need:
- 9-inch pie dish. Glass or ceramic works best for even baking. I use a glass Pyrex dish because I can see the crust browning through the sides.
- Large mixing bowl. Any bowl will do, but a wide one makes it easier to whisk without splashing.
- Whisk. A sturdy whisk is your best friend here. You want to get the filling smooth without over-beating.
- Measuring cups and spoons. Accurate measurements matter in baking, even for a forgiving recipe like this one.
- Rubber spatula. For scraping every last bit of filling into the pie crust. Waste not, want not!
- Oven. Standard home oven, preheated to 425°F (220°C) for the first 15 minutes, then reduced to 350°F (175°C).
- Cooling rack. Essential for letting the pie cool evenly. If you don’t have one, you can use a wire oven rack or even a cutting board with a towel under it.
If you don’t have a whisk, a fork works in a pinch—just be prepared to work a little harder. And if you don’t have a pie dish, you can use a 9-inch round cake pan or even a cast-iron skillet. The baking time might vary slightly, so keep an eye on it.
Preparation Method
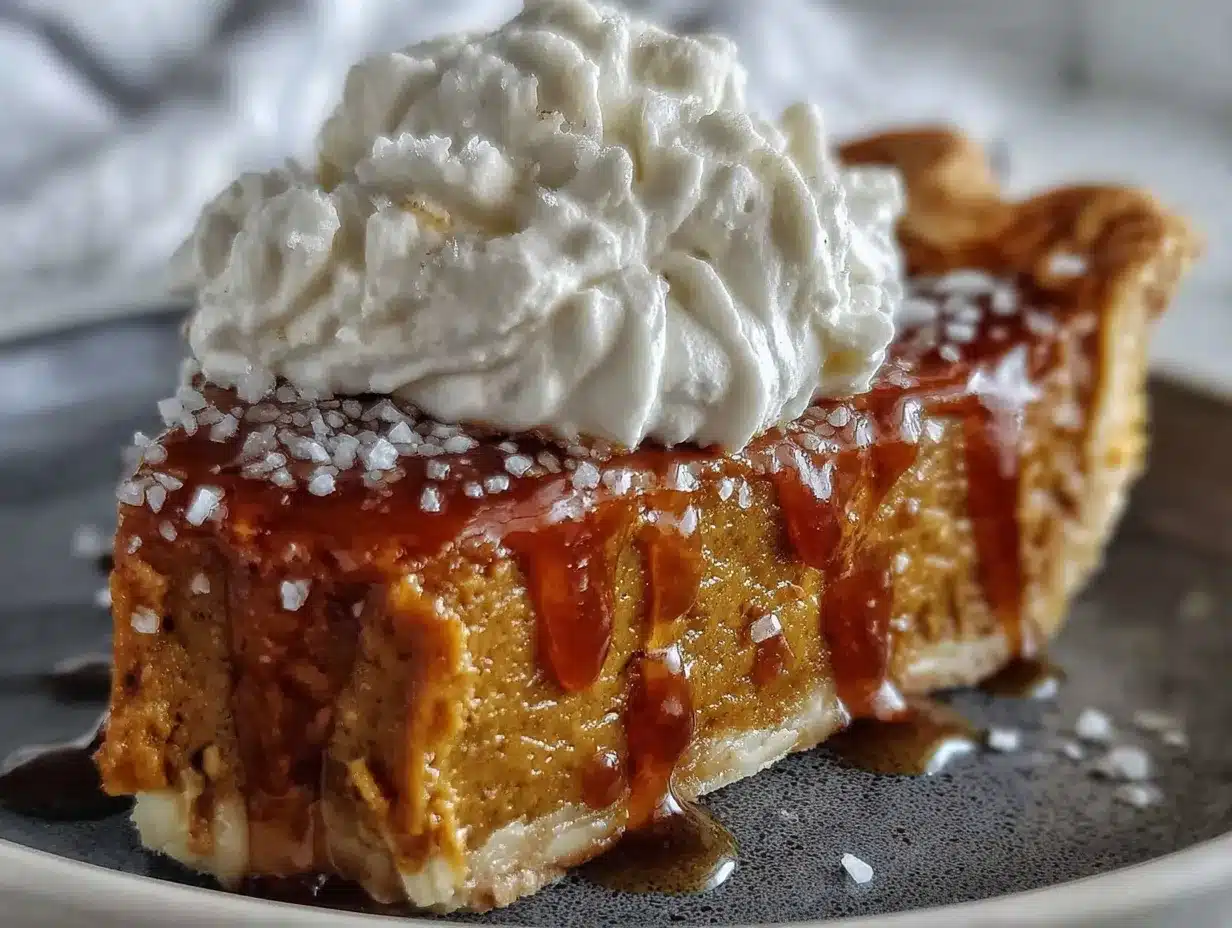
Alright, let’s get baking. This is the part where I share all the little tricks I’ve learned from making this pie more times than I can count.
- Preheat your oven to 425°F (220°C). Place your unbaked pie crust in the pie dish and set it aside. If you’re using a store-bought crust, let it sit at room temperature for about 10 minutes first—it’s easier to work with.
- In a large mixing bowl, whisk together the eggs and sugar until they’re well combined and slightly frothy. This should take about 30 seconds. Don’t over-whisk—you don’t want to incorporate too much air, which can cause cracks.
- Add the pumpkin puree, sweetened condensed milk, cinnamon, ginger, nutmeg, cloves, and salt. Whisk everything together until the mixture is completely smooth. I like to scrape the bottom of the bowl with a spatula to make sure there are no hidden lumps of pumpkin. The color should be a uniform, rich orange.
- Pour the filling into the unbaked pie crust. Use your spatula to get every last drop. The filling should come almost to the top of the crust. If it’s a little over, that’s fine—it will settle as it bakes.
- Bake at 425°F (220°C) for 15 minutes. This initial high heat helps set the crust and gives the filling a nice start. After 15 minutes, reduce the oven temperature to 350°F (175°C) and bake for another 40-50 minutes.
- Check for doneness. The pie is done when the edges are set and the center is just slightly jiggly—like Jell-O that’s been set but not quite firm. If you insert a knife near the center, it should come out mostly clean. If it’s still very liquidy, give it another 5-10 minutes.
- Cool completely on a wire rack. This is crucial. The pie will continue to set as it cools. Let it sit at room temperature for at least 2 hours, then refrigerate for at least 4 hours or overnight. I know it’s hard to wait, but cold pumpkin pie is where it’s at.
Troubleshooting Tip: If your crust is browning too quickly, cover the edges with aluminum foil or a pie shield after the first 20 minutes. If the filling cracks, don’t panic—it still tastes amazing. You can cover it with whipped cream and no one will ever know.
Cooking Tips & Techniques
I’ve made every mistake in the book with this pie, so you don’t have to. Here are the lessons I’ve learned the hard way.
- Don’t over-mix the filling. I know I said to whisk until smooth, but once it’s smooth, stop. Over-mixing incorporates too much air, which can cause the filling to puff up and then crack as it cools.
- Use room-temperature ingredients. Cold eggs and cold milk can make the filling lumpy and prevent it from baking evenly. Let everything sit out for about 20 minutes before you start.
- Blind bake your crust if you like a crisp bottom. I don’t always do this because it adds time, but if you want a super crispy crust, pre-bake it for 10 minutes at 375°F (190°C) with pie weights or dried beans. Then let it cool before adding the filling.
- Watch the oven like a hawk. Every oven runs a little differently. I once left a pie in for an extra five minutes because I got distracted, and it came out dry and cracked. Set a timer and check it at the 40-minute mark.
- Let it cool slowly. Don’t put a hot pie directly in the fridge. The sudden temperature change can cause it to crack. Let it cool on the counter first, then refrigerate.
One more thing—if you’re making this for a crowd, you can double the recipe and bake it in a 9×13-inch dish. Just increase the baking time by about 15 minutes. It’s a great way to feed a lot of people without making multiple pies.
Variations & Adaptations
This recipe is wonderfully adaptable. Here are some of my favorite twists.
- Dairy-Free Version: Replace the sweetened condensed milk with full-fat coconut milk and add 1/3 cup of sugar. The coconut flavor is subtle and pairs beautifully with the pumpkin and spices.
- Gluten-Free Version: Use a gluten-free pie crust. I’ve tried several brands, and Wholly Gluten Free is my favorite. You can also make a crustless pumpkin pie by greasing the pie dish well and baking the filling directly.
- Spice It Up: Add a pinch of cardamom or allspice for a more complex flavor. I sometimes add 1/4 teaspoon of black pepper for a subtle warmth—it sounds weird, but it works.
- Chocolate Pumpkin Pie: Melt 1/2 cup of dark chocolate chips and swirl it into the filling before baking. It adds a rich, decadent twist that’s perfect for chocolate lovers.
- No-Bake Version: If you’re short on time, you can make a no-bake pumpkin pie by combining the filling with a package of unflavored gelatin and chilling it in a pre-baked graham cracker crust. It’s not quite the same, but it’s still delicious.
I once made a maple pumpkin pie by substituting half the sugar with maple syrup. It was a little runny, so I added an extra egg, and it turned out amazing. Don’t be afraid to experiment—that’s how new favorites are born.
Serving & Storage Suggestions
This pie is best served cold, straight from the fridge. The texture is firm and silky, and the flavors are more pronounced. Here are my favorite ways to serve it.
- With Whipped Cream: A dollop of lightly sweetened whipped cream is the classic pairing. I like to add a pinch of cinnamon to the cream for extra flavor.
- With Ice Cream: Vanilla bean ice cream is a fantastic contrast to the spiced pumpkin. It’s especially good if you serve the pie slightly warm.
- Drizzled with Caramel: A simple caramel sauce takes this pie over the top. Store-bought is fine, but homemade is even better.
- Garnished with Toasted Pecans: Sprinkle toasted pecans on top for a crunchy texture. It adds a nice contrast to the smooth filling.
Storage Instructions: Store leftover pie in the refrigerator, covered with plastic wrap or in an airtight container, for up to 5 days. The flavors actually improve after a day or two. To freeze, wrap the cooled pie tightly in plastic wrap and then in foil. It will keep for up to 3 months. Thaw in the refrigerator overnight before serving.
Reheating: If you prefer warm pie, place individual slices in a 300°F (150°C) oven for 10-15 minutes. You can also microwave for 20-30 seconds, but the crust will get a little soft.
Nutritional Information & Benefits
Here’s the approximate nutritional breakdown for one slice (based on 8 servings):
- Calories: 320
- Fat: 12g
- Saturated Fat: 5g
- Carbohydrates: 48g
- Sugar: 32g
- Fiber: 3g
- Protein: 6g
- Sodium: 320mg
Pumpkin is packed with vitamin A (over 200% of your daily needs per serving), which is great for eye health and immune function. It’s also a good source of fiber, which helps with digestion. The spices—cinnamon, ginger, and nutmeg—have anti-inflammatory properties. This isn’t health food, but it’s not empty calories either. It’s a dessert that brings a little something extra to the table.
Conclusion
This classic pumpkin pie recipe has saved me more times than I can count. It’s the dessert that turned a forgotten potluck into a personal victory, the one that makes people ask for seconds even when they’re already full. It’s proof that you don’t need fancy ingredients or hours of prep to make something truly memorable. All you need is a can of pumpkin, a few pantry staples, and a willingness to try. I hope you give it a shot—and I hope it becomes a tradition in your home, just like it has in mine.
If you make this pie, I’d love to hear about it. Leave a comment below and tell me how it turned out, or share your own twist on the recipe. And if you’re looking for more budget-friendly desserts for a crowd, check out my easy apple crisp recipe or my no-bake chocolate cookies. Happy baking!
Frequently Asked Questions
Can I use fresh pumpkin instead of canned?
Yes, you can! Just make sure to roast or steam the pumpkin until tender, then puree it until smooth. You’ll need about 2 cups of puree for this recipe. Fresh pumpkin has a higher water content, so you may need to cook the filling a little longer to set properly.
Why did my pumpkin pie crack?
Cracking usually happens when the pie is over-baked or cooled too quickly. To prevent it, check the pie at the 40-minute mark and remove it from the oven when the center is still slightly jiggly. Let it cool slowly on a wire rack before refrigerating.
Can I make this pie ahead of time?
Absolutely! In fact, I recommend it. The pie needs at least 4 hours to set in the fridge, but it’s even better after 24 hours. You can make it up to two days in advance. Just keep it covered in the refrigerator.
How do I store leftover pumpkin pie?
Cover the pie with plastic wrap or foil and store it in the refrigerator for up to 5 days. You can also freeze it for up to 3 months. Just wrap it tightly in plastic wrap and then in foil. Thaw in the fridge overnight before serving.
Can I use a different type of milk?
Yes. Evaporated milk is the traditional choice, but you can use half-and-half, whole milk, or even oat milk. If you use a thinner milk, the filling may be a little less creamy, but it will still taste great. Just reduce the sugar slightly if you’re using sweetened condensed milk.
Pin This Recipe!
Classic Pumpkin Pie Recipe: Best Easy Budget Dessert for a Crowd

This classic pumpkin pie is incredibly budget-friendly, quick and easy to make with simple ingredients, and a guaranteed crowd-pleaser. It features a silky, perfectly spiced filling and a flaky crust, making it the star of any potluck or holiday gathering.
- Prep Time: 15 minutes
- Cook Time: 55 minutes
- Total Time: 1 hour 10 minutes (plus cooling and chilling time)
- Yield: 8 servings 1x
- Category: Dessert
- Cuisine: American
Ingredients
- 1 (15-ounce) can pumpkin puree (not pumpkin pie filling)
- 1 (14-ounce) can sweetened condensed milk (or evaporated milk, see notes)
- 2 large eggs, room temperature
- 1/2 cup granulated sugar
- 1 teaspoon ground cinnamon
- 1/2 teaspoon ground ginger
- 1/4 teaspoon ground nutmeg
- 1/4 teaspoon ground cloves
- 1/2 teaspoon salt
- 1 (9-inch) unbaked pie crust
Instructions
- Preheat your oven to 425°F (220°C). Place your unbaked pie crust in the pie dish and set it aside. If using a store-bought crust, let it sit at room temperature for about 10 minutes first.
- In a large mixing bowl, whisk together the eggs and sugar until well combined and slightly frothy, about 30 seconds. Do not over-whisk.
- Add the pumpkin puree, sweetened condensed milk, cinnamon, ginger, nutmeg, cloves, and salt. Whisk until the mixture is completely smooth and uniform in color.
- Pour the filling into the unbaked pie crust, using a spatula to get every last drop. The filling should come almost to the top of the crust.
- Bake at 425°F (220°C) for 15 minutes. Then reduce the oven temperature to 350°F (175°C) and bake for another 40-50 minutes.
- Check for doneness: the pie is done when the edges are set and the center is just slightly jiggly. A knife inserted near the center should come out mostly clean.
- Cool completely on a wire rack for at least 2 hours, then refrigerate for at least 4 hours or overnight before serving.
Notes
For a dairy-free version, use full-fat coconut milk instead of sweetened condensed milk and add 1/3 cup sugar. For gluten-free, use a gluten-free pie crust. To prevent cracking, do not over-mix the filling and let the pie cool slowly. If the crust browns too quickly, cover edges with foil after 20 minutes.
Nutrition
- Serving Size: 1 slice
- Calories: 320
- Sugar: 32
- Sodium: 320
- Fat: 12
- Saturated Fat: 5
- Carbohydrates: 48
- Fiber: 3
- Protein: 6
Keywords: pumpkin pie, classic pumpkin pie, easy pumpkin pie, budget dessert, crowd-pleaser, Thanksgiving dessert, fall dessert


