It was 11:47 PM on a random Wednesday in October, and I had a sudden, undeniable craving for something warm, cheesy, and wrapped in carbs. I didn’t have any fancy pizza dough or time to let yeast rise, but I had a tube of refrigerated crescent rolls, a bag of mozzarella sticks, and what I can only describe as a very specific vision. The idea arrived, fully formed, like a message from my sleep-deprived brain: what if I made tiny pizzas that looked like little mummies? I mean, honestly, you know that feeling when a weird idea just feels *right*? I was standing there in my pajamas, the kitchen light the only one on in the house, and I just went for it. I forgot I was out of pizza sauce, so I used a little leftover marinara from the back of the fridge—a happy accident that actually worked better. The result was so ridiculous and so delicious that I knew I had to make it for my next get-together. This is the kind of recipe that stays with you, not because it’s fancy, but because it’s pure, unapologetic fun. And let me tell you, when I served these at my Halloween party, they vanished before the actual pizza arrived. Maybe you’ve been there—needing a snack that’s equal parts clever and comforting, something that makes people smile before they even take a bite. These Cheesy Mummy Pizza Bites are exactly that.
Why You’ll Love This Recipe
Let’s be real for a second. Hosting a gathering can be stressful. You want to impress your guests, but you also don’t want to spend the whole night in the kitchen while everyone else is having fun. These mummy pizza bites solve that problem completely. They look like you spent hours crafting them, but they come together in 20 minutes flat. As someone who has tested this recipe for three different parties now, I can tell you with confidence: they are the first thing to disappear from the table every single time.
- Quick & Easy: From fridge to table in under 20 minutes. Perfect for last-minute party planning or when you realize you forgot to prep a snack.
- Simple Ingredients: You only need four main ingredients—crescent rolls, mozzarella sticks, pizza sauce, and candy eyes. No fancy grocery trips required.
- Perfect for Halloween Parties: These are the ultimate crowd-pleaser for any spooky gathering. Kids and adults alike go crazy for the mummy design.
- Crowd-Pleaser: I’ve served these to picky eaters, cheese lovers, and even my cousin who “doesn’t do themed food.” Everyone reaches for seconds.
- Unbelievably Delicious: The combination of flaky, buttery crescent roll dough wrapped around gooey, melted mozzarella is next-level comfort food. The pizza sauce dip ties it all together.
What makes this recipe different from the rest is the technique. I learned through trial and error (and a few melted blobs) that the key is cutting the crescent roll dough into thin strips and wrapping them loosely. This gives the mummies their signature bandaged look while allowing the cheese to peek through. It’s not just another pizza snack—it’s my best version, tested and perfected for maximum cuteness and maximum flavor. This recipe is the kind that makes you close your eyes after the first bite. It’s comfort food reimagined—faster, funnier, and perfect for impressing your guests without any stress.
What Ingredients You Will Need
This recipe uses simple, store-bought ingredients to deliver big flavor and even bigger smiles. You likely have most of these in your kitchen already, which is the beauty of it. Let’s break down what you need and why each ingredient matters.
- 1 can (8 oz) refrigerated crescent roll dough: This is your mummy wrapping. I prefer the Pillsbury brand for its consistent flakiness, but any brand works. The key is to get the sheets version if you can find it—it saves you from having to press the perforations together. If you only have the perforated kind, just pinch the seams firmly.
- 6 mozzarella string cheese sticks: These are the mummy bodies. Each stick gets cut in half to make 12 bites. I recommend using full-fat mozzarella sticks for the best melt and stretch. The low-fat versions don’t get as gooey, and honestly, for a party snack, go for the good stuff.
- 1/2 cup pizza sauce: This serves two purposes. First, you dip the mummies in it (essential). Second, a tiny dab helps the candy eyes stick. I like using Rao’s Homemade Marinara because it’s thick and flavorful, but any pizza sauce works. If you’re feeling fancy, you can season it with a pinch of dried oregano or red pepper flakes.
- 12 edible candy eyes: These are what bring your mummies to life. You can find them at most craft stores or online. They’re surprisingly affordable and last forever in your pantry. If you can’t find them, you can make eyes with small dots of black olive or even black sesame seeds, but the candy eyes are way more fun.
- 1 tablespoon melted butter: Brushing this over the dough before baking gives the mummies a beautiful golden-brown color. You can also use an egg wash (one egg beaten with a tablespoon of water), but butter adds more flavor and richness.
- Optional: 1/2 teaspoon garlic powder and 1/2 teaspoon dried oregano: Mix these into the melted butter for extra flavor. It’s a small step that makes a big difference. Your kitchen will smell incredible.
Substitution Guidance: If you’re gluten-sensitive, look for gluten-free crescent roll dough—it’s available at most major grocery stores. For a dairy-free version, use dairy-free mozzarella shreds (though they won’t hold the stick shape as well) and a dairy-free butter alternative. The flavor will be slightly different, but the fun factor remains the same. For a vegetarian option, these are already vegetarian-friendly. Just double-check your candy eyes—some brands use gelatin.
Equipment Needed
You don’t need a professional kitchen to pull these off. Here’s what you’ll need:
- Baking sheet: A standard half-sheet pan works perfectly. Line it with parchment paper for easy cleanup—trust me, the melted cheese can get sticky.
- Sharp knife or pizza cutter: You’ll use this to cut the crescent roll dough into strips. A pizza cutter makes the job faster and cleaner, but a sharp knife works just fine.
- Pastry brush: For brushing the melted butter over the dough. If you don’t have one, you can use a paper towel or even your fingers (just wash your hands first).
- Small bowl: For the melted butter mixture.
- Cutting board: A clean surface for cutting the dough and cheese sticks.
- Oven: Preheated to 375°F (190°C). A toaster oven also works if you’re making a smaller batch.
I’ve made these in a friend’s kitchen that had exactly none of these tools (we used a butter knife and a cereal bowl), and they still turned out great. Don’t stress about having the perfect equipment. The recipe is forgiving.
Preparation Method
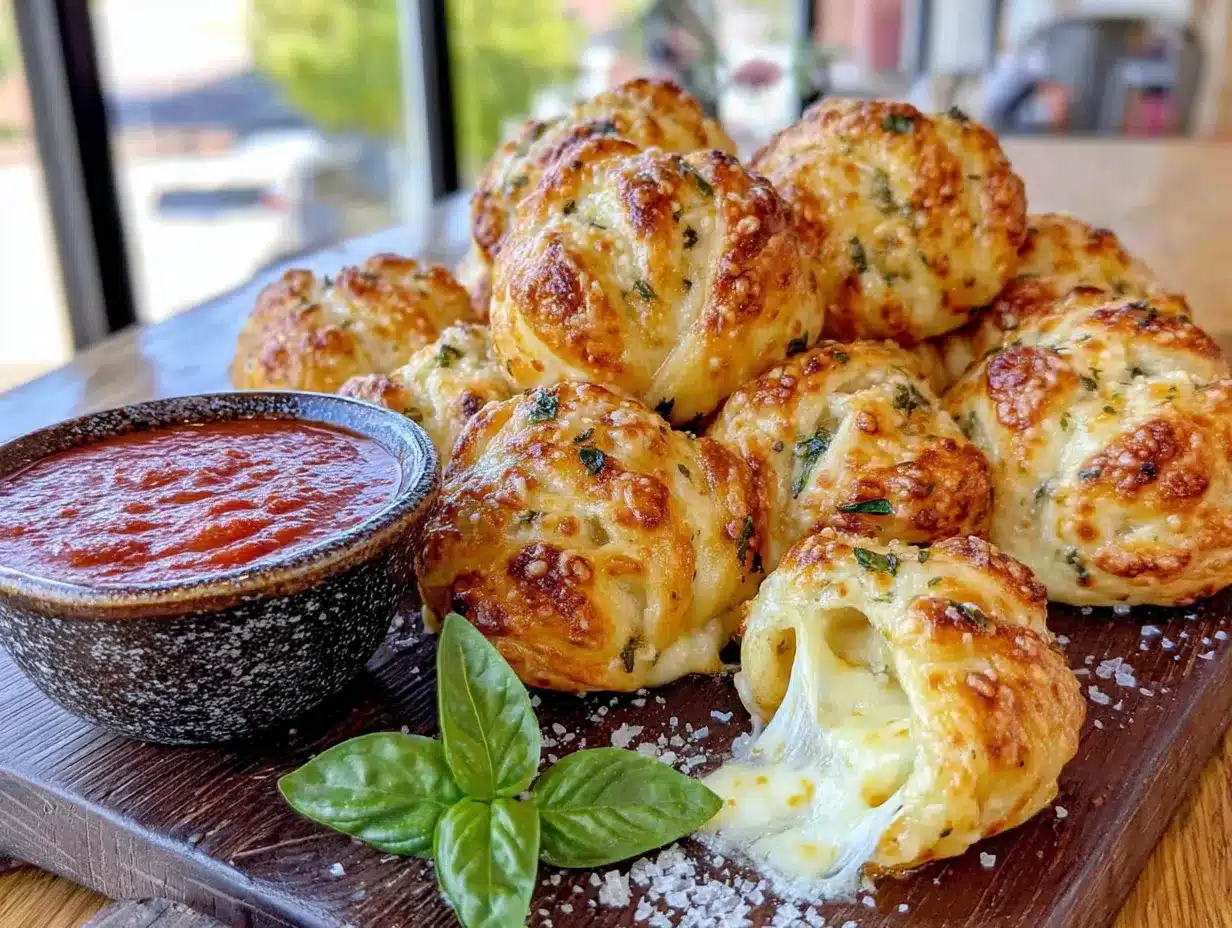
Alright, let’s get to the fun part. This is where the magic happens. Follow these steps carefully, and you’ll have a platter of adorable, delicious mummy pizza bites in no time.
- Preheat your oven to 375°F (190°C). Line a baking sheet with parchment paper. This is non-negotiable for easy cleanup—the cheese will try to escape, and parchment paper is your best defense.
- Prepare the mozzarella sticks. Unwrap 6 mozzarella string cheese sticks. Cut each one in half crosswise, so you have 12 equal pieces. Set them aside. If they feel too soft, pop them in the freezer for 5 minutes—they’ll be easier to work with.
- Prepare the crescent roll dough. Unroll the crescent roll dough onto a clean cutting board. If you’re using the perforated sheets, press the seams together firmly. Using a sharp knife or pizza cutter, cut the dough into 12 strips, each about 1/2 inch wide. Don’t worry if they’re not perfectly uniform—it adds to the mummy charm.
- Wrap the mummies. Take one piece of mozzarella and start wrapping a strip of dough around it, starting at one end and working your way to the other. Leave a small gap in the middle where the eyes will go. Don’t wrap too tightly—the dough will expand as it bakes, and you want the cheese to be able to peek through. Repeat with the remaining cheese and dough strips.
- Place on baking sheet. Arrange the wrapped mummies on the prepared baking sheet, leaving about 2 inches between each one. They will puff up a bit, so give them room to breathe.
- Brush with butter. In a small bowl, mix the melted butter with garlic powder and oregano (if using). Brush this mixture generously over each mummy. This is what gives them that gorgeous golden color and extra flavor.
- Bake. Place the baking sheet in the preheated oven and bake for 10-12 minutes, or until the dough is golden brown and the cheese is melted and bubbly. Keep an eye on them—ovens vary, and you don’t want the cheese to completely burst out.
- Add the eyes. Remove the baking sheet from the oven. While the mummies are still warm, use a tiny dab of pizza sauce to “glue” two candy eyes onto each mummy in the gap you left earlier. Press gently so they stick.
- Serve immediately. Transfer the mummies to a serving platter with a bowl of warm pizza sauce for dipping. These are best enjoyed hot, while the cheese is still stretchy.
Sensory cues: At step 7, your kitchen should smell like buttery, garlicky pizza heaven. The dough will be puffed and golden, and you’ll see little bubbles of melted cheese trying to escape. That’s exactly what you want.
Troubleshooting tip: If your dough tears while wrapping, don’t panic. Just press it back together—the heat will seal it during baking. If the cheese starts leaking too much, your dough was wrapped too tightly. It still tastes great, just a little less mummy-like.
Cooking Tips & Techniques
After making these about a dozen times (for parties, for my kids, for myself at 11 PM), I’ve picked up a few tricks that make a real difference. Let me share them so you don’t have to learn the hard way.
Don’t overwork the dough. Crescent roll dough is delicate. The more you handle it, the tougher it gets. When you’re cutting the strips, use a light touch. When you’re wrapping, be gentle. Think of it like bandaging a tiny, delicious patient.
Leave that gap for the eyes. I learned this one the hard way. The first time I made these, I wrapped the dough completely around the cheese, leaving no space. When I added the eyes on top, they looked like mummies with weird forehead growths. Leaving a small gap in the center gives the eyes a natural place to sit and makes the mummy face instantly recognizable.
Chill the cheese if needed. If your kitchen is warm or your mozzarella sticks feel soft, pop them in the freezer for 5-10 minutes before wrapping. Cold cheese holds its shape better and melts more slowly, giving the dough time to bake through without the cheese completely escaping.
Watch the bake time. The difference between perfect mummies and cheese explosions is about 2 minutes. Start checking at the 10-minute mark. You want the dough golden brown and the cheese just starting to bubble. If you see a full-on cheese volcano, pull them out immediately.
Multitask strategically. While the mummies are baking, warm your pizza sauce in a small saucepan or microwave. You can also set up your serving platter and get the candy eyes ready. This way, everything comes together the moment they come out of the oven.
I once forgot to add the garlic powder to the butter and only realized after the first batch was baked. Honestly, they were still delicious—just a little less aromatic. The lesson? Don’t sweat the small stuff. Even imperfect mummies are still cheesy, buttery, and wonderful.
Variations & Adaptations
One of the best things about this recipe is how easy it is to customize. Here are some variations I’ve tried and loved:
- Spicy Mummies: Add 1/4 teaspoon of red pepper flakes to the melted butter mixture. You can also stuff a small slice of jalapeño inside the cheese before wrapping. It adds a nice kick that cuts through the richness.
- Pepperoni Mummies: Before wrapping the dough around the cheese, place a small piece of pepperoni flat against the cheese stick. Wrap the dough around both. You get little pockets of crispy pepperoni throughout—so good.
- Vegetarian Mummy Bites: Swap the mozzarella stick for a piece of firm tofu (pressed and cut to size) or a roasted red pepper strip. The flavor profile changes, but they’re still fun and delicious.
- Air Fryer Method: If you have an air fryer, these cook beautifully in it. Preheat to 350°F (175°C) and cook for 6-8 minutes, checking halfway through. They come out extra crispy on the outside and perfectly gooey on the inside.
- Gluten-Free Version: Use gluten-free crescent roll dough. The texture is slightly different—a bit more crumbly—but the taste is still fantastic. Handle the dough gently to prevent tearing.
- Dipping Sauce Variations: Beyond pizza sauce, try ranch dressing, garlic butter, or even a spicy sriracha mayo. My personal favorite is a simple garlic aioli—mix 1/4 cup mayo with 1 clove minced garlic and a squeeze of lemon juice.
I once tried a variation with cheddar cheese sticks instead of mozzarella. It worked, but the cheddar didn’t stretch the same way. The flavor was sharper, which some people preferred. It’s worth experimenting if you’re feeling adventurous.
Serving & Storage Suggestions
These mummy pizza bites are best served hot, right out of the oven, when the cheese is at its stretchiest and the dough is still flaky. Arrange them on a large platter with a bowl of warm pizza sauce in the center. The contrast of the golden mummies against a dark platter looks especially striking for Halloween parties.
What to serve alongside: These pair beautifully with a simple green salad dressed with vinaigrette (the acidity cuts through the richness). For a full party spread, add a bowl of popcorn tossed with garlic powder and parmesan, or a platter of raw veggies with ranch dip. If you’re hosting a Halloween gathering, serve them alongside a batch of spooky spider deviled eggs for a themed appetizer spread that will wow your guests.
Storage instructions: If you have leftovers (unlikely, but possible), store them in an airtight container in the refrigerator for up to 3 days. The dough will soften, but the flavor remains. To reheat, place them on a baking sheet in a 350°F (175°C) oven for 5-7 minutes, or until warmed through. The microwave works in a pinch, but the dough will be softer and less crispy. I don’t recommend freezing these—the texture of the dough changes too much upon thawing.
Flavor development: Honestly, these are best fresh. The magic is in that first bite of warm, gooey cheese wrapped in flaky dough. That said, cold leftovers make a surprisingly good snack the next day. Don’t judge me—I’ve eaten them straight from the fridge at 2 AM.
Nutritional Information & Benefits
Let’s be honest: these are a treat, not a health food. But here’s the estimated nutritional breakdown for one mummy pizza bite (based on 12 servings):
| Nutrient | Amount per Serving |
|---|---|
| Calories | 145 |
| Total Fat | 9g |
| Saturated Fat | 5g |
| Cholesterol | 20mg |
| Sodium | 380mg |
| Total Carbohydrates | 11g |
| Dietary Fiber | 0g |
| Sugars | 2g |
| Protein | 7g |
Health benefits: Mozzarella cheese is a good source of calcium and protein, which support bone health and muscle function. The pizza sauce provides a small amount of lycopene, an antioxidant linked to heart health. The crescent roll dough offers quick energy from carbohydrates—perfect for fueling a party or a late-night snack session.
Dietary considerations: This recipe contains gluten, dairy, and eggs (if using an egg wash). It is not suitable for vegans or those with celiac disease without modifications. For a lighter option, you can use low-fat mozzarella sticks, but the texture won’t be as rich.
My personal perspective? Everything in moderation. These mummy bites are about joy and celebration, not daily nutrition. They’re the kind of food that brings people together, makes them laugh, and creates memories. That has its own kind of value.
Conclusion
These Cheesy Mummy Pizza Bites are more than just a Halloween snack—they’re a conversation starter, a crowd-pleaser, and proof that you don’t need hours in the kitchen to create something memorable. With just 20 minutes and a handful of simple ingredients, you can serve up something that looks impressive, tastes incredible, and makes everyone at your party smile.
I encourage you to make these your own. Try different fillings, experiment with the dipping sauces, or get creative with the face designs. Maybe add little dough arms or a tiny hat—the possibilities are endless. That’s the beauty of a simple recipe: it leaves room for your imagination to run wild.
Honestly, this recipe has become a staple in my hosting rotation. Every time I make them, someone asks for the recipe, and I love watching their face light up when I tell them how easy it is. I hope they bring the same joy to your kitchen. If you try them, I’d love to hear about it—drop a comment below and let me know how your mummies turned out. Did you add any fun twists? Did the kids help wrap them? Share your stories, and don’t forget to tag me in your photos. Happy haunting, and happy eating!
Frequently Asked Questions
Can I make these ahead of time for a party?
Yes! You can assemble the mummies up to 24 hours in advance. Keep them covered in the refrigerator on the baking sheet. Bake them just before serving for the best texture. If you’re really short on time, you can bake them a few hours ahead and reheat in a 350°F oven for 5 minutes.
Can I use homemade pizza dough instead of crescent rolls?
Absolutely. Roll out your homemade dough to about 1/4-inch thickness and cut it into strips. The bake time may increase slightly (12-15 minutes), and the texture will be more bread-like. It’s a great option if you have leftover dough on hand.
What if I can’t find edible candy eyes?
No problem! You can use small dots of black olive, sliced black beans, or even draw eyes on with a little black food coloring gel. Another fun option is to use small rounds of black construction paper (just remind guests to remove them before eating).
Can I make these in a microwave?
Technically yes, but I don’t recommend it. The dough will be soft and chewy rather than flaky and golden. If you’re in a true emergency situation, microwave on high for 30-45 seconds, but the texture won’t compare to oven-baked.
Are these suitable for kids to help make?
Absolutely! This is a fantastic recipe for kids. They can help wrap the dough around the cheese sticks, brush on the butter, and place the candy eyes. It’s a fun Halloween activity that doubles as a snack. Just be careful with the hot baking sheet when it comes out of the oven.
Pin This Recipe!
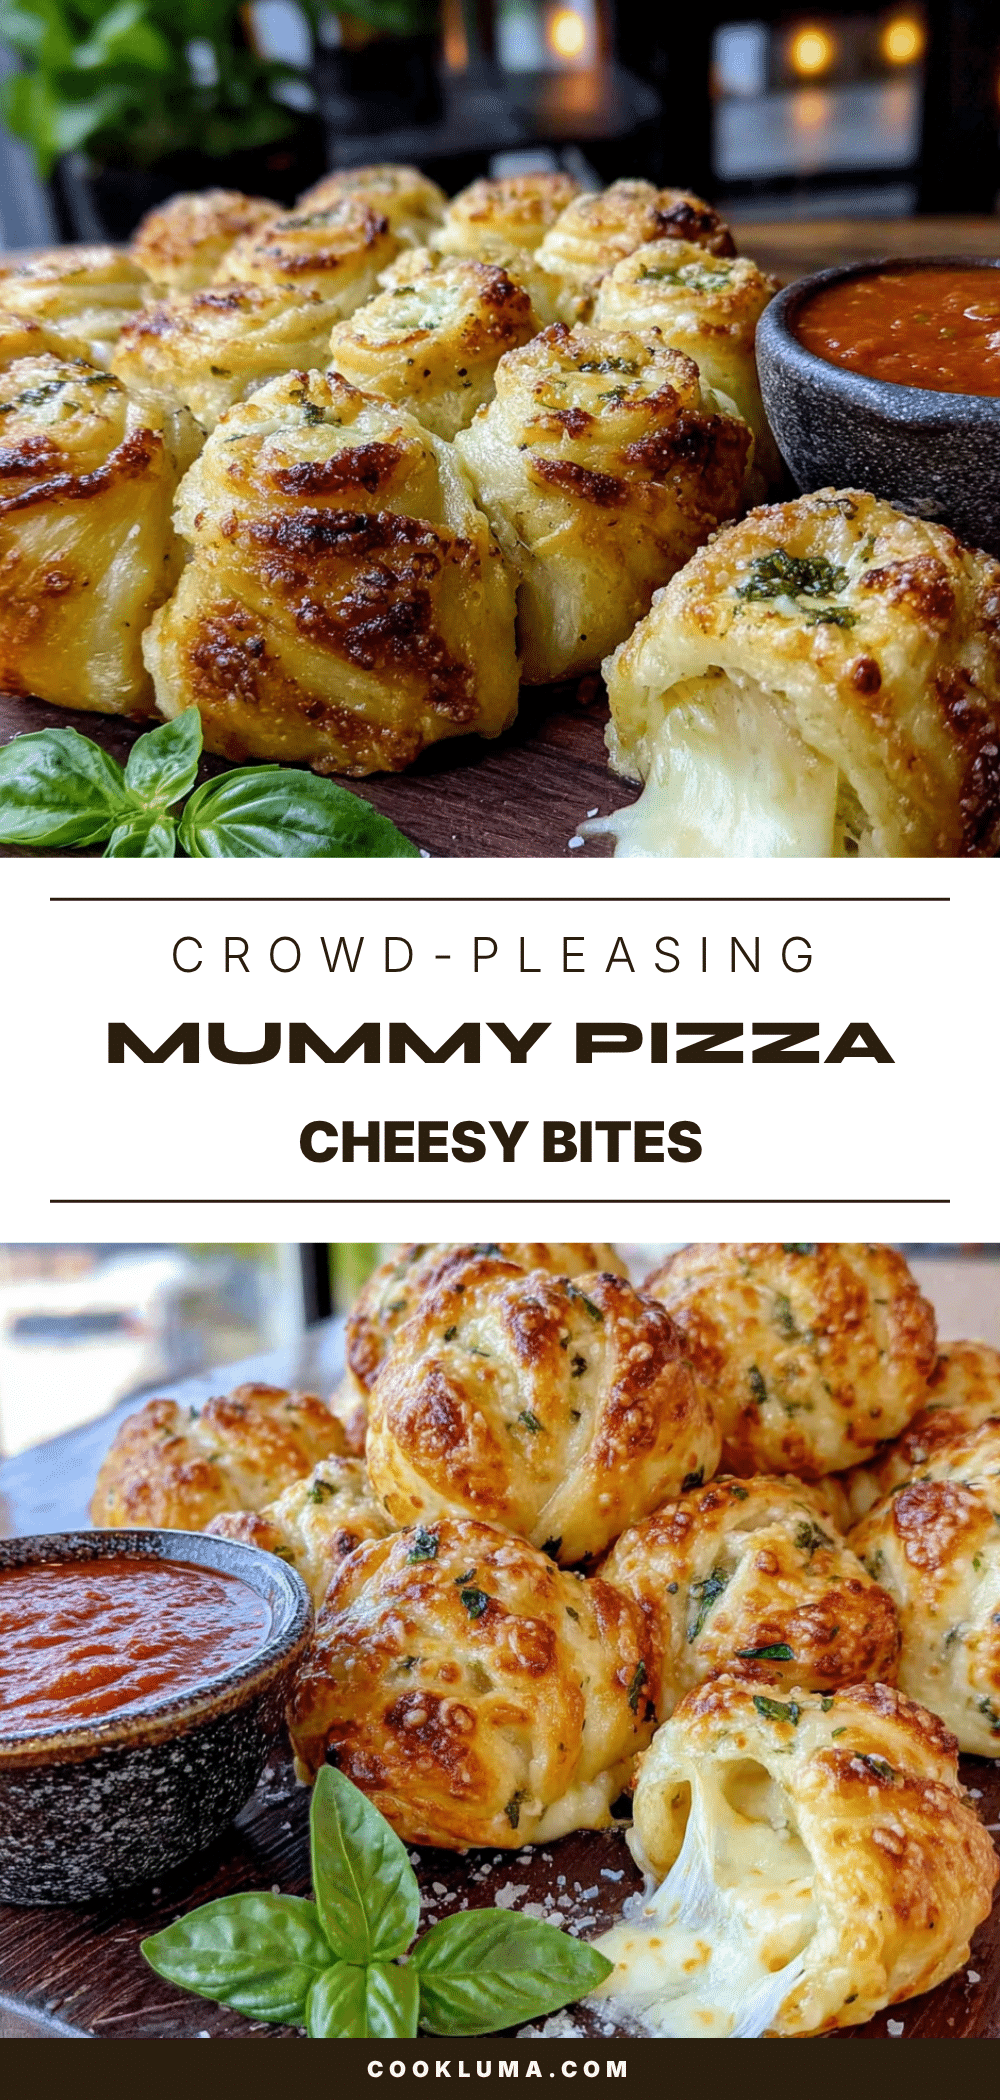
Best Cheesy Mummy Pizza Bites: Easy 20-Min Recipe
These Cheesy Mummy Pizza Bites are a quick, fun, and delicious Halloween snack made with crescent roll dough, mozzarella sticks, and candy eyes. Ready in just 20 minutes, they’re perfect for parties and guaranteed to be a crowd-pleaser.
- Prep Time: 10 minutes
- Cook Time: 12 minutes
- Total Time: 22 minutes
- Yield: 12 servings 1x
- Category: Appetizer
- Cuisine: American
Ingredients
- 1 can (8 oz) refrigerated crescent roll dough
- 6 mozzarella string cheese sticks
- 1/2 cup pizza sauce
- 12 edible candy eyes
- 1 tablespoon melted butter
- 1/2 teaspoon garlic powder (optional)
- 1/2 teaspoon dried oregano (optional)
Instructions
- Preheat your oven to 375°F (190°C). Line a baking sheet with parchment paper.
- Unwrap 6 mozzarella string cheese sticks. Cut each one in half crosswise to make 12 equal pieces. Set aside.
- Unroll the crescent roll dough onto a clean cutting board. If using perforated sheets, press the seams together firmly. Using a sharp knife or pizza cutter, cut the dough into 12 strips, each about 1/2 inch wide.
- Take one piece of mozzarella and start wrapping a strip of dough around it, starting at one end and working your way to the other. Leave a small gap in the middle for the eyes. Repeat with remaining cheese and dough strips.
- Arrange the wrapped mummies on the prepared baking sheet, leaving about 2 inches between each.
- In a small bowl, mix the melted butter with garlic powder and oregano (if using). Brush this mixture generously over each mummy.
- Bake for 10-12 minutes, or until the dough is golden brown and the cheese is melted and bubbly.
- Remove from the oven. While still warm, use a tiny dab of pizza sauce to ‘glue’ two candy eyes onto each mummy in the gap left earlier.
- Serve immediately with warm pizza sauce for dipping.
Notes
For best results, leave a small gap in the dough wrapping for the eyes. If the cheese sticks feel soft, freeze for 5 minutes before wrapping. Start checking at 10 minutes to avoid cheese explosions. These are best served fresh but can be reheated in a 350°F oven for 5-7 minutes.
Nutrition
- Serving Size: 1 mummy pizza bite
- Calories: 145
- Sugar: 2
- Sodium: 380
- Fat: 9
- Saturated Fat: 5
- Carbohydrates: 11
- Protein: 7
Keywords: mummy pizza bites, Halloween appetizer, cheesy pizza bites, crescent roll recipe, easy Halloween snack, party appetizer, mozzarella sticks


