My neighbor across the hall, a retired special effects artist named Leo, watched me hauling a bag of candy corn and a box of pretzel sticks up the stairs last October. He didn’t say anything at first. Then he just shook his head with this knowing smile and disappeared back into his apartment. Twenty minutes later, there was a knock on my door, and he handed me a shallow wooden crate filled with fake moss, plastic spiders, and a handwritten note that simply said, “Make it a scene, not just a snack.” That was the moment this whole graveyard board idea was born.
Honestly, I had been overthinking Halloween snacks for weeks. Everything I found online was either too complicated—like those elaborate cake pops that look like eyeballs—or just plain boring. I wanted something that felt festive but didn’t require a culinary arts degree. And let me tell you, watching Leo turn a pile of snacks into a tiny haunted cemetery with nothing but pretzel sticks and a little imagination? That changed everything. I mean, the man used a melted marshmallow as a ghost and called it a day.
This spooky graveyard snack mix charcuterie board is what happens when a party planner and a prop master accidentally collaborate. It’s the kind of thing you put out at a Halloween gathering and watch people stop mid-conversation to grab a handful. Maybe you’ve been there—staring at a Pinterest board full of intimidating recipes, wondering if you even own the right piping tips. I get it. This board is the opposite of that. It’s forgiving, it’s flexible, and it’s honestly kind of fun to build. The recipe stayed with me because it proved something I’d always suspected: the best party food doesn’t take itself too seriously.
Why You’ll Love This Recipe
Let me be straight with you—I’ve tested this board at three different parties now, and it has never failed to get the exact reaction I was hoping for. People walk in, see the little graveyard scene, and just light up. That’s the whole point, right?
- Quick & Easy: You can throw this together in under 20 minutes, which is honestly faster than most of my Halloween costume decisions.
- Simple Ingredients: No fancy grocery trips needed. You likely already have pretzels, chocolate, and some kind of creepy candy in your pantry.
- Perfect for Halloween Parties: Great for spooky movie nights, trick-or-treat gatherings, or even a Halloween potluck where you want to show off without actually cooking.
- Crowd-Pleaser: Always gets rave reviews from kids and adults alike. I’ve seen grown adults argue over the last chocolate-covered pretzel.
- Unbelievably Delicious: The salty-sweet combo with that crunchy texture is next-level comfort food. It’s like a party in a graveyard—in the best way possible.
What makes this recipe different from the rest? It’s not just a snack mix thrown in a bowl. It’s a scene. The graveyard theme turns ordinary snacks into something memorable. Plus, I’ve figured out the perfect ratio of sweet to salty so you don’t end up with a board that’s either cloying or too savory. This isn’t just another version—it’s your best version.
This recipe is the kind that makes you close your eyes after the first bite. It’s comfort food reimagined—healthier in the sense that you control what goes in, faster than baking anything, but with the same soul-soothing satisfaction. Perfect for impressing guests without stress, or turning a simple snack into something that feels like an event.
What Ingredients You Will Need
This recipe uses simple, wholesome ingredients to deliver bold flavor and satisfying texture without the fuss. Most of these are pantry staples, which is exactly what you want when you’re scrambling to get ready for a Halloween party.
For the Graveyard Base
- 3 cups pretzel sticks (I recommend Snyder’s for their sturdy crunch—they make the best tombstones)
- 2 cups mini pretzel twists (adds variety in texture and shape)
- 2 cups cheese crackers (like Goldfish or Annie’s—the orange color fits the Halloween vibe)
- 1 cup roasted and salted peanuts (or any nut you prefer)
- 1 cup candy corn (the classic Halloween candy, optional if you’re not a fan)
For the Tombstones & Decorations
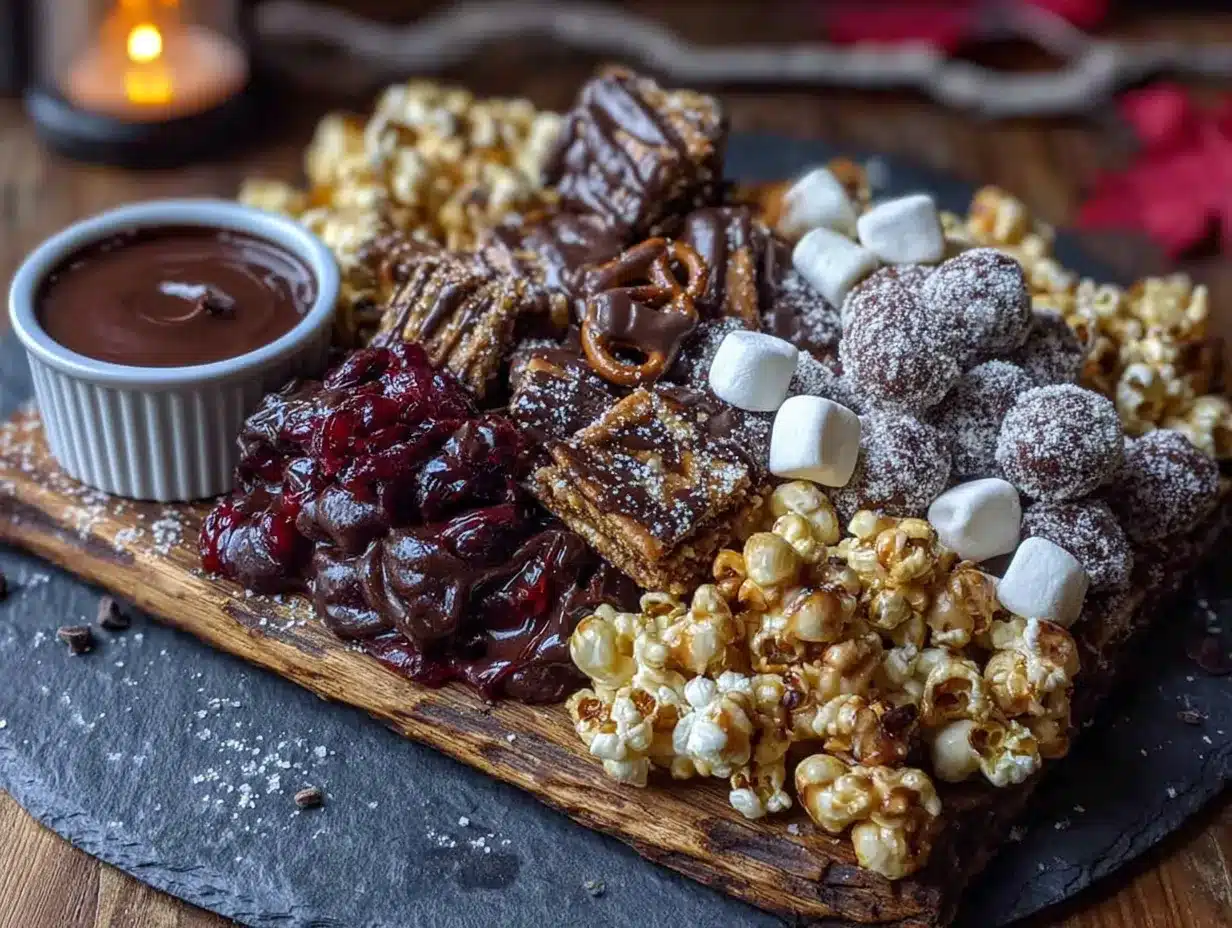
- 1 cup chocolate-covered pretzels (use these as gravestones—stand them upright in the mix)
- 1 cup chocolate-covered almonds (look like creepy rocks or small tombstones)
- 1 cup gummy worms (for that crawling-out-of-the-ground effect)
- 1 cup candy pumpkins or candy eyes (for a fun, spooky touch)
- 1 cup white chocolate melting wafers (for making ghosts—I use Ghirardelli for smooth melting)
- Black decorating gel (for writing “RIP” on the tombstones)
For the Spooky Atmosphere
- 1 cup popped popcorn (plain or lightly salted—adds volume and a light texture)
- 1 cup dried cranberries or raisins (look like little red drops of… well, you know)
- 1 cup dark chocolate chips (adds a rich, bitter contrast to the sweet candy)
- Optional: edible glitter or luster dust (for a magical graveyard effect)
Ingredient selection tip: Look for firm, unbroken pretzel sticks for the tombstones. Broken ones can still be used in the mix, but the tall ones make the best grave markers. For the white chocolate ghosts, I’ve found that Ghirardelli melting wafers give the smoothest result without seizing up. If you’re dairy-free, use Enjoy Life brand white chocolate chips instead.
Substitution guidance: Use gluten-free pretzels for a gluten-free option. Swap peanuts with almonds or cashews if needed. For a nut-free version, skip the nuts and add more popcorn or cheese crackers. The beauty of this board is that it’s endlessly adaptable.
Equipment Needed
You don’t need much for this recipe, which is part of why I love it. Here’s what you’ll want on hand:
- Large wooden cutting board or serving platter: The bigger, the better. I use a 16×20 inch board from IKEA that cost me $12. It’s perfect for this.
- Small bowls or ramekins: For holding the white chocolate ghosts, gummy worms, or any loose candy you want to keep contained.
- Parchment paper: For setting the white chocolate ghosts on while they harden.
- Microwave-safe bowl: For melting the white chocolate. A glass measuring cup works great.
- Spatula: For stirring the chocolate and shaping the ghosts.
- Toothpicks: For adding details to the ghosts or tombstones.
- Piping bag or zip-top bag: For writing on the tombstones with the black decorating gel.
If you don’t have a large board, use a baking sheet or even a clean pizza pan. I’ve used a cutting board from a thrift store before—it adds character. For the white chocolate melting, a double boiler works if you don’t have a microwave, but honestly, the microwave is faster and easier to control. Just go in 30-second intervals.
Preparation Method
Let’s build this graveyard. It’s easier than you think, and the process is honestly half the fun.
- Make the white chocolate ghosts (10 minutes + 15 minutes setting time)
Melt 1 cup of white chocolate melting wafers in a microwave-safe bowl in 30-second intervals, stirring between each, until completely smooth. Drop small spoonfuls onto a parchment-lined baking sheet. Use the back of a spoon to shape each blob into a ghost-like teardrop shape. While still wet, add two tiny chocolate chips for eyes. Let them set at room temperature for about 15 minutes, or pop them in the fridge for 5 minutes if you’re in a hurry. I’ve definitely forgotten about them and ended up with flat ghosts—still delicious, just less spooky. - Prepare the tombstones (5 minutes)
Take your chocolate-covered pretzels and use the black decorating gel to write “RIP” on each one. You can also add tiny crosses or other spooky symbols. Let the gel dry for a few minutes. If you’re feeling creative, use different colored gels for variety. I once made a tombstone that said “BRB” and it got more laughs than anything else on the board. - Assemble the snack mix base (5 minutes)
In a large bowl, combine the pretzel sticks, mini pretzel twists, cheese crackers, peanuts, candy corn, popcorn, dried cranberries, and dark chocolate chips. Toss gently to mix. Don’t overmix or you’ll break the pretzels—I learned this the hard way when I ended up with pretzel dust. - Build the graveyard scene (10 minutes)
Spread the snack mix evenly across your serving board or platter. Create a slightly raised area in the center by piling more mix there. This will be your “graveyard hill.” Arrange the chocolate-covered pretzel tombstones upright in the mix, pressing them in so they stand tall. Space them out like a real cemetery. - Add the spooky details (5 minutes)
Place the white chocolate ghosts around the graveyard. Nestle gummy worms into the mix so they look like they’re crawling out of the ground. Scatter candy pumpkins and candy eyes around for extra color. If you’re using edible glitter, lightly dust it over the top for a magical, moonlit effect. - Final touches (2 minutes)
Step back and look at your board. Adjust any tombstones that are leaning. Add more gummy worms if it needs more creepy factor. The beauty of this board is that there’s no wrong way to arrange it—it’s supposed to look a little chaotic, like a real graveyard after a storm.
Sensory cue: You should see a mix of dark chocolate, bright orange candy corn, and white ghosts against the golden pretzels. The smell is incredible—sweet chocolate mixed with salty pretzels and that distinct candy corn aroma. The texture when you grab a handful is crunchy, slightly chewy, and satisfying.
Cooking Tips & Techniques
I’ve made this board about a dozen times now, and I’ve picked up a few tricks that make a real difference.
Don’t overthink the ghosts. My first batch looked more like blobs than ghosts, and honestly, that’s fine. They still tasted good, and everyone knew what they were supposed to be. If you want them to look more ghost-like, use a toothpick to drag the chocolate slightly upward to create a tail. But if they end up looking like potatoes, just call them ghost potatoes and move on.
Keep the tombstones stable. The chocolate-covered pretzels can be top-heavy. Push them deep into the snack mix so they don’t tip over. If they still wobble, use a dab of melted chocolate at the base to glue them to the board. I learned this after my entire graveyard collapsed during a party. It was tragic, but also kind of funny.
Layer your textures. Make sure every handful has a mix of crunchy, chewy, and smooth. That means not clustering all the gummy worms in one spot. Spread them out so everyone gets a little bit of everything.
Time management. Make the ghosts and tombstones the night before. Store them in an airtight container at room temperature. Then assembly takes only 10 minutes on party day. This is a lifesaver when you’re juggling other Halloween preparations.
Common mistake to avoid: Adding the gummy worms too early. They can get sticky and melt into the mix if left out too long. Add them right before serving for the best texture. Also, don’t use stale pretzels—they’ll break when you try to stick them in the mix. Fresh pretzels are key.
Variations & Adaptations
This board is incredibly flexible, and I’ve tried several variations over the years.
Dietary variations: For a gluten-free version, use gluten-free pretzels and cheese crackers. For a vegan board, use dark chocolate that’s dairy-free, skip the white chocolate ghosts (or use vegan white chocolate), and use vegan gummy worms. For a nut-free version, replace peanuts and almonds with more popcorn, seeds, or extra pretzels.
Seasonal adaptations: Swap candy corn for seasonal candies like pumpkin-shaped Reese’s in the fall. In summer, use bright-colored gummy candies for a less spooky, more playful vibe. For Christmas, use red and green M&Ms and turn the tombstones into holiday trees.
Flavor twists: Add a spicy kick by tossing in some chili-lime peanuts or spicy popcorn. For a s’mores version, add mini marshmallows and graham cracker pieces. I tried a “haunted forest” version once with green candy melts shaped like trees and it was a hit, though it took longer to make.
Different cooking methods: This board is no-bake, but you can toast the nuts and coconut flakes beforehand for extra depth. I’ve also tried drizzling melted dark chocolate over the entire board for a more decadent version. It’s messy but worth it.
Personal variation: I once made a “zombie apocalypse” version where I added broken pretzels as “bones” and used red frosting as “blood.” It was a little over the top, but my friends still talk about it. The key is to have fun with it and not take yourself too seriously.
Serving & Storage Suggestions
Serve this board at room temperature. It’s best enjoyed within a few hours of assembly, but it can sit out for up to 4 hours without any issues. The chocolate might soften slightly if your house is warm, but that just adds to the spooky, melting effect.
Presentation tips: Place the board on a table with good lighting so people can see all the details. Add a few fake spiderwebs or plastic spiders around the board for extra atmosphere. I like to use a black tablecloth underneath to make the colors pop. Small signs like “Enter if you dare” or “Beware of snacks” add a fun touch.
Complementary dishes: Serve alongside a warm pumpkin dip or a bowl of caramel apple slices. For drinks, a spooky punch or apple cider fits the theme perfectly. If you’re doing a full Halloween spread, this board works great as a centerpiece with other finger foods around it.
Storage instructions: If you have leftovers (which is rare in my house), separate the wet and dry components. Remove the gummy worms and ghosts first. Store the snack mix in an airtight container at room temperature for up to a week. The ghosts and tombstones can be stored separately in a cool, dry place for up to two weeks. Do not refrigerate—the condensation will make the pretzels soggy.
Reheating tips: This board doesn’t need reheating, but if the chocolate has softened too much, you can pop the tombstones and ghosts in the fridge for 10 minutes before serving again. The snack mix itself is best at room temperature.
Flavor development: Interestingly, the flavors meld together slightly overnight. The pretzels absorb a tiny bit of moisture from the candy corn, making them slightly chewier. Some people prefer this, but I like the fresh crunch best.
Nutritional Information & Benefits
Per serving (about 1 cup of mix with decorations): approximately 350-400 calories, 15g fat, 50g carbohydrates, 5g protein, 3g fiber, 25g sugar. These values are estimates and will vary based on your specific ingredients and portions.
This board offers some surprising health benefits. Dark chocolate chips provide antioxidants and flavonoids that support heart health. Peanuts offer protein and healthy fats that keep you full longer. Pretzels provide quick energy, making this a great snack for active kids and adults. Dried cranberries add vitamin C and fiber.
Dietary considerations: This recipe can be made gluten-free, nut-free, and vegan with simple substitutions. It’s naturally egg-free and dairy-free if you choose the right ingredients. The main allergens to watch for are peanuts, tree nuts, dairy (in the chocolate), and gluten (in the pretzels).
My personal wellness perspective: I love that this board lets you control the portions. You can fill half your plate with the lighter popcorn and pretzels, then just grab a few of the richer chocolate pieces. It’s indulgent without being overwhelming, and the variety means you’re not eating the same thing over and over. Plus, the act of building the board is a fun activity in itself—it gets you away from the screen and into the kitchen.
Conclusion
This spooky graveyard snack mix charcuterie board is worth trying because it captures everything I love about Halloween: creativity, fun, and a little bit of mischief. It’s the kind of recipe that makes people smile before they even take a bite. And when they do take a bite? The crunch, the sweetness, the salty pretzel—it all works together perfectly.
I encourage you to customize this board based on your preferences. Swap in your favorite candies, add your own spooky decorations, or make it as healthy or indulgent as you want. There’s no wrong way to build a graveyard. That’s the beauty of it.
Personally, I love this recipe because it reminds me of that afternoon with Leo, watching him turn a simple idea into something magical. Every time I make it, I think about the power of a good neighbor and a shared laugh. And honestly, any recipe that comes with a story like that is worth keeping around.
I’d love to hear how your graveyard board turns out! Drop a comment below with your favorite Halloween candy additions, or share a photo of your creation. Don’t forget to tag a friend who needs this recipe in their life. Happy haunting, and happy snacking!
Frequently Asked Questions
Can I make this board ahead of time?
Yes! Make the ghosts and tombstones up to two days in advance. Store them in an airtight container at room temperature. Assemble the snack mix and arrange the board on the day of your party for the freshest texture.
How long does this board stay fresh?
The snack mix stays fresh for up to a week in an airtight container. Once assembled, the board is best enjoyed within 4 hours. Remove gummy worms and any moisture-sensitive items before storing leftovers.
Can I use milk chocolate instead of dark chocolate?
Absolutely! Milk chocolate chips or melting wafers work great for the ghosts and tombstones. Just be aware that milk chocolate is softer and may not hold its shape as well in warm environments. Dark chocolate is more stable, but both taste delicious.
What if I don’t have a large serving board?
No problem! Use a baking sheet, a large pizza pan, or even a clean cardboard box covered in foil. The board doesn’t have to be fancy—it’s the contents that matter. I’ve used a thrifted cutting board and it worked perfectly.
Can I add fresh fruit to this board?
Yes, but add it right before serving. Fresh fruit like apple slices or grapes can make the pretzels soggy if left too long. I recommend placing fruit in a separate small bowl on the side to keep everything crisp.
Pin This Recipe!
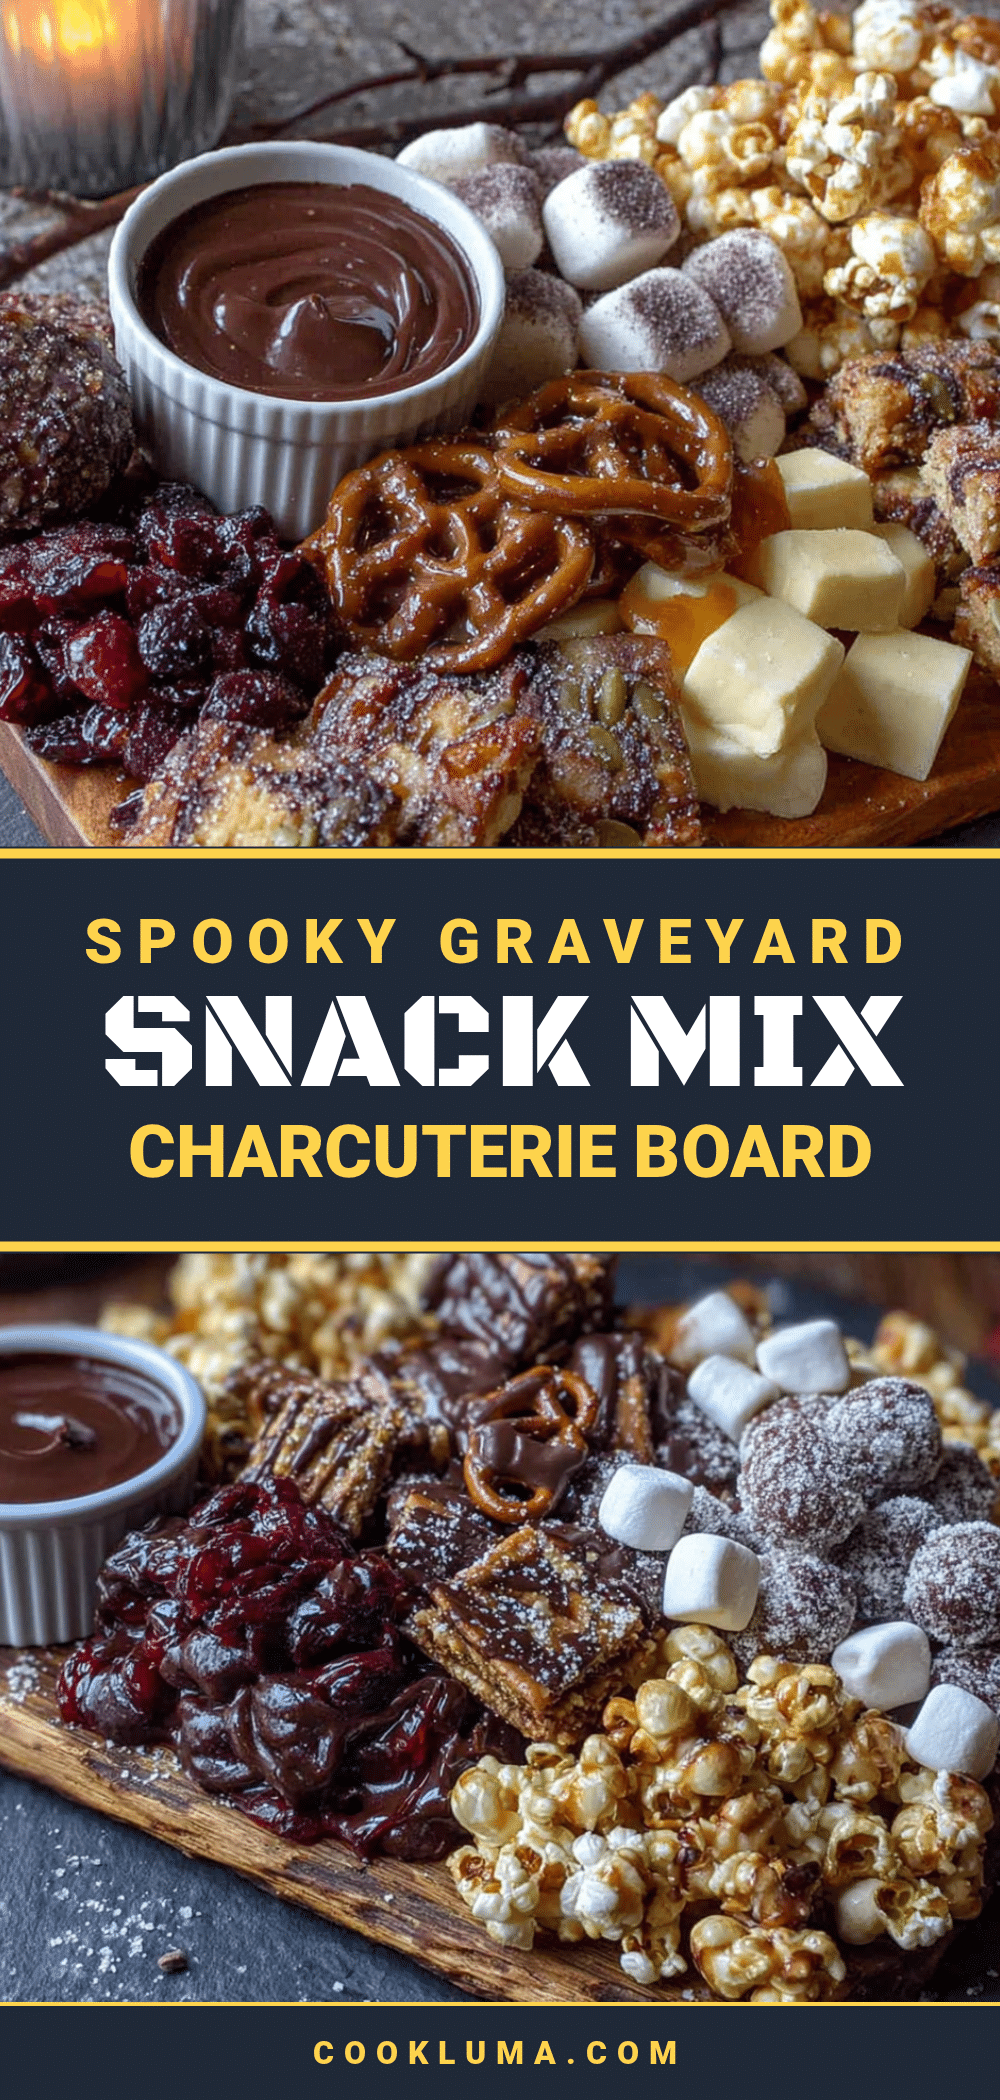
Spooky Graveyard Snack Mix Charcuterie Board: Easy Halloween Recipe
A fun and easy Halloween snack board that turns ordinary snacks into a spooky graveyard scene. Perfect for parties, it combines salty pretzels, sweet candy, and chocolate tombstones for a crowd-pleasing treat.
- Prep Time: 20 minutes
- Cook Time: 0 minutes
- Total Time: 20 minutes (plus 15 minutes setting time for ghosts)
- Yield: 12 servings 1x
- Category: Appetizer
- Cuisine: American
Ingredients
- 3 cups pretzel sticks
- 2 cups mini pretzel twists
- 2 cups cheese crackers (like Goldfish or Annie’s)
- 1 cup roasted and salted peanuts
- 1 cup candy corn
- 1 cup chocolate-covered pretzels
- 1 cup chocolate-covered almonds
- 1 cup gummy worms
- 1 cup candy pumpkins or candy eyes
- 1 cup white chocolate melting wafers
- Black decorating gel
- 1 cup popped popcorn (plain or lightly salted)
- 1 cup dried cranberries or raisins
- 1 cup dark chocolate chips
- Optional: edible glitter or luster dust
Instructions
- Make the white chocolate ghosts: Melt 1 cup of white chocolate melting wafers in a microwave-safe bowl in 30-second intervals, stirring between each, until completely smooth. Drop small spoonfuls onto a parchment-lined baking sheet. Use the back of a spoon to shape each blob into a ghost-like teardrop shape. While still wet, add two tiny chocolate chips for eyes. Let them set at room temperature for about 15 minutes, or pop them in the fridge for 5 minutes if you’re in a hurry.
- Prepare the tombstones: Take your chocolate-covered pretzels and use the black decorating gel to write ‘RIP’ on each one. You can also add tiny crosses or other spooky symbols. Let the gel dry for a few minutes.
- Assemble the snack mix base: In a large bowl, combine the pretzel sticks, mini pretzel twists, cheese crackers, peanuts, candy corn, popcorn, dried cranberries, and dark chocolate chips. Toss gently to mix.
- Build the graveyard scene: Spread the snack mix evenly across your serving board or platter. Create a slightly raised area in the center by piling more mix there. Arrange the chocolate-covered pretzel tombstones upright in the mix, pressing them in so they stand tall. Space them out like a real cemetery.
- Add the spooky details: Place the white chocolate ghosts around the graveyard. Nestle gummy worms into the mix so they look like they’re crawling out of the ground. Scatter candy pumpkins and candy eyes around for extra color. If you’re using edible glitter, lightly dust it over the top for a magical, moonlit effect.
- Final touches: Step back and look at your board. Adjust any tombstones that are leaning. Add more gummy worms if it needs more creepy factor.
Notes
Make the ghosts and tombstones the night before to save time. Store them in an airtight container at room temperature. Add gummy worms right before serving to prevent them from getting sticky. Use fresh pretzels for best texture. The board is best enjoyed within 4 hours of assembly.
Nutrition
- Serving Size: 1 cup
- Calories: 375
- Sugar: 25
- Sodium: 400
- Fat: 15
- Saturated Fat: 5
- Carbohydrates: 50
- Fiber: 3
- Protein: 5
Keywords: Halloween snack mix, graveyard charcuterie board, spooky snack board, easy Halloween recipe, no-bake Halloween snack


