The school Halloween party was in less than twelve hours and I’d completely forgotten. My daughter had reminded me exactly three times that week, and somehow, between work deadlines and a teething toddler, it had slipped right out of my brain. At 9 PM, I was staring into a pantry that contained butter, chocolate chips, and a bag of powdered sugar I’d bought for a recipe I never made. Everyone else would be bringing elaborate cupcakes with fondant bats or those perfect store-bought cookie platters. I had a baking sheet and a prayer. Honestly, I almost just grabbed a pack of Oreos from the gas station. But then I remembered these spider web cookie bars I’d seen somewhere—a simple twist on a classic chocolate chip bar. I had thirty minutes and a very forgiving oven. Let me tell you, when I walked into that classroom the next day with a pan of these, the moms who spent hours on their treats were giving me the side-eye. The kids, though? They devoured every last crumb. The spider web design looked way more impressive than the effort it took, and that’s my favorite kind of recipe. Maybe you’ve been there—that moment when you need a win without the work. These bars are that win.
Why You’ll Love This Recipe
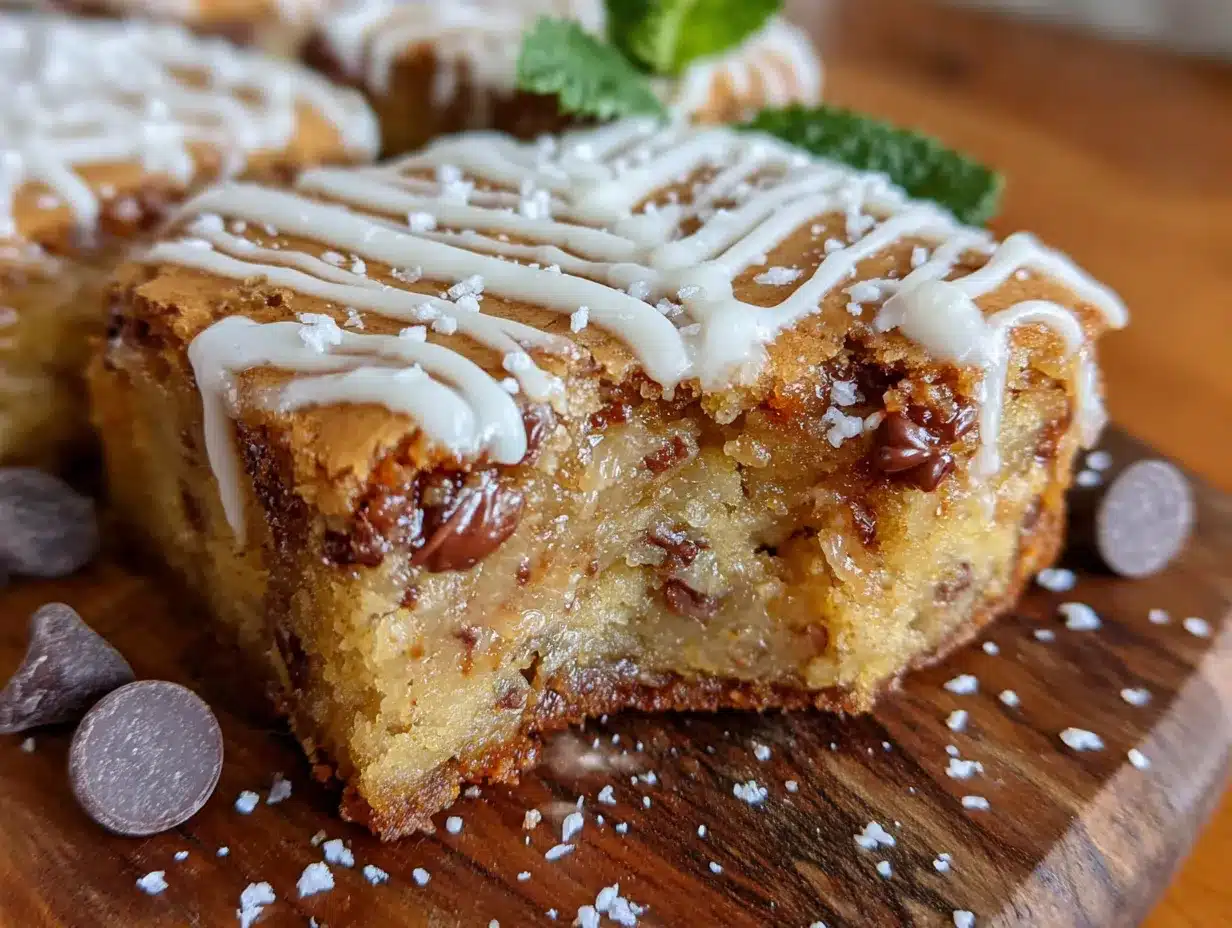
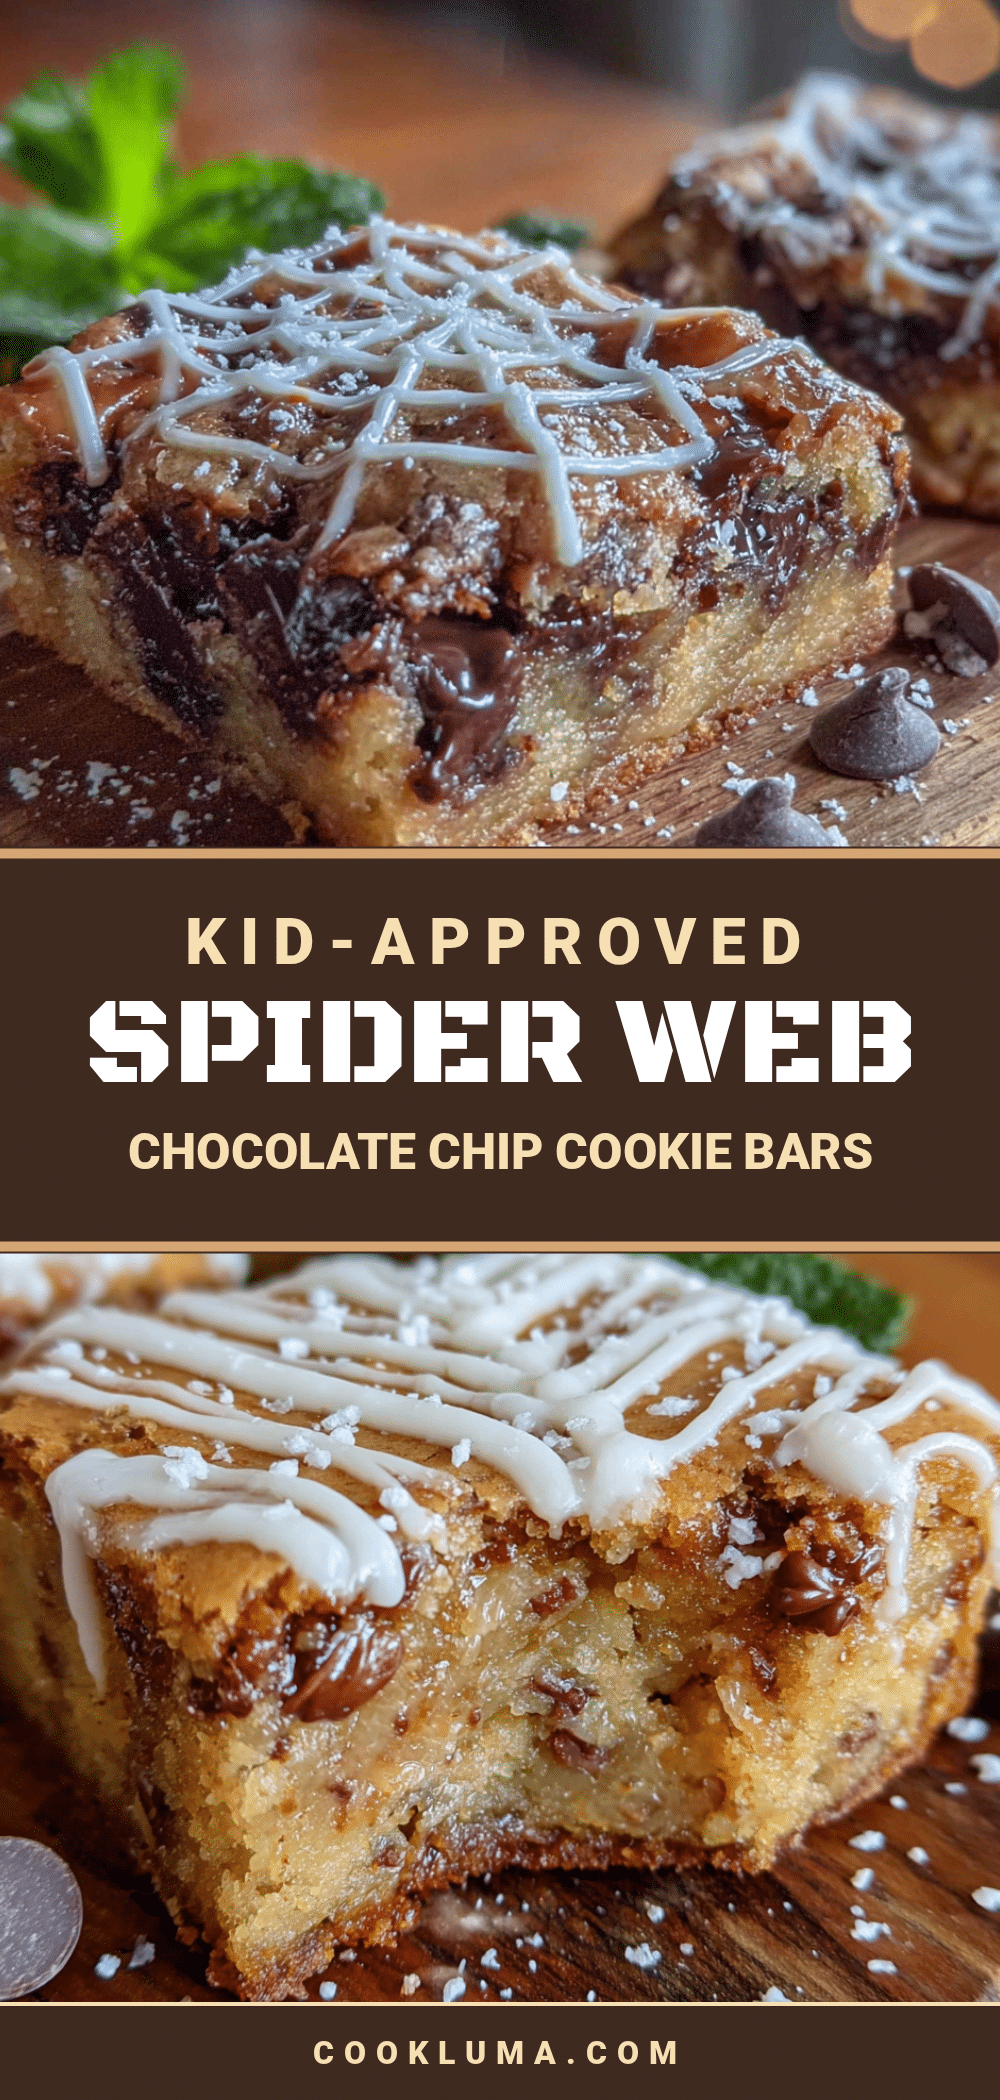
Let’s be real for a second. Parenting is exhausting, and the last thing you need is a complicated recipe that requires a pastry bag and a degree in food art. These spider web chocolate chip cookie bars are the opposite of that. They start with a simple, one-bowl cookie bar base that you press into a pan. The magic happens with a quick chocolate glaze and a toothpick. That’s it. No piping, no special tools, no stress.
- Quick & Easy: From start to finish, you’re looking at about 40 minutes. Most of that is hands-off baking time.
- Simple Ingredients: You probably have everything in your kitchen right now. Butter, sugar, eggs, flour, chocolate chips—the usual suspects.
- Perfect for Halloween Parties: This is the recipe that makes you look like a Pinterest superstar without the Pinterest-level effort.
- Crowd-Pleaser: It’s a chocolate chip cookie in bar form. Kids and adults fight over the corners. I’m not joking.
- Unbelievably Delicious: The base is soft and chewy, the chocolate glaze adds a fudgy layer, and the spider web design makes it feel special.
What makes this recipe different from every other Halloween treat out there? It’s the texture. The bars stay soft for days, which is a big deal when you’re making them ahead for a party. I tested this recipe four times to get that perfect balance—firm enough to hold the glaze but soft enough to melt in your mouth. It’s comfort food with a spooky twist, and it costs about the same as a box of brownie mix. Your wallet will thank you.
What Ingredients You Will Need
This recipe relies on basic pantry staples to create something that looks way fancier than it is. The ingredients are simple, but each one plays a specific role in getting that perfect texture and flavor.
For the Cookie Bar Base
- 1 cup (2 sticks) unsalted butter, softened (I always use Land O’Lakes—it has a consistent fat content that gives the best texture)
- 1 cup packed light brown sugar (adds moisture and that deep, caramel-like sweetness)
- 1/2 cup granulated sugar (helps the bars spread and crisp up on the edges)
- 2 large eggs, room temperature (cold eggs will seize the butter mixture, so let them sit out for 15 minutes)
- 2 teaspoons vanilla extract (pure, not imitation—it makes a real difference here)
- 2 1/4 cups all-purpose flour (spoon and level it—don’t scoop directly from the bag)
- 1 teaspoon baking soda
- 1/2 teaspoon salt (I use fine sea salt; it dissolves more evenly)
- 2 cups semisweet chocolate chips (I prefer Ghirardelli—they hold their shape better during baking)
For the Spider Web Glaze
- 1 cup powdered sugar
- 2 tablespoons milk (whole milk gives a creamier glaze, but 2% works fine)
- 1/2 teaspoon vanilla extract
- 2 tablespoons unsweetened cocoa powder (sifted to avoid lumps)
- 1 tablespoon melted butter (adds richness and helps the glaze set with a slight shine)
Substitution Guidance: If you’re out of brown sugar, you can use all granulated sugar, but the bars will be slightly less chewy. For a dairy-free version, swap the butter with a plant-based baking stick (not margarine in a tub—it has too much water). If you want to make these gluten-free, use a 1:1 gluten-free flour blend like Bob’s Red Mill. The texture will be a little more cakey, but still delicious.
Equipment Needed
- 9×13-inch baking pan (metal pans work best for even browning; glass pans take longer to bake)
- Parchment paper (non-negotiable—it makes lifting the bars out so much easier)
- Electric hand mixer or stand mixer (you can do this by hand with a wooden spoon, but your arm will get a workout)
- Large mixing bowl
- Medium microwave-safe bowl (for the glaze)
- Toothpick or skewer (for creating the spider web design)
- Wire cooling rack
- Spatula
I’ve made these bars with a cheap hand mixer I got for fifteen dollars, and they turned out perfect. You don’t need fancy equipment. The toothpick is the star of the show here—make sure you have a few on hand because they can break if you press too hard.
Preparation Method
Preheat your oven to 350°F (175°C). Line your 9×13-inch baking pan with parchment paper, leaving some overhang on the sides. This is your lifeline later—you’ll lift the whole slab out in one piece.
- Cream the butter and sugars: In a large mixing bowl, beat the softened butter, brown sugar, and granulated sugar together on medium speed for about 3 minutes. You want it light and fluffy—scrape down the sides once. The mixture should look pale and grainy, like wet sand.
- Add the eggs and vanilla: Beat in the eggs one at a time, making sure each is fully incorporated before adding the next. Add the vanilla and beat for another 30 seconds. The mixture might look a little curdled at this point—that’s normal. Don’t panic.
- Mix the dry ingredients: In a separate bowl, whisk together the flour, baking soda, and salt. Add this to the wet mixture in two additions, mixing on low speed until just combined. Overmixing here will make the bars tough. Stop when you can’t see any more streaks of flour.
- Fold in the chocolate chips: Use a spatula to fold in the chocolate chips by hand. This ensures even distribution without overworking the dough. The dough will be thick and slightly sticky—that’s exactly what you want.
- Press into the pan: Transfer the dough to your prepared pan. Use your hands or a spatula to press it into an even layer. Wet your fingers slightly if the dough is too sticky. Make sure it reaches all the corners evenly.
- Bake: Bake for 20-25 minutes, or until the edges are golden brown and the center looks set but still soft. A toothpick inserted in the center should come out with a few moist crumbs—not wet batter. My oven runs hot, so I always check at 20 minutes. Let the bars cool completely in the pan on a wire rack. This is crucial—if you add the glaze while they’re warm, it’ll melt into a mess.
- Make the glaze: While the bars cool, make the glaze. In a medium microwave-safe bowl, whisk together the powdered sugar, milk, vanilla, cocoa powder, and melted butter. Microwave for 15 seconds and stir until smooth. The glaze should be thick but pourable—if it’s too thick, add a drop more milk. If it’s too thin, add a little more powdered sugar.
- Create the spider web design: Pour the chocolate glaze over the cooled bars and spread it into an even layer using a spatula. While the glaze is still wet, drop small dollops of the reserved white glaze (if you set some aside) in a spiral pattern. Working quickly, drag a toothpick from the center outward through the white dollops to create the web effect. Wipe the toothpick clean between each line for a clean design.
- Let the glaze set: Allow the glaze to set at room temperature for about 30 minutes, or pop the pan in the refrigerator for 15 minutes if you’re in a hurry. Once set, lift the bars out using the parchment paper overhang and cut into squares.
Cooking Tips & Techniques
I’ve made this recipe about a dozen times now, and I’ve learned a few things the hard way. First, don’t skip the parchment paper. The first time I made these, I greased the pan and ended up with a spatula fight that I lost. The bars crumbled everywhere. Parchment paper is your best friend.
Second, let the bars cool completely. I know, I know—you’re impatient. I am too. But if you pour that glaze onto warm bars, it’ll soak in and you’ll lose that beautiful spider web effect. I once tried to speed things up by putting the pan in the freezer for ten minutes. The center was still warm and the glaze turned into a muddy mess. Learn from my mistakes.
For the spider web design, less is more. You don’t need a perfect spiral. I’ve found that starting with five or six dollops of white glaze in a rough circle works best. Then drag your toothpick through them from the center outward. If you mess up, just swirl the glaze together and start over—it’s very forgiving. My four-year-old helped me with this step last year, and his web looked more like a spider had a meltdown, but the kids at the party loved it anyway.
One more thing: use room temperature eggs. I know it seems fussy, but cold eggs can cause the butter to seize up, making the dough lumpy. If you forget to take them out ahead of time, place the eggs in a bowl of warm water for five minutes. Problem solved.
Variations & Adaptations
Peanut Butter Spider Webs: Swap 1/2 cup of the butter for creamy peanut butter. The peanut butter flavor pairs beautifully with the chocolate, and it adds a little protein. My husband’s cousin brought these to a family gathering and they disappeared in ten minutes.
White Chocolate Ghost Bars: Use white chocolate chips instead of semisweet in the base. For the glaze, skip the cocoa powder and use all white glaze. Then pipe small ghost shapes with melted dark chocolate. It’s a little more work, but the kids go crazy for it.
Gluten-Free Version: As I mentioned earlier, a 1:1 gluten-free flour blend works perfectly here. I tested this with Cup4Cup and the texture was almost identical to the original. Just make sure your blend contains xanthan gum—if it doesn’t, add 1/2 teaspoon to the dry ingredients.
Spooky Sprinkle Bars: For an even easier version, skip the spider web design and just sprinkle Halloween-themed sprinkles over the glaze before it sets. Orange and black jimmies are my go-to. It takes about ten seconds and still looks festive.
Double Chocolate Version: Add 1/4 cup of cocoa powder to the dry ingredients for a chocolate-on-chocolate experience. Reduce the flour by 2 tablespoons to keep the texture right. This version is dangerously good—I ate three bars in one sitting.
Serving & Storage Suggestions
These bars are best served at room temperature. The glaze stays firm but gives slightly when you bite into it, and the cookie base is soft and chewy. Cut them into 24 squares for a party—they’re rich enough that a small piece satisfies.
For storage, place the bars in an airtight container at room temperature. They’ll stay fresh for up to 4 days. I’ve found that they actually taste better on day two—the flavors meld together and the texture softens even more. If you’re making them for a party, bake them the day before and add the glaze the morning of.
You can freeze these bars for up to 3 months. Wrap the entire slab (unglazed) tightly in plastic wrap, then foil. When you’re ready to serve, thaw at room temperature, then make the glaze fresh. I’ve done this for two Halloween parties now and nobody could tell they were made weeks in advance.
For reheating, pop a bar in the microwave for 10 seconds. It’s not necessary, but it makes the chocolate chips all melty again. Serve them with a glass of cold milk—it’s the classic pairing for a reason.
Nutritional Information & Benefits
Each bar (based on 24 servings) contains approximately 210 calories, 11g of fat, 28g of carbohydrates, 2g of protein, and 16g of sugar. Keep in mind that these are estimates—your numbers will vary based on the specific brands and substitutions you use.
While these are definitely a treat, there are a few bright spots. The chocolate chips contain antioxidants from cocoa, and if you use dark chocolate chips, you’ll get even more. The butter provides vitamin A, and the eggs add a small amount of protein. I’m not saying these are health food—they’re cookies bars, after all—but I feel better knowing there’s at least some nutritional value.
If you’re watching your sugar intake, you can reduce the sugar in the base by 1/4 cup without affecting the texture too much. The glaze is harder to adjust, but you can use a sugar-free powdered sugar substitute. I tried this once and it worked okay, though the glaze was slightly less shiny.
Potential allergens include dairy (butter, milk), eggs, wheat (flour), and soy (often in chocolate chips). If you’re serving these at a school party, check with the teacher about any classroom allergies. I always send a note with the ingredients listed, just in case.
Conclusion
These spider web chocolate chip cookie bars are the recipe you’ll come back to year after year. They’re simple enough for a Tuesday night, festive enough for a Halloween party, and delicious enough that nobody will believe how easy they were. I’ve made them for school events, family gatherings, and even a neighborhood potluck, and they’ve never let me down.
What I love most about this recipe is how adaptable it is. You can dress it up or keep it simple. You can make it gluten-free or peanut butter or double chocolate. It’s a canvas for your creativity, and it always delivers. That first bite—soft cookie, melty chocolate, that glossy glaze—it’s pure comfort.
I’d love to hear how these turn out for you. Did your kids help with the spider web design? Did you try a different variation? Drop a comment below and share your experience. And if you’re looking for more easy treats, don’t miss our no-bake pumpkin pie bites—they’re another lifesaver for busy parents. Happy baking, and may your spider webs always be spooky!
Frequently Asked Questions
Can I make these spider web cookie bars ahead of time?
Absolutely! You can bake the bars up to two days in advance. Just keep them covered at room temperature and add the glaze the day you plan to serve them. The glaze stays shiny and fresh for about 24 hours.
Why did my glaze turn out lumpy?
Lumpy glaze usually means the cocoa powder wasn’t sifted. Cocoa powder loves to clump, so always sift it before whisking. If you already have lumps, microwave the glaze for 10 seconds and whisk vigorously—that usually does the trick.
Can I use a different pan size?
You can use a 9×9-inch pan for thicker bars, but you’ll need to increase the baking time by 5-8 minutes. For a larger crowd, double the recipe and use a half-sheet pan. Just keep an eye on the baking time—it’ll be shorter.
My bars turned out too dry. What went wrong?
Overbaking is the most common culprit. Remember, the bars should look set but still soft in the center when you take them out. They continue to cook as they cool. Also, make sure you’re measuring your flour correctly—scooping directly from the bag packs in too much flour.
Can I skip the spider web design?
Of course! These are fantastic as plain chocolate chip cookie bars with a simple chocolate glaze. You can also top them with sprinkles, crushed candy canes for Christmas, or just leave them plain. The cookie bar base is the real star.
Pin This Recipe!
Best Spider Web Chocolate Chip Cookie Bars Recipe
These spider web chocolate chip cookie bars are a simple, one-bowl recipe that looks way more impressive than the effort it takes. Perfect for Halloween parties, they feature a soft and chewy cookie base topped with a fudgy chocolate glaze and a spooky spider web design made with a toothpick.
- Prep Time: 15 minutes
- Cook Time: 25 minutes
- Total Time: 40 minutes
- Yield: 24 servings 1x
- Category: Dessert
- Cuisine: American
Ingredients
- 1 cup (2 sticks) unsalted butter, softened
- 1 cup packed light brown sugar
- 1/2 cup granulated sugar
- 2 large eggs, room temperature
- 2 teaspoons vanilla extract
- 2 1/4 cups all-purpose flour
- 1 teaspoon baking soda
- 1/2 teaspoon salt
- 2 cups semisweet chocolate chips
- 1 cup powdered sugar
- 2 tablespoons milk
- 1/2 teaspoon vanilla extract
- 2 tablespoons unsweetened cocoa powder, sifted
- 1 tablespoon melted butter
Instructions
- Preheat oven to 350°F (175°C). Line a 9×13-inch baking pan with parchment paper, leaving overhang on the sides.
- In a large mixing bowl, beat the softened butter, brown sugar, and granulated sugar together on medium speed for about 3 minutes until light and fluffy.
- Beat in the eggs one at a time, ensuring each is fully incorporated. Add the vanilla and beat for another 30 seconds.
- In a separate bowl, whisk together the flour, baking soda, and salt. Add to the wet mixture in two additions, mixing on low speed until just combined.
- Fold in the chocolate chips with a spatula until evenly distributed.
- Transfer the dough to the prepared pan and press into an even layer.
- Bake for 20-25 minutes, until edges are golden brown and center is set but still soft. Cool completely in the pan on a wire rack.
- For the glaze: In a medium microwave-safe bowl, whisk together powdered sugar, milk, vanilla, cocoa powder, and melted butter. Microwave for 15 seconds and stir until smooth.
- Pour the chocolate glaze over the cooled bars and spread into an even layer. While still wet, drop small dollops of reserved white glaze (if set aside) in a spiral pattern. Drag a toothpick from the center outward through the dollops to create a web effect. Wipe the toothpick clean between lines.
- Let the glaze set at room temperature for about 30 minutes, or refrigerate for 15 minutes. Lift bars out using parchment overhang and cut into squares.
Notes
Let bars cool completely before adding glaze to avoid a muddy mess. For the spider web design, less is more; start with 5-6 dollops of white glaze. Use room temperature eggs to prevent butter from seizing. Parchment paper is essential for easy removal.
Nutrition
- Serving Size: 1 bar
- Calories: 210
- Sugar: 16
- Sodium: 120
- Fat: 11
- Saturated Fat: 6
- Carbohydrates: 28
- Fiber: 1
- Protein: 2
Keywords: spider web, chocolate chip, cookie bars, Halloween, easy, one-bowl, party treat


