There used to be a tiny bakery in the old strip mall on Elm Street called The Cozy Hen that made the most incredible deviled eggs for their Halloween party trays. When they closed three summers ago—a handwritten sign on the door saying “Off to chase the sun”—I honestly felt a little lost. Their spider deviled eggs weren’t just cute; they were the highlight of every October get-together. After seven tries—and one particularly tragic batch where the “spiders” looked more like sad blobs—I finally cracked the code. Let me tell you, the relief was real. I mean, who knew getting the olive legs just right would take so much trial and error? Maybe you’ve been there, staring at a platter of food that’s supposed to look fun but just looks… weird. This recipe brings back that bakery magic, minus the stress and the trip to the strip mall.
These spooky spider deviled eggs are the perfect way to get kids excited about Halloween without loading them up on sugar. They’re creepy, they’re cute, and they come together with ingredients you probably already have in your fridge. Honestly, the first time my kids saw the olive spiders crawling across the plate, they squealed with delight—and then gobbled them up before I could even snap a picture. That’s the kind of reaction every parent wants, right?
What makes this recipe so special is how it transforms a classic appetizer into something memorable. The black olive “spiders” perched on creamy, tangy filling create a visual that’s both spooky and approachable. No fancy tools, no weird ingredients, just a little creativity and a lot of flavor. Plus, you can make them ahead, which is a lifesaver when you’re juggling costumes, carving pumpkins, and keeping tiny humans entertained. I’ve brought these to school parties, neighborhood potlucks, and even our own family Halloween dinner, and they never last more than ten minutes. Trust me—this is the recipe that’ll make you the coolest parent on the block.
Why You’ll Love This Recipe
Let me break down why these spooky spider deviled eggs deserve a permanent spot in your Halloween rotation. I’ve tested this recipe more times than I care to admit, and here’s what makes it a winner for busy families:
- Quick & Easy: From start to finish, you’re looking at about 30 minutes of active time. The eggs do most of the work while they boil, and the assembly is so simple my seven-year-old can help (with supervision on the olive cutting). Perfect for those chaotic after-school hours before trick-or-treating begins.
- Simple Ingredients: Eggs, mayo, mustard, paprika, and a can of black olives. That’s it. No special trips to a specialty store, no hunting down obscure garnishes. You probably have everything except the olives, and those are a dollar at any grocery store.
- Perfect for Halloween Gatherings: Whether it’s a classroom party, a family dinner, or a neighborhood potluck, these eggs fit right in. They’re portable, they don’t need to be kept hot, and they look impressive without requiring hours of effort.
- Crowd-Pleaser: I’ve yet to meet a kid who doesn’t think these are the coolest thing on the snack table. Adults love them too—there’s something about the spider design that makes everyone smile. Plus, deviled eggs are already a potluck classic, so you’re working with a proven favorite.
- Unbelievably Delicious: The creamy, tangy filling paired with the briny pop of black olive is a combination that just works. The paprika adds a subtle warmth, and the texture is smooth and satisfying. Honestly, I’ve caught myself eating the filling straight from the bowl—no judgment here.
What sets this recipe apart from other Halloween deviled eggs is the attention to detail. The spider legs are positioned just right, the filling is piped for a clean look, and the seasoning is balanced so the olives don’t overpower everything else. I’ve seen versions where the spiders look like messy splotches or the filling is too runny—this one nails it every time. It’s comfort food with a spooky twist, and it’s the kind of recipe that makes you feel like a kitchen rockstar without breaking a sweat.
What Ingredients You Will Need
This recipe uses simple, everyday ingredients to create something that looks way more complicated than it actually is. Here’s what you’ll need to gather before you start:
- 12 large eggs (room temperature works best for even cooking, but cold is fine too—just adjust your boiling time slightly)
- 1/3 cup mayonnaise (I prefer Hellmann’s or Duke’s for that classic tangy flavor, but any brand works. For a lighter version, use Greek yogurt mixed with a little mayo)
- 1 tablespoon yellow mustard (this gives the filling that signature yellow hue and a subtle tang. Dijon works too if you want a milder flavor)
- 1 teaspoon white vinegar (optional, but it brightens the filling and cuts through the richness. Apple cider vinegar is a good substitute)
- 1/2 teaspoon salt (adjust to taste—remember the olives add saltiness too)
- 1/4 teaspoon black pepper (freshly ground is best, but pre-ground works in a pinch)
- 1/2 teaspoon paprika (plus extra for garnish. Smoked paprika adds a lovely depth, but sweet paprika is more traditional)
- 1 can (6 ounces) large black olives (you need the big ones for the spider bodies. Look for “jumbo” or “colossal” pitted olives—the regular small ones are too tiny to work with)
Ingredient Tips from My Kitchen:
- For the creamiest filling, let your eggs come to room temperature before boiling. Cold eggs can cook unevenly and make peeling a nightmare. Trust me, I’ve learned this the hard way after peeling what felt like a hundred eggs.
- If you’re using a different brand of mayonnaise, taste the filling before adding extra salt. Some mayo brands are saltier than others, and you don’t want to overdo it.
- The white vinegar is totally optional, but I’ve found it makes a noticeable difference in brightening the flavors. My grandma always added a splash to her deviled eggs, and I’ve stuck with it ever since.
- For the olives, I recommend Lindsay or Pearls brand jumbo pitted black olives. They’re consistently large and hold their shape well when you cut them into spiders. Avoid the sliced olives—they won’t work for this.
Equipment Needed
You don’t need any fancy gadgets for this recipe, which is part of its charm. Here’s what you’ll want to have on hand:
- Large pot for boiling the eggs (make sure it’s big enough that the eggs aren’t crowded—they need room to cook evenly)
- Medium bowl for mixing the filling
- Sharp knife and cutting board (a paring knife works best for cutting the olive spiders)
- Piping bag or zip-top bag (for piping the filling neatly. A zip-top bag with the corner snipped off works perfectly if you don’t have a piping bag)
- Large star tip (optional, but it gives the filling a pretty ruffled edge. If you’re piping into a zip-top bag, you can skip the tip)
- Slotted spoon (for removing the eggs from the boiling water)
- Egg holder or paper towels (for drying the eggs after boiling)
If you don’t have a piping bag, don’t stress. A zip-top bag works just as well—just fill it, snip off a tiny corner, and squeeze. I’ve been using this method for years, and honestly, it’s easier to clean up. For the olive spiders, a small paring knife gives you more control than a chef’s knife. If all you have is a butter knife, you can still make it work—just be patient and cut slowly. The key is making clean cuts so the spiders look recognizable.
Preparation Method
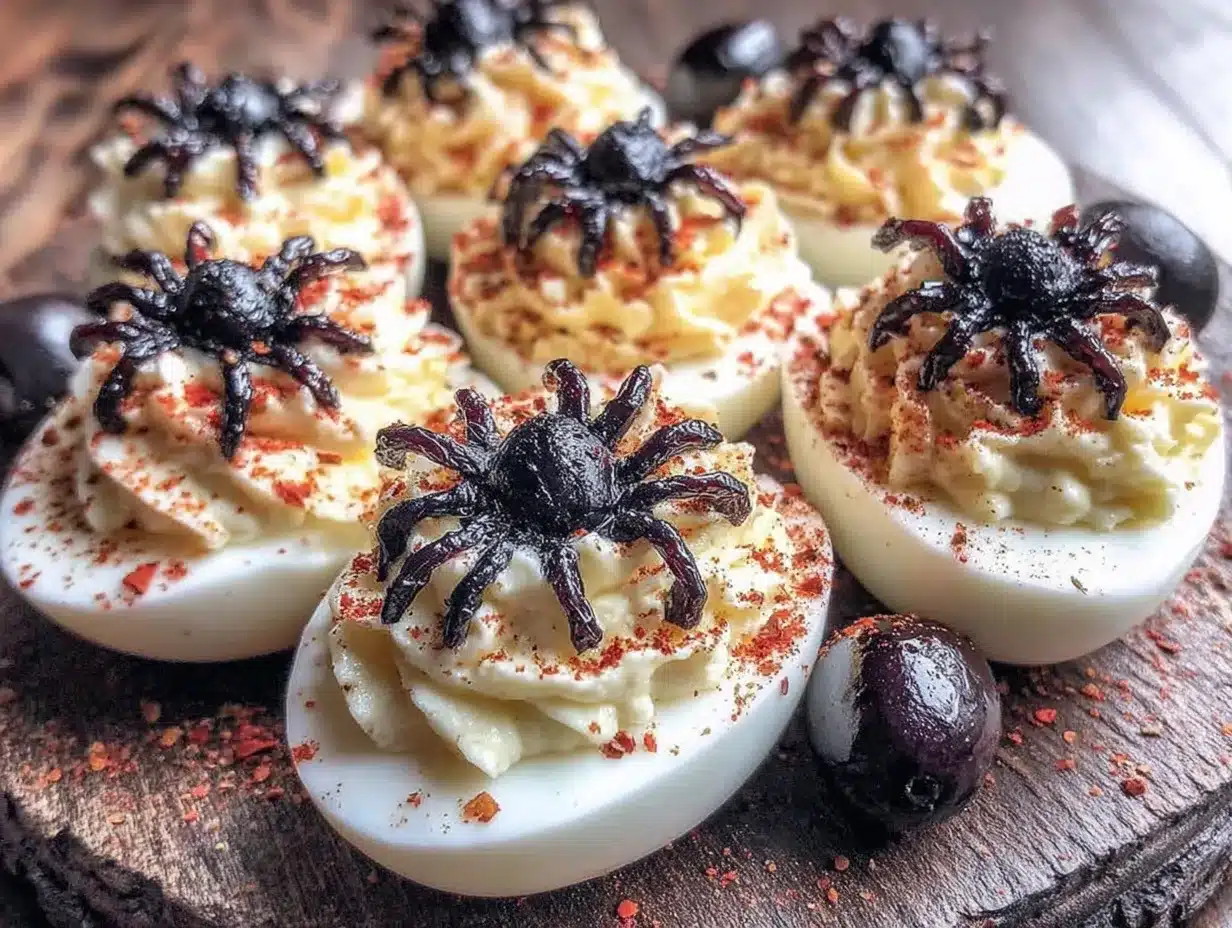
Let’s walk through this step by step. I’ve included time estimates and sensory cues so you know exactly what to look for at each stage.
Step 1: Boil the Eggs (15 minutes)
Place your 12 eggs in a large pot and cover them with cold water by about an inch. Bring the water to a rolling boil over high heat—you’ll see big bubbles breaking the surface. Once it’s boiling, cover the pot, turn off the heat, and let the eggs sit for exactly 12 minutes. This gives you hard-boiled eggs with firm whites and creamy yolks—no green ring around the yolk. While they sit, prepare a bowl of ice water. When the timer goes off, use a slotted spoon to transfer the eggs to the ice bath. Let them cool for at least 5 minutes. This shock stops the cooking and makes peeling so much easier.
Step 2: Peel the Eggs (5-10 minutes)
Gently tap each egg on the counter to crack the shell all over, then roll it between your palms to loosen the shell. Start peeling from the wider end—there’s usually an air pocket there that makes it easier to get under the membrane. Rinse the peeled eggs under cool water to remove any tiny shell fragments. Pat them dry with paper towels. If you’re struggling with peeling, try using eggs that are a week or two old—fresh eggs are harder to peel. I keep a stash of “older” eggs in the fridge just for deviled eggs.
Step 3: Cut and Scoop the Yolks (5 minutes)
Using a sharp knife, slice each egg in half lengthwise. Gently pop the yolks into a medium bowl. Arrange the egg white halves on a serving platter, cut-side up. You should have 24 white halves. If any tear, don’t worry—just hide them under the filling or save them for snacking later. I’ve had plenty of egg white casualties over the years, and nobody notices once the spiders are on top.
Step 4: Make the Filling (5 minutes)
To the bowl with the yolks, add the mayonnaise, yellow mustard, white vinegar (if using), salt, pepper, and paprika. Mash everything together with a fork until smooth and creamy. Taste it—adjust the salt, pepper, or mustard to your liking. The filling should be tangy, creamy, and slightly peppery. If it’s too thick, add a tiny splash of milk or extra mayo. If it’s too runny, add another yolk if you have one, or just pipe it carefully.
Step 5: Pipe the Filling (5 minutes)
Spoon the filling into a piping bag fitted with a large star tip, or into a zip-top bag with a small corner snipped off. Pipe a generous swirl of filling into each egg white half. Aim for a nice rosette shape—start from the outside and work your way in, lifting up at the end. Don’t overfill; you want the spiders to sit on top without toppling over. If you don’t have a piping bag, you can spoon the filling in and smooth it with a knife—it won’t look as fancy, but it’ll taste the same.
Step 6: Create the Spider Olives (10 minutes)
This is the fun part. Drain your can of jumbo black olives and pat them dry with paper towels. For each spider, you’ll need one whole olive for the body and half an olive cut into legs. Take one olive and slice it in half crosswise—you’ll use one half for the body. Take the other half and cut it into thin strips lengthwise to create 4-6 “legs.” Repeat this process until you have enough spiders for all 24 eggs. The legs should be thin but not fragile—think matchstick size. Place one olive body on top of each deviled egg, then arrange 4-6 legs around it, pressing them gently into the filling so they stay put. You can angle the legs to look like the spider is crawling—some legs curved, some straight.
Step 7: Garnish and Serve (2 minutes)
Lightly sprinkle paprika over the top of each spider deviled egg for a pop of color. If you want extra spooky vibes, add a tiny dollop of mustard or hot sauce on top of the olive body for “eyes.” I’ve also used small dots of red bell pepper for a more dramatic look. Serve immediately or refrigerate until ready to serve.
Cooking Tips & Techniques
After making these spooky spider deviled eggs more times than I can count, I’ve picked up a few tricks that make the process smoother. Let me share what I’ve learned—including the mistakes I’ve made so you don’t have to repeat them.
Perfect Hard-Boiled Eggs Every Time: The biggest hurdle is getting eggs that peel easily. Start with older eggs—fresh ones are notoriously hard to peel. After boiling, the ice bath is non-negotiable. I once skipped it because I was in a hurry, and I spent twenty minutes picking shell fragments out of my eggs. Not worth it. Also, gently rolling the eggs on the counter before peeling loosens the membrane, making the shell slide off in big pieces.
Consistent Olive Spiders: The key to cute spiders is using jumbo olives. Regular olives are too small and the legs look like little specks. When cutting the legs, use a sharp knife and cut slowly. If the olive starts to fall apart, you’re cutting too fast or the knife is dull. I ruined an entire can of olives my first time because I was rushing—lesson learned. Also, pat the olives dry before cutting so they don’t slide around.
Timing and Multitasking: Here’s how I streamline the process: While the eggs are boiling, I prep the olives and set up my piping bag. While the eggs are cooling in the ice bath, I make the filling. This way, everything comes together in about 30 minutes. If you’re making these for a party, you can boil and peel the eggs a day ahead—store them in the fridge in a covered container. Then just assemble the day of.
Common Mistakes to Avoid: Don’t overmix the filling or it can become gummy. Mash until just smooth. Don’t skip the mustard—it’s what gives deviled eggs their signature tang. And whatever you do, don’t boil the eggs for too long. Overcooked yolks turn greenish and develop a sulfur smell that nobody wants. Stick to the 12-minute off-heat method and you’ll be golden.
My Biggest Failure: The first time I made these, I used regular-sized olives and tried to cut them into spiders. The legs were so tiny they looked like little black dots, and the bodies kept rolling off the eggs. My kids called them “confused caterpillars.” We laughed about it, but I knew I needed bigger olives. Now I buy jumbo and the difference is night and day. Don’t be like me—go big with your olives.
Variations & Adaptations
One of the best things about this recipe is how easy it is to tweak based on what you have or who you’re feeding. Here are some variations I’ve tried and loved:
- Gluten-Free Version: This recipe is naturally gluten-free as written, so no changes needed. Just double-check your mustard and mayonnaise labels if you’re serving someone with celiac disease—some brands may contain gluten.
- Dairy-Free Option: Use a vegan mayonnaise or a dairy-free alternative like avocado mayo. The filling will be slightly different in texture, but still delicious. I’ve made this with Vegenaise and it worked beautifully.
- Spicy Spider Eggs: Add 1/2 teaspoon of cayenne pepper or a few dashes of hot sauce to the filling for a kick. My husband loves this version, and it adds a nice contrast to the creamy filling. Just be careful if kids are eating them—maybe make a separate batch.
- Colorful Garnishes: Instead of paprika, try sprinkling the eggs with smoked paprika, chili powder, or even a tiny pinch of black sesame seeds for extra spooky effect. For a fun twist, add a small slice of red bell pepper on top of the olive body to look like spider eyes.
- Different Spider Designs: You can use pimento-stuffed olives for a red-eyed spider look. Or, use small pretzel sticks for the legs instead of olive strips—they add a salty crunch. I’ve even seen people use capers for tiny spider bodies, though I prefer the olives for their size and flavor.
- Seasonal Adaptations: For a non-Halloween version, skip the spider design and just garnish with fresh herbs like dill or chives. The deviled egg filling is classic enough to work year-round for picnics, barbecues, or holiday brunches.
I once made a batch with avocado in the filling for a healthier twist. I mashed half an avocado with the yolks and reduced the mayo slightly. It turned green, which was actually perfect for Halloween—I called them “monster eggs.” The kids thought it was hilarious, and the flavor was creamy and fresh. Don’t be afraid to experiment—worst case, you end up with a funny story and a snack.
Serving & Storage Suggestions
These spooky spider deviled eggs are best served chilled, straight from the fridge. The cold filling holds its shape better, and the olives stay firm. Here’s how to make them shine at your Halloween gathering:
Presentation Ideas: Arrange the eggs on a black or dark-colored platter to make the spiders pop. I like to scatter a few whole black olives around the platter for extra visual interest, or add some fake spider webs from the dollar store for a creepy vibe. You can also serve them on a bed of fresh lettuce or purple cabbage for color contrast. For a classroom party, I’ve used a Halloween-themed platter with little plastic spiders scattered around—the kids went wild.
Complementary Dishes: These eggs pair beautifully with other Halloween snacks like mummy hot dogs, pumpkin-shaped cheese crackers, or a bowl of popcorn balls. For a full meal, serve them alongside a hearty soup like chicken noodle or butternut squash. They also work great as part of a Halloween charcuterie board with cheeses, crackers, and veggie sticks.
Storage Instructions: Store any leftover deviled eggs in an airtight container in the refrigerator for up to 2 days. The olives may soften slightly over time, but they’ll still taste great. Do not freeze deviled eggs—the texture of the filling will become watery and grainy when thawed. Trust me on this one; I learned the hard way.
Reheating: These are served cold, so no reheating needed. If you’ve stored them, just let them sit at room temperature for about 10 minutes before serving to take the chill off. The flavors actually develop and meld together after a few hours in the fridge, so making them a day ahead is totally fine.
Flavor Development: I actually think these taste better the next day. The filling absorbs more of the mustard and paprika flavors, and the olives mellow out. If you’re planning ahead, make the filling and boil the eggs a day in advance, then assemble the morning of your event. The spiders will look fresher and the filling will be perfectly set.
Nutritional Information & Benefits
While deviled eggs aren’t exactly health food, they do offer some surprising nutritional benefits. Here’s a rough breakdown per serving (one spider deviled egg half):
- Calories: Approximately 70-80 calories per half
- Protein: About 5-6 grams (eggs are a complete protein source)
- Fat: 5-6 grams (mostly from the yolk and mayo)
- Carbohydrates: Less than 1 gram
- Vitamin D: Eggs are one of the few natural food sources of vitamin D
- Choline: Important for brain health, especially in kids
Health Benefits: Eggs are packed with high-quality protein, which helps keep kids full and satisfied during long Halloween parties. The yolks contain lutein and zeaxanthin, antioxidants that support eye health. Black olives provide healthy monounsaturated fats and a small amount of iron. If you’re watching your intake, you can use light mayonnaise or swap half the mayo for plain Greek yogurt—this cuts the calories and adds a protein boost.
Dietary Considerations: This recipe is naturally low-carb and keto-friendly. It’s also gluten-free and nut-free, making it safe for most common allergies. However, it does contain eggs and mayonnaise (which may contain eggs and soy), so be mindful if you’re serving someone with allergies. For a vegan version, you’d need to use a plant-based egg substitute and vegan mayo—I haven’t tried this, but I’ve seen it done successfully by other bloggers.
From my perspective, these deviled eggs are a great way to include protein-rich snacks in your Halloween spread without relying on candy. They’re a nice balance to all the sugar, and they give kids something savory to munch on between sweets. I always feel a little better knowing my kids ate something with actual nutrients before diving into their candy haul.
Conclusion
These spooky spider deviled eggs are more than just a Halloween snack—they’re a memory in the making. The first time my kids helped me assemble the spiders, we laughed so hard at the wobbly legs and crooked bodies. Now it’s become a tradition we look forward to every October. That’s the beauty of this recipe: it’s simple enough for little hands to help, impressive enough to wow a crowd, and delicious enough to disappear in minutes.
I hope you give these a try and make them your own. Maybe you’ll add extra paprika for a smokier flavor, or use different colored olives for a twist. The best recipes are the ones that evolve with your family, and this one is perfect for that. Whether you’re hosting a Halloween bash or just looking for a fun after-school snack, these spider deviled eggs deliver on every level.
I’d love to hear how yours turn out! Drop a comment below and let me know if your kids loved them as much as mine do. Did you try a fun variation? Did the spiders come out perfectly or did you have a few “confused caterpillars” like I did? Share your photos and stories—I read every single comment and I can’t wait to see your spooky creations. Happy Halloween, and happy cooking!
Frequently Asked Questions
Can I make these spider deviled eggs ahead of time?
Absolutely! You can boil and peel the eggs up to 2 days in advance and store them in the fridge. The filling can also be made a day ahead and kept in an airtight container. Assemble the spiders on the day you plan to serve them for the best appearance—the olives stay firmer and the filling looks fresher.
How do I keep the olive spiders from falling off the eggs?
Make sure your filling is thick enough to support the olives. If it’s too runny, add a bit more yolk or mayo. Gently press the olive body and legs into the filling so they’re slightly embedded. Chilling the assembled eggs for 15-20 minutes before serving also helps everything set and stay in place.
Can I use a different type of olive for the spiders?
Jumbo black olives work best because they’re large and easy to cut. However, you can use pimento-stuffed green olives for a different look—the red pimento looks like a spider eye. Kalamata olives are too small and soft, so I don’t recommend them. Stick with firm, large black olives for the best results.
My deviled egg filling is too runny. How do I fix it?
If your filling is too thin, you can add another hard-boiled yolk (if you have an extra egg) or a tablespoon of breadcrumbs to absorb the moisture. Alternatively, you can chill the filling for 15-20 minutes before piping—it will firm up slightly. Next time, use less mayonnaise or make sure your yolks are fully mashed before adding the wet ingredients.
Are these spider deviled eggs safe for kids with allergies?
This recipe contains eggs and mayonnaise (which often contains eggs and soy). It’s naturally gluten-free and nut-free. If you’re serving someone with allergies, check your mayonnaise label for any hidden allergens. For an egg allergy, you’d need a completely different base—I’ve seen recipes using tofu or potato for egg-free deviled eggs, but I haven’t tested them myself. Always inform guests about the ingredients if allergies are a concern.
Pin This Recipe!
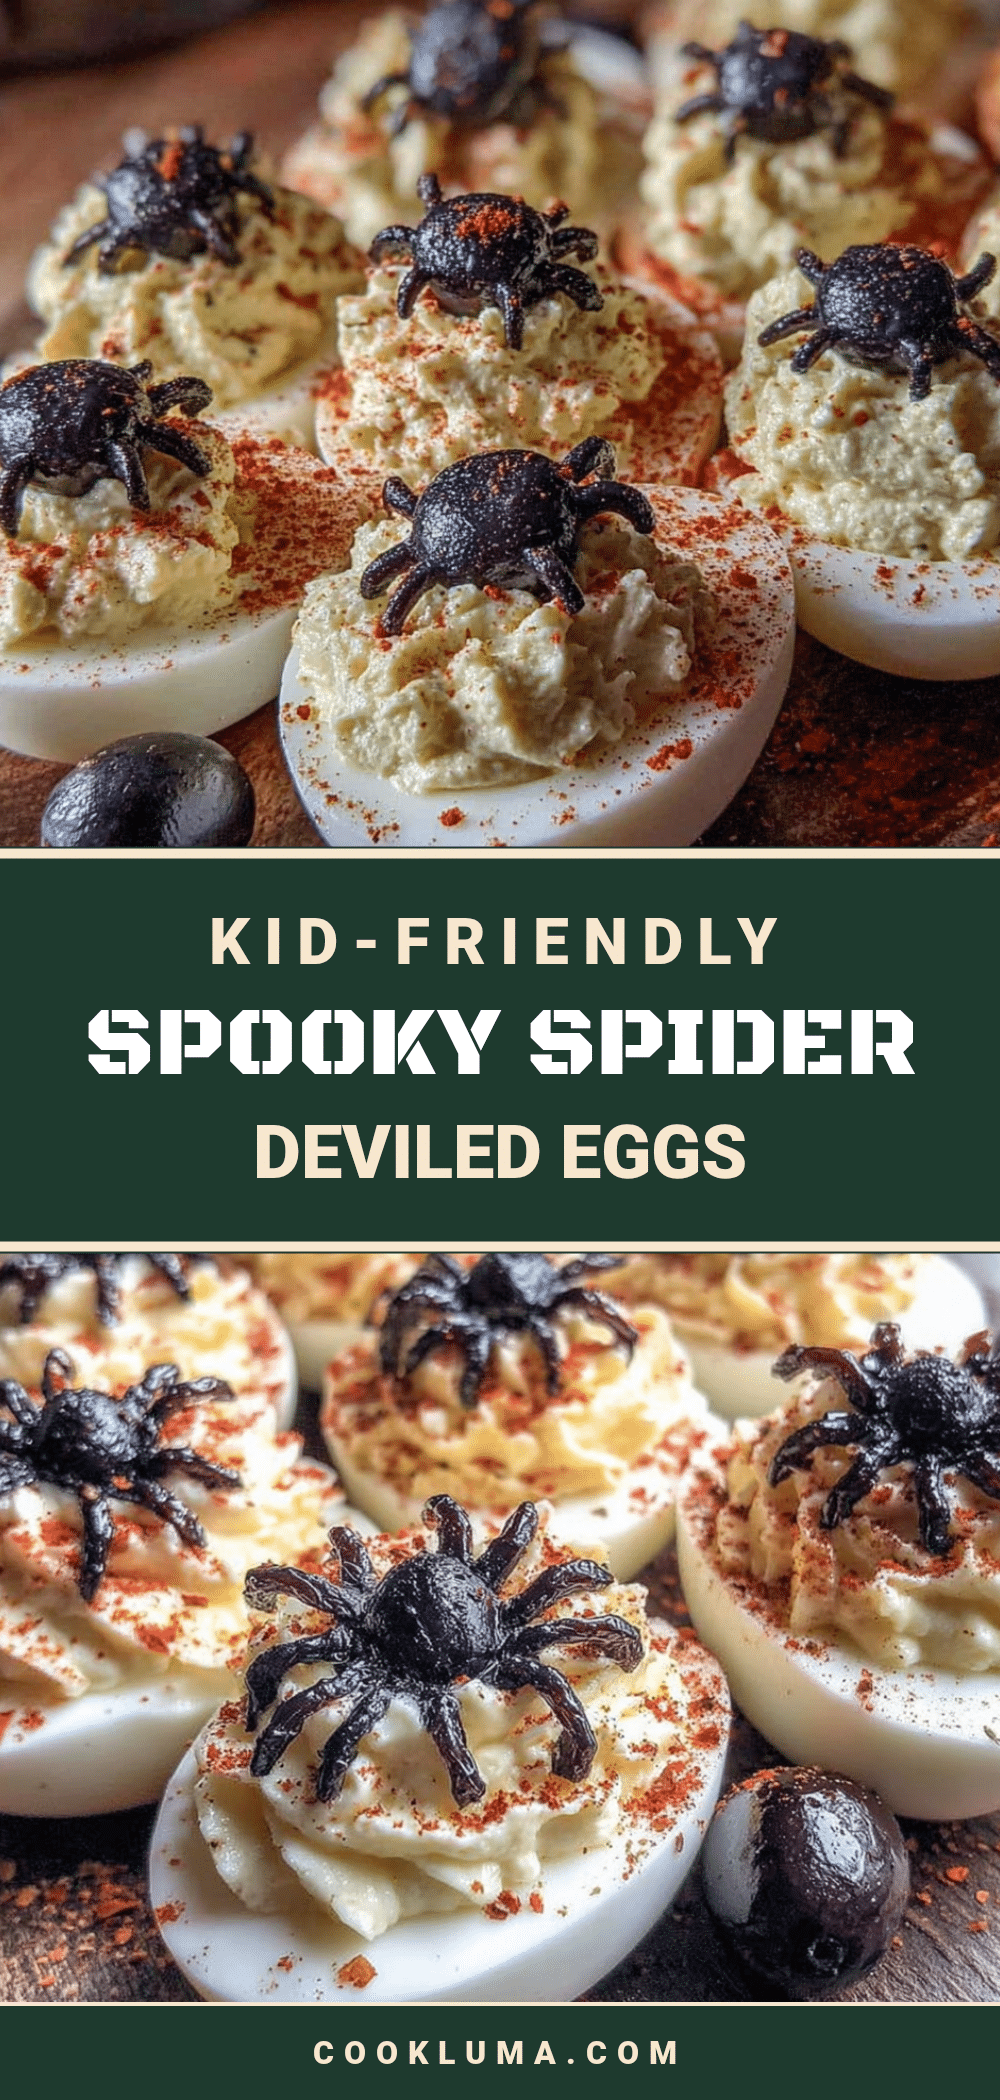
Spooky Spider Deviled Eggs: Easy Kid-Friendly Halloween Recipe
These spooky spider deviled eggs are the perfect way to get kids excited about Halloween without loading them up on sugar. They’re creepy, cute, and come together with simple ingredients you probably already have in your fridge.
- Prep Time: 30 minutes
- Cook Time: 15 minutes
- Total Time: 45 minutes
- Yield: 24 servings 1x
- Category: Appetizer
- Cuisine: American
Ingredients
- 12 large eggs
- 1/3 cup mayonnaise
- 1 tablespoon yellow mustard
- 1 teaspoon white vinegar (optional)
- 1/2 teaspoon salt
- 1/4 teaspoon black pepper
- 1/2 teaspoon paprika (plus extra for garnish)
- 1 can (6 ounces) large black olives (jumbo or colossal pitted)
Instructions
- Place eggs in a large pot and cover with cold water by about an inch. Bring to a rolling boil over high heat. Cover, turn off heat, and let sit for exactly 12 minutes. Meanwhile, prepare a bowl of ice water. Transfer eggs to ice bath and cool for at least 5 minutes.
- Gently tap each egg to crack the shell, then roll between palms to loosen. Peel starting from the wider end. Rinse under cool water and pat dry.
- Slice each egg in half lengthwise. Pop yolks into a medium bowl. Arrange egg white halves on a serving platter, cut-side up.
- To the yolks, add mayonnaise, mustard, vinegar (if using), salt, pepper, and paprika. Mash with a fork until smooth and creamy. Adjust seasoning to taste.
- Spoon filling into a piping bag fitted with a large star tip, or into a zip-top bag with a small corner snipped off. Pipe a generous swirl into each egg white half.
- Drain olives and pat dry. For each spider, slice one olive in half crosswise. Use one half for the body. Cut the other half into thin strips lengthwise to create 4-6 legs. Place one olive body on each deviled egg, then arrange legs around it, pressing gently into the filling.
- Lightly sprinkle paprika over the top. Serve immediately or refrigerate until ready to serve.
Notes
For best results, use older eggs for easier peeling. Jumbo olives are essential for recognizable spiders. The filling can be made a day ahead; assemble spiders on serving day. Chilling assembled eggs for 15-20 minutes helps the olives stay in place.
Nutrition
- Serving Size: 1 spider deviled egg
- Calories: 7080
- Sodium: 150200
- Fat: 56
- Saturated Fat: 1.5
- Carbohydrates: 1
- Protein: 56
Keywords: Halloween, deviled eggs, spider, kid-friendly, appetizer, party snack, spooky, easy


