My husband had declared himself a pumpkin-hater for the better part of a decade. Ten years. He’d make this face—you know the one—whenever I mentioned pumpkin bread, pumpkin pancakes, or heaven forbid, pumpkin spice anything. I’d learned to just make my fall treats for myself and the neighbors. Then last October, I was testing this brown butter pumpkin bundt cake for a friend’s birthday, and I caught him standing at the kitchen counter, fork in hand, taking a fourth bite of a slice I’d left to cool. “This isn’t pumpkin,” he said, mouth half-full. “It’s… cake.” I didn’t say a word. I just pointed at the can of pumpkin puree sitting on the counter. He looked at it, looked at his fork, and went back for a fifth bite. That’s the moment I knew this recipe was something special. I mean, if it can win over a decade-long pumpkin skeptic, it can win over anyone.
This isn’t your standard pumpkin cake, honestly. Brown butter changes everything—it adds this nutty, almost caramel-like depth that makes the pumpkin taste richer, more sophisticated. And the maple glaze? It seeps into the warm cake and creates this sticky-sweet top that cracks just slightly when you cut into it. I’ve made this cake for Thanksgiving brunch, for random Tuesday coffee dates, and once just because the grocery store had a sale on canned pumpkin. Every single time, someone asks for the recipe. Let me tell you, there’s something deeply satisfying about watching people take that first bite and close their eyes. That’s the kind of reaction we’re going for here.
Why You’ll Love This Recipe
Let me be real with you—I’ve tested a lot of pumpkin cakes over the years. Some were too dry, some were too dense, and some just tasted like a spice cabinet exploded. This one is different. It’s the kind of cake that makes you wonder why you ever bothered with boxed mixes.
- Rich, Nutty Flavor : Browning the butter adds a depth that plain melted butter just can’t touch. It’s like the difference between a regular chocolate chip cookie and one with browned butter—you’ll never go back.
- Incredibly Moist : The combination of pumpkin puree and buttermilk keeps this cake tender for days. I’ve had slices on day three that still tasted fresh-baked.
- Perfect for Fall Gatherings : Whether it’s Thanksgiving, a cozy brunch, or just a Sunday afternoon with coffee, this cake fits right in. It’s impressive without being fussy.
- Simple Pantry Ingredients : Nothing weird here. If you’ve got flour, sugar, eggs, and a can of pumpkin, you’re basically there.
- Crowd-Pleaser : I’ve served this to pumpkin lovers and pumpkin skeptics alike, and it disappears every time. That one guy who said he “didn’t do pumpkin”? I saw him sneak back for seconds.
What makes this version stand out from the dozens of pumpkin bundt cakes out there? It’s the technique. Browning the butter takes maybe five extra minutes, but it transforms the entire cake. The maple glaze isn’t just for looks—it soaks into the warm cake, creating this almost candied top layer that contrasts beautifully with the tender crumb underneath. I’ve tested this with different pans, different oven temperatures, and different mixing methods, and this version is the one that works every single time.
This recipe is for those days when you want something that feels special but doesn’t require a pastry degree. It’s comfort food that happens to look gorgeous on a cake stand. And honestly? It’s the kind of cake that makes you feel a little bit proud when you set it on the table.
What Ingredients You Will Need
This recipe relies on simple, wholesome ingredients working together to create something truly special. Most of these are pantry staples, which is exactly what I love about it.
For the Brown Butter Pumpkin Cake:
- 1 cup (2 sticks) unsalted butter — Use good-quality butter here since it’s the star. I prefer Kerrygold or Plugrà for their higher fat content, which browns beautifully.
- 1 ¾ cups (350g) granulated sugar — Regular white sugar works perfectly. You could swap half with brown sugar for a deeper flavor, but I like the clean sweetness here.
- ½ cup (100g) packed light brown sugar — Adds moisture and a hint of molasses that plays nicely with the pumpkin.
- 4 large eggs, room temperature — Cold eggs can seize the batter, so let them sit out for 30 minutes first.
- 1 can (15 oz) pumpkin puree — Not pumpkin pie filling! Just plain pumpkin. I use Libby’s, but store brands work fine too.
- ½ cup (120ml) buttermilk, room temperature — Adds tenderness and helps activate the baking soda. If you don’t have buttermilk, add 1 tablespoon of lemon juice to regular milk and let it sit for 5 minutes.
- 2 teaspoons vanilla extract — Pure vanilla, not imitation. It makes a difference.
- 2 ½ cups (312g) all-purpose flour — Spoon and level it; don’t scoop straight from the bag or you’ll end up with too much flour.
- 2 teaspoons baking powder — Make sure it’s fresh. Test it by dropping a bit in hot water; if it fizzes, it’s good.
- 1 teaspoon baking soda — Same freshness check applies.
- 1 teaspoon salt — I use fine sea salt. Kosher salt works too, but you might need a bit more.
- 2 teaspoons ground cinnamon — The backbone of the spice blend.
- 1 teaspoon ground ginger — Adds warmth without being spicy.
- ½ teaspoon ground nutmeg — Freshly grated if you have it, but pre-ground is fine.
- ¼ teaspoon ground cloves — A little goes a long way. Don’t skip it—it rounds out the flavor.
For the Maple Glaze:
- 1 ½ cups (180g) powdered sugar, sifted — Sifting prevents lumps. Trust me on this one.
- 3 tablespoons pure maple syrup — Not pancake syrup! Real maple syrup gives that authentic flavor. Grade A dark amber is my favorite here.
- 2-3 tablespoons milk or heavy cream — Heavy cream makes a richer glaze, but milk works fine too.
- Pinch of salt — Balances the sweetness.
Equipment Needed
You don’t need a fancy kitchen to make this cake, but a few specific tools make the process much smoother.
- 10-12 cup Bundt pan — This is non-negotiable. A 6-cup pan is too small and the batter will overflow. I use a Nordic Ware classic bundt pan and it releases beautifully every time.
- Light-colored saucepan for browning the butter — Dark pans make it hard to see the butter change color, and you’ll end up with burnt butter instead of browned butter.
- Stand mixer or hand mixer — You can mix by hand, but it takes some elbow grease. A mixer makes the creaming step much easier.
- Whisk for combining dry ingredients — A fork works in a pinch, but a whisk aerates the flour mixture better.
- Rubber spatula — For scraping down the bowl and getting every last bit of batter into the pan.
- Cooling rack — Essential for even cooling and preventing a soggy bottom.
- Parchment paper or baking spray with flour — Regular cooking spray won’t cut it. I use Baker’s Joy spray, or I grease the pan with shortening and dust it with flour.
If you don’t have a stand mixer, a hand mixer works perfectly fine. I actually used a hand mixer for years before upgrading, and the cakes turned out just as good. The key is just to cream the butter and sugar long enough—about 3 minutes.
Preparation Method
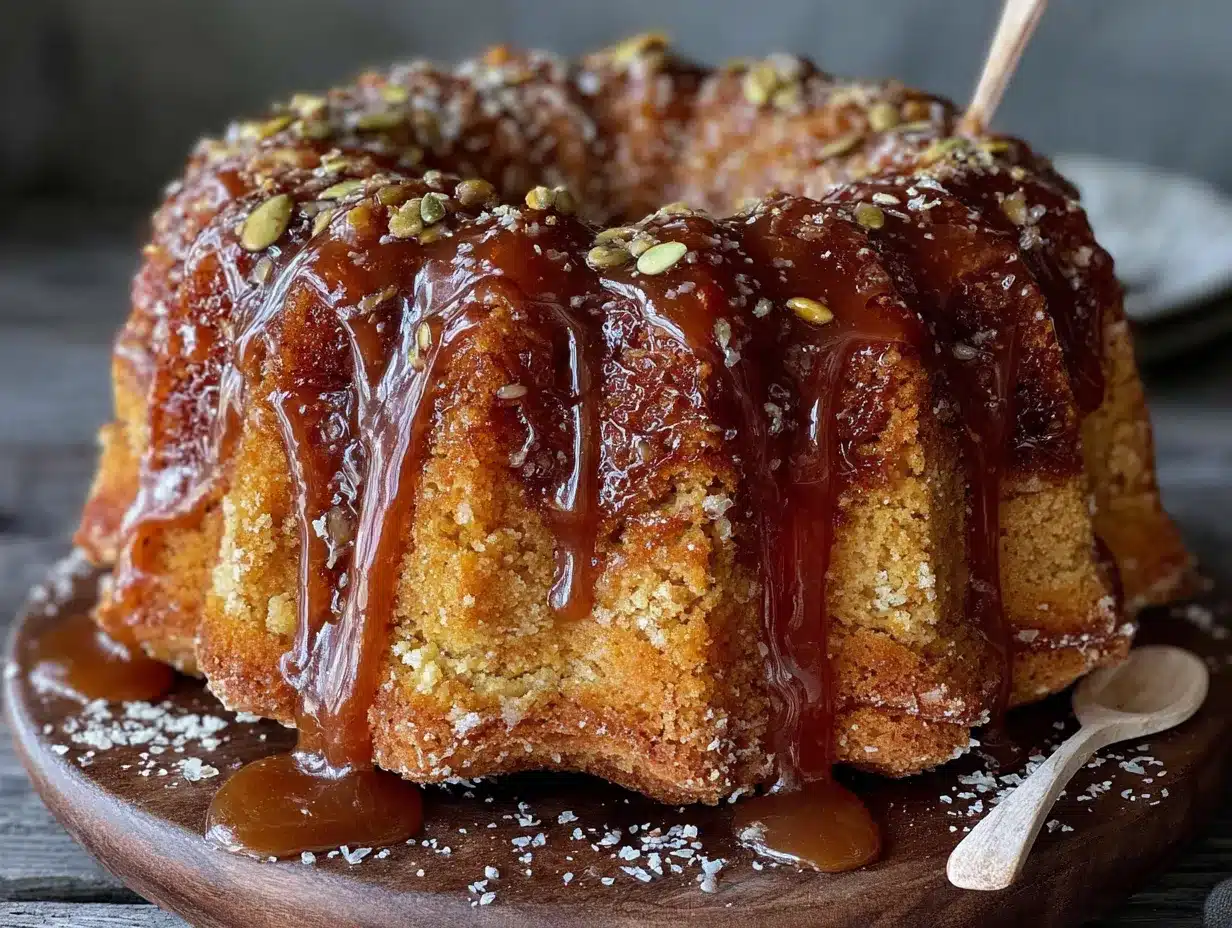
Alright, let’s get to the good part. Take your time with these steps—rushing is the number one reason cakes don’t turn out right.
- Brown the butter. Cut the butter into pieces and add it to a light-colored saucepan over medium heat. Stir constantly with a rubber spatula or wooden spoon. The butter will melt, then foam, then start to crackle. After a few minutes, the crackling will subside and you’ll see golden-brown specks forming at the bottom. The smell will be nutty and incredible. Once the butter is a deep amber color (think the color of a penny), remove it from the heat immediately. Pour it into a heatproof bowl and let it cool for about 15 minutes. Don’t skip the cooling step—hot butter will cook your eggs.
- Preheat and prep. Preheat your oven to 350°F (175°C). Position the rack in the center of the oven. Grease your bundt pan thoroughly—get into every nook and cranny. I use a pastry brush to apply a thick layer of shortening, then dust with flour. Tap out the excess flour over the sink.
- Mix the dry ingredients. In a medium bowl, whisk together the flour, baking powder, baking soda, salt, cinnamon, ginger, nutmeg, and cloves. Set aside. This step ensures the spices are evenly distributed throughout the cake.
- Cream the sugars and butter. In a large mixing bowl, combine the cooled browned butter with the granulated sugar and brown sugar. Beat with your mixer on medium speed for 2-3 minutes until the mixture looks lighter and slightly fluffy. It won’t get as fluffy as regular butter since it’s melted, but it should look well-combined and creamy.
- Add the eggs one at a time. Crack each egg into a small bowl first (no shell surprises!), then add it to the butter-sugar mixture. Beat on medium speed after each addition until fully incorporated. The batter should look smooth and glossy.
- Add the pumpkin and vanilla. Pour in the pumpkin puree and vanilla extract. Beat on low speed until combined. Don’t overmix here—just until you don’t see any more white streaks. The batter will look a bit curdled at this point, but that’s totally normal.
- Alternate adding dry ingredients and buttermilk. With the mixer on low speed, add about one-third of the flour mixture. Mix until just combined. Add half of the buttermilk, mix briefly. Add another third of the flour, mix, then the remaining buttermilk, then the last of the flour. Stop mixing as soon as the flour disappears. Overmixing at this stage will make the cake tough.
- Finish mixing by hand. Use your rubber spatula to give the batter a few final folds, scraping the bottom of the bowl to make sure everything is incorporated. The batter should be thick and smell amazing.
- Pour into the pan. Spoon the batter into the prepared bundt pan and spread it evenly. Tap the pan firmly on the counter a few times to release any air bubbles. This step is important—air bubbles can create holes in your finished cake.
- Bake. Place the pan in the preheated oven and bake for 50-60 minutes. Start checking at 50 minutes by inserting a long skewer or toothpick into the center. If it comes out clean or with just a few moist crumbs, it’s done. The top should be deep golden brown and the cake should pull away slightly from the edges of the pan.
- Cool in the pan. Place the pan on a cooling rack and let the cake cool in the pan for exactly 15 minutes. Set a timer—I’m serious. If you try to unmold it too soon, it will fall apart. If you wait too long, it might stick.
- Unmold the cake. Place your cooling rack upside down on top of the pan. Holding both together, flip them over. Lift the pan off gently. If any parts stick, give the pan a gentle tap. Let the cake cool completely on the rack before glazing—about 1-2 hours.
- Make the glaze. In a small bowl, whisk together the sifted powdered sugar, maple syrup, and 2 tablespoons of milk or cream. Add more liquid a teaspoon at a time until the glaze is thick but pourable—it should slowly drizzle off your whisk. Add a pinch of salt.
- Glaze the cake. Place the cooled cake on your serving plate. Drizzle the glaze over the top, letting it drip down the sides naturally. Don’t try to spread it with a knife—the drips are part of the charm. Let the glaze set for about 15 minutes before slicing.
Cooking Tips & Techniques
I’ve made this cake more times than I can count, and I’ve learned a few things the hard way. Let me save you some trouble.
Don’t rush the brown butter. The first time I made browned butter, I got impatient and cranked the heat to high. Ten seconds later, I had burnt butter that smelled like a campfire gone wrong. Keep the heat at medium and be patient. The whole process takes about 5-7 minutes, and those last 30 seconds are when the magic happens. Watch for the color change and that nutty aroma—once you smell it, it’s almost done.
Room temperature ingredients matter. I know, I know, it’s annoying to wait for eggs and buttermilk to warm up. But cold ingredients don’t emulsify properly, and you’ll end up with a dense, uneven crumb. If you’re in a hurry, place the eggs in a bowl of warm water for 5 minutes and microwave the buttermilk for 10-15 seconds.
Grease that pan like your life depends on it. I cannot stress this enough. Bundt pans are notorious for sticking, especially in the fancy crevices. I use a pastry brush to get shortening into every groove, then dust with flour and tap out the excess. If you’re using a non-stick spray, make sure it contains flour—regular cooking spray won’t cut it.
Let it cool properly. The 15-minute cooling period in the pan is crucial. Too soon and the cake crumbles. Too late and it steams and sticks. Set a timer and don’t wander off. I’ve lost more than one cake to “I’ll just check my phone real quick.”
Test for doneness with a skewer. Toothpicks are too short for a bundt cake. Use a long wooden skewer or a thin knife. Insert it into the thickest part of the cake—usually near the center tube. If it comes out clean, you’re good. If there’s wet batter, give it another 5 minutes.
Variations & Adaptations
One of the best things about this cake is how adaptable it is. Here are some ways to make it your own.
Gluten-Free Version: Swap the all-purpose flour with a 1:1 gluten-free baking flour blend. I’ve used Bob’s Red Mill and King Arthur brands with great success. Don’t use almond flour or coconut flour alone—they’ll change the texture completely. Add 1 teaspoon of xanthan gum if your blend doesn’t already include it.
Dairy-Free Adaptation: Use a plant-based butter like Earth Balance for browning (it browns beautifully, by the way). Replace the buttermilk with ½ cup of unsweetened almond or oat milk mixed with 1 tablespoon of lemon juice. For the glaze, use coconut cream or a dairy-free milk alternative.
Spice It Up: If you love a bold pumpkin spice flavor, add ½ teaspoon of cardamom and a pinch of white pepper to the spice blend. The cardamom adds this floral, almost citrusy note that’s absolutely gorgeous with the brown butter.
Add Mix-Ins: Fold in 1 cup of toasted pecans or walnuts after the flour is incorporated. Or try ¾ cup of dried cranberries for a tart contrast. One time I added chocolate chips (because why not?), and it was incredible—like a pumpkin chocolate chip muffin in cake form.
Change the Glaze: Not a maple fan? Make a cream cheese glaze instead. Beat 4 ounces of softened cream cheese with 2 tablespoons of butter, then add 1 cup of powdered sugar and a splash of vanilla. Thin with milk until pourable. It’s tangy and rich and perfect with the pumpkin.
Serving & Storage Suggestions
This cake is wonderful at room temperature, but I actually prefer it slightly warm. Pop a slice in the microwave for about 10-15 seconds—the glaze gets a little melty and the cake becomes incredibly tender. It’s dangerous, honestly.
For serving, I like to keep it simple. A dollop of lightly sweetened whipped cream or a scoop of vanilla ice cream is all you need. If I’m feeling fancy, I’ll sprinkle some toasted pumpkin seeds or chopped pecans over the glazed cake for a little crunch.
This cake pairs beautifully with coffee, chai tea, or a hot apple cider. For a brunch spread, serve it alongside a frittata or a simple fruit salad—the richness of the cake balances nicely with something fresh.
Storage: Store the cake in an airtight container at room temperature for up to 3 days. If you’ve glazed the entire cake, place a piece of parchment paper between the cake and the lid to prevent the glaze from sticking. After day 3, move it to the refrigerator for up to 5 days total.
Freezing: This cake freezes beautifully. Wrap the unglazed cake tightly in plastic wrap, then in aluminum foil. Freeze for up to 3 months. When you’re ready to serve, thaw it overnight in the refrigerator, bring it to room temperature, and then glaze it fresh. I’ve done this for Thanksgiving prep and it works like a charm.
Reheating: For individual slices, microwave for 10-15 seconds. For a whole cake, warm it in a 300°F (150°C) oven for about 10 minutes—just enough to take the chill off without melting the glaze completely.
The flavors actually deepen after a day or two. I’m not saying you should wait that long, but if you somehow have leftovers, you’re in for a treat.
Nutritional Information & Benefits
Let’s be honest—this is a cake, not a health food. But that doesn’t mean it can’t fit into a balanced lifestyle. Here’s a rough estimate per slice (based on 12 servings):
- Calories: ~420
- Fat: 18g
- Carbohydrates: 62g
- Protein: 6g
- Fiber: 2g
- Sugar: 42g
Now, let’s talk about the good stuff. Pumpkin is packed with vitamin A (over 200% of your daily needs in one serving), which supports eye health and immune function. It’s also rich in fiber, which helps keep you full and supports digestion. The cinnamon in this cake has anti-inflammatory properties, and ginger is known for settling upset stomachs. So while this isn’t a salad, it’s not empty calories either.
If you’re watching your sugar intake, you can reduce the granulated sugar to 1 ½ cups without affecting the texture too much. The glaze is where most of the sugar lives, so you could skip it entirely and dust the cake with powdered sugar instead. I’ve done this for brunches where I wanted something a little lighter, and it’s still delicious.
This recipe contains gluten, dairy, and eggs, so it’s not suitable for those with allergies to those ingredients. But with the substitutions I mentioned earlier, you can easily adapt it.
Conclusion
This brown butter pumpkin bundt cake with maple glaze is the kind of recipe that becomes a tradition. It’s the cake you bring to Friendsgiving and everyone asks for the recipe. It’s the cake you make on a rainy Sunday just because the house smells amazing. It’s the cake that converts pumpkin skeptics—I’ve seen it happen with my own eyes.
What I love most about this recipe is how forgiving it is. It doesn’t require any fancy techniques or hard-to-find ingredients. It just asks for a little patience with the brown butter and a generous hand with the pan greasing. And in return, it gives you a cake that’s moist, flavorful, and absolutely stunning on a plate.
I’d love to hear how yours turns out. Did you add pecans? Try the cream cheese glaze? Convert a pumpkin hater in your own life? Drop a comment below and let me know. And if you share it on social media, tag me—I want to see your beautiful bundt cakes!
Now go preheat that oven. Your kitchen is about to smell incredible.
Frequently Asked Questions
Can I use a different pan if I don’t have a bundt pan?
Yes! You can bake this batter in two 9-inch round cake pans or a 9×13 inch rectangle pan. Adjust the baking time to 30-35 minutes for round pans and 35-40 minutes for the rectangle pan. Start checking for doneness a few minutes early since the thinner layers bake faster.
Why did my cake stick to the pan?
This usually happens for one of three reasons: the pan wasn’t greased thoroughly enough, the cake wasn’t cooled long enough in the pan, or the pan has a worn non-stick coating. Next time, use a pastry brush to apply a thick layer of shortening into every crevice, then dust with flour. And set that 15-minute timer!
Can I make this cake ahead of time?
Absolutely. You can bake the cake a day ahead and store it wrapped tightly at room temperature. Glaze it just before serving for the best presentation. You can also freeze the unglazed cake for up to 3 months—perfect for holiday prep.
My glaze is too thin or too thick. How do I fix it?
If the glaze is too thin, add more sifted powdered sugar a tablespoon at a time until it reaches the right consistency. If it’s too thick, add milk or cream a teaspoon at a time. The ideal glaze should slowly drizzle off your whisk and hold its shape for a second before melting back into the bowl.
Can I use fresh pumpkin instead of canned?
You can, but I don’t recommend it for this recipe. Fresh pumpkin puree has a much higher water content than canned, which can make the cake dense and gummy. If you really want to use fresh, you’ll need to strain the puree through cheesecloth overnight to remove excess moisture. Canned pumpkin is actually more consistent and reliable for baking.
Pin This Recipe!
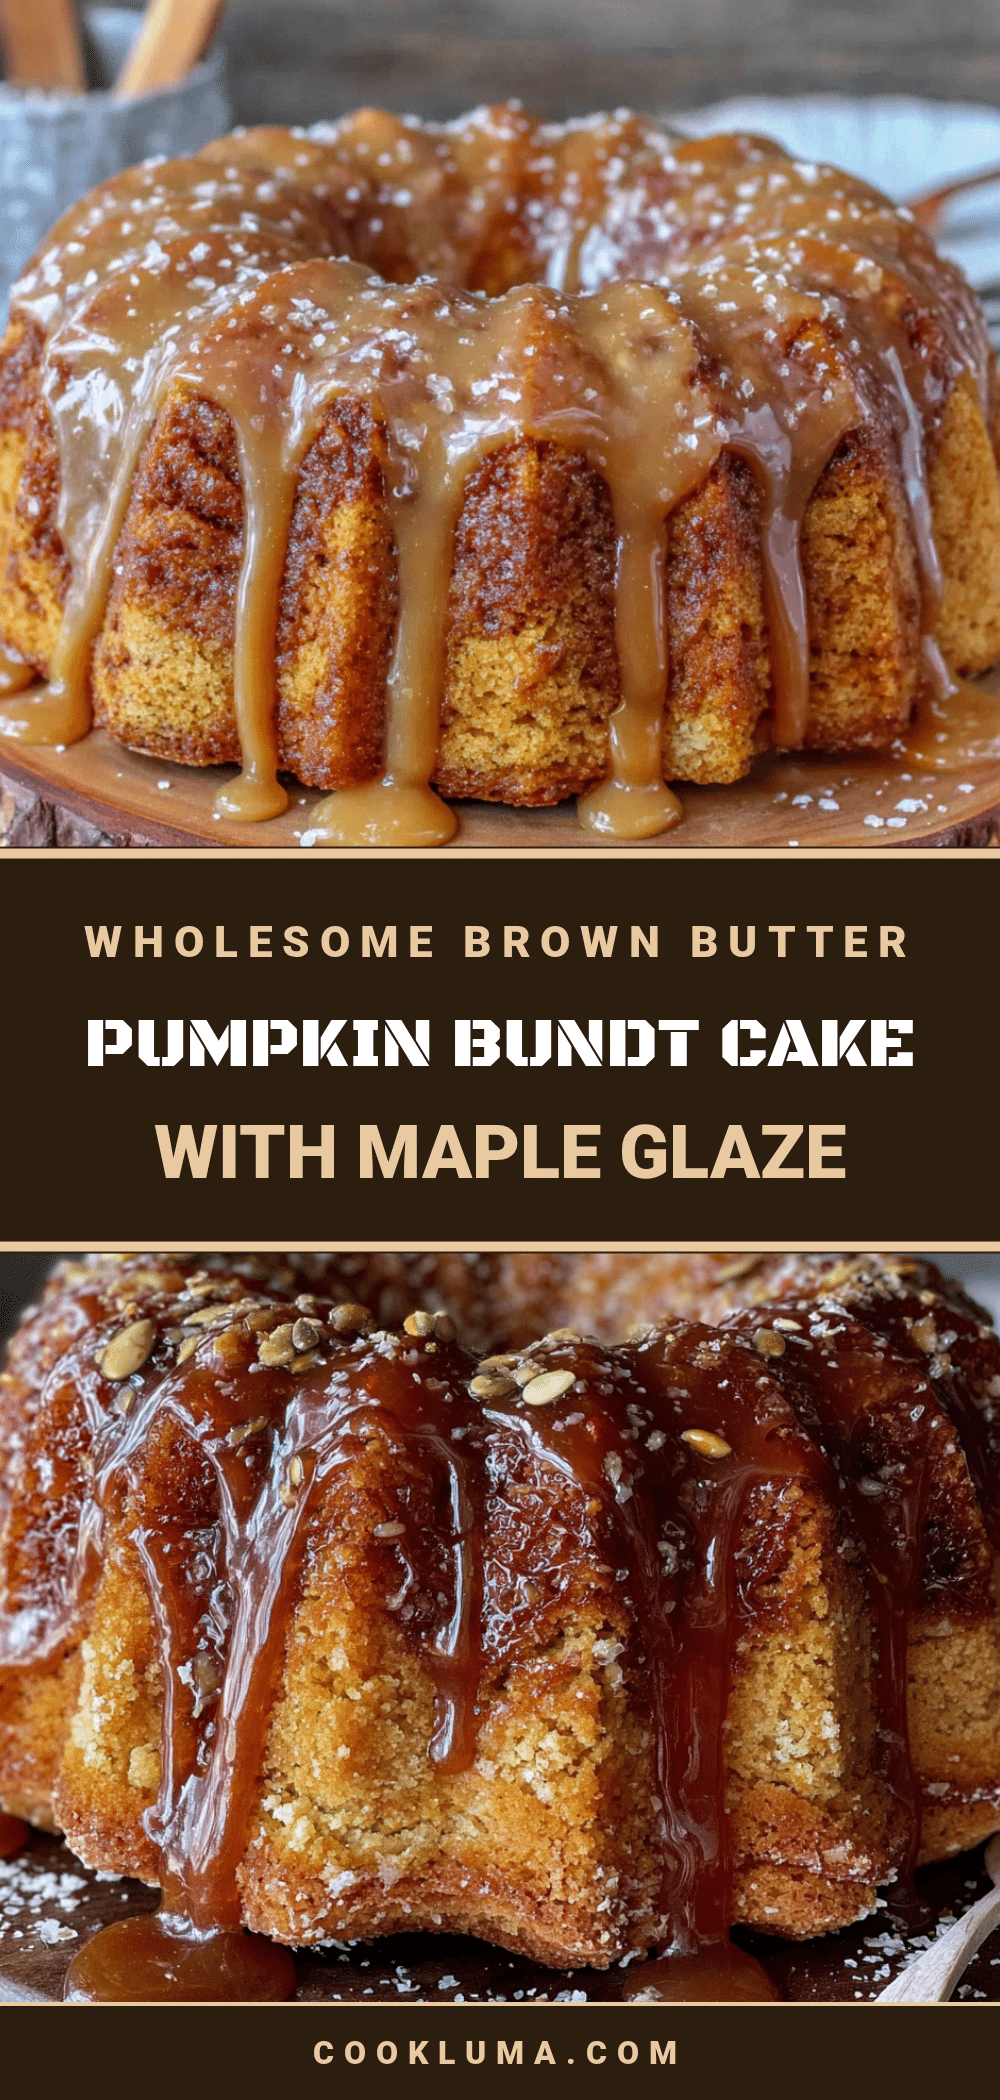
Best Brown Butter Pumpkin Bundt Cake with Maple Glaze
This brown butter pumpkin bundt cake with maple glaze is incredibly moist and flavorful, featuring a nutty depth from browned butter and a sticky-sweet maple glaze. It’s a crowd-pleaser that converts even pumpkin skeptics.
- Prep Time: 20 minutes
- Cook Time: 55 minutes
- Total Time: 1 hour 15 minutes
- Yield: 12 servings 1x
- Category: Dessert
- Cuisine: American
Ingredients
- 1 cup (2 sticks) unsalted butter
- 1 ¾ cups (350g) granulated sugar
- ½ cup (100g) packed light brown sugar
- 4 large eggs, room temperature
- 1 can (15 oz) pumpkin puree
- ½ cup (120ml) buttermilk, room temperature
- 2 teaspoons vanilla extract
- 2 ½ cups (312g) all-purpose flour
- 2 teaspoons baking powder
- 1 teaspoon baking soda
- 1 teaspoon salt
- 2 teaspoons ground cinnamon
- 1 teaspoon ground ginger
- ½ teaspoon ground nutmeg
- ¼ teaspoon ground cloves
- 1 ½ cups (180g) powdered sugar, sifted
- 3 tablespoons pure maple syrup
- 2–3 tablespoons milk or heavy cream
- Pinch of salt
Instructions
- Brown the butter: Cut the butter into pieces and add to a light-colored saucepan over medium heat. Stir constantly until the butter melts, foams, and turns a deep amber color with golden-brown specks. Remove from heat and pour into a heatproof bowl. Let cool for about 15 minutes.
- Preheat and prep: Preheat oven to 350°F (175°C). Grease a 10-12 cup bundt pan thoroughly with shortening and dust with flour.
- Mix dry ingredients: In a medium bowl, whisk together flour, baking powder, baking soda, salt, cinnamon, ginger, nutmeg, and cloves. Set aside.
- Cream sugars and butter: In a large mixing bowl, combine cooled browned butter with granulated sugar and brown sugar. Beat on medium speed for 2-3 minutes until lighter and slightly fluffy.
- Add eggs one at a time: Add eggs one at a time, beating on medium speed after each addition until fully incorporated. Batter should be smooth and glossy.
- Add pumpkin and vanilla: Pour in pumpkin puree and vanilla extract. Beat on low speed until combined. Batter may look curdled; that’s normal.
- Alternate dry ingredients and buttermilk: With mixer on low, add one-third of flour mixture, mix until just combined. Add half of buttermilk, mix briefly. Repeat with remaining flour and buttermilk, ending with flour. Stop mixing as soon as flour disappears.
- Finish mixing by hand: Use a rubber spatula to fold batter a few times, scraping bottom of bowl to ensure everything is incorporated.
- Pour into pan: Spoon batter into prepared bundt pan and spread evenly. Tap pan firmly on counter a few times to release air bubbles.
- Bake: Bake for 50-60 minutes. Start checking at 50 minutes by inserting a long skewer into center; if it comes out clean or with a few moist crumbs, it’s done. Top should be deep golden brown.
- Cool in pan: Place pan on a cooling rack and let cake cool in pan for exactly 15 minutes. Set a timer.
- Unmold cake: Place cooling rack upside down on top of pan, flip over, and lift pan off gently. Let cake cool completely on rack before glazing (1-2 hours).
- Make glaze: In a small bowl, whisk together sifted powdered sugar, maple syrup, and 2 tablespoons milk or cream. Add more liquid a teaspoon at a time until glaze is thick but pourable. Add a pinch of salt.
- Glaze cake: Place cooled cake on serving plate. Drizzle glaze over top, letting it drip down sides naturally. Let glaze set for about 15 minutes before slicing.
Notes
Don’t rush the brown butter; keep heat at medium and watch for color change. Room temperature ingredients are important for proper emulsification. Grease the bundt pan thoroughly to prevent sticking. Let cake cool in pan for exactly 15 minutes before unmolding. For best results, use a long skewer to test doneness.
Nutrition
- Serving Size: 1 slice
- Calories: 420
- Sugar: 42
- Sodium: 380
- Fat: 18
- Saturated Fat: 10
- Carbohydrates: 62
- Fiber: 2
- Protein: 6
Keywords: brown butter, pumpkin bundt cake, maple glaze, fall dessert, pumpkin cake, bundt cake, Thanksgiving dessert


