The church bake sale was in six hours and I’d completely forgotten. I mean, completely. I’d walked past the sign-up sheet in the vestibule all week, telling myself I had plenty of time. Then Thursday morning rolled around, and I woke up with that jolt of panic—you know the one. The kind where you sit bolt upright in bed and groan before your feet even hit the floor.
Everyone else would be bringing their A-game. Martha’s famous lemon bars, the ones with the perfect dusting of powdered sugar. Old Mrs. Patterson’s pecan tarts that she’s been making since the Carter administration. And me? I had a can of pumpkin puree in the pantry, a stick of butter in the fridge, and about four hours before I needed to be there with something that didn’t look like a last-minute disaster. I mean, honestly, I was tempted to just stop at the grocery store bakery and pretend. But I couldn’t do that to myself. Or to the bake sale.
So I did what any reasonable person in a panic would do. I decided to make a homemade pumpkin pie from scratch. With a flaky all-butter crust. Because when you’re late and underprepared, apparently your brain decides to go full homesteader. I cracked my knuckles, cranked up the oven, and told myself it was fine. Totally fine.
The butter was cold, the flour was measured, and I had exactly one shot at this. No time for a second attempt. My kitchen looked like a flour bomb had gone off by the time I was done, and I may have burned my fingertips on the pie crust edge trying to crimp it while it was still too warm. But you know what? That pie—that slightly lopsided, imperfectly crimped, homemade pumpkin pie—sold out in the first fifteen minutes. Someone actually asked me for the recipe. I laughed and said I’d have to write it down properly. That day, I learned something important: you don’t need perfection. You just need a good recipe and a little bit of faith.
Why You’ll Love This Recipe
This isn’t just another pumpkin pie recipe. This is the one that makes people close their eyes after the first bite. I’ve tested this version at least a dozen times, tweaking the spice blend, adjusting the butter temperature, and even swapping out different types of cream until I got it exactly right. It’s been family-approved, neighbor-approved, and yes—church bake sale approved.
- Quick & Easy : The filling comes together in about 10 minutes. The crust needs a little chill time, but the active work is minimal. Perfect for a busy Thursday morning panic-bake.
- Simple Ingredients : No fancy grocery trips needed. Butter, flour, sugar, eggs, pumpkin puree, and a handful of spices. You probably have most of this in your kitchen right now.
- Perfect for Cozy Evenings : This pie is made for cold weather, slow afternoons, and the kind of day that needs fixing with something warm and sweet. It’s comfort food in its purest form.
- Crowd-Pleaser : I’ve served this to kids, adults, and picky in-laws. It always gets rave reviews. The flaky crust and silky filling are a winning combination.
- Unbelievably Delicious : The texture is what sets this apart. The filling is creamy without being heavy, and the crust shatters when you bite into it. It’s next-level comfort food.
What makes this recipe different from the rest? It’s the technique. Most recipes skip the step of pre-baking the crust properly, which leads to a soggy bottom. Not this one. I also use a blend of heavy cream and whole milk for the filling, which gives it that ultra-smooth, velvety texture without being too rich. And the spice blend? I spent months tweaking it. It’s warm, aromatic, and perfectly balanced—not too heavy on the cinnamon, with just a hint of ginger and clove.
This recipe is the kind that makes you want to curl up on the couch with a slice and a cup of coffee. It’s soul-soothing satisfaction in every bite.
What Ingredients You Will Need
This recipe uses simple, wholesome ingredients to deliver bold flavor and satisfying texture without the fuss. Most of these are pantry staples, especially if you do a lot of fall baking.
For the Flaky All-Butter Crust
- 1 ¼ cups (160g) all-purpose flour (I recommend King Arthur Flour for consistent results)
- ½ teaspoon salt
- 1 tablespoon granulated sugar
- ½ cup (113g) cold unsalted butter, cut into small cubes (must be very cold—straight from the fridge)
- 3-4 tablespoons ice water (plus more if needed)
For the Pumpkin Filling
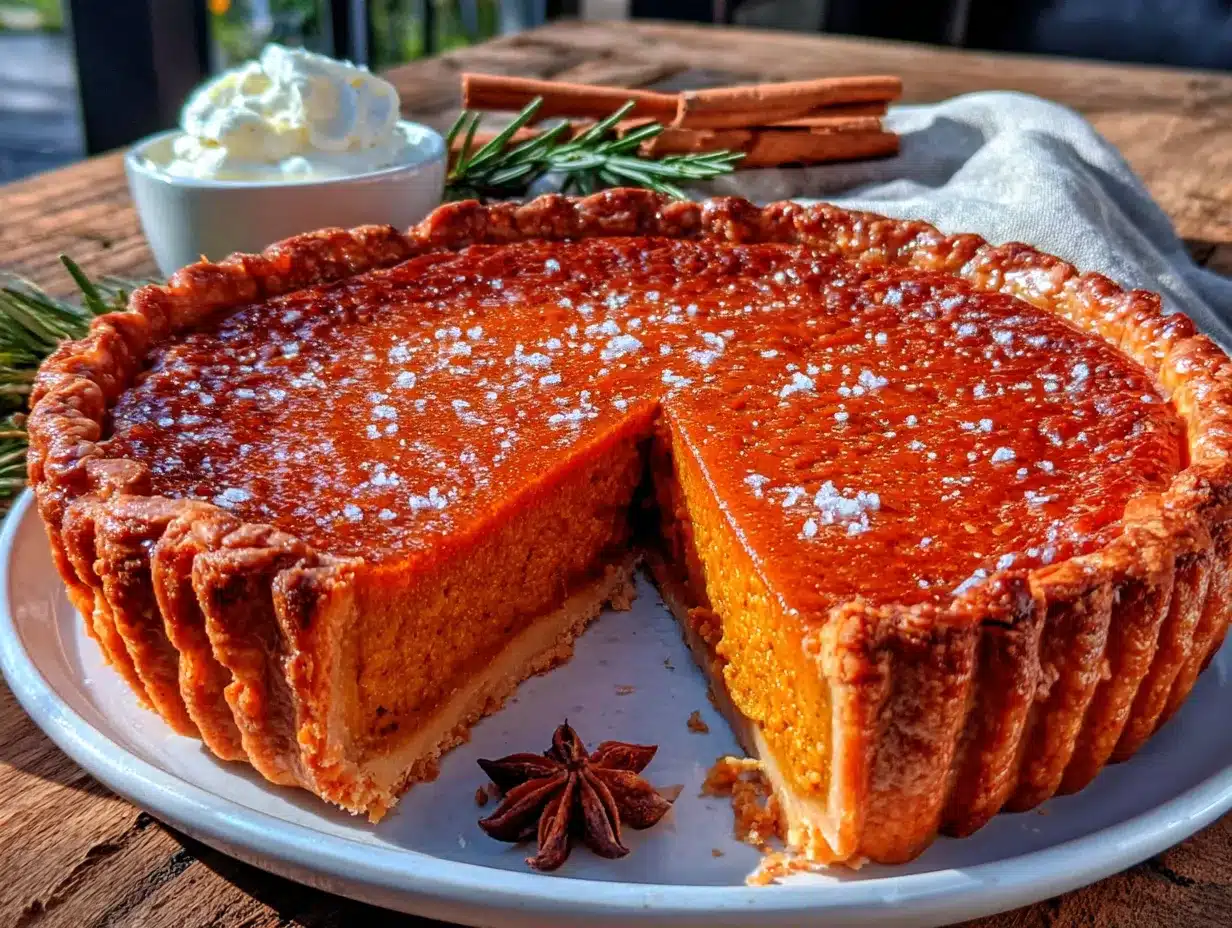
- 1 can (15 oz or 425g) pumpkin puree (not pumpkin pie filling—make sure it’s 100% pure pumpkin)
- ¾ cup (150g) packed light brown sugar
- 2 large eggs, room temperature
- 1 large egg yolk, room temperature
- 1 cup (240ml) heavy cream
- ¼ cup (60ml) whole milk
- 1 teaspoon vanilla extract
- 1 ½ teaspoons ground cinnamon
- ½ teaspoon ground ginger
- ¼ teaspoon ground nutmeg (freshly grated if possible)
- ¼ teaspoon ground cloves
- ¼ teaspoon salt
Ingredient Notes & Substitutions
Butter : Use unsalted butter so you can control the salt level. European-style butter (like Plugrà or Kerrygold) has a higher fat content, which makes the crust even flakier. If you only have salted butter, reduce the added salt in the crust to ¼ teaspoon.
Pumpkin Puree : I prefer Libby’s brand for consistent texture and flavor. It’s thicker than some store brands, which helps prevent a watery filling. If you’re using homemade pumpkin puree, make sure to strain it through cheesecloth first to remove excess moisture.
Heavy Cream & Milk : The combination of heavy cream and whole milk gives the filling a luxurious texture without being too heavy. You can substitute with half-and-half if needed, but the filling won’t be quite as silky. For a dairy-free version, use full-fat coconut milk and a dairy-free butter substitute.
Spices : Feel free to adjust the spice blend to your taste. Some people prefer more cinnamon, others like a stronger ginger kick. I’ve found this ratio to be the sweet spot—warm and aromatic without overwhelming the pumpkin flavor.
Equipment Needed
- 9-inch pie dish (glass or ceramic works best for even baking)
- Rolling pin
- Large mixing bowl
- Medium mixing bowl
- Pastry cutter or two forks (for cutting butter into flour)
- Plastic wrap
- Parchment paper
- Pie weights or dried beans (for blind baking)
- Whisk
- Measuring cups and spoons
- Kitchen scale (optional but helpful for accuracy)
- Cooling rack
If you don’t have pie weights, you can use dried beans or even uncooked rice. I’ve used the same bag of dried black beans for blind baking for years—they work perfectly and you can’t use them for soup afterward, so just keep them in a jar labeled “pie weights.”
Preparation Method
Step 1: Make the Crust (30 minutes active + 1 hour chilling)
In a large mixing bowl, whisk together the flour, salt, and sugar. Add the cold butter cubes. Using a pastry cutter or two forks, cut the butter into the flour until the mixture resembles coarse meal with some pea-sized butter pieces remaining. You want to see visible bits of butter—this is what creates the flaky layers.
Sprinkle 3 tablespoons of ice water over the mixture and stir with a fork until the dough starts to come together. If it seems dry, add the remaining tablespoon of water, one teaspoon at a time. The dough should hold together when you squeeze it in your fist, but it shouldn’t be sticky.
Turn the dough out onto a lightly floured surface and shape it into a disk about 1 inch thick. Wrap tightly in plastic wrap and refrigerate for at least 1 hour. You can make this up to 3 days ahead.
Step 2: Roll Out the Crust (15 minutes)
Remove the dough from the refrigerator and let it sit at room temperature for 5 minutes—just until it’s pliable enough to roll without cracking. On a lightly floured surface, roll the dough into a 12-inch circle, about ⅛ inch thick. Rotate the dough frequently and add more flour as needed to prevent sticking.
Carefully transfer the dough to your 9-inch pie dish. Gently press it into the bottom and up the sides. Trim the excess dough, leaving about a ½-inch overhang. Fold the overhang under itself and crimp the edges using your fingers or a fork. Place the crust in the refrigerator for 30 minutes to firm up.
Step 3: Blind Bake the Crust (25 minutes)
Preheat your oven to 375°F (190°C). Line the chilled pie crust with parchment paper and fill with pie weights or dried beans. Bake for 15 minutes. Remove the parchment and weights, then bake for another 5-7 minutes, until the bottom looks dry and lightly golden. Set aside to cool slightly while you make the filling.
Pro tip: If you see any cracks forming in the crust during blind baking, gently press a little bit of reserved dough or a beaten egg white into the crack to seal it. I learned this the hard way after a filling leak disaster.
Step 4: Make the Filling (10 minutes)
Reduce the oven temperature to 350°F (175°C). In a medium bowl, whisk together the pumpkin puree and brown sugar until smooth. Add the eggs and egg yolk, one at a time, whisking well after each addition. Whisk in the heavy cream, milk, and vanilla extract.
In a small bowl, combine the cinnamon, ginger, nutmeg, cloves, and salt. Add the spice mixture to the pumpkin mixture and whisk until fully incorporated. The filling should be smooth and silky, with a beautiful deep orange color.
Step 5: Bake the Pie (50-60 minutes)
Place the pre-baked crust on a baking sheet (this catches any spills and makes it easier to handle). Pour the filling into the warm crust. Bake at 350°F (175°C) for 50-60 minutes, until the edges are set and the center is just slightly jiggly—like set Jell-O, not liquid.
If the crust edges are browning too quickly, loosely cover them with aluminum foil or a pie shield after about 30 minutes. Let the pie cool completely on a wire rack, at least 2 hours. The filling will continue to set as it cools.
Cooking Tips & Techniques
I’ve made this pie more times than I can count, and I’ve definitely had my share of failures. Here are the lessons I learned the hard way so you don’t have to.
Keep everything cold. For the flakiest crust, your butter and water need to be ice cold. If your kitchen is warm, pop the flour and bowl in the fridge for 10 minutes before you start. Warm butter melts into the flour instead of creating those beautiful flaky layers.
Don’t overwork the dough. This is the most common mistake. Overworking the dough develops gluten, which makes the crust tough instead of tender. Mix just until it comes together, and handle it as little as possible. A few streaks of flour are totally fine.
Blind bake is non-negotiable. I know it’s an extra step, but trust me on this. If you skip blind baking, you’ll end up with a soggy bottom crust. The pre-baking creates a barrier that keeps the crust crisp even after the wet filling is added. I once tried to skip it because I was in a hurry, and the result was a sad, doughy mess.
Watch the jiggle. The filling is done when the edges are set and the center wobbles slightly when you gently shake the pan. If the whole pie looks liquid, it needs more time. If it’s completely firm, you’ve overbaked it and the filling might crack. That jiggle is your friend.
Cool completely. I know it’s hard to wait, but slicing into a warm pie will result in a runny mess. The filling needs time to fully set. Let it cool at room temperature for at least 2 hours, then refrigerate for another hour if you want clean slices.
Variations & Adaptations
One of the best things about this recipe is how adaptable it is. Here are some variations I’ve tried and loved.
Spiced Maple Pumpkin Pie
Replace the brown sugar with ¾ cup of pure maple syrup and reduce the heavy cream to ¾ cup. The maple flavor pairs beautifully with the warm spices. Just note that the filling will be slightly softer, so make sure to cool it completely before slicing.
Ginger Snap Crust
For an extra kick of spice, swap the all-butter crust for a ginger snap crust. Crush 2 cups of ginger snaps (about 200g) and mix with 5 tablespoons of melted butter. Press into the pie dish and bake at 350°F (175°C) for 10 minutes before adding the filling. No blind baking needed.
Dairy-Free Version
Use a dairy-free butter substitute (like Miyoko’s or Earth Balance) for the crust and replace the heavy cream and milk with full-fat coconut cream. The coconut flavor is subtle and actually complements the pumpkin nicely. I’ve made this for friends with dairy allergies and they couldn’t tell the difference.
Pumpkin Pie Bars
If you don’t want to deal with a pie crust, press the dough into a 9×13-inch baking dish and top with the filling. Bake at 350°F (175°C) for 35-40 minutes. Cut into squares for an easy, portable dessert. Perfect for potlucks.
Serving & Storage Suggestions
This pie is best served at room temperature or slightly chilled. I personally love it with a generous dollop of lightly sweetened whipped cream. The cool, airy cream is the perfect contrast to the rich, spiced filling.
For a truly cozy experience, serve a slice with a cup of hot coffee or a mug of spiced apple cider. It’s also wonderful with a scoop of vanilla bean ice cream—the cold creaminess against the warm spices is pure comfort.
Storage: Cover the pie loosely with plastic wrap or aluminum foil and store in the refrigerator for up to 4 days. The crust will stay crisp for the first 2 days, then soften slightly. I actually think day 2 is when the flavors are at their best—the spices have had time to meld together.
Freezing: This pie freezes beautifully. Let it cool completely, then wrap it tightly in plastic wrap and then aluminum foil. Freeze for up to 3 months. To serve, thaw overnight in the refrigerator and bring to room temperature before slicing.
Reheating: If you prefer warm pie, place individual slices on a baking sheet and warm in a 300°F (150°C) oven for 10 minutes. Don’t use the microwave—it will make the crust soggy.
Nutritional Information & Benefits
Per slice (based on 8 servings): Approximately 380 calories, 22g fat, 42g carbohydrates, 6g protein, 3g fiber, 28g sugar. This is an estimate and will vary based on specific ingredients used.
While this is definitely a treat, pumpkin is packed with vitamin A and fiber. One cup of pumpkin puree contains over 200% of your daily vitamin A needs, plus a good amount of vitamin C, potassium, and iron. The spices—cinnamon, ginger, nutmeg, and cloves—are also rich in antioxidants and have anti-inflammatory properties.
This recipe is not gluten-free, dairy-free, or vegan in its standard form, but see the variations section for adaptations. It contains eggs, dairy, and gluten.
I believe in balance. This pie is a celebration food, meant to be enjoyed fully and without guilt. One slice of homemade pie is not going to derail your health goals—it’s going to nourish your soul. And honestly, that matters just as much.
Conclusion
This homemade pumpkin pie with flaky all-butter crust is the kind of recipe that becomes a tradition. It’s the pie you make for Thanksgiving, for cozy Sunday dinners, for those days when you need something warm and familiar. It’s forgiving enough for beginners and satisfying enough for experienced bakers.
I love this recipe because it reminds me that you don’t need fancy equipment or hours of free time to make something beautiful. You just need good ingredients, a little patience, and the willingness to try. That slightly lopsided pie I made for the bake sale? It taught me that imperfection is part of the charm. Every crack in the crust, every uneven crimp—it’s proof that this was made by hand, with care.
So go ahead. Give it a try. Make a mess in your kitchen. Burn your fingertips a little. And then enjoy the best slice of pumpkin pie you’ve ever had. I promise you won’t regret it.
If you make this recipe, I’d love to hear about it! Leave a comment below and let me know how it turned out. Did you try a variation? Did your family love it? Share your stories—I read every single one.
Frequently Asked Questions
Can I use store-bought pie crust instead of making it from scratch?
Absolutely. If you’re short on time, a high-quality store-bought crust will work fine. Just make sure to blind bake it first to prevent a soggy bottom. I recommend the refrigerated crusts from the dairy section rather than the frozen ones—they tend to have a better texture.
Why did my pie crust shrink during baking?
This usually happens when the dough is overworked or not chilled enough before baking. The gluten tightens up in the oven and pulls the crust down. Make sure to chill the shaped crust for at least 30 minutes before blind baking, and handle the dough as little as possible.
How do I prevent cracks in my pumpkin pie filling?
Cracks happen when the filling is overbaked. The key is to pull the pie out when the center is still slightly jiggly—it will continue to set as it cools. Also, make sure your oven temperature is accurate. An oven thermometer is a cheap investment that makes a huge difference.
Can I make this pie ahead of time?
Yes! This pie actually tastes better the next day. You can bake it up to 2 days in advance and store it covered in the refrigerator. Bring it to room temperature before serving. You can also freeze the unbaked pie crust for up to 3 months—just thaw it in the refrigerator overnight before using.
My filling turned out watery. What went wrong?
This can happen if you’re using homemade pumpkin puree that hasn’t been strained properly, or if your canned pumpkin is a thinner brand. Make sure to use 100% pure pumpkin puree, not pumpkin pie filling. If your puree looks watery, you can cook it down on the stovetop for a few minutes to concentrate the flavor and remove excess moisture.
Pin This Recipe!
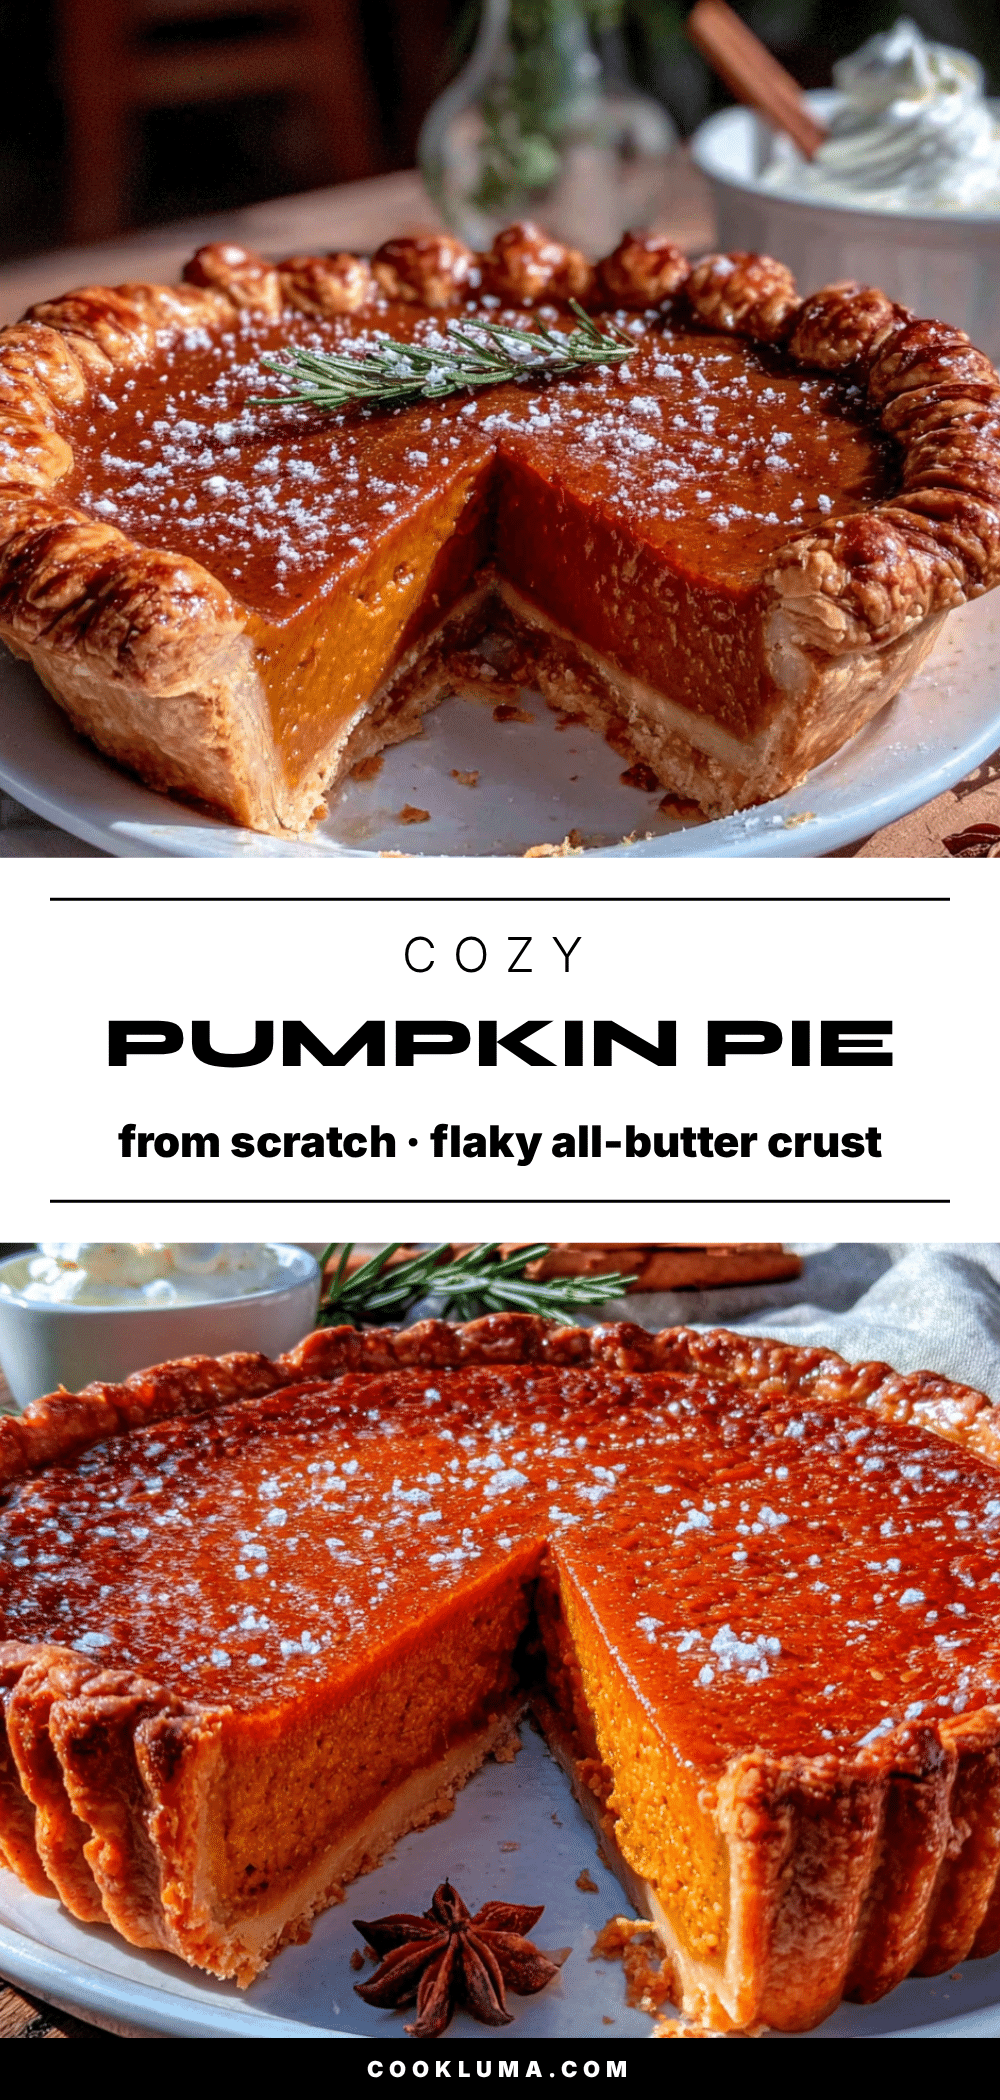
Homemade Pumpkin Pie with Flaky Butter Crust
This homemade pumpkin pie features a flaky all-butter crust and a silky, perfectly spiced filling. It’s a crowd-pleasing dessert that’s perfect for Thanksgiving, cozy evenings, or any occasion that calls for comfort food.
- Prep Time: 30 minutes
- Cook Time: 60 minutes
- Total Time: 2 hours 30 minutes (plus 1 hour chilling and 2 hours cooling)
- Yield: 8 servings 1x
- Category: Dessert
- Cuisine: American
Ingredients
- 1 ¼ cups (160g) all-purpose flour
- ½ teaspoon salt
- 1 tablespoon granulated sugar
- ½ cup (113g) cold unsalted butter, cut into small cubes
- 3–4 tablespoons ice water
- 1 can (15 oz or 425g) pumpkin puree (100% pure pumpkin)
- ¾ cup (150g) packed light brown sugar
- 2 large eggs, room temperature
- 1 large egg yolk, room temperature
- 1 cup (240ml) heavy cream
- ¼ cup (60ml) whole milk
- 1 teaspoon vanilla extract
- 1 ½ teaspoons ground cinnamon
- ½ teaspoon ground ginger
- ¼ teaspoon ground nutmeg (freshly grated if possible)
- ¼ teaspoon ground cloves
- ¼ teaspoon salt
Instructions
- Make the crust: In a large mixing bowl, whisk together flour, salt, and sugar. Add cold butter cubes. Using a pastry cutter or two forks, cut the butter into the flour until the mixture resembles coarse meal with some pea-sized butter pieces remaining.
- Sprinkle 3 tablespoons of ice water over the mixture and stir with a fork until the dough starts to come together. If it seems dry, add the remaining tablespoon of water, one teaspoon at a time. The dough should hold together when squeezed but not be sticky.
- Turn the dough out onto a lightly floured surface and shape into a disk about 1 inch thick. Wrap tightly in plastic wrap and refrigerate for at least 1 hour (up to 3 days ahead).
- Roll out the crust: Remove dough from refrigerator and let sit at room temperature for 5 minutes. On a lightly floured surface, roll the dough into a 12-inch circle, about ⅛ inch thick. Transfer to a 9-inch pie dish, press into bottom and up sides. Trim excess dough, leaving a ½-inch overhang. Fold overhang under and crimp edges. Refrigerate for 30 minutes.
- Blind bake the crust: Preheat oven to 375°F (190°C). Line chilled pie crust with parchment paper and fill with pie weights or dried beans. Bake for 15 minutes. Remove parchment and weights, then bake for another 5-7 minutes until bottom looks dry and lightly golden. Set aside to cool slightly.
- Make the filling: Reduce oven temperature to 350°F (175°C). In a medium bowl, whisk together pumpkin puree and brown sugar until smooth. Add eggs and egg yolk one at a time, whisking well after each addition. Whisk in heavy cream, milk, and vanilla extract.
- In a small bowl, combine cinnamon, ginger, nutmeg, cloves, and salt. Add spice mixture to pumpkin mixture and whisk until fully incorporated.
- Bake the pie: Place pre-baked crust on a baking sheet. Pour filling into warm crust. Bake at 350°F (175°C) for 50-60 minutes, until edges are set and center is just slightly jiggly. If crust edges brown too quickly, cover loosely with aluminum foil after about 30 minutes.
- Let pie cool completely on a wire rack, at least 2 hours. The filling will continue to set as it cools.
Notes
Keep all ingredients cold for the flakiest crust. Blind baking is essential to prevent a soggy bottom. The filling is done when the center jiggles slightly—do not overbake. Cool completely before slicing for clean pieces. The pie tastes even better the next day after flavors meld.
Nutrition
- Serving Size: 1 slice (1/8 of pie)
- Calories: 380
- Sugar: 28
- Sodium: 320
- Fat: 22
- Saturated Fat: 13
- Carbohydrates: 42
- Fiber: 3
- Protein: 6
Keywords: pumpkin pie, homemade pie, flaky crust, all-butter crust, Thanksgiving dessert, fall baking, pumpkin dessert, comfort food


