This was supposed to be a simple, no-fuss weeknight mac and cheese. I had the cheddar, the milk, the elbow pasta—everything for my go-to stovetop version that never lets me down. But somewhere between chopping an onion and answering a frantic text from my sister about what to bring to her potluck, I grabbed the wrong thing out of the fridge. Instead of reaching for the heavy cream, my hand closed around a container of leftover roasted butternut squash puree from a soup I’d made two days before. I stared at it for a solid ten seconds, already annoyed at myself. The oven was preheating for something else, the pasta water was boiling over, and I was already running late. Honestly, I almost just dumped the squash down the sink.
But then I thought—maybe? I mean, people put pumpkin in mac and cheese all the time, right? Butternut squash is basically the same thing, just a little sweeter. So I shrugged, stirred it into the cheese sauce, and held my breath. What came out was nothing like the plan—and way, way better.
The first thing I noticed was the color. This wasn’t your pale, sad mac and cheese. This was a deep, golden-orange, the kind of shade that makes you think it’s been aged in a fancy cheese cave or something. The squash didn’t make it taste like a vegetable casserole, either. It just made the sauce incredibly creamy, almost velvety, without needing a ton of extra butter or cream. And the flavor? Subtle. Nutty. It rounded out the sharp cheddar in a way I still can’t fully explain. I brought that accidental batch to the potluck, and let me tell you, it was the first dish to disappear. People asked for the recipe, and I had to admit it started with a mistake. Maybe you’ve been there—grabbing the wrong ingredient and ending up with something unforgettable. That’s how this Crowd-Pleasing Roasted Butternut Squash Mac and Cheese was born, and it’s been a staple at every gathering I’ve hosted since.
Why You’ll Love This Recipe
I’ve tested this recipe more times than I care to count, tweaking the ratio of squash to cheese, the type of pasta, even the roasting time for the squash itself. After a dozen trials (and a few disasters where the sauce broke or turned watery), I landed on a version that’s foolproof and genuinely crowd-pleasing. Here’s why this one stands out:
- Quick & Easy: From start to table, this comes together in about 45 minutes. The roasted squash does most of the work, and the sauce comes together in one pot. Perfect for busy weeknights or when you’re juggling hosting duties.
- Simple Ingredients: No fancy grocery trips. You likely have most of this in your kitchen right now—pasta, cheddar, milk, butter, and a single butternut squash. No nutritional yeast, no cashew cream, no obscure spices.
- Perfect for Gatherings: This is the dish you bring to a potluck, serve at Thanksgiving, or make for a cozy dinner party. It’s hearty enough to be a main but works beautifully as a side. Plus, it scales up easily.
- Crowd-Pleaser: I’ve served this to picky kids, cheese snobs, and veggie skeptics. Every single person has gone back for seconds. The squash is undetectable—it just makes the sauce better.
- Unbelievably Delicious: The texture is what gets you. It’s creamy without being gluey, rich without being heavy. The roasted squash adds a natural sweetness that balances the sharp cheddar perfectly.
What makes this recipe different from the dozens of other butternut squash mac and cheese recipes out there? It’s the technique. Instead of boiling the squash and mashing it (which can make the sauce grainy), I roast it until it’s caramelized, then blend it into the cheese sauce. This gives you a silky-smooth result with deep, roasted flavor. And I’ve nailed the cheese-to-squash ratio—enough squash to add creaminess and nutrients, but not so much that you lose that classic mac and cheese taste. This isn’t just another healthy swap. It’s comfort food reimagined—healthier, faster, but with the same soul-soothing satisfaction. Perfect for impressing guests without stress, or turning a simple meal into something memorable.
What Ingredients You Will Need
This recipe uses simple, wholesome ingredients to deliver bold flavor and satisfying texture without the fuss. Most of these are pantry staples, and the squash is easy to find in any grocery store year-round. Here’s what you’ll need:
For the Roasted Butternut Squash
- 1 medium butternut squash (about 2 pounds or 900g) – peeled, seeded, and cubed into 1-inch pieces. I recommend buying pre-cut cubes from the store if you’re short on time, but roasting a whole squash gives better flavor.
- 2 tablespoons olive oil – helps the squash caramelize. Avocado oil works too.
- ½ teaspoon salt – enhances the natural sweetness of the squash.
- ¼ teaspoon black pepper – a little kick to balance the sweetness.
For the Cheese Sauce
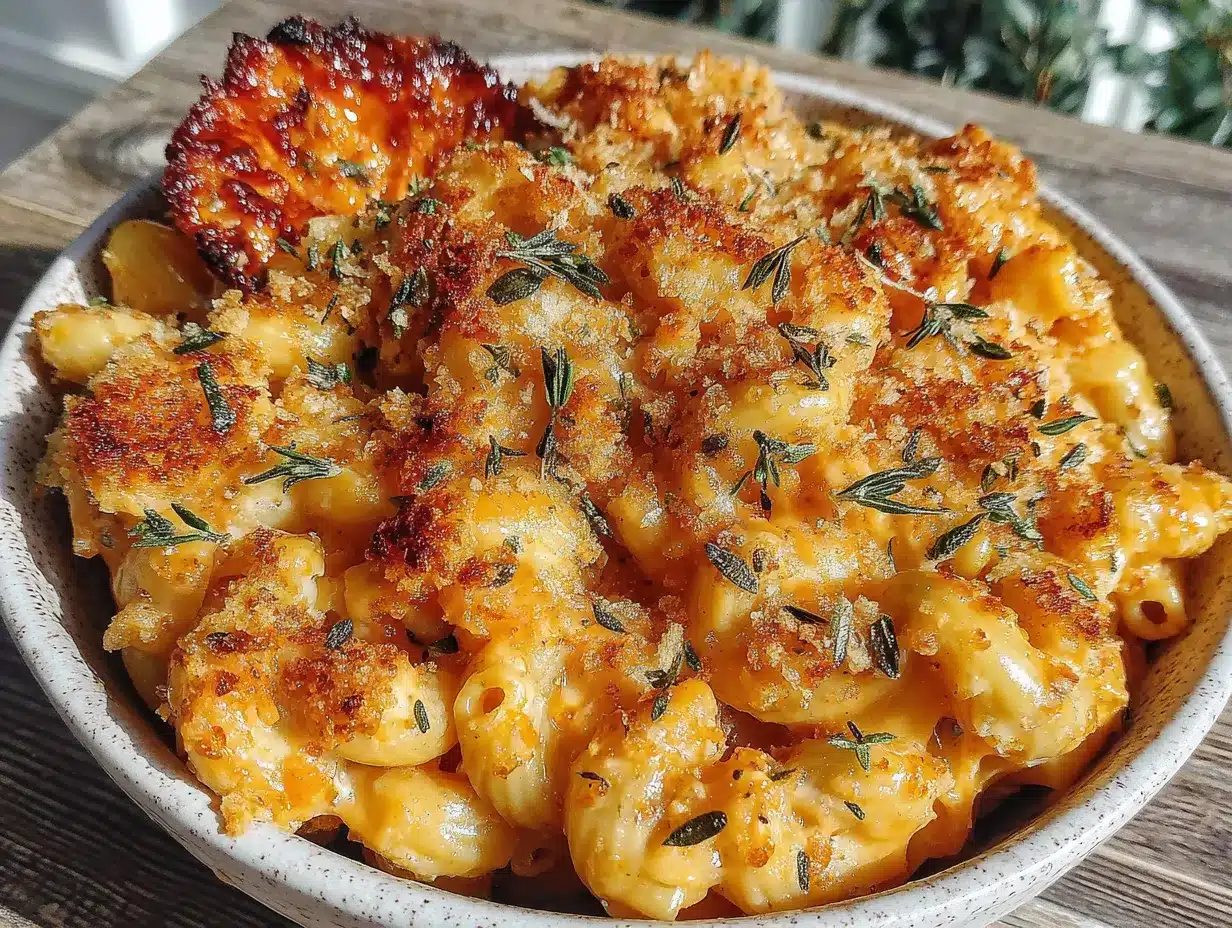
- 1 pound (450g) elbow macaroni or any short pasta – cavatappi, shells, or rotini work great. The nooks and crannies hold the sauce beautifully.
- 4 tablespoons (½ stick) unsalted butter – adds richness. You can use salted butter, just reduce the added salt.
- ¼ cup all-purpose flour – thickens the sauce. For a gluten-free version, use a 1:1 gluten-free flour blend.
- 3 cups whole milk – gives the creamiest result. 2% works, but avoid skim milk. For a dairy-free option, use unsweetened oat milk or full-fat canned coconut milk.
- 2 cups shredded sharp cheddar cheese – I prefer Tillamook or Cabot for their meltability and bold flavor. Pre-shredded cheese has anti-caking agents that can make the sauce grainy, so shred your own.
- 1 cup shredded Gruyère or Monterey Jack cheese – adds creaminess and a nutty flavor. Gruyère is my go-to, but Jack is more budget-friendly.
- 1 teaspoon Dijon mustard – cuts through the richness and adds a subtle tang. Don’t skip it!
- ½ teaspoon garlic powder – optional, but I love the savory depth it adds.
- Salt and pepper to taste
For the Topping (Optional but Recommended)
- ½ cup panko breadcrumbs – gives a crunchy contrast to the creamy pasta.
- 2 tablespoons melted butter – helps the breadcrumbs toast evenly.
- ¼ cup grated Parmesan cheese – adds a salty, umami kick to the topping.
Ingredient Selection Tips: Look for a butternut squash that feels heavy for its size and has a firm, tan skin without soft spots. If you’re using pre-cut cubes, make sure they’re uniform in size for even roasting. For the cheese, I’ve found that sharp cheddar gives the most flavor without needing to use a ton of it. And don’t skip the Dijon mustard—it’s the secret ingredient that makes the sauce taste more complex. You can also add a pinch of nutmeg or cayenne pepper if you want a little warmth.
Equipment Needed
You don’t need a lot of fancy tools for this recipe, but a few key pieces make the process smoother. Here’s what I use:
- Baking sheet – for roasting the squash. A rimmed sheet pan works best to catch any juices.
- Large pot – for boiling the pasta. Use a 5- to 6-quart pot so the pasta has room to move.
- Medium saucepan – for making the cheese sauce. A heavy-bottomed pot prevents scorching.
- Blender or food processor – to puree the roasted squash until smooth. An immersion blender works too, but you’ll need to transfer the squash to a tall container.
- Whisk – for stirring the sauce without lumps.
- Wooden spoon or silicone spatula – for stirring the pasta and sauce together.
- 9×13-inch baking dish – if you’re baking the mac and cheese with a topping. A 3-quart casserole dish works too.
- Cheese grater – please, please grate your own cheese. Pre-shredded just doesn’t melt the same way.
Budget-Friendly Options: If you don’t have a blender, you can mash the roasted squash with a fork or potato masher. It won’t be as smooth, but it still works. And if you don’t have a baking dish, you can skip the baked topping and serve it straight from the pot—it’s just as delicious.
Preparation Method
Let’s walk through this step by step. I’ve included timing and sensory cues so you know exactly what to look for at each stage.
- Preheat your oven to 400°F (200°C). While it’s heating, peel your butternut squash using a vegetable peeler or a sharp knife. Cut it in half lengthwise, scoop out the seeds, and cut the flesh into 1-inch cubes. Toss the cubes with olive oil, salt, and pepper directly on a baking sheet. Spread them in a single layer—crowding them will steam instead of roast. Roast for 25-30 minutes, flipping halfway through. The squash is done when the edges are caramelized and a fork slides in easily. You’ll smell a sweet, nutty aroma when it’s ready.
- While the squash roasts, cook your pasta. Bring a large pot of salted water to a rolling boil. Add the elbow macaroni and cook according to package directions until al dente—usually about 7-8 minutes. I always set a timer and taste a piece a minute before the timer goes off. You want it firm, not mushy, because it will continue cooking in the sauce. Drain the pasta and set it aside. Don’t rinse it—the starch helps the sauce stick.
- Make the cheese sauce. In a medium saucepan, melt the butter over medium heat. Once it’s foamy, whisk in the flour and cook for 1-2 minutes, stirring constantly. This is your roux, and it should smell slightly toasty, like pie crust. Slowly pour in the milk while whisking vigorously to prevent lumps. Keep whisking until the mixture thickens, about 3-4 minutes. It should coat the back of a spoon. Reduce the heat to low.
- Blend the roasted squash. Transfer the roasted squash to a blender or food processor. Add about ½ cup of the milk mixture from the saucepan and blend until completely smooth. The puree should be thick but pourable. If it’s too thick, add another tablespoon of milk. Pour the squash puree back into the saucepan with the remaining milk mixture and whisk to combine.
- Add the cheese. With the heat still on low, add the shredded cheddar and Gruyère a handful at a time, whisking until each addition is fully melted before adding the next. Stir in the Dijon mustard, garlic powder, and a pinch of salt and pepper. Taste the sauce—it should be creamy, cheesy, with a subtle sweetness from the squash. Adjust seasoning if needed.
- Combine the pasta and sauce. Pour the drained pasta into the saucepan with the cheese sauce. Stir gently with a wooden spoon until every piece of pasta is coated. The sauce will seem a little thin at first, but it will thicken as it sits. If you’re serving immediately, you’re done! If you want a baked topping, move to the next step.
- Optional: Bake with a topping. Preheat your oven to 375°F (190°C). Transfer the mac and cheese to a greased 9×13-inch baking dish. In a small bowl, mix the panko breadcrumbs with melted butter and Parmesan cheese. Sprinkle evenly over the top. Bake for 15-20 minutes, until the topping is golden brown and the sauce is bubbly around the edges. Let it rest for 5 minutes before serving—this helps the sauce set.
Pro Tip: If the sauce looks a little grainy at any point, don’t panic. That usually means the heat was too high or the cheese was added too quickly. Take it off the heat and whisk in a splash of cold milk—it should smooth right out.
Cooking Tips & Techniques
After making this recipe more times than I can count, I’ve picked up a few tricks that make a real difference. Here are the ones I swear by:
Roast the squash until it’s almost too dark. The first time I made this, I pulled the squash out when it was just tender. The sauce was fine, but it lacked that deep, nutty flavor. Now I let it go until the edges are dark brown and slightly crispy. That caramelization is where the magic happens—it adds a natural sweetness you can’t get from boiling or steaming.
Grate your own cheese. I know, I know, it’s an extra step. But pre-shredded cheese is coated with cellulose and starches to prevent clumping, which means it doesn’t melt as smoothly. I’ve made the mistake of using it when I was in a rush, and the sauce turned out grainy and separated. Grating a block of cheddar takes two minutes and makes a noticeable difference.
Don’t overcook the pasta. This is a classic mistake. You think you’re saving time by cooking the pasta a little longer, but then it turns to mush when you mix it with the sauce and bake it. Cook it al dente—firm to the bite—and it will hold up perfectly.
Use a low heat for the cheese sauce. High heat is the enemy of a smooth cheese sauce. It can cause the proteins in the cheese to seize up, leaving you with a clumpy mess. Keep the heat on low and be patient. If you’re in a hurry, you’re better off taking the pot off the heat entirely and letting the residual warmth melt the cheese.
Make it ahead of time. This is a lifesaver for hosting. You can prepare the mac and cheese completely (minus the topping) a day in advance, store it in the fridge, and then add the topping and bake it right before serving. The flavors actually meld together overnight, making it even better. Just add 5-10 minutes to the baking time since you’re starting from cold.
One mistake I made: The first time I tried to double this recipe for a party, I used a pot that was too small for the sauce. It bubbled over, made a mess on the stove, and I had to start over. Learn from my error—use a pot that’s at least 4 quarts for the sauce, especially if you’re scaling up.
Variations & Adaptations
This recipe is incredibly flexible. Here are some ways to make it your own:
Dietary Variations:
- Gluten-Free: Use gluten-free pasta and a 1:1 gluten-free flour blend for the roux. I’ve tested this with Barilla gluten-free elbows, and it works perfectly. Just be careful not to overcook the pasta—gluten-free varieties can get mushy fast.
- Dairy-Free: Swap the butter with vegan butter or olive oil, use unsweetened oat milk or full-fat coconut milk, and replace the cheese with a high-quality dairy-free shred. I like Violife or Miyoko’s for melting. The squash helps create creaminess, so it’s less reliant on dairy.
- Lower-Carb: Replace the pasta with steamed cauliflower florets or roasted broccoli. The cheese sauce is thick enough to coat vegetables beautifully.
Flavor Twists:
- Spicy Kick: Add ½ teaspoon of cayenne pepper or a diced jalapeño to the cheese sauce. I tried this for a game day gathering, and it was a hit with the spice lovers.
- Herb Infusion: Stir in 2 tablespoons of fresh sage or thyme leaves after roasting the squash. The earthy herbs complement the sweetness of the squash and the richness of the cheese.
- Bacon Lover’s Version: Crumble 6 slices of cooked bacon over the top before adding the breadcrumb topping. I mean, bacon makes everything better, right?
Seasonal Adaptations:
- In the fall, use fresh butternut squash from the farmers’ market. In winter, frozen cubed squash works in a pinch—just thaw and pat dry before roasting to avoid excess moisture.
- In summer, swap the butternut squash for roasted sweet potatoes or carrots. Both have a similar sweetness and creamy texture when blended.
Serving & Storage Suggestions
Serving: Serve this mac and cheese hot, straight from the oven or stovetop. If you baked it with a topping, let it rest for 5 minutes so the sauce sets and doesn’t run all over the plate. I like to garnish with a sprinkle of fresh parsley or chives for a pop of color. It pairs beautifully with a simple green salad dressed with lemon vinaigrette—the acidity cuts through the richness. For a heartier meal, serve it alongside roasted chicken, grilled sausages, or a pile of sautéed greens. And if you’re hosting, present it in a warm cast-iron skillet for that rustic, dinner-party vibe.
Storage: Leftovers keep well in an airtight container in the refrigerator for up to 4 days. The sauce will thicken as it sits, so don’t be alarmed. To reheat, add a splash of milk and warm it in a saucepan over low heat, stirring occasionally. You can also microwave individual portions—just cover the bowl with a damp paper towel to prevent drying out. For longer storage, freeze the mac and cheese (without the breadcrumb topping) in a freezer-safe container for up to 3 months. Thaw overnight in the fridge, then add the topping and bake as directed. The flavors actually deepen after freezing, so it’s a great make-ahead option for busy weeks.
Flavor Development: Here’s a secret—this mac and cheese tastes even better the next day. The squash and cheese have time to meld, and the sauce becomes even creamier. I’ve been known to make it specifically for leftovers. Just don’t tell my guests.
Nutritional Information & Benefits
Here’s an approximate nutritional breakdown per serving (based on 8 servings, with the baked topping):
| Nutrient | Amount per Serving |
|---|---|
| Calories | 480 |
| Total Fat | 22g |
| Saturated Fat | 12g |
| Cholesterol | 60mg |
| Sodium | 580mg |
| Total Carbohydrates | 52g |
| Dietary Fiber | 5g |
| Sugars | 8g |
| Protein | 20g |
| Vitamin A | 180% DV |
| Vitamin C | 25% DV |
| Calcium | 35% DV |
| Iron | 15% DV |
Health Benefits: Butternut squash is packed with vitamin A (great for eye health and immunity) and fiber, which helps with digestion. The cheese provides calcium and protein, making this a more balanced meal than your average mac and cheese. Plus, the squash adds natural sweetness, so you can use less cheese and still get a rich flavor. This recipe is a great way to sneak veggies into a family meal without anyone noticing. It’s also vegetarian-friendly and can be adapted to be gluten-free or dairy-free. Just keep in mind that it’s still a comfort food—portion control is your friend!
Conclusion
This Crowd-Pleasing Roasted Butternut Squash Mac and Cheese is the kind of recipe that makes you look like a kitchen genius with minimal effort. It’s creamy, cheesy, and just a little bit healthier thanks to the hidden squash. But more than that, it’s a dish that brings people together. I’ve served it at casual weeknight dinners, holiday feasts, and everything in between, and it never fails to get compliments. The best part? It started as a mistake, and now it’s one of my most-requested recipes.
I hope you give this a try and make it your own. Maybe add a little extra garlic, or swap the cheddar for smoked gouda. The beauty of this recipe is that it’s forgiving and flexible. So go ahead—roast that squash, grate that cheese, and get ready to watch it disappear. And when someone asks for the recipe, just smile and tell them it was a happy accident.
I’d love to hear how it turns out for you! Drop a comment below and let me know if you tried any variations, or tag me in your photos on social media. Happy cooking, friend!
Frequently Asked Questions
Can I use frozen butternut squash instead of fresh?
Yes, you can! Frozen butternut squash works in a pinch. Just thaw it completely and pat it dry with paper towels before roasting to remove excess moisture. Roast it at 400°F for about 20 minutes, or until tender and slightly caramelized. The texture won’t be quite as creamy as fresh, but it’s still delicious.
Can I make this recipe without a blender?
Absolutely. If you don’t have a blender, mash the roasted squash with a fork or potato masher until it’s as smooth as you can get it. It won’t be perfectly silky, but it will still blend into the sauce nicely. Just make sure there are no large chunks, or you’ll have lumps in your mac and cheese.
Why did my cheese sauce turn out grainy?
Grainy cheese sauce usually happens when the heat is too high or the cheese is added too quickly. To fix it, take the pot off the heat and whisk in a splash of cold milk or a teaspoon of lemon juice. The acid can help smooth out the sauce. Next time, keep the heat on low and add the cheese a handful at a time, whisking until each addition is fully melted.
Can I add protein to this dish?
Definitely! This mac and cheese is great with shredded rotisserie chicken, cooked crumbled sausage, or crispy bacon. Stir the protein in after combining the pasta and sauce, just before transferring to the baking dish. For a vegetarian option, try adding roasted chickpeas or sautéed mushrooms.
How do I prevent the mac and cheese from drying out when reheating?
The key is to add moisture. When reheating in the microwave, cover the bowl with a damp paper towel. On the stovetop, add a splash of milk or cream and stir over low heat until warmed through. If you’re reheating a large batch in the oven, cover the dish with foil and add a few tablespoons of milk before baking at 350°F for 15-20 minutes.
Pin This Recipe!
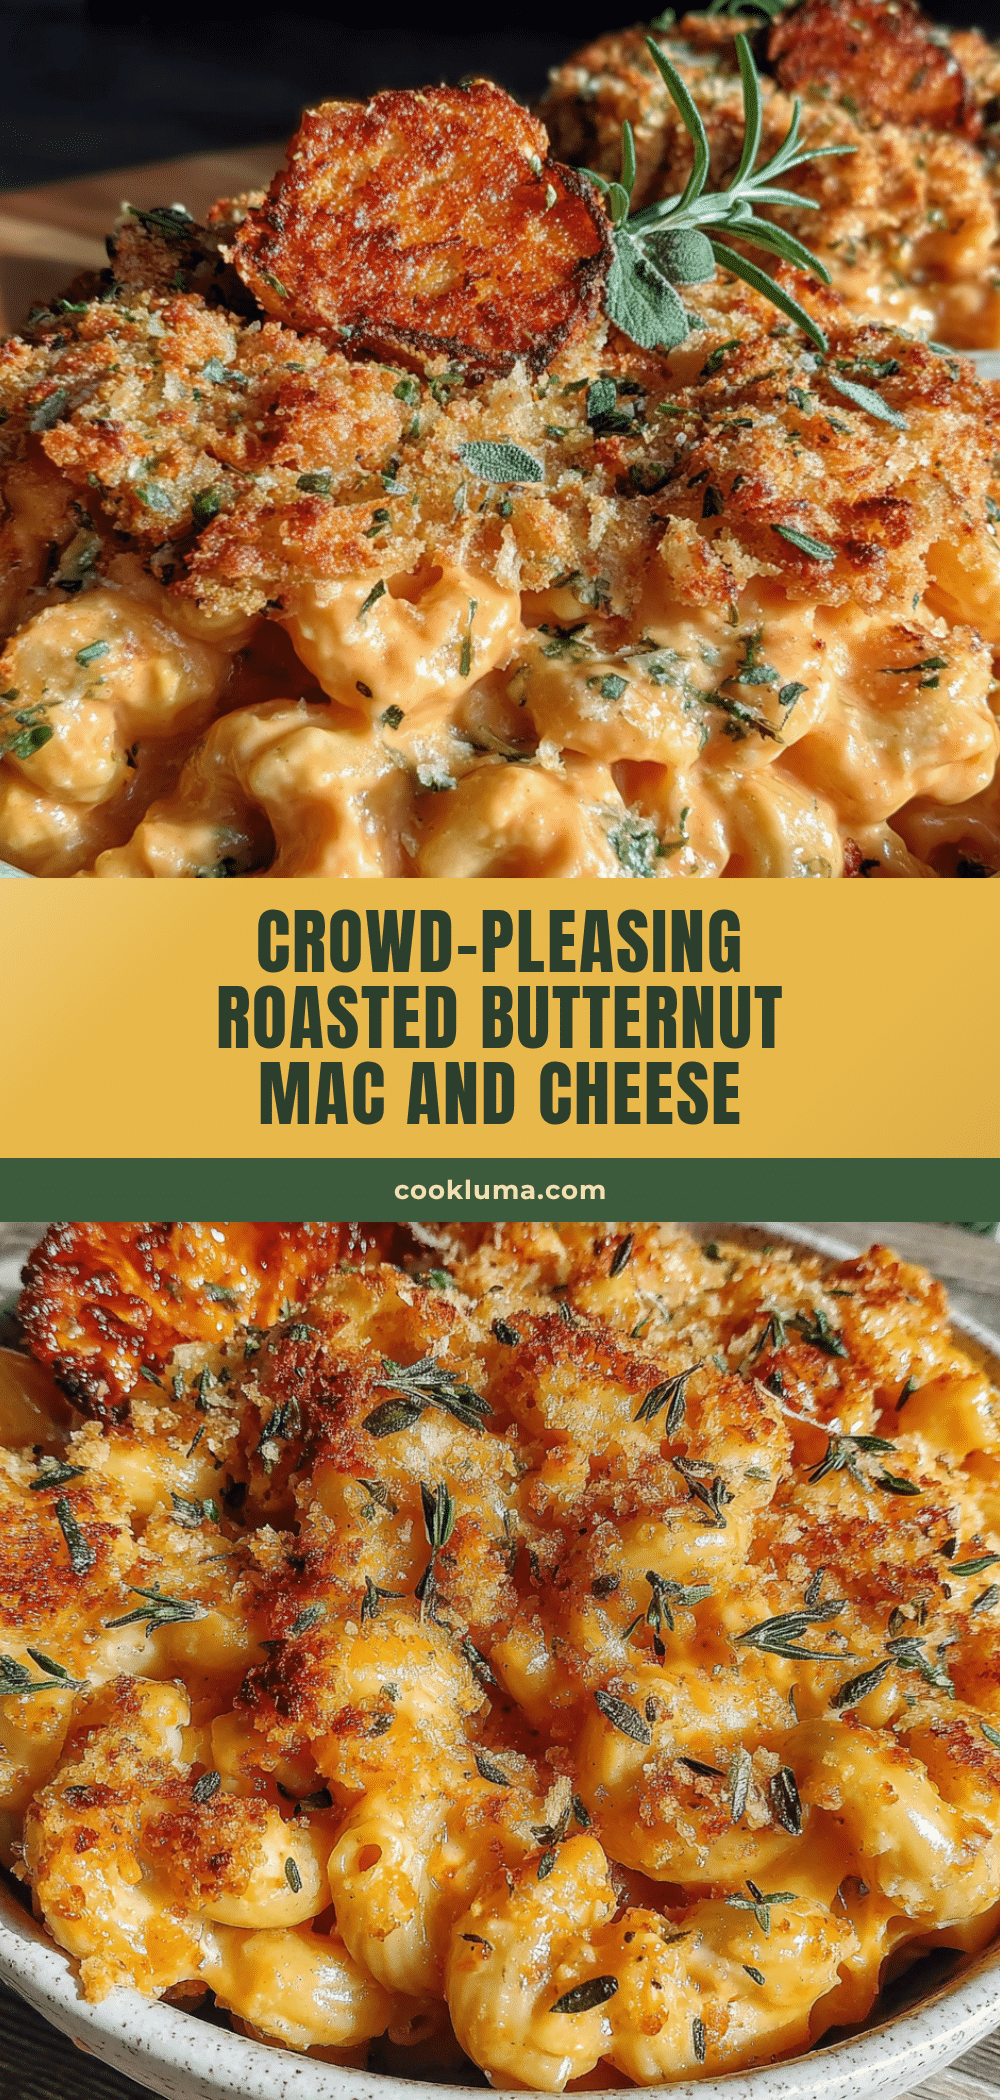
Best Roasted Butternut Squash Mac and Cheese (Easy + Crowd-Pleasing)

This creamy, cheesy mac and cheese gets a secret boost from roasted butternut squash, adding natural sweetness and a velvety texture. It’s a crowd-pleasing comfort food that’s perfect for weeknights, potlucks, or holiday gatherings.
- Prep Time: 15 minutes
- Cook Time: 30 minutes
- Total Time: 45 minutes
- Yield: 8 servings 1x
- Category: Main Course
- Cuisine: American
Ingredients
- 1 medium butternut squash (about 2 pounds or 900g), peeled, seeded, and cubed into 1-inch pieces
- 2 tablespoons olive oil
- ½ teaspoon salt
- ¼ teaspoon black pepper
- 1 pound (450g) elbow macaroni or any short pasta
- 4 tablespoons (½ stick) unsalted butter
- ¼ cup all-purpose flour
- 3 cups whole milk
- 2 cups shredded sharp cheddar cheese
- 1 cup shredded Gruyère or Monterey Jack cheese
- 1 teaspoon Dijon mustard
- ½ teaspoon garlic powder (optional)
- Salt and pepper to taste
- ½ cup panko breadcrumbs (optional topping)
- 2 tablespoons melted butter (optional topping)
- ¼ cup grated Parmesan cheese (optional topping)
Instructions
- Preheat your oven to 400°F (200°C). Peel the butternut squash, cut in half lengthwise, scoop out seeds, and cut into 1-inch cubes. Toss with olive oil, salt, and pepper on a baking sheet. Spread in a single layer and roast for 25-30 minutes, flipping halfway, until edges are caramelized and fork-tender.
- While squash roasts, bring a large pot of salted water to a boil. Cook elbow macaroni according to package directions until al dente (about 7-8 minutes). Drain and set aside (do not rinse).
- In a medium saucepan, melt butter over medium heat. Whisk in flour and cook for 1-2 minutes, stirring constantly, until the roux is slightly toasty. Slowly pour in milk while whisking vigorously. Continue whisking until thickened, about 3-4 minutes. Reduce heat to low.
- Transfer roasted squash to a blender or food processor. Add about ½ cup of the milk mixture and blend until completely smooth. Pour the squash puree back into the saucepan with the remaining milk mixture and whisk to combine.
- With heat on low, add shredded cheddar and Gruyère a handful at a time, whisking until each addition is fully melted. Stir in Dijon mustard, garlic powder, and salt and pepper to taste. Adjust seasoning as needed.
- Pour the drained pasta into the saucepan with the cheese sauce. Stir gently until every piece is coated. If serving immediately, you’re done. For a baked topping, proceed to the next step.
- Optional: Preheat oven to 375°F (190°C). Transfer mac and cheese to a greased 9×13-inch baking dish. In a small bowl, mix panko breadcrumbs with melted butter and Parmesan cheese. Sprinkle evenly over the top. Bake for 15-20 minutes, until topping is golden brown and sauce is bubbly. Let rest 5 minutes before serving.
Notes
Roast the squash until edges are dark brown for deeper flavor. Always grate your own cheese for a smooth sauce. Cook pasta al dente to avoid mushiness. For a make-ahead option, prepare without topping, refrigerate, then add topping and bake before serving. If sauce becomes grainy, whisk in a splash of cold milk off the heat.
Nutrition
- Serving Size: 1 serving (about 1 c
- Calories: 480
- Sugar: 8
- Sodium: 580
- Fat: 22
- Saturated Fat: 12
- Carbohydrates: 52
- Fiber: 5
- Protein: 20
Keywords: butternut squash mac and cheese, roasted butternut squash, easy mac and cheese, crowd-pleasing mac and cheese, comfort food, vegetarian mac and cheese


