The Thanksgiving class party was in two hours and I’d completely forgotten. Every other parent would be bringing Pinterest-worthy pies and elaborately decorated cupcakes that looked like they belonged in a bakery window. I had a tube of pre-made sugar cookie dough, a jar of sprinkles that had been sitting in my pantry since last Christmas, and a kid who was looking at me with those big eyes that said “please don’t embarrass me, Mom.”
I mean, let’s be honest—I was that parent. The one who shows up with store-bought cookies while everyone else has homemade masterpieces. But here’s the thing about desperation: it makes you creative. I grabbed the dough, some frosting I found in the back of the fridge, and told my daughter to wash her hands. We were about to make something, even if I had no idea what.
That’s when she put her hand flat on the counter and said, “Mom, what if we traced my hand?” And honestly? That moment changed everything. We cut out hand shapes from the cookie dough, baked them, and decorated them like turkeys using whatever candy we could find. The result was so ridiculously cute that the other parents actually asked for the recipe. I stood there, frosting on my apron, trying to explain that it wasn’t really a recipe—it was just a hand and some sugar cookies.
But that’s the thing about these hand turkey sugar cookies. They’re not complicated. They’re not fancy. They’re the kind of thing you make when you’re running late, when you’ve got kids tugging at your sleeves, when you need a win that doesn’t require a culinary degree. And you know what? They always steal the show. Maybe you’ve been there too—scrambling for something that looks impressive but is secretly the easiest thing in the world. These cookies are that secret weapon.
Why You’ll Love This Recipe
Let me tell you why these hand turkey sugar cookies have become my go-to for every Thanksgiving gathering, school party, and family get-together. I’ve tested this approach at least a dozen times now, and it works every single time without fail.
- Quick & Easy : From start to finish, you’re looking at about 30 minutes of active time. The dough comes together fast, and the decorating is where the real fun begins. Perfect for those mornings when you remember the party is today.
- Simple Ingredients : You probably have everything in your kitchen right now. Sugar cookie dough (homemade or store-bought), frosting, and whatever candy you’ve got stashed away. No fancy grocery trips needed.
- Perfect for Gatherings : These cookies are made for potlucks, class parties, and family dinners. They’re interactive, fun, and kids absolutely love making them. Plus, they’re a conversation starter—everyone wants to know how you got the hand shape so perfect.
- Crowd-Pleaser : I’ve brought these to three different Thanksgiving events now, and they always disappear first. Kids love the novelty, and adults love the nostalgia. It’s a win-win.
- Unbelievably Delicious : The texture is soft with slightly crispy edges, and the frosting adds that perfect sweetness. But honestly, the best part is watching someone’s face light up when they realize it’s a handprint.
What makes these different from every other sugar cookie recipe? It’s the technique. Instead of rolling and cutting with cookie cutters, you’re using an actual hand as the template. This isn’t just another version of a sugar cookie—it’s the most personal, customizable, and ridiculously adorable version you’ll ever make. I’ve had friends tell me these are the only cookies they make for Thanksgiving now, and honestly? I get it.
These cookies aren’t just good—they’re the kind that make you laugh when you see them. They’re comfort food with a sense of humor, perfect for impressing other parents without any stress, and guaranteed to turn a simple classroom party into something memorable.
What Ingredients You Will Need
This recipe uses simple, wholesome ingredients to create something that looks way more complicated than it actually is. Most of these are pantry staples, and I’ve included easy substitutions so you can work with what you have.
For the Sugar Cookie Dough
- 2 ¾ cups all-purpose flour (340g) – I prefer Gold Medal for consistent results
- 1 teaspoon baking soda
- ½ teaspoon baking powder
- 1 cup unsalted butter, softened (226g) – must be room temperature for proper creaming
- 1 ½ cups granulated sugar (300g)
- 1 large egg, room temperature
- 1 teaspoon vanilla extract (use pure, not imitation)
- ¼ teaspoon salt
For the Royal Icing
- 2 cups powdered sugar (240g)
- 2 tablespoons meringue powder (I recommend Wilton brand)
- 3-4 tablespoons warm water
- ½ teaspoon vanilla extract
- Food coloring – red, orange, yellow, brown (gel colors work best)
For Decorating
- Candy corn (for feathers)
- Chocolate chips or candy eyes (for eyes)
- Red hots or small candies (for the wattle)
- Orange sprinkles or small orange candies (for the beak)
- Sprinkles in fall colors (optional, for extra flair)
Ingredient Tips : For the best texture, make sure your butter is truly softened—it should give slightly when pressed but not be melted. If you’re using store-bought dough, look for the refrigerated logs rather than the tubs; they hold their shape better when cutting. For the icing, gel food coloring is worth the extra cost because it doesn’t thin out the consistency like liquid drops do.
Substitution Guidance : You can use gluten-free all-purpose flour blend for a gluten-free version. For dairy-free, substitute the butter with a high-quality vegan butter stick (not the spreadable kind). If you don’t have meringue powder, you can use 2 tablespoons of pasteurized egg whites instead, but the consistency will be slightly different.
Equipment Needed
You don’t need much for these cookies, and that’s part of the beauty. Here’s what I use:
- Large mixing bowl and hand mixer (or stand mixer with paddle attachment)
- Rolling pin (a wine bottle works in a pinch, trust me)
- Parchment paper or silicone baking mat
- Baking sheets (I use Nordic Ware, they distribute heat evenly)
- Sharp knife or pizza cutter for cutting hand shapes
- Piping bags or zip-top bags for icing
- Cooling rack
- Small bowls for organizing candies
Budget-Friendly Options : If you don’t have piping bags, just snip a tiny corner off a zip-top bag. It works perfectly and saves you a trip to the store. For a rolling pin, a clean wine bottle or even a smooth glass jar will do the job. I’ve used both when mine was in the dishwasher.
Personal Note : I learned the hard way that thin baking sheets can cause the cookies to brown too quickly on the bottom. If you’re using an older pan, consider doubling it up with another pan underneath for insulation.
Preparation Method
Alright, let’s get to the fun part. Here’s exactly how to make these adorable hand turkey sugar cookies.
- Preheat and Prep : Preheat your oven to 350°F (175°C). Line two baking sheets with parchment paper. This is non-negotiable—the parchment prevents sticking and makes cleanup a breeze.
- Make the Dough : In a medium bowl, whisk together the flour, baking soda, baking powder, and salt. In a large bowl, cream the softened butter and sugar together until light and fluffy—about 3 minutes with a hand mixer. You’re looking for a pale, airy texture. Add the egg and vanilla, mixing until just combined. Gradually add the dry ingredients, mixing on low speed until a soft dough forms. Don’t overmix, or the cookies will be tough.
- Chill the Dough : Wrap the dough in plastic wrap and refrigerate for at least 30 minutes. I know, I know—you’re in a hurry. But this step is crucial. Chilled dough is much easier to handle and won’t stick to your hands or the counter. If you’re really pressed for time, pop it in the freezer for 15 minutes.
- Roll and Trace : On a lightly floured surface, roll the dough to about ¼-inch thickness. Here’s the fun part—have your child (or yourself) place their hand flat on the dough. Using a sharp knife or pizza cutter, carefully trace around the hand, leaving about ½ inch of space around the fingers. Lift the hand-shaped dough gently with a spatula and transfer to the prepared baking sheet. Space them about 2 inches apart—they’ll spread slightly.
- Bake to Perfection : Bake for 8-10 minutes, or until the edges are just barely golden. The centers should still look slightly underdone—they’ll continue cooking on the hot pan. Let them cool on the baking sheet for 5 minutes, then transfer to a wire rack to cool completely. This is critical: if you try to ice them while they’re warm, the icing will melt into a sticky mess.
- Make the Icing : While the cookies cool, make the royal icing. Combine the powdered sugar and meringue powder in a bowl. Add 3 tablespoons of warm water and the vanilla, then beat on medium speed for 4-5 minutes until stiff peaks form. The icing should be thick but pipeable—if it’s too stiff, add water one teaspoon at a time. Divide the icing into small bowls and color each one: brown for the body, orange for the beak, red for the wattle, and yellow for the feet.
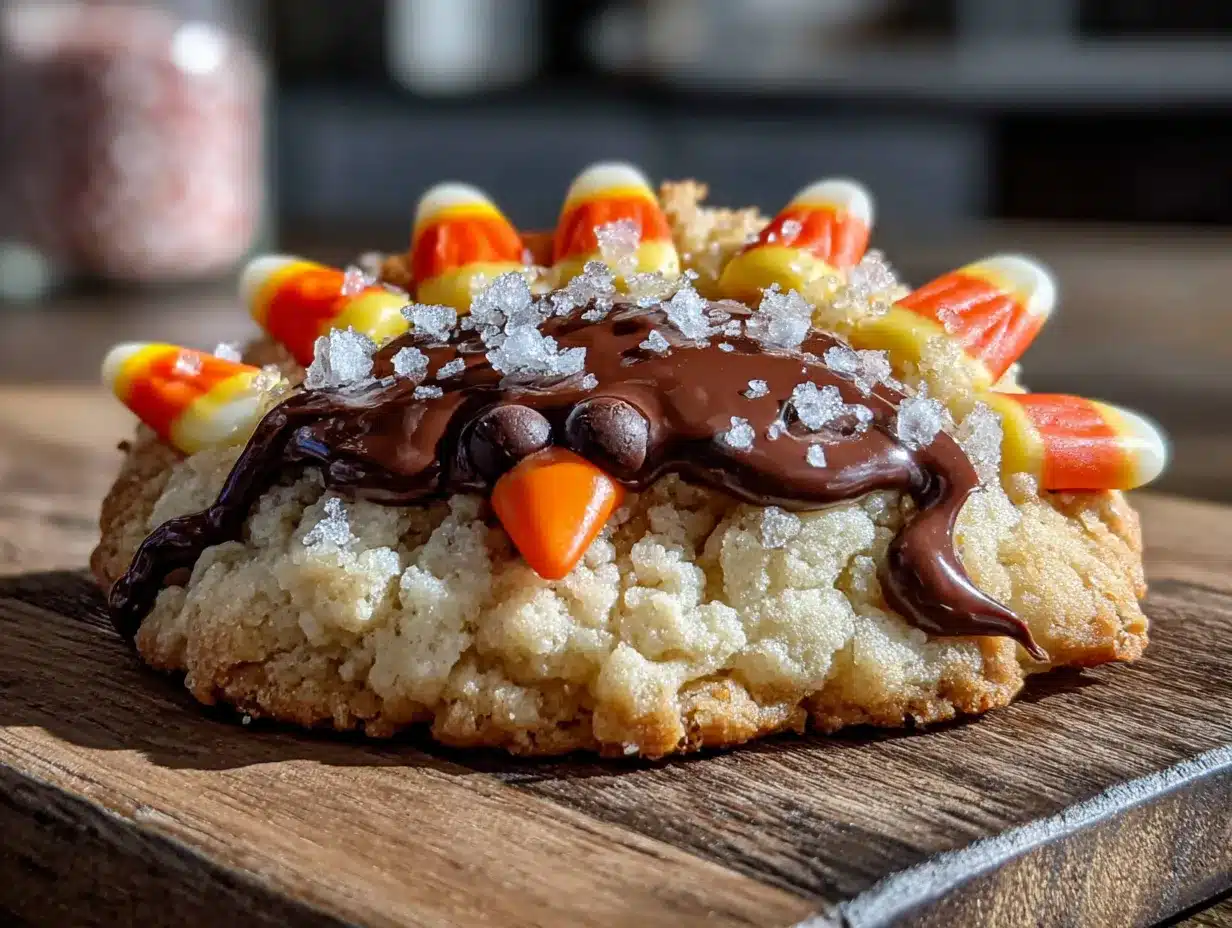
- Decorate the Turkeys : This is where the magic happens. Start by piping brown icing onto the palm area of the cookie to create the turkey body. While the icing is still wet, press candy corn into the fingers to create feathers—one piece per finger, pointy end facing outward. Add two candy eyes or chocolate chips above the brown icing. Pipe a small orange triangle for the beak and a red dot or small red candy for the wattle. Add orange sprinkles or small candies for the feet at the bottom of the palm.
- Let Them Set : Allow the decorated cookies to sit at room temperature for about 1 hour so the icing can harden. If you’re in a humid environment, this might take longer. The icing should be firm to the touch before you stack or store them.
Cooking Tips & Techniques
After making these cookies about fifteen times (seriously, they’re addictive to make), I’ve learned a few things the hard way. Let me save you some trouble.
The Dough Thickness Trap : I once rolled the dough too thin because I was rushing, and the hand shapes came out looking more like alien claws than turkey hands. Roll to a consistent ¼-inch thickness. Too thin and they’ll break; too thick and they’ll puff up and lose the hand shape.
The Finger Spacing Issue : When you trace the hand, make sure the fingers are spread apart. If they’re too close together, the cookies will merge into one blob during baking. I tell my kids to “make jazz hands” before I trace—it works every time.
The Icing Consistency Battle : Royal icing can be finicky. If it’s too thick, it won’t spread smoothly. If it’s too thin, it’ll run off the cookie and make a mess. The perfect consistency is like toothpaste—thick enough to hold its shape but soft enough to spread with a toothpick. Test a small amount on a plate first before you start decorating.
Timing Strategy : If you’re making these for a party, bake the cookies the day before and store them in an airtight container. Decorate them the morning of the event. This spreads out the work and ensures the icing is fresh and vibrant. I learned this after trying to do everything in one evening and ending up with frosting on my ceiling (don’t ask).
Common Mistake : Don’t skip the chilling step. I did once because I was in a hurry, and the dough stuck so badly to the counter that I ended up with a hand-shaped mess that looked more like a horror movie prop than a cookie. Chill the dough. Trust me.
Variations & Adaptations
One of the best things about these cookies is how customizable they are. Here are some variations I’ve tried and loved.
Dietary Variations
Gluten-Free Version : Substitute the all-purpose flour with a 1:1 gluten-free baking flour blend. I’ve used Bob’s Red Mill with great results. Add ½ teaspoon of xanthan gum if your blend doesn’t already include it. The texture will be slightly more tender, but the hand shape holds up beautifully.
Vegan Option : Use vegan butter sticks and replace the egg with a flax egg (1 tablespoon ground flaxseed mixed with 3 tablespoons water, let sit for 5 minutes). For the icing, use aquafaba (chickpea water) instead of meringue powder—3 tablespoons of aquafaba whipped to stiff peaks works perfectly.
Flavor Twists
Chocolate Hand Turkeys : Replace ¼ cup of the flour with unsweetened cocoa powder. The chocolate version is rich and pairs beautifully with white icing for contrast. My kids actually prefer this version now.
Spiced Autumn Variation : Add 1 teaspoon of cinnamon, ½ teaspoon of nutmeg, and ¼ teaspoon of cloves to the dry ingredients. The warm spices make these smell incredible while baking and give them a more “Thanksgiving” flavor profile.
Seasonal Adaptations
Christmas Hand Cookies : Instead of turkey decorations, use red and green icing to make the hand into a Christmas tree. Add star sprinkles at the top and mini M&Ms as ornaments. The hand shape becomes a tree shape!
Easter Bunnies : Turn the hand shape into a bunny by adding pink icing for the ears and white icing for the face. It’s amazing how versatile this hand shape is once you start playing with it.
Serving & Storage Suggestions
These cookies are best served at room temperature, which means they’re ready to go whenever you are. Here’s how to handle them.
Serving Temperature : Serve at room temperature, ideally within 24 hours of decorating. The icing should be fully set so it doesn’t smudge when people pick them up. If you’re serving them at a party, arrange them on a platter with the hand shapes facing outward so everyone can see the fun design.
What to Serve Alongside : These cookies pair beautifully with warm apple cider, hot chocolate, or even a simple glass of milk. For a Thanksgiving spread, arrange them next to pumpkin pie or pecan bars for a colorful dessert table. I like to put them on a separate plate so kids can grab them without navigating around the more delicate pies.
Storage Instructions : Store undecorated cookies in an airtight container at room temperature for up to 5 days. Decorated cookies should be stored in a single layer (or with parchment paper between layers) in an airtight container. They’ll keep for 3-4 days, though the candy decorations might soften slightly over time.
Freezer Tips : You can freeze the unbaked hand-shaped cookies on a baking sheet until solid, then transfer to a freezer bag. Bake directly from frozen, adding 2-3 minutes to the baking time. Baked and undecorated cookies also freeze well for up to 3 months. Just thaw at room temperature before decorating.
Flavor Development : Honestly, these cookies taste best the day they’re made. The sugar cookie texture is at its peak—crispy on the edges, soft in the middle. After a day or two, they’ll soften slightly, which some people actually prefer. I’ve noticed the spiced version actually gets better on day two as the flavors meld together.
Nutritional Information & Benefits
Let’s be real—these are cookies, not health food. But here’s what you’re looking at per cookie (based on a standard hand-sized cookie with icing and decorations).
| Nutrient | Amount Per Cookie |
|---|---|
| Calories | 180-220 |
| Total Fat | 8g |
| Saturated Fat | 5g |
| Carbohydrates | 28g |
| Sugar | 16g |
| Protein | 2g |
Health Highlights : The butter provides vitamin A and healthy fats, while the egg adds protein. If you use the spiced version, cinnamon has anti-inflammatory properties. That said, these are a treat—perfect for special occasions but not an everyday snack.
Dietary Considerations : This recipe contains gluten, dairy, and eggs. For allergen-friendly versions, check the variations section above. The vegan option works surprisingly well and tastes just as good.
My Wellness Perspective : I believe in balance. These cookies are about joy and creativity, not nutrition. When my kids help me make them, we focus on the fun of decorating and the excitement of sharing with friends. That’s the real benefit—the memories we create in the kitchen together.
Conclusion
These hand turkey sugar cookies have become a tradition in our house, and I honestly can’t imagine Thanksgiving without them. They’re the recipe that saved me from showing up empty-handed to that class party, and they’ve been saving me ever since. Every time I make them, I smile at how something so simple can bring so much joy.
I hope you’ll try these with your kids, your grandkids, or just for yourself—because let’s be honest, adults love decorating cookies too. Don’t be afraid to get creative with the decorations. Use different candies, try different icing colors, make it your own. The beauty of this recipe is that every single cookie is unique, just like the hand that shaped it.
When you make these, I’d love to hear about it. Drop a comment below and tell me about your decorating adventures—did your kids go wild with the sprinkles? Did you discover a new candy combination? Did you end up with frosting in your hair like I did? Share your photos and stories. And if you loved this recipe, please share it with a friend who needs a last-minute party win. Trust me, they’ll thank you.
Now go make some cookies and have fun with it. Happy Thanksgiving, friends!
Frequently Asked Questions
Can I use store-bought cookie dough for this recipe?
Absolutely! In fact, that’s how I started making these. Store-bought sugar cookie dough works perfectly—just make sure it’s the refrigerated log kind, not the tub. The log holds its shape better when you’re tracing and cutting the hand shapes. Just roll it out to ¼-inch thickness and proceed with the tracing method.
How do I prevent the hand shapes from losing their form while baking?
The key is chilling the dough thoroughly before baking. After you cut out the hand shapes, pop the baking sheet in the refrigerator for 10-15 minutes before putting it in the oven. This helps the cookies hold their shape. Also, make sure your butter isn’t too soft when you make the dough—overly soft butter leads to spreading.
Can I make these cookies ahead of time for a party?
Yes! I actually recommend it. Bake the hand-shaped cookies up to 3 days in advance and store them in an airtight container at room temperature. Decorate them the day before or the morning of your event. The icing needs about an hour to set fully, so factor that into your timeline. I’ve also frozen the undecorated baked cookies for up to 3 months.
What if I don’t have meringue powder for the icing?
No problem! You can make a simple glaze instead by mixing 1 cup of powdered sugar with 2-3 tablespoons of milk or water and ½ teaspoon of vanilla. It won’t be as stiff as royal icing, so it’ll spread more, but it still works great for these cookies. Just be aware that the glaze won’t harden as firmly, so you’ll need to store the cookies in a single layer.
My cookies turned out too hard. What went wrong?
This usually happens from overbaking or overmixing the dough. Sugar cookies should be baked just until the edges are set—the centers should still look slightly underdone. Also, be gentle when mixing the dry ingredients into the wet ingredients. Overmixing develops the gluten, which leads to tough cookies. If they’re already baked and hard, try serving them with a scoop of ice cream or dipping them in hot chocolate to soften them up!
Pin This Recipe!
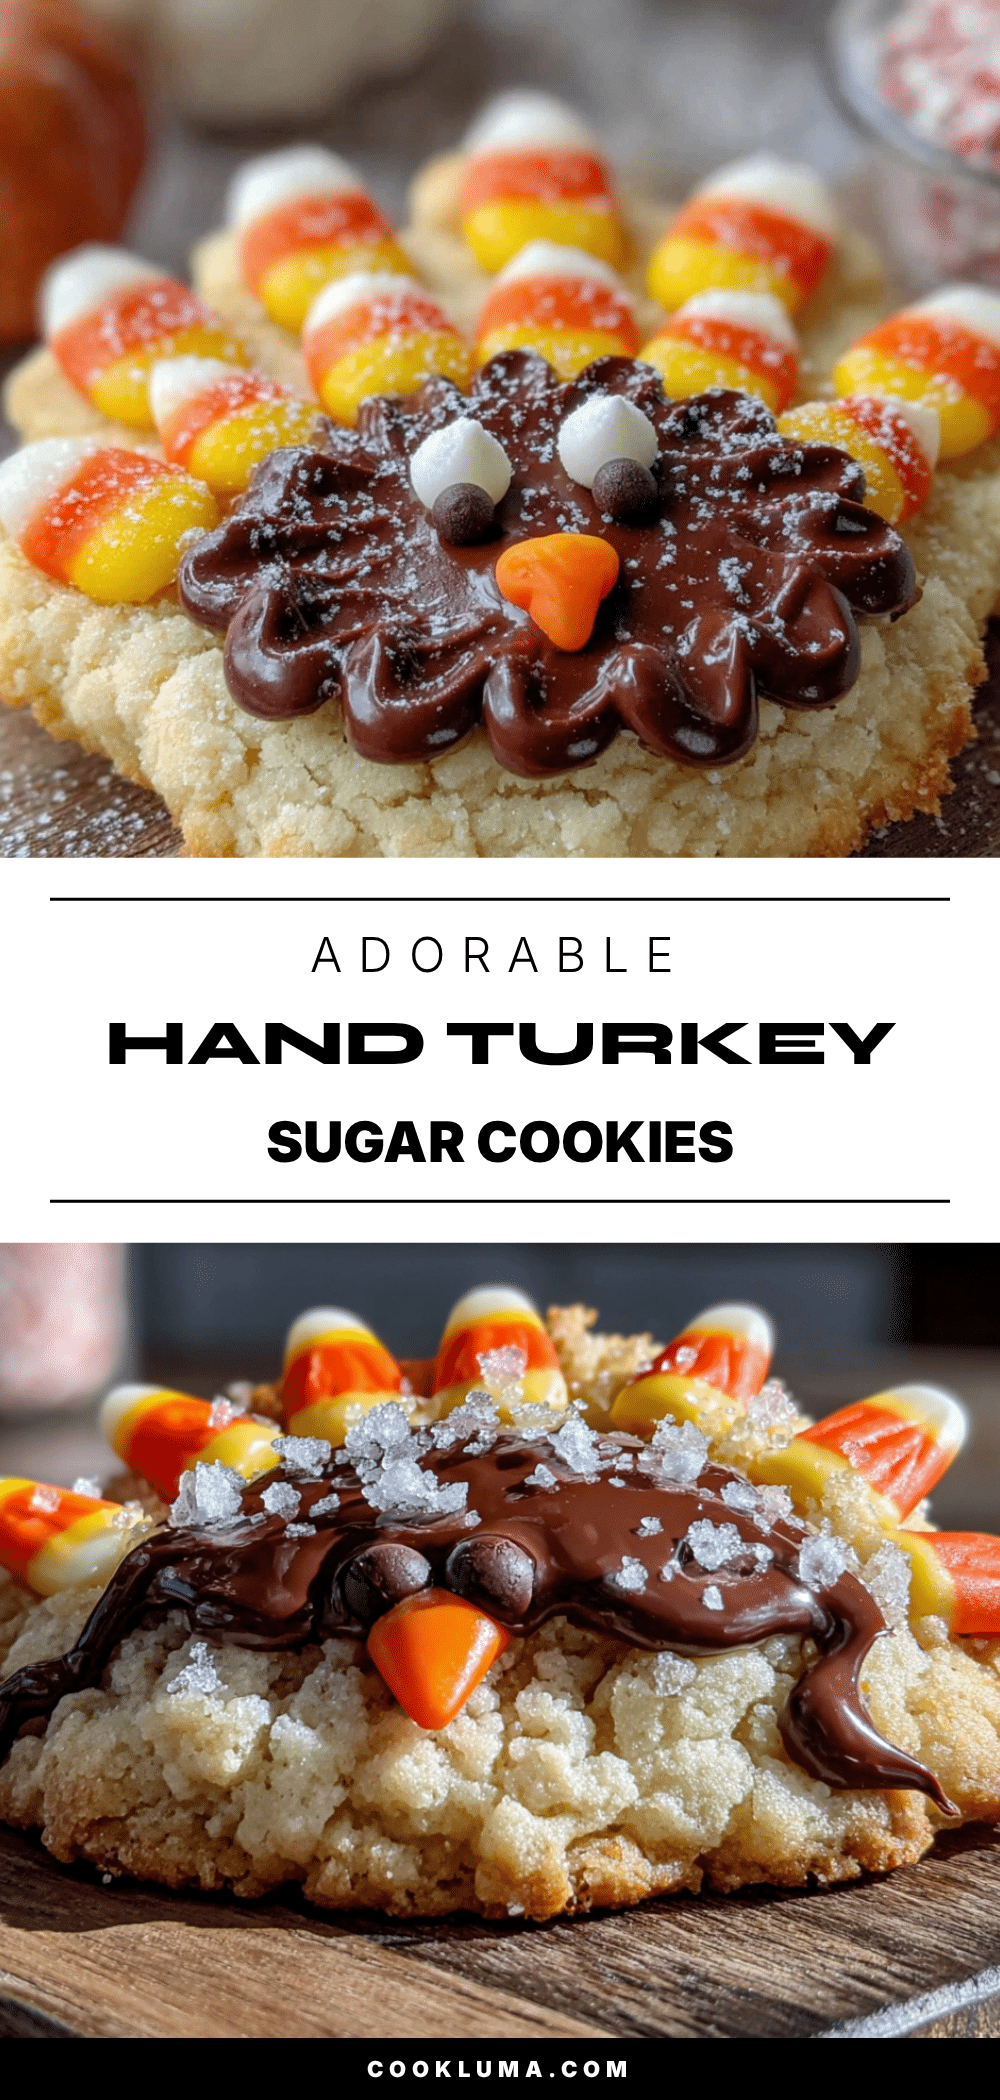
Easy Hand Turkey Sugar Cookies for Kids

These adorable hand turkey sugar cookies are quick, easy, and perfect for Thanksgiving parties. Made with simple ingredients and decorated with candy, they’re a fun, kid-friendly treat that always steals the show.
- Prep Time: 30 minutes
- Cook Time: 10 minutes
- Total Time: 1 hour 40 minutes (includes chilling and setting)
- Yield: 12-16 cookies 1x
- Category: Dessert
- Cuisine: American
Ingredients
- 2 ¾ cups all-purpose flour (340g)
- 1 teaspoon baking soda
- ½ teaspoon baking powder
- 1 cup unsalted butter, softened (226g)
- 1 ½ cups granulated sugar (300g)
- 1 large egg, room temperature
- 1 teaspoon vanilla extract
- ¼ teaspoon salt
- 2 cups powdered sugar (240g)
- 2 tablespoons meringue powder
- 3–4 tablespoons warm water
- ½ teaspoon vanilla extract
- Food coloring (red, orange, yellow, brown)
- Candy corn (for feathers)
- Chocolate chips or candy eyes (for eyes)
- Red hots or small candies (for wattle)
- Orange sprinkles or small orange candies (for beak)
- Sprinkles in fall colors (optional)
Instructions
- Preheat oven to 350°F (175°C). Line two baking sheets with parchment paper.
- In a medium bowl, whisk together flour, baking soda, baking powder, and salt.
- In a large bowl, cream softened butter and sugar until light and fluffy (about 3 minutes).
- Add egg and vanilla, mixing until just combined.
- Gradually add dry ingredients, mixing on low until a soft dough forms. Do not overmix.
- Wrap dough in plastic wrap and refrigerate for at least 30 minutes (or freeze for 15 minutes).
- On a lightly floured surface, roll dough to ¼-inch thickness.
- Place a hand flat on the dough and trace around it with a sharp knife or pizza cutter, leaving ½ inch space around fingers.
- Transfer hand-shaped dough to prepared baking sheets, spacing 2 inches apart.
- Bake for 8-10 minutes, until edges are just barely golden. Centers should look slightly underdone.
- Cool on baking sheet for 5 minutes, then transfer to a wire rack to cool completely.
- For icing: Combine powdered sugar and meringue powder. Add 3 tablespoons warm water and vanilla. Beat on medium speed for 4-5 minutes until stiff peaks form. Adjust consistency with water if needed.
- Divide icing into bowls and color: brown for body, orange for beak, red for wattle, yellow for feet.
- Pipe brown icing onto palm area of cooled cookies to create turkey body.
- While icing is wet, press candy corn into fingers for feathers (pointy end outward).
- Add candy eyes or chocolate chips above brown icing.
- Pipe orange triangle for beak and red dot or candy for wattle.
- Add orange sprinkles or candies for feet at bottom of palm.
- Let decorated cookies sit at room temperature for about 1 hour until icing hardens.
Notes
Chill dough thoroughly to prevent sticking and maintain hand shape. Roll to consistent ¼-inch thickness. For best results, bake cookies the day before and decorate the morning of the event. Store undecorated cookies in an airtight container for up to 5 days; decorated cookies keep for 3-4 days.
Nutrition
- Serving Size: 1 cookie
- Calories: 200
- Sugar: 16
- Sodium: 120
- Fat: 8
- Saturated Fat: 5
- Carbohydrates: 28
- Protein: 2
Keywords: hand turkey cookies, sugar cookies, Thanksgiving cookies, kids cookies, easy cookies, handprint cookies


