The school Halloween party was in three hours and I’d completely forgotten. My son had reminded me on Tuesday. Then again on Wednesday. And Thursday morning. But somewhere between the work emails and the grocery run and the dog needing his shots, the “spooky treat” assignment slipped right out of my brain. Now it was Friday at 2:00 PM and I was staring into my pantry like it held the secrets to the universe. Spoiler alert: it didn’t.
All I had was a box of instant chocolate pudding, some cold milk, a package of Oreos that were probably a week past their prime, and a bag of gummy worms my husband bought for his desk stash. I mean, honestly, that’s not exactly the stuff of Pinterest dreams. Every other parent was going to show up with those elaborate cake pops that look like eyeballs or those mummy hot dogs with the perfect little mustard faces. Meanwhile, I was about to bring chocolate pudding cups. Groundbreaking, right?
But here’s the thing about desperation — it makes you creative. I crushed those stale Oreos into what looked like potting soil, layered the chocolate pudding into clear plastic cups, and stuck a few gummy worms in there like they were wiggling their way out of the dirt. It took me maybe twelve minutes total. And you know what happened? Those little dirt cups were the first thing to disappear. Kids were grabbing seconds before the teacher even finished setting up the punch bowl. One little girl told me they were “the best thing ever” with such conviction that I almost believed I’d planned it all along.
Maybe you’ve been there — scrambling at the last minute for a classroom treat, a neighborhood party, or just trying to make a Tuesday feel special. These Halloween dirt cups are the answer to that panic. They’re so simple it almost feels like cheating, but kids absolutely lose their minds over them. And honestly? That’s the kind of win I can get behind.
Why You’ll Love This Recipe
Let me tell you why this recipe has become my go-to for every Halloween event, school party, and spooky movie night. I’ve tested it about a dozen times now — sometimes with different pudding flavors, once with homemade whipped cream, even a version with crushed graham crackers instead of Oreos. The classic version is still the best, hands down.
- Comes together in under 15 minutes — No baking, no complicated steps, no waiting for things to cool. You can make these while your kid is finishing their homework and still have time to clean up the mess.
- Uses simple ingredients you probably already have — Chocolate pudding, Oreos, gummy worms, and some plastic cups. That’s it. No special trips to the craft store for candy eyes or fondant.
- Perfect for Halloween parties and school events — These are the kind of treats that make kids squeal with delight. The gummy worms peeking out of the “dirt” get them every time.
- Budget-friendly for feeding a crowd — A single batch costs maybe eight dollars and makes enough for a whole classroom. Compare that to store-bought Halloween treats and you’re saving serious money.
- No special equipment required — You don’t need a mixer, a food processor, or anything fancy. A zip-top bag and a rolling pin will do the job just fine.
What makes these dirt cups different from other Halloween treats? It’s the texture combination. The silky smooth pudding against the crunchy Oreo “dirt” and the chewy gummy worms — it’s like a party in your mouth. Plus, the presentation is genuinely fun without being fussy. Kids can even help assemble them, which makes it a great activity for a rainy October afternoon.
This recipe isn’t just good — it’s the kind that makes you feel like a superhero parent even when you’re winging it. It’s comfort food with a spooky twist, and it brings that same soul-soothing satisfaction of a simple dessert without the stress.
What Ingredients You Will Need
This recipe uses simple, everyday ingredients that come together to create something that feels way more special than it should. Most of these are probably in your kitchen right now, which is exactly the point.
For the Pudding Base
- 1 box (3.9 ounces / 110 grams) instant chocolate pudding mix — I prefer Jell-O brand for the smoothest texture, but store brands work fine too. Make sure you get the instant kind, not the cook-and-serve version.
- 2 cups (480 ml) cold whole milk — Whole milk gives the richest, creamiest pudding. You can use 2% if that’s what you have, but avoid skim milk — it makes the pudding runny and thin.
For the “Dirt” Topping
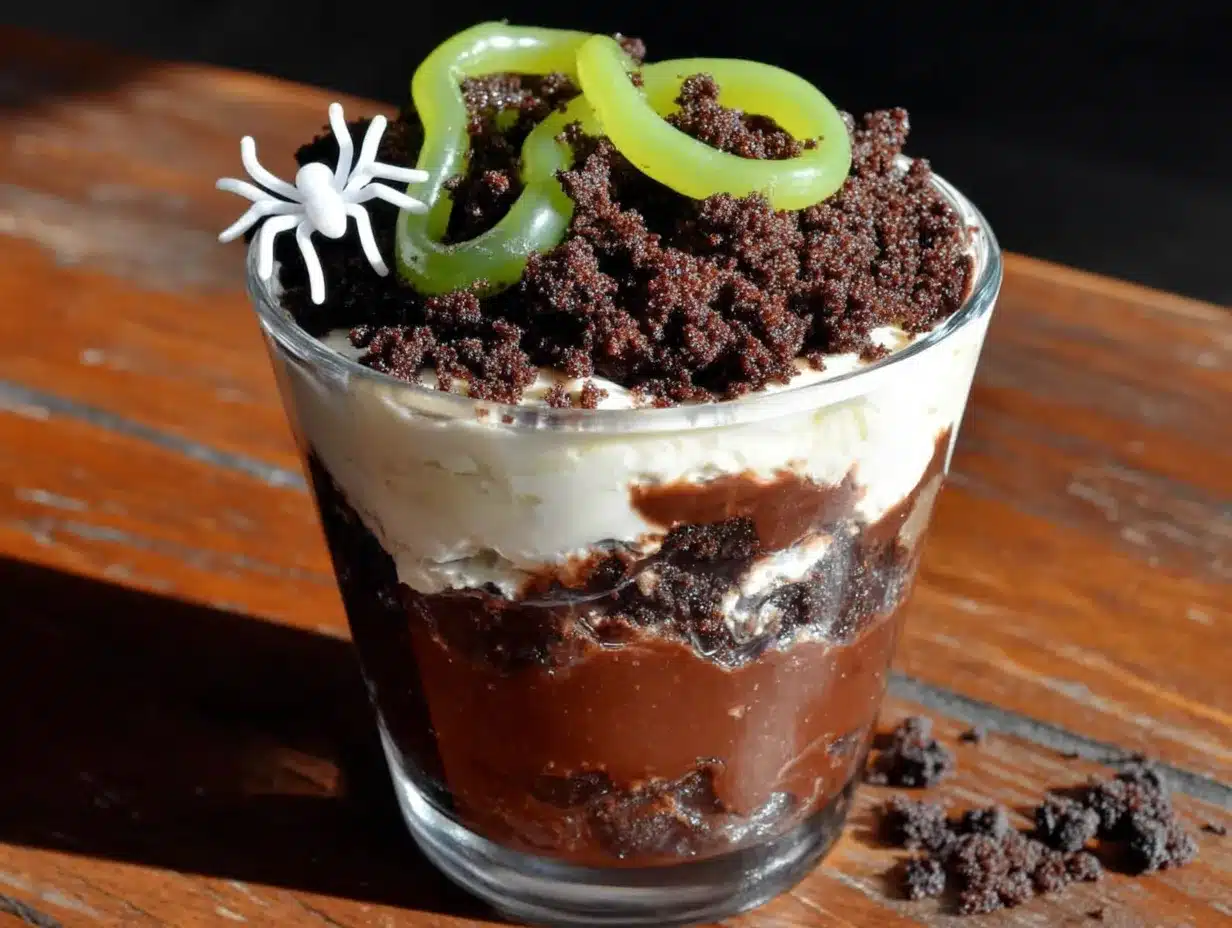
- 1 package (14.3 ounces / 405 grams) chocolate sandwich cookies — Oreos are the classic choice, but any chocolate sandwich cookie works. I’ve used the generic store brand before and honestly couldn’t tell the difference.
- Optional: 2 tablespoons (28 grams) melted butter — This helps the crumbs hold together slightly and gives them a more “soil-like” texture. Not strictly necessary, but it adds a nice richness.
For Decoration
- 1 cup gummy worms — Get the bright, colorful ones for maximum kid appeal. I like the Trolli brand because they’re extra squishy and come in fun colors.
- Optional: 8-10 small plastic cups (5-7 ounce size) — Clear cups are best so kids can see the layers. Solo cups or any small disposable cups work too.
- Optional: 8-10 gummy spiders or other Halloween candies — These are fun additions if you want to go all out, but totally optional.
Ingredient Tips from My Kitchen
I learned the hard way that the type of pudding mix matters a lot. The first time I made these, I accidentally bought cook-and-serve pudding and ended up with a grainy, lumpy mess that took forever to set. Instant pudding is non-negotiable here — it sets up in about five minutes and gives you that perfectly smooth texture.
For the Oreos, I recommend using the regular ones rather than Double Stuf. The extra filling makes the crumbs stickier and harder to get that fine, soil-like texture. If all you have are Double Stuf, just scrape off some of the cream filling before crushing them.
As for the gummy worms, the sour ones add a nice tangy contrast to the sweet pudding. My kids actually prefer the sour ones now, but regular gummy worms work great too. Just make sure they’re fresh and soft — stale gummy worms are a texture nightmare.
Equipment Needed
One of the best things about this recipe is that you probably already own everything you need. No fancy kitchen gadgets required.
- Medium mixing bowl — For whisking the pudding. Any bowl you have will work.
- Whisk — A whisk works better than a spoon for getting the pudding smooth without lumps.
- Measuring cups and spoons — For measuring milk and any optional ingredients.
- Zip-top plastic bag (quart size) — For crushing the Oreos. This is way less messy than using a food processor and easier to clean up.
- Rolling pin or heavy-bottomed pan — For crushing the cookies inside the bag. A wine bottle works in a pinch.
- Small plastic cups (5-7 ounce size) — Clear cups let kids see the layers, which is half the fun. I buy mine at the dollar store in packs of 20 for about two bucks.
- Spoon or small spatula — For layering the pudding and crumbs.
If you don’t have a rolling pin, don’t worry. I’ve used the bottom of a coffee mug, a cast iron skillet, and even my fist (not recommended, but it works). The goal is just to get those cookies crushed into fine crumbs. A food processor works beautifully if you have one, but honestly, the bag-and-rolling-pin method is faster and means fewer dishes to wash.
Preparation Method
Alright, let’s get these dirt cups made. I promise this is the easiest Halloween treat you’ll ever make.
- Make the chocolate pudding. In a medium mixing bowl, combine the instant chocolate pudding mix with 2 cups (480 ml) of cold whole milk. Whisk vigorously for about 2 minutes until the mixture starts to thicken. You’ll feel it getting heavier in the bowl — that’s how you know it’s working. Let it sit for 5 minutes to fully set. The pudding should be thick enough that it holds its shape when you lift the whisk.
- While the pudding sets, crush the Oreos. Place the entire package of chocolate sandwich cookies into a quart-size zip-top bag. Squeeze out as much air as possible and seal it closed. Use a rolling pin to crush the cookies into fine crumbs. You want them to look like potting soil — some larger pieces are okay, but aim for mostly fine crumbs. This takes about 3-4 minutes of steady rolling. If you see big chunks, pick up the bag and give it a few good whacks against the counter.
- Optional: Mix in melted butter. If you want a slightly richer “dirt” texture, pour the crushed Oreos into a small bowl and stir in 2 tablespoons (28 grams) of melted butter. Mix with a fork until the butter is evenly distributed. This step isn’t necessary, but it does make the crumbs clump together a bit more like real soil. My kids actually prefer it without the butter, so I usually skip it.
- Layer the cups. Spoon about 2 tablespoons of the crushed Oreo crumbs into the bottom of each clear plastic cup. This creates the first layer of “dirt.” Then spoon the chocolate pudding on top, filling each cup about three-quarters full. You want enough room for the top layer of crumbs without overflowing.
- Add the gummy worms. Take 2-3 gummy worms and gently press them into the pudding so they’re partially buried. Let the ends stick out like they’re trying to escape. This is the part that makes kids absolutely lose it — the worms look like they’re wiggling out of the dirt.
- Finish with the top layer. Sprinkle the remaining crushed Oreo crumbs over the top of each cup, covering the pudding completely. Make sure you cover the base of the gummy worms so it looks like they’re coming up from underground. You want a thick enough layer that you can’t see any pudding peeking through.
- Chill before serving. Place the finished dirt cups in the refrigerator for at least 30 minutes before serving. This helps the layers set and makes the whole thing feel more cohesive. If you’re making them for a party, you can prepare them up to 24 hours in advance and keep them refrigerated.
One thing I learned the hard way — don’t skip the chilling step. The first time I made these, I served them immediately and the pudding was too soft. The crumbs sank into the pudding and it looked more like a muddy mess than dirt cups. Giving them time in the fridge makes all the difference.
Cooking Tips & Techniques
After making these dirt cups more times than I care to count, I’ve picked up a few tricks that make the process smoother and the results better. Here’s what I’ve learned.
Crush the Oreos while the pudding sets. This is just good time management. The pudding needs 5 minutes to thicken, and that’s exactly how long it takes to crush the cookies. By the time your crumbs are ready, the pudding is perfectly set and ready to layer.
Use a food processor for finer crumbs. If you have one, it’ll give you a more uniform texture that looks more like real dirt. Just pulse the Oreos in short bursts so you don’t turn them into paste. About 10-15 pulses should do it.
Don’t overmix the pudding. Whisk just until the powder is dissolved and the mixture starts to thicken. Overmixing can make the pudding grainy or cause it to separate. You want it smooth and silky, not watery.
Wipe the rims of the cups. Before adding the top layer of crumbs, take a damp paper towel and wipe the inside rim of each cup. This removes any pudding residue and helps the crumbs stick to the sides, creating that clean “dirt” look.
Make extra for the adults. I’m not kidding. Every time I’ve made these for a party, the grown-ups sneak them just as much as the kids. They’re nostalgic and delicious, and there’s something about eating “dirt” that makes everyone feel like a kid again.
One mistake I keep making. I always underestimate how many Oreos I need. A full package is just right for 8-10 cups, but if you’re making a smaller batch, you’ll still want a generous crumb layer. Skimping on the dirt makes the cups look sad and unfinished.
Variations & Adaptations
This recipe is incredibly flexible, which is one of the reasons I love it. Here are some variations I’ve tried and loved.
Dairy-Free Version
Swap the whole milk for oat milk or almond milk, and use dairy-free chocolate pudding mix. Most instant pudding mixes are actually dairy-free — you just need to use a plant-based milk. I’ve made this with oat milk and it turns out just as creamy and delicious.
Gluten-Free Version
Use gluten-free chocolate sandwich cookies. There are several brands available now, including Glutino and Kinnikinnick. The texture is slightly different, but kids won’t notice once everything’s layered together.
Pumpkin Spice Dirt Cups
For a fall twist, use vanilla pudding mixed with a teaspoon of pumpkin pie spice. Top with crushed graham crackers and candy pumpkins instead of gummy worms. It’s a fun variation for Thanksgiving or fall harvest parties.
Peppermint Dirt Cups
Around Christmas, I swap the chocolate pudding for vanilla and add a drop of peppermint extract. Crush up chocolate mint cookies instead of Oreos, and top with crushed candy canes. It feels totally different but uses the same basic method.
Individual Serving Jars
For a fancier presentation, use small mason jars instead of plastic cups. They’re reusable and make the dirt cups look way more polished. Plus, kids love having their own little jar of treats.
Serving & Storage Suggestions
These dirt cups are best served cold, straight from the refrigerator. The contrast between the cold, creamy pudding and the crunchy Oreo crumbs is part of what makes them so satisfying.
For presentation: Arrange the cups on a platter or tray with a few extra gummy worms scattered around for effect. If you’re feeling extra festive, you can add a plastic spider ring to each cup or stick a little Halloween pick in the top. I’ve also seen people add a dollop of whipped cream with a gummy worm on top for an extra layer of indulgence.
What to serve alongside: These pair perfectly with apple slices, popcorn balls, or any other Halloween treats. For a full spooky spread, serve them alongside mummy hot dogs, pumpkin-shaped cheese crackers, and witch’s brew punch.
Storage instructions: Keep the dirt cups covered in the refrigerator for up to 3 days. The Oreo crumbs will soften slightly over time, but they’ll still be delicious. If you’re making them more than a day ahead, I recommend storing the crumbs separately and adding them just before serving. This keeps the “dirt” crunchy.
Freezing: I don’t recommend freezing these. The pudding gets icy and the texture becomes weird when thawed. These are strictly a make-ahead-and-refrigerate situation.
How flavors develop: Honestly, these taste best after about 2-3 hours in the fridge. The flavors meld together and the pudding sets up perfectly. If you can make them in the morning for an afternoon party, that’s the sweet spot.
Nutritional Information & Benefits
Let’s be real — these are a treat, not a health food. But here’s the nutritional breakdown so you know what you’re working with.
Per serving (1 dirt cup):
- Calories: 320
- Total Fat: 12g
- Saturated Fat: 5g
- Cholesterol: 15mg
- Sodium: 420mg
- Total Carbohydrates: 52g
- Dietary Fiber: 2g
- Sugars: 38g
- Protein: 5g
Health highlights: The milk provides calcium and vitamin D, which are important for growing kids. The chocolate pudding contains a small amount of iron from the cocoa. And the gummy worms? Well, they’re mostly sugar, but they make kids happy, and that counts for something too.
Dietary considerations: This recipe contains dairy and gluten. For dairy-free and gluten-free options, check the variations section above. It’s also nut-free, which makes it safe for school classrooms with allergy restrictions.
My take on treats: I believe in balance. These dirt cups are a fun, occasional treat that brings joy to Halloween celebrations. They’re not something you’d eat every day, but for a special occasion? Absolutely worth it. And honestly, knowing exactly what’s in them makes me feel better than buying pre-packaged Halloween treats with ingredients I can’t pronounce.
Frequently Asked Questions
Can I make these dirt cups the night before?
Absolutely! In fact, they taste even better the next day. Just keep them covered in the refrigerator and add any extra gummy worms right before serving so they stay bright and colorful.
Can I use homemade pudding instead of instant?
You can, but it changes the texture. Homemade pudding is thinner and takes longer to set, so your layers might not be as clean. If you want to go homemade, cook the pudding, let it cool completely, and then layer it. Just know that the final result won’t be as firm.
How do I get the crumbs to look like real dirt?
The key is crushing the Oreos until they’re very fine. Use a food processor if you have one, or spend a few extra minutes with the rolling pin. Removing the cream filling from the cookies also helps, but it’s not necessary.
Can I use other types of pudding?
Yes! Vanilla pudding with crushed graham crackers makes a “sand” version that’s perfect for beach-themed parties. Butterscotch pudding is also delicious and gives a different flavor profile. Just stick with instant pudding for the best texture.
How many cups does this recipe make?
This recipe makes 8-10 dirt cups, depending on the size of your cups. If you’re using smaller cups (5 ounces), you’ll get closer to 10. Larger cups (7 ounces) will give you about 8 servings.
Conclusion
These Kid-Approved Halloween Dirt Cups with Gummy Worms are the kind of recipe that makes you look like a hero with almost zero effort. They’re quick, cheap, and absolutely irresistible to kids of all ages. Whether you’re scrambling for a school party, planning a Halloween celebration, or just want to surprise your kids with something fun, these dirt cups deliver every single time.
What I love most about this recipe is how it brings people together. I’ve seen kids who barely know each other bond over comparing whose gummy worm is “escaping” the fastest. I’ve watched parents sneak bites when they think no one is looking. And I’ve felt that warm, fuzzy feeling that comes from making something simple that brings so much joy.
So go ahead — grab those ingredients and give these a try. Customize them with your kids’ favorite candies, experiment with different pudding flavors, and make them your own. And when your little one takes that first bite with wide eyes and a chocolate-smeared smile, you’ll know exactly why this recipe is worth keeping in your back pocket.
I’d love to hear how yours turn out! Drop a comment below and let me know what variations you tried, or share a photo of your dirt cups. And if you know another parent who’s scrambling for a last-minute Halloween treat, send them this recipe. We’ve all been there, and we all deserve a win.
Pin This Recipe!
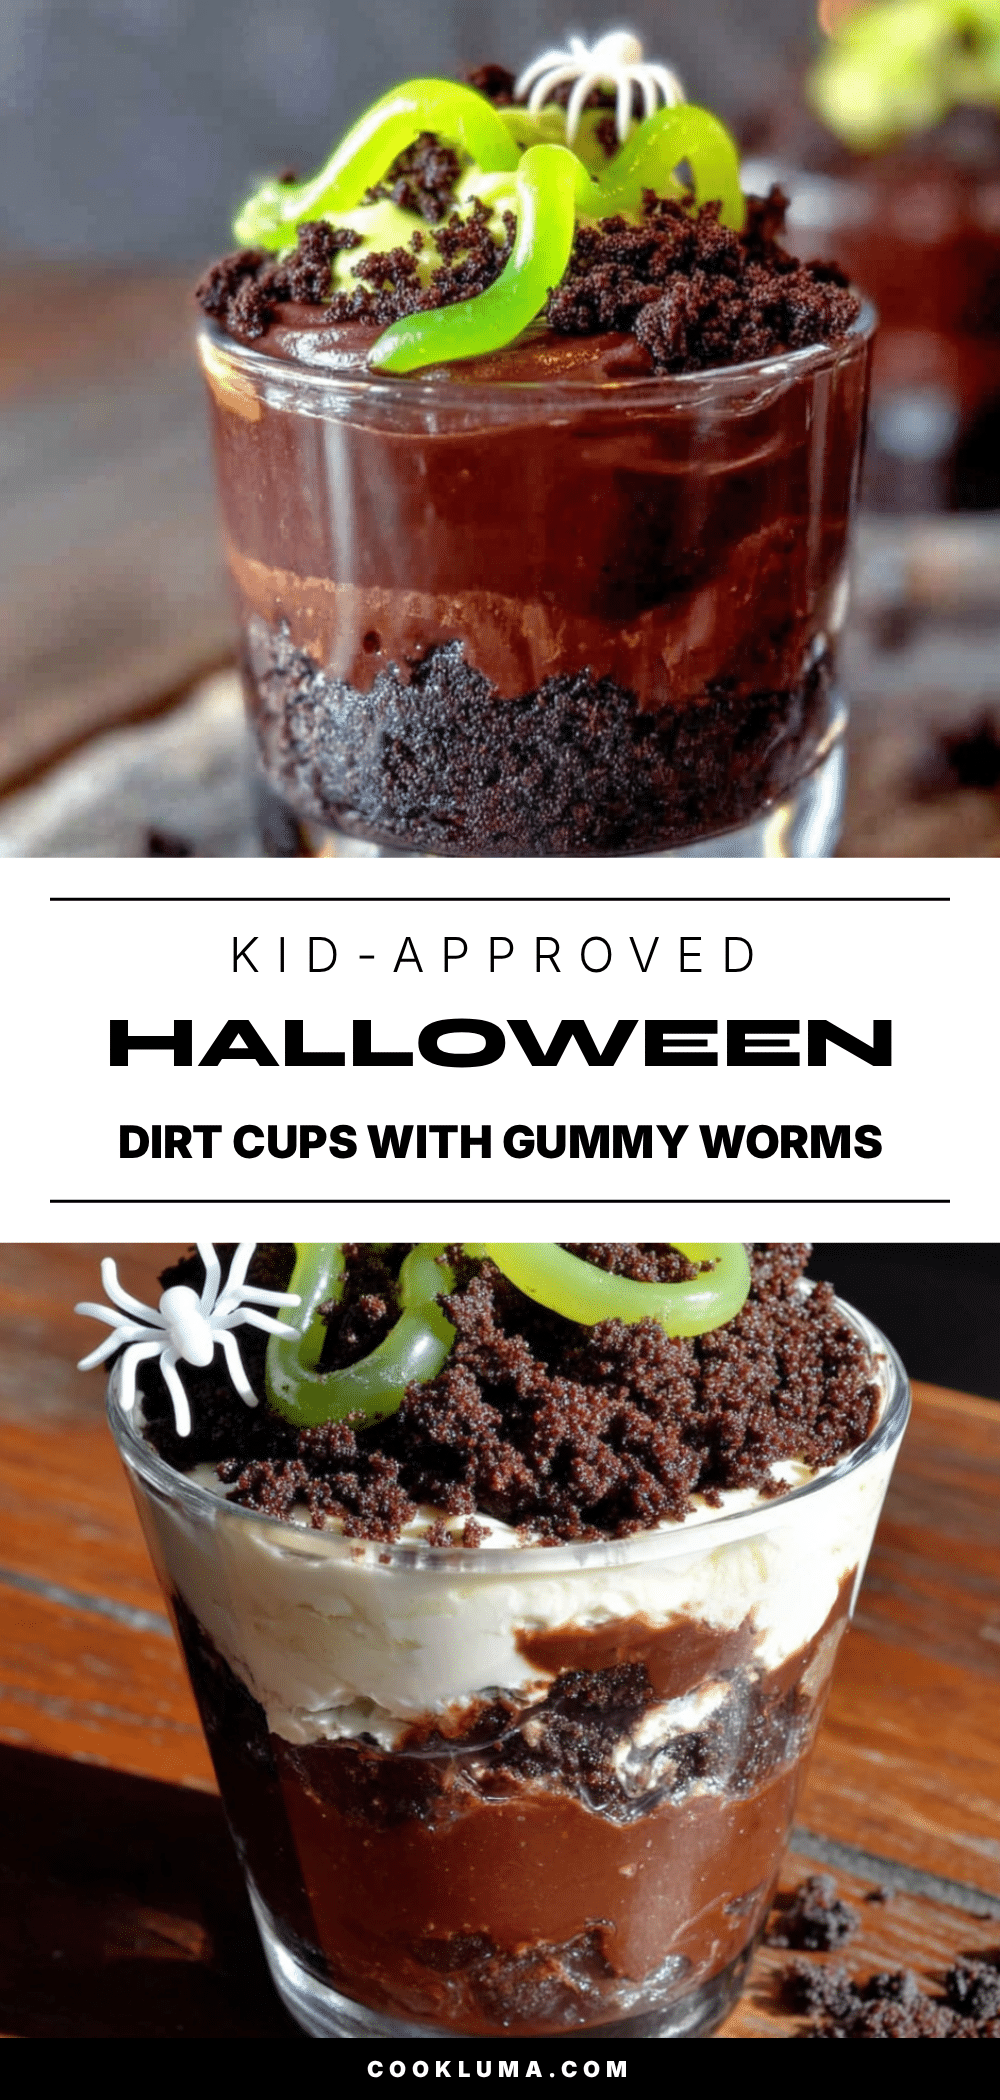
Easy Kid-Approved Halloween Dirt Cups with Gummy Worms
These no-bake Halloween dirt cups are the ultimate last-minute treat! Layers of creamy chocolate pudding, crushed Oreo ‘dirt,’ and gummy worms wiggling out create a spooky dessert that kids absolutely love. Ready in under 15 minutes with simple ingredients.
- Prep Time: 12 minutes
- Cook Time: 0 minutes
- Total Time: 42 minutes (including 30 minutes chilling)
- Yield: 8-10 servings 1x
- Category: Dessert
- Cuisine: American
Ingredients
- 1 box (3.9 ounces / 110 grams) instant chocolate pudding mix
- 2 cups (480 ml) cold whole milk
- 1 package (14.3 ounces / 405 grams) chocolate sandwich cookies (e.g., Oreos)
- 2 tablespoons (28 grams) melted butter (optional)
- 1 cup gummy worms
- 8–10 small plastic cups (5–7 ounce size)
- 8–10 gummy spiders or other Halloween candies (optional)
Instructions
- In a medium mixing bowl, combine the instant chocolate pudding mix with 2 cups of cold whole milk. Whisk vigorously for about 2 minutes until the mixture starts to thicken. Let it sit for 5 minutes to fully set.
- While the pudding sets, place the entire package of chocolate sandwich cookies into a quart-size zip-top bag. Squeeze out as much air as possible and seal it closed. Use a rolling pin to crush the cookies into fine crumbs that look like potting soil (about 3-4 minutes).
- Optional: For a richer ‘dirt’ texture, pour the crushed Oreos into a small bowl and stir in 2 tablespoons of melted butter with a fork until evenly distributed.
- Spoon about 2 tablespoons of the crushed Oreo crumbs into the bottom of each clear plastic cup to create the first layer of ‘dirt.’
- Spoon the chocolate pudding on top of the crumbs, filling each cup about three-quarters full.
- Take 2-3 gummy worms and gently press them into the pudding so they are partially buried, with the ends sticking out like they are trying to escape.
- Sprinkle the remaining crushed Oreo crumbs over the top of each cup, covering the pudding completely and the base of the gummy worms.
- Refrigerate the finished dirt cups for at least 30 minutes before serving. Can be prepared up to 24 hours in advance.
Notes
Use instant pudding mix, not cook-and-serve. Regular Oreos work better than Double Stuf for finer crumbs. Don’t skip the chilling step—it helps the layers set. For best results, make 2-3 hours ahead. Store covered in the refrigerator for up to 3 days. For dairy-free, use oat or almond milk and dairy-free pudding mix. For gluten-free, use gluten-free chocolate sandwich cookies.
Nutrition
- Serving Size: 1 dirt cup
- Calories: 320
- Sugar: 38
- Sodium: 420
- Fat: 12
- Saturated Fat: 5
- Carbohydrates: 52
- Fiber: 2
- Protein: 5
Keywords: Halloween dirt cups, gummy worms, chocolate pudding, Oreo dirt, no-bake dessert, kid-friendly, easy Halloween treat, school party dessert


