My neighbor, Dave, swore he hated gingerbread. For years. Every December, when the holiday baking frenzy would begin, he’d make a point of announcing it—usually while holding a plain black coffee like it was a badge of honor. “Too much spice,” he’d say. “Tastes like a candle.” I never argued. Honestly, I just kept making my own coffee, perfectly content with my usual splash of cream. Then, last Christmas Eve, I was testing this homemade gingerbread coffee creamer recipe in my tiny kitchen. I had molasses on the counter, a cinnamon stick I’d fished out of the back of the pantry, and that warm, spicy scent filling every corner of the apartment. I poured a generous amount into my mug, took a sip, and let out a little hum of satisfaction. That’s when I heard a knock at the door. It was Dave, holding his empty travel mug. “Got any of that… holiday stuff left?” he asked, trying to look casual but failing miserably. I just smiled and poured him a cup. He didn’t say much, but I saw him take a second sip. Then a third. By the time he left, he asked for the recipe. That’s the thing about this creamer—it doesn’t try to convince you. It just shows up, tastes incredible, and lets you discover for yourself what you’ve been missing.
Why You’ll Love This Recipe
I’ve tested a lot of copycat creamer recipes over the years. Some were too watery, others were cloyingly sweet, and a few just tasted like sadness in a mug. This one? It’s the real deal. It nails that cozy, spicy-sweet balance of the Starbucks version, but with ingredients you can actually pronounce. No artificial flavors, no weird preservatives—just real pantry staples doing their thing.
- Quick & Easy: Comes together in under 10 minutes. No simmering for hours or fussing with complicated steps. You’re literally minutes away from the best cup of holiday coffee.
- Simple Ingredients: You likely have everything in your kitchen right now. Molasses, brown sugar, cinnamon, ginger, nutmeg, and a little vanilla. No special trips to a fancy grocery store required.
- Perfect for the Holidays: This creamer turns an ordinary morning into something special. It’s great for Christmas morning, cozy weekend brunches, or even as a homemade gift in a pretty jar.
- Crowd-Pleaser: Even self-proclaimed gingerbread skeptics (yes, Dave) end up asking for more. It’s that good.
- Unbelievably Delicious: The texture is silky, the flavor is warm and layered, and it makes your whole kitchen smell like a bakery. It’s comfort in a cup.
What makes this recipe different from the rest? It’s all about the technique. Most copycat recipes just dump everything into milk and call it a day. But I found that gently heating the spices with the cream first—letting them bloom in the warmth—unlocks a depth of flavor you just can’t get from dumping cold spices into coffee. It’s a small step, but it makes a world of difference.
This creamer isn’t just good. It’s the kind that makes you close your eyes after the first sip. It’s holiday magic in a mug, without the guilt or the weird ingredients.
What Ingredients You Will Need
This recipe uses simple, wholesome ingredients to deliver that unmistakable gingerbread flavor. Most of these are pantry staples, especially if you do any amount of holiday baking.
For the Creamer Base
- 1 ½ cups whole milk (or your preferred milk—oat milk works great for a dairy-free version)
- 1 cup heavy cream (adds richness and that silky texture; substitute with full-fat coconut milk for a dairy-free option)
- ¼ cup packed dark brown sugar (light brown works too, but dark gives a deeper molasses flavor that’s closer to the Starbucks version)
- 2 tablespoons molasses (use unsulphured molasses for the best flavor—blackstrap is too bitter here)
- 1 teaspoon vanilla extract (I prefer pure vanilla extract, but imitation works in a pinch)
- 1 teaspoon ground cinnamon (I recommend Ceylon cinnamon for a milder, sweeter spice, but Saigon works too)
- ½ teaspoon ground ginger (freshly ground if you can, but pre-ground is perfectly fine)
- ¼ teaspoon ground nutmeg (freshly grated is amazing here, but pre-ground saves time)
- ⅛ teaspoon ground cloves (a little goes a long way—don’t be tempted to add more)
- Tiny pinch of black pepper (trust me on this—it doesn’t make it spicy, just adds a subtle warmth that rounds everything out)
Ingredient Tips & Sourcing
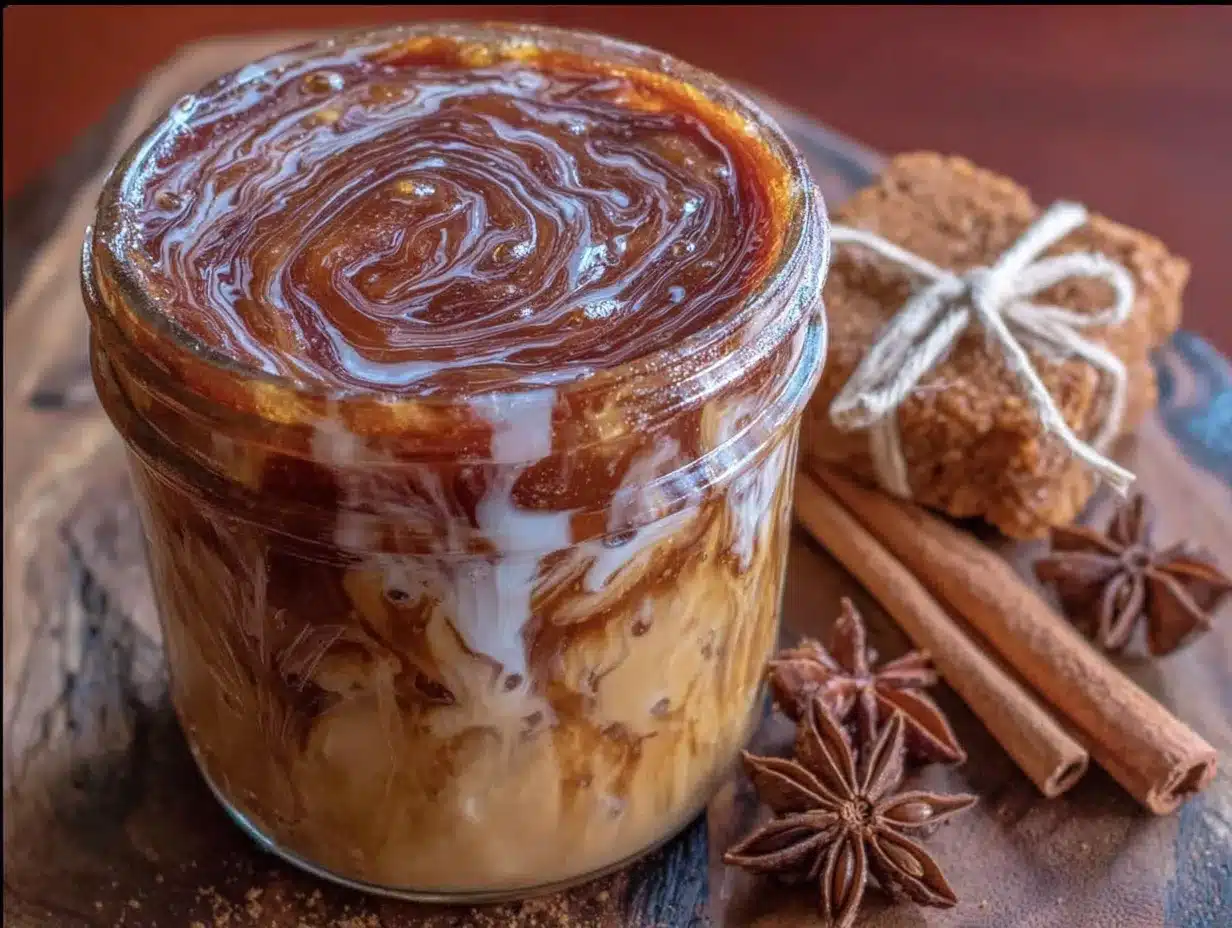
I’ve found that the quality of your molasses really matters here. Grandma’s Molasses is my go-to brand for this recipe—it’s widely available and has that perfect balance of sweetness and depth. If you’re using a different brand, just make sure it’s unsulphured. For the cinnamon, I personally love the warm, floral notes of Ceylon cinnamon from Burlap & Barrel. It’s pricier, but it makes a noticeable difference in the final flavor.
If you’re making this dairy-free, oat milk is my top recommendation. It’s creamy enough to mimic the texture of whole milk without being overpowering. Coconut milk works too, but it will add a slight coconut flavor that may or may not be what you’re going for.
Equipment Needed
The beauty of this recipe is that you don’t need any fancy equipment. Just a few basic kitchen tools and you’re good to go.
- Small saucepan (a 1.5-quart or 2-quart size works perfectly)
- Whisk (helps incorporate the spices smoothly without lumps)
- Measuring cups and spoons (for accuracy)
- Fine-mesh strainer (optional, but recommended for straining out any spice clumps)
- Glass jar or bottle (for storing the finished creamer—a 16-ounce mason jar works great)
- Funnel (makes pouring into the jar much less messy)
If you don’t have a fine-mesh strainer, you can skip it. Just make sure to whisk the spices really well. I’ve also used a milk frother to mix everything together right in the jar for a no-cook version, but honestly, the stovetop method gives a better result. For budget-friendly options, a basic saucepan from a thrift store works just as well as a fancy one.
Preparation Method
This recipe comes together in about 10 minutes. I’ll walk you through each step so you get it perfect on your first try.
- Combine the milk and cream. Pour 1 ½ cups whole milk and 1 cup heavy cream into your small saucepan. Place it over medium heat. You’re not trying to boil it—just warm it gently. Look for small bubbles forming around the edges of the pan, but don’t let it come to a full boil. This usually takes about 3-4 minutes.
- Add the brown sugar and molasses. Once the milk mixture is warm, add ¼ cup packed dark brown sugar and 2 tablespoons molasses. Whisk continuously until both are fully dissolved. The mixture will turn a beautiful caramel color. This takes about 1-2 minutes. If you see any lumps of brown sugar, keep whisking—they’ll dissolve as the mixture warms.
- Bloom the spices. This is the secret step. Reduce the heat to low. Add 1 teaspoon ground cinnamon, ½ teaspoon ground ginger, ¼ teaspoon ground nutmeg, ⅛ teaspoon ground cloves, and a tiny pinch of black pepper. Whisk vigorously for about 30 seconds. You’ll smell the spices become more aromatic as they bloom in the warm liquid. This step releases their essential oils and creates a much deeper, more complex flavor.
- Simmer gently. Let the mixture simmer on low heat for 2-3 minutes, whisking occasionally. Don’t let it boil. You’re just giving the flavors time to meld together. The mixture should be steaming but not bubbling aggressively. If you see it start to bubble, turn the heat down immediately.
- Remove from heat and add vanilla. Take the saucepan off the stove. Stir in 1 teaspoon vanilla extract. The vanilla adds a final layer of warmth and rounds out all the spices beautifully.
- Strain (optional but recommended). Place your fine-mesh strainer over a glass jar or bottle. Pour the creamer through the strainer. This catches any tiny clumps of spice or undissolved sugar. If you don’t have a strainer, you can skip this step—just make sure you whisked everything really well.
- Cool and store. Let the creamer cool to room temperature before sealing the jar. It will thicken slightly as it cools. Once cool, screw on the lid and refrigerate. The creamer will keep for up to 2 weeks, but honestly, it never lasts that long in my house.
Pro tip: If you’re in a hurry, you can skip the stovetop method entirely. Just shake all the ingredients in a jar with a tight-fitting lid until the sugar dissolves. The flavor won’t be as deep, but it’s still delicious in a pinch.
Cooking Tips & Techniques
I’ve made this creamer more times than I can count, and I’ve learned a few things along the way. Here are my best tips for getting it right every time.
Don’t boil the creamer. This is the most common mistake. If you let the mixture boil, the cream can separate and you’ll end up with a grainy texture. Keep the heat low and be patient. You want it steaming, not bubbling.
Bloom your spices. I mentioned this in the method, but it’s worth repeating. Adding the spices to warm liquid and letting them sit for a minute before adding the vanilla really does make a difference. It’s the same principle as blooming spices in oil for savory dishes—it just wakes them up.
Taste as you go. Everyone’s palate is different. I like my creamer on the spicier side, but you might prefer more sweetness. After you add the spices, dip a spoon in and taste it. Add a pinch more cinnamon if you want, or a little extra brown sugar. This is your creamer—make it taste the way you love.
Use a whisk, not a spoon. A whisk incorporates the spices much more evenly than a spoon. You’ll avoid those annoying clumps of cinnamon that float to the top of your coffee later.
Let it sit overnight. The flavor improves dramatically after a day in the fridge. I know it’s hard to wait, but if you can make this the night before you plan to use it, you’ll be rewarded with an even deeper, more rounded gingerbread flavor.
Variations & Adaptations
This recipe is a great starting point, but feel free to make it your own. Here are some variations I’ve tried and loved.
Dairy-Free Gingerbread Creamer
Swap the whole milk with oat milk and the heavy cream with full-fat coconut milk. Oat milk gives the creamiest texture without overpowering the gingerbread flavor. Coconut milk adds a slight tropical note, but it’s still delicious. I’ve also used almond milk, but it’s thinner and doesn’t give the same silky mouthfeel.
Sugar-Free Version
Replace the brown sugar with 2-3 tablespoons of your favorite granulated sweetener (like monk fruit or erythritol) and add ½ teaspoon of molasses extract instead of regular molasses. The flavor won’t be as deep, but it’s a great option if you’re watching your sugar intake.
Extra Spicy Gingerbread
Double the ground ginger and add a pinch of cayenne pepper. This gives it a nice little kick that’s perfect for cold winter mornings. My friend Sarah calls this the “Gingerbread with a Punch” version, and it’s become her holiday staple.
Pumpkin Gingerbread Fusion
Add 2 tablespoons of pumpkin puree and an extra ¼ teaspoon of pumpkin pie spice. This creates a hybrid flavor that’s perfect for the transition from fall to winter. Just make sure to whisk the pumpkin in really well so there are no lumps.
Vanilla Bean Version
Instead of vanilla extract, scrape the seeds from half a vanilla bean and add them with the spices. The tiny black specks floating in your coffee look beautiful, and the flavor is more floral and complex.
Serving & Storage Suggestions
This creamer is incredibly versatile. Here’s how to get the most out of it.
Serving temperature: I prefer it in hot coffee, but it’s also amazing in iced coffee. For iced coffee, just pour the creamer over ice and add your cold brew. The creamer is thick enough that it doesn’t get watery.
How much to use: Start with 2-3 tablespoons per 8-ounce cup of coffee. Adjust based on how sweet and creamy you like it. I personally use about ¼ cup because I have a serious sweet tooth.
Presentation ideas: For a festive touch, rim your mug with crushed gingerbread cookies or a mixture of cinnamon and sugar. Top with a dollop of whipped cream and a sprinkle of cinnamon. It makes for a gorgeous photo and an even better first sip.
Storage: Keep the creamer in a sealed glass jar in the refrigerator. It will stay fresh for up to 2 weeks. The spices may settle at the bottom, so give the jar a good shake before each use.
Freezing: Yes, you can freeze this creamer! Pour it into an ice cube tray and freeze. Pop a cube or two into your hot coffee for a perfectly portioned, mess-free creamer. The texture might be slightly different after thawing, but the flavor is still great.
Flavor development: The flavor actually gets better after a day or two in the fridge. The spices meld together and the molasses deepens. So don’t worry if it tastes a little sharp on day one—give it time.
Nutritional Information & Benefits
Here’s the nutritional breakdown for a 2-tablespoon serving of this creamer. Keep in mind that these are estimates and will vary based on the exact ingredients you use.
| Nutrient | Amount per 2 tbsp |
|---|---|
| Calories | 45 |
| Total Fat | 3g |
| Saturated Fat | 2g |
| Carbohydrates | 4g |
| Sugar | 3g |
| Calcium | 20mg |
| Iron | 0.3mg |
Health benefits: This creamer isn’t just delicious—it also includes some ingredients with real health benefits. Cinnamon is known for its anti-inflammatory properties and can help regulate blood sugar. Ginger is great for digestion and can help soothe an upset stomach. Molasses is a source of iron, calcium, and magnesium. Of course, this is still a treat, but it’s nice to know there’s a little goodness in every sip.
Dietary considerations: This recipe is vegetarian and can easily be made dairy-free, gluten-free, and nut-free. It’s not suitable for vegans unless you use plant-based milk and cream. The sugar content is moderate, but you can adjust it to your needs.
Frequently Asked Questions
Can I use this creamer in cold brew?
Absolutely! This creamer is actually amazing in cold brew. Just pour it over ice with your coffee. The creamer is thick enough that it doesn’t dilute the flavor. I actually prefer it in cold brew during the warmer months.
How long does homemade gingerbread creamer last?
Stored in a sealed jar in the refrigerator, this creamer will stay fresh for up to 2 weeks. The flavor actually improves after a day or two as the spices meld together. Just give it a good shake before each use, as the spices may settle at the bottom.
Can I make this without heavy cream?
Yes, you can! If you want a lighter version, use all milk instead of the milk and cream combination. The texture won’t be as rich, but it will still taste delicious. For a dairy-free option, oat milk mixed with a splash of coconut cream works beautifully.
Why did my creamer separate?
Separation usually happens if the mixture got too hot. If you boiled the creamer, the fat in the cream can separate from the liquid. To fix this, let it cool to room temperature, then whisk it vigorously or shake it in a sealed jar. If it’s still separated, you can try blending it with an immersion blender.
Can I double this recipe?
Definitely! This recipe doubles beautifully. Just use a larger saucepan and keep an eye on the heat so it doesn’t boil. The simmering time might be slightly longer since there’s more liquid. I often make a double batch to give as holiday gifts.
Conclusion
This homemade gingerbread coffee creamer is everything I want in a holiday treat—warm, spicy, sweet, and completely comforting. It turns an ordinary cup of coffee into something special without any fuss or weird ingredients. Whether you’re a lifelong gingerbread lover or a reluctant convert like Dave, this creamer has a way of winning you over.
I love that this recipe is so adaptable. You can make it dairy-free, sugar-free, extra spicy, or keep it classic. It’s your creamer, so make it taste the way you love. And if you mess up the first time? Don’t worry. I’ve scorched a batch or two in my day, and it’s still better than anything you can buy at the store.
I’d love to hear how this turns out for you. Did you add a little extra ginger? Did you try it in iced coffee? Drop a comment below and let me know. And if you’re feeling generous, share this recipe with a friend who needs a little holiday cheer in their morning cup. Happy sipping!
Pin This Recipe!
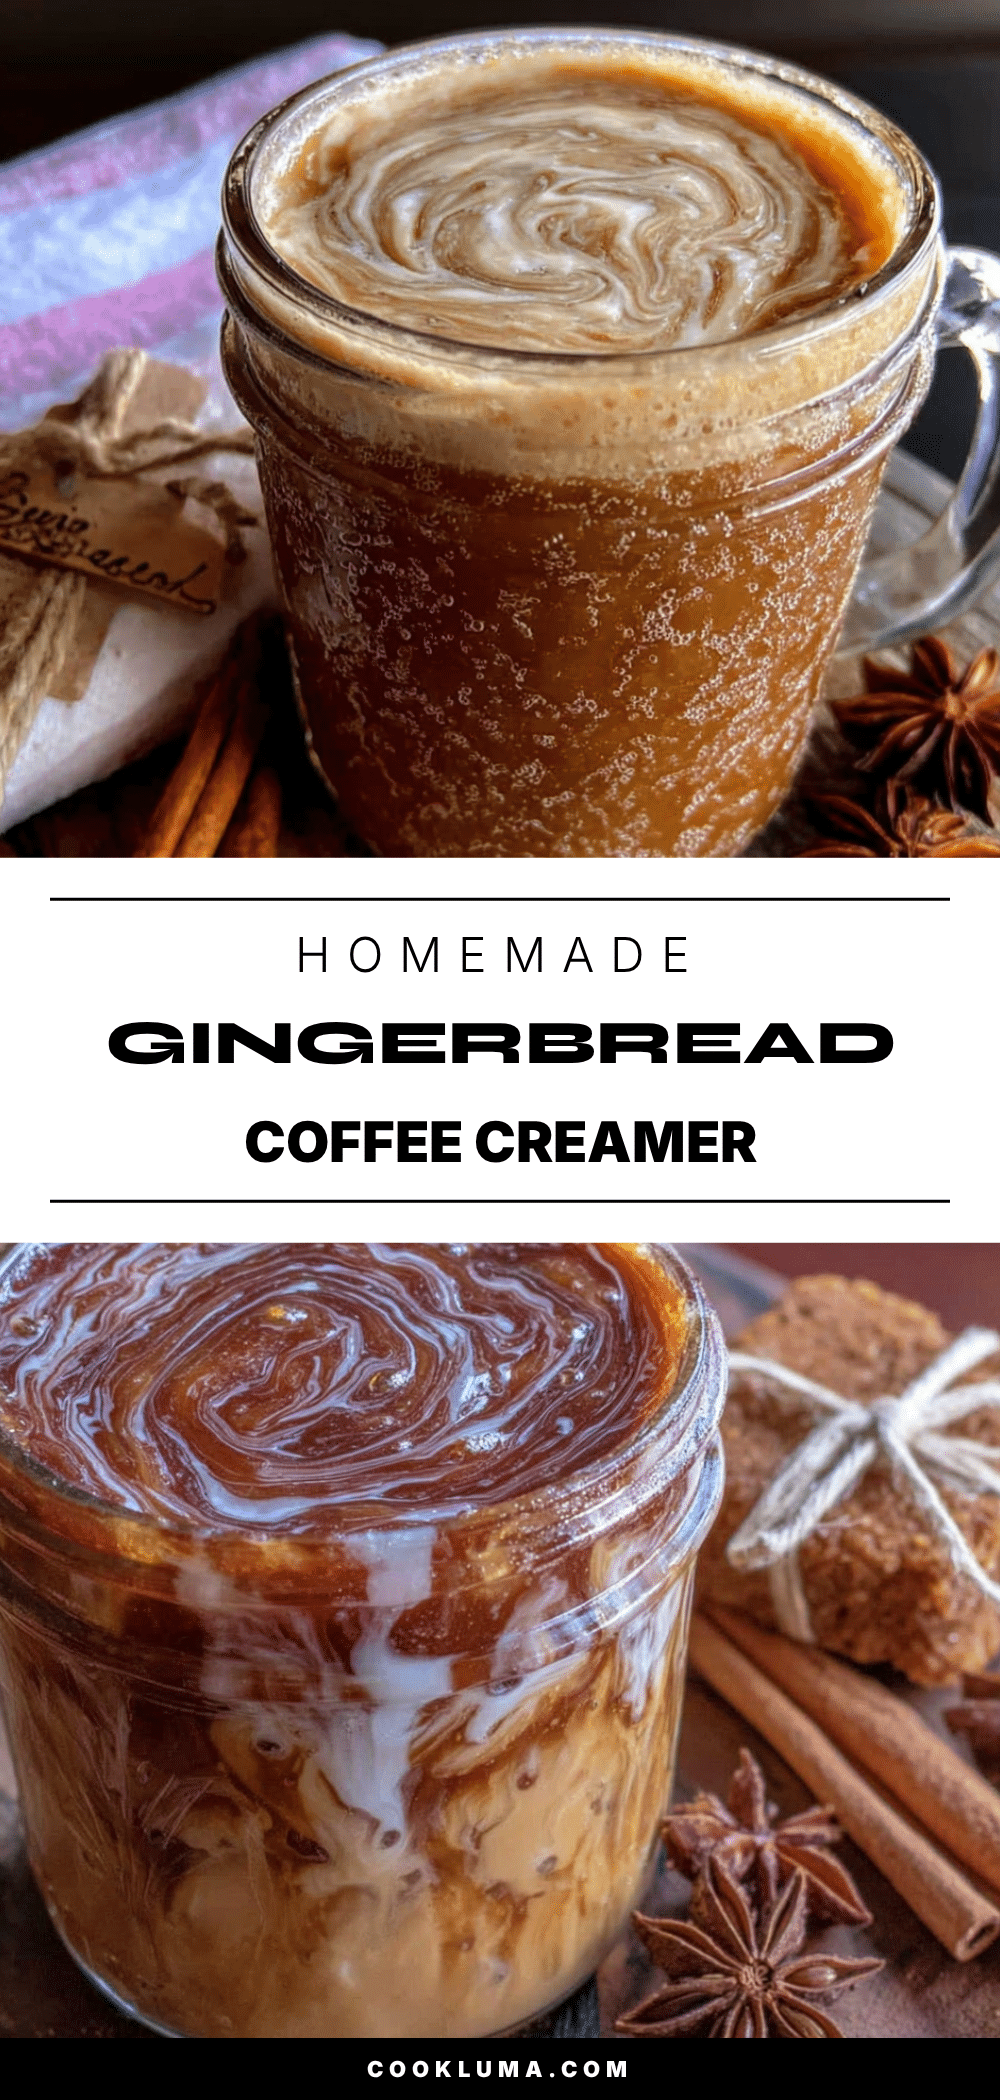
Homemade Gingerbread Coffee Creamer – Best Copycat Recipe
This homemade gingerbread coffee creamer nails that cozy, spicy-sweet balance of the Starbucks version, but with ingredients you can actually pronounce. No artificial flavors, no weird preservatives—just real pantry staples doing their thing.
- Prep Time: 5 minutes
- Cook Time: 5 minutes
- Total Time: 10 minutes
- Yield: 16 servings (2 tablespoons per serving) 1x
- Category: Beverage
- Cuisine: American
Ingredients
- 1 ½ cups whole milk (or oat milk for dairy-free)
- 1 cup heavy cream (or full-fat coconut milk for dairy-free)
- ¼ cup packed dark brown sugar (light brown works too)
- 2 tablespoons unsulphured molasses
- 1 teaspoon vanilla extract
- 1 teaspoon ground cinnamon (Ceylon recommended)
- ½ teaspoon ground ginger
- ¼ teaspoon ground nutmeg
- ⅛ teaspoon ground cloves
- Tiny pinch of black pepper
Instructions
- Combine the milk and cream. Pour 1 ½ cups whole milk and 1 cup heavy cream into a small saucepan. Place over medium heat. Warm gently until small bubbles form around the edges, about 3-4 minutes. Do not boil.
- Add the brown sugar and molasses. Once the milk mixture is warm, add ¼ cup packed dark brown sugar and 2 tablespoons molasses. Whisk continuously until fully dissolved, about 1-2 minutes.
- Bloom the spices. Reduce heat to low. Add 1 teaspoon ground cinnamon, ½ teaspoon ground ginger, ¼ teaspoon ground nutmeg, ⅛ teaspoon ground cloves, and a tiny pinch of black pepper. Whisk vigorously for about 30 seconds until aromatic.
- Simmer gently. Let the mixture simmer on low heat for 2-3 minutes, whisking occasionally. Do not let it boil. The mixture should be steaming but not bubbling aggressively.
- Remove from heat and add vanilla. Take the saucepan off the stove. Stir in 1 teaspoon vanilla extract.
- Strain (optional but recommended). Place a fine-mesh strainer over a glass jar or bottle. Pour the creamer through the strainer to catch any clumps.
- Cool and store. Let the creamer cool to room temperature before sealing the jar. It will thicken slightly as it cools. Refrigerate for up to 2 weeks. Shake well before each use.
Notes
Don’t boil the creamer or the cream can separate. Blooming the spices in warm liquid releases their essential oils for deeper flavor. The flavor improves after a day in the fridge. For a quick no-cook version, shake all ingredients in a jar until sugar dissolves. To freeze, pour into an ice cube tray and pop a cube into hot coffee.
Nutrition
- Serving Size: 2 tablespoons
- Calories: 45
- Sugar: 3
- Sodium: 10
- Fat: 3
- Saturated Fat: 2
- Carbohydrates: 4
Keywords: gingerbread coffee creamer, homemade coffee creamer, copycat Starbucks gingerbread creamer, holiday coffee creamer, gingerbread latte, dairy-free coffee creamer, sugar-free coffee creamer


