The woman at the community garden plot next to mine watched me struggle with a butternut squash for a solid minute before she said anything. I was trying to hack through it with a knife that clearly wasn’t meant for the job, and I could feel her eyes on me the whole time. Finally, she just shook her head, walked over, and pulled a serrated vegetable knife out of her apron pocket. “You’re going to lose a finger,” she said, in an accent I later learned was from the Peloponnese. “And you’re making it too hard.”
Her name was Eleni, and she didn’t just teach me how to handle winter squash that day. Over the next few months, she’d bring me little containers of things she’d made — a spoon-sweet from green walnuts, a tray of pastitsio that took me three days to finish, and eventually, this cheesecake. She called it “American pie with Greek bones,” which I think is the best description I’ve ever heard for a quick pumpkin cheesecake with a gingersnap crust. The first time she handed me a slice wrapped in wax paper, I took a bite and honestly forgot where I was for a second. Maybe you’ve been there — that moment when a dessert just clicks, and you know you’ll be making it for years.
The thing about Eleni’s version was that it wasn’t fussy. She didn’t use a water bath. She didn’t chill it overnight. She just mixed everything in one bowl, pressed the crust in with her fingers, and baked it while we drank coffee on her back steps. I’ve adapted it over the years — added a little more spice, swapped in full-fat cream cheese because let’s face it, that’s non-negotiable — but the spirit of it stays the same. This quick pumpkin cheesecake is the dessert you make when you want something that tastes like you spent hours on it, but you actually have laundry to fold and a weeknight to survive. That’s why it stuck with me. That’s why I keep making it.
Why You’ll Love This Recipe
I’ve tested this quick pumpkin cheesecake more times than I can count, and I can tell you with confidence — it works every single time. Here’s why this one is different from the complicated, fussy versions you see online.
- Quick & Easy: This comes together in about 30 minutes of active time. You don’t need a stand mixer, a springform pan, or a culinary degree. Just a bowl, a whisk, and a hungry family waiting for dessert.
- Simple Ingredients: No trips to three different stores. You probably have most of this in your pantry already — canned pumpkin, cream cheese, sugar, eggs, and a box of gingersnaps. I mean, how often does that happen?
- Perfect for Weeknights: This is the kind of dessert you can pull together while dinner is in the oven. It bakes in under 40 minutes, and while it’s technically better after a chill, you can absolutely serve it warm if you’re impatient. I won’t tell.
- Crowd-Pleaser: I’ve brought this to potlucks, Thanksgiving dinners, and random Tuesday night dinners with friends. It always gets that “wait, you made this?” reaction. Kids love the gingersnap crust, and adults love that it’s not overly sweet.
- Unbelievably Delicious: The texture is the real star here — silky and dense without being heavy, with that warm pumpkin spice flavor that just feels like a hug. The gingersnap crust adds a little snap and warmth that a regular graham cracker crust just can’t match.
This isn’t just another pumpkin cheesecake recipe. It’s the one you’ll bookmark, text to your sister, and make on repeat all fall long. It’s comfort food that doesn’t require a nap afterward.
What Ingredients You Will Need
This quick pumpkin cheesecake uses simple, pantry-friendly ingredients that work together to create something surprisingly elegant. The ingredient list is short, but each one plays an important role in getting that perfect texture and flavor.
For the Gingersnap Crust
- 1 ½ cups (180g) gingersnap cookie crumbs — I use Nabisco brand, but any crispy gingersnap works. You can crush them in a food processor or just put them in a ziplock bag and go to town with a rolling pin. The latter is more satisfying, honestly.
- ¼ cup (50g) granulated sugar — Just regular white sugar. It helps the crust hold together and adds a little sweetness to balance the spicy cookies.
- 5 tablespoons (70g) unsalted butter, melted — Salted butter works too if that’s what you have. Just skip the pinch of salt I’d normally add. Let it cool slightly so it doesn’t make the crumbs soggy.
For the Pumpkin Cheesecake Filling
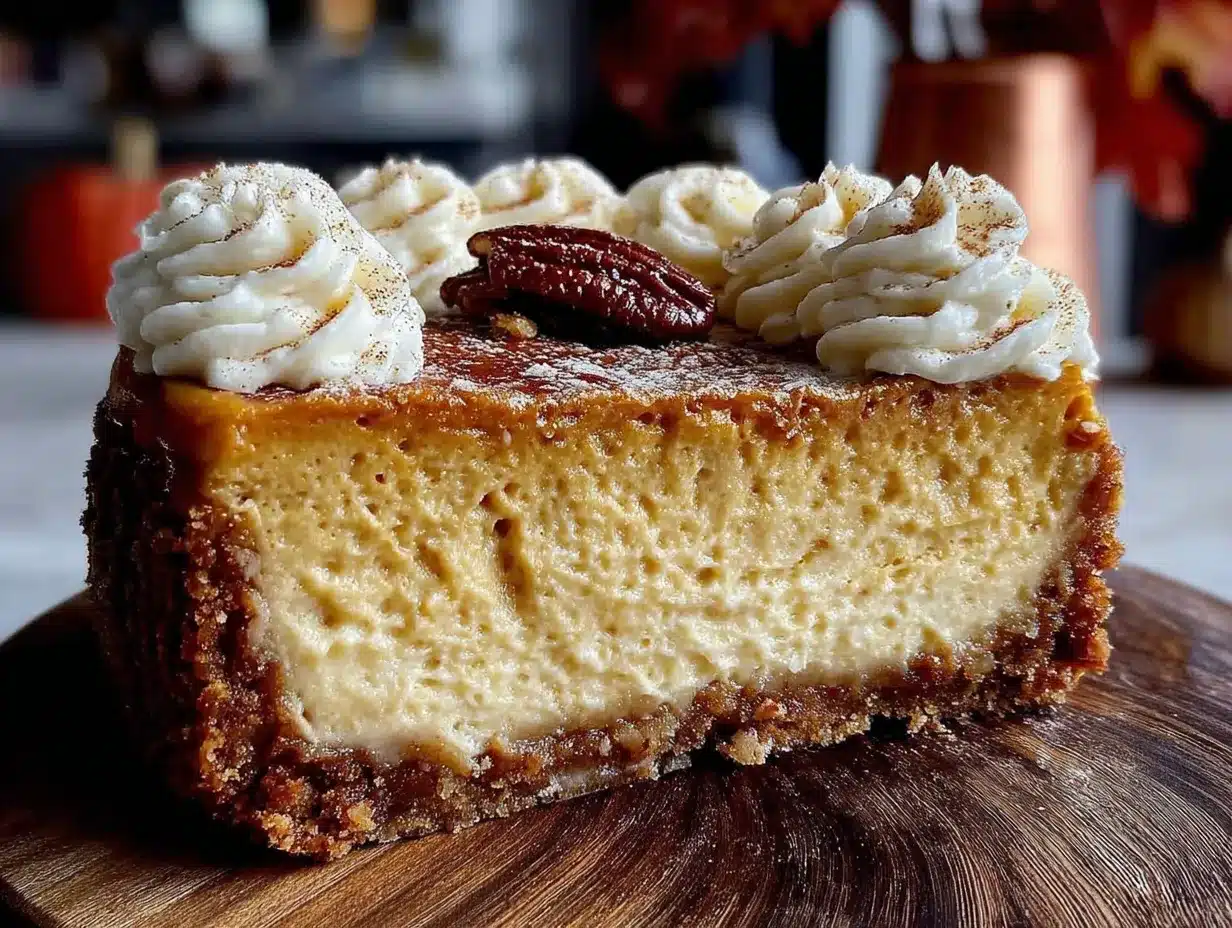
- 16 ounces (450g) full-fat cream cheese, softened — This is non-negotiable. Low-fat cream cheese has too much water and will make your cheesecake runny. Set it out on the counter for about an hour before you start.
- ¾ cup (150g) granulated sugar — You could reduce this to ½ cup if you prefer a less sweet dessert, but I find ¾ cup is the sweet spot for balancing the tangy cream cheese and earthy pumpkin.
- 1 cup (240g) canned pumpkin puree — Not pumpkin pie filling. Look for 100% pure pumpkin. Libby’s is my go-to because it’s consistently thick and not watery.
- 2 large eggs, room temperature — Cold eggs can seize up the batter and create lumps. If you forgot to take them out, put them in a bowl of warm water for 5 minutes.
- 1 teaspoon vanilla extract — Pure vanilla is better, but imitation works fine here since the pumpkin and spices are the main event.
- 1 teaspoon pumpkin pie spice — Or make your own: ½ teaspoon cinnamon, ¼ teaspoon ginger, ⅛ teaspoon nutmeg, ⅛ teaspoon cloves. I usually add an extra pinch of cinnamon because I’m addicted to it.
- ¼ teaspoon salt — Don’t skip this. Salt makes everything taste more like itself, including sugar and pumpkin.
Equipment Needed
You don’t need a lot of fancy equipment for this quick pumpkin cheesecake, which is part of why I love it. Here’s what you’ll need:
- 9-inch pie plate or 9-inch springform pan — A standard glass or ceramic pie dish works perfectly. If you use a springform pan, you can remove the sides for a prettier presentation. I’ve made this in a disposable aluminum pan for potlucks and it worked great.
- Mixing bowls — One medium bowl for the crust, one large bowl for the filling. Nothing fancy needed.
- Electric hand mixer or stand mixer — You can absolutely whisk this by hand if your arm is up for it, but a mixer makes the cream cheese silky smooth in about 30 seconds. I use my hand mixer 90% of the time.
- Measuring cups and spoons — Standard set. For the pumpkin, I just use a 1-cup measure and level it off.
- Spatula — For scraping down the bowl and smoothing the top of the cheesecake.
- Rolling pin or food processor — For crushing the gingersnaps. A ziplock bag and a heavy pan also work if you need to release some frustration.
That’s it. No water bath, no springform pan required, no special equipment. I’ve made this in a tiny apartment kitchen with a hand mixer that sounded like it was dying, and it still came out perfect.
Preparation Method
Let me walk you through this step by step. I’ve made this quick pumpkin cheesecake enough times that I could do it in my sleep, but I’ll share all the little tricks I’ve learned along the way.
- Preheat your oven to 350°F (175°C). Get this going first so it’s ready when you are. Position the rack in the middle of the oven — not too close to the top or bottom.
- Make the gingersnap crust. Crush your gingersnaps into fine crumbs. You want about 1 ½ cups. I usually crush a few extra because someone always sneaks a handful. In a medium bowl, mix the crumbs with the sugar. Pour in the melted butter and stir until every crumb is moistened. It should look like wet sand and clump together when you squeeze it.
- Press the crust into the pan. Dump the crumbs into your pie plate or springform pan. Use your fingers (or the bottom of a flat measuring cup) to press them firmly into the bottom and up the sides. Don’t press too hard — you want it compact but not rock solid. I like to go about 1 inch up the sides. Pop it in the fridge while you make the filling, or just set it aside.
- Beat the cream cheese. In a large bowl, beat the softened cream cheese with an electric mixer on medium speed until it’s smooth and fluffy — about 2 minutes. Scrape down the sides and bottom of the bowl with a spatula. This step is crucial. If your cream cheese is lumpy now, it’ll be lumpy forever.
- Add the sugar. Beat in the sugar until everything is combined, about 1 minute. Scrape the bowl again. I know I keep saying that, but it really matters.
- Mix in the pumpkin and vanilla. Add the pumpkin puree and vanilla extract. Beat on low speed until just combined. Don’t go crazy here — you don’t want to incorporate too much air, which can cause cracks later.
- Add the eggs one at a time. Crack the first egg into the batter and beat on low just until the yolk disappears. Add the second egg and do the same. Overmixing at this stage will incorporate too much air, and your cheesecake might puff up and crack. We’re going for dense and silky, not fluffy.
- Add the spices and salt. Sprinkle in the pumpkin pie spice and salt. Beat on low for about 10 seconds, just until everything is evenly distributed. Give it one final scrape with the spatula and give it a few stirs by hand to make sure everything is incorporated.
- Pour the filling into the crust. Take the crust out of the fridge and pour the filling in. Use your spatula to smooth the top into an even layer. Give the pan a gentle tap on the counter to release any air bubbles — just one or two taps, not a full drum solo.
- Bake for 35-40 minutes. The edges should look set and slightly puffed, but the center should still jiggle slightly when you gently shake the pan. This is the sweet spot. Overbaking will give you a dry, cracked cheesecake. Underbaking is actually better than overbaking — it’ll firm up as it cools.
- Cool completely at room temperature. Set the pan on a wire rack and let it cool for about an hour. Don’t rush this. If you put a warm cheesecake in the fridge, condensation will form on top and make it watery.
- Chill for at least 2 hours (or overnight). Once it’s cool, cover it with plastic wrap and refrigerate for at least 2 hours. Overnight is better — the flavors meld together and the texture gets even creamier. I’ve definitely snuck a slice after just an hour, and it was still amazing.
Cooking Tips & Techniques
After making this quick pumpkin cheesecake more times than I can count, I’ve collected a few hard-earned lessons. Here are the things I wish someone had told me the first time.
Room temperature ingredients are not optional. I learned this the hard way when I made a cheesecake with cold cream cheese and ended up with lumpy batter that I had to strain through a sieve. Cold cream cheese doesn’t blend smoothly. Cold eggs can make the batter seize up. Take everything out of the fridge an hour before you start. Set a timer if you’re scatterbrained like me.
Don’t overmix the batter. I know it’s tempting to keep beating until it’s perfectly smooth, but every extra second incorporates more air. Too much air means your cheesecake will puff up in the oven, then collapse and crack as it cools. Mix until just combined, then stop. I’ve had to learn this lesson about four times before it stuck.
The jiggle test is your best friend. The center should wobble like Jell-O when you shake the pan. If the whole thing is solid, it’s overbaked. If it looks like soup, give it another 5 minutes. I usually check at 35 minutes, then every 2 minutes after that. The edges should be set and slightly pulling away from the crust.
Crush those cookies properly. If you have big chunks of gingersnap in your crust, it’ll fall apart when you cut it. You want fine, even crumbs. A food processor is easiest, but a rolling pin and a ziplock bag work great. Just make sure there are no rogue pieces that didn’t get crushed.
Let it cool slowly. I once put a slightly warm cheesecake in the fridge because I was in a hurry, and the next morning there was a puddle of condensation on top. The texture was still good, but the top looked weird. Let it sit on the counter for a full hour, then cover and refrigerate. Patience pays off here.
Variations & Adaptations
This quick pumpkin cheesecake is pretty perfect as-is, but I’ve messed around with enough variations to know what works. Here are some of my favorites.
Gluten-Free Version: Use gluten-free gingersnaps for the crust. Most major brands make them now, or you can use gluten-free graham crackers with extra ginger and cinnamon. The filling is naturally gluten-free, so this is an easy swap. I’ve tested this with my gluten-intolerant friend Sarah, and she couldn’t tell the difference.
Dairy-Free Adaptation: Use dairy-free cream cheese (I like Kite Hill or Violife) and a vegan butter substitute. The texture will be slightly less firm, but it still sets up nicely. I’d recommend chilling it overnight for the best results. I made this for a dairy-free friend last Thanksgiving, and it disappeared faster than the regular dessert.
Spice It Up: If you love bold flavors, add an extra teaspoon of fresh grated ginger to the filling, or sprinkle some crystallized ginger over the top before serving. I once added a pinch of cayenne pepper to the crust, and it was weirdly amazing — just a tiny hint of heat that made the pumpkin taste even sweeter.
Pumpkin Chocolate Swirl: Melt ¼ cup of dark chocolate chips and swirl it into the batter before baking. Use a knife to gently create figure-eight patterns. The chocolate and pumpkin combination is honestly one of the best things I’ve ever put in my mouth. I do this when I want to feel fancy.
No-Bake Version: If you don’t want to turn on the oven, you can make this as a no-bake cheesecake. Use the same crust, but for the filling, beat the cream cheese with ½ cup powdered sugar instead of granulated, fold in 1 cup of whipped cream, and chill for at least 4 hours. The texture is lighter and fluffier, more like a mousse. It’s a completely different dessert but equally delicious.
Serving & Storage Suggestions
This quick pumpkin cheesecake is versatile enough for any occasion, but here’s how I like to serve and store it.
Serving: I prefer this cheesecake cold, straight from the fridge. It slices cleaner and the texture is firmer. If you want to serve it at room temperature, let it sit out for about 20 minutes before slicing. Use a sharp knife dipped in hot water and wiped dry between cuts for the cleanest slices. I top mine with a dollop of whipped cream and a sprinkle of cinnamon. A drizzle of caramel sauce is also amazing, especially if you’re serving it to guests.
What to Serve With It: A cup of strong coffee or a spiced chai latte is the perfect companion. If you’re serving this after a heavy meal, keep the toppings light. If it’s the main event, go ahead and add the caramel sauce and extra whipped cream. I’ve also served it with a side of fresh pear slices, which cuts through the richness beautifully.
Storage: Cover the cheesecake tightly with plastic wrap or transfer it to an airtight container. It will keep in the refrigerator for up to 5 days. The flavors actually get better after a day or two — the spices meld together and the texture becomes even creamier. I usually make this a day ahead when I’m having people over.
Freezing: This cheesecake freezes beautifully. Wrap the entire cheesecake (or individual slices) in plastic wrap, then in aluminum foil. It will keep for up to 3 months. To thaw, transfer it to the refrigerator overnight. I’ve frozen individual slices for emergency dessert situations, and they taste just as good after thawing.
Reheating: I don’t usually reheat this cheesecake — it’s meant to be served cold. But if you want a warm dessert, you can microwave individual slices for about 10 seconds. It won’t be as pretty, but it’ll taste like pumpkin pie in cheesecake form. Honestly, it’s pretty great.
Nutritional Information & Benefits
I’m not a nutritionist, but I’ve done the math on this quick pumpkin cheesecake. Here’s what you’re looking at per slice (based on 8 servings).
- Calories: Approximately 380-420 per slice
- Protein: 7-8 grams
- Carbohydrates: 38-42 grams
- Fat: 24-28 grams
- Fiber: 2-3 grams
- Sugar: 28-32 grams
The good news? Pumpkin is packed with vitamin A, which is great for your eyes and immune system. It also has a decent amount of fiber, which helps balance out the sugar. The cream cheese adds protein and calcium, and the gingersnaps contain ginger, which is known for its anti-inflammatory properties. I mean, it’s still dessert — let’s not pretend it’s a salad — but it’s not the worst thing you could eat.
Dietary Considerations: This recipe contains gluten (from the gingersnaps), dairy (from the cream cheese and butter), and eggs. It can be adapted for gluten-free and dairy-free diets (see variations above). It’s naturally nut-free and soy-free if you use standard ingredients.
My personal take? Dessert should be delicious first and nutritious second. This cheesecake hits that balance beautifully. It’s rich enough to satisfy a craving, but it won’t leave you feeling gross afterward. I call that a win.
Conclusion
This quick pumpkin cheesecake with gingersnap crust has become my go-to fall dessert for a reason. It’s simple enough for a Tuesday night, but impressive enough for Thanksgiving dinner. It uses ingredients you probably already have, comes together in about 30 minutes of active time, and tastes like you spent hours on it. What more could you want?
I love this recipe because it reminds me of Eleni and her garden, and because it proves that you don’t need complicated techniques or fancy equipment to make something truly special. It’s honest food — the kind that feeds both the body and the soul. The gingersnap crust adds just the right amount of warmth and spice, and the pumpkin filling is creamy and rich without being heavy. Every time I make it, I’m reminded that the best recipes are often the simplest ones.
I’d love to hear how yours turns out. Did you add any variations? Did you serve it with something unexpected? Drop a comment below and let me know — I read every single one, and I love seeing how people make this recipe their own. And if you loved it, share it with a friend who needs a quick dessert win. Happy baking, friends!
Frequently Asked Questions
Can I use fresh pumpkin instead of canned?
Yes, but you’ll need to roast and puree it first, then drain off any excess liquid. Fresh pumpkin has more water than canned, so your cheesecake might be slightly softer. I’d recommend using canned pumpkin for the most consistent results — it’s already the right texture and moisture level.
Can I make this cheesecake without a mixer?
Absolutely. You’ll need a strong arm and some patience, but you can absolutely whisk everything by hand. Just make sure your cream cheese is very soft (leave it out for 2 hours), and whisk vigorously until smooth. A silicone spatula works better than a whisk for smearing the cream cheese against the bowl.
Why did my cheesecake crack on top?
Cracks usually happen from overbaking or overmixing. If the center is too firm when you take it out, it will crack as it cools. Next time, pull it out when the center still has a slight jiggle. Also, make sure you’re not overmixing the batter — too much air can cause cracking too. A cracked cheesecake still tastes amazing, so don’t stress about it.
Can I use a different cookie for the crust?
Yes! Graham crackers are the obvious substitute, but speculoos cookies (like Biscoff) work beautifully too. You could even use vanilla wafers or shortbread cookies. Just adjust the sugar — if your cookies are already sweet, you might want to reduce the sugar in the crust to 2 tablespoons instead of ¼ cup.
How do I know when the cheesecake is done baking?
The edges should look set and slightly puffed, and the center should jiggle like Jell-O when you gently shake the pan. If the whole thing wobbles like liquid, it needs more time. If it’s completely firm, it’s overbaked. I always err on the side of underbaking — it will continue to set as it cools. Trust the jiggle test!
Pin This Recipe!
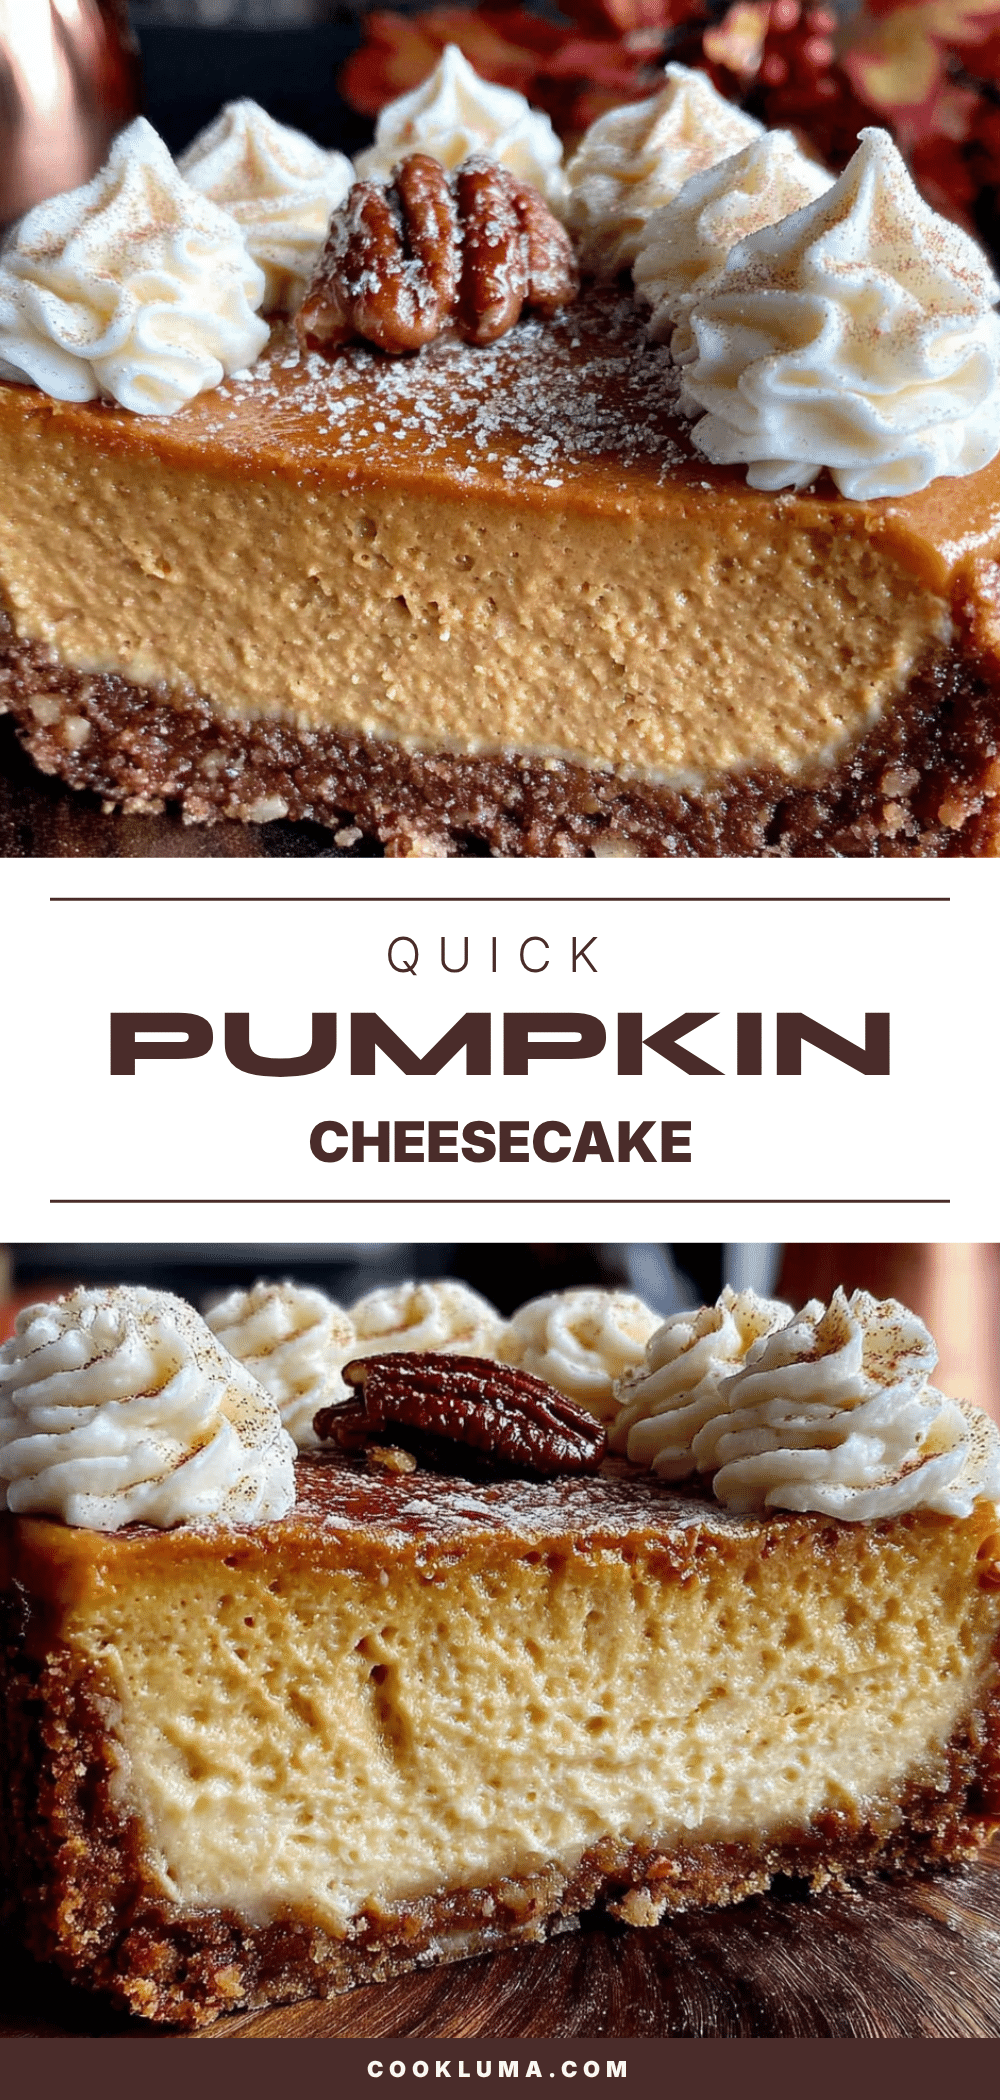
Quick Pumpkin Cheesecake with Gingersnap Crust – Easy 30-Minute Dessert
A quick and easy pumpkin cheesecake with a gingersnap crust that comes together in about 30 minutes of active time. Perfect for weeknights, it’s silky, dense, and full of warm pumpkin spice flavor.
- Prep Time: 30 minutes
- Cook Time: 35-40 minutes
- Total Time: 1 hour 5 minutes (plus chilling time)
- Yield: 8 servings 1x
- Category: Dessert
- Cuisine: American
Ingredients
- 1 ½ cups (180g) gingersnap cookie crumbs
- ¼ cup (50g) granulated sugar
- 5 tablespoons (70g) unsalted butter, melted
- 16 ounces (450g) full-fat cream cheese, softened
- ¾ cup (150g) granulated sugar
- 1 cup (240g) canned pumpkin puree
- 2 large eggs, room temperature
- 1 teaspoon vanilla extract
- 1 teaspoon pumpkin pie spice
- ¼ teaspoon salt
Instructions
- Preheat your oven to 350°F (175°C). Position the rack in the middle of the oven.
- Make the gingersnap crust: Crush gingersnaps into fine crumbs. In a medium bowl, mix crumbs with sugar. Pour in melted butter and stir until every crumb is moistened.
- Press the crust into a 9-inch pie plate or springform pan. Use fingers or a flat measuring cup to press firmly into the bottom and up the sides (about 1 inch up). Refrigerate while making filling.
- In a large bowl, beat softened cream cheese with an electric mixer on medium speed until smooth and fluffy, about 2 minutes. Scrape down sides and bottom.
- Beat in sugar until combined, about 1 minute. Scrape bowl again.
- Add pumpkin puree and vanilla extract. Beat on low speed until just combined.
- Add eggs one at a time, beating on low just until yolk disappears after each addition.
- Sprinkle in pumpkin pie spice and salt. Beat on low for about 10 seconds until evenly distributed. Scrape bowl and stir by hand.
- Pour filling into crust. Smooth top with a spatula. Gently tap pan on counter to release air bubbles.
- Bake for 35-40 minutes. Edges should be set and slightly puffed, center should jiggle slightly when shaken.
- Cool completely at room temperature on a wire rack, about 1 hour.
- Cover with plastic wrap and refrigerate for at least 2 hours, preferably overnight.
Notes
Room temperature ingredients are crucial. Don’t overmix the batter. Use the jiggle test for doneness. Let cool slowly to avoid condensation. Can be made gluten-free or dairy-free with substitutions.
Nutrition
- Serving Size: 1 slice
- Calories: 380420
- Sugar: 2832
- Fat: 2428
- Carbohydrates: 3842
- Fiber: 23
- Protein: 78
Keywords: pumpkin cheesecake, quick dessert, gingersnap crust, fall dessert, easy cheesecake


